Empty Spools at Asilomar: Monday 24 February 2014

25 02 2014

First full day of class today. Pam explained the thread painting process and then we were into it, working straight away on our prepared photo. No practising!!

The basic process with a photo printed on fabric:

  1. Add fusible to the back of the photo, then fuse it onto the background fabric. Make sure you leave at least 4 inches of background fabric around all edges of the photo so you have something to hold onto.
  2. Add batting and backing and pin baste all layers together.
  3. Start with the eyes and the black edges around the eyes. Mark with black pen first,  if necessary, then stitch with black thread.
  4. Finish the eyes with other coloured thread. Get the eyes right first; everything else is easy after that.
  5. Now mark and stitch all other black areas.
  6. Work from dark to light when stitching.
  7. Use short tight stitches and check the fine details  against the original photo.
  8. When stitching, don’t drop the feed dogs, and use both straight free motion stitches as well as zigzag  stitches for the filler areas.

My progress

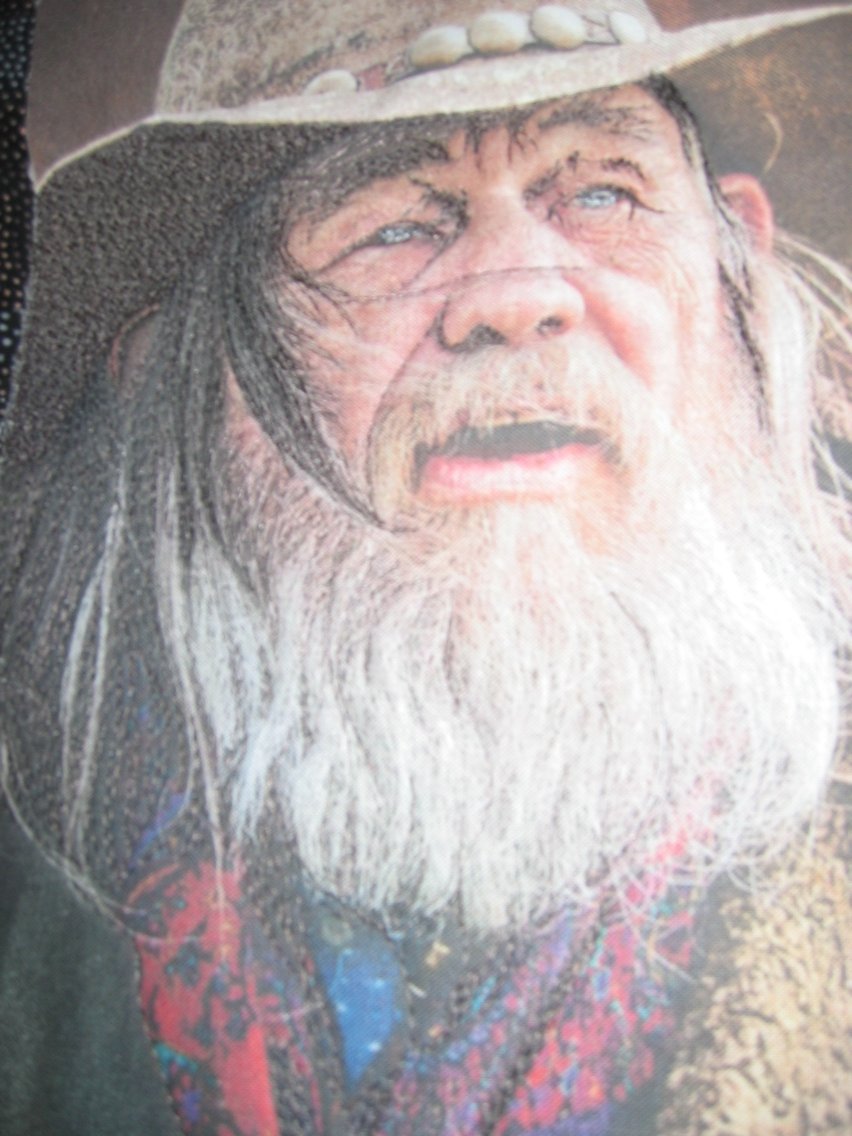
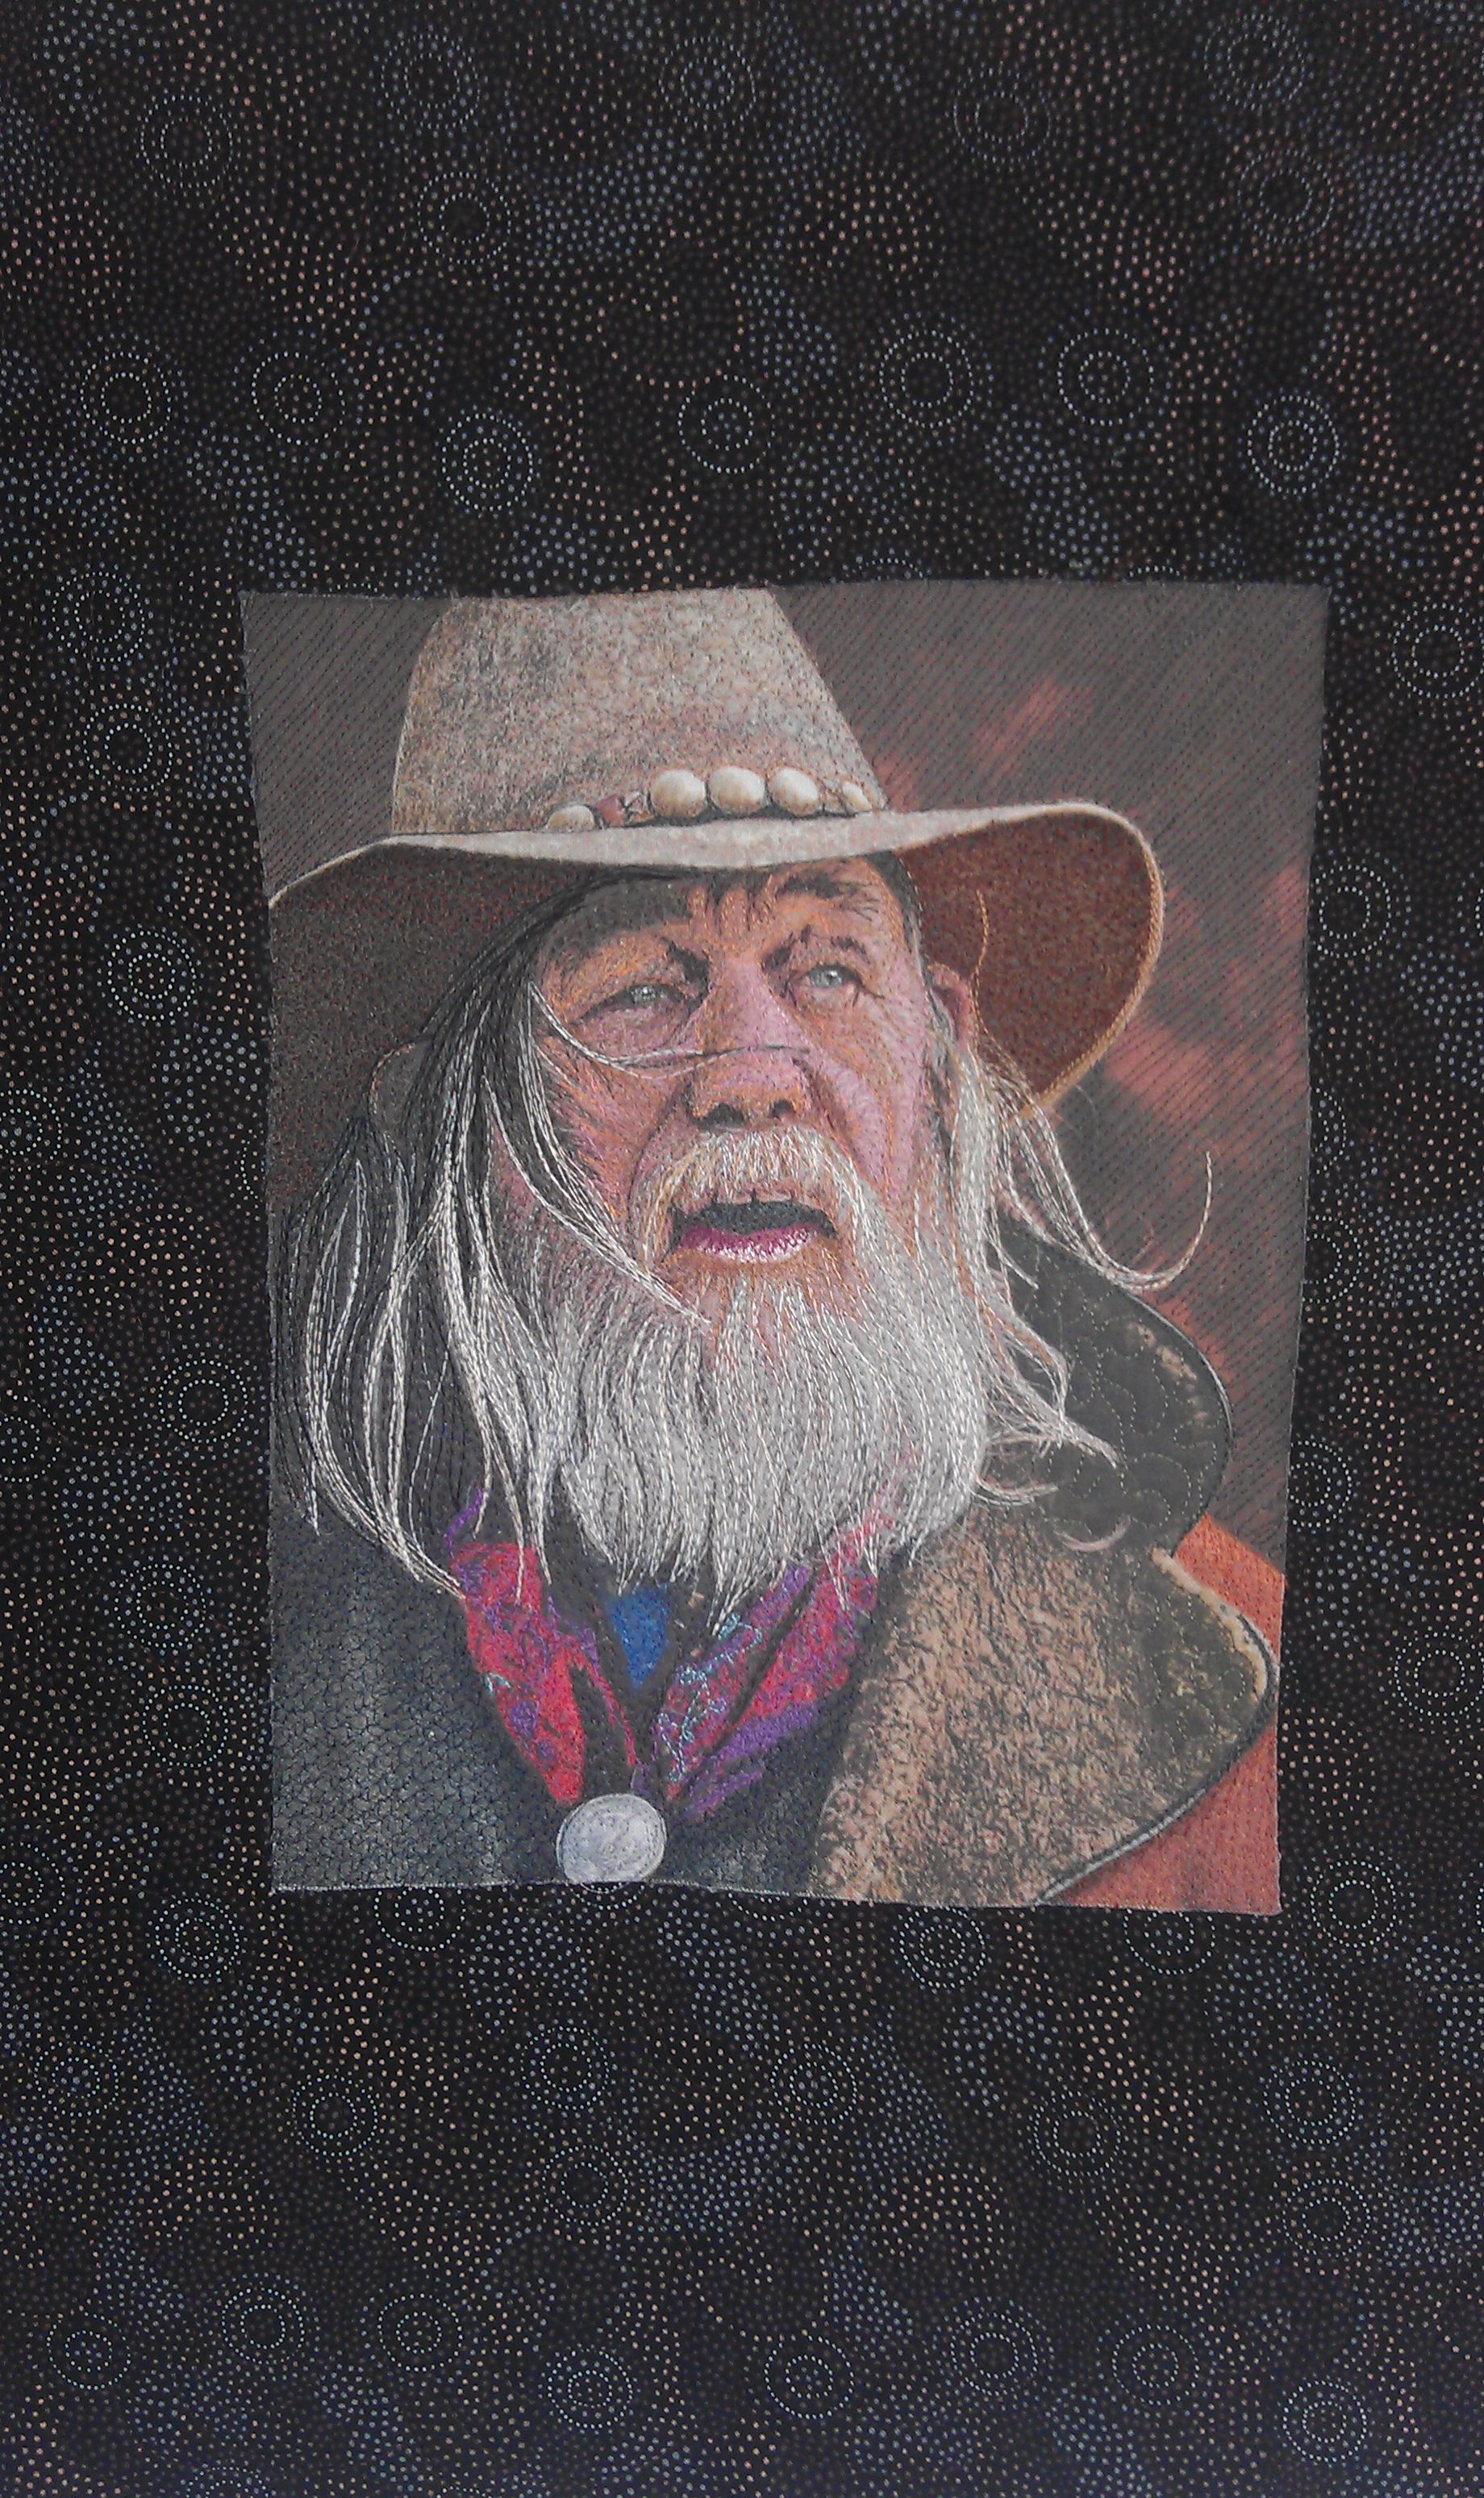
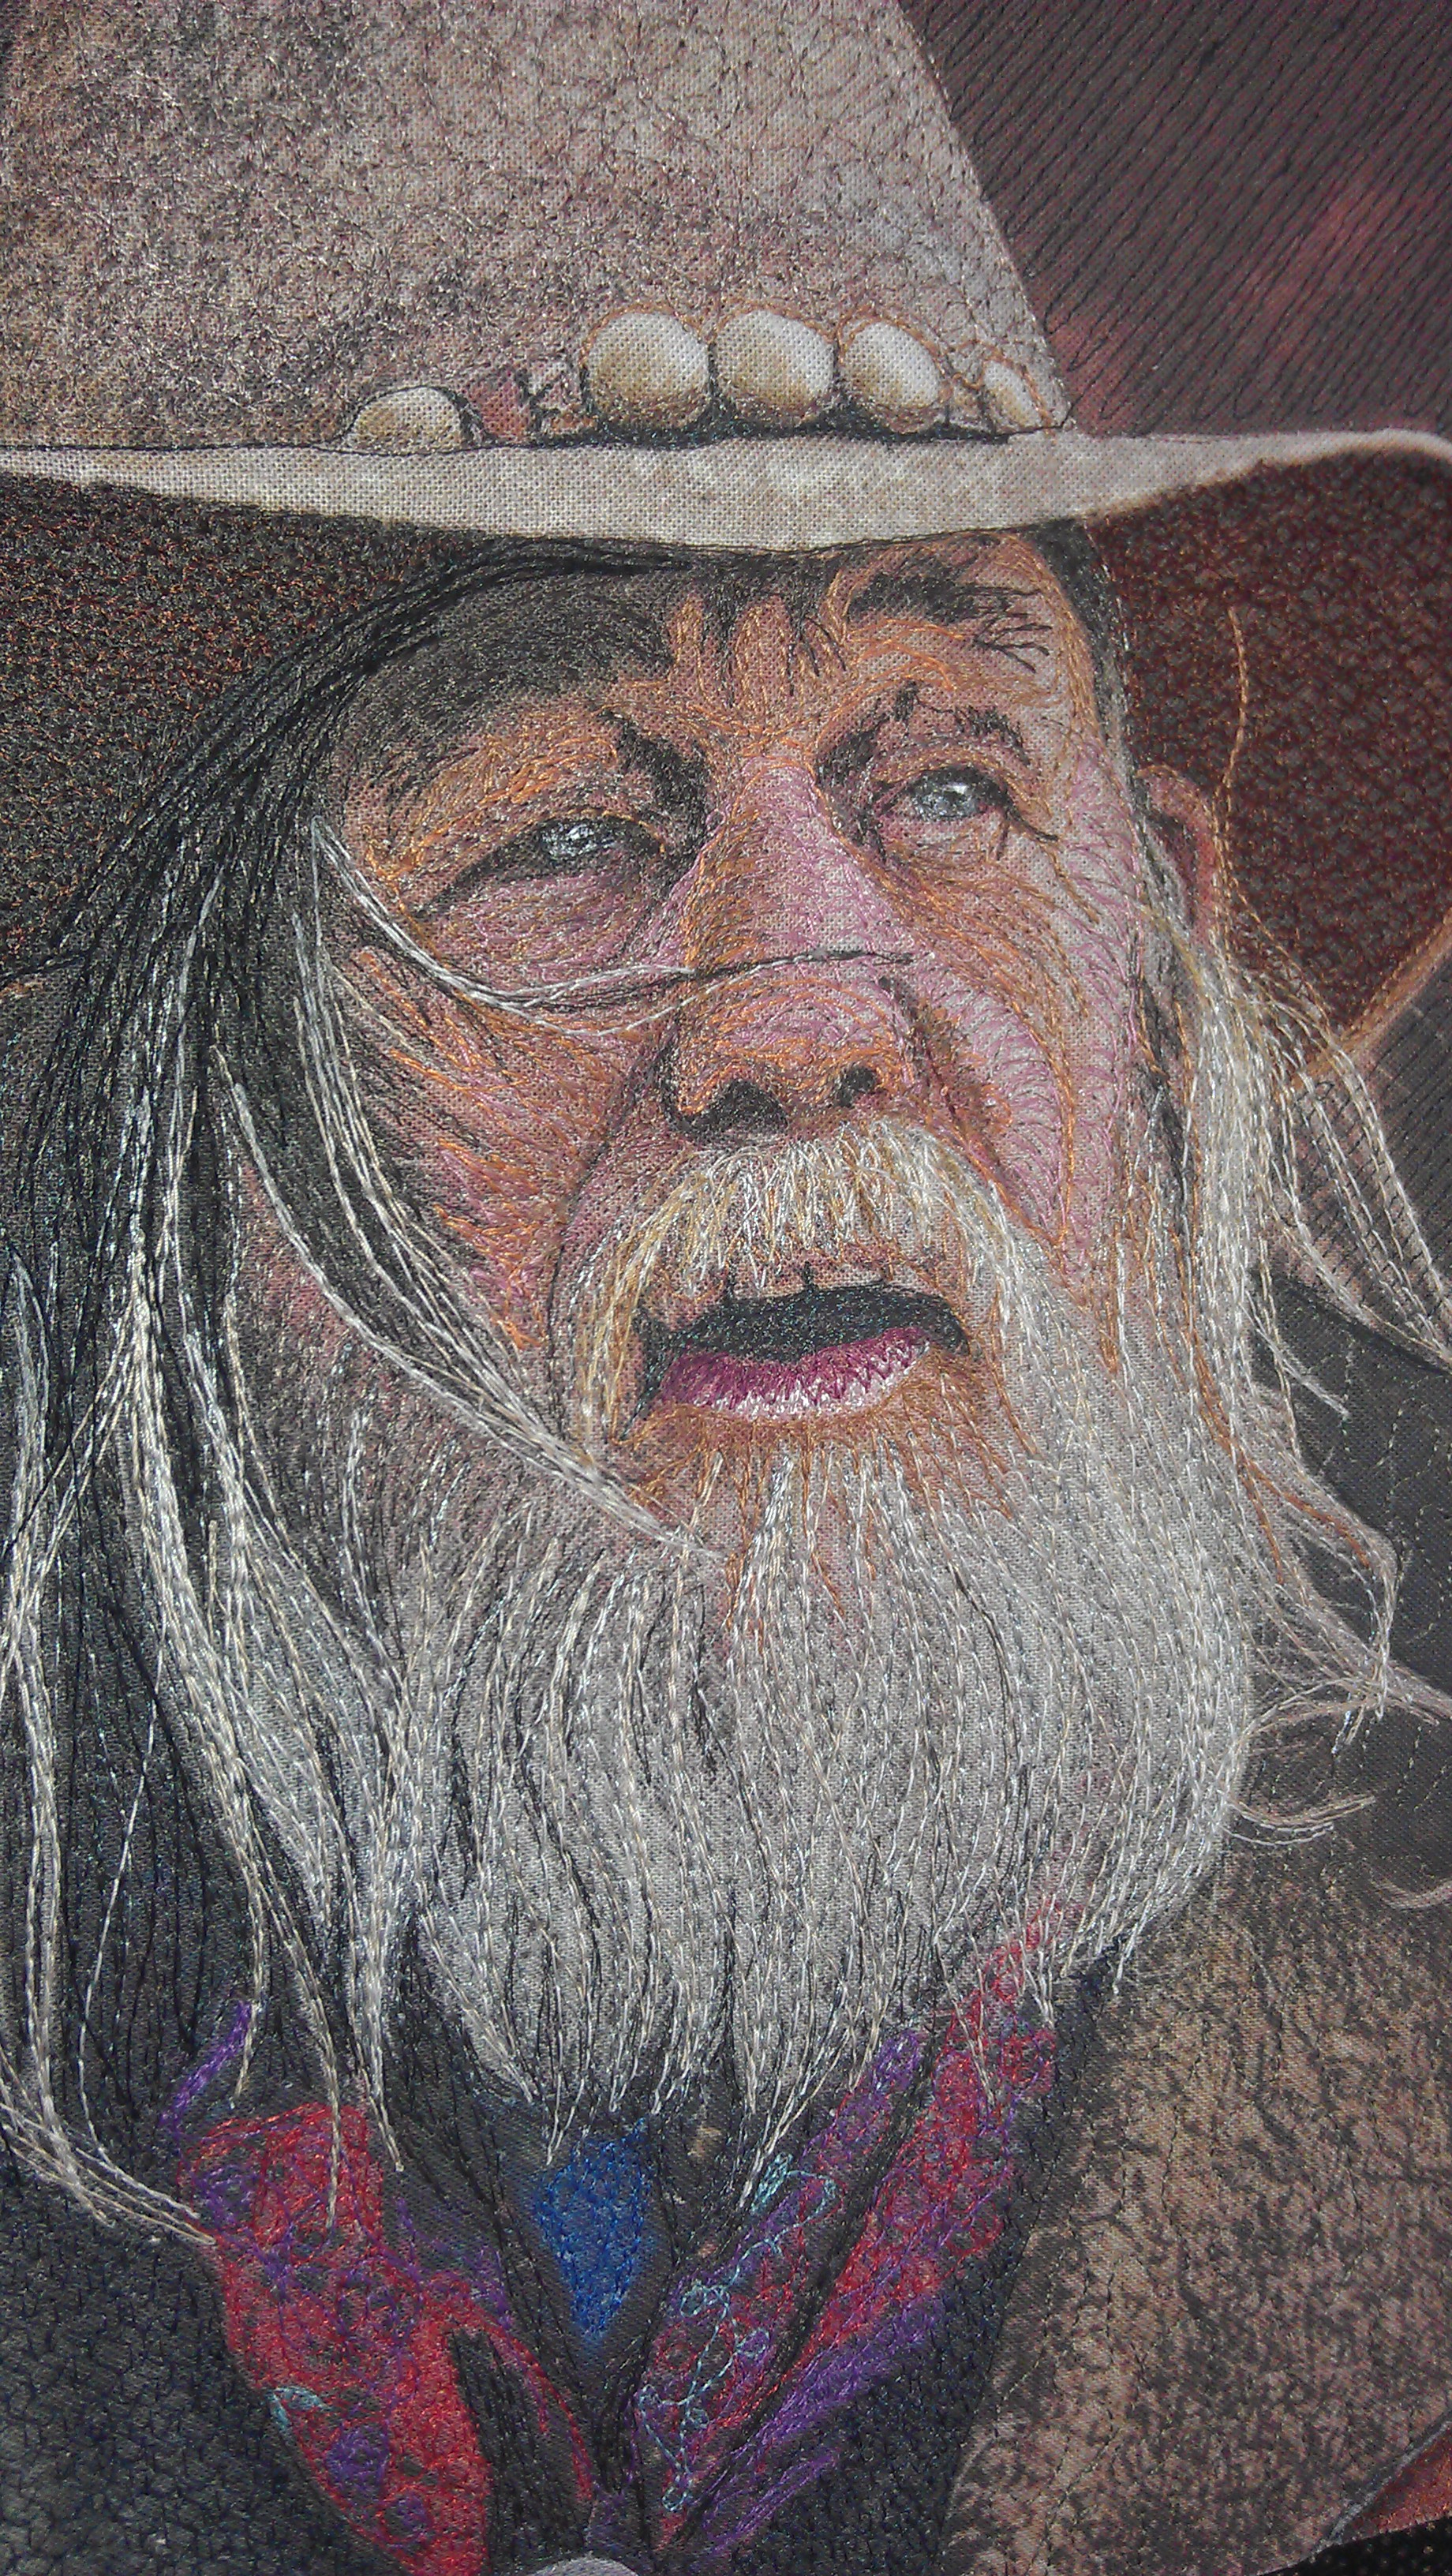
I decided to start with a photo of an old, rugged cowboy (some people thought he looked like Jeff Bridges!). The photos below show the original photo I worked from, and then my progress, from stitching the black of his eyes, hair, hat etc. to adding the pink and tan on his face, the white and shiny grey for his hair, etc.

Cowboy_original

Original photo of the cowboy, who was my inspiration

I used multiple free motion zigzag passes (in different directions) on the underside of his hat and on his vest; meandering stipple on the wool collar of his coat; scribble stitching on the top side of his hat; and straight-ish diagonal lines in black for the background. I also added red, blue and purple scribble stitching to his bandana, and various greys for the silver dollar clasping his bandana. I got up a real rhythm doing his hair and beard, and I guess I used about 15 different colours for those elements. I used about 5 different colours in his face. And I dotted a shine in his eyes with some white paint, using the very pointed end of a bamboo skewer (satay stick).

I finished him early on the second day, but I’ve put all the photos in this post to keep them together and to show the development of his face.

cowboy02_IMG_4259

Stitching the black areas around the eyes first
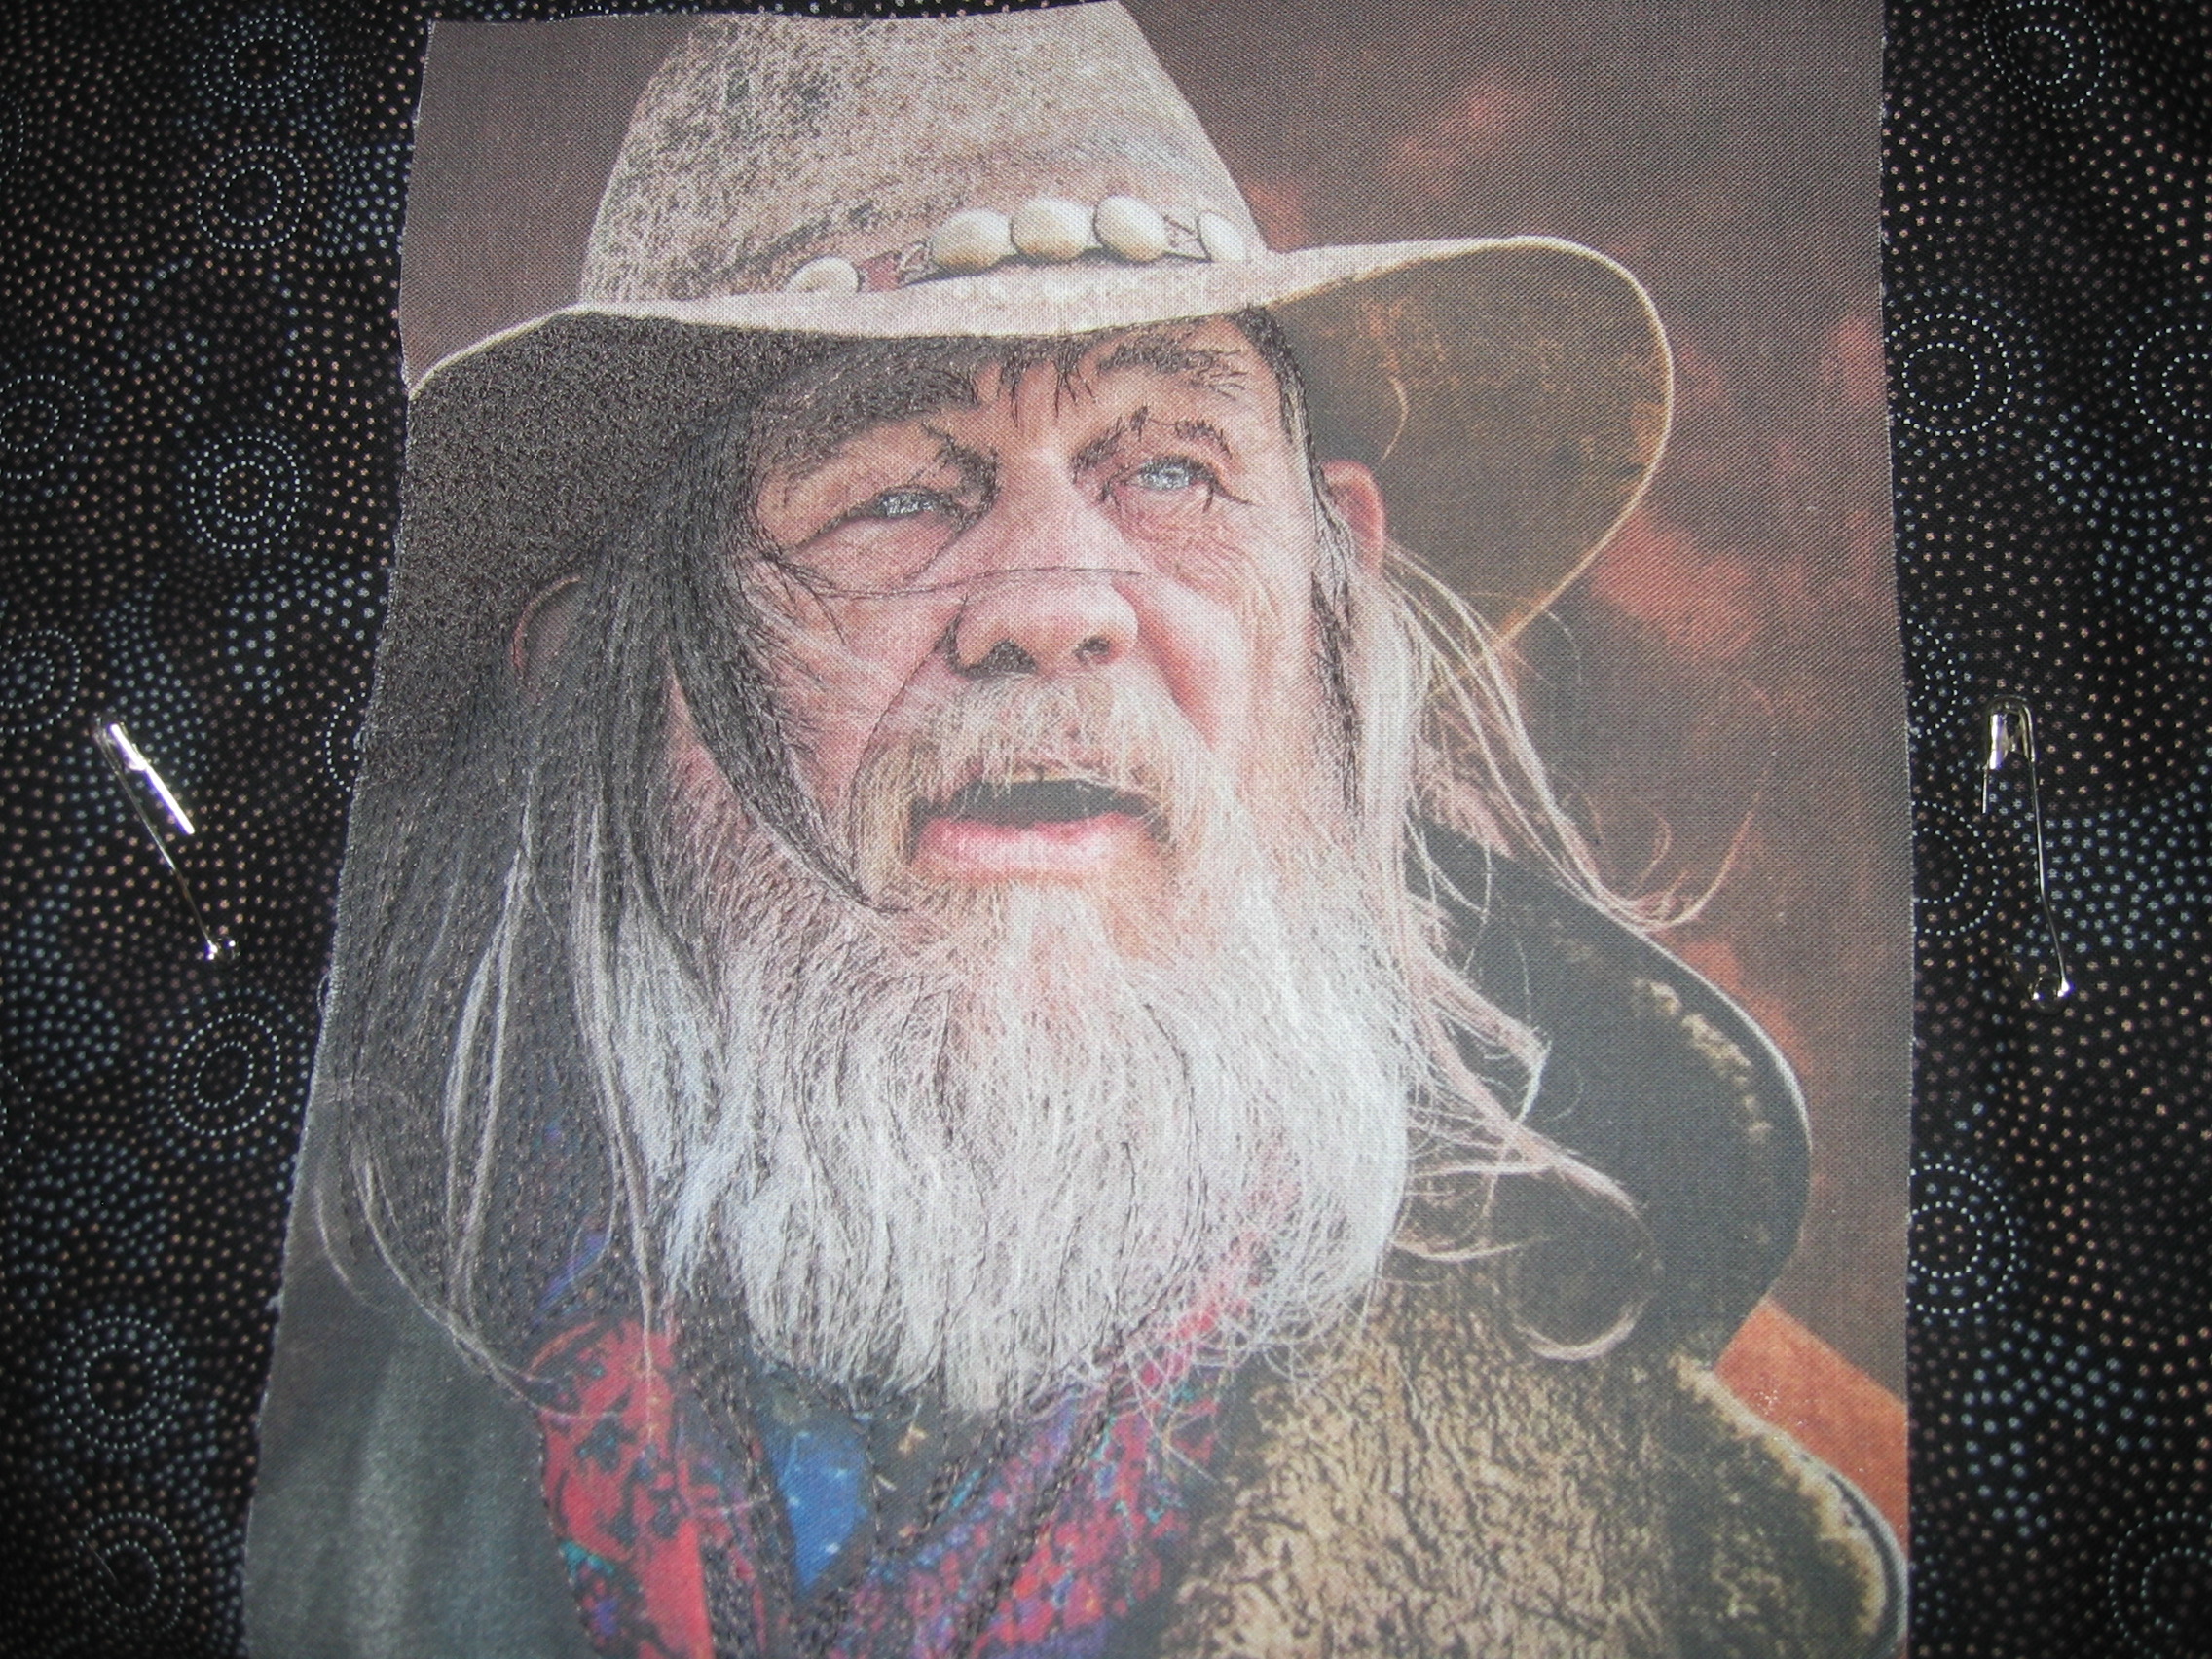
cowboy03_IMG_4262

Adding more black — eyebrows, hair

cowboy04_IMG_4263

Adding dark brown (especially the underside of the hat), and the grey of the eyes
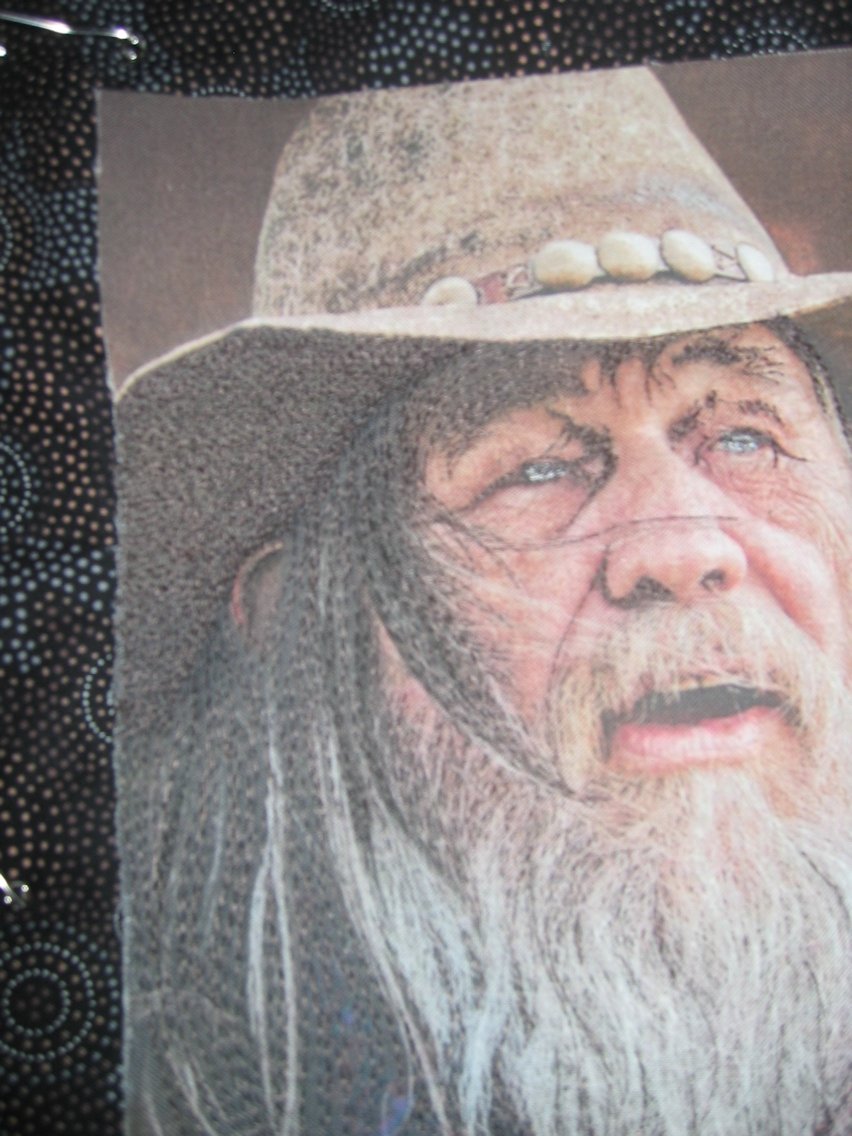
cowboy05_IMG_4264

cowboy06_IMG_4265

Adding tan to the face and the beard

cowboy09_IMAG1777

Pink added to the face, and all other elements now stitched, including the beard and rest of the hair, and the background fabric (I was so into the process I forgot to take photos of each stage!)
cowboy11_IMAG1779

cowboy12_IMAG1780

cowboy13_IMG_4284

cowboy14_IMG_4285

I finished him when I got home by adding a thin black border around his portrait and a binding in the same fabric as the background.

cowboy01

I then decided to get him valued by my state’s quilt guild. They valued him at $2000! Yes, that’s TWO THOUSAND! And they added a personal note about how much they ‘all loved this little quilt’.

Update May 2014: I’ve had this quilt valued, and the certificate of valuation is below. However the valuation only takes account the materials and techniques used and the quality of both — it takes no account of the time to learn the techniques nor the time taken to make the piece, which can be hundreds of hours.

_Valuation 2014_American_Cowboy

Meals

Breakfast: scrambled eggs with sausage links; lunch: chicken Caesar salad, carrot and ginger soup; dinner: pork loin steak with veges, carrot and walnut cake.

See also:


Empty Spools at Asilomar: Sunday 23 February 2014

25 02 2014

Registration and start of classes today. Fortunately I was able to find Asilomar and check in just after 11am, and orient myself as to where the main halls etc. were in relation to my room, and unpack. I wouldn’t have liked to have left it until 4pm (as suggested in the brochure) as classes started then. As it was,  I left my friend’s house in Monterey at 3:30pm and was pushing to get to registration and to class on time.

I’m in Pam Holland’s group (yes, Pam is a fellow Australian, but I chose her class because of what she was teaching that I wanted to learn, not who she was) and we spent that first session on thread and needles and why she uses what she does. Interesting stuff and I took notes which I’ll add to this blog later when I can type on a proper keyboard and not a tablet.

Dinner was at 6 pm as it will be every night, and was pot roast with rice and veges and a nice dessert cake thing. After dinner we had a general group session in the main hall (Merrill Hall) welcoming us, then it was to bed.

My room is at the top of a bit of a hill and some distance from the meeting hall, dining room, and our workshop room, so there’s a lot walking and lots of steps and stairs. Add to that the bracing fresh air and this could be quite an energetic week!

The only issue I have at the moment is that the place is full of log fires for heating, all of which seem to be going, and the smoke is getting to me.

I won’t post any pictures until I get home as I can’t resize them on the tablet (as far as I know), so you’ll have to live without them for  a while.

Notes from Pam’s initial session:

Thread:

  • Cotton thread has a centre core, and the fibres wind around it with either an S or Z shape twist. With an S-shape twist, when you pull the thread it will bounce back up on release; with a Z-shape twist, it doesn’t bounce back when pulled and released, which is ideal for thread painting. Z-twist threads include Superior Masterpiece, Aurifil, YLI, Madeira, Robison-Anton; S-twist threads include those by Gutermann and Sulky. Silk-finished (mercerised) cottons are fine (e.g. Mettler) as they are coated.
  • All thread weights listed as the same are NOT equal; e.g. Superior vs Aurifil 50 wt — one is thicker than the other and so may need a different size needle.
  • YLI monofilament: Only ever use the first half of the spool then throw the rest away! Superior Masterpiece 50 wt goes well in the bobbin with the YLI monofilament; don’t use mono in the top and bobbin.
  • When using the sewing machine as a drawing tool (i.e thread painting/sketching), use a thread stand — it gives the thread another two feet (~60 cm) to ‘relax’.
  • For thread sketching, have many gradations of one colour in your thread.

Needles:

  • Universal needles are semi-ballpoint needles, which separate the weft and warp of the fabric, resulting in some fraying as it separates.
  • Sharps include embroidery needles, leather needles, quilting needles and don’t separate the fabric as they pierce it. Sharps are good for raw edge applique.
  • Pam uses size 60 needles, which have TINY holes, though she got us to use 70 needles for our work.

Using the markers:

  • User the coloured markers to ‘dye’ the thread AFTER the stitching is done. Dyeing works best on cotton threads, not polyesters, rayons, etc.
  • Use a fine (0.05 mm?) black UniPin marker for the outlines of the eyes and other very dark areas, BEFORE you stitch.
  • The markers she recommends are Fabrico markers (from Tsukineko) — using brush end, mostly. There are many colours, but she said about nine colours are sufficient, and recommends getting the ‘mud’ colours, not the brights for faces, drapes in clothing etc. For the week, we used sand, grey, and an orange marker.

fabrico_marker

Recommendations for thread sketching/painting a child’s face:

  • Print the image out lightly on paper, then shade with coloured pencils to see how to achieve softness.
  • Use less stitching.

Batting:

  • There’s a right and wrong side to batting. Look for the needle punch holes – where they went in is the right side; where they came out is the wrong side.
  • Put the right side facing up when layering top, batting (i.e. right side up), backing.

See also:


2014 US trip: First days in California

23 02 2014

My apologies for any typos. I’m writing these posts on my tablet using the in-built keyboard and SwiftKey, and I still feel like I’m all thumbs.

My flight over was a bit unusual this time. There was quite a bit of turbulence about 8 hours into the flight and I got quite nauseous – mostly sweaty and clammy and very uncomfortable, so much so that it took about another 3 hours before I could put my seat back without feeling horrible.

After some 14 hours in the air we arrived into LAX on time, but right behind about 3 other flights, so the lines for immigration were really long. It took more than two hours to get through immigration, baggage claim and customs, then another hour to get my rental car and get on the road to my uncle’s place near Newport Beach, which was about another hour. I did a bit of shopping along the drive down – The Container Store mostly… OMG! what a place!

My uncle is now 90 and is quite frail though his mind is still pretty sharp. It was good to see him again, though it was sad to see the state of his health and once strong body. I stayed at his place overnight and will call in again for a few hours on the day I fly home.

I spent most of Saturday driving from Newport Beach to Monterey.  What I thought would take about 5 hours actually took about 7 or so. I stopped for about 30 minutes in Buellton to have some lunch and refuel, but the rest was driving time. I got to Monterey just on 6 pm.

The drought in California is very evident. Everything was incredibly brows and very dry. Huge trees are dead or dying. Pollution and blowing topsoil was everywhere. The only green I saw was in the irrigated fields.

I had dinner with an old friend last night. We laughed a lot and cried a bit. This was the first time I’ve seen her in several years, and in the past 18 months she’s lost her father, her son, had to put her mother into care, and is losing her husband to the bitter cruelty of Alzheimer’s. Too much tragedy for one person to bear alone. I cannot conceive of her pain. Oh, and she has an as yet undiagnosed shadow on her lung…

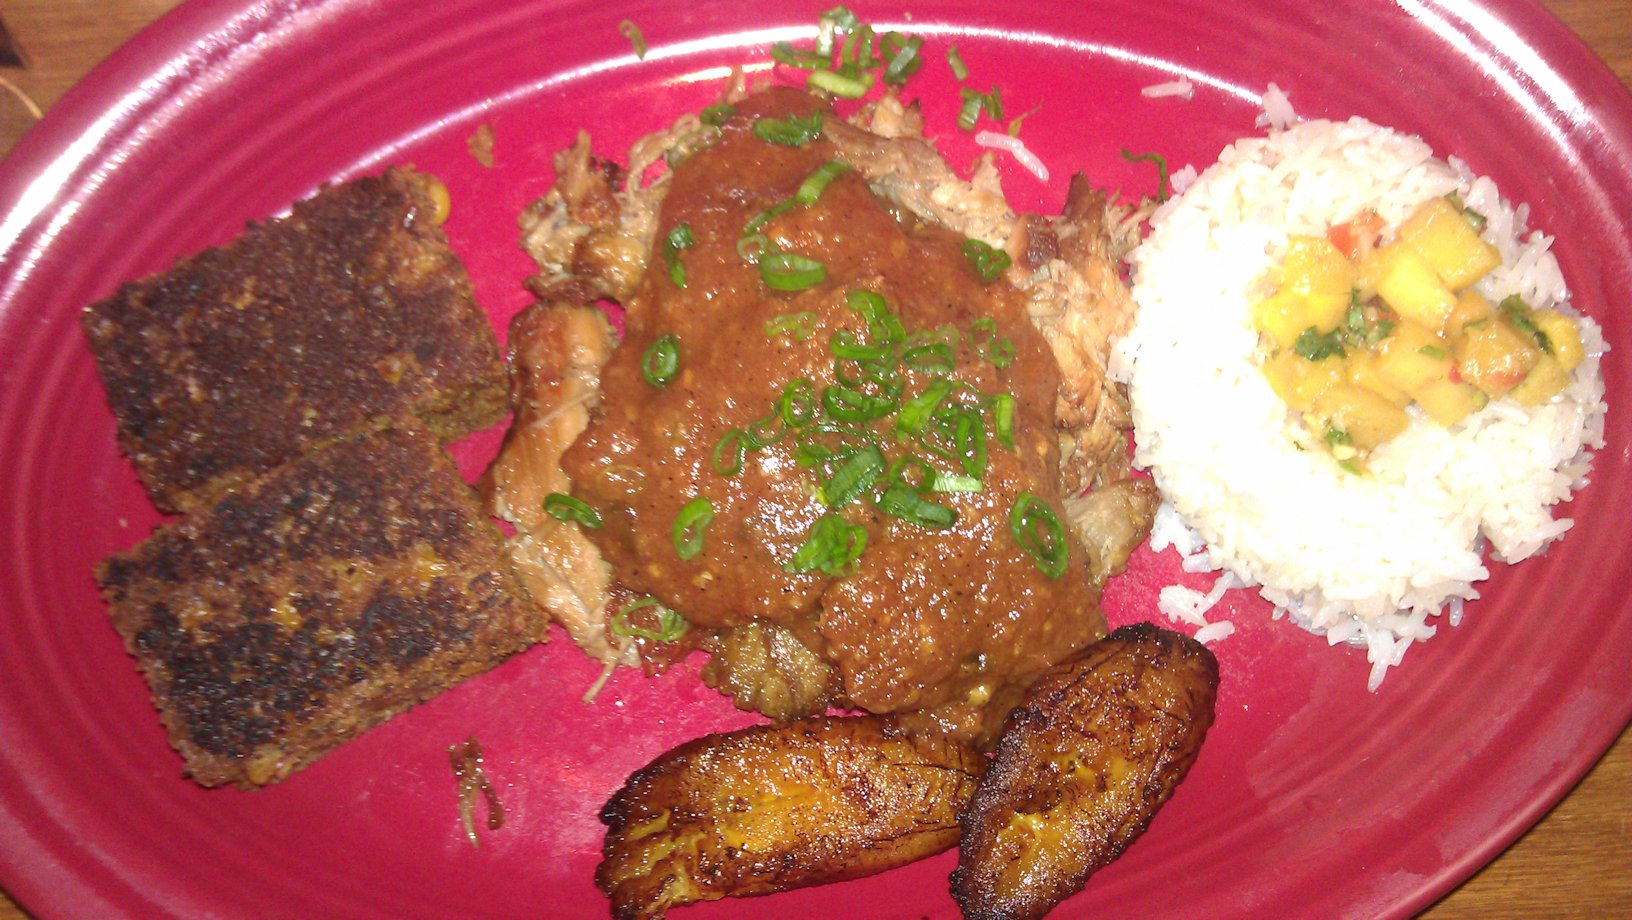
On a lighter note,  the meal was fantastic. We went to Hula’s Island Grill and shared edamame (OMG!), then she had the butterfish for her main meal while I had the Jawaiian jerk pork. The food was wonderful as was the De Paolo zinfandel we had with it. And with it being national margarita day, we shared a margarita too!

Tomorrow I catch up with other friends in Monterey, then start my ‘Empty Spools’ quilting week at Asilomar in the afternoon.

I’ll  try to post pictures if I can figure out how to do so with my tablet!

IMAG1767_Endomame

The wonderful, spicy endamame, with a gorgeous Zin to accompany it

IMAG1768_JawaiianJerkPork

Jawaiian Jerk Pork, with Johnny cakes, plantains, and lovely goodies in the rice


IMAG1769_GrilledButterfish

Grilled butterfish with a miso and mushroom sauce


To uncap at the table or not

20 02 2014

stelvin

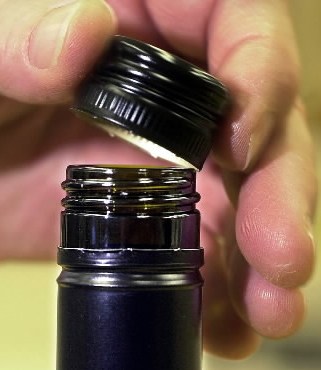
There’s a steakhouse we go to every few months, and they have this strange policy — they don’t uncap your chosen bottle of wine at the table in front of you. Instead, they uncap it at the bar and bring you the opened bottle with no cap on the side.

How their system works: I choose the wine I want either from the minimal wine list or from a locked display cabinet and let the server know which one. Out of sight of the customer, the server unlocks the cabinet and gets the wine, or gets it from the bottleshop that is attached to the venue, or gets it from somewhere else. The server then opens the wine behind the bar and brings the opened bottle to the table with the wine glasses.

Why is this of concern to me, you might ask? Here are some potential issues with this:

  • How do I know that the wine is from a new, full bottle and not a half empty bottle from behind the counter that they’ve topped up with another (cheaper?) wine? A wine that was potentially paid for by another person and now is being resold a second time,
  • How do I know that no-one has ‘doctored’ the wine with a foreign substance?
  • How do I know that no-one has dropped a sedative drug into the wine?

So when we were paying our bill at this restaurant last night, I asked why the wine was not uncapped at the table by the server. No-one could give me a logical, reasonable response. Instead I got ‘it’s policy’, ‘that’s how we do it’, ‘we don’t give you the cap because it might be put back on the bottle and then the bottle used as a weapon’, ‘it’s licensing regulations’ and the like.

I particularly liked the ‘used as a weapon’ response — this from a place that serves big juicy steaks and that has HUGE steak knives sitting on every table when you walk in. I’m talking 6″ plus steak knives with a 1″ wide blade and a decent serrated edge and a solid wooden handle. You want to prevent people from using a bottle as a weapon? Then reconsider the placement of massive steak knives at every place setting. And weapons? In a family restaurant in a country town frequented by your typical middle class couples and family groups? Highly unlikely.

If they had wines with a cork, would they also uncork the wine at the bar, or uncork it at the table? If they would uncork it at the table, then why not use the same procedure for Stelvin caps?

All their excuses are very lame. And I doubt licensing regulations have anything to do with this ‘policy’.

I’m still concerned that they won’t uncap a wine at the table in front of the customer who has paid for that wine.


Quilt for a 60th

15 02 2014

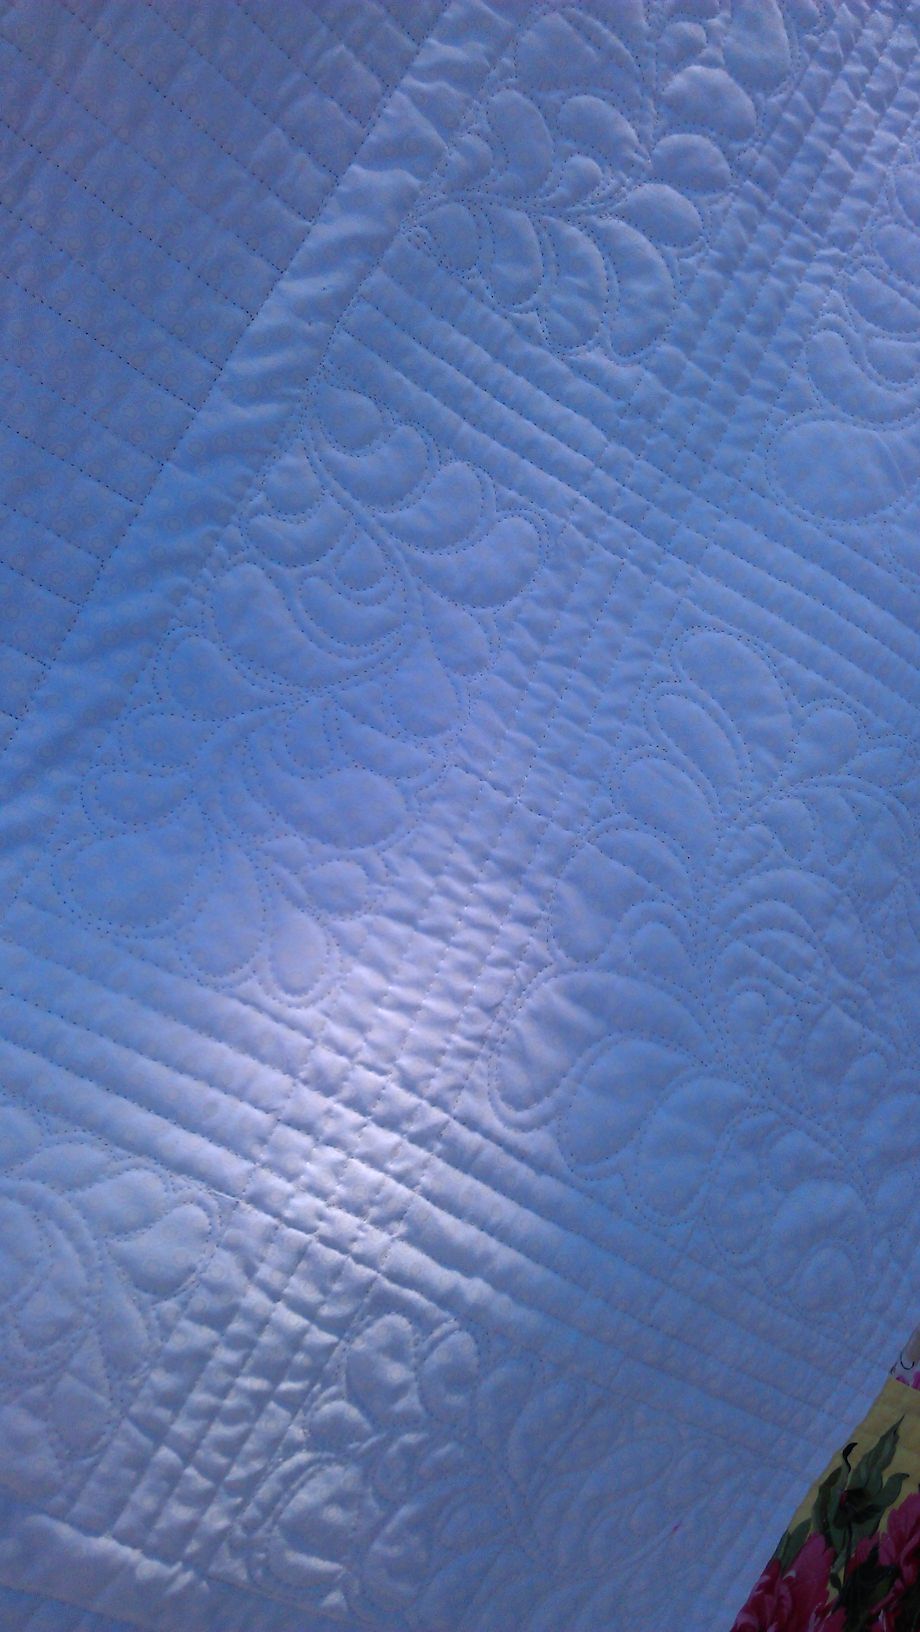
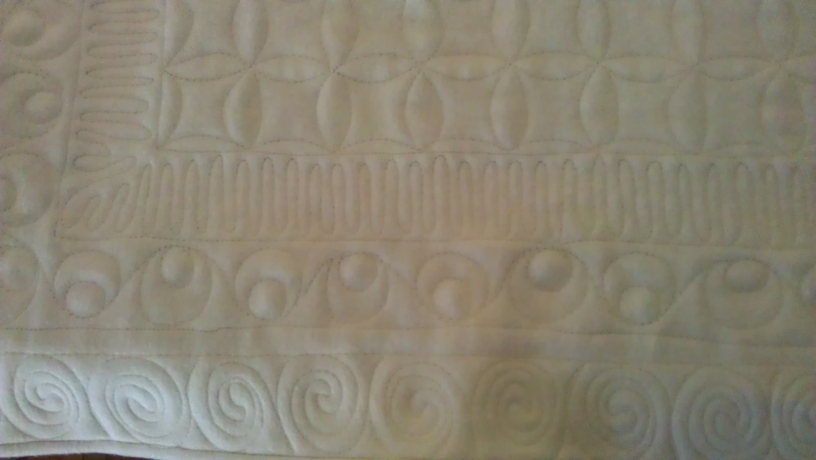
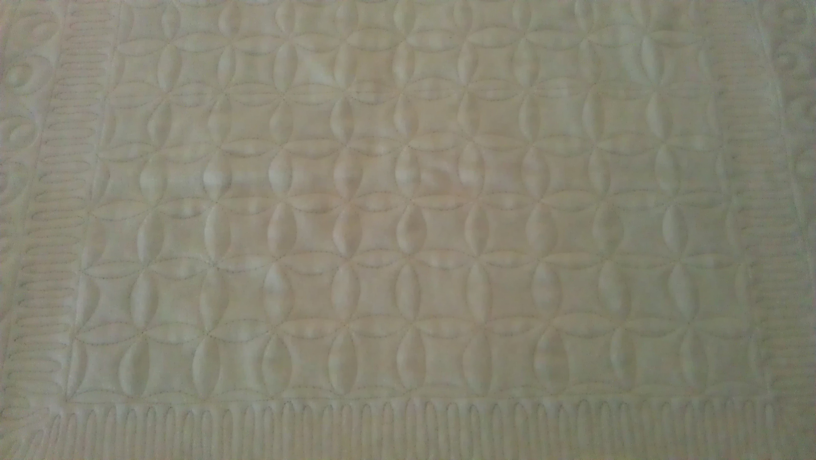
I was asked to quilt a special quilt for someone turning 60 soon. I don’t know the person so didn’t know whether she would be more inclined toward traditional quilting (such as feathers) or more modern quilting (e.g. straight lines). The quilt design leant itself to either — the floral fabrics were quite traditional, but they were set off by white, which is more in line with ‘modern’ quilts. I asked the person who’d given me the task, and she wasn’t a lot of help 😉 — she said the recipient was both traditional and modern, and that if I could combine both styles, that would be good. Hmmm… a challenge…

I started by stitching in the ditch around all blocks and in between the 1″ sashing strips, and did straight ‘piano key’ stitching every half inch on the border fabrics. I did all this stitching in a plain white cotton thread. But what to do in the large floral and white squares? I thought of doing different motifs in each (in different colours), then thought that might be too ‘busy’ — I suspect this is a quilt to be used, not for show. So I decided to go with free form (no marking) feathers, in a soft pink variegated thread.

(Click on a photo to view it larger)

gwen02

gwen05

gwen04

gwen03

Back:

gwen01

Threads used:

  • Top: Gutermann white cotton; Fil-Tec ‘Affinity’ (40 wt trilobal polyester, ‘Mauve’ colour 60149)
  • Bobbin: Fil-Tec Glide pre-wound bobbin (cream)


Orchid art quilt: Finished

13 02 2014

I finally finished my orchid art quilt! Actually I’d mostly finished it a few weeks ago, but had to finalise it by adding a label and prepping it for going into the 2014 Boyup Brook Art Awards. Anyhow, it’s all done now and I can reveal photos of the finished piece.

I started this piece and finished more than 75% of it at the 5-day Quilting Adventures workshop with Velda Newman in Texas, March 2013. That last 25% took me nearly a year!

My friend Wade in California took the photo on which this piece was based. Just a few short months after I started it, Wade’s beloved daughter 19-year-old Evelyn was tragically killed in a car being driven by a drunk/drugged driver. So I’ve named this art quilt in her memory.

Below the photos are my artist’s statement for this work, the original photo on which is was based, and links to the workshop I did with Velda Newman.

The finished piece is 38×39″.

IMAG1674

IMAG1677

IMAG1678

IMAG1676

IMAG1679

IMAG1675

Artist’s Statement

***************

In Memory of Evelyn

The inspiration for this art quilt came from a photograph of an orchid taken by my friend Wade Courtney (California). Shortly after I started this piece, Wade’s beloved only daughter Evelyn (age 19) was tragically killed in a car driven by a drunk/drugged driver. I named this piece in Evelyn’s honour.

I used several techniques in this piece, many of which were taught by renowned quilt artist, Velda Newman, in a 5-day Quilting Adventures workshop with her that I attended in Texas in March 2013. The main flower was a single piece of white cloth that I cut into several pieces and then treated with various paint techniques and paint products, such as artist acrylics, Derwent Inktense watercolour pencils and sticks, and Copic markers.

Surface stitching was done on my Handi Quilter Sweet 16, using threads of various weights, colours, and types—monofilaments, rayons, trilobal polyesters, etc. Much of the surface stitching was completed prior to adding the batting and background fabric, with more done afterwards to add the impression of stems, leaves, and other flowers in the background. I sketched three smaller flowers on white fabric then coloured them with Copic markers, before fusing and machine appliqueing them to the quilt. To finish this quilt, I used a ‘pocket’ technique, where I stitched a backing fabric all round, leaving a small section open to pull the quilt through, before topstitching close to the edge. Some minor quilting was done at this stage to keep the three or more layers together.

Designed and created March 2013 to January 2014

**************

Photo on which this quilt was based

qa_day2_veldaclass00_wade_pink_orchid

See these posts for my progress on this art quilt:


Gossamer wings

10 02 2014

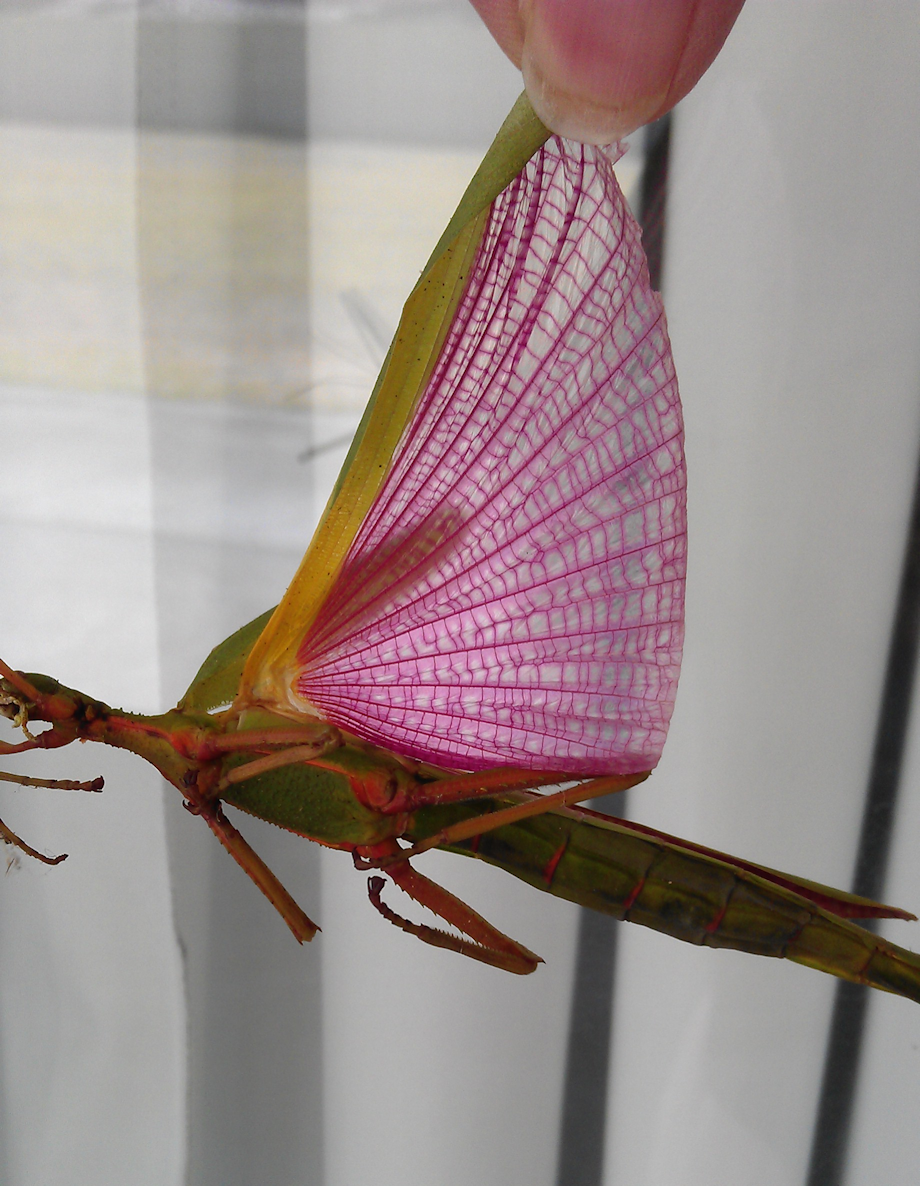
I spotted this dead something near the back door. At first I didn’t know what it was, but when I turned it over, it was clear it was a large stick insect/praying mantis. I picked it up by one of its now-dry wings, and saw the most amazing pink gossamer wing hiding underneath the green of the outer wing. So pretty.

stick_insect01

stick_insect02  stick_insect03


Clutch for an iPad

6 02 2014

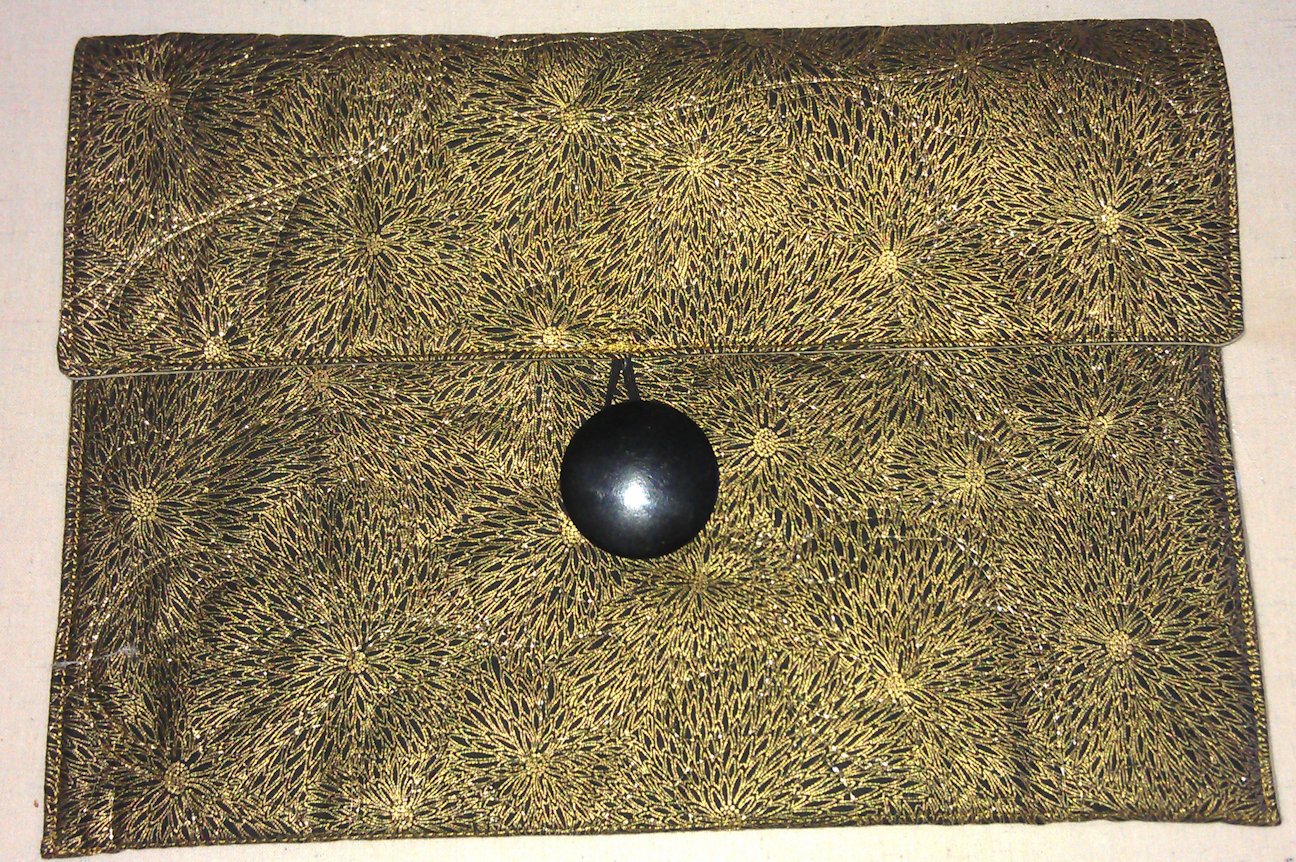
Last month my friend Clare asked me to make an evening clutch for her sister’s birthday present. One like this one in my Etsy store: https://www.etsy.com/au/listing/100227098/clutch-peacock-blue-satin-quilted-with, but it had to be big enough for her sister’s iPad.

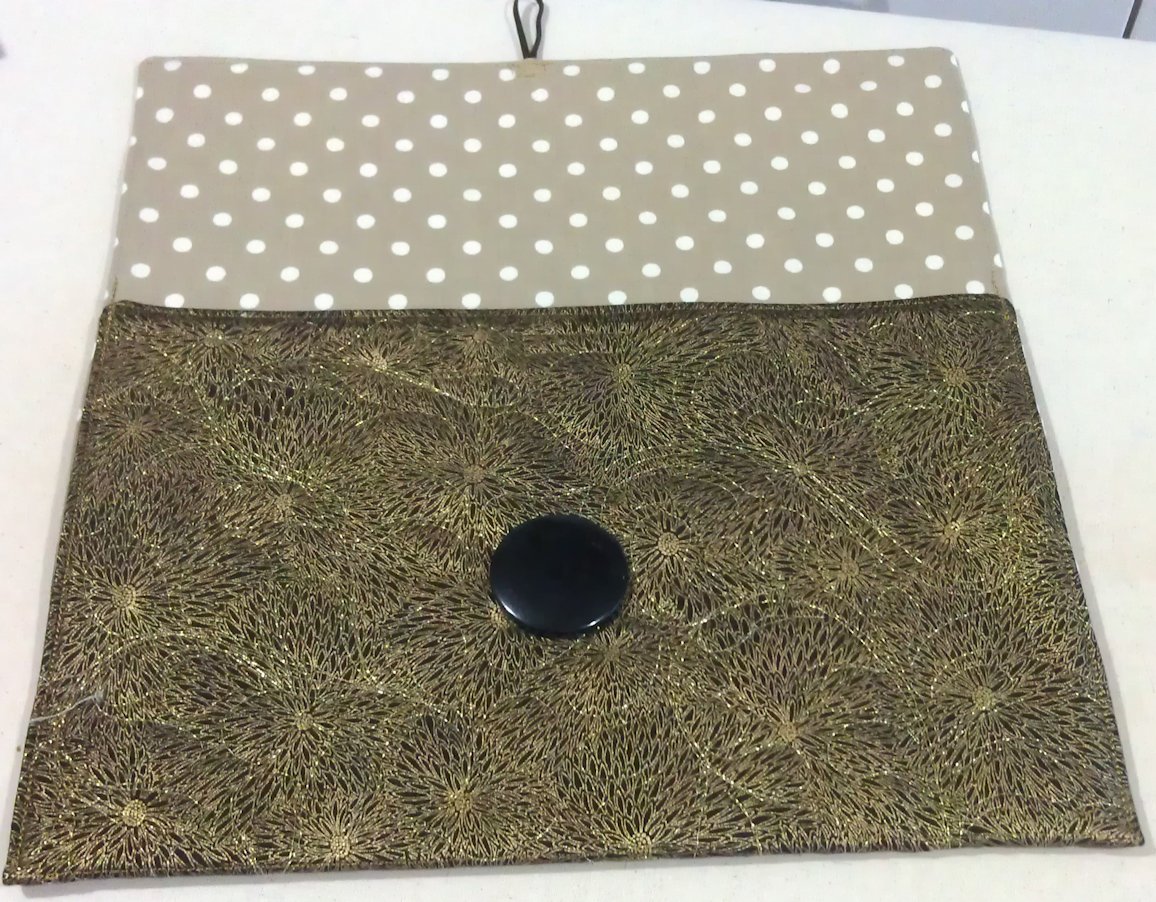
Clare chose one of my fabrics (a black fat quarter with a gorgeous gold flower burst) and I made it in an afternoon. I used a gold metallic thread for the quilting (all-over feathers), and a vintage black button that I *think* was from my grandmother’s stash from years ago.

I chose a lighter fabric for the inside only because there’s nothing worse than being out to dinner, for example, and hunting (in dim light) for something inside a purse that has a black lining!

IMAG1671

IMAG1667

I hope Clare and her sister like it!


Scrappy Quilt: Finished

28 01 2014

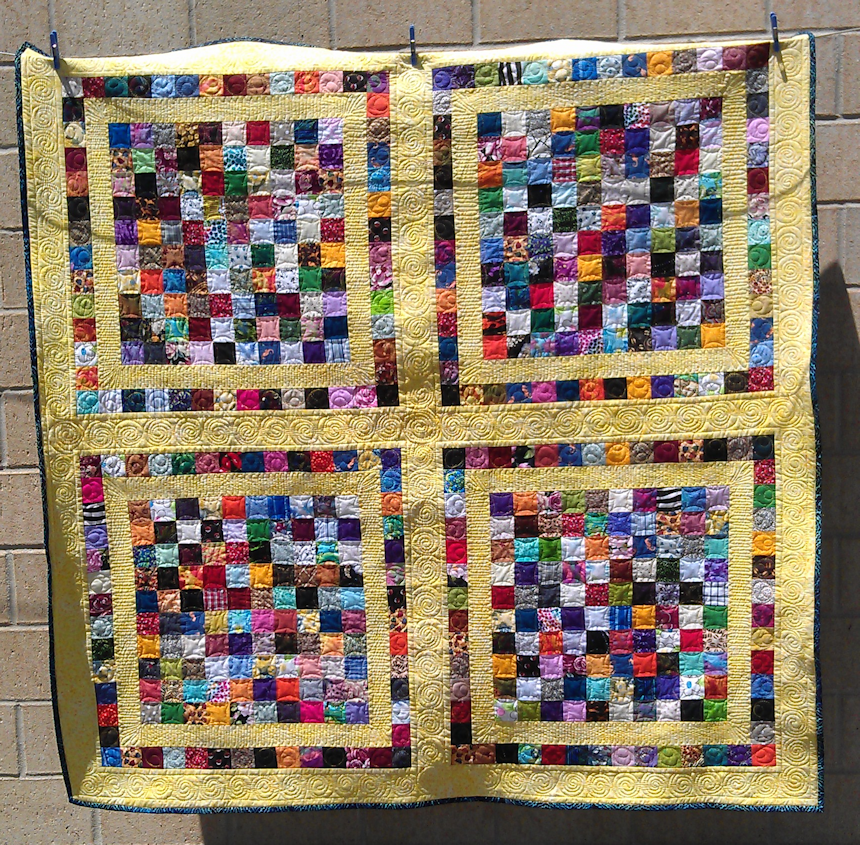
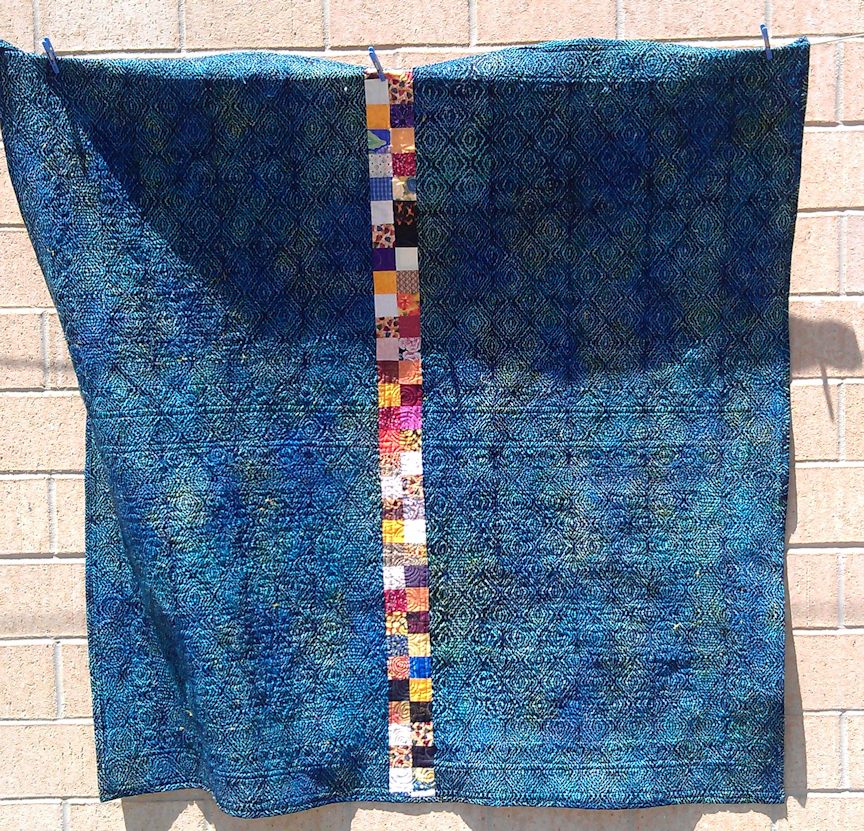
I finished up my scrappy quilt over the Australia Day long weekend. This quilt is for me, and used up lots of 2.5″ squares of scrap fabric. The only ‘new’ fabrics in this quilt were the yellow border fabric and the blue/green backing fabric, both of which I bought in Bali about 18 months ago. I still don’t think I made much of a dent in my scrap stash… 😉

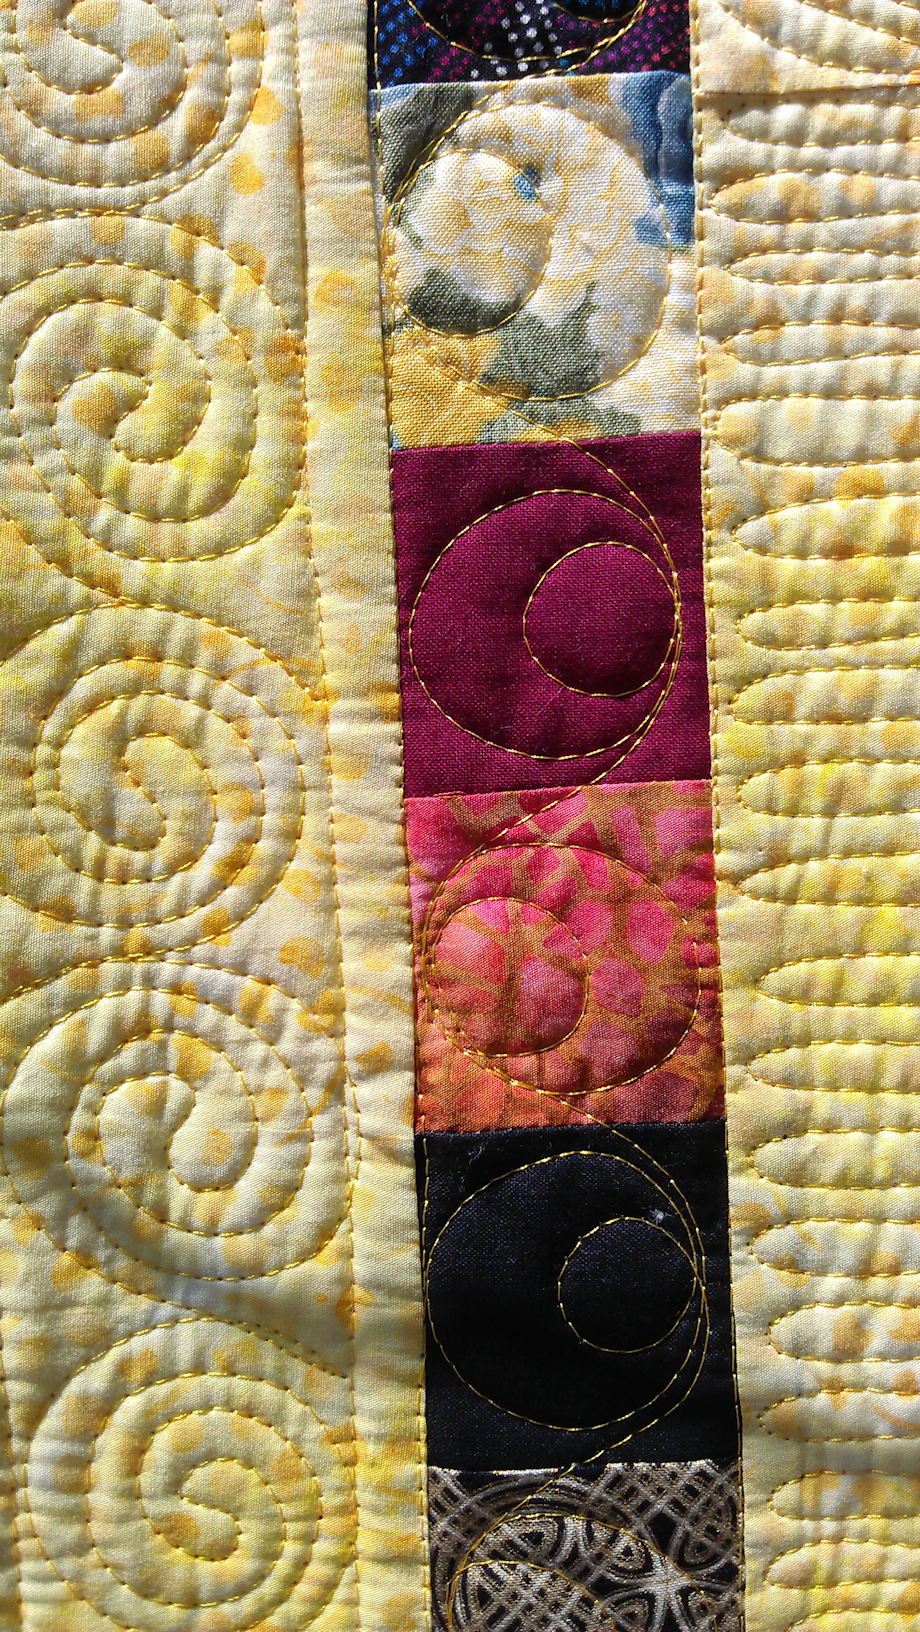
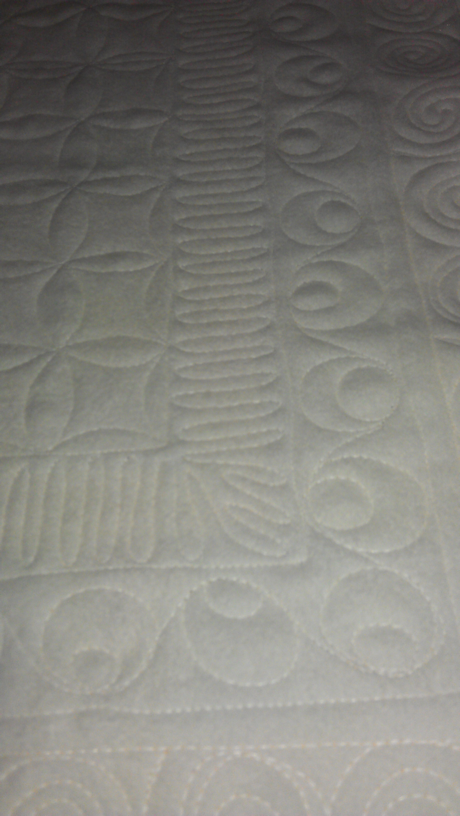
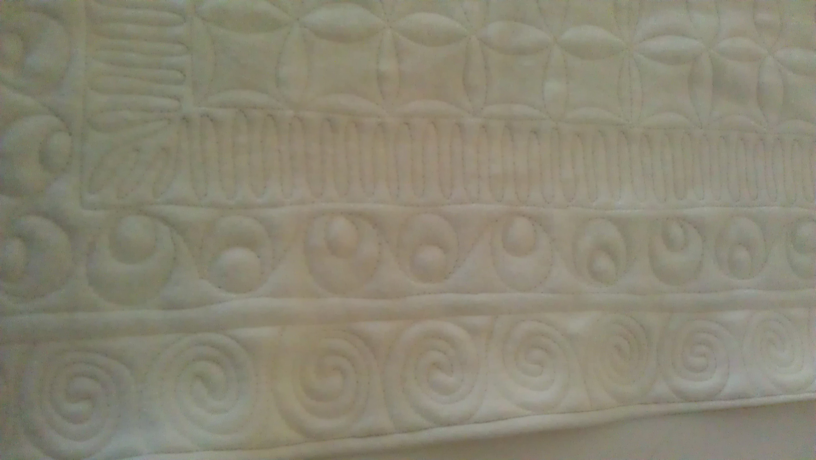
For the quilting, I did cathedral windows in the 100-square blocks, a long U shape in the first yellow borders, a double circle in the border of scrap fabrics, then some spirals in the outer yellow border. I used the same thread throughout. All the quilting, except the stitch in the ditch and the straight lines in the outer border where I used the Line Tamer ruler, was done free motion. No rulers, markers, templates.

On the back, I joined the backing fabric with more strips of the scrap squares, and as I’d made five 100-square blocks, I used the fifth block as my foot warmer pocket — I backed it in a fleecy fabric and quilted it the same as the main quilt. For the binding, I used the same fabric as the backing fabric and I like how that contrasts nicely with the yellow in the borders.

The pattern I used was a free one from here: http://weddingdressblue.wordpress.com/2011/07/06/100-patch-quilt-tutorial/
Click on a photo to view it larger.

scrappy_front03

scrappy_front01

scrappy_front02

scrappy_front04

Back: First photos without the foot pocket attached

back02

back01 back03

The back (inside) of the foot pocket on the back:

foot_back01

foot_back02

foot_back03

foot_back04

Threads used:

  • Top: Fil-Tec Glide ‘Mango’ (40 wt trilobal polyester, color 80116)
  • Bottom: Fil-Tec Glide pre-wound bobbin (white)


Cute but destructive birds

25 01 2014

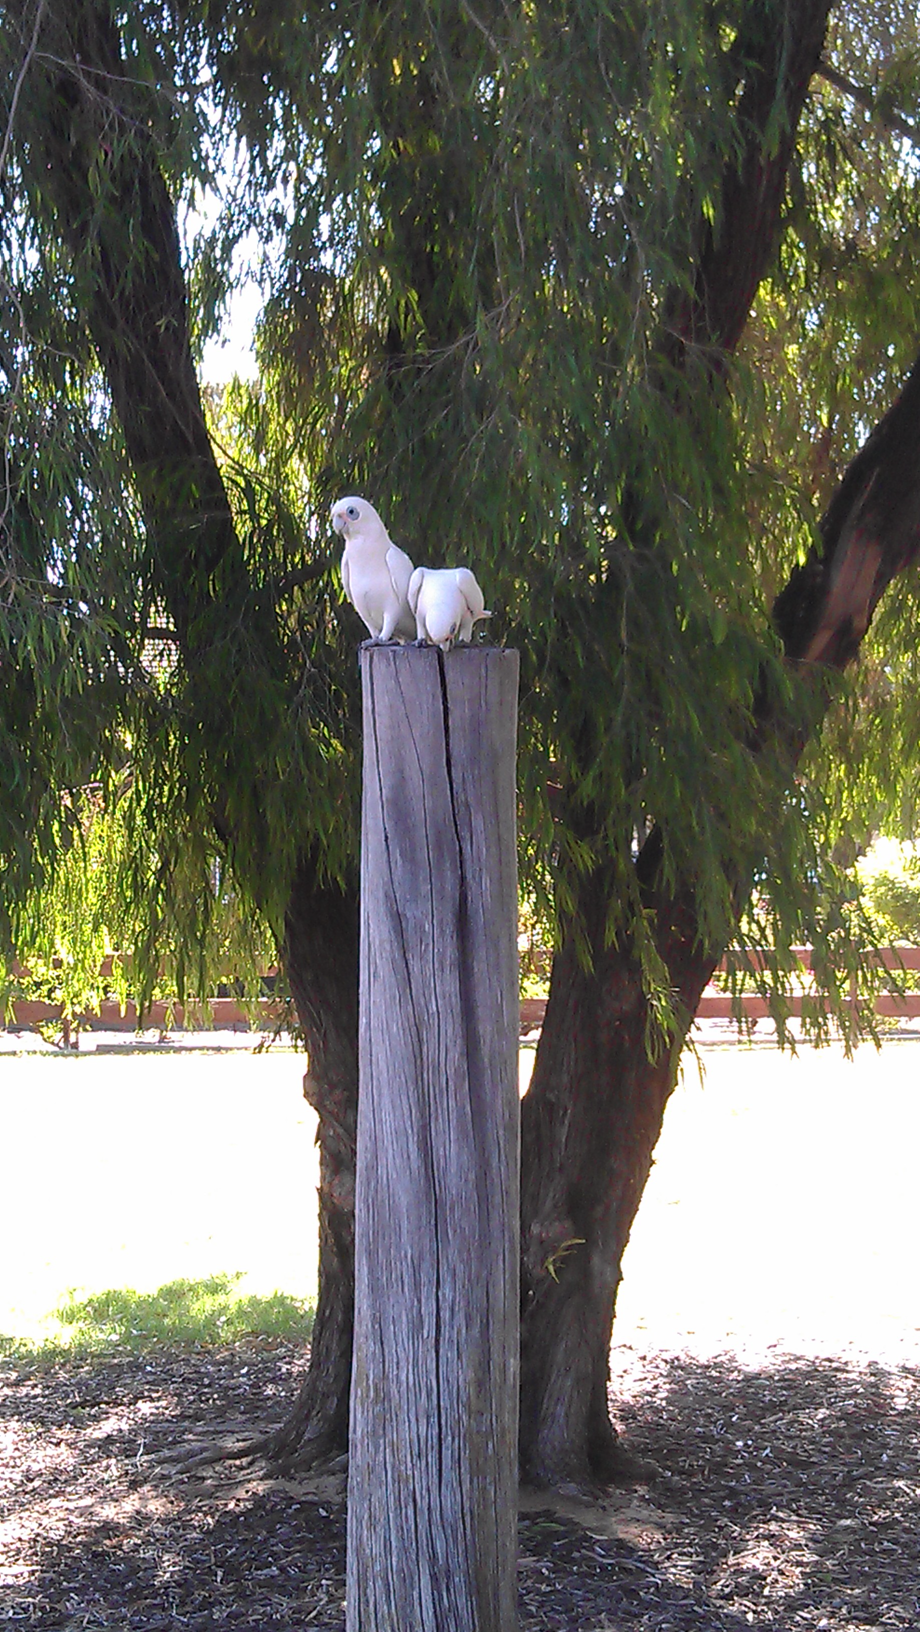
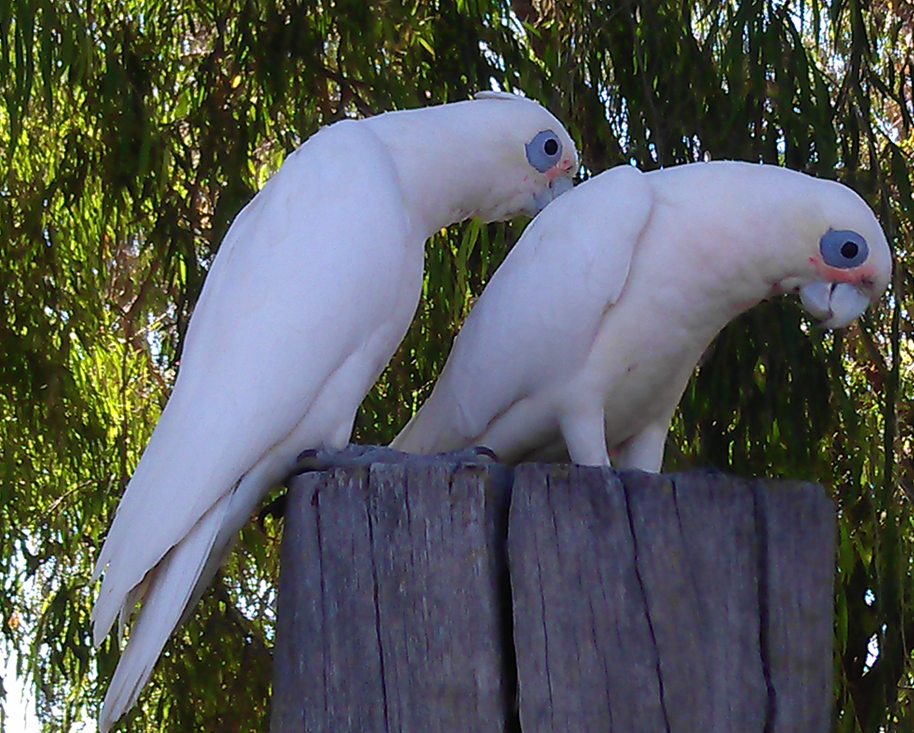
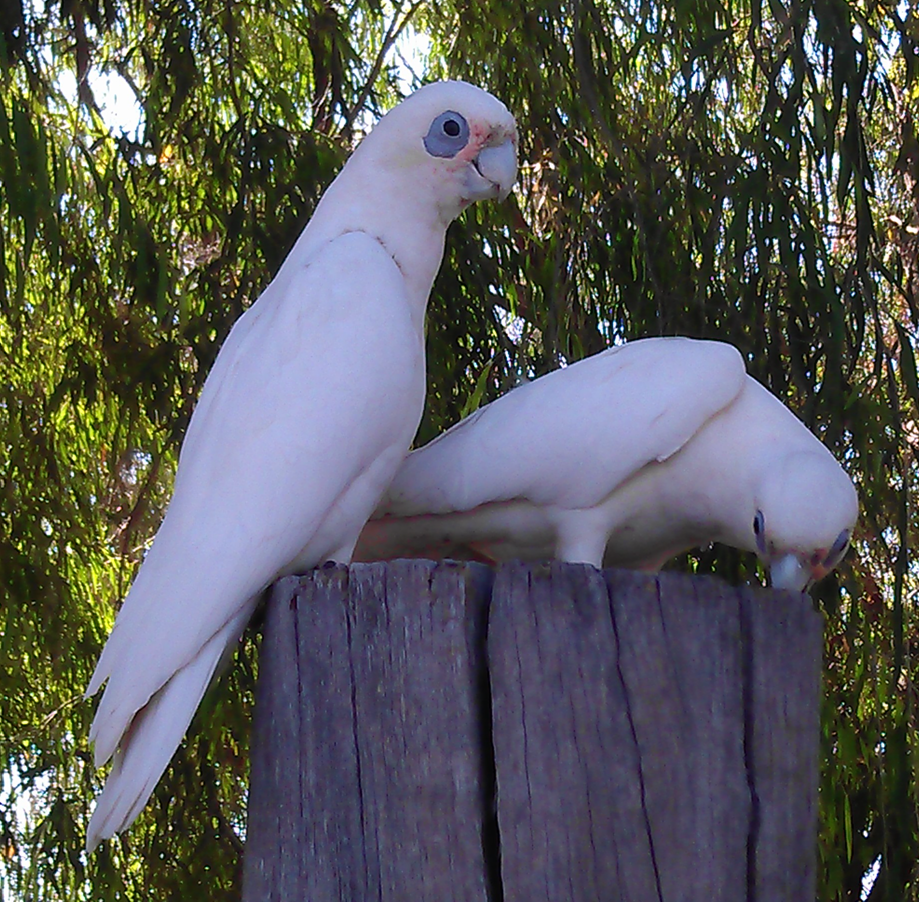
Like many parts of Western Australia, my local shopping centre’s surrounding parkland is overrun with Little Corellas. They are a very social, very noisy native bird, and they are also very destructive, digging up lawns and making small sand hollows in the lawn as a result, pecking at wood and anything else that intrigues them, and flocking in huge numbers. They are super cute as long as it’s not your property they’re attacking 😉

On a very hot day last week I was walking back to my car in the local shopping centre’s car park when I spotted this pair. They had moved away from the main flock and were pecking away at the old tree stump/pole under the shade of the peppermint tree. They weren’t afraid of me at all and I was able to get within a metre of them to take these photos with my phone. At one stage the one on the left put its foot on the back of the other one as if to hold it in position so it didn’t fall off the narrow perch, or if you want to get all anthropomorphic, it looked like one had it’s arm over the other one’s shoulders, just like good friends do 😉

Perhaps they were a mating pair — it seems they pair for life: http://birdlife.org.au/bird-profile/little-corella

corellas02

corellas03

corellas04

corellas05

corellas06

corellas07

corellas08


Update: This flock of Little Corellas has nearly decimated the main signage for the shopping centre. This signage was replaced less than 12 months’ ago, and these birds have attacked it with gusto the past couple of weeks. As a result, there are bits of styrofoam everywhere near the main doors to the shopping centre, and the sign is looking wrecked. Either the signage will have to be replaced with something more sturdy and less attractive to birds, or the corellas will have to go. I wonder which it will be….