Xylem

24 05 2015

I’ll be submitting this one to the OMG (Organic Modern Graphic) quilt movement (https://www.facebook.com/groups/OMGQuilts/) for acceptance as my second OMG quilt. If accepted, it will get an OMG #, but until then, I’ve called it ‘Xylem’.

My interpretation of ‘organic’ for this one was at the cellular level and beyond, as per ‘Synapse‘ that I created a week ago. It’s a 7×10 piece, and represents xylem cells that are in plants and trees. The dark green base is cheesecloth that I painted with a mix of blue and yellow fabric paints.

How I made it is described below the photos (click on a photo to view it larger); I go into all the steps (with photos) for those interested in finding out how I do my pieces on a very stiff interfacing.

But first, the finished piece! (This art quilt is now available for sale from my Etsy store: https://www.etsy.com/au/listing/605097136/xylem-art-quilt)

xylem05

xylem04

xylem03

xylem02

Threads used:

  • Fil-Tec Affinity ‘Forest’ (40 wt, trilobal polyester [variegated], colour 60293)
  • Isacord neon yellow/ lime(40 wt, trilobal polyester, colour Fb6010/A2941)

xylem06

Process

Preparing the cheesecloth

(No photos for this bit)

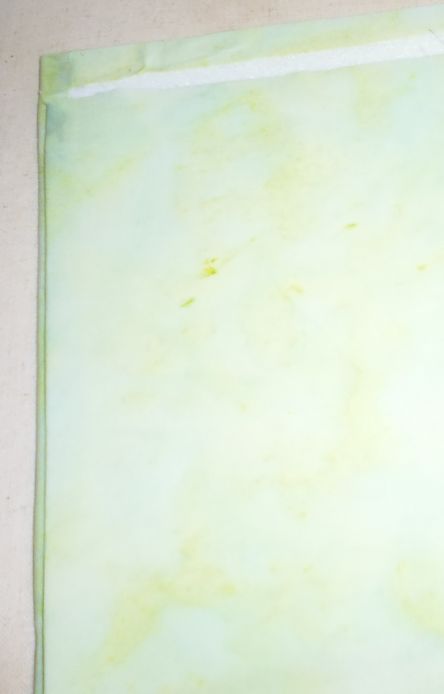
I roughly cut some white cheesecloth, then made some holes by pulling apart the threads. I mixed together some blue and yellow fabric paint to make green. I was aiming for a blue/lime colour, but that didn’t happen! I then lightly mist sprayed the cheesecloth with water and applied the paint with a sponge applicator. I left it outside to dry.

Making the front

Next, I made the base that the cheesecloth would be stitched to. The steps below describe the whole process (with photos). You can deviate from these steps at various stages, if you want, and I’ve indicated where these options are most likely to occur.

  1. Cut a 7×10 inch rectangle of Floriani Stich ‘n’ Shape (or Timtex or any other similar stiff interfacing). Preferably use a non-fusible for this, but if you only have fusible, make sure it’s just fusible on one side, not both.
  2. Cut a rectangular piece of batting slightly smaller than 7×10 measurements — you want the batting to fit on the 7×10 interfacing but not go over the edges. Cut it about an eighth of an inch smaller on each side.
  3. Cut two pieces of fabric about a half inch more on EACH side than the interfacing (i.e. about 8×11 each). You can use different colours — one for the front, one for the back — or the same colour (I’ve used the same colour in the steps below).
  4. Cut four 2″ pieces of hook-side Velcro for hanging.
    7x10_making01
  5. Lay the batting over one side of the interfacing (if the interfacing is fusible on one side, lay it on the fusible side). Do not go over the edges — the batting has to fit within the dimensions of the interfacing.
    7x10_making02
  6. Lay this combined piece (interfacing + batting) on the wrong side of the top fabric, making sure that there’s some top fabric overhang on all sides sufficient to wrap over the edges and onto the back. Flip the piece over and check the placement of the top fabric.
    7x10_making03
  7. Finger press and then press (with an iron) the edges of the top fabric to the back, keeping the fabric taut.
    7x10_making04
  8. If your edges won’t stay in position, run a bead of Elmer’s School Glue under the fabric and heat set it into position with an iron. This glue is a boon for quilters as it will hold things in place that would normally shift.
    7x10_making05
    7x10_making06
    7x10_making077x10_making08
  9. The top part of the base is now complete. Set it aside.

Making the back

You’ll make a ‘hemmed’ piece with the backing fabric.

  1. Place the backing fabric right side down. Turn over and finger press one ‘hem’, then iron it.
    7x10_making09
  2. Place the backing fabric over the back of the main piece to see how much hem you need to turn over on the opposite side. Make sure you keep the final size of the backing fabric slightly smaller (about an eighth of an inch on each side) than the 7×10 main piece.
    7x10_making10
  3. Repeat for the other sides, testing the placement as you go.
    7x10_making11
  4. Again, use Elmer’s School Glue to hold the hems (especially the corners) down once they are the correct size. Heat set the glue with the iron.
  5. Test the whole backing piece against the back of the main piece, making sure all edges are smaller than the dimensions of the main piece.
    7x10_making12
  6. At this point you have several choices — you can set the backing piece aside and do any applique, quilting etc. on the top piece, then add the backing piece and then the Velcro; OR you can add the Velcro to the backing piece now (which is what I did so that the stitching used to hold down the Velcro didn’t show through on the front of the main piece) and then either set the backing piece aside and do the applique/quilting, then add the backing piece; OR you can topstitch/glue the backing piece (with or without the Velcro) to the main piece and then do the applique/quilting, stitching the Velcro on when you’re finished if you didn’t add it earlier. Much will depend on whether you want your quilt stitching to show through on the back, whether you’re OK with the Velcro stitching showing through on the front (not such a big deal for very dark and/or busy fabrics), and/or whether you want topstitching (I didn’t on this piece). Whatever you do, at some point you have to add the Velcro to the right side of the backing fabric, and at some point you have to stitch and/or glue the backing fabric to the main piece.

    7x10_making13

    I made the backing piece separately and added the Velcro BEFORE I attached the backing fabric to the main piece.

  7. Because I chose to add the backing later, I now placed the cheesecloth on the main piece and did all my quilting stitches.
    xylem01
  8. Once that was done, I glued the backing fabric to the back. The backing fabric covered up the mess of stitching on the back of the interfacing, giving a much cleaner look to the piece.
  9. Don’t forget to add a label!


Lawn – before and after

24 05 2015

I’ve had a chap (Simon) come out and advise me on some treatments for our lawn, which is a bit patchy and never really seems green. He was here earlier this week applying the chicken poo pellets (yes, there’s a distinct odour….), and the lawn feeding solutions (Power Feed and SeaSol). He advised me to NOT get the lawn mowed for a couple of months, and reckoned that after another application of the Power Feed and SeaSol in 2 weeks, and perhaps one more application, the lawn should be looking much healthier.

He also suggested I take a photo of the lawn ‘before’, so I did. However, I forgot to take the photo before he came, so this photo is of the back lawn about 3 days after the application of the goodies, and so there’s a slight brown tinge on the lawn from the chook pellets.

Let’s see how it looks in a few weeks…

lawn_before

Update 14 June 2015

This is how the lawn looks 3 weeks after the initial application of the goodies. Some of the dead patches are starting to show signs of life and the weeds are loving the fertiliser… (click the photo to view it larger)

P1040645

Late October 2015

Wow! Look at it now. He said it would take several months, but promised that it WOULD come back. And come back it has!

P1050055

P1050051

P1050052

P1050054

Early December 2015

A week ago, Simon partially top dressed the back lawn with an organic soil improver/mulch. I took these photos one week later — the difference is dramatic! Even though you can still see the dark brown of the organic material, the new growth is a much richer, darker green than previously. I’m very pleased, especially as we’re coming into summer when the heat and relentless sun takes its toll on gardens. When I compare these photos to those I took back in May when we started the treatments, it’s hard to believe it’s the same lawn. In addition to the healthy colour, the lawn is now spongy, not crackling, underfoot and there are very few spots for the weeds to take hold.

lawn_20151202c

lawn_20151202b

lawn_20151202a


Batch cooking

24 05 2015

I cooked up a storm for 3 hours on Friday afternoon — the aim was to fill the freezer with prepared meals so that on the nights I don’t feel like cooking, I can always grab something and heat it up for our dinner. I’ve been doing this for decades, and it works well.

In that 3 hours I made:

  • about 4 litres of chicken stock (chicken carcasses, celery tops, carrots, onions, mushrooms, chillis, etc.), strained so that I only have the stock and none of the bits
  • 8 servings of my Mexican Chicken
  • 8 servings of Chicken Madras
  • about 3 litres of pumpkin soup (butternut pumpkin, sweet potato, chicken stock [from the freezer from an earlier batch cooking episode], chilli, mushrooms, etc. — I don’t add coconut cream and yoghurt until I heat it up ready for serving)

And yes, we ate the crusty loaf of bread (in the foreground of the photo) that night with some of the pumpkin soup!

batch_cooking


Community Quilt 212

24 05 2015

This was a HUGE scrappy quit, done in a fairly traditional style. In fact, I think a lot of the top was hand stitched. What an effort!

How to quilt it? Well, the obvious first step was to stitch in the ditch around ALL the blocks and borders, and the coloured fabrics in those blocks. This took a few hours, even with my favourite Line Tamer ruler.

I decided to leave the coloured blocks unstitched, except for the ditch stitching, so they’d ‘pop’. In the white space, I echo quilted about a half inch from the seams, then free-motion stitched large ribbon candy in the remaining spaces.

I did a similar treatment in the final white borders, leaving the inner white border and the coloured border unstitched (except for stitch in the ditch).

In total, this quilt took about 6 hours to quilt on my Handi Quilter Sweet Sixteen. It was big!

One of the photos below shows the quilting in progress — the area on the left is fully quilted; the area on the right is just pinned ready for stitching. You can see what a difference quilting makes.

(Click on a photo to view it larger)

quilt212_03

quilt212_04

quilt212_01


quilt212_02

Threads used:

  • Top: Fil-Tec Glide ‘Cream’ (40 wt trilobal polyester, colour 20001)
  • Bottom: Fil-Tec Magna Glide Classic pre-wound bobbin (white)


Synapse

17 05 2015

I’ve submitted this one to the OMG (Organic Modern Graphic) quilt movement (https://www.facebook.com/groups/OMGQuilts/) for acceptance as an OMG quilt. If accepted, it will get an OMG #, but until then, I’ve called it ‘Synapse’. Update:  Accepted! This is now ‘OMG #31: Synapse’. This art quilt is now available for sale from my Etsy store: https://www.etsy.com/au/listing/605096612/synapse-art-quilt

My interpretation of ‘organic’ for this one was at the cellular level and beyond. It’s a 7×10 piece. How I made it is described below the photo (click on the photo to view it larger).

P1040571_02

The background fabric is some old navy linen I had from my dressmaking days, and the synapses are some old pink poplin (or similar) from one of the first quilts I made in the late 1980s.

The base of the quilt is a 7×10 piece of Floriani ‘Stitch n Shape’, layered with some batting, and covered with the navy fabric. I turned over the edges and glued them down (Elmer’s School Glue). Then I used another piece of navy fabric to cover the back, turning under the edges, gluing it to the back, and then topstitching the layers to hold them together. Next, I added Velcro hook pieces on the back as per the OMG guidelines (NOTE: If I did another like this, I’d add the Velcro to the backing piece BEFORE gluing and stitching it to the back).

Next I fused Mistyfuse to the back of the pink fabric, drew the free-form synapse shapes on the back, then cut them out and placed and fused them to the top, making a couple of them wrap around the edges.

I stitched some background DNA-like ladder structures in navy thread (Fil-Tec Glide ‘Navy’, colour 32965), then the synapse applique pieces and their tendrils in a bright pink thread (Mettler Poly Sheen, colour 1950).

The end result is a nice stiff enclosed piece, with some texture and puffiness from stitching on the top and leaving certain areas unstitched to allow them to ‘pop’.


Community Quilt 211

17 05 2015

There were lots of very busy fabric in this quilt, and some very slippery non-cotton ones (particularly the border fabric). I started by stitching in the ditch around all the blocks and borders.

How to quilt it? The busy-ness of the fabrics dictated something simple and all-over. So I went back to a design that I have a lot of ‘muscle memory’ for — open headbands.

(Click on a photo to view it larger)


quilt211_01


quilt211_02

Threads used:

  • Top: Robison-Anton ‘Taupe’ (40 wt rayon, colour 2298)
  • Bottom: Fil-Tec Magna Glide Classic pre-wound bobbin (light tan)


Community Quilt 210

17 05 2015

I think is the last of three very similar quilts: #201 and #209 were the earlier ones.

So I did mostly the same quilting on it — echo stitching around all the applique motifs (after stitching in the ditch around the blocks and the applique pieces, of course).

I left the sashing strips unstitched, and in the larger border I free-motion bubbles/pebbles of various sizes to emulate the fabric.

(Click on a photo to view it larger)


quilt210_01


quilt210_02

Threads used:

  • Top: Robison-Anton ‘Crimson’ (40 wt rayon, colour 2416)
  • Bottom: Fil-Tec Magna Glide Classic pre-wound bobbin


Community Quilt 209

17 05 2015

This bright quilt was a larger version of Quilt #201, but essentially the same. So I did mostly the same quilting on it — echo stitching around all the applique motifs (after stitching in the ditch around the blocks and the applique pieces, of course).

In the sashing strips, I stitched a straight diagonal line across each square. And in the aqua border I free-motion stitched elongated U’s of various lengths, keeping them about a half-inch wide.

(Click on a photo to view it larger)


quilt209_01

quilt209_02

quilt209_03

Threads used:

  • Top: Robison-Anton ‘Mint Julep’ (40 wt rayon, colour 2310); Madeira Rayon (40 wt, colour 1166 [dark blue]); Madeira Rayon (40 wt, colour 1169 [green])
  • Bottom: Fil-Tec Magna Glide Classic pre-wound bobbin (white and black)


Clearing kangaroos

13 05 2015

My Twitter feed has Tweets from our State’s roads people, and I have it filtered to get just the Tweets relating to the south-west of Western Australia. Here are a couple that came through a week or two ago – read up from the bottom:

kangaroo_tweets

What I want to know is how did the kangaroo get ‘cleared’ from the road? Did it just hop away? Did someone get out of their vehicle and chase it into the bush or farmland surrounding the road? Was some sort of ‘kangaroo clearing’ equipment brought in to clear the kangaroo? Curious minds want to know 😉

(I suspect it just hopped away.)

As an aside, I think Mandjoogoordap Drive — at 14 letters — must be the longest single road name in Western Australia!


Shelley’s quilt

13 05 2015

I can’t lay any claim to this beautiful quilt, except for making and attaching the binding. But I wanted to show the pictures of it, as it was beautifully made using old family linen and laces. My friend Faye had inherited this linen and intended making a quilt from it, or getting a quilt made (I’m not 100% sure of the whole story). Someone had offered to make it — a process that took a couple of years. This was the first-ever quilt that person made, and she did a magnificent job.

But during the making of it, the person it was for (Shelley) passed away, aged just 32. So the quilt became even more special for Faye.

Eventually it was completed and Faye asked if I could quilt it. I could, but I knew I couldn’t do it justice, so I recommended a local long-arm quilter who has won several quilting awards. After a few more months, the quilt came back to me to make and attach the binding. The quilter stitched into one of the borders ‘In loving memory of Shelley, aged 32’.

In time, this huge quilt will likely go to Faye’s granddaughter, who is only 4 years old at the moment.

The quilt was so big that I could only show just over half of it on the line.

(Click on a photo to view it larger)

P1040544

P1040549

P1040548

P1040547

P1040546

P1040545