I spent some time on the dragonfly quilt yesterday, mostly learning how to work with monofilament and metallic threads!
HINT: If your metallic thread just doesn’t want to spend time in the eye of the needle, put it in the bobbin, then turn the fabric over and sew on the back! Experiment a bit first and make sure you know where the edges of your applique pieces are. I did this by stitching down the raw edge fused applique pieces with mononfilament thread in the top and a contrasting thread in the bobbin. When I turned over the top, I could see the outlines of each appliqued piece.
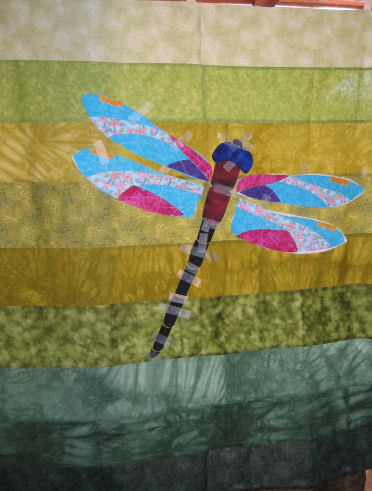
So here’s the progress so far… First picture is of the quilt top before arranging the applique pieces and fusing them on. Note the innovative use of the sliding glass door and window as a light box!

Next came the placement of the dragonfly pieces (again, note the innovative use of magic tape!):
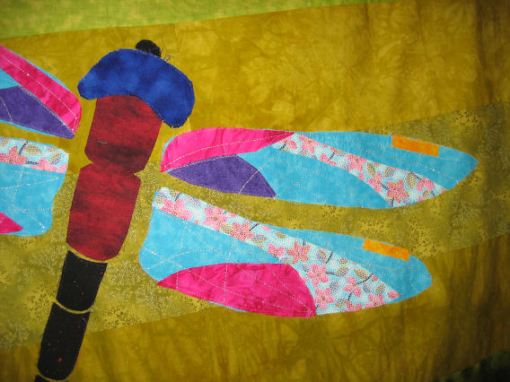
Oops! Forgot one step—I used silver metallic thread on the wings to create a sort of lace effect the other day. Here’s the result:

I then stitched down the applique pieces with monofilament thread in the top and a contrasting thread in the bobbin. For the dark body pieces, I used grey monofilament with black in the bobbin; and for the wings, clear monofilament with blue in the bobbin. This gave me stitching ‘boundaries’ on the back of the top.
I was on a roll, so next I tried putting the silver metallic thread in the bobbin case and sewing from the back. When I’d sewn with the silver thread earlier (on the wings), it had continually ‘stripped’ in the eye of the needle, so I tried the bobbin technique and it worked like a dream! I had to adjust the tension a bit, so experiment on scraps first. Here’s the test piece to see how it looked:

Once I had the hang of doing free motion embroidery with the feature thread hidden (!), I went ahead and added silver highlighting to both sides of the dragonfly’s body parts.
Here’s the back of the quilt top showing the outlines I stitched within—well, sorta stitched within! I know that the edges of the dragonfly’s body will be covered with a bias tape, so I wasn’t too concerned about being 100% accurate and within the lines.

Then I cut out and sewed a pale blue tulle over each wing to add to the lace effect, and to soften the brightness of the blues, pinks and purples.

And the last steps I did before the heat and humidity stopped me working was to start placing and fusing some of the 70+ grape leaves to the background:
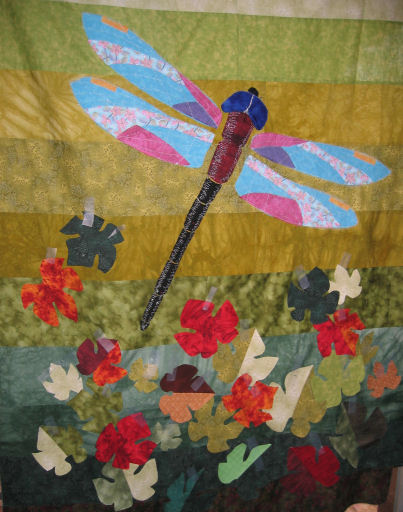
I’ve decided to only place the grape leaves in the lower part of the quilt. Two reasons: To create a feeling of leaf litter, and to let the dragonfly ‘fly’ and rise from the leaf litter.
Next immediate tasks:
- Add gold metallic thread to the leaves I’ve already fused, emulating leaf veins
- Place and fuse more leaves over the top of the existing ones
I might get some of this done today—it’s MUCH cooler than yesterday, and even though we’re going out for a couple of hours, I’m sure I’ll get some of this done. If I can, I’ll use the gold metallic thread as the top thread so I avoid having to outline each leaf in monofilament (70+ leaves outlined in monofilament = a lot of sewing!). Hopefully this will work—the gold metallic thread I have is thinner and less knobbly than the silver. Based on my last experience with the gold thread, I’ll have to experiment with the tension but that shouldn’t take too long to get right. And this time I’m not quilting through many layers of fabric either, so it should be a lot easier.
Links to all posts about this quilt
- Evolution of a quilt: 1
- Evolution of a quilt: 2
- Evolution of a quilt: 3
- Evolution of a quilt: 4
- Evolution of a quilt: 5
- Evolution of a quilt: 6 (this one)
- Evolution of a quilt: 7
- Evolution of a quilt: 8
- Evolution of a quilt: 9
- Evolution of a quilt: 10
- Evolution of a quilt: 11


[…] Evolution of a quilt: 6 […]
[…] Evolution of a quilt: 6 […]