Eyelids: Before and after

16 07 2015

Warning! The photos in this post may be disturbing to some people. If you don’t like photos of post-operative wounds and healing, look away now.

With that warning, you might be wondering why I’m even posting about the eyelid surgery I had last week, and posting photos of the healing process. Well, it’s because SO many people have told me in the past week or so that they are either considering this surgery, know someone who’s considering it, or know someone who’s had it done. Far more than I expected… and several people working in my local shops wanted me to remove my sunglasses to see what the results were.

I wanted to document the process I went through for anyone considering this surgery — with photos to show you what my first week post-surgery was like. And to document the pros and cons as I’ve experienced them. Over the next few weeks I’ll add more photos to show you how my eyes look after all the bruising and swelling has gone down.

Remember, this is MY story — if you’ve had this operation or are intending to have this operation, your experience may be different.

What surgery I had and why

I had surgery to remove drooping eyelid tissue that was starting to obscure my vision. The surgery is called a blepharoplasty and involves removing excess tissue (skin, fat, muscle) from the eyelids. I had this surgery on the advice of my ophthalmologist after I asked him about my drooping right eyelid when I visited him earlier this year. He confirmed that ultimately the eyelid would obscure my vision and that although the left eyelid wasn’t as droopy, he’d do both at once so that I didn’t look lopsided.

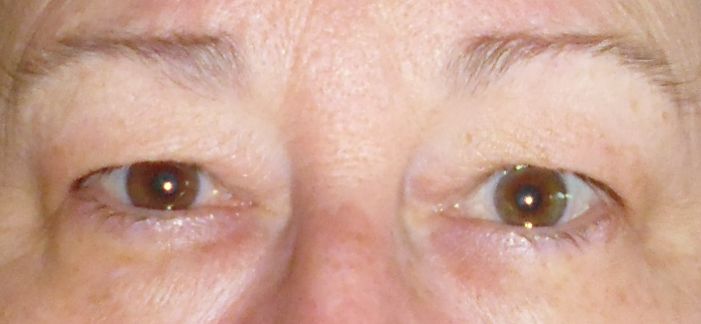
Here’s a photo of my eyes the day before the operation (absolutely no make-up) — my right eye is on the left in the photo:
P1040765_20150708_before

You can see how the eyelid has folded over and how my eyelashes are almost totally hidden by the fold. The cause is likely a combination of genetics, weight gain, and aging.

There’s no eyelid definition, either. This lack of eyelid definition is often the reason some women have this surgery, and why this surgery is classed as ‘cosmetic’ by the health insurance companies, and therefore attracts only a small rebate. In my case, the surgery was recommended by an ophthalmologist for vision reasons, but the health insurance companies still treat it as ‘cosmetic’ (don’t get me started on that…).

If you look closely at my right eye and compare it to the left, you can see that the eyelid is well on the way to blocking light (at least) from that eye. This photo was taken in the morning — by evening, my right eyelid droops even more, to the point of closing totally (and involuntarily) by about 8:30 or so every night (when watching TV).

For comparison, the photo below is of my eyes taken July 2004, some 11 years ago, when I was not only younger, but thinner, not as grey, and wearing a little eye make-up on the day:

eyes_July2004

Pre-op

Although the ophthalmologist told me he could do this surgery under local anaesthetic in his rooms, I opted for ‘twilight’ anaesthetic in the day-surgery unit at a private hospital. Why? Because I had a major eye operation when I was a child and even today I get traumatised if a doctor of any sort puts an instrument anywhere near my eyes. I wanted to feel nothing — and I wanted to know nothing!

When I was waiting in a bed to be taken to surgery, the anaesthetist came to insert the cannula and discussed the anaesthetic procedure with me. It didn’t sound like what I’d been told and I told him so, as well as told him I’d freak out if I was awake and saw an instrument near my eyes. He suggested for everyone’s sake that he put me under a general anaesthetic, even though the ophthalmologist would prefer me to be awake so he could tell me when to open and close my eyelids. I was very grateful to the anaesthetist, and eagerly agreed to a general!

I was told the procedure would take somewhere around 45 to 60 minutes (that’s for both eyes).

(Aside: Waiting is traumatic — I arrived at Admissions just before 9:30, went through another 4 waiting rooms/stages, etc. before being wheeled to surgery at noon. That was some 2.5 hours of being alone with my thoughts and trying to fight off thoughts about what was to happen to me and whether I should go through with it or not. Fortunately, I took my tablet device with me so I distracted myself by playing Scrabble against the computer. Oh, it was a cold day and despite the air conditioning in the hospital, it was bloody freezing in the light cotton gown I had on — my bare feet [yes, I had to remove my shoes] were like blocks of ice.)

Post-op

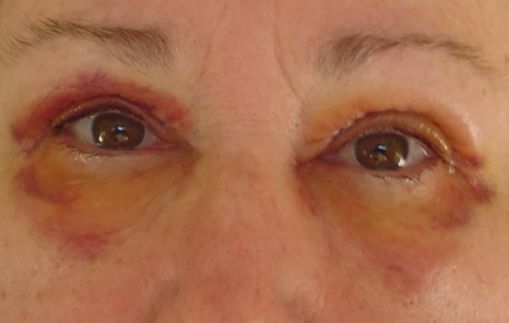
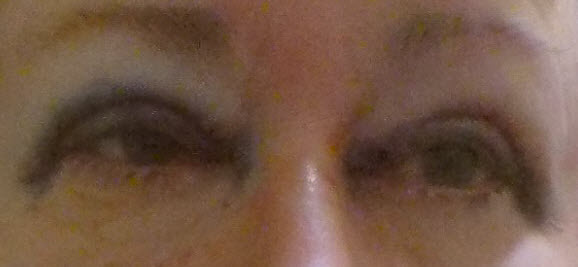
After being brought around in the recovery ward, I got dressed and took a couple of photos with my tablet of my immediate post-op eyes. The bruising and obvious stitches were a bit scary, but already I could see eyelid definition and my eyelashes!
after_surgery_20150709_02

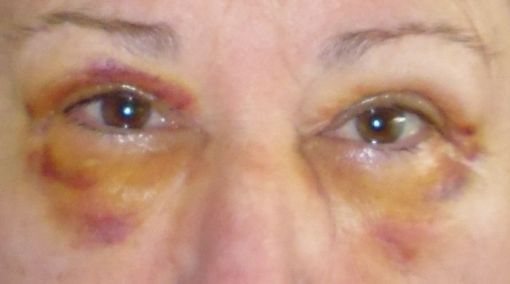
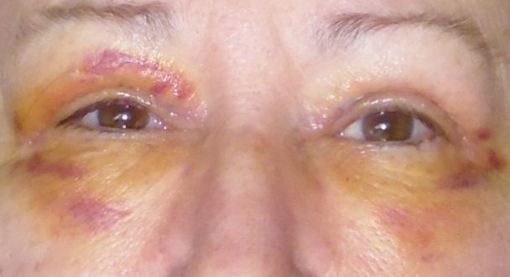
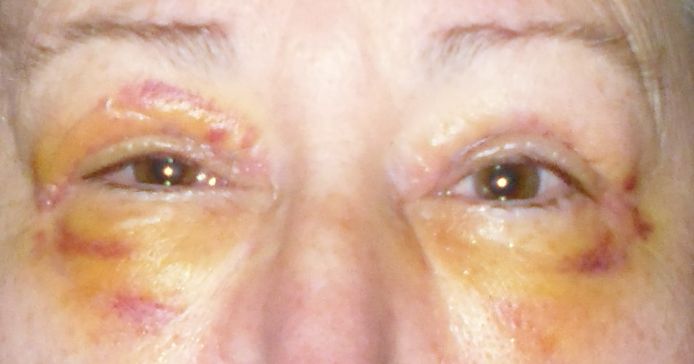
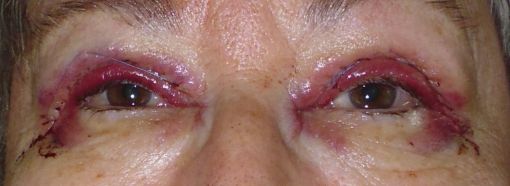
The next series of photos were taken at approximately the same time each morning for the next seven days. Excuse the quality of these photos — I had to take them with the camera pointed upside down at me! Selfies with a camera aren’t so easy…
P1040768_20150710

10 July 2015, approx 18 hours after surgery

P1040774_20150711

11 July 2015

P1040779_20150712

12 July 2015

P1040784_20150713

13 July 2015

P1040788_20150714

14 July 2015

P1040790_20150715

15 July 2015 – the stitches come out today!
P1040792_20150716

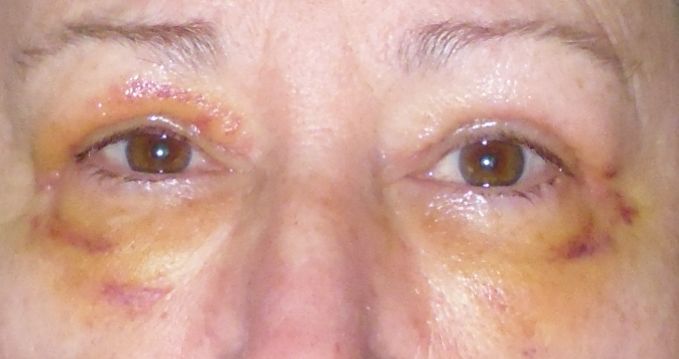
16 July 2015, after the stitches were removed

As you can see from these photos, the bruising and swelling gradually faded over the first week. I still have some residual bruising (16 July), but now that the stitches are out, my eyes are feeling much better. By the way, despite the horrific images above, the view from inside was fine and I felt very little pain — it looks far worse than it feels!

Pros and cons

The obvious positives are that my vision will be better in the long term as I won’t have to deal with drooping eyelids. And I can see my eyelashes and eyelids, so I should be able to wear eye make-up again, if I choose to (I haven’t worn eye make-up in years as there was no point as it couldn’t be seen, or it smudged all over the upper eyelids).

The list of cons looks long, but most of these are very temporary and will go with the passage of time:

  • Bruising and swelling — Expect some bruising and swelling for at least a week. Ice packs help with both, and sleeping half sitting up helps a bit with the swelling.
  • Wear sunglasses inside and out if you have to go out and about — Unfortunately, in this day and age, others may think you’ve been abused as versus had an operation or been in an accident of some sort. You WILL have some serious black eyes — wearing sunglasses is preferable to having a well-meaning person call the police to question you or your partner about abuse!
  • Tightness — Even a week later, my eyelid area feels a little tight. This is normal and will fade over time. It felt even tighter when the stitches were in, but now that they’re out, the tight feeling above my eyes has gone. However, there’s still quite a bit of tightness on the inner and outer parts of the eyes.
  • Tenderness — For the first few days, everything close to and around my eyes was quite tender (not especially sore — just tender), fading off over time. A week on and I’m still a bit tender in the outer and inner corners where the incision occurred, but not along the incision lines across the eyelids. Again, this will fade.
  • Showering — I didn’t realise how much I splashed my face when taking a shower! Until I couldn’t do it. Now that the stitches are out, I’m very gently splashing my face with water (no soaps, cleansers, or gels yet) in the shower. Splashing my face is part of my routine for waking up and feeling refreshed, so not being able to do it each day made me feel like I hadn’t ‘properly’ woken up. It’s a little thing…
  • Rubbing and scratching — Like the splashing, I didn’t realise how much I rubbed or scratched my eyes each day — until I couldn’t! This was probably the hardest thing to live with. There’s nothing worse than having an itch you can’t scratch — whether it’s because of tenderness, fear of infecting the area, or fear of pulling on stitches. It was agonising at times. However, now that the stitches have been removed and the area is healing well, I’m starting to rub and scratch a little. Ah, the relief 😉
  • Blinking — I blinked a lot more the first few days. I think that was for two reasons — one, my eyes felt a little dry; and two, I wanted to check that the eyelid muscles were still working as they should.
  • Follow instructions — I was given ointment to put onto the incisions for the first few days, and was told to use the ice packs the hospital gave me. I was religious about the ointment; not so much the ice packs, unless I noticed the swelling. I should have been more diligent with that. When I had the stitches out yesterday (a painless procedure, by the way), I asked about when I could start using my cosmetic eye cream again and was told about another two weeks. However, the person who removed my sutures said it was OK to stop the ointment and to use something like a drop of Bio-Oil in the interim.
  • Cost — This isn’t a cheap operation. The quote I was given by the eye surgery people was AU$1800 for both eyes, of which I had to pay $600 after Medicare and Medibank Private rebates were taken into account. I haven’t yet received the anaesthetist’s bill, which no doubt will be several hundred dollars (I don’t know how much will be covered by government and private health insurance). I shouldn’t have any hospital charges as my Medibank Private top hospital private health insurance covers that, and I had already paid the annual $150 excess for an operation I had in April this year at the same hospital.

I’ll update this post with photos of my progress over the next few weeks. I won’t be taking photos every day now — perhaps once a week for a few weeks until it’s all settled down.

Two weeks after surgery

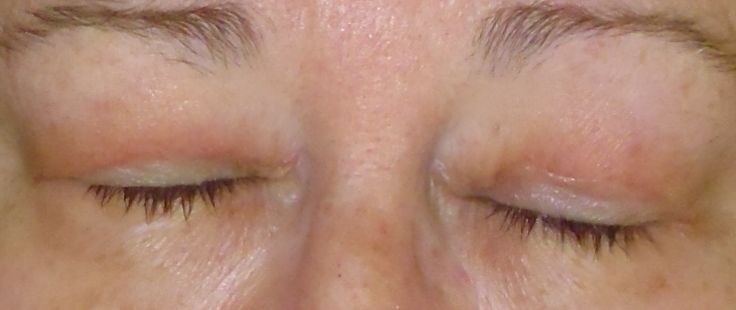
Two weeks after surgery I still have some residual swelling and bruising, but it’s going fast. I’ve now had my post-op appointment with the ophthalmologist and he’s pleased with how they look. He reckons I look a lot younger! (BONUS!!) I still have’t received a bill from the anaesthetist, so maybe that’s still to come, or perhaps it was covered as part of the hospital/surgical coverage. I guess I’ll find out within a month… My eyelids are still a little tight, but I’m sure that will settle with time too. I can now wear eye cream again, too. And I can splash my face and rub my eyes (gently!) if they are itchy.

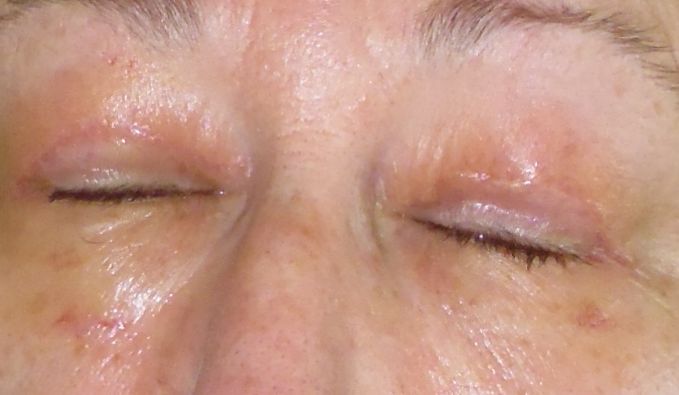
P1040822_20150723a

P1040823_20150723b

The photo with my eyes closed shows the scars — they are quite fine and unless you knew to look you wouldn’t notice them.

Four weeks after surgery

One month on and all the obvious signs of surgery are gone — no more black eyes and minimal puffiness. The scars are fading. However, there’s still a bit of tenderness and dryness, especially around/in the right eye. And the scar above the right eye feels a little lumpier too. I’m sure this too will fade. I’ll post more pics in a couple more months’ time.


P1040844_20150806

P1040845_20150806

Three months after surgery

These will probably be the last photos I post, as everything has settled down into the ‘new normal’. As with the other photos, taken without makeup.

10 October 2015

10 October 2015
10 October 2015 - eyes closed
10 October 2015


Shed: Before and after

12 07 2015
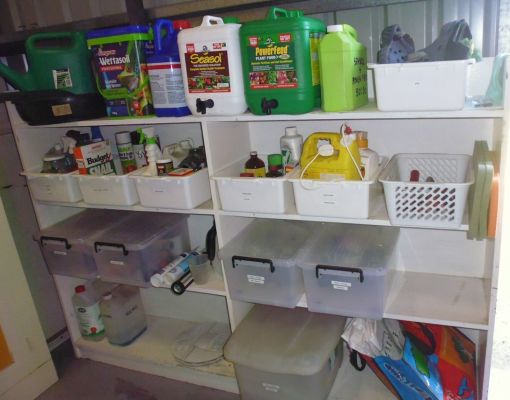
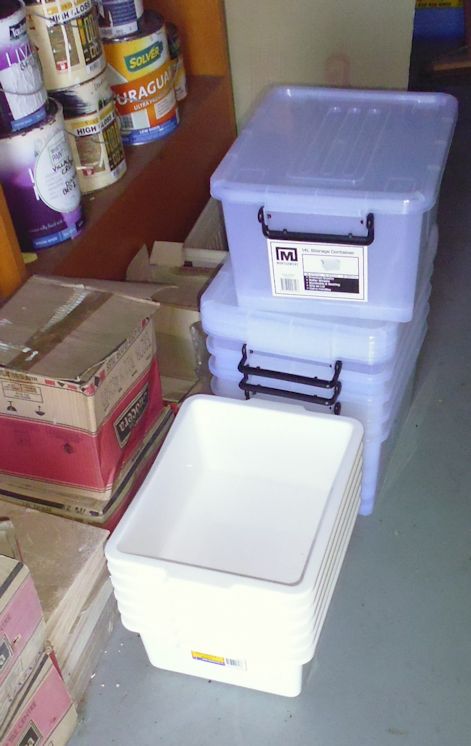
A week or so ago I bought some open and covered tubs from Bunnings, with the aim of sorting out the gardening stuff in the shed.

shed01

It wasn’t TOO bad — almost everything was in the one place, on an old bookshelf just inside the shed door. But the herbicides were mixed in with the insecticides, and the stuff I bought recently for my casual yard guy to use was all on the floor making it difficult for him to get on with his job.

shed02
 After a few hours, my garden area in the shed was all nicely sorted and all tubs were labelled. I even sorted out the sprinkler, hose, and irrigation fittings into tubs of like stuff, and then into ziplock bags of the same thing (e.g. separate labelled ziplocks for 360 degree MP Rotator heads and for 90 to 210 degree MP Rotator heads). This makes it easier for me (or anyone who works in my garden) to find what they need without scratching through a big tub of bits.

And I put my tub of PPE right near the door (personal insecticide, gardening footware, fly net, cap, gloves, safety glasses, etc.) ready for me to grab it and put it on when I next venture into the garden. (PPE = personal protective equipment)

Achievement unlocked!

shed03


2015 Challenge pieces and show and tell
8 07 2015
A bit of background… Since 2009, five of us have participated in an annual 4-day retreat down south, where we get to hang out, sew/quilt, laugh, sew some more, tell off-colour and groan-worthy jokes, play, sew some more, laugh even more, eat good food, etc. It’s a delightful break in the middle of the year and the middle of our winter. And it’s a most wonderful time spent with cherished friends. I highly recommend such a weekend to anyone!

To give some focus to the weekend, a challenge is set the previous year that we have to make and keep secret until the reveal at our retreat weekend.

Details of this year’s Challenge and the process for making my piece are here: https://rhondabracey.com/2015/07/04/2015-challenge/

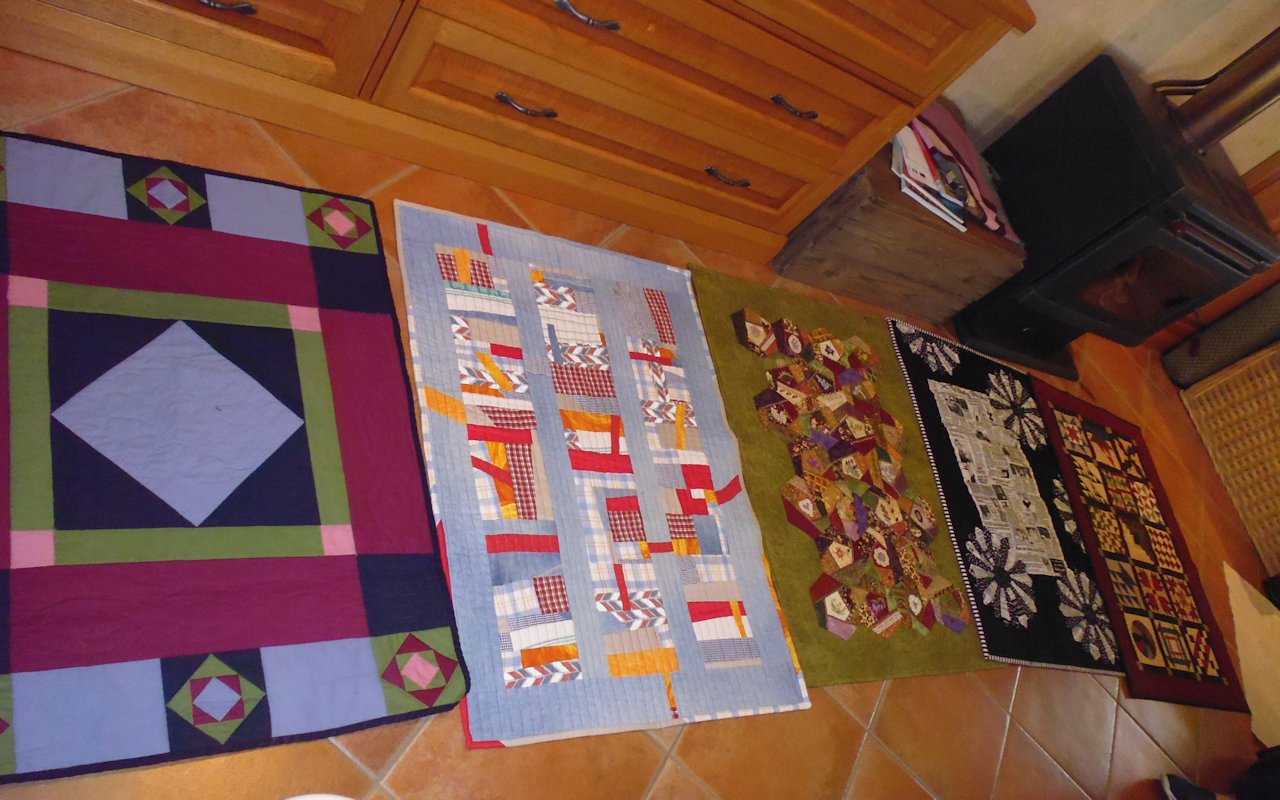
Here are the pieces the five of us made, with my recollections of how they relate to something QI (quite interesting) about the history of quilting.

F chose the colour blue to use in her quilt and that colour was passed on to me to use in mine. F received ‘burgundy’ from M to use in her quilt. F’s quilt represented the Amish quilting tradition, which came out of Wales, the Netherlands, and Germany. One of the interesting snippets she spoke about related to two fashion houses that have direct connections to these traditions — Laura Ashley, which came out of the Welsh traditional quilts, and Esprit, which houses a collection of old Amish quilts.

Image7

F gave me ‘blue’ and I decided to give ‘red’ to B. I incorporated blue and red in a quilt that represents the Gee’s Bend quilting tradition of improvisation and making do with fabric scraps from old work clothes etc.

IMG_7135

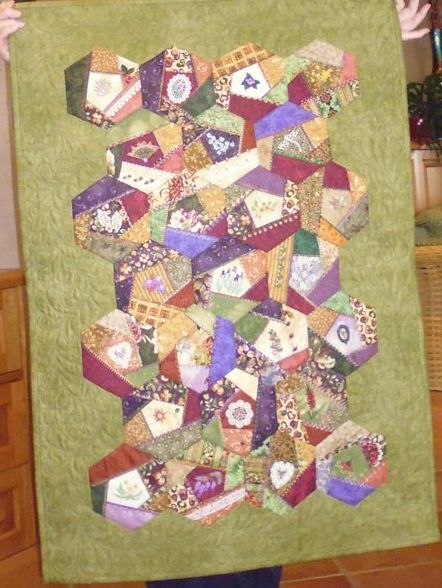
B took my ‘red’ and passed ‘gold’ on to G. B’s quilt represented two traditions — hexagons and crazy quilting (around since at least the 1770s, but made ‘fashionable’ in the Victorian era and up until the 1930s). B used English paper piecing for the hexagons, then HAND embellished each one with lace, beads, embroidery etc.

Image6

G got ‘gold’ from B and passed on ‘black’ to M. G’s quilt looked at the history of our little group — the printed newspaper fabric in the middle has black and white photos of each of us featured alongside the articles! She also added five Dresden plates, also using that newsprint fabric, one for each of us. The gold she had to incorporate was a gold thimble on the main newspaper.

P1040698

M got ‘black’ from G and passed on ‘burgundy’ to F, completing the circle. M made an ‘underground railroad’ quilt, of several TINY traditional blocks. Supposedly, the underground railroad quilts were coded directions to slaves who were escaping from the US to Canada in the 1800s. She read how each block was part of the message.

P1040700


underground_railroad

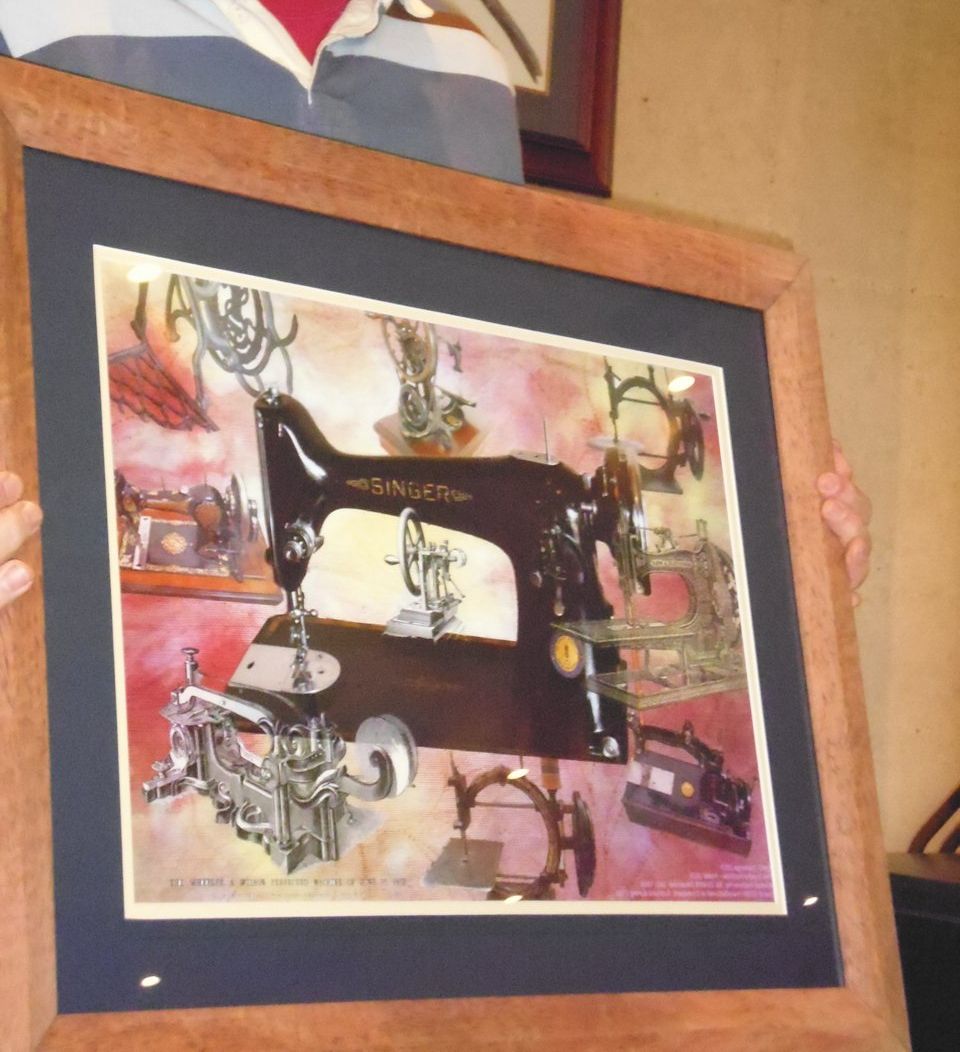
Finally, Brian, who set the challenge, revealed his piece, a many-layered photograph he had created, surrounded by a wooden frame he had made. The colour we gave him was ‘pink’, and he used B’s treadle sewing machine as the centrepiece of a history of sewing machines. The background was an enlarged piece of hand-dyed fabric that B had dyed.

Image8

All the quilts together on the floor:

P1040701

Show and tell

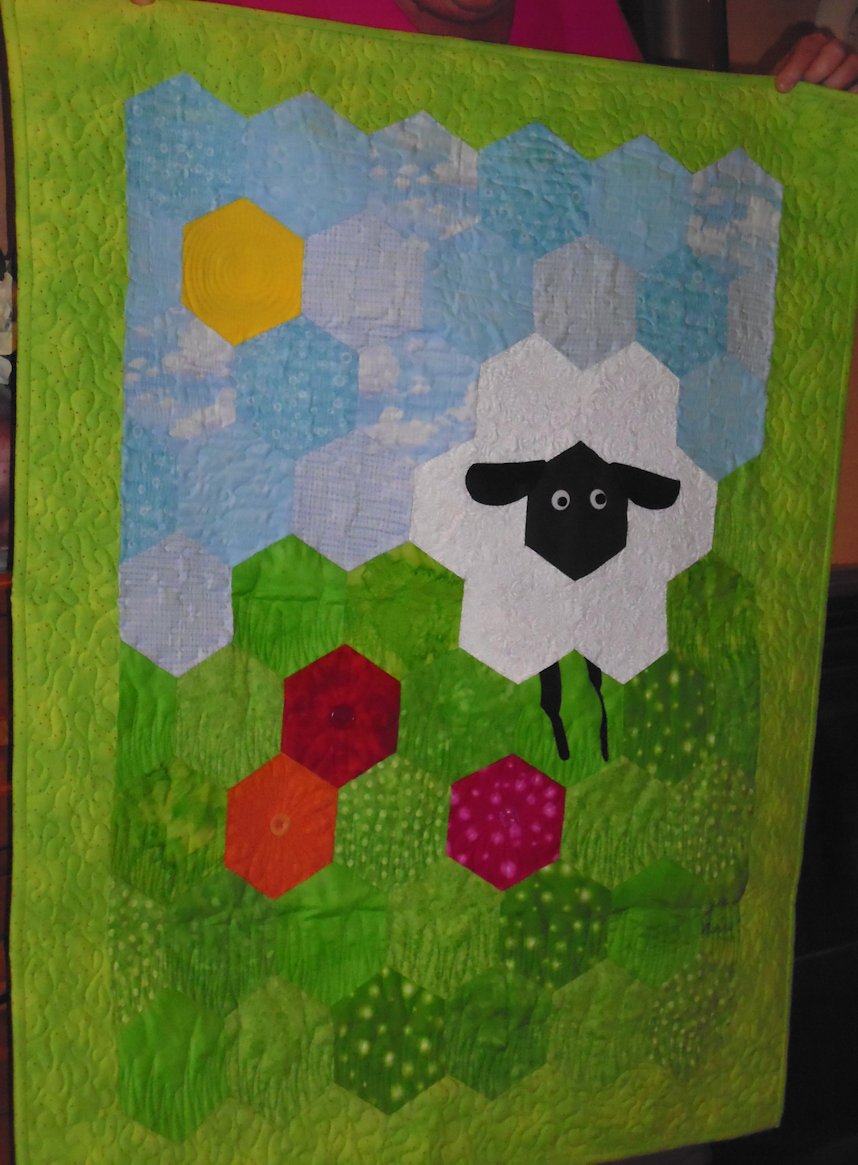
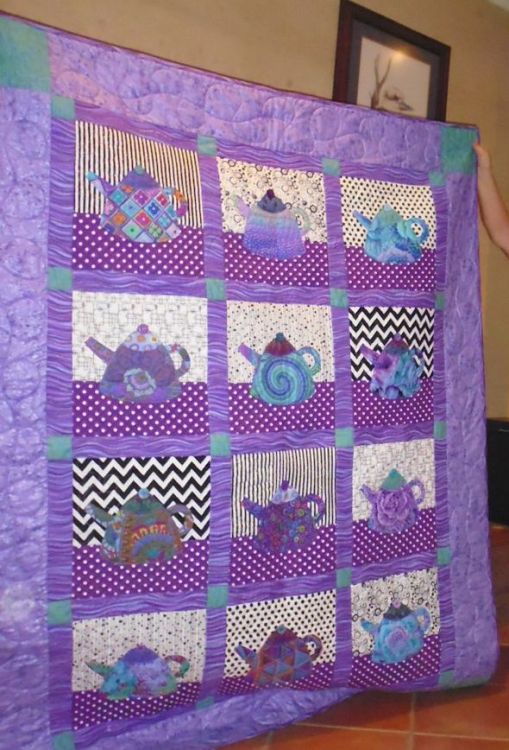
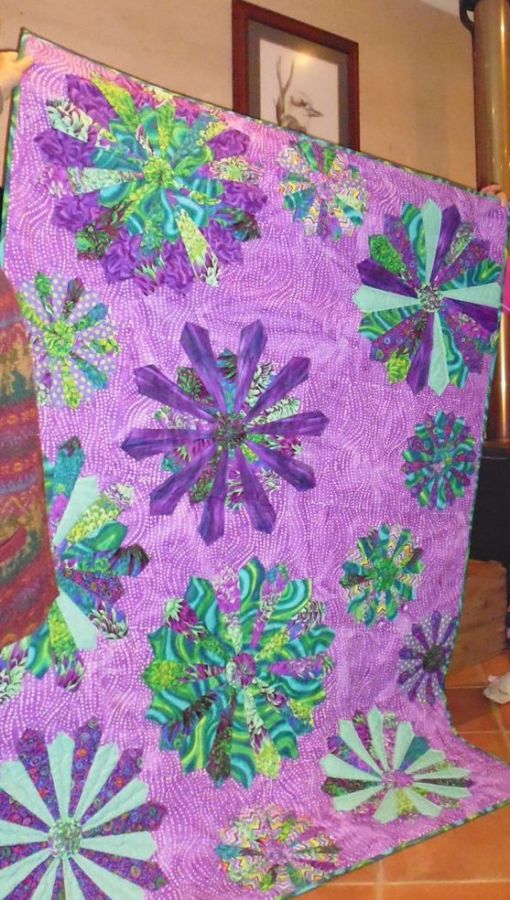
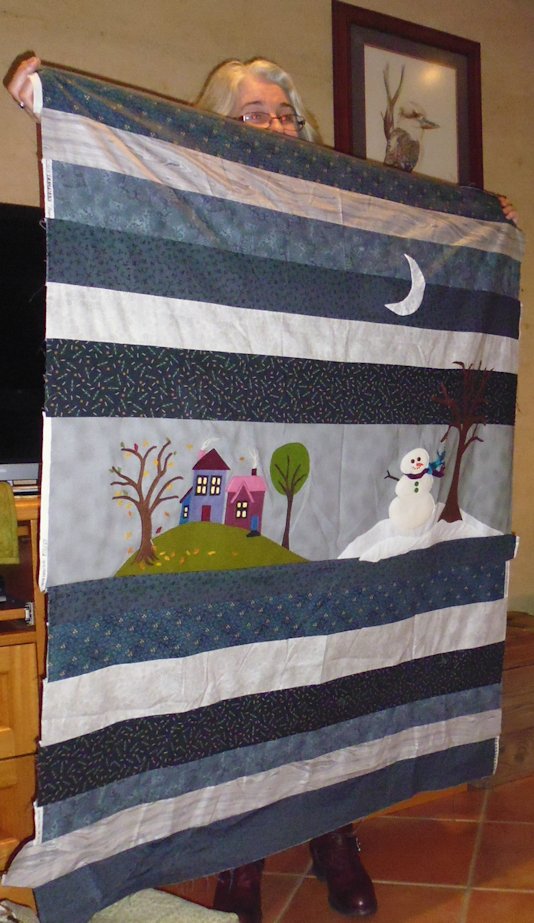
After we’ve done the challenge reveal, we get to do ‘show and tell’. Here are some of those pieces.

G’s show and tell pieces:

P1040708


P1040707

Image9

Image10

Ann’s show and tell (Ann is a local quilt shop owner, invited along to join us):

P1040710

P1040711


M’s Christmas runner made entirely from Accuquilt Go! Cutter dies:

P1040712

And B’s finished piece that she started last year:

P1040704

Other activities from the weekend

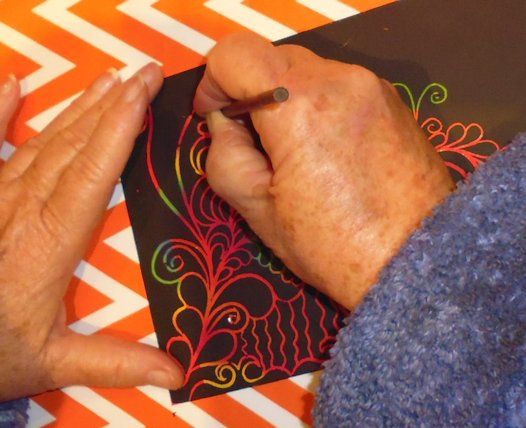
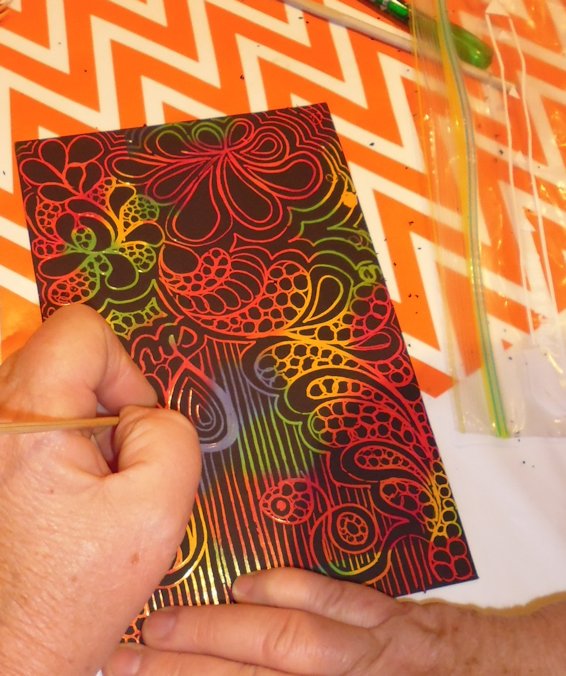
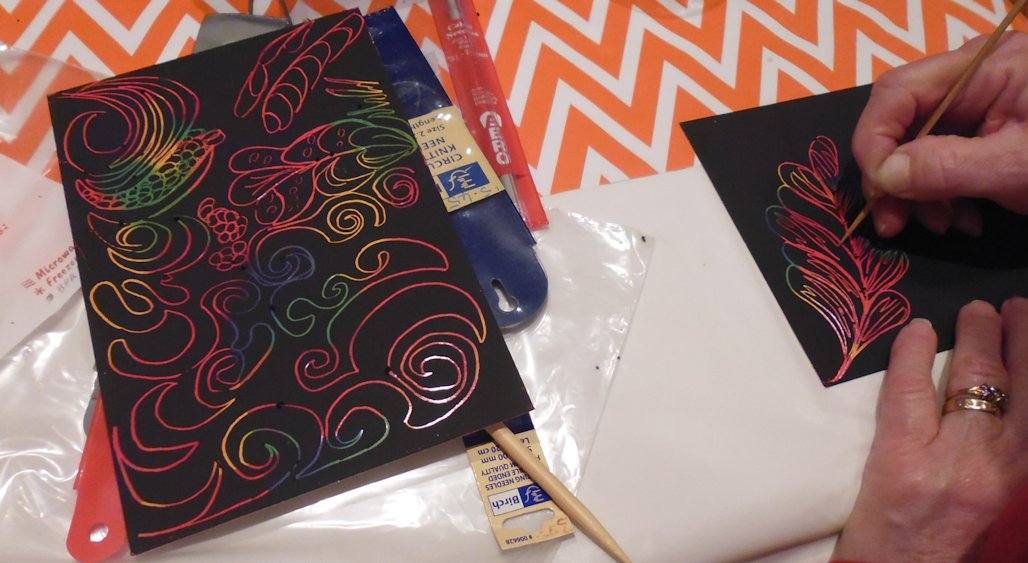
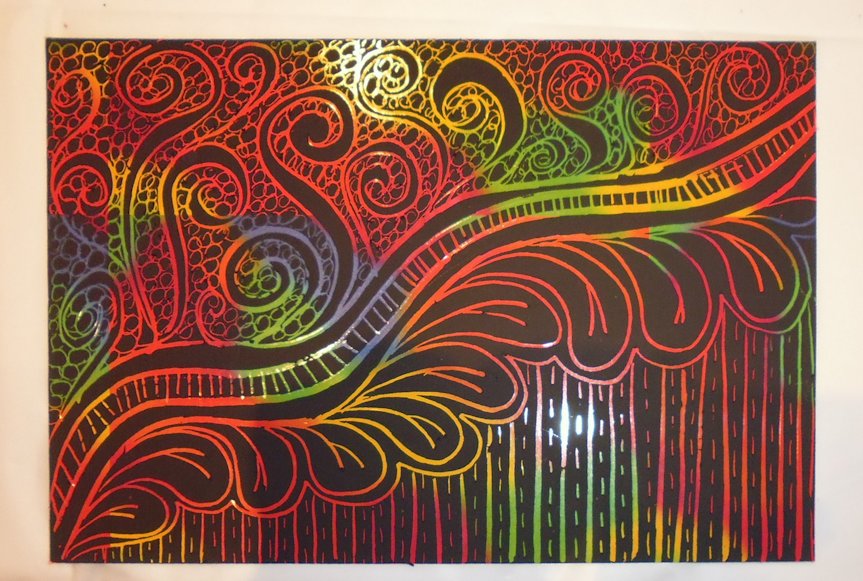
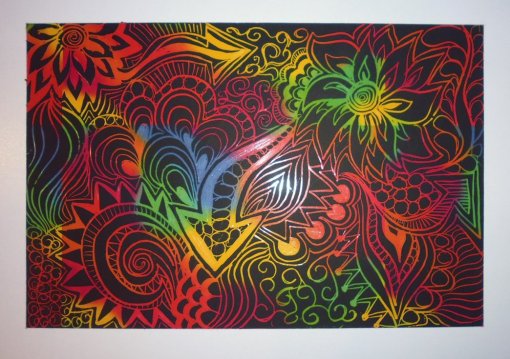
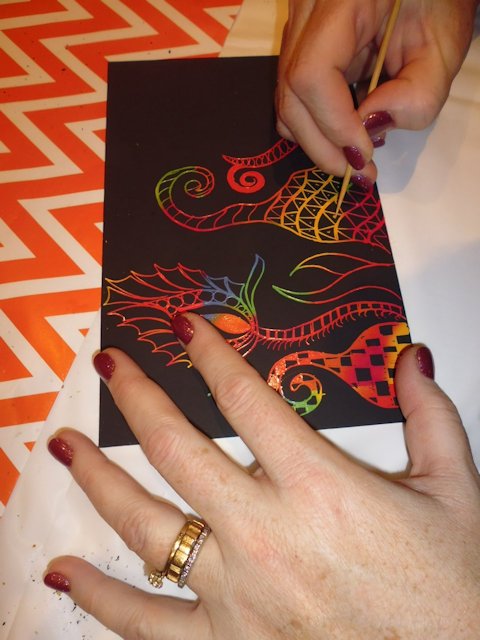
While we sew and quilt a lot on our weekend, we also do other stuff. On Saturday night after dinner, G handed out cards coated in a black waxy stuff. Our job was to use a stylus of some sort (satay sticks were ideal!) and scratch patterns in the surface. Great fun! It seems you can buy sets of these cards in the kids’ section in K-Mart or Big W (??) stores in Australia.

P1040715

P1040718

P1040719

P1040725


I was pleased with my efforts, especially my second one, which emulated the ‘graffiti quilting’ technique made famous by the lovely Karlee Porter:

P1040716


P1040726


On Sunday, we had ‘O’ day — we had to incorporate words starting with the letter ‘O’ into the day, e.g. clothing, food we made, etc. We all dressed up! From left, B was an ‘orange oblong [with owl]’, F was ‘on and off’, G was ‘Osama Bin-Liner’, M wore a ‘One-horned mystical creature onesie’, and I was ‘orange is the new black’. Brian took the photo, dressed as an ‘orphan’. The other ‘O’ thing for the day was the ‘odd’ animal tails we wore — you can see two of them on F (zebra) and me (tiger) 😉

Image11

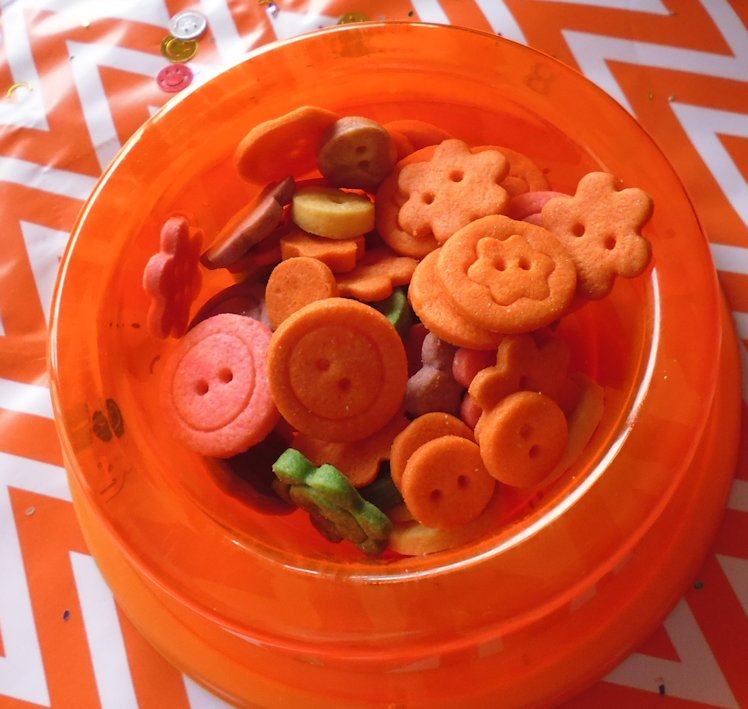
G made some shortbread biscuits, shaped and pressed like buttons, and served in an orange plastic pet food bowl (brand new, of course!). Clever!

P1040693

And M worked on an OMG quilt:

P1040742

To finish off a fabulous weekend, Helen Godden and her family arrived from Canberra on the Monday. Helen revealed our challenge for 2016, and it looks like a doozy!

See also:


Community Quilt 219

8 07 2015

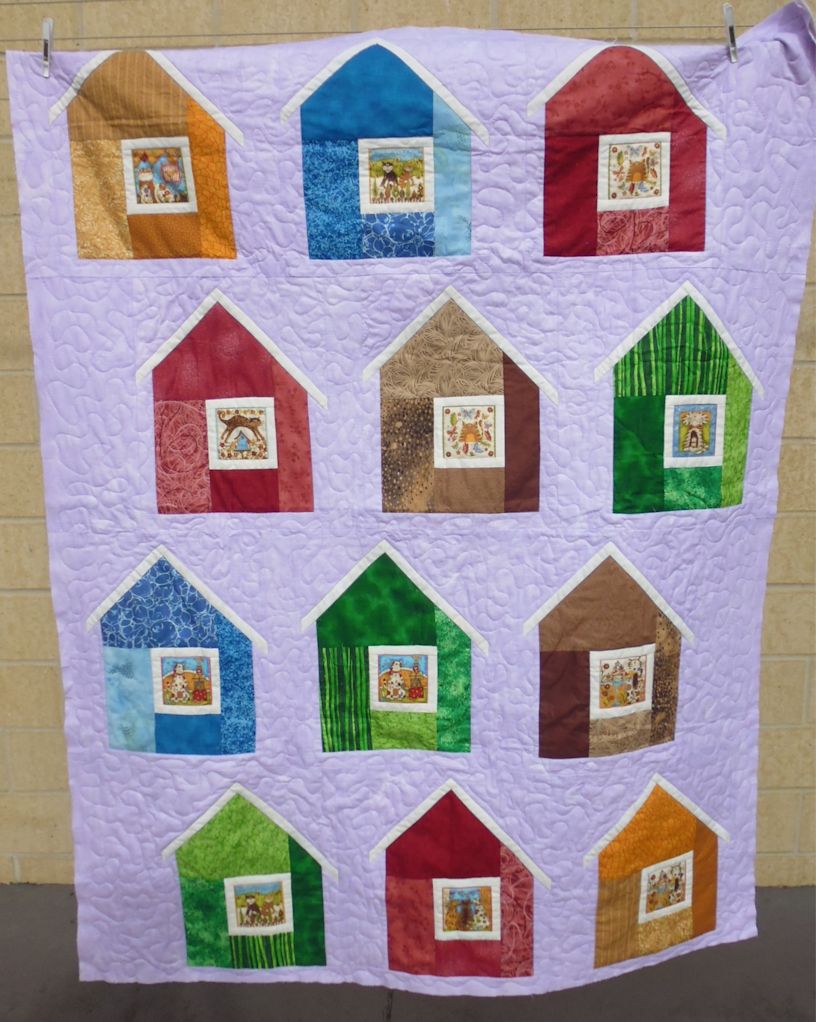
Cats in window boxes!

I started this cheerful quilt by stitching in the ditch around each house and the window borders within each. Then I just did a large meandering stipple to hold the layers together.

(Click on a photo to view it larger)


quilt219_02

quilt219_01

Threads used:

  • Top: Isacord ‘Lavender’ (40 wt, trilobal polyester, colour 3040)
  • Bottom: Fil-Tec Magna Glide Classic pre-wound bobbin (cream)


Community Quilt 218

8 07 2015

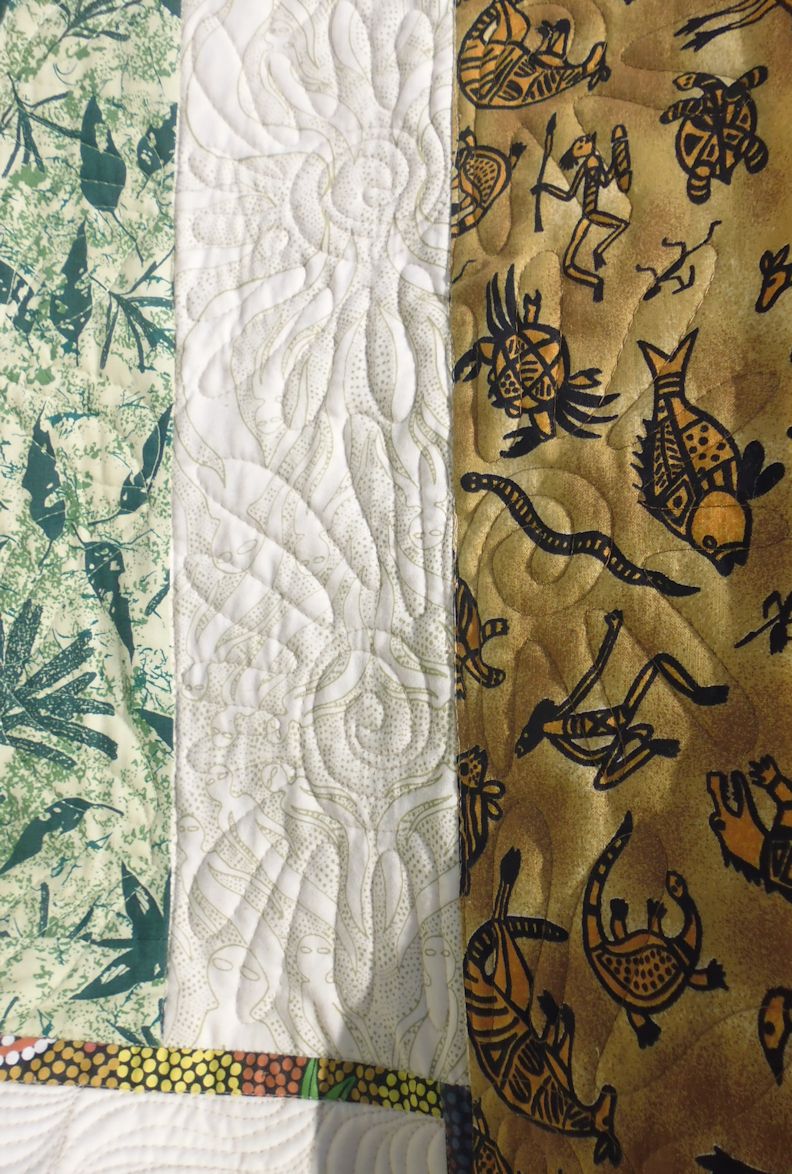
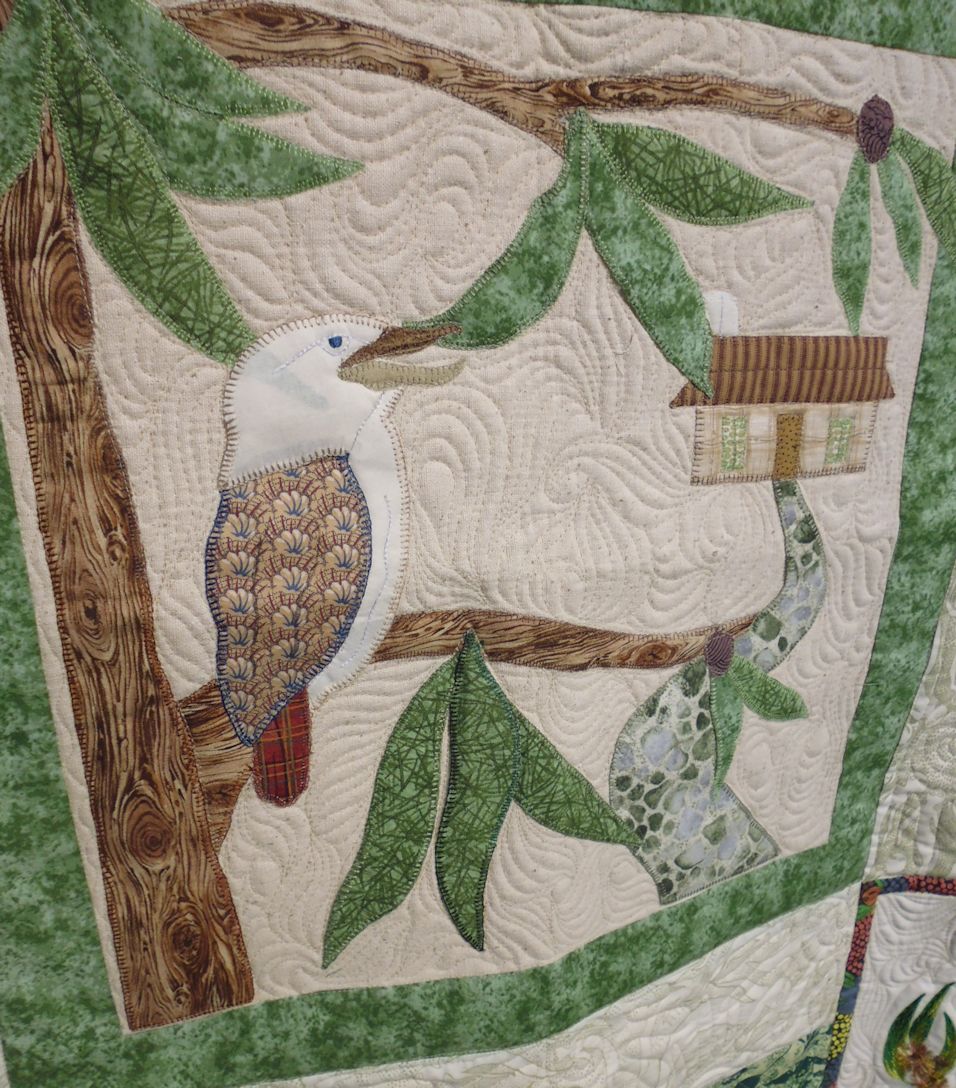
This Australiana quilt was a bit of a mish-mash of fabrics and elements — there was applique, some embroidered animals, some traditional and modern quilt blocks in the corners, as well as a linen-like fabric in the centre, and weird ghost forms in the white/cream/green border fabric.

How to quilt it? First, I stitched in the ditch around all the blocks, borders, sashing strips, and the appliqued pieces in the centre block. Next, I did some McTavishing in the centre block’s background to make the applique pieces ‘pop’; I also echo quilted around the embroidered animals in that block and then McTavished in there too. For the green leaf fabric, I stitched large leaves going in a zigzag pattern diagonally (about 8 leaves per fabric strip). I did other filler stitches in the remaining corner blocks, then a stylised sun motif in the ghost fabric strips. I repeated the stylised sun motif in the brown border fabric too.

(Click on a photo to view it larger)

quilt_218_01

quilt218_03

quilt218_02

quilt218_04

Threads used:

  • Top: Rasant (cotton/poly, colour 1630 [was 0861]); Robison-Anton ‘Earthen tan’ (40 wt, rayon, colour 2569)
  • Bottom: Fil-Tec Magna Glide Classic pre-wound bobbin (light tan)


Community Quilt 217

8 07 2015

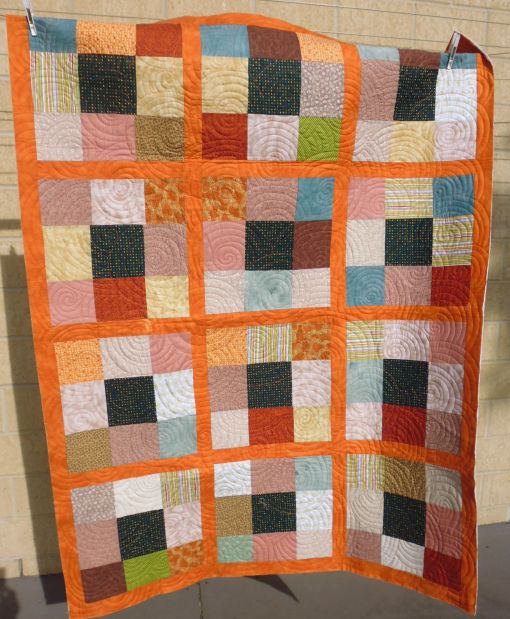
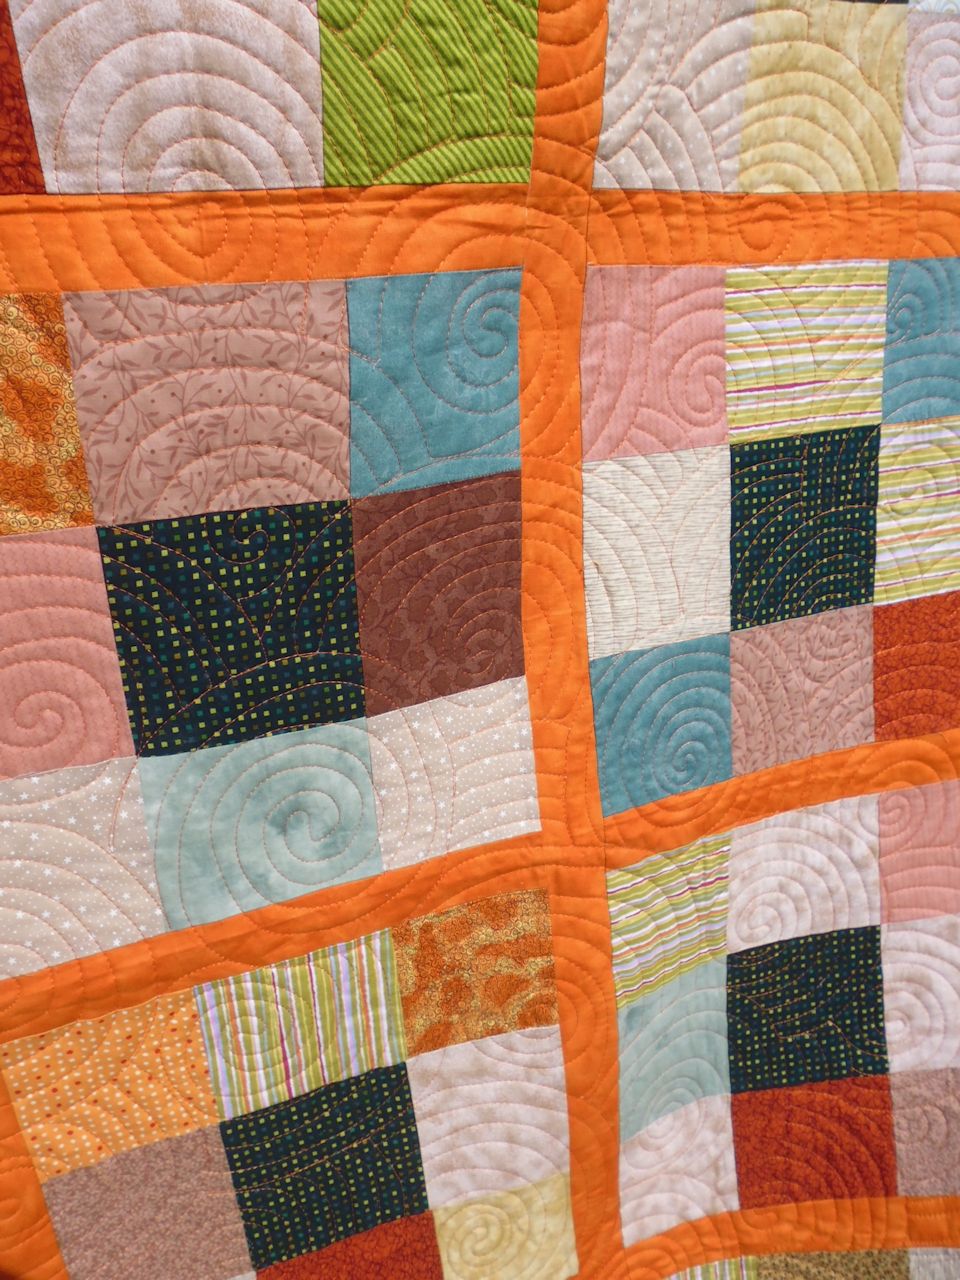
Hmmmm… Orange and geometric? That calls for a rounded shape — in this case, BIG ‘overlapping’ spirals, in orange.

(Click on a photo to view it larger)

quilt217_01

quilt217_02

Threads used:

  • Top: Glide ‘Lava’ (40 wt, trilobal polyester, colour 51585)
  • Bottom: Fil-Tec Magna Glide Classic pre-wound bobbin (light tan)


Community Quilt 216

8 07 2015

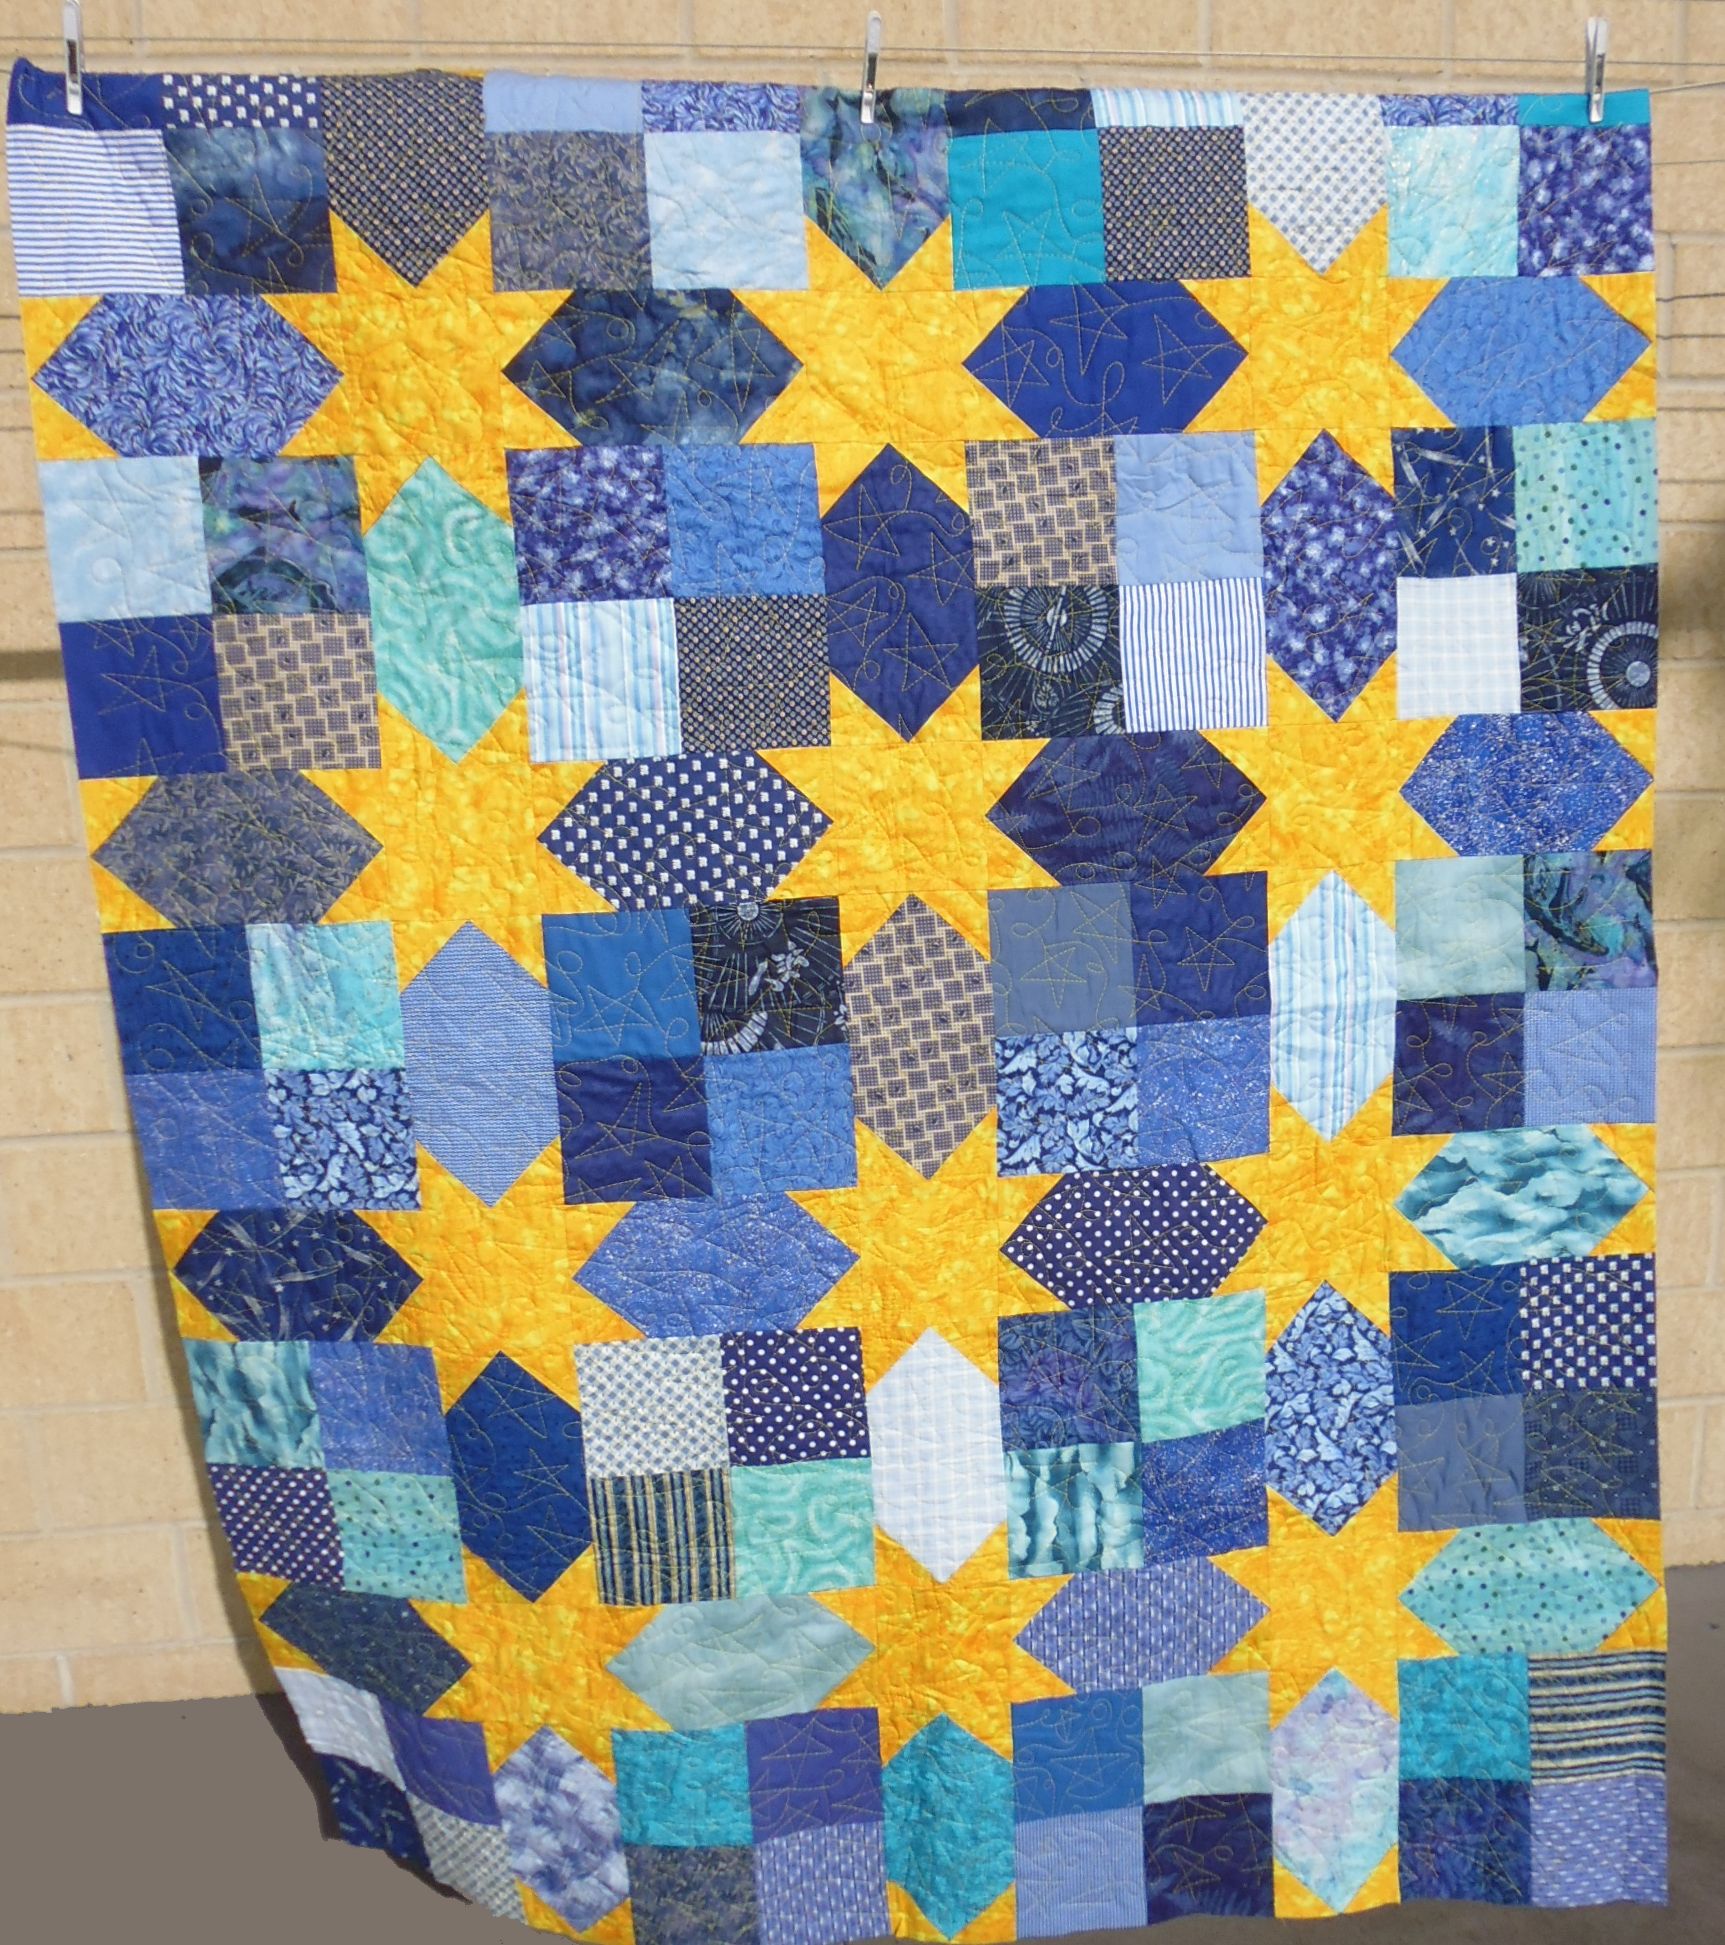
As soon as I took this quilt out of the bag, I knew I had to quilt it with stars! So I did. Free-motion stars and loops, in yellow.

(Click on a photo to view it larger)

quilt216_02

quilt216_01

Threads used:

  • Top: Isacord ‘Citrus’ (40 wt, trilobal polyester, colour 0600)
  • Bottom: Fil-Tec Magna Glide Classic pre-wound bobbin (light tan)


Thread painting Fabulous Mr Fox!

8 07 2015

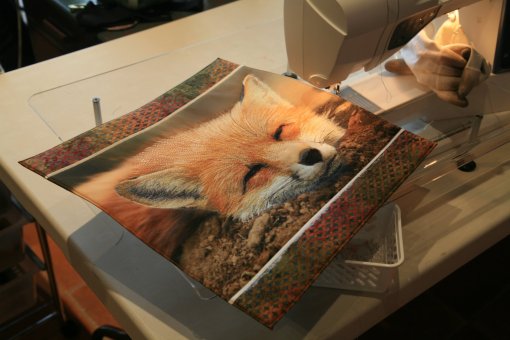
In the group of photos I had printed onto fabric during the Quilting Adventures workshop I took in March 2015 with Lura Schwarz Smith and Kerby Smith was a gorgeous photo of a fox that I’d found on Flickr. Prior to the workshop, I’d emailed the owner of the photo to get permission to use it for printing on fabric and then ‘painting’ with thread, which he gave.

On my annual quilting retreat this past weekend I finally got around to thread painting ‘Fabulous Mr Fox!’. The techniques for putting this piece together are detailed below the photos.

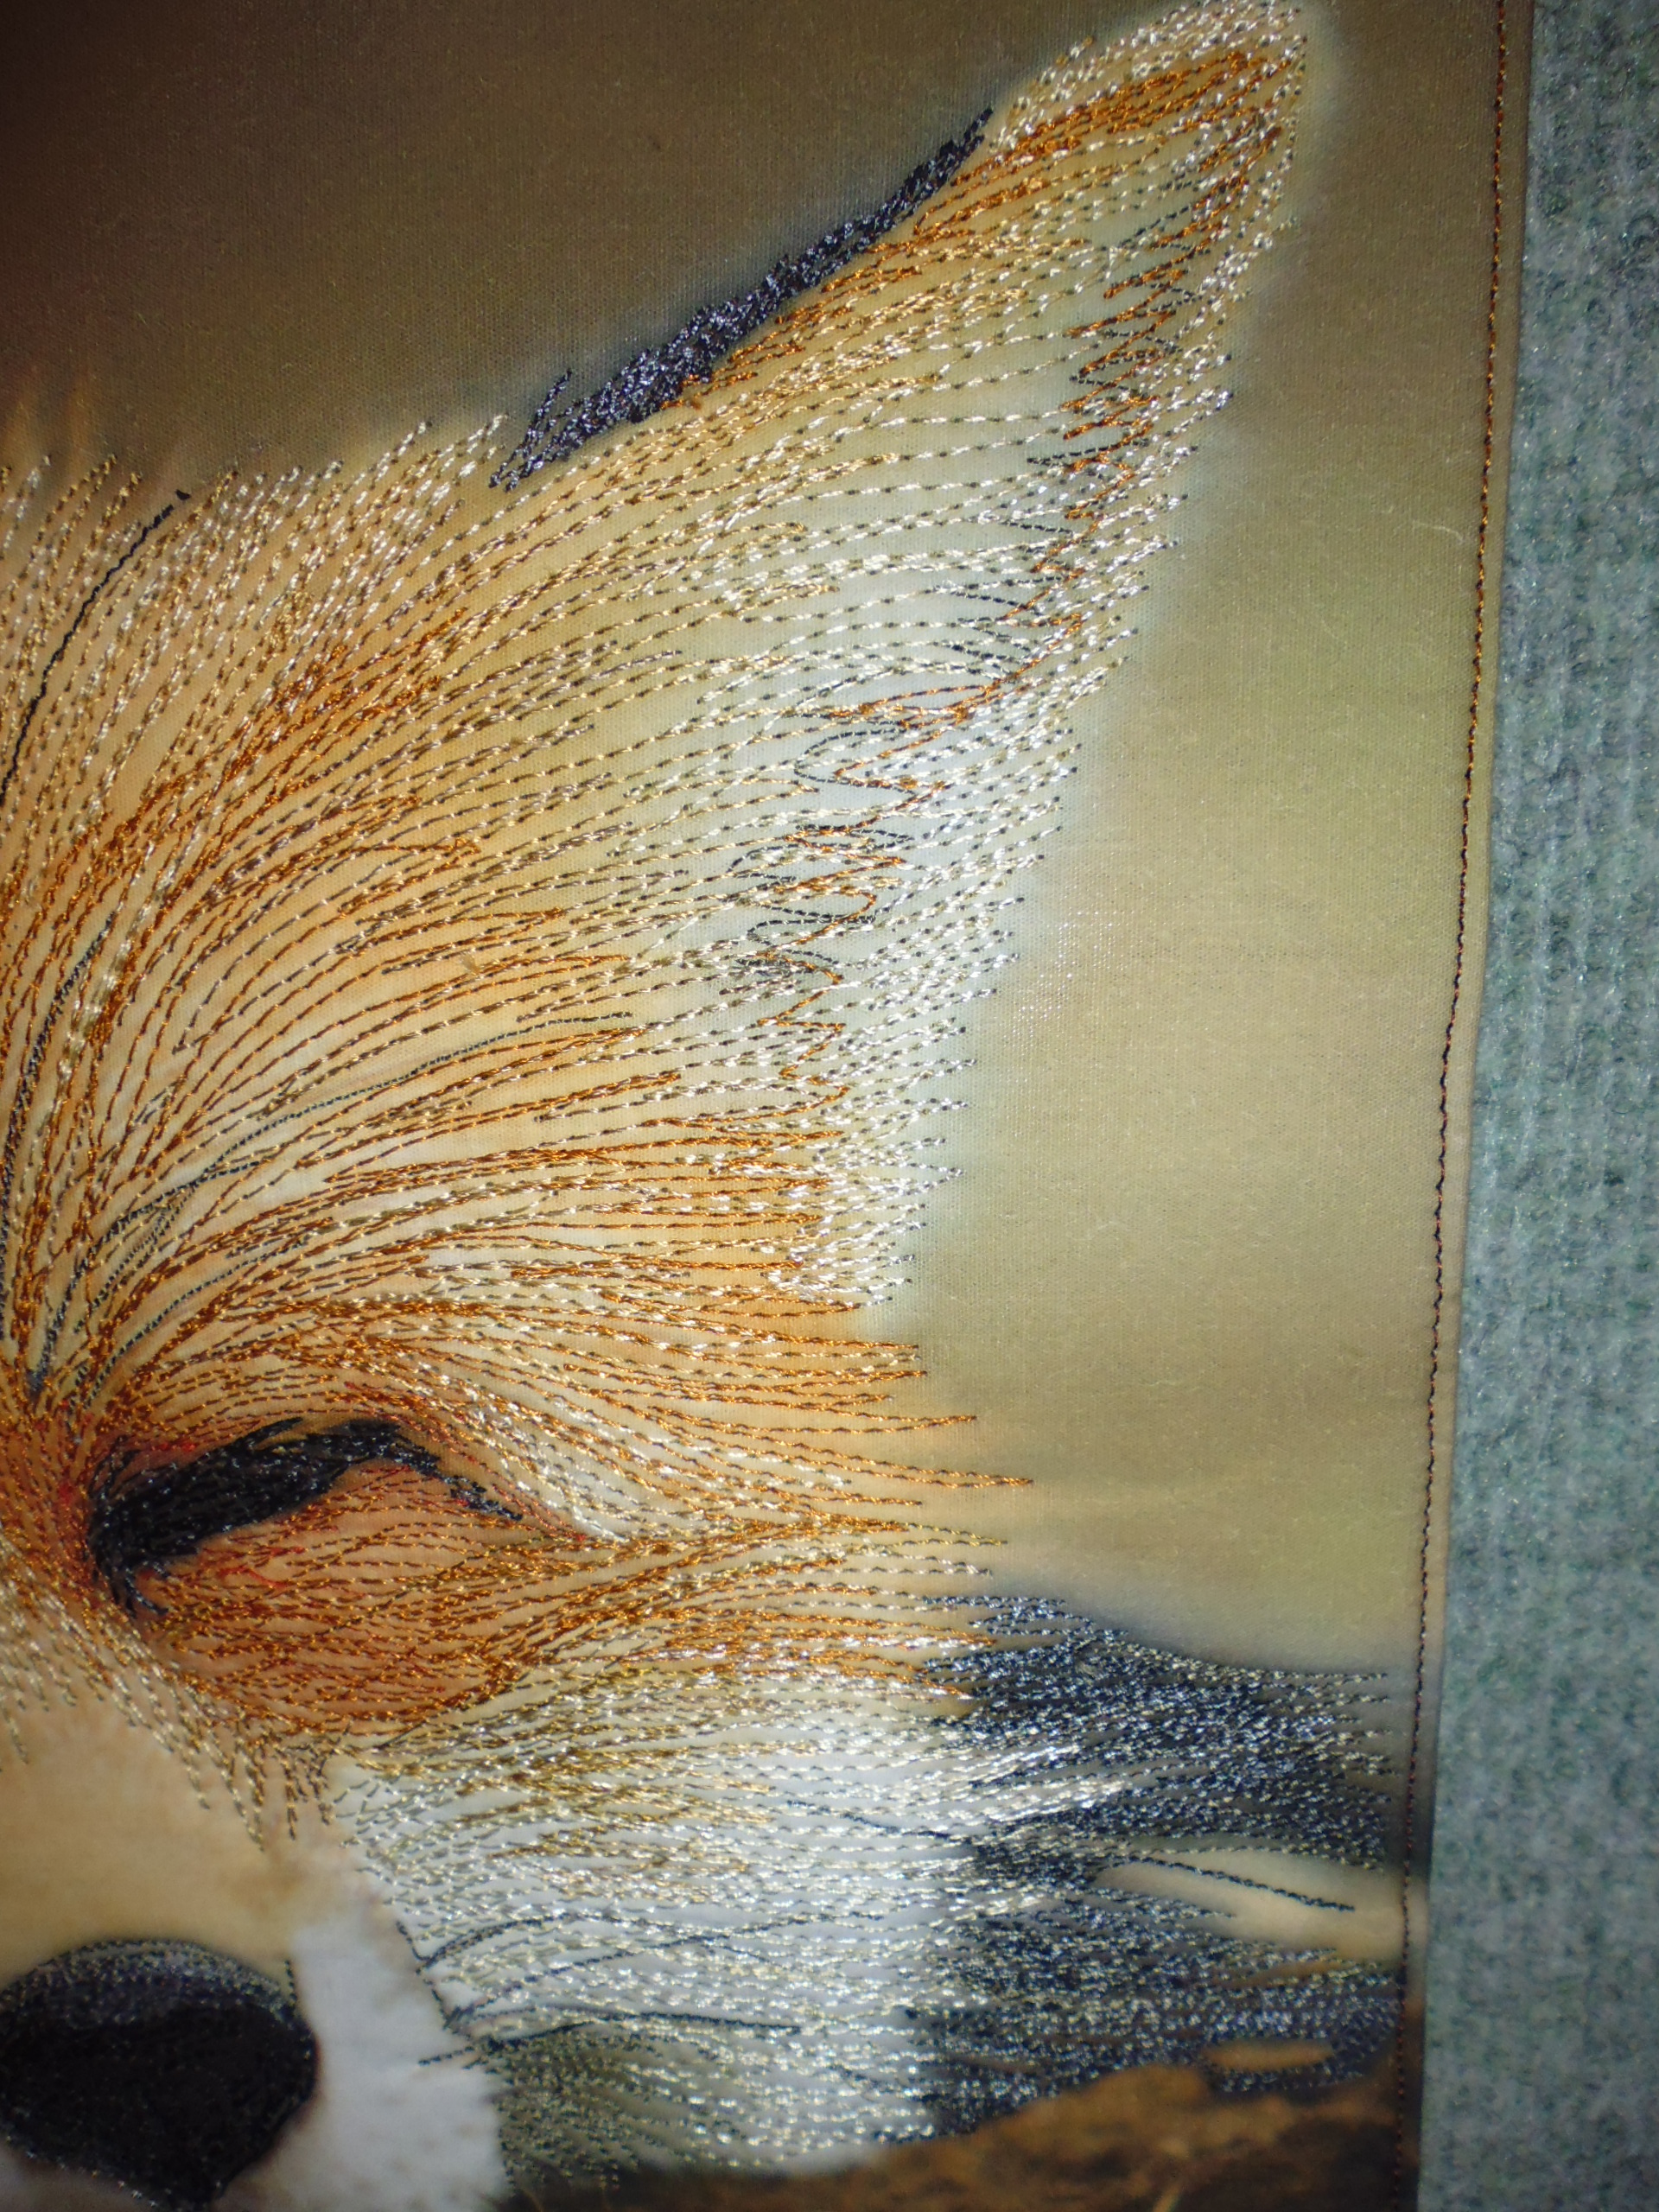
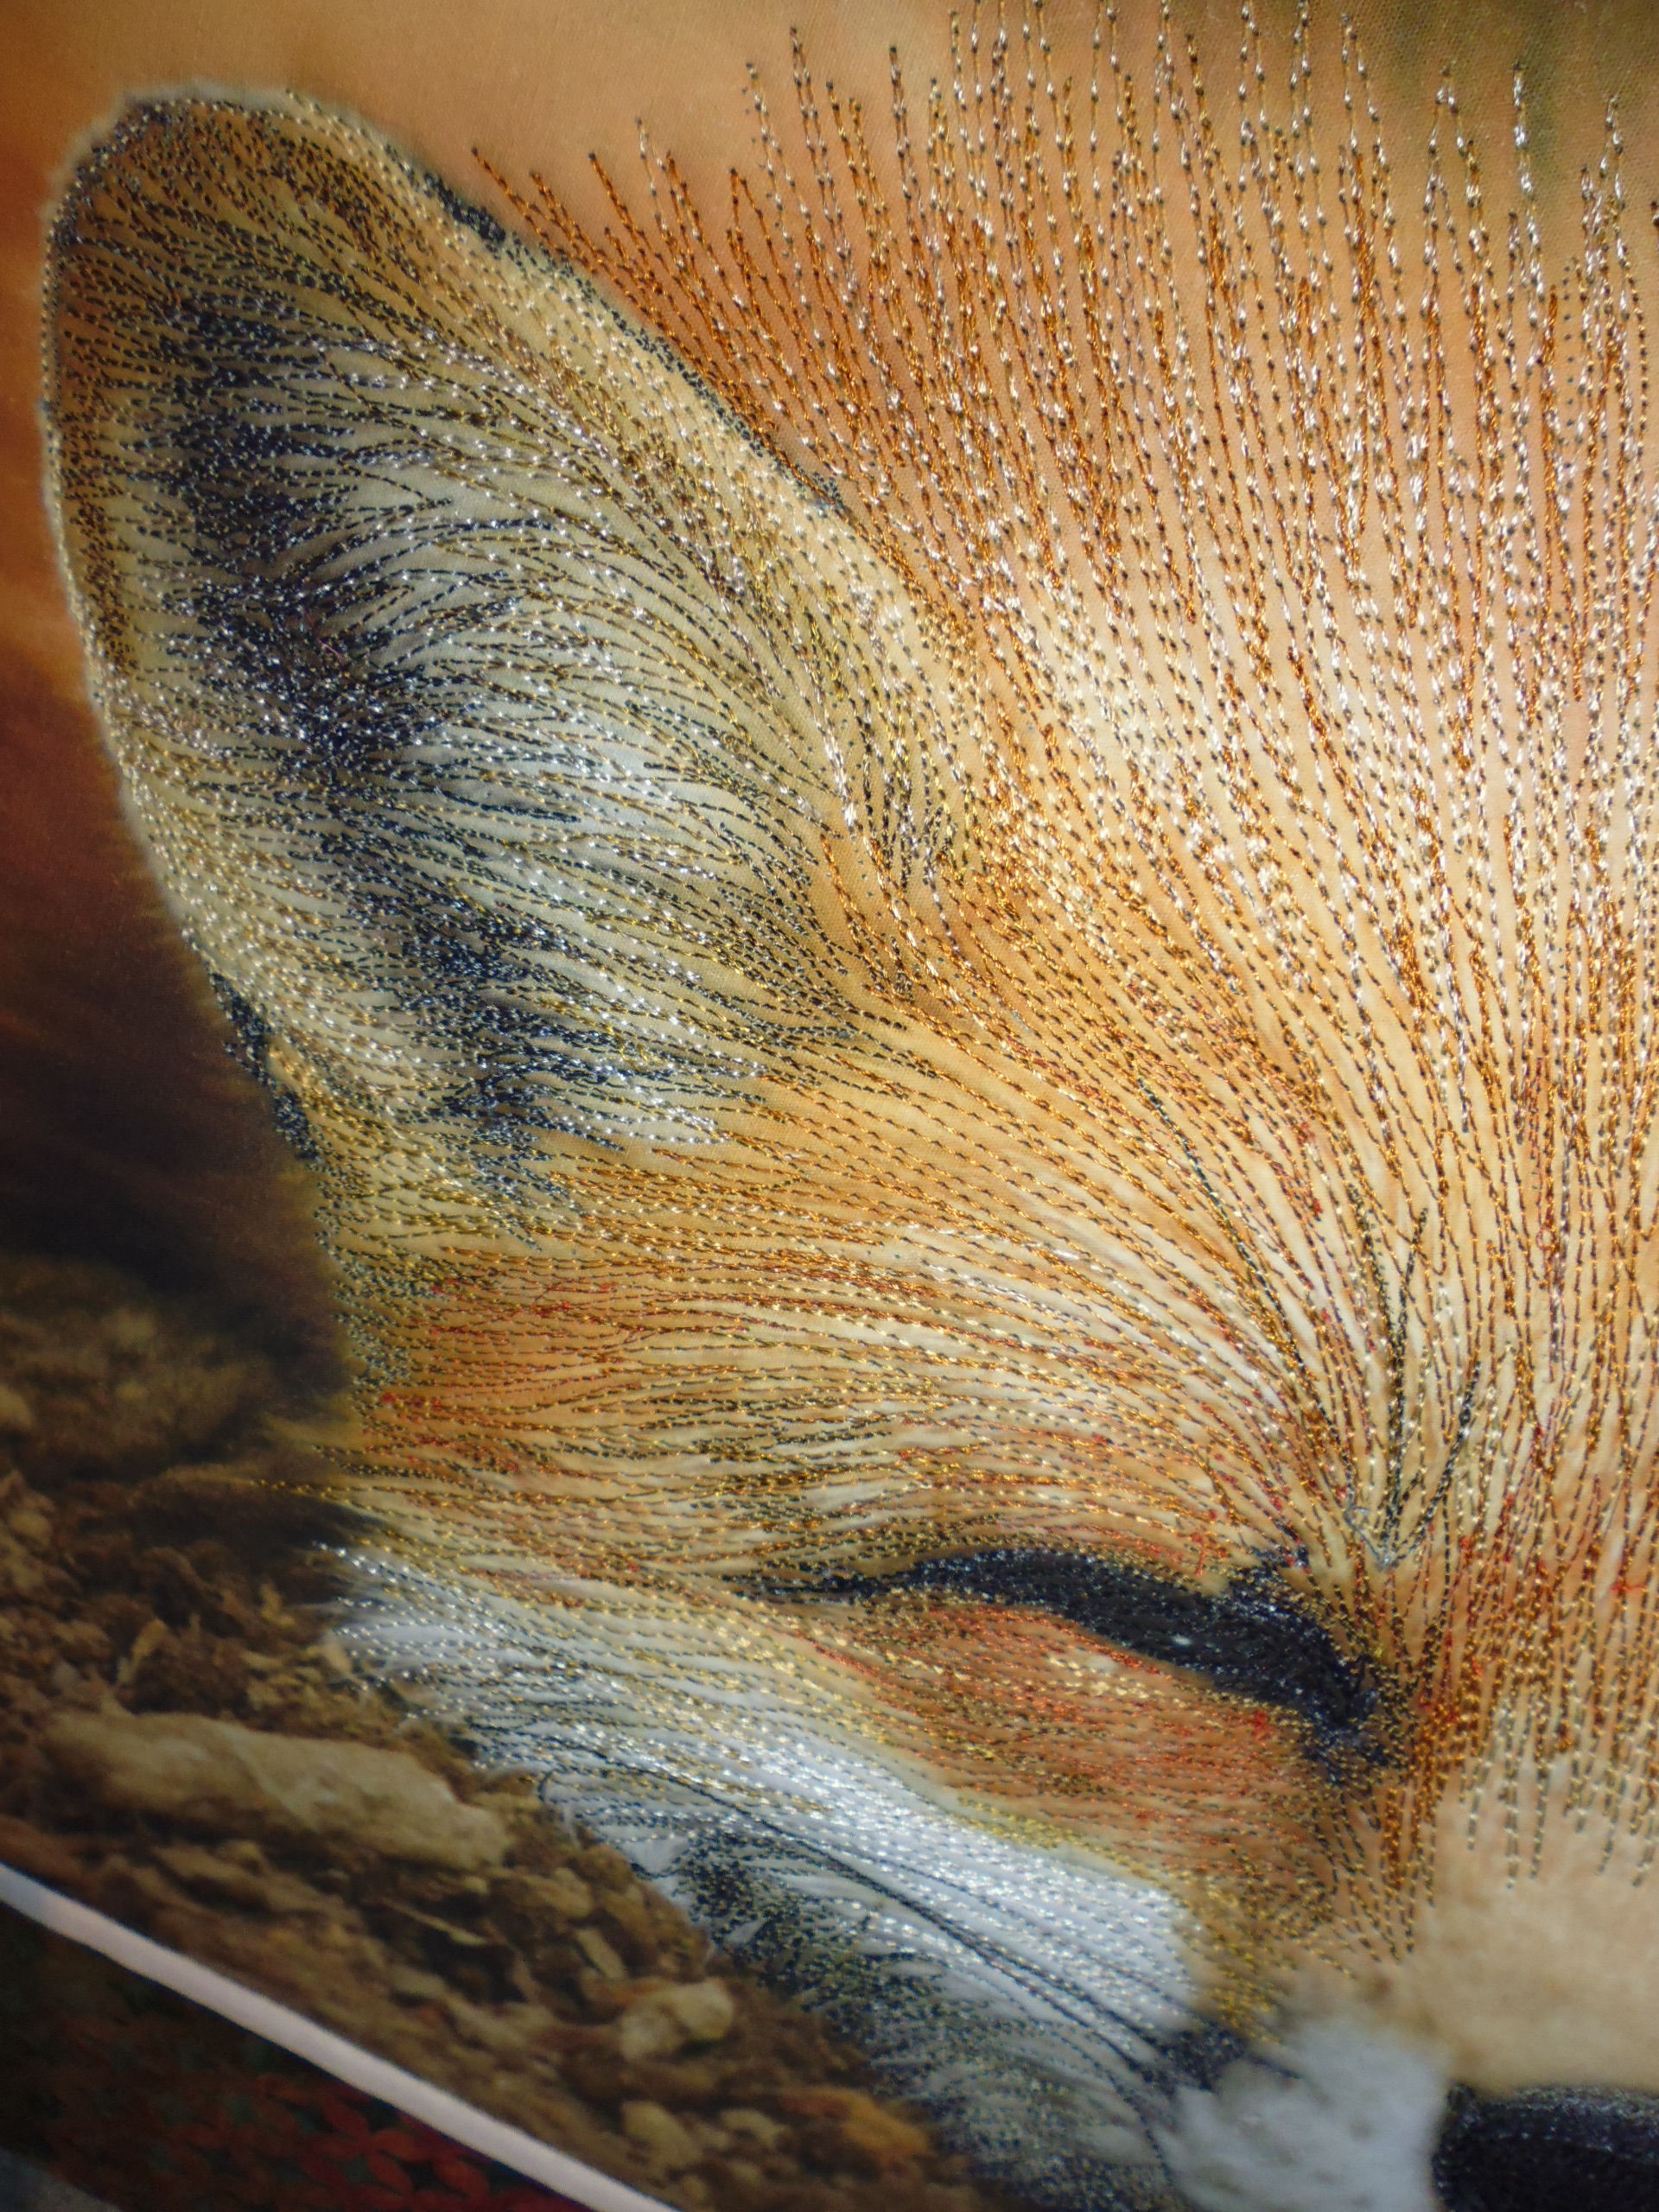
I had a lot of fun playing with various threads (about 20 different ones) and free motion stitching (on my domestic sewing machine) to get the effect of the fur, and the life in his eyes (no, I don’t know if the fox is a male or female, but I’m calling him ‘Fabulous Mr Fox!’). I used the knowledge I’d gained from Pam Holland’s workshop I’d attended in February 2014 at Empty Spools at Asilomar to do the thread work — starting with the eyes and dark areas first, then adding lighter and lighter threads as I went along. I decided not to stitch the ground, the background, or the body of the fox in the distance, instead concentrating on the face. I also didn’t stitch the muzzle as I wanted it to puff a bit.

I really love how Fabulous Mr Fox! turned out, and I was especially pleased with how I captured his ear on the left side of the photo.

Oh, I got an email from the photographer after I notified him of the completion of this piece and linked to my in progress photos on Flickr. Here’s what he said: “VERY VERY NICE WORK!! I am glad to see your work! I think your friend is happy person. Thank you for using my photo!”

(Click on a photo to view it larger; Note: These photos are big and may take a while to download on a slow connection)

P1040744

P1040745

P1040746

P1040747

P1040748

P1040749

IMG_7128

Back:

P1040750

Threads used:

P1040751

How I put this piece together

To make this piece I used:

  • Floriani Stitch ‘n’ Shape as the heavy duty stabiliser
  • a piece of batting to go between the stabiliser and the top of the piece
  • a piece of batik that I wrapped around the stabiliser and batting, creating the ‘border’ fabric
  • another piece of batik on the back (I only had a fat quarter of the front piece of batik and it wasn’t enough to fully wrap around the piece)
  • approx 20 different threads of various weights and types (trilobal polyesters, silks, rayons, cottons, invisible threads etc.)
  • MistyFuse to fuse the photo in place
  • Elmer’s School Glue to help wrap the batik tightly around the stabiliser

I started with the Stitch ‘n’ Shape cut to the final size, then layered a piece of batting on top of it and cut that to the same size as the stabiliser.

Next, I took the top batik fat quarter and covered the front of the piece, wrapping the top and bottom edges to the back and fusing them in place. Then I wrapped the side edges of fabric to the back and held them in place with a bead of Elmer’s School Glue before heat pressing the glued edges to make them stick.

Back on the front, I trimmed the photo printed on the fabric to the size I wanted, leaving a quarter inch of white fabric surrounding the photo as a framing border top and bottom, and leaving the sides uncut so that I could wrap them to the back (I didn’t want raw edges at the edges of the piece). I applied MistyFuse to the back of the photo, then fused the photo into place on the front, being careful to make sure I had the photo centred vertically on the piece (i.e. same width of the top and bottom ‘border’ fabric). Next, I wrapped the overhanging side edges of the photo to the back, and heat pressed them to seal them to the back with the MistyFuse.

I cut a piece of toning batik fabric the size of the finished piece, then turned and pressed about a half inch hem around each side. I placed this fabric on the back of the piece, ran a bead of glue on each turned-over hem (one at a time), then pressed the backing in place, heat sealing the glue to make sure the backing piece was secure.

Now I was almost ready to start stitching! But before I did, I used invisible thread to stitch a line between the photo and the white framing border, top and bottom. Then I top-stitched the whole piece with some variegated brown/gold thread. The reason for these two lots of stitching was to prevent (as far as possible) warping associated with heavy thread work. That said, I still got some warping, which I fixed at the end with both dry and steam pressing, followed by placing the piece under some heavy books immediately after steam pressing.

The stitching was fairly basic — I started with the black areas (the eyes first), and then added lighter and lighter colours as I went. I mostly free-motion stitched in straight and slightly curved lines as the fur and most other elements in the photo were straight lines.

All told, this piece took about 8 hours to make from start to finish (not including getting the photo onto the fabric). Sizes: Photo: approx. 27 x 40 cm (10.5 x 16 inches); entire piece: approx. 37 x 38 cm (14.5 x 14.75 inches)

See also:


2015 Challenge

4 07 2015

Our quilt challenge for this year was set last 4 July by Brian (Bobbie’s husband). We had to create something quite interesting (QI) related to the history of quilting (HQ). Oh, and we decided that Brian had to make something too — in a medium of his choice (e.g. wood, photograph), any size, but pink had to be used in it somewhere.

Here’s the challenge:

2015_challenge

I had some ideas right from the beginning, initially focusing on Amish quilts. Later in the weekend I remembered the Gee’s Bend quilts and decided on that, as I love their improvisational nature and bright colours and their ‘modern quilt’ aesthetic. By that time F had given me her colour (any blue) and once I decided on creating something in the Gee’s Bend spirit, I decided to add at least red, and passed that colour on to B.

When I got home, I did a little research to see some pictures of the Gee’s Bend quilts, read a bit about their history, and how they came out of necessity using whatever fabric was to hand to make a warm bed covering.

I decided to start by raiding my box of rags!!! After eliminating any stretch knits (t-shirts, undervests, etc.), I was left with a small pile of old almost threadbare jeans, old work khakis, old work shorts, old tea towels, and even an old pair of cotton boxers! Some rags had stains from years/decades ago, but I didn’t try to get these out. While I had lots of blues, creams, whites, and khakis, I didn’t have those bright spots of colour I needed (except for the red plaid boxers!), so I went to my scrap stash and boxes of decades-old fabrics, where I found some bright yellow, plain red lawn, and a heavy (curtain?) fabric with red and blue chevrons. I added these to the mix.

rag_bundle

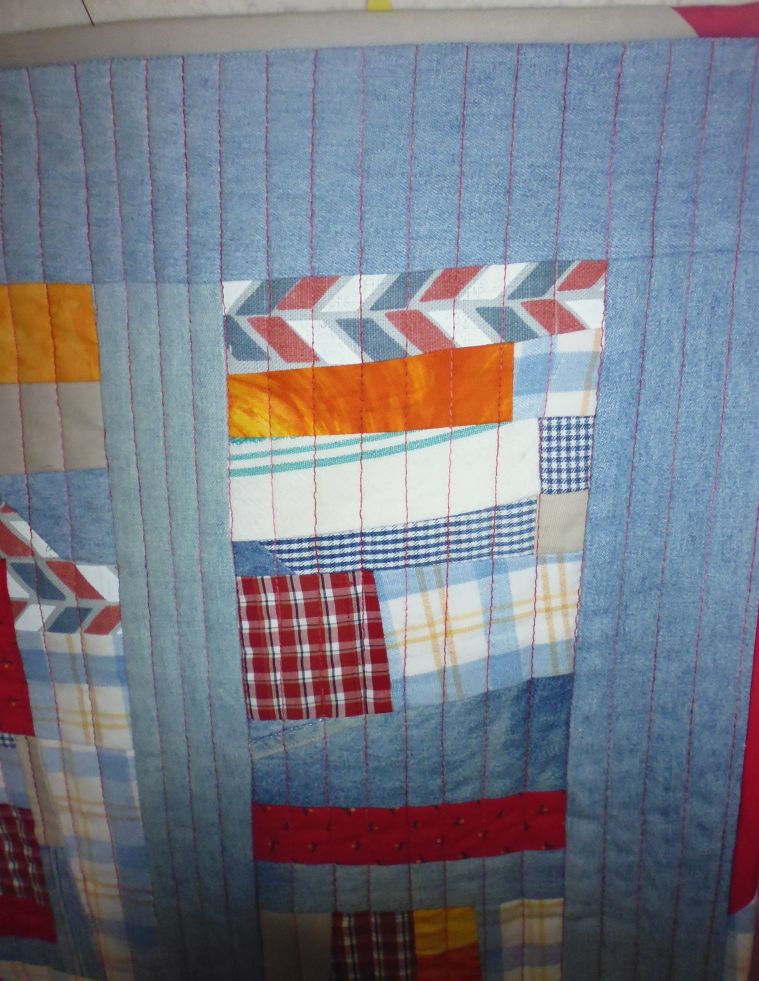
The next step was deciding what to do. After checking some of the images of the Gee’s Bend quilts, I decided to do three strips of crazy piecing, using the faded denim for the borders and sashing strips. To keep it simple, I trimmed down the crazy strip piecing to 6.5 inches across (the width of my main ruler). I also slashed some pieces before I added them to the strips and inserted yellow or red bits to cross more than one colour strip.

I also slashed the border and sashing pieces and added yellow and red fabrics there too. I used the leftovers for the binding. For the back, I made another crazy strip of scraps, surrounded by the rest of the red lawn fabric, and then a dark grey gabardine I’ve had forever. By the time I’d finished, I had almost no rag scraps left!

Stitching was interesting — all those different fabric types and weights and thicknesses made for some interesting times on the sewing machine. The walking foot was my friend! As I wanted to keep with the ‘make do’ theme, I had deliberately left some seams in the denim and checked shorts fabric, but the sewing machine dealt with those very thick bits without a hitch.

I quilted this quilt with simple vertical lines approximately 1/2 inch apart. Again, in keeping with the Gee’s Bend aesthetic, I didn’t want to be too precise with the quilting. I used a heavy weight variegated red cotton thread (12 wt, Wonderfil Tutti Frutti, colour FT12).

Oh, and I had it all finished — including a label — by 26 July 2014!

This quilt has quite a bit of ‘quilt history’ associated with it: Gee’s Bend of course, crazy patchwork, making do with any sort of fabric scraps (from the Great Depression), improvisational piecing, even a ‘modern quilt’ look.

I’ve called it ‘Crazy Ragbag’.

finished01

finished02

finished03


finished04

Some YouTube videos about the women of Gee’s Bend and their quilts:


Middle of winter, 2015

29 06 2015

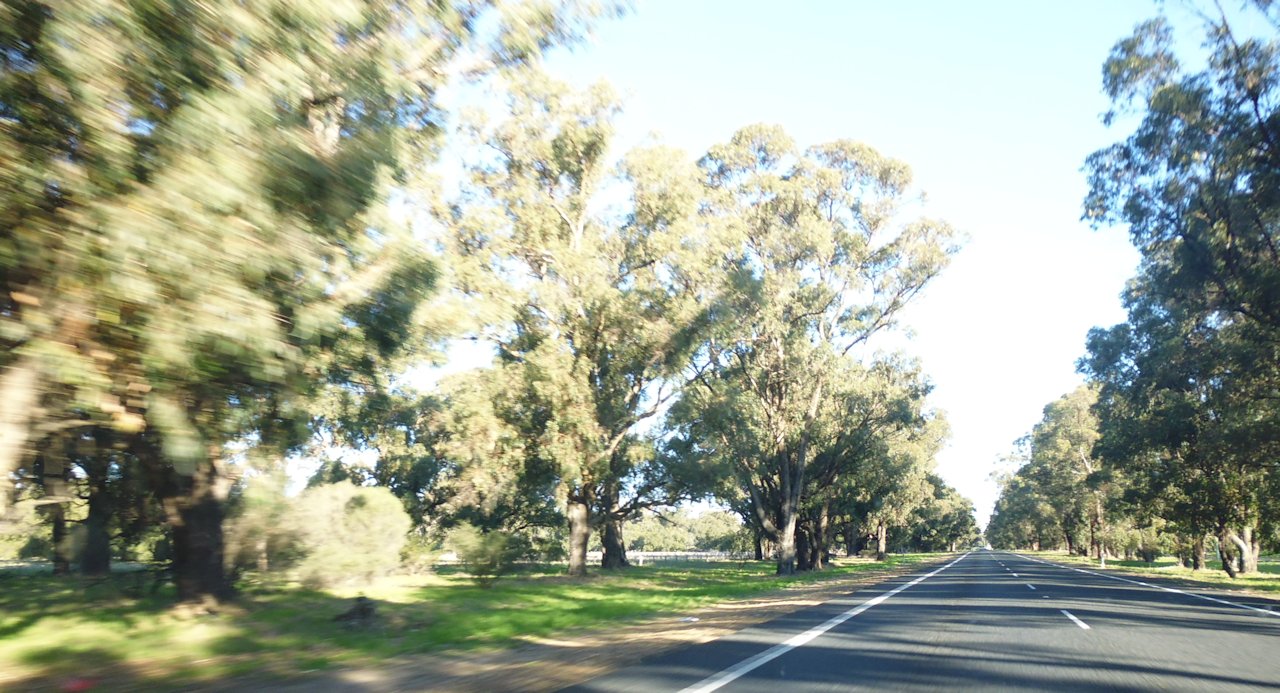
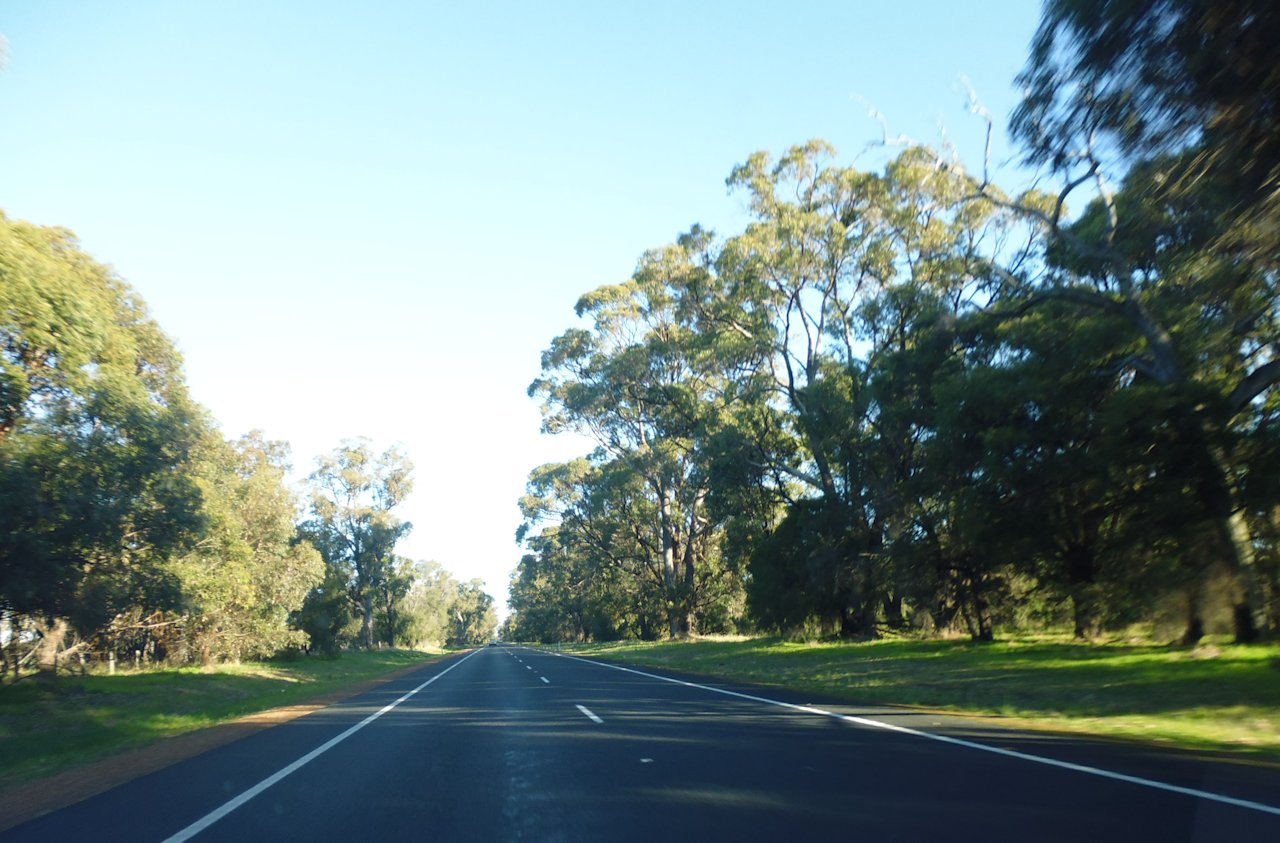
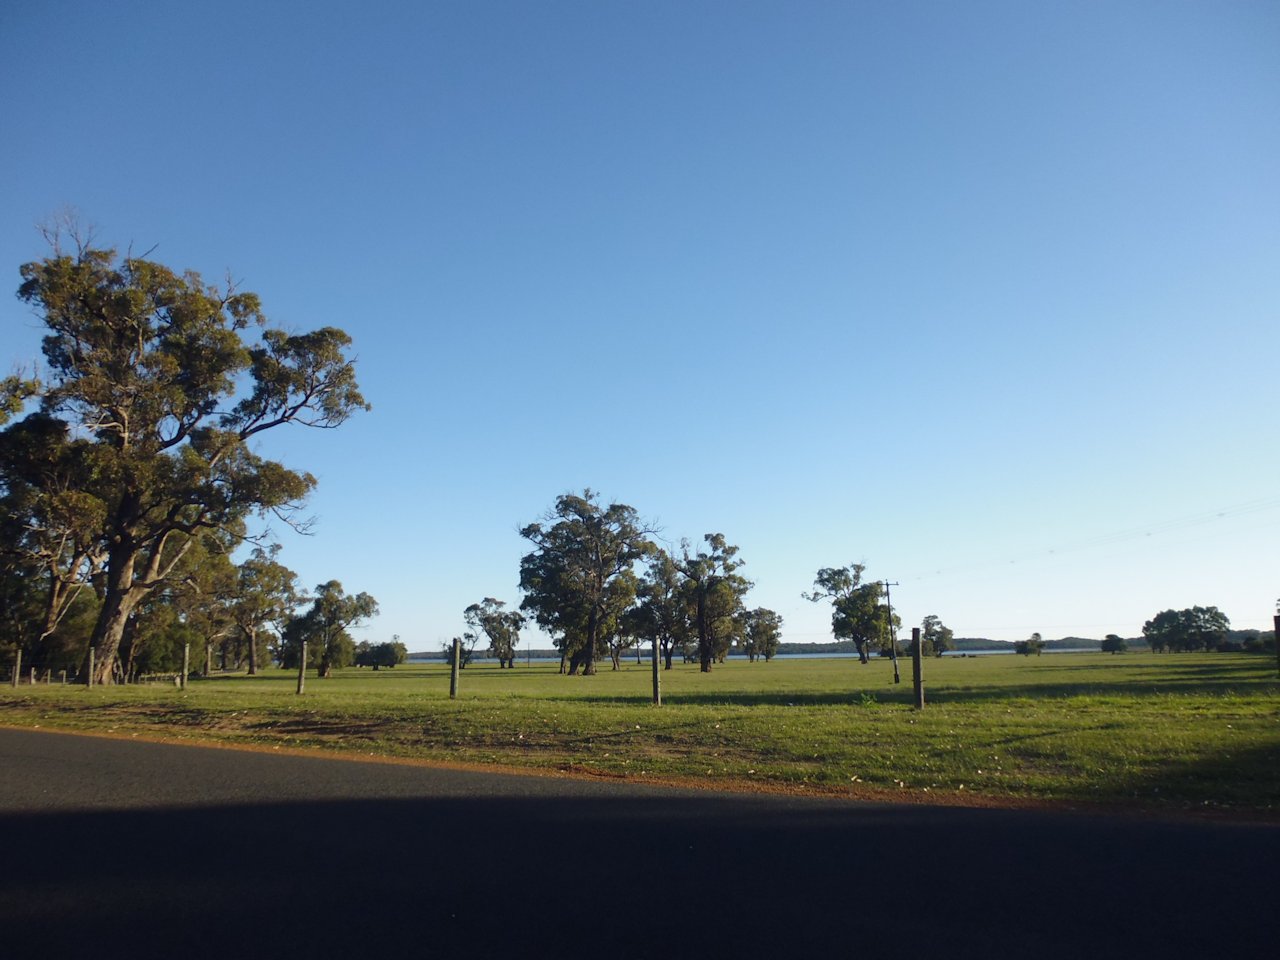
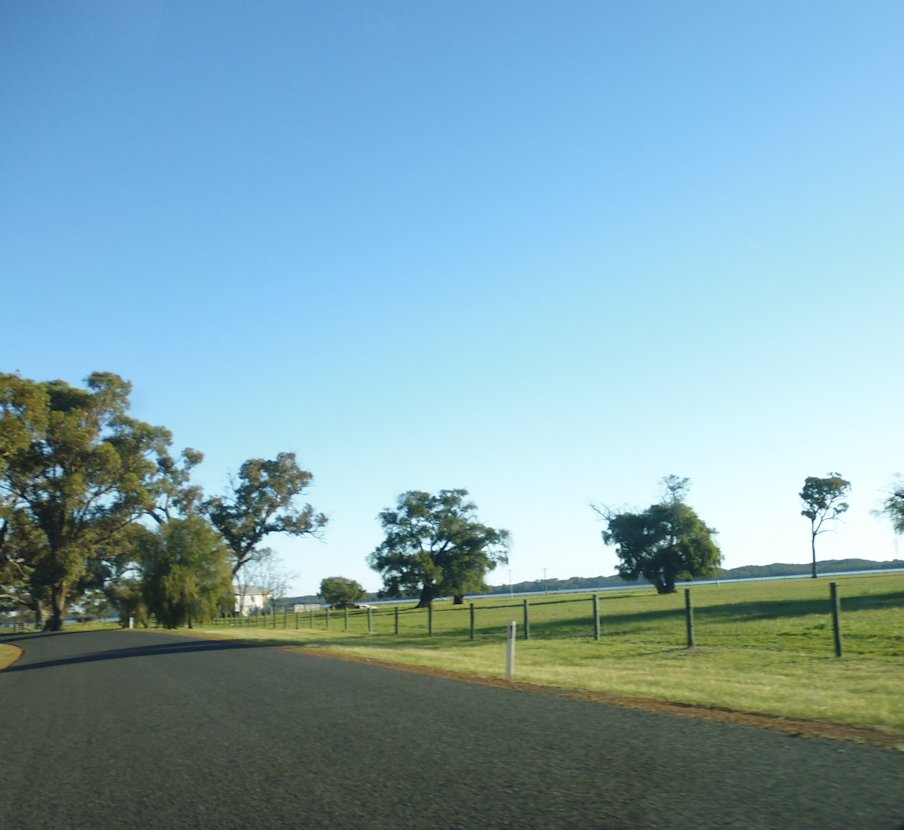
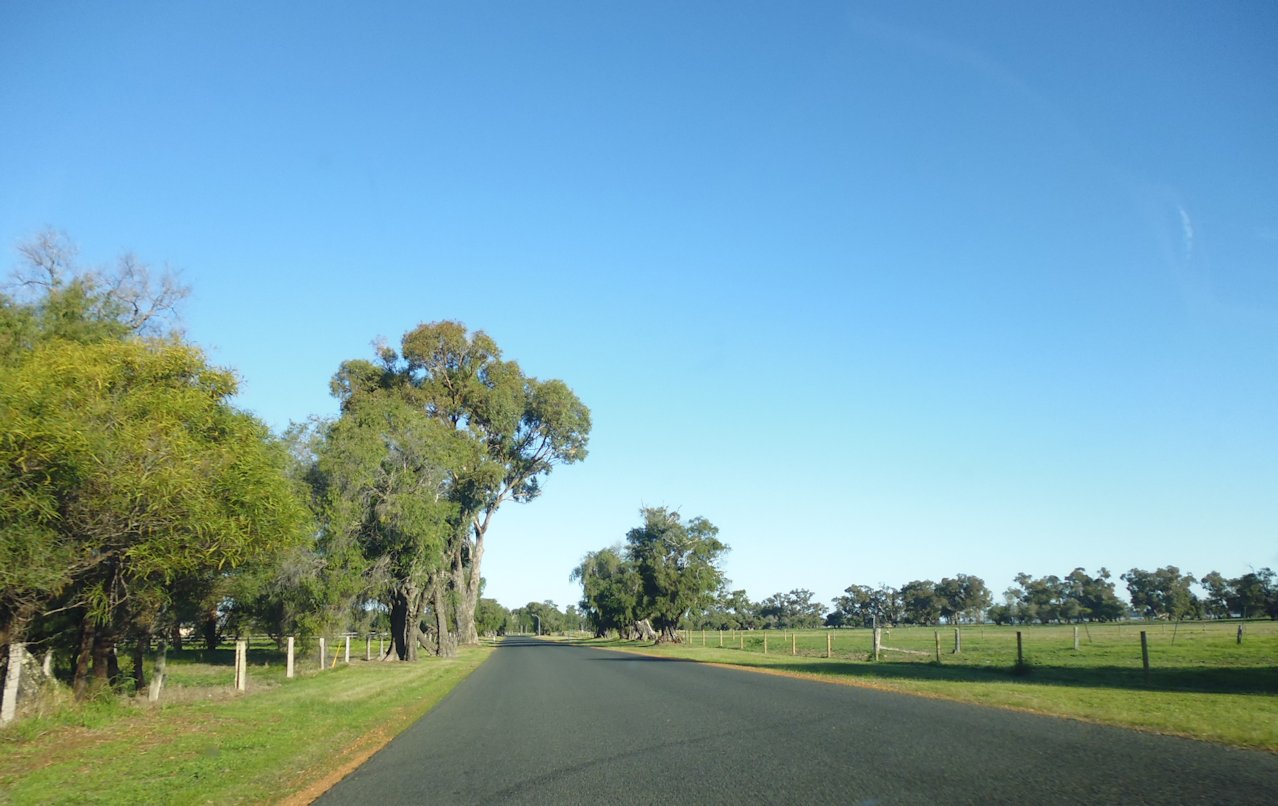
Yesterday was one of those magic winter’s days we get here — clear blue skies, green grass, dry, mild temperatures (about 19C [66F]). I took a few photos through the car window (yes, naughty, I know!) while driving to and from Perth, and a few more quite close to home to show my North American friends, in particular, what winter is like in my part of the world.

(Click on a photo to view it larger)

Forrest Highway, heading south, near Myalup about 4pm

Forrest Highway, heading south, near Myalup about 4pm

Forrest Highway, heading south, near Myalup about 4pm

Forrest Highway, heading south, near Myalup about 4pm

Forrest Highway, heading south, near Myalup about 4pm

Forrest Highway, heading south, near Myalup about 4pm

Near top end of Leschenault Estuary, Western Australia, around 4pm

Near top end of Leschenault Estuary, Western Australia, around 4pm

Cathedral Ave, near top end of Leschenault Estuary, Western Australia, around 4pm

Cathedral Ave, near top end of Leschenault Estuary, Western Australia, around 4pm

Near top end of Leschenault Estuary, Western Australia, around 4pm

Near top end of Leschenault Estuary, Western Australia, around 4pm

Cathedral Ave, near top end of Leschenault Estuary, Western Australia, around 4pm

Cathedral Ave, near top end of Leschenault Estuary, Western Australia, around 4pm

Near top end of Leschenault Estuary, Western Australia, around 4pm

Near top end of Leschenault Estuary, Western Australia, around 4pm

Heading towards Perth on Forrest Highway

Heading towards Perth on Forrest Highway (if you view the photo at full size, you’ll see horses in the paddocks alongside the road)