Community Quilt 225

16 08 2015

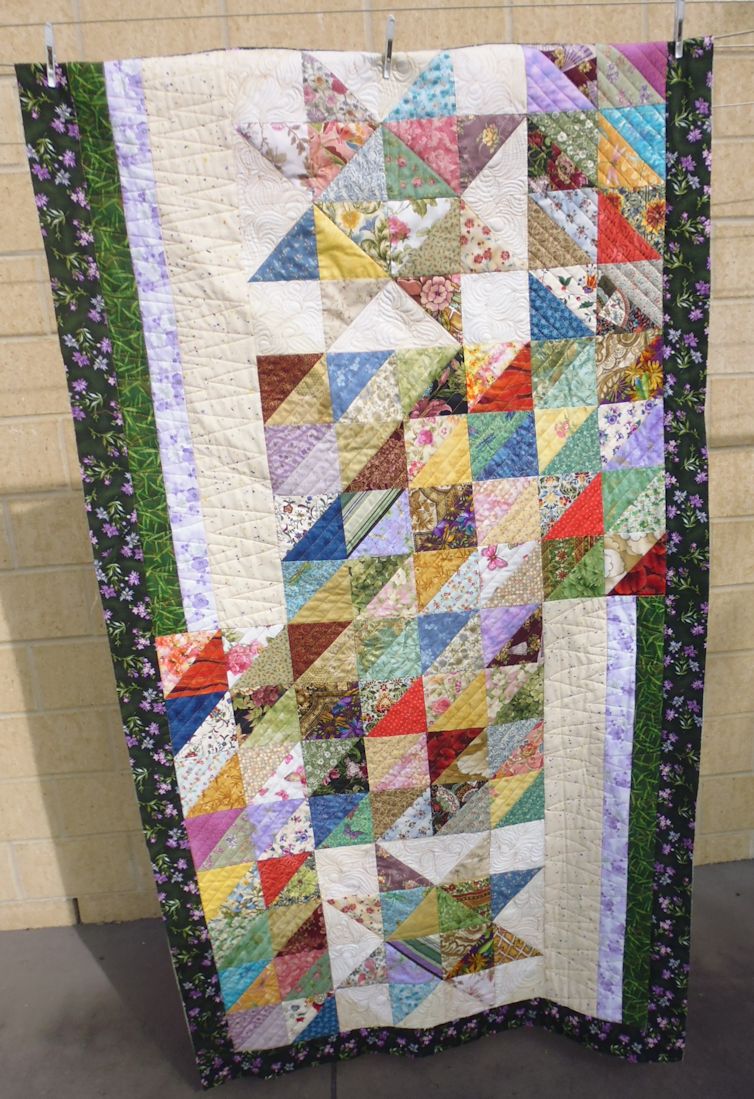
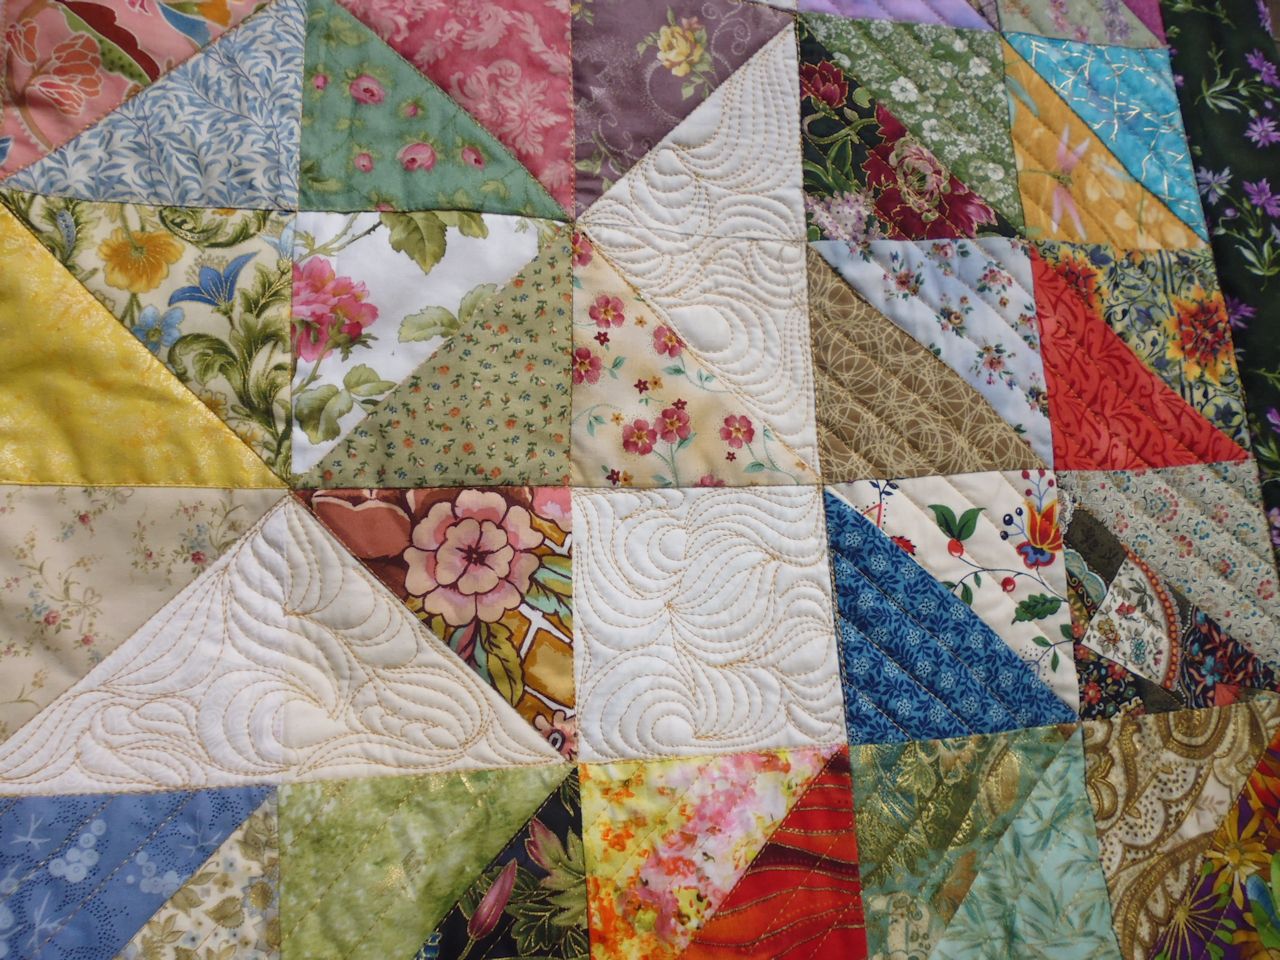
Another scrappy quilt. This one was made up of lots of half-square triangles, with two large stars formed from some of them. And then there was a strange 3-strip panel on each side.

The direction of the main triangles leant itself to some straight-line quilting. I stitched in the ditch along the main diagonal seams first, the through the middle, then through the space created by those lines. I liked the effect, especially as I used a gold thread (NOT metallic) to set off the many fabrics that had splashes of gold in them.

For the stars, I just stitched in the ditch, then did some McTavishing in the white space. It took a while to decide what to do with the 3-strip panels. I thought about feathers then figured they’d look out of place with the straight lines of the diagonals, so I did some mountain peaks (no rulers or marking) along one side first, then echoed back on the other side.

(Click on a photo to view it larger)


quilt225_01

quilt225_03

quilt225_02

Threads used:

  • Top: Fil-Tec Glide ‘Military Gold’ (40 wt, trilobal polyester, colour 27407)
  • Bottom: Fil-Tec Magna Glide Classic pre-wound bobbin


Community Quilt 224

16 08 2015

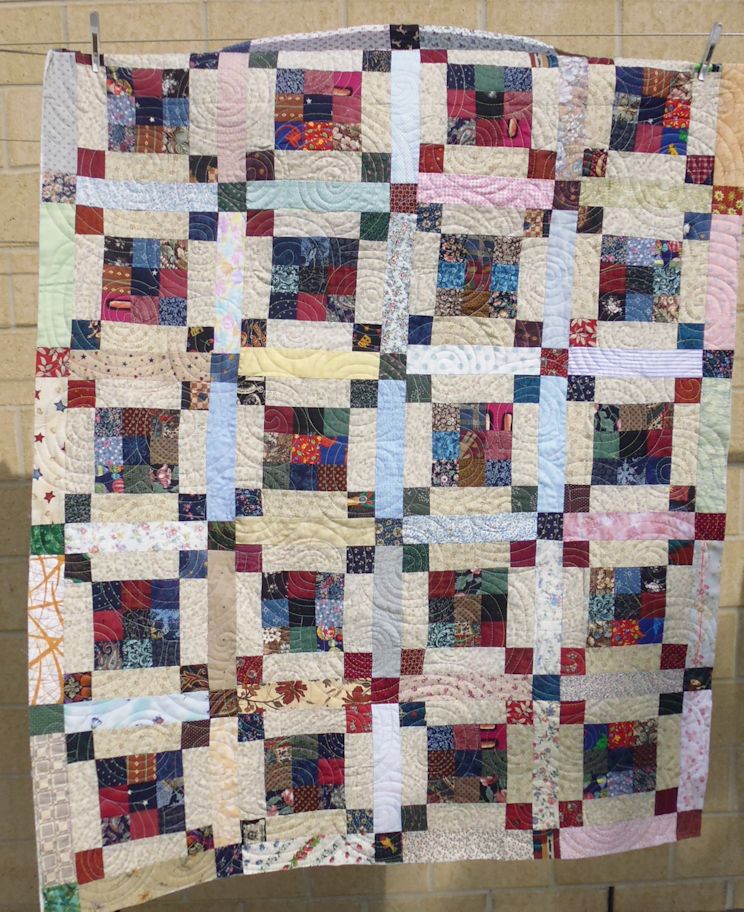
This small scrappy quilt had so many colours happening, I didn’t know how to quilt it! Eventually I decided on a variegated pastel thread and a big spiral motif, which I think sets off the quilt quite nicely and unifies the many squares and colours that make up this quilt.

(Click on a photo to view it larger)

quilt224_01

quilt224_02

Threads used:

  • Top: Fil-Tec Harmony ‘Spring’ (40 wt, cotton, colour 14062)
  • Bottom: Fil-Tec Magna Glide Classic pre-wound bobbin (white)


Community Quilt 223

16 08 2015

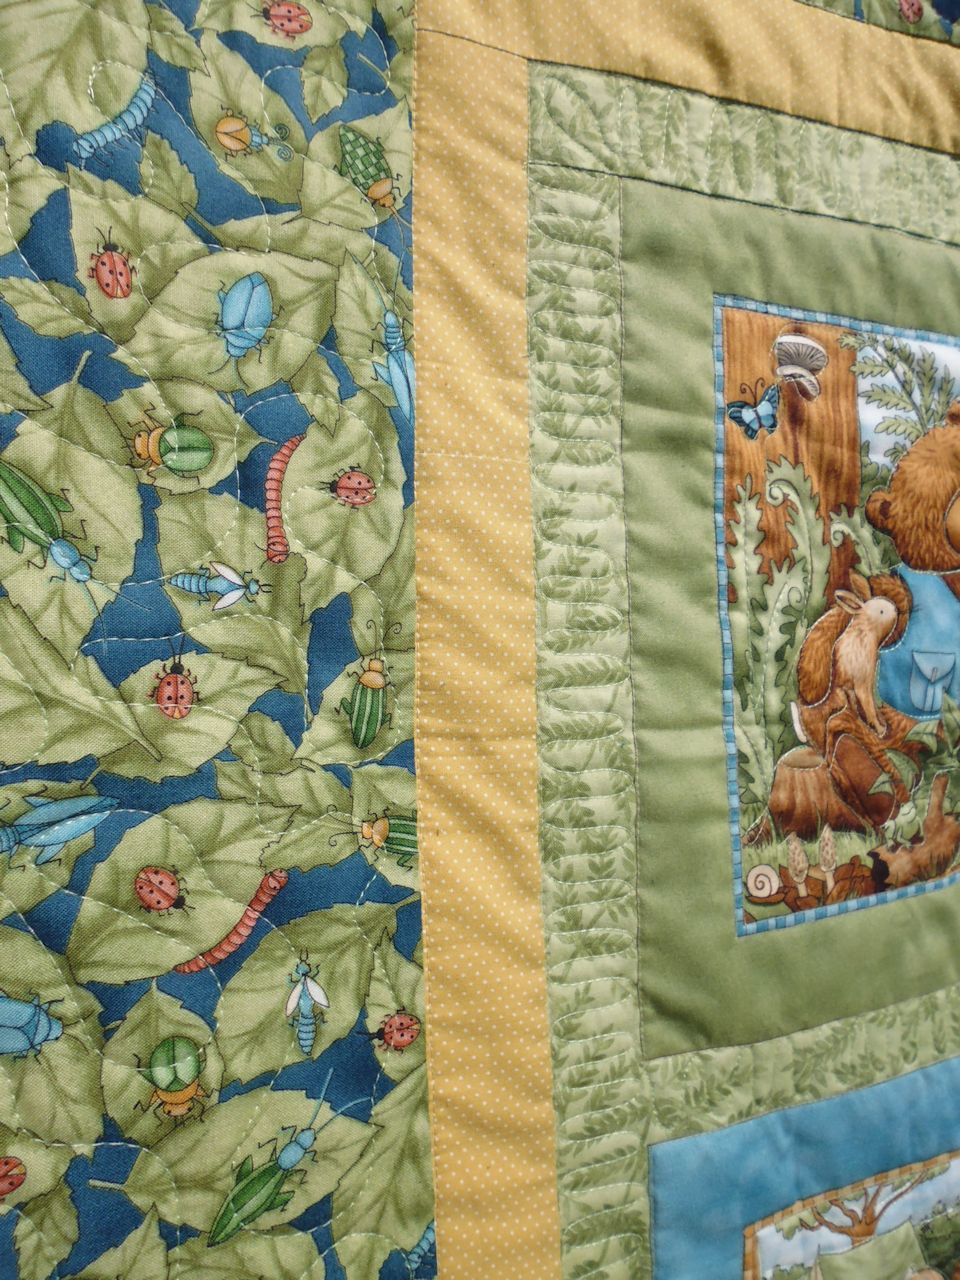
I thought this quilt was individual blocks, but the entire centre was a single panel print! Clever.

I started by stitching in the ditch around each of the ‘blocks’, leaving the ‘borders’ around each one unstitched. Then I did loopy Ns and Us in the soft green leaf border, and a meandering stipple in the large leaf border. Finally, I outlined the main elements in each bear and rabbit block. I didn’t try to be too precise here — the aim was to hold the layers together yet keep some puffiness in these blocks.

(Click on a photo to view it larger)

quilt223_01

quilt223_03

quilt223_02

Threads used:

  • Top: Rasant (cotton, colour 0861); Isacord (40 wt, trilobal polyester, colour FB 5660 [soft green])
  • Bottom: Fil-Tec Magna Glide Classic pre-wound bobbin (light tan)


Community Quilt 222

16 08 2015

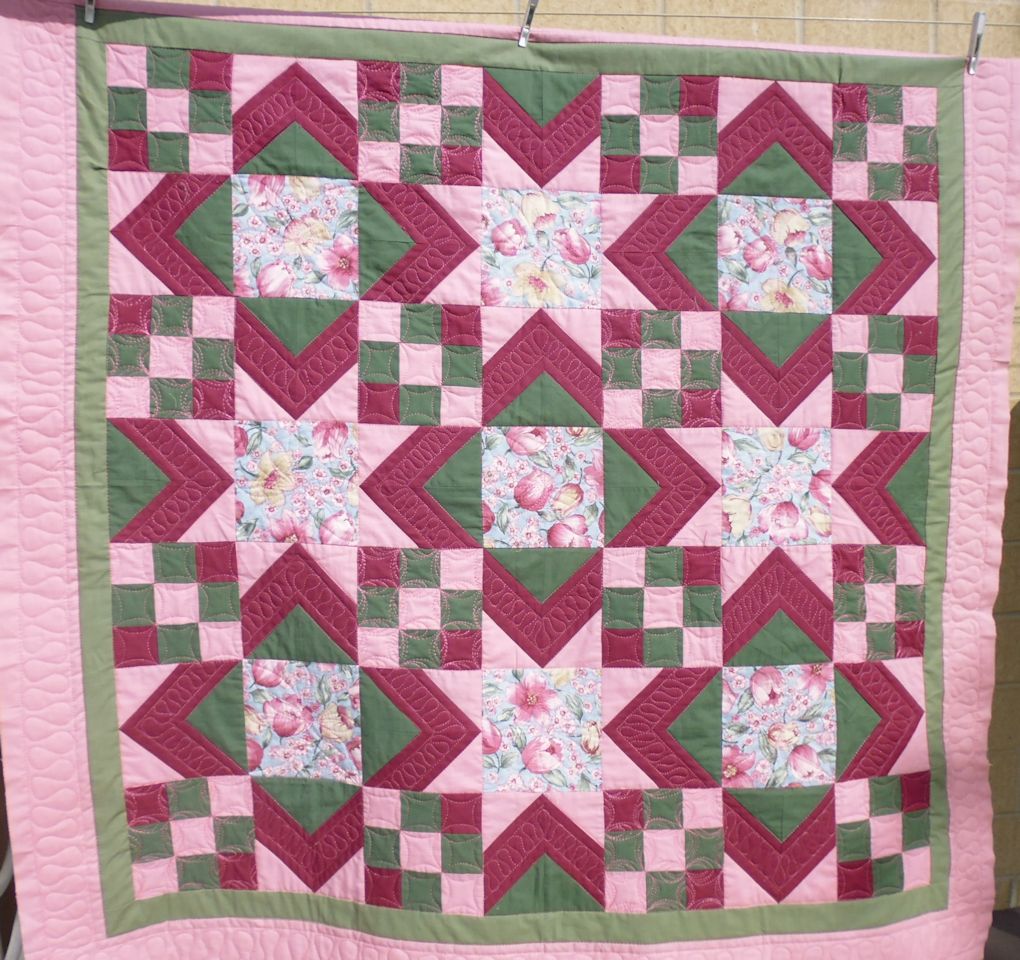
How to quilt this quilt? I started with straight line echoing and ribbon candy in the maroon Vs, followed by cathedral windows and a cathedral window variation in each alternate 9-patch block. In each centre, I stitched an 8-petal free-motion flower with each petal hitting a corner or seam. I left the pink and green triangles unstitched, then straight-line echoed in the border and filled the space with a ribbon candy motif.

(Click on a photo to view it larger)

quilt222_01

quilt222_02


quilt222_03

Threads used:

  • Top: Floriani embroidery thread (40 wt, rayon?, colour PF106)
  • Bottom: Fil-Tec Magna Glide Classic pre-wound bobbin (light tan)


Community Quilt 221

16 08 2015

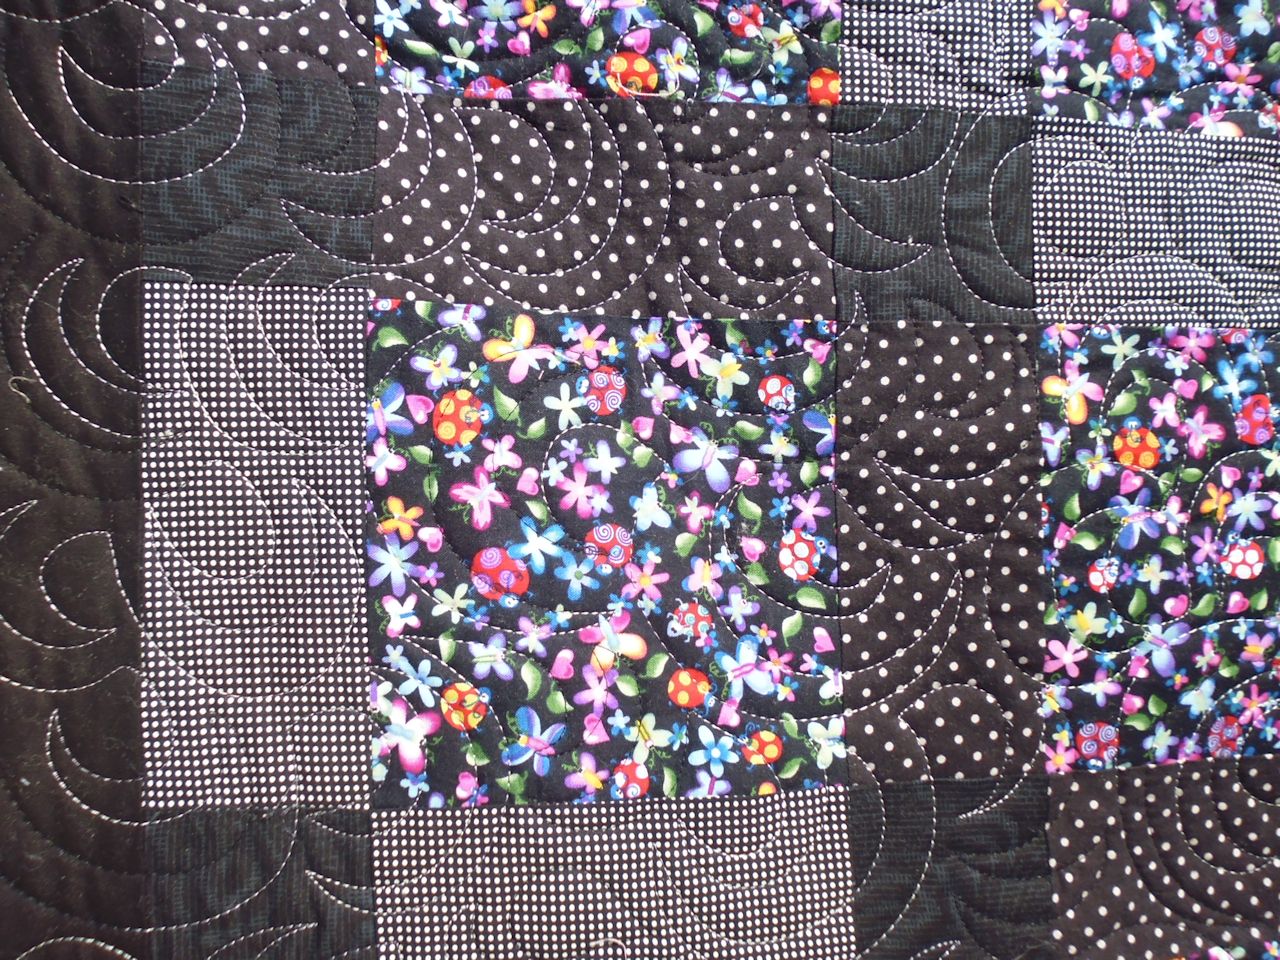
I knew that any quilting I did on this quilt would fade into the background, so I just an all-over motif (my open headbands) in a black and white variegated thread. I thought about using a neon pink or green thread, but went for the more subtle black and white instead.

(Click on a photo to view it larger)

quilt221_01

quilt221_02

Threads used:

  • Top: Wonderfil Mirage (30 wt, rayon?, colour SD28)
  • Bottom: Fil-Tec Magna Glide Classic pre-wound bobbin (black)


Easy cathedral windows for hexagons

4 08 2015

I modified my method for quilting easy cathedral windows (suitable for squares, rectangles, or grids) to work with hexagons (see Community Quilt 220).

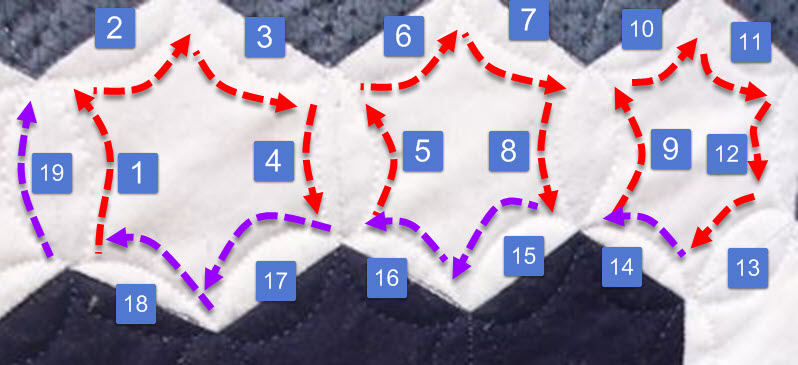
The photo below shows the stitching order — the red lines (1 to 13) show the first row of stitching, where you start with one of the vertical arcs near the adjoining seam, then do two arcing hops followed by a completed arc up (or down, as in the photo) the seam, followed by two more arcs, then a vertical one and so on until the end. Then come back along the other edge with more arc hops all the way back to the beginning (the purple lines numbered 14 to 19). (Note: If you’re doing a complete circle of hexagons like I was in Community Quilt 220, then numbers 14 to 19 will go in the other direction to complete the ‘loop’.)

Easy!

cathedral_windows_hexagonal_numbered


Community Quilt 220

4 08 2015

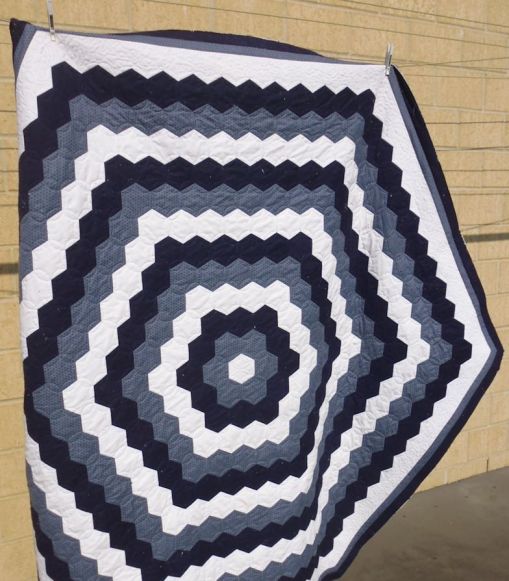
I took ages to get to this hexagonal quilt. First, I really didn’t have any idea how to quilt it so it sat over the back of the sofa for a few weeks. And second, I have a shoulder that’s playing up (surgery is scheduled for December), so in the meantime I have to take it easy with many of the actions involved in quilting.

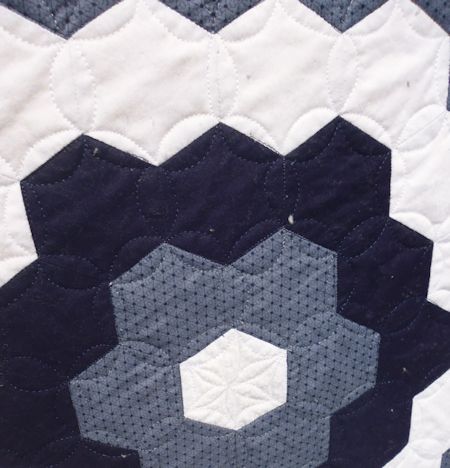
I eventually decided on my easy cathedral window motif, which I adapted for hexagons — do two arcs to hop from corner to corner for two sides inside a hexagon, then arc up (or down) the vertical seam then back down the other side. Repeat until you get to the end of one row, then arc up (or down) to the other side and just do arcs hopping from one side to the next to fill in the remaining sides. Rinse, lather, repeat for all rows.

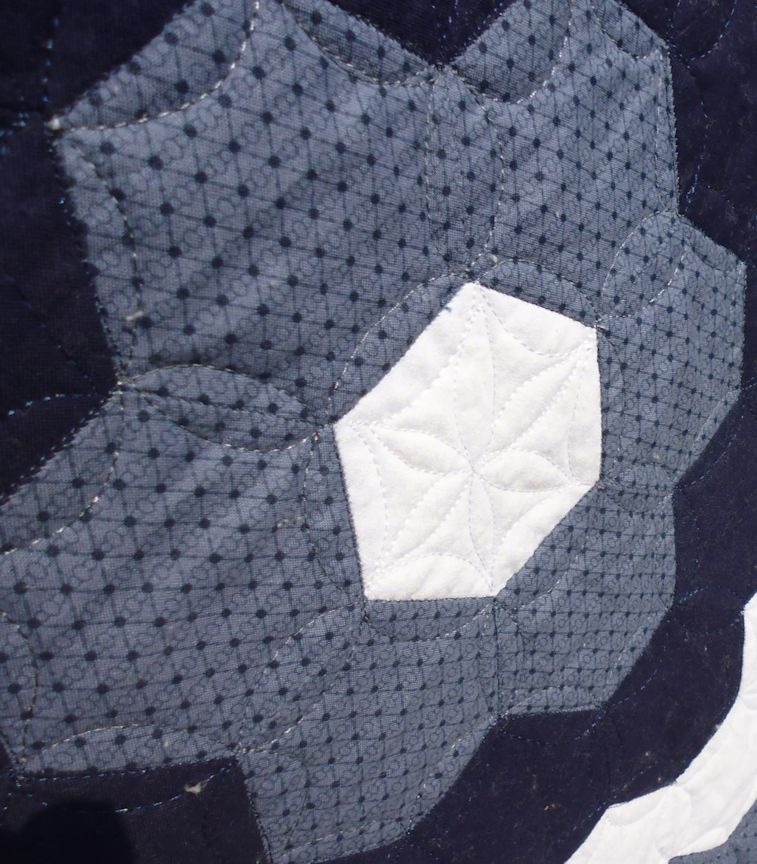
I left the blue borders unquilted, and did a smallish stipple in the white border. I finished off with a flower in the very centre.

NOTE: The batting used in this quilt was VERY fluffy, so there are bits of fluff all over it, which are very prominent in the navy sections. This quilt needs a good brush down with a lint brush.

(Click on a photo to view it larger)

quilt220_03

quilt220_04


quilt220_02

quilt220_01

quilt220_05

Threads used:

  • Top: Fil-Tec Glide ‘Navy’ (40 wt, trilobal polyester, colour 32965); Fil-Tec Glide ‘White’ (40 wt, trilobal polyester, colour 10000); Floriani embroidery thread (40 wt, rayon, colour PF487 [dark grey])
  • Bottom: Fil-Tec Magna Glide Classic pre-wound bobbin (white, lead grey, black)


Watercolour pencils and textile medium – a happy marriage

26 07 2015

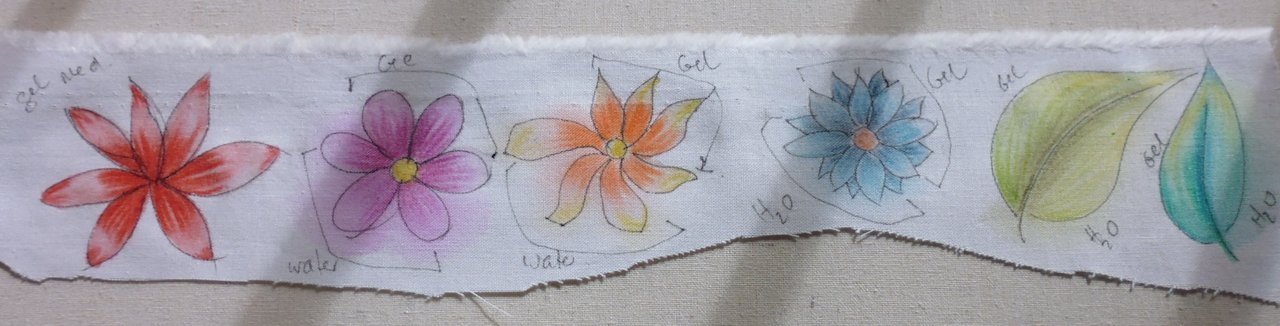
In the Aug/Sept 2015 issue of Quilting Arts magazine was a description of a fabric painting technique that used watercolour pencils (or sticks) plus a textile medium to intensify and set the colour. It looked interesting, so I decided to try it. I was really pleased with how it turned out.

I outlined some basic flowers using a permanent thin black fabric marker on some plain white Kona cotton. For the red flower I only used my Derwent Inktense watercolour pencils to colour the petals, then painted on textile medium (Folk Art Textile Medium ‘Plaid’ 794 [http://www.plaidonline.com/folkart-mediums-textile-medium-2-oz/56/794/product.htm]), keeping within the lines. Immediately it was added, the red intensified, and there was no bleeding outside where I’d painted the medium.

I needed to test it with other colours — both a small distance from each other and blended — to see if the textile medium would ‘run’ the colours into each other. It didn’t. I also needed to test how well just water would do with the watercolour pencils on the fabric — there’s no point in paying for textile medium if water out of the tap works just as well!

Below is a photo of my tests. I was very pleased with how the textile medium intensifies the colour AND fixes it so that you get no blending of colour with the brush, nor bleeding into other areas of the fabric. You can blend the watercolour pencils (or Inktense watercolour blocks) before applying the medium, or after (when it’s still wet) — it won’t cause the colours to run into each other. And with the textile medium there’s no ‘bleeding’ into the fabric either, as there is with water, which failed miserably in this test (see the photo for how badly the water did with this fabric).

(Click on a photo to view it larger)

P1040832

The next photo is of part of a piece I decided to paint with this technique. I used Frixion Gel pen to mark my lines (yes, it irons out, even through the dried colour and textile medium), then shaded the line with black Inktense watercolour pencil, shading only near the left edge. The top part of the photo shows the immediate change in colour with the application of the textile medium (I didn’t shade the right edge of the column as I wanted it to fade off to light grey. The lower half is the watercolour pencil shading.

P1040835

You don’t need to apply much colour. In fact, I’d advise you apply a small amount to start with. You can always add more when the fabric is still wet. But it would be impossible to remove the excess colour if you applied too much.


Cleaning out

26 07 2015

We moved to our current house 5.5+ years ago, and prior to that we had a BIG move from a house we lived in for 16 years in Perth. At the time of the big move, I culled a lot of paperwork from my personal files. And did the same again, though on a smaller scale, when we moved here. I had some time so decided to tackle my personal file drawer.

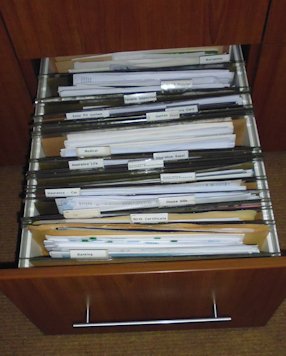
The piles of paper below are what I removed from the drawer! The left pile will be shredded and given to friend for her compost, while the right pile goes into the recycling bin (it’s shiny paper mostly, and doesn’t do well in compost).


P1040824

The drawer STILL looks full, even after removing all that paperwork! I guess I should do this sort of cull more often than every 5 or so years…

P1040825


Having fun with yarn!

20 07 2015

P1040812

This past weekend I travelled to Perth to do a 2-day Yarn Couching workshop with Helen Godden, Australian Handi Quilter Ambassador and co-inventor (with her father) of the couching feet for Handi Quilter machines. And a darned nice person, too! (If you think you’ve heard Helen’s name before on this blog, you have — she was one of the co-hosts of the QuiltVenture trip to the US I did in Oct/Nov 2014.)

I purchased the couching feet when they first came out and had done a bit of experimenting with them. But I didn’t feel very confident using them and had a few issues with starting and ending, and with the thread skipping the yarn. So I invested in learning the proper way to use these feet from the designer of them — and had a ball of fun doing so! I was in the second-ever class in the world that Helen has run on this technique (the first class was the two days prior), and so it was a learning experience for us all — Helen got lots of examples of how we all interpreted the same pattern she provided, and we got the benefit of her knowledge and artistic flair.

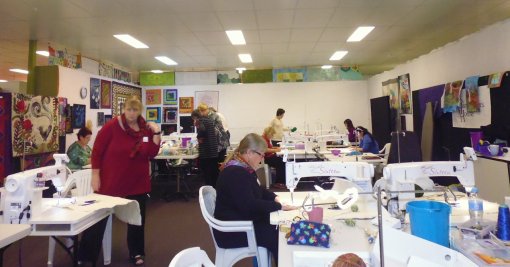
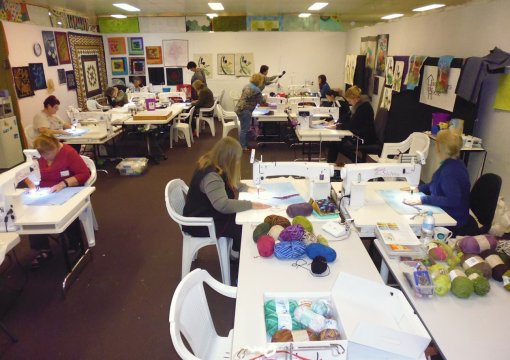
There were 16 ladies in the class (14 on their Sweet Sixteens, the same machine I have) held at Handcrafters House, and all were very generous in sharing their yarns. My yarn stash was pretty small as I don’t knit or crochet, but I was able to supplement my meager supplies with yarns from others.

The technique is basically thread painting, but with yarn instead of thread. As I’ve done a lot of thread painting, I was comfortable with that side of it. It was the hints and tips and ‘best practice’ stuff I was there for. And we got plenty of that! Helen will be releasing an online class soon on this technique (including patterns), and I highly recommend it if you have the Handi Quilter couching feet but aren’t sure what to do with them or how to use them.

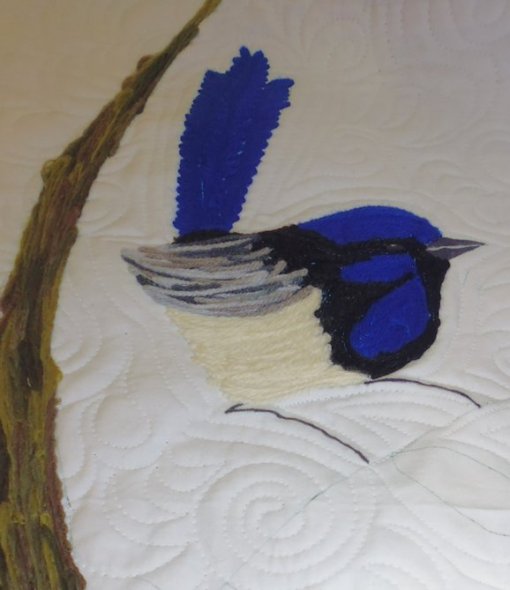
On Day 1 Helen showed us the basics and we did just enough practice to feel comfortable before yarn couching the blue wren pattern Helen gave us.

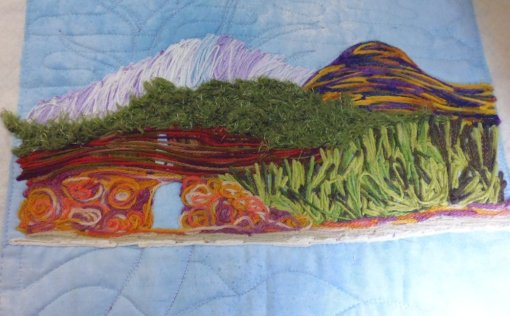
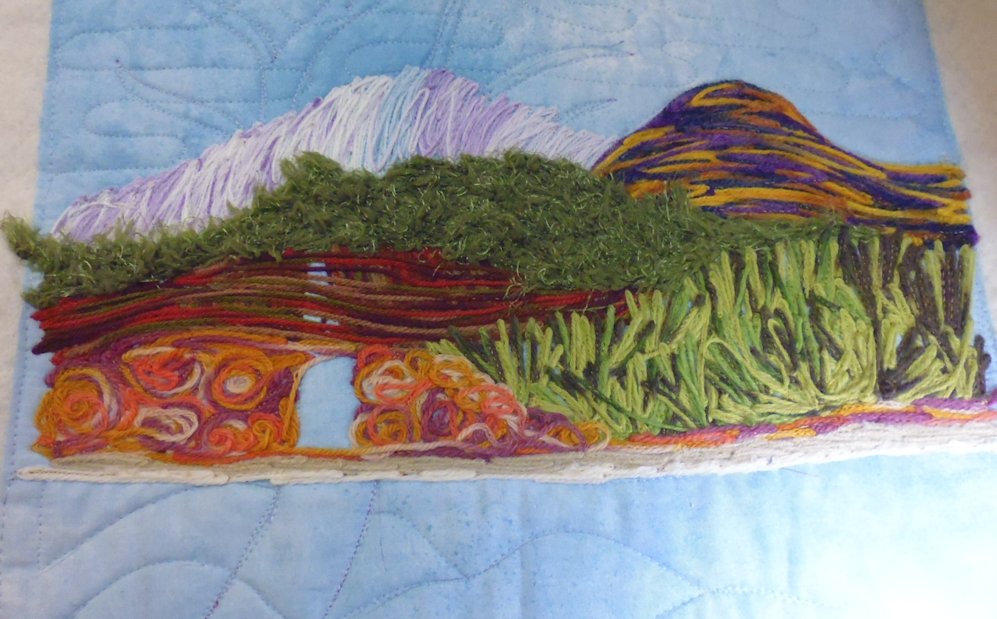
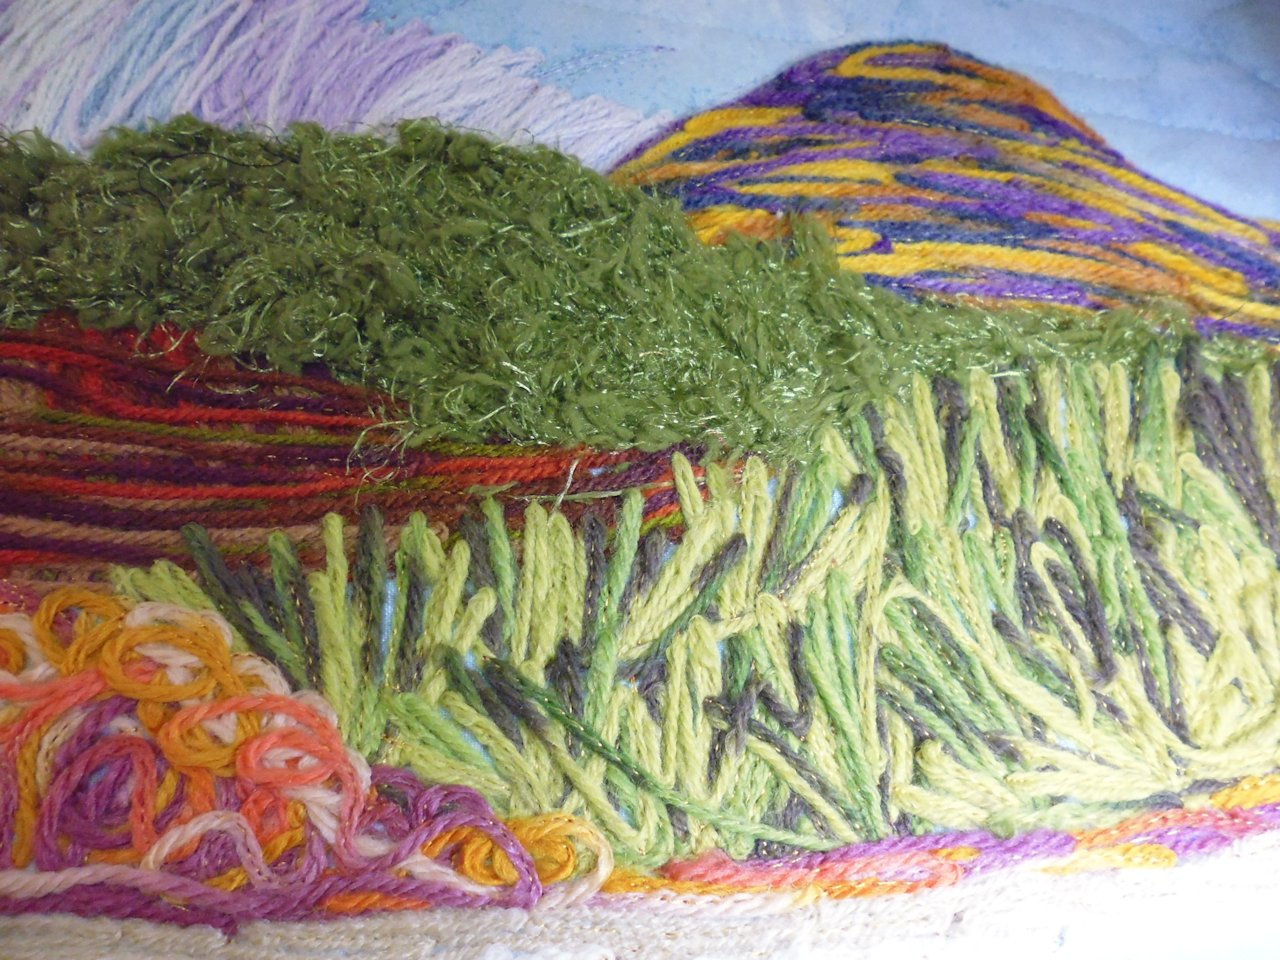
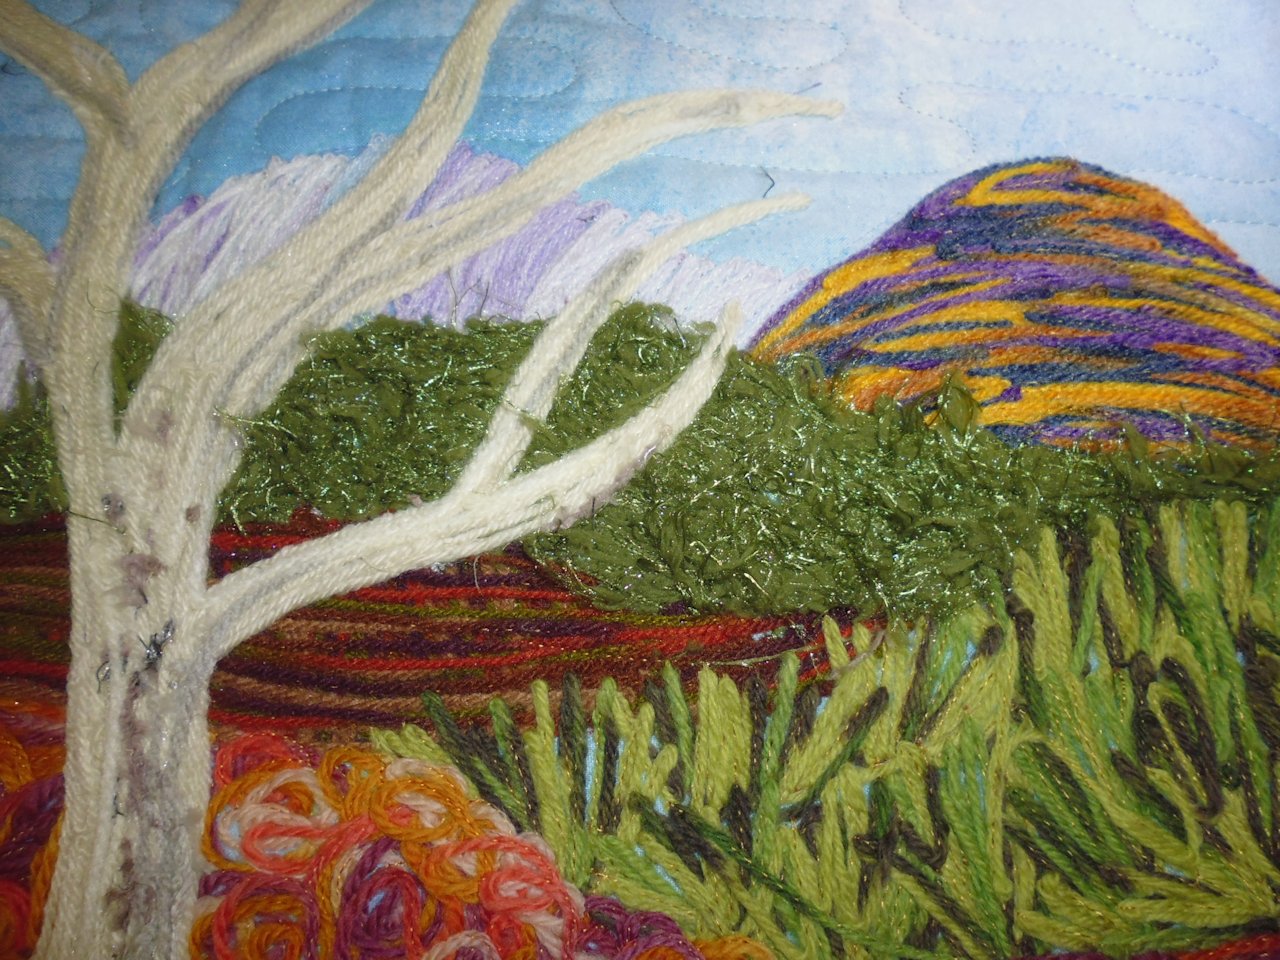
Day 2 saw us all interpreting Helen’s landscape pattern. I added a snowy mountain and water to mine! (This art quilt is now available for sale from my Etsy store: https://www.etsy.com/au/listing/618938579/australian-desert-art-quilt)

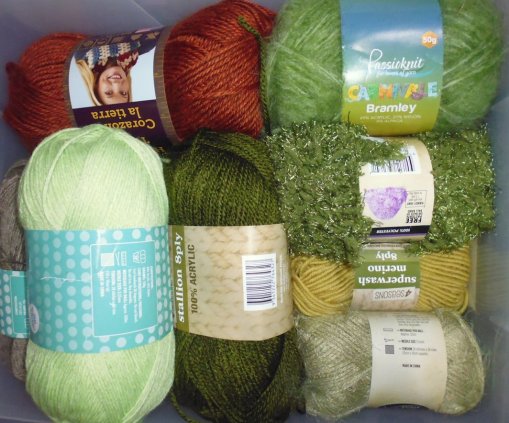
The day after the course finished, I went to my local Spotlight and stocked up on yarn — fortunately they had a 40% off all yarns sale on at the time, so I was able to make good use of the dollars I spent. Maybe I’ll get to use them now that I have lots of ideas and inspiration from Helen! I’m hooked!

(Click on a photo to view it full size)

The wren

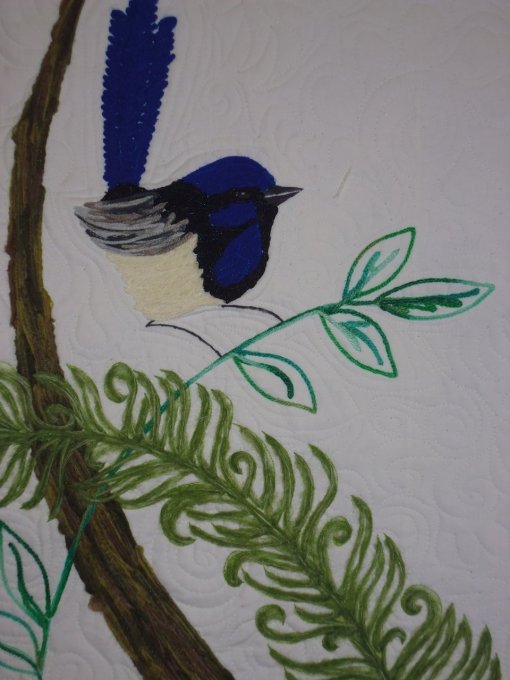
The pattern markings were done with a Frixion pen, which magically irons out; the beak, eye, and legs were done with a Sharpie; everything else about the bird and the leaves was couched yarn; the background was quilted prior to couching the bird and leaves.
P1040797

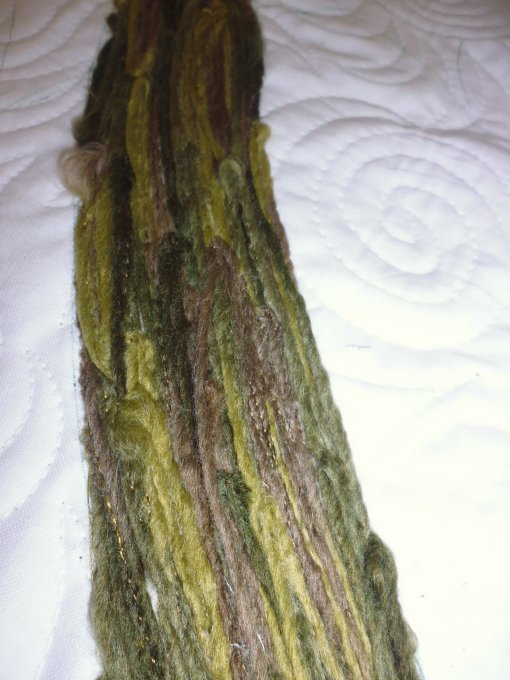
For the long flat leaf, I used a knobbly variegated earthy green yarn — I really liked the effect, but I think it was a bit heavy for the pattern. I could see myself using this sort of yarn in a forest or jungle background scene, or for reeds or rushes in a foreground. If you look closely, you can see the thread I used to secure the yarn to the quilt top.
P1040798

I LOVE the yarn I used for the fern — it was soft and fluffy and had a cream core, which stitched out as veins in the fern leaves. I found some of this yarn at Spotlight, so have now purchased my own ball of it!
P1040800

A hive of industry

P1040799


P1040809

The landscape piece

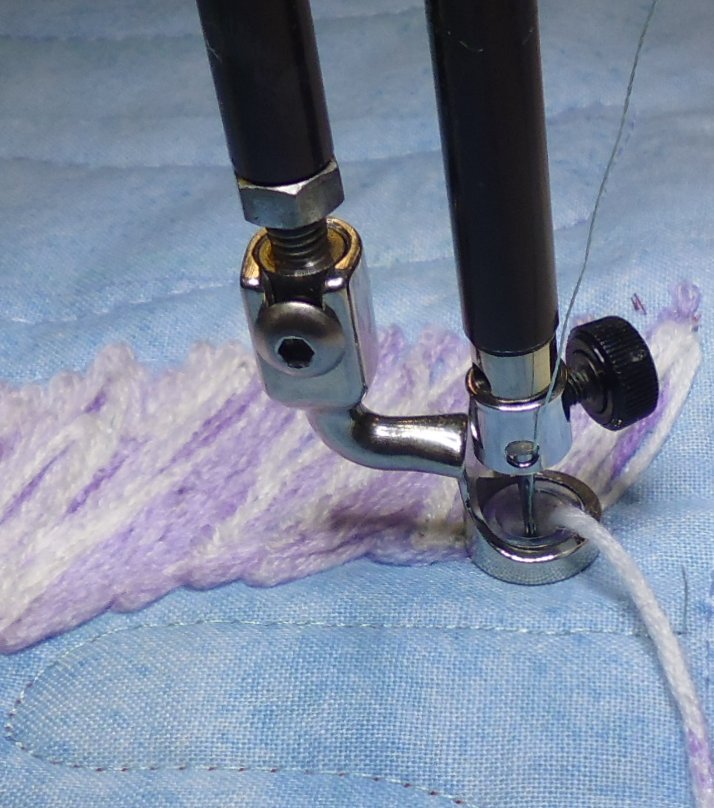
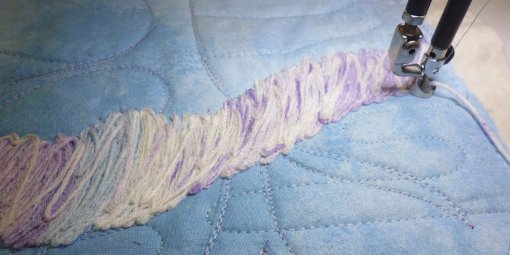
After tracing the pattern onto our sky fabric, creating our quilt sandwich, and stitching down the main elements of the apttern to stabilise it, we started couching the elements furthest away — the hills in the background. I used a variegated 4-ply baby-soft yarn in creams, soft blues, and mauves for the snowy mountain range. The close-up of the needle shows the special plastic surround of the couching foot and the hole that the needle, thread, and yarn go through.

P1040806

P1040807


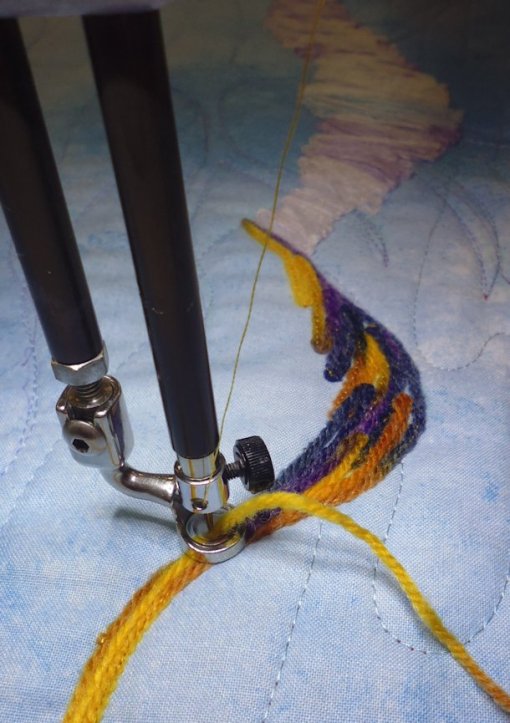
I stitched the front hills with a variegated 8-ply purple, blue, orange, brown, and yellow yarn. Helen thought they looked like The Bungle Bungles (Purnululu)!P1040808
More layers added…
P1040810

P1040811

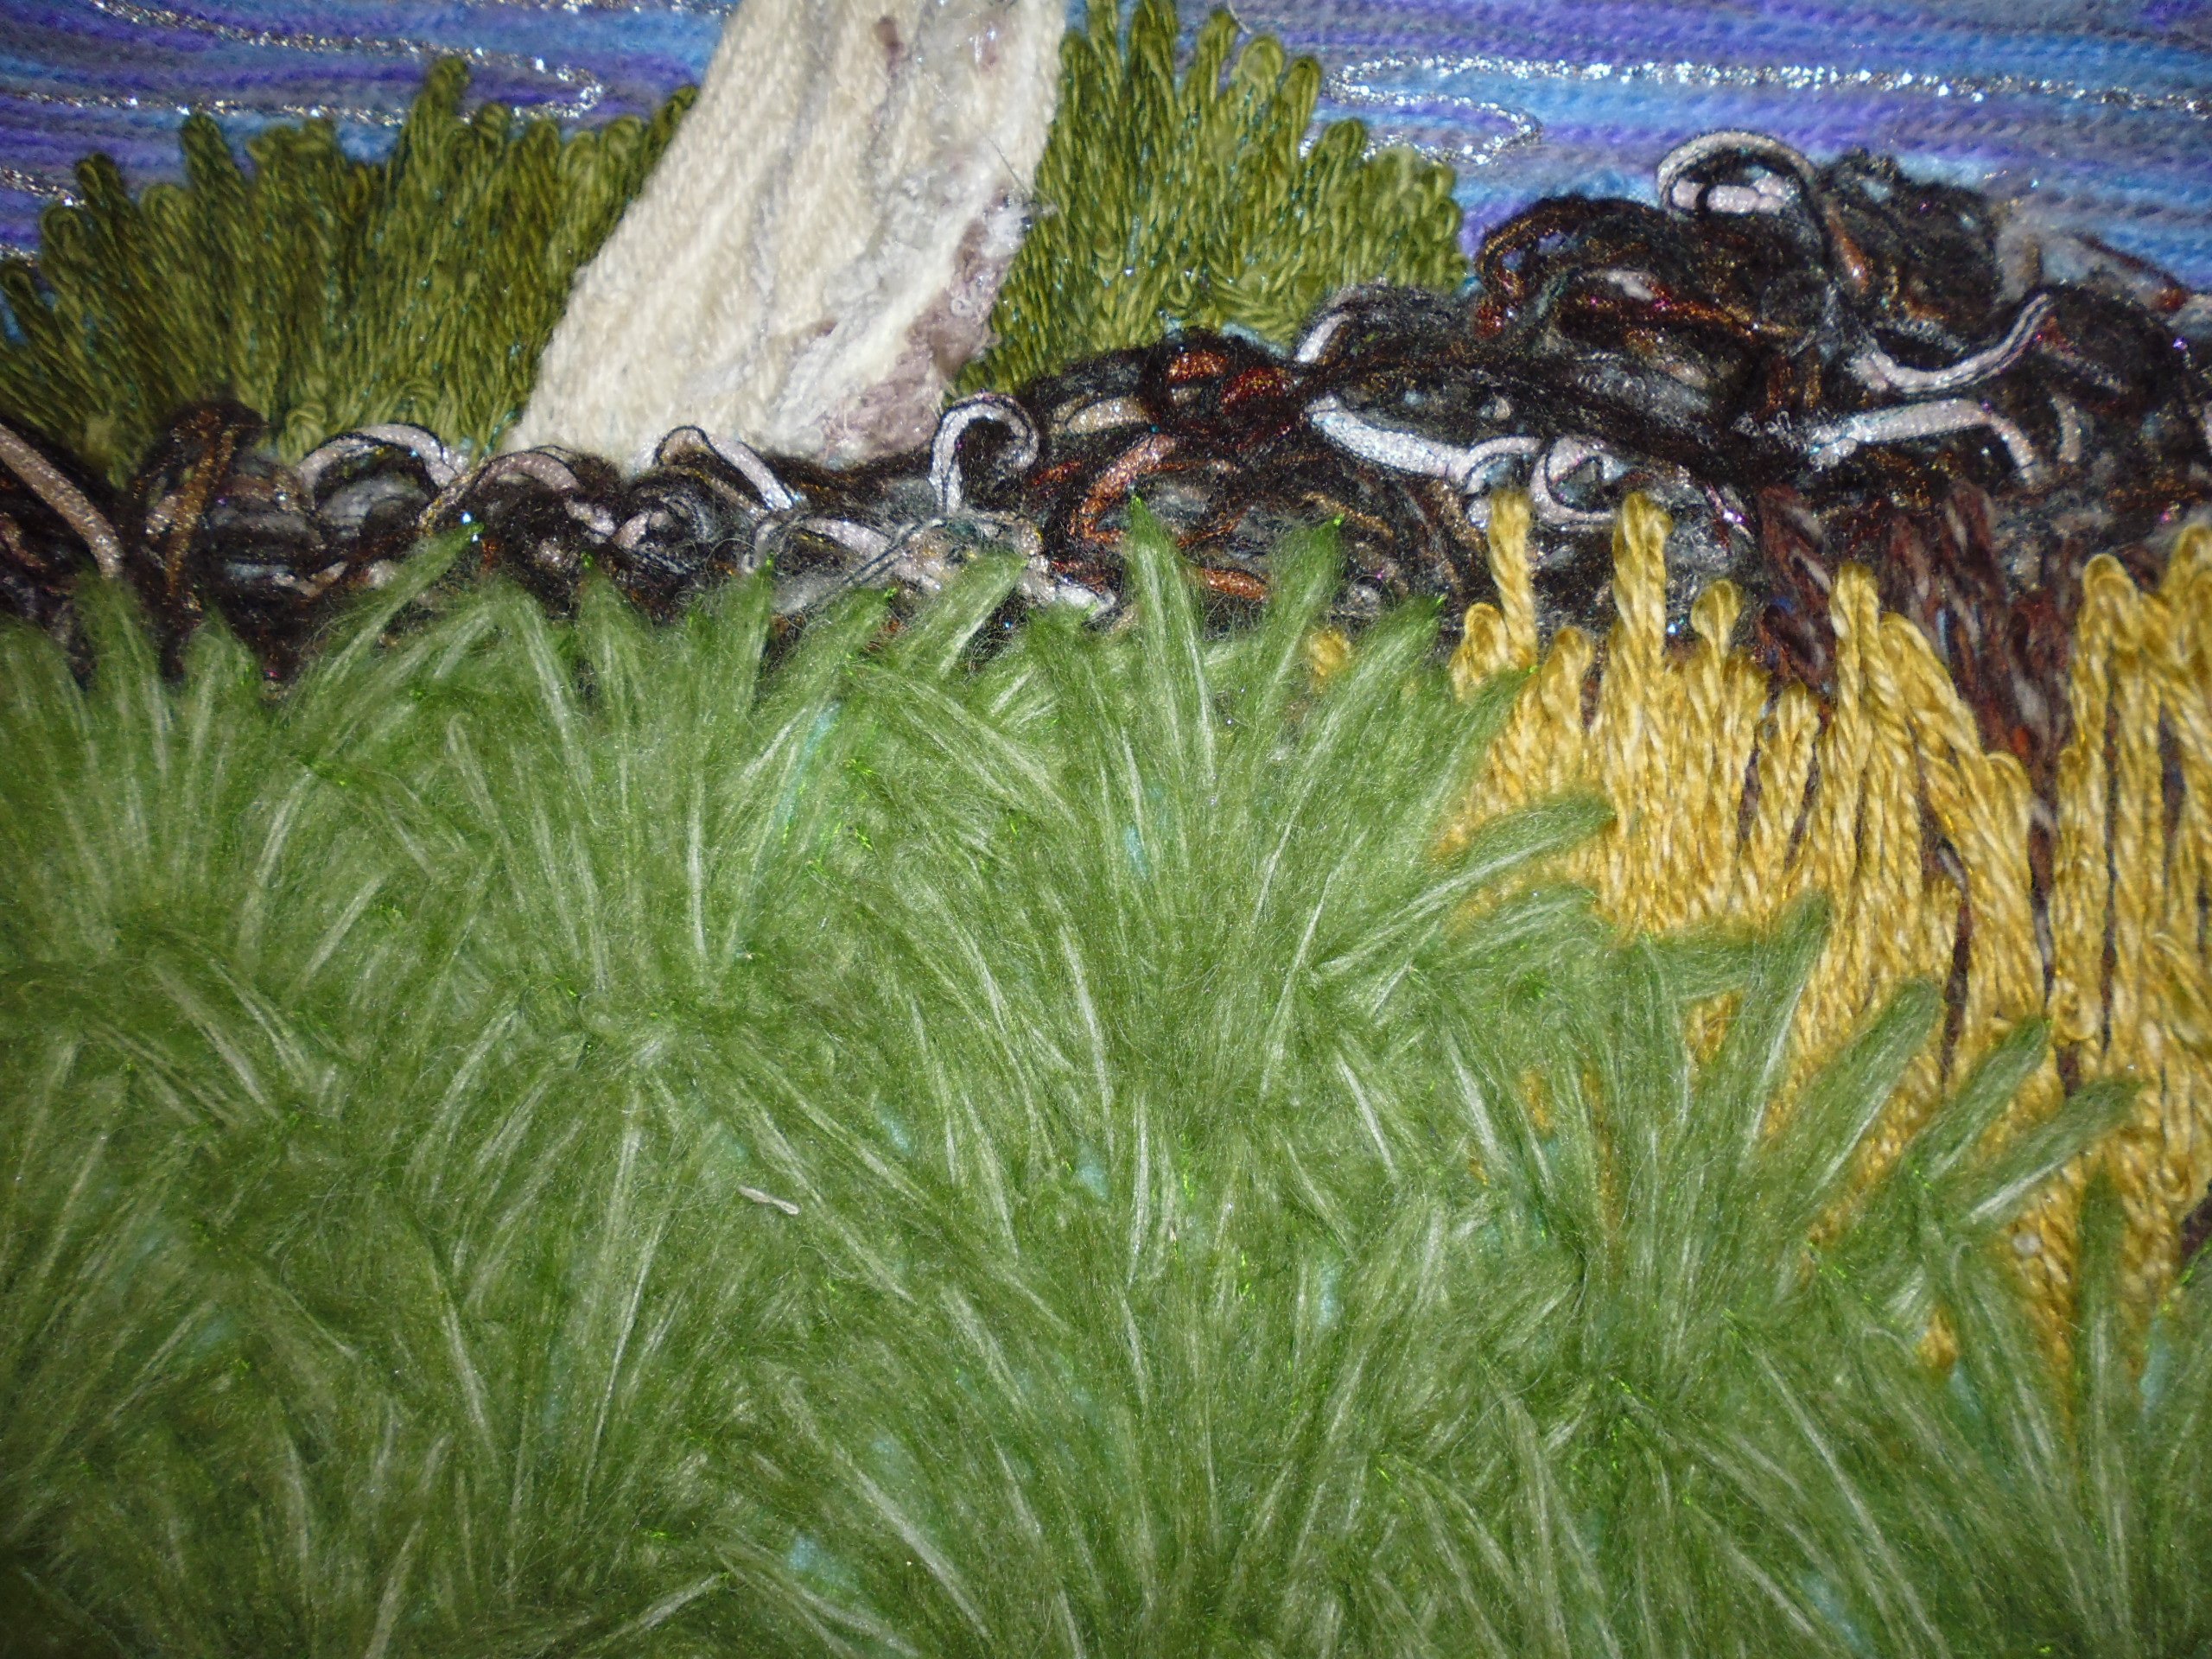
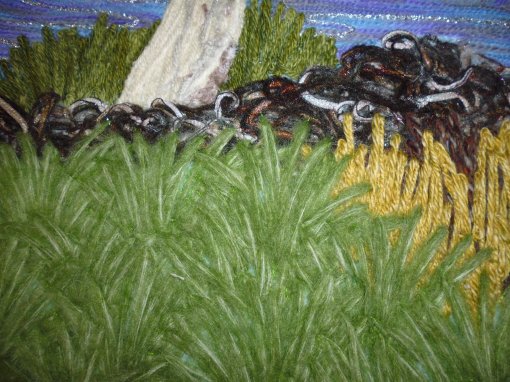
After adding the water, the reeds behind the tree, and the tree, I stitched the foreground elements. I was REALLY pleased with the effect for the plants right in the foreground — I used the same soft furry green yarn I’d used for the fern on the wren piece. Again, the cream core of the yarn showed through as veins on the leaves. LOVE that yarn!
P1040813

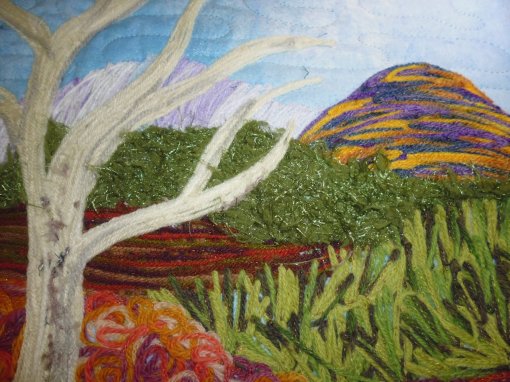
The tree was a bit of a disaster that I rescued from awfulness 😉 I started by stitching it in cream, then added a furry brown, black, and grey yarn as shadows. It looked just awful, so I unpicked most of it and gave the bits left on the front a haircut, leaving just a few to add some character to the tree. I then overstitched the tree with some variegated cream and grey yarn and was quite happy with how it turned out. 30 minutes earlier was a different story…
P1040814


The finished piece (prior to ironing it flat and trimming it to size and adding a binding):

P1040812

Yarn stash

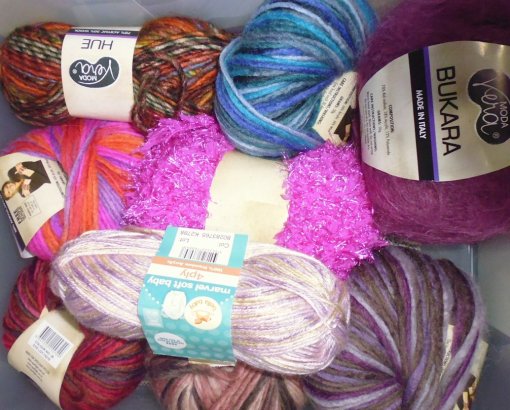
My new stash — yarn!

P1040815

P1040816

P1040817


P1040818

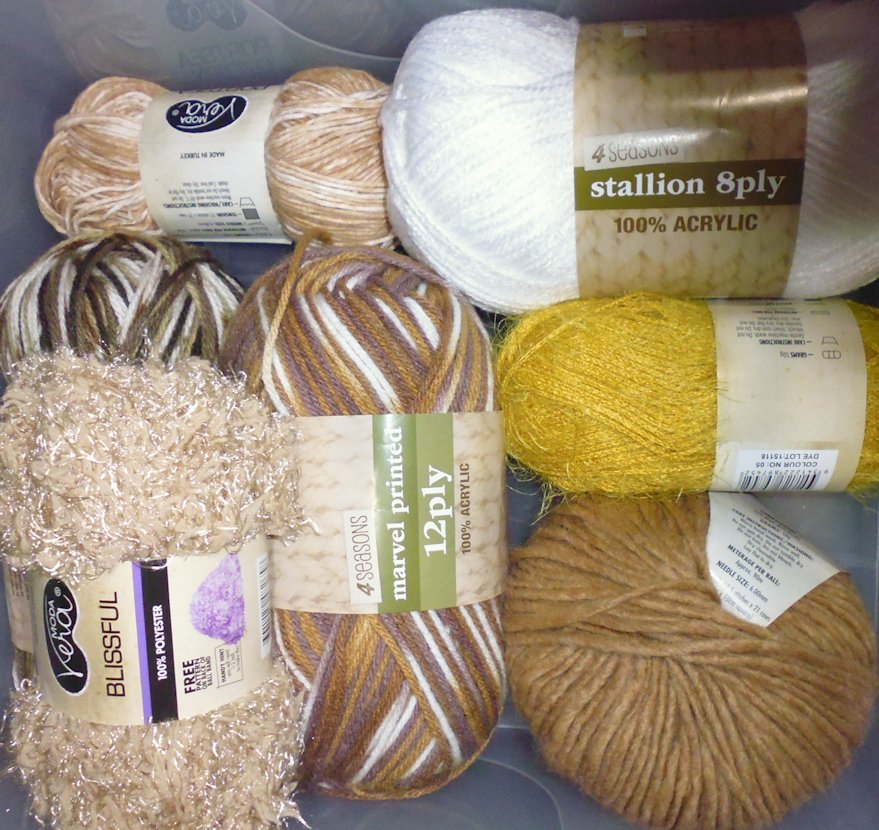
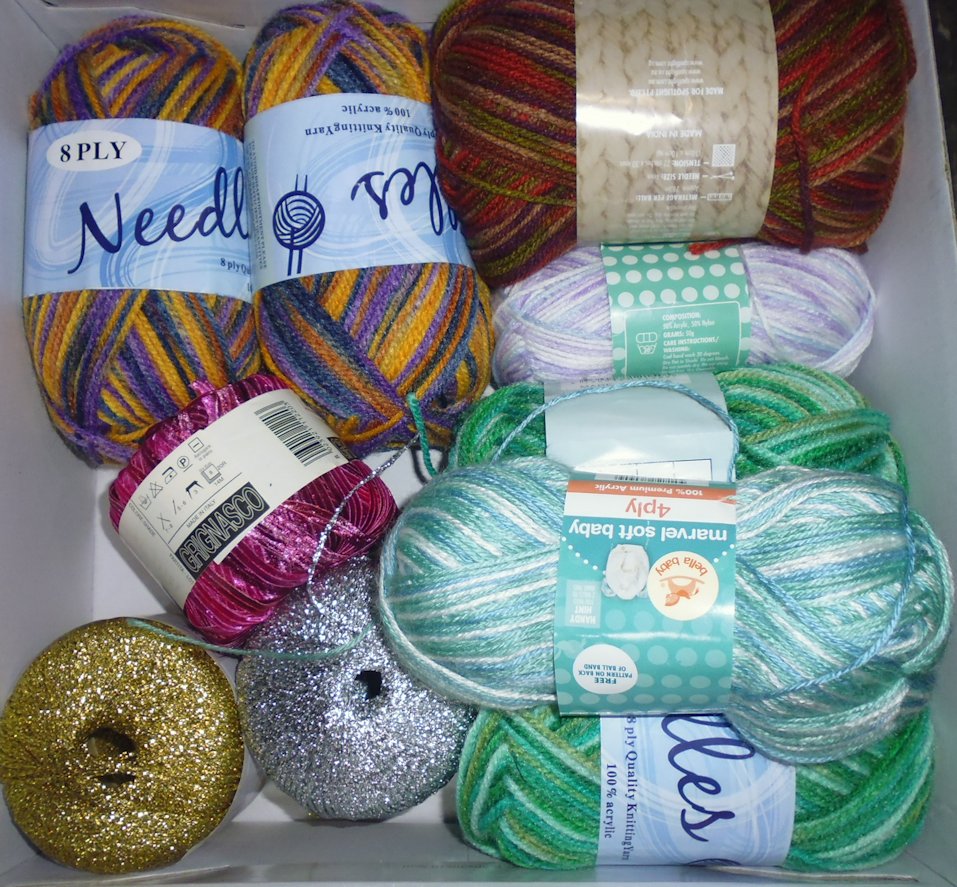
This was my previous yarn ‘stash’ – 8 balls of yarn, 2 of metallic, and one ribbon yarn….

P1040820

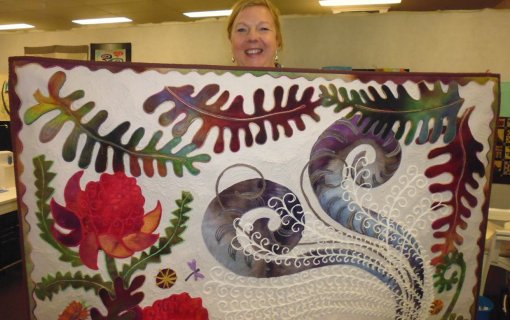
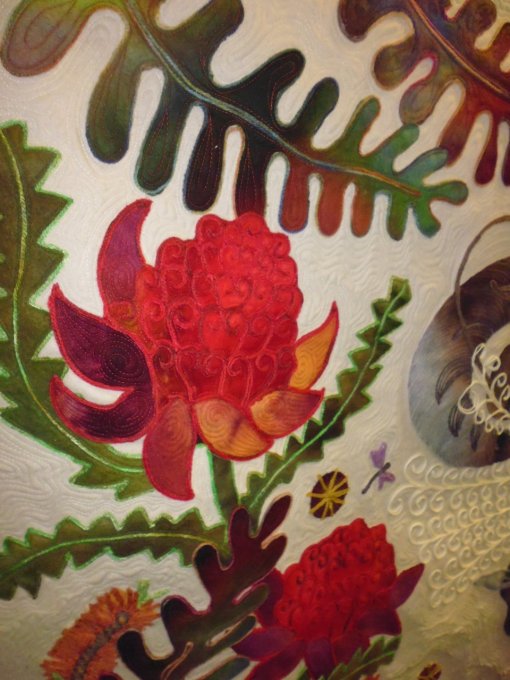
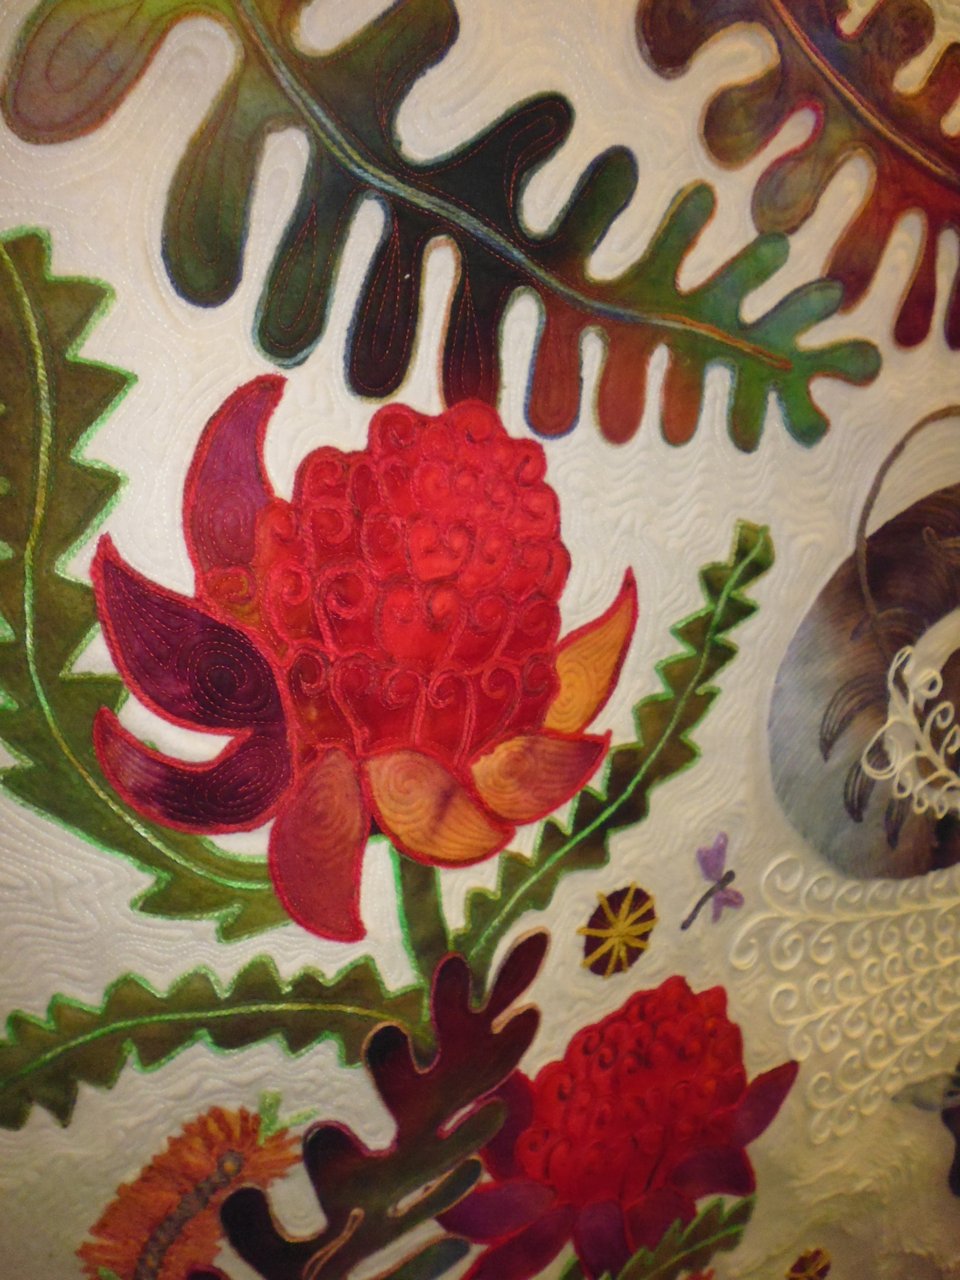
Helen’s lyrebird and waratah quilt

One of Helen’s amazing quilts, with couching emphasising all the main elements and making the lyrebird’s white tail:

P1040802


P1040804

P1040803

P1040801