It took two months from signing the contract to getting our solar panels installed. A lot of stuff happened in between, so it’s not like anyone was slacking off in that time (that’s what you get for government [federal and state] intervention and approvals…). I took some progress photos today as the three guys did the installation. I didn’t think the installation would happen as the weather forecast for today was for storms, heavy rain, and strong — even gale force — winds.
But the guys turned up on time at 8 am (that got them 10 big gold stars from me, right there!) and got straight into the job. They were all done and about to drive out around 2:30 pm just as the storm hit, so they were able to work on the metal roof without having to deal with the slipperiness that rain would have caused. But they did have to deal with the wind, which fortunately was coming from the opposite direction to the side of the shed they were working on.
We have a BIG shed (about 6 m x 12 m), and there’s lots of room inside for things like the inverter. There’s also an electrical sub-board there too, so it was easy peasy for them to install the 20 panels on the shed. They installed them in landscape mode, not portrait like most installations, as the roof space on top of the shed meant they could get the 20 panels installed evenly and neatly that way.
Oh, and they earned another 10 gold stars for cleaning up after themselves (roof, driveway, inside the shed… though they lost a couple for not cleaning up after themselves in the shed’s toilet…), and some more gold stars for being friendly and polite and explaining everything I asked about (and anyone who knows me knows that I would have asked LOTS of questions!). And another set of gold stars for removing an old (unused) TV antenna from the shed that they said would cast a shadow on one panel in summer, reducing its efficiency — so even though removing that antenna wasn’t part of their brief, they did it for me at no extra charge. One final set of gold stars was for them not having to turn the power to the house off at ANY stage of the installation. The only power outage we had during this whole process was for about 10 to 15 minutes some weeks ago when Western Power swapped out the main electricity meter.
Even in the short time between the system being turned on this afternoon and the storm hitting, we were producing more electricity than we were using — and that was on quite an overcast day. Of course, the proof will be in the next couple of electricity bills, which should be substantially less than the current $250 to $300 per month that they are now.
Here are progress photos of the shed before installation, during installation, and when it was all done:

Eastern side of the shed first thing this morning; the main shed roof is the one at the greater angle — the lower sloped roof in front is the roof of the boat/caravan/car bay at the side of the shed

First of the rail holders getting installed. The weather was good then — just windy.
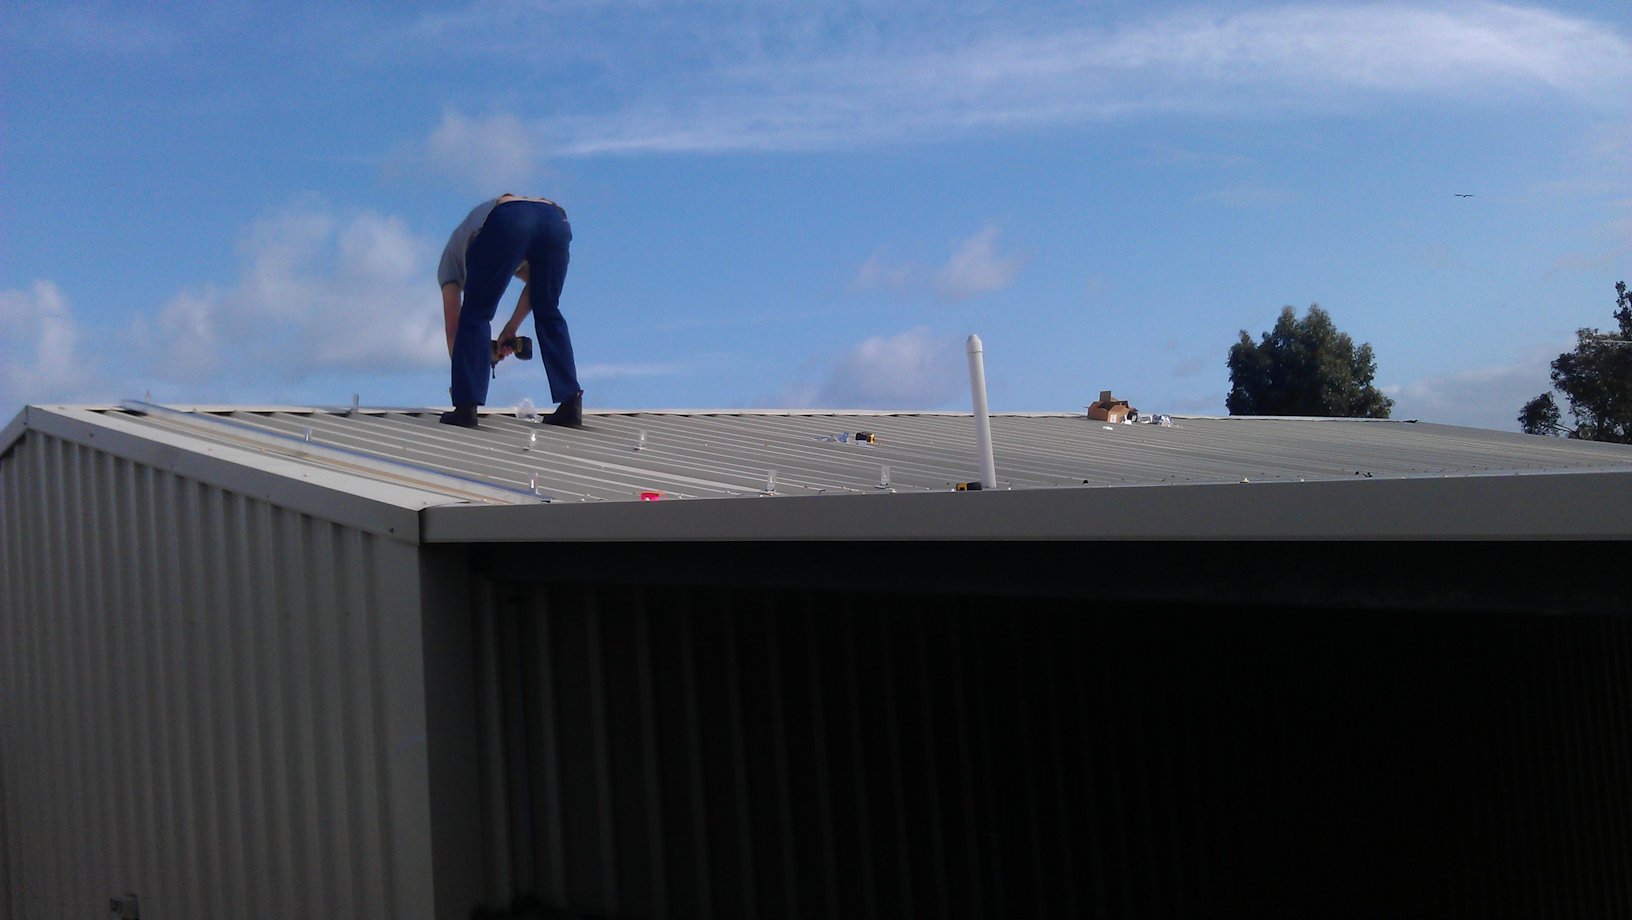
No tradie bum crack! Extra gold stars for that! Note the height of the vent pipe…

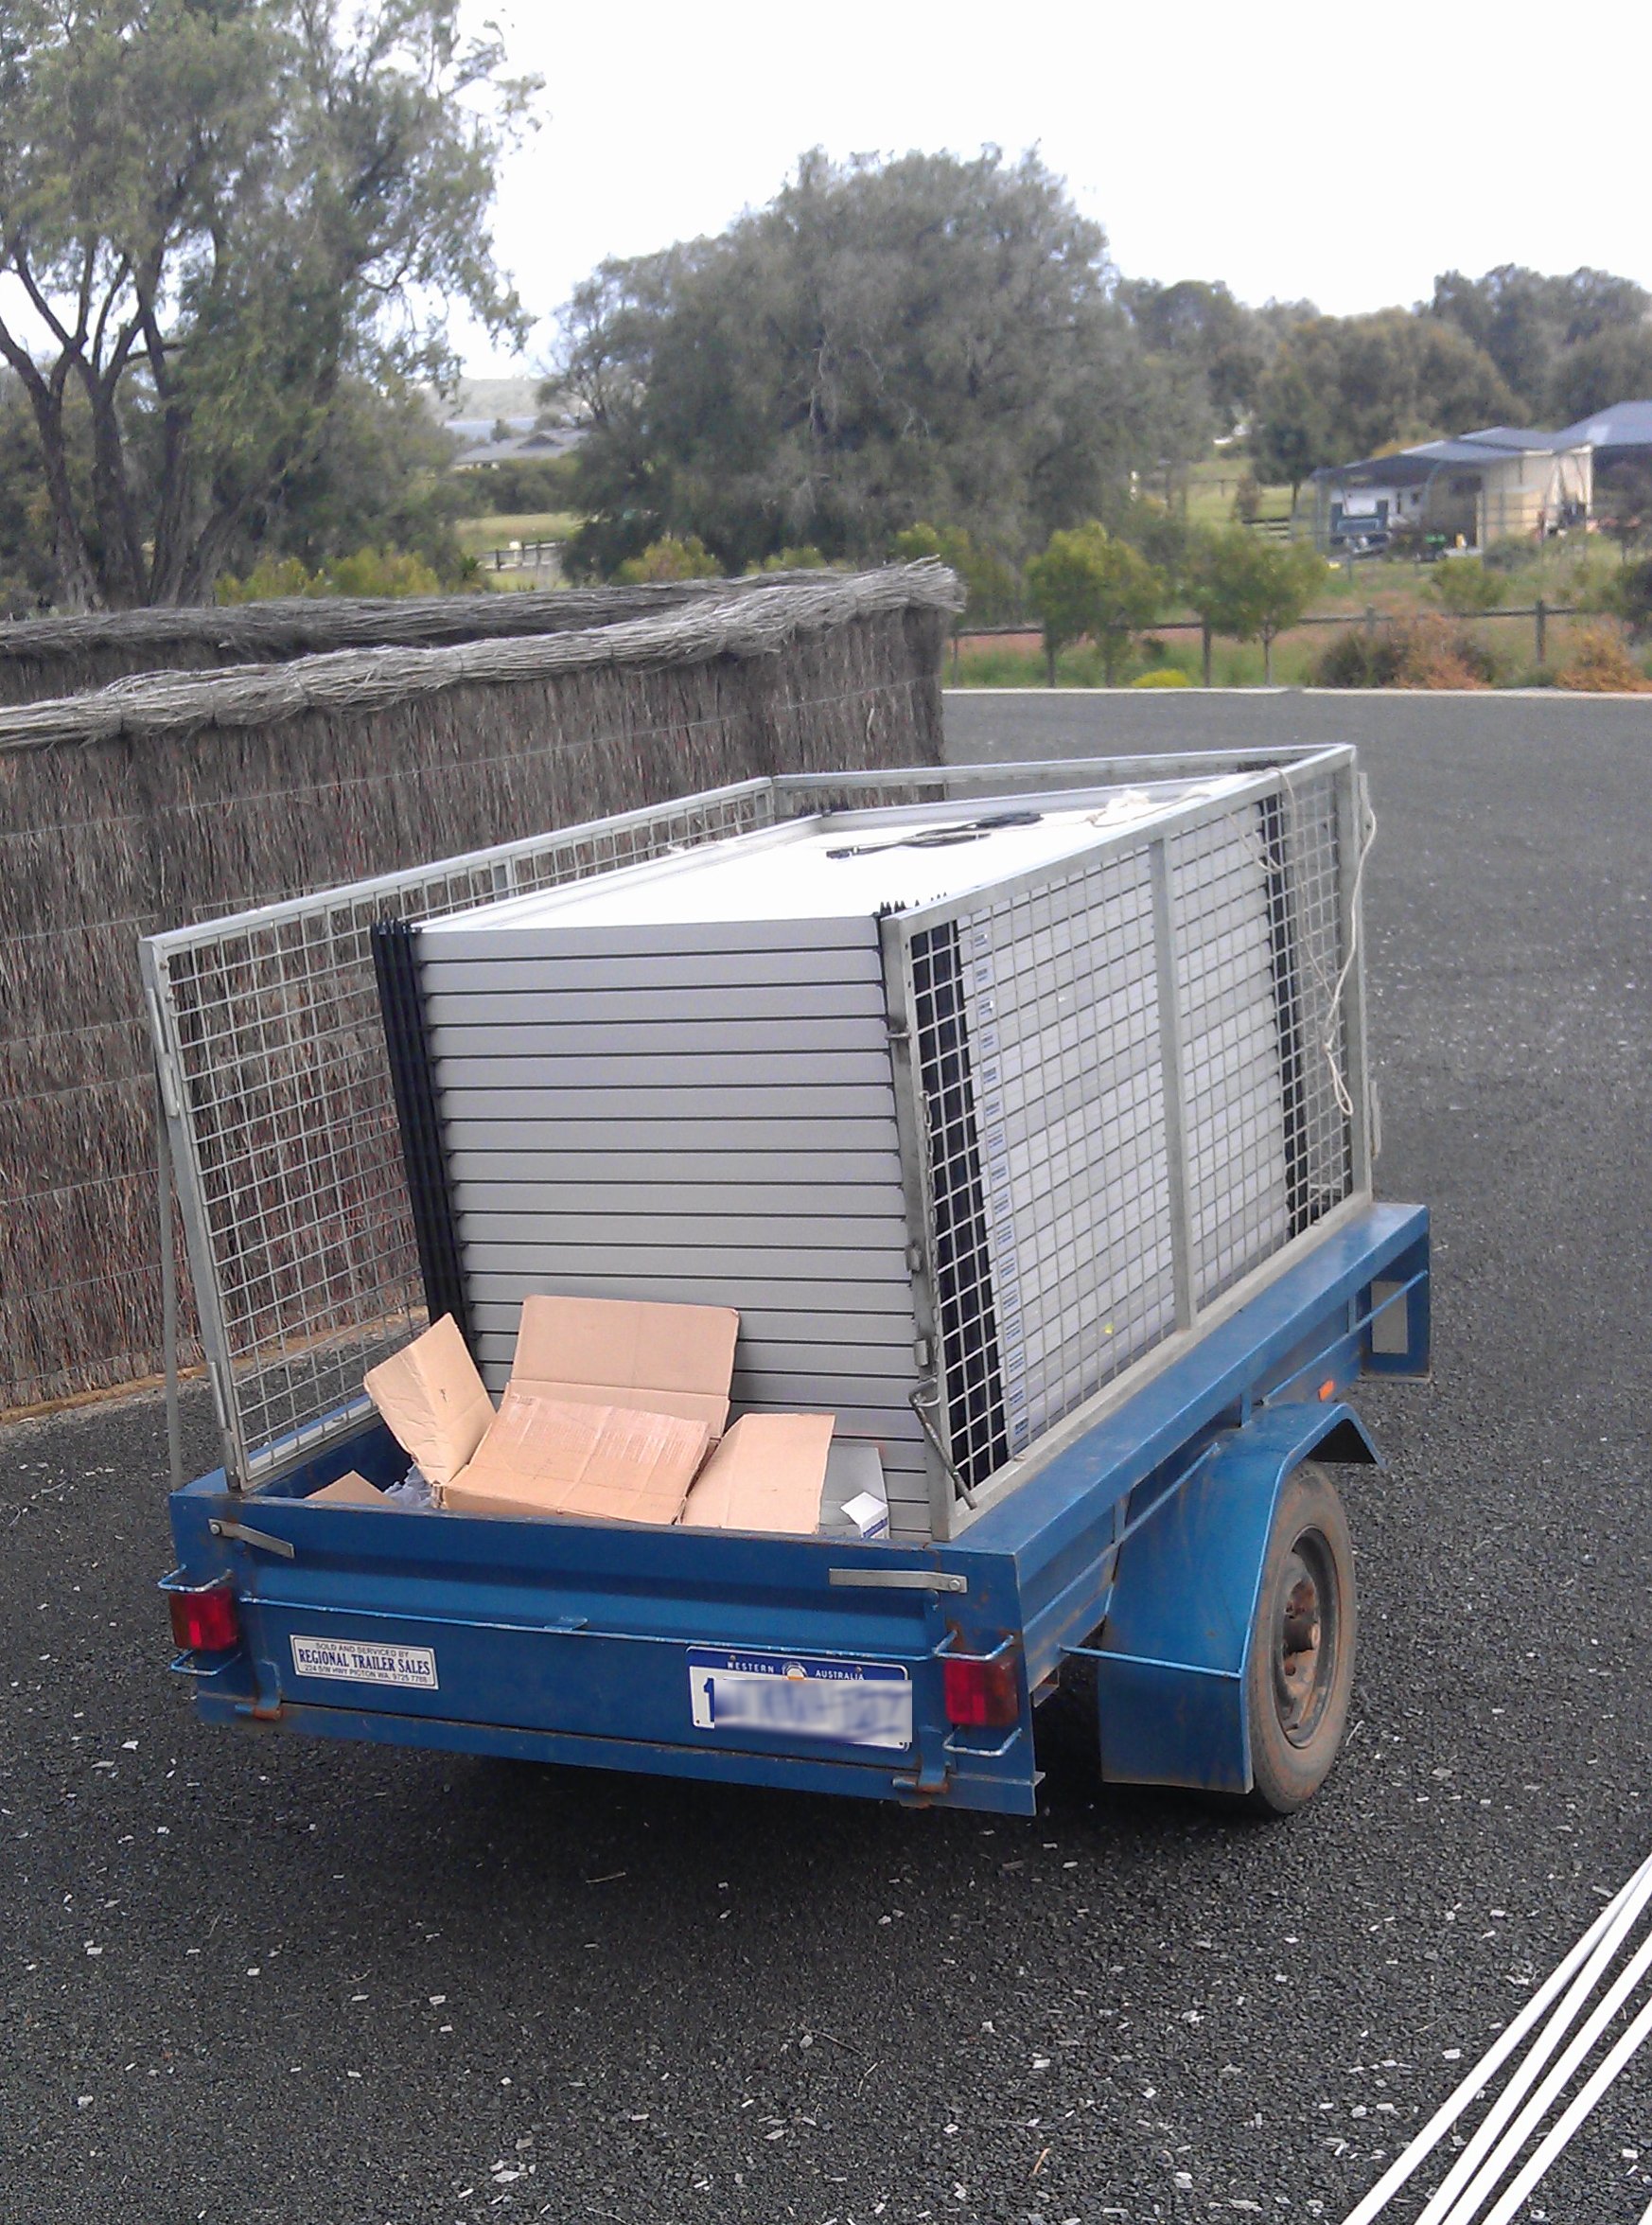
German-made Conergy (division of Bosch) solar panels all stacked and ready for us
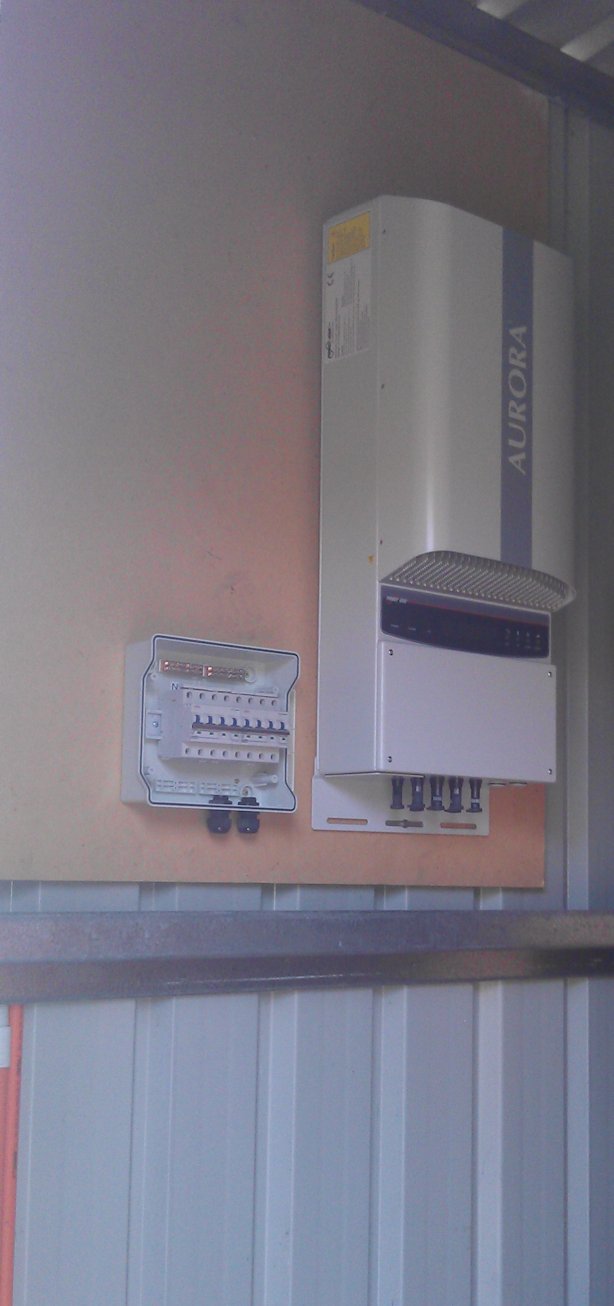
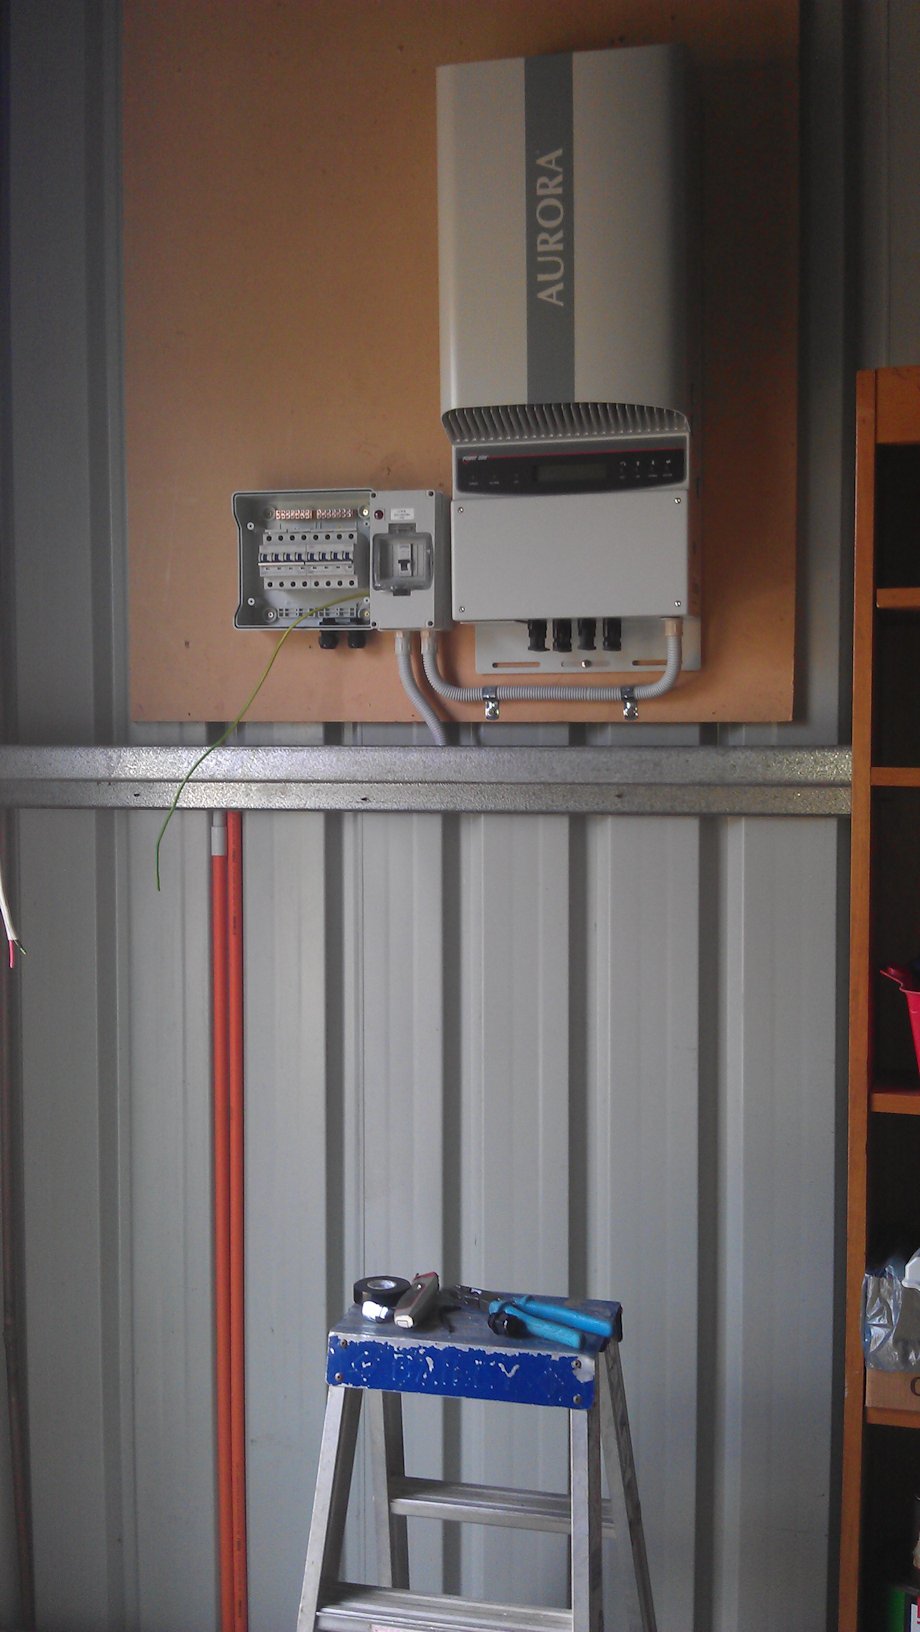
Initial stage of the inverter installation. First they had to install the board it was mounted on…

Now the rails. I like how they used fluoro coloured string for getting their lines straight – much easier to see than normal white or tan string

Progress inside the shed for the inverter installation
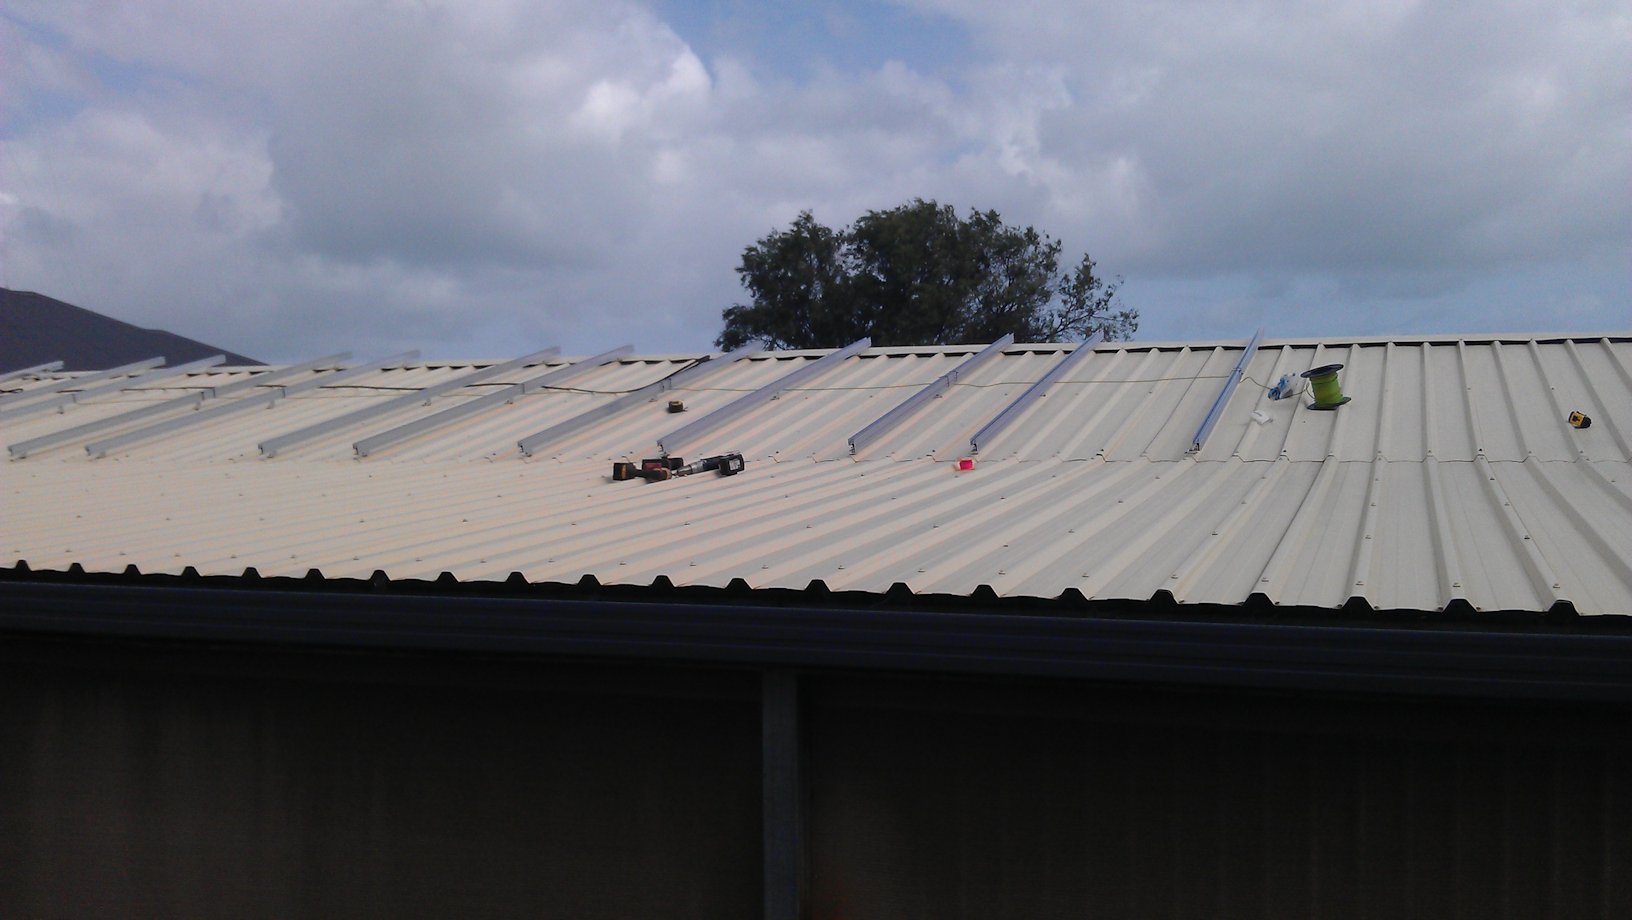

The first nine panels are almost done. Note the threatening sky…

Nine down, eleven to go… Can they get it done before the rain hits?

In this wind, solar panels are like sails…
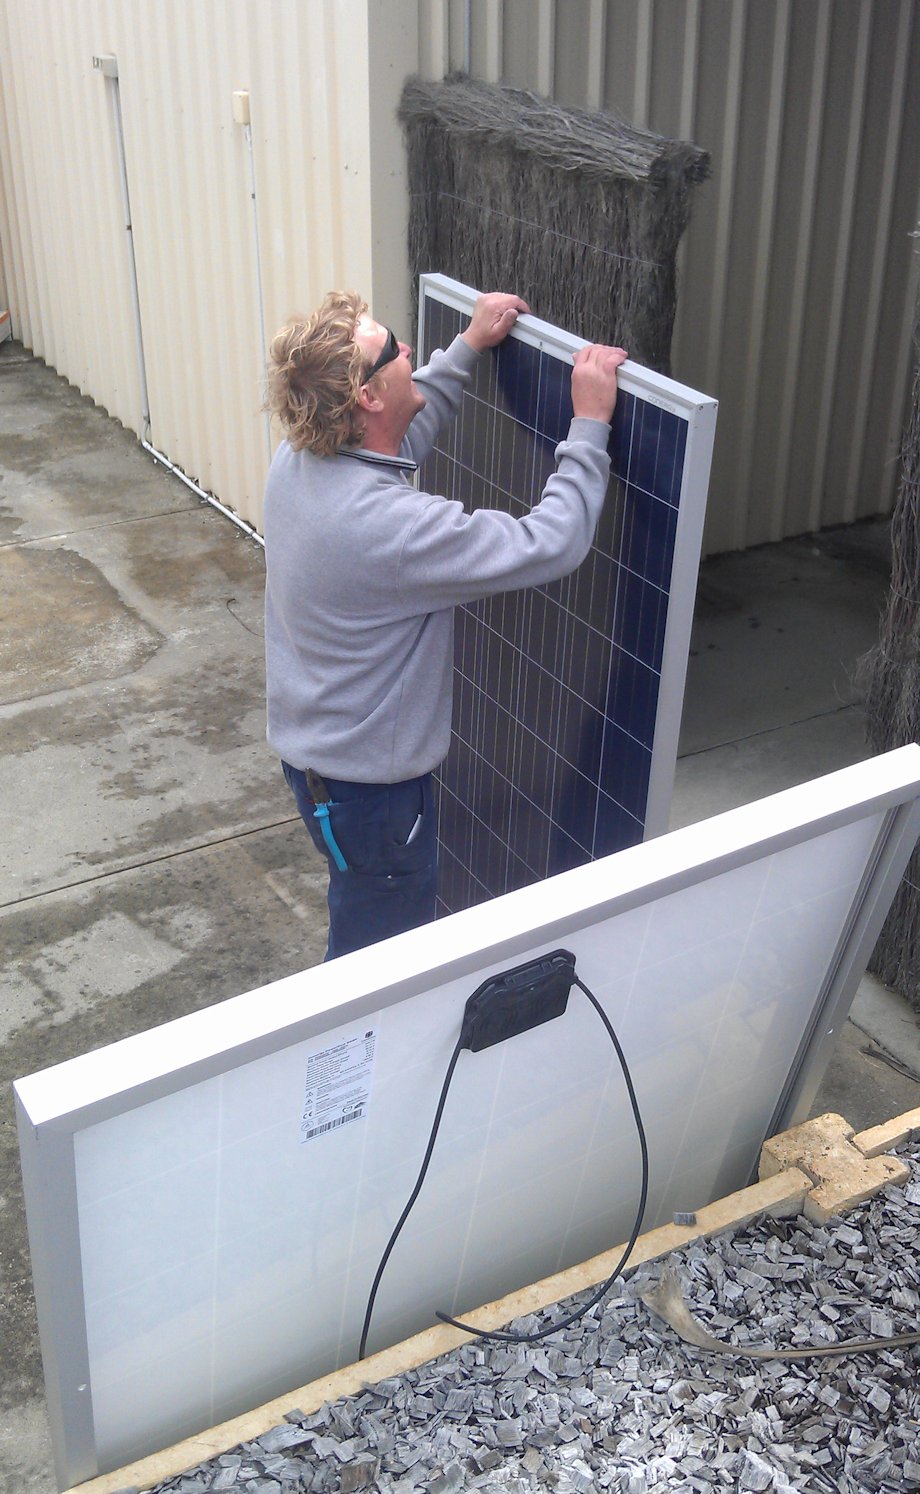
The boss passing up the panels to the young bucks on the roof. He did all the work inside and kept out of the weather 😉
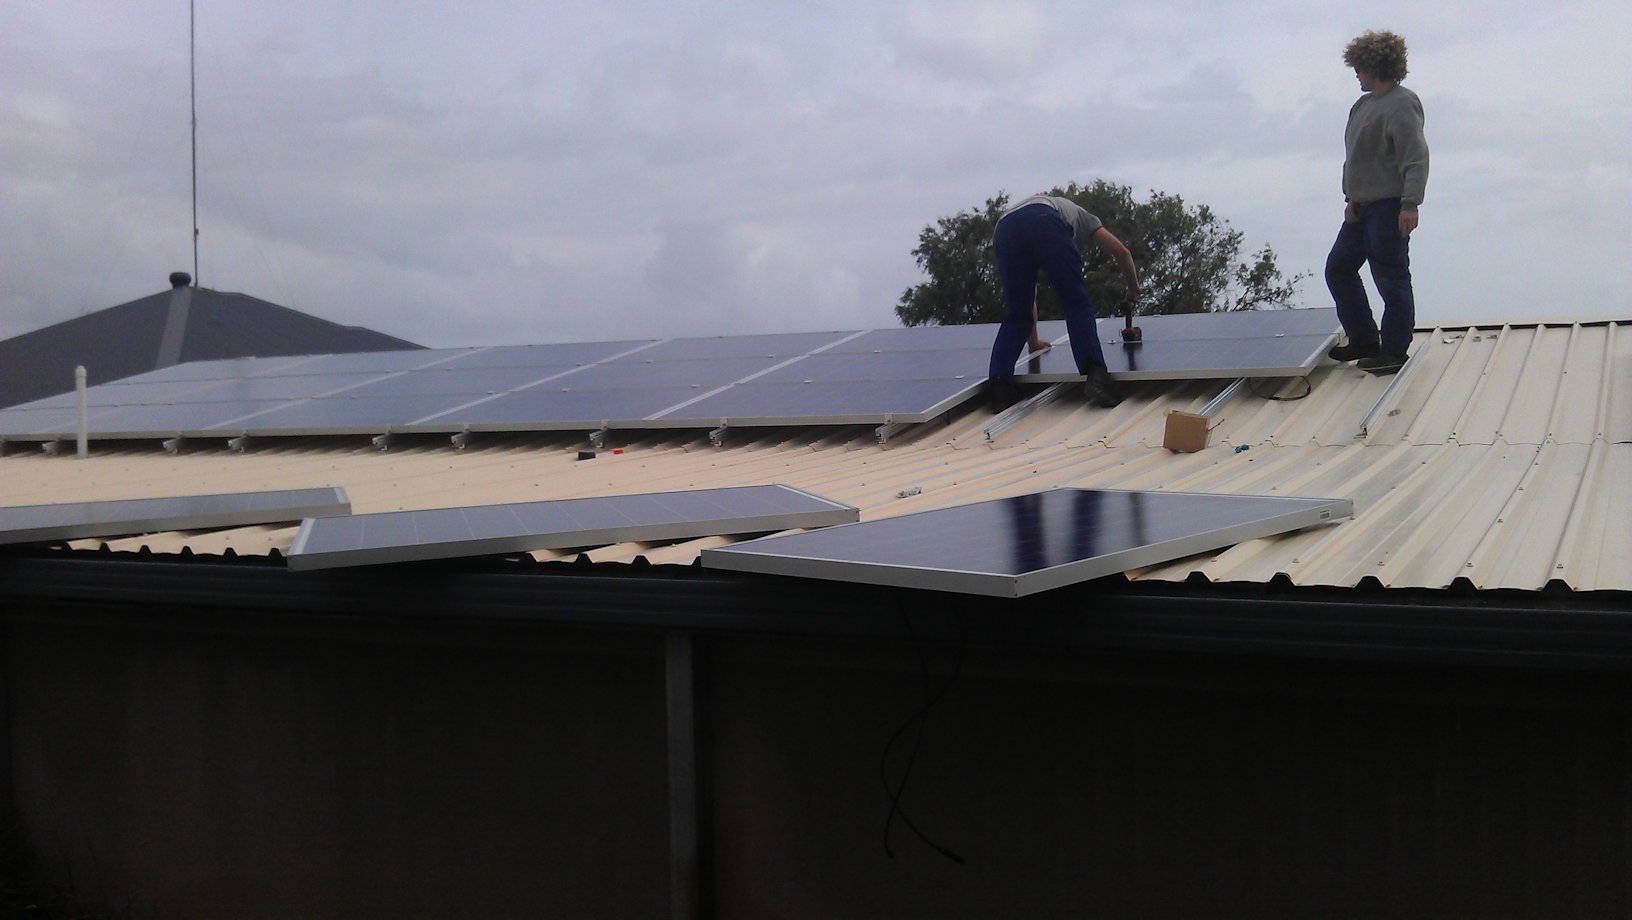
17 down, 3 to go…
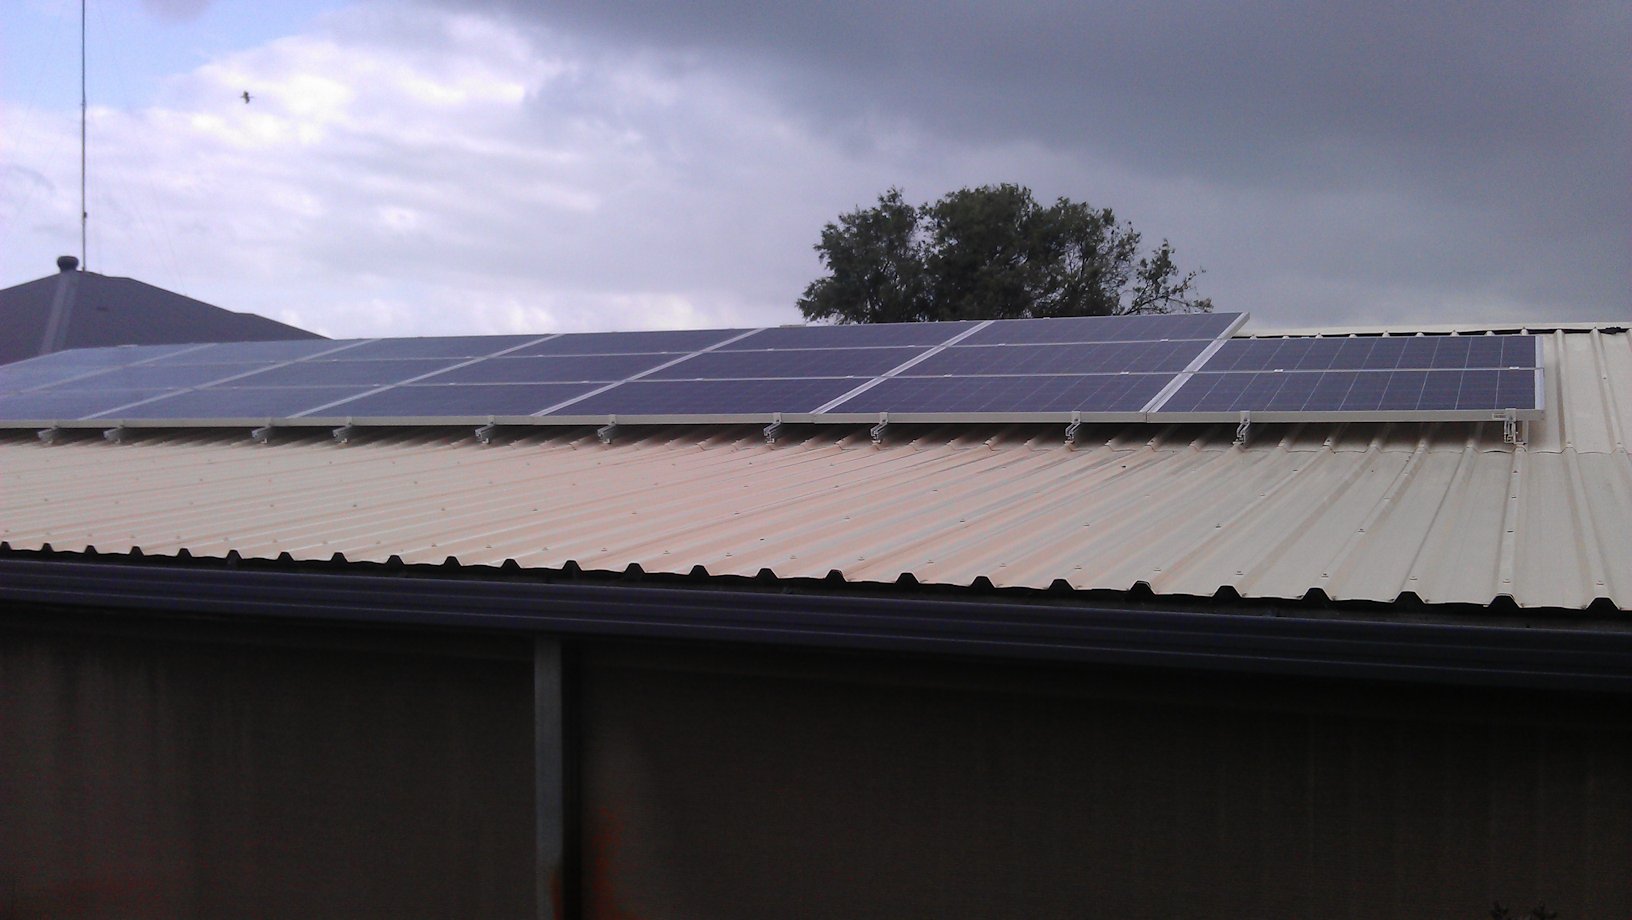
All done!

And here comes the rain… Note the height of that vent pipe now — they cut it down so that it won’t cast a shadow on the panels thus reducing efficiency a tad (more gold stars)
Update (next day): Even with the gloomy, very overcast and stormy weather today, we’re currently producing twice what we’re using. Part of the deal was a ‘tracker’ than lets us know in real-time exactly how much electricity we’re using in the house at any moment, so I know what we’re using and can see on the inverter panel what we’re producing. For example: Usage = 1.4; production = 3.2. Of course, as the days get longer, less cloudy, and there’s more UV radiation, I expect that the production rate will go up even more.
Update 9 September 2013: So far our system has averaged 21 kWh per day, even though it’s only producing a maximum of about 3.4 (of 5) at the highest point in the day (that’s expected to increase to 5 or more in the next couple of months as the sun’s angle changes and the number of hours of daylight increases). I called the providers of the system and the chap on the phone answered heaps of my questions:
- Yes, the solar system powers our house while it is producing power; any excess that we don’t use is sent to the grid. At night and when the output is low (overcast, low light), of course, we’re taking from the grid.
- It’s far better for us to use power during the day when it’s effectively ‘free’ than at night. So, doing laundry, cooking etc. are all better done during the day. And in summer or the depths of winter, it will be better to turn on the air conditioning in the morning to cool/heat the house for ‘free’ and thus not expend as much energy getting hot house cool (or vice versa) later in the day. Working from home helps too, as our computer use will mostly be in daylight hours (though I have a server that’s on 24/7, so only some of its power usage will be ‘free’).
- Over 12 months, a 5 kW system like ours should average 20 kWh (20 Western Power units) — some months will be much more, some much less, but on average 20 kWh per day is expected to be the average. Based on our pre-solar usage of around 31 to 34 units per day, that means that effectively about 2/3 of our daily power will be produced by the system. We may not use all those 20 units per day, of course, so there will still be a bill, which I was expecting — I knew the 5 kW system would not cover ALL our usage.
- He also confirmed that hot days don’t equal best production. In fact, on very hot days the system is less efficient than on days around 25C. The system uses UV light, not heat to generate power.
- Our optimum production time in summer is likely to be around 10 am as our system faces east and is at a low angle. So he encouraged us to do as many powered activities as possible in the mornings, if we could.
- And no, we shouldn’t feel guilty any more about turning on the air con in summer or winter! That’s not to say we should waste power, but more that we should take advantage of the optimum times to use power so that we use as much as possible that’s ‘free’.
Update 31 August 2015: Two years on…
- Total kWh produced since installation = 14,884, which averages out at 20.36 kWh per day throughout the year — rain, hail, or shine. Right on track with expectations.
Update 30 August 2016: Three years on…
- Total kWh produced for the past 12 months = 7,359, averaging out at 20.1 kWh per day for the past 12 months. Again, on track with the expected average output. And this year, we’ve had quite a wet, cloudy winter — much more so than the past two years, so that may be why the average is down just a tad.
- Total kWh produced since installation = 22,243, averaging out at 20.29 kWh per day since installation.
Update 30 August 2017: Four years on…
- Total kWh produced for the past 12 months = 7,542, averaging out at 20.66 kWh per day for the past 12 months. Again, on track with the expected average output.
- Total kWh produced = 29,785, averaging out at 20.38 kWh per day since installation.
Update 30 August 2018: Five years on…
- Total kWh produced for the past 12 months = 5,748, averaging out at 15.74 kWh per day for the past 12 months. In addition to a wet and quite cloudy winter and a very mild summer, one of the isolators was faulty for up to 8 months, not the couple of months I’d thought. When I checked the electricity bills, the number of renewable units fed back into the grid dropped dramatically around January 2018, which indicated that the system wasn’t producing as expected.
- Total kWh produced since installation = 35,533, averaging out at 19.45 kWh per day since installation, so just a tad under the expected 20 kWh, despite the fairly big drop this year. This should go back to average next year, because the faulty isolator has been replaced and the output from both arrays is now similar.
Update 30 August 2019: Six years on…
- Total kWh produced for the past 12 months = 7,383, averaging out at 20.22 kWh per day for the past 12 months. Again, on track with the expected average output.
- Total kWh produced = 42,916, averaging out at 19.58 kWh per day since installation.
Update 30 August 2020: Seven years on…
- Total kWh produced for the past 12 months = 7,437, averaging out at 20.32 kWh per day for the past 12 months. Again, on track with the expected average output.
- Total kWh produced = 50,353, averaging out at 19.69 kWh per day since installation.
Update 30 August 2021: Eight years on…
- Total kWh produced for the past 12 months = 7,327, averaging out at 20.07 kWh per day for the past 12 months. Again, on track with the expected average output.
- Total kWh produced = 57,680, averaging out at 19.74 kWh per day since installation.
Update 30 August 2022: Nine years on…
- Total kWh produced for the past 12 months = 7,320, averaging out at 20.05 kWh per day for the past 12 months. Again, on track with the expected average output.
- Total kWh produced = 65,000 averaging out at 19.77 kWh per day since installation.
Update 30 August 2023: 10 years on…
- Total kWh produced for the past 12 months = 7,405, averaging out at 20.2877 kWh per day for the past 12 months. Again, on track with the expected average output.
- Total kWh produced = 72,405, averaging out at 19.8261 kWh per day since installation.
Update 30 August 2024: 11 years on…
- Total kWh produced for the past 12 months = 7,371, averaging out at 20.1393 kWh per day for the past 12 months. Again, on track with the expected average output.
- Total kWh produced = 79,776, averaging out at 19.8547 kWh per day since installation.
Update 30 August 2025: 12 years on…
- Total kWh produced for the past 12 months = 7,429, averaging out at 20.3534 kWh per day for the past 12 months. Again, on track with the expected average output. Very wet winter—wettest for nearly 30 years.
- Total kWh produced = 87,205, averaging out at 19.8962 kWh per day since installation.