Driving and renting a car in the US

23 01 2014

A professional colleague of mine is going to rent a car and drive in the US (California mostly) for the first time, and he asked me if I had any tips. Over the course of a couple of emails, here’s what I told him, based on my experiences as an Australian who rents a car in the US and drives quite long distances there at least once a year. I decided to write a blog post incorporating our email exchange so that I have it for future reference, and in case anyone else is looking for this sort of information.

*******************

Renting a car

Where to get it: In the earlier days, I’d hunt the car rental company websites looking for the best deal and trying to compare apples and oranges. However, the last two times I’ve got a car via Priceline.com AND got insurance via Priceline as well. If you enter a bid, you can often get a car for $25 a day or even less, even when it’s normally $50/day. And that’s from the brand name companies. For example, I bid $25 a day on a mid-size car and got it with Avis via Priceline, so it will be just a tad over $500 for the two weeks including all taxes etc. (they are the killer, as are one-way drop-off fees or fees for dropping off at a different location to where you picked up the car!). I could have tried bidding lower, but I thought that was a good deal so I took it. You’re not bidding against other people – Priceline submits the bid to the providers and they choose whether or not they want to accept it. I specified only brand name rental companies too, when I placed my bid.

Drivers license: I haven’t needed an International Drivers License any time I’ve rented in the US (typically in California and Texas). I just show my Australian drivers license and my passport, and that’s all the car rental companies seem to want.

Car size and other info: If you’re driving any distance, consider a standard or mid-size car, not a compact. You’ll have more leg room, driver/passenger comfort, and space for suitcases etc. I rarely get an SUV as I like to have a boot (trunk) that hides my possessions/suitcases/laptop bag from people! The price difference is not a lot between the models. If you’re travelling with more than 2 people for any part of the journey, consider a full-size 4 door. All cars I’ve booked have had air con and unlimited mileage, so that’s a no-brainer. One other thing — car rental companies invariably will NOT let you take the car into Mexico, so if you’re thinking of going to Mexico, do it another way. Typically, Canada is OK, but check with the car rental company before you book in case they don’t cover you and the car while you’re there. If you nominate an additional driver, you’re likely to pay an extra daily fee for that, AND the other driver usually has to be with you at the time you pick up the car so that their license etc. can be checked. So if you and your other party are arriving at different times, that could be a problem.

Car rental insurance: Again, I got this as an add-on via Priceline when I booked the car. I think the insurance cost me $80/week for full coverage with a US insurer. While your Australian travel insurance and credit card insurance offers SOME coverage, don’t expect it to offer all. There were many years when I didn’t take car insurance and winged it hoping that I wouldn’t have an accident. I never did have an accident, but I’m a bit more cautious these days so I take the insurance option that Priceline offers, instead of the very expensive insurance offered when you pick up your car.

GPS or not: I’ve never taken the (expensive) option of a GPS unit. That’s because I’m often going to places I’ve already been, or have printed out my Google Maps and driving directions before I leave Australia and have them ready to use. When I’m in my hotel room I’ll recheck the route via my laptop the night before, and have the printed map next to me when I’m driving.

Fill up or not: I usually opt to fill up the tank myself before returning it to the airport (there are always gas stations ringing the airport for the rental car people), UNLESS you know that the full tank option the car rental company is offering is way less than the price per gallon on the street (it rarely is, and how do you know the street price when you’ve only just landed?). Be aware that if you take the rental car company’s fill up option, they will charge you upfront for a FULL tank of gas no matter how much is left in the tank, so if you take that option, make sure there’s not much fuel left in the tank when you return the car.

Returning the car at LAX: Signposting back to the rental car return places at LAX is fairly clear, BUT stay in the right lane of W Century Blvd heading back to the airport off the 405 (there’s an ARCO gas station on the right after you cross under the freeway and a Shell on the right at the corner of Aviation Blvd for filling up). Look for the car rental company signs about halfway up the poles at the corners of the streets. Different companies have different locations, so your company may be in street A whereas another company may be in street B. That said, many are in Aviation Blvd, and there’s a free shuttle to LAX.

Returning the car at DFW: These guys got it right when they built the airport! ALL the car rental companies are in the same lot, and there’s a single shuttle bus (large) option that services ALL companies. Just make sure you catch the correct bus for your DFW Terminal number. Getting the car back to the car rental lot at DFW is super easy as the signage can’t be missed.

Driving in the US

The car: All the controls in your car are the same as at home (except the windscreen wipers which seem to be different in EVERY car no matter where you are) – so the foot pedals for brakes and accelerator are still on the right side of your body, and the parking brake is either in the centre console or a foot press thing, just as in cars here. You’ll be driving on ‘the other side of the road’, but your controls are still in the same place in relation to your body.

Signs and directions: Driving is SO easy in the US! The roads and highways are very well signed (not like Australia) and it’s all very logical. For example, an exit number relates to the number of miles to/from the state border, so is logically sequenced – e.g. Exit 25 in Nevada is 25 miles from the California state border; Exit 26 is approx. one mile after Exit 25; Exit 30 is about 5 miles past Exit 25. Highways are also logical – main interstates are odd numbered north-south and even numbered east-west and the numbering starts at the west coast and moves from left to right across the country for the north-south interstates and from bottom to top for the east-west ones (e.g. I5 is the main north-south interstate running from Canada to Mexico through California; I10 is the main interstate running from California to Texas and beyond; I80 runs east-west via Utah, and I15 runs north-south in California but further east than I5 – there’s a pattern to it all!). Minor highways are typically two or three digits long and are white on the road signs, whereas interstates are blue/red/white signs.

Merging: Merging is done properly by most people, and merging lanes onto freeways/interstates are invariably long and you can get right up to speed before having to merge. Trucks stay in their correct lanes. People let you in. Yes, there are some crazy drivers and speeds at times, but it all seems very controlled.

Speed on freeways and interstates: No-one seems to stick to the speed limit and it can seem crazy at times, but the traffic tends to travel at the same speed so keeping up with it is the best option, especially in LA. Allow a LOT of contingency room with times as an LA freeway back to the airport can become a car park fairly quickly. I always try to get to LAX at least three hours before my flight, in case there’s a problem with the traffic.

HOV/Car pool lanes: If there are two of you, then you can travel in the HOV lanes on the LA freeways (and elsewhere in cities, depending on where you’re going). These are the car pool lanes and require two or more people in the car. When you see an HOV lane, don’t just pull into it – there are double yellow lines for much of their length with the occasional break for a dashed line. You pull in/out where there are the dashed lines.

Other road rules: There’s ‘right turn on a red light if it is safe to do so’ (for us, that would be a left turn on a red) in most states, which is a most eminently sensible law to keep traffic moving. And they have 4-way STOP signs at some intersections. The rule there is you go in the order you arrived, so first one to the intersection stops, then moves off first, the next one stops, and moves off second, etc. Again, eminently sensible and works well.

The hardest things…: The hardest thing about driving in the US is driving on suburban roads with little/no traffic and few lane markings – you invariably turn the wrong way into a street and end up on the wrong side of the road. When driving on marked roads, highways, freeways, it’s really easy — just follow the cars in front! The other hardest thing is being a pedestrian as we look the ‘wrong’ way when checking for traffic.

Paying for petrol: Gas stations in the US, almost without exception, allow you to pay by credit card at the pump. Super simple and super easy and gets the traffic in the gas station flowing quicker. BUT… you may need to enter a US ZIP code to allow your credit card to be recognised. Either find a ZIP code near where you are that you can enter OR go into the gas station first and give them your credit card to pre-authorise while you pump.

Travel insurance

DO NOT travel to the US without travel insurance!!!!! EVER. I can’t stress this enough. A two-day stay in hospital with tests could easily cost $50K and up, and having to be airlifted back to Australia is probably a $30K exercise. I’ve never needed to claim, but one small car accident and a broken bone could cost dearly in both rental car and medical bills without insurance. I get an annual worldwide policy for just over $300 a year. That covers me for any travel within Australia and anywhere in the world. By buying an annual policy, I don’t have to think about travel insurance for individual trips.


Travel tips

28 03 2013

Some travel tips I picked up on my most recent trip to the US…

Phones

  • If you’re travelling from Australia to the US and are a Telstra Mobile customer, then SERIOUSLY consider getting a US SIM card for your phone if you’re taking your personal phone, not a company one. It will save you an absolute packet — hundreds, if not thousands, of dollars (see this horror story of a $12,000 bill for 13 days in Thailand: http://www.news.com.au/breaking-news/victorian-man-hit-with-12k-roaming-bill-after-thailand-holiday/story-e6frfkp9-1226618187589). You won’t have your usual Australian phone number for the time you’re away (text or email your new number to all those back home who need to know), but you will get MUCH cheaper calls, texts, and data charges than you would if you used Telstra’s global roaming. See this blog post of mine for details on using a T-Mobile Pay-per-day SIM: http://cybertext.wordpress.com/2013/03/21/telstra-to-t-mobile-settings-on-phone/ Update July 2015: You can now buy T-Mobile and other SIM cards at a kiosk at Sydney International Airport (I think Melbourne too), and you may even get your new phone # allocated before you take off.
  • If you’re staying in expensive hotels in the US (or pretty much ANY hotel in Australia!), they’ll likely want to charge you big bucks for using their WiFi or wired network to access the internet. Instead, use your smartphone as a modem and tether it to your laptop — you might only get 3G signal strength, but that’s often better than you’ll get in hotels that advertise ‘highspeed broadband’ anyway. Some hotels have free WiFi in the lobby, so if you only need to check email, then sit yourself down there with a wine or a coffee instead.
  • While many places in the US have free WiFi, don’t assume that because you’re going through WiFi on your phone with your Telstra SIM that it will be free — it won’t! So get yourself a US SIM (see above).

Hotels

  • Some hotels have day rates, but these are REALLY hard/impossible to find via their websites. Day rates are ideal for a long layover (e.g. arrive at LAX at 7 am, but your next flight doesn’t leave until after midday; arrive at DFW for your 10 pm flight to Australia, but Qantas check-in doesn’t open until 6 pm and it’s now only 2 pm). But you have to ask for a day rate! In my experience, asking via the hotel’s email contact form, Facebook, or Twitter account may not get you a response, so pick up the phone (Skype is CHEAP from anywhere, or use your phone with your US SIM when in the US and make a free call) and call the hotel and ASK a real person. Call the direct number of the hotel — don’t go through the reservations call centre for all hotels in the chain. I’ve been able to score a day rate at the fabulous Grand Hyatt at DFW Airport and at the not-so-fabulous Hacienda Hotel near LAX. In both cases, the day rate was for a specified number of hours (typically 6 to 12 hours) and was cheaper than an overnight stay. The big advantage of a day rate at an airport hotel is that you can shower, repack, rest (though I’ve avoided that temptation in case I miss my connecting flight!), have some quiet time away from the airport bustle, etc. If you don’t want to fork out for the day rate at the Grand Hyatt in Terminal 4 at DFW, then ask about using their fitness centre — when I was there in 2012, the guy at Reception suggested that paying $30 for one-off access to their fitness centre might suit too, if I only wanted to use the shower facilities. I didn’t take him up on it as I needed to repack and figured there wouldn’t be room to do that effectively in the fitness centre. But it was an option I hadn’t thought of before. Update: I found two websites that only feature reputable hotels with day rates (there are plenty of not so reputable ones in a Google search results list!): http://between9and5.com/en/ and http://www.bookadayroom.com/; interestingly, neither of these listed the two hotels I mentioned above.
  • If you’re on the road in the US and need to stop somewhere for the night, check sites like Hotels.com and Priceline.com on your phone on your way to the location (NOT while you’re driving, of course), or even in the hotel’s carpark, to get current rates for the hotel that night. You can either book there and then via your phone, though I’ve found that just walking into Reception and mentioning that Hotels.com (for example) had the rate at $XX is enough to score the same rate… or even less. Beats dealing with filling in awkward forms on a small device like a phone and hunting out your credit card etc. If the hotel won’t match the price and you really want to stay there, walk outside (or even do it at Reception!) and make the booking via Hotels.com, etc. Or go somewhere else. Unlike Australia, there’s a plethora of hotels in the US near interstates or major towns/cities willing to compete for your dollar.
  • If you’re turning up late-ish in the day and haven’t booked your hotel room, you might be able to score a further discounted rate. Some hotels discount their rates late in the day just so they can get customers in the door. I scored a $99 room (already discounted from $119) for $69 at a Hampton Inn in Texas (Hampton Inns have another advantage in that they have a decent free breakfast in their locations too, so you can save by not buying breakfast; some even have soup and crackers and vege sticks in the evenings too, so if you’re not up for going out for a meal or even for a big meal, you can get sustenance there as part of your room rate. And they have really comfy beds!).

Airport lounges

  • Got a long-ish layover, but not long enough to get a hotel room near the airport? Consider buying a ‘day pass’ into an airline lounge. Some airlines have this option, but not all. Each airline will have its own rules about allowing access to non-members, and some may not allow you in if you haven’t got a ticket flying with them that day, or if the lounge is likely to be full, but again, it doesn’t hurt to ask. Oh, and you’ll have a better chance of getting in if you are dressed appropriately (no scruffy track pants, uggs, torn jeans [unless you really are a rock star, of course!], etc.), and don’t be loud and brash about insisting on getting in — you can catch more flies with honey than with Vegemite! Alaska Airlines used to offer a day pass for $30, but when I was in LAX a month ago I noticed that it’s $45 there. Also, there are no showers at the Alaska Airlines lounge in Terminal 6 at LAX either — just in case you were hunting a shower! The Alaska Airlines people told me that Delta (or was it United?) in another terminal at LAX has showers in their lounge, with a day pass of $30 for lounge access. I didn’t check this, so I can’t confirm it. Of course, if you’re heading home to Australia via LAX and are a member of the Qantas Club or  flying Business Class, you’ll have access to showers in the Qantas lounge (THANK YOU, QANTAS!!).

My adage when travelling is “Ask. The worst you can get is ‘No’.” More often the answer is a ‘Yes’!


Quilting Adventures Spring Seminar: Day 5: 15 March 2013

16 03 2013

My very long day started early when I woke up at 6:00 am having not gone to sleep until well after 1:30 am. Those who were left had our last meal at the T Bar M Resort (scrambled eggs, tortillas, grated cheese, hot sauce, plus all the cereals, fruits, juices, etc.).

Those in Velda’s class a critique of their work done by Velda. I was second to be critiqued as I had to leave for the long (4+ hours) drive back to Dallas. Then it was hugs and goodbyes all round and I left my quilting buddies — new and old — to find Kim and Deb and bid them farewell too. I sincerely hope I’ll be back.

First stop was to fuel up — the drive down from Dallas took a half tank, so I wasn’t going to risk it on the way back. Then it was on to Austin. I’d been warned several times that Austin traffic is horrendous, especially as SXSW and spring break are both on at the moment. The traffic was flowing smoothly heading north on Interstate 35 and I cleared downtown Austin without any problems, but those heading south were in a car park on the interstate. The radio traffic report said there had been an accident on the upper deck of the interstate as it passes by downtown Austin. The traffic heading south was banked up almost to Round Rock, and the frontage roads were equally as packed with people trying to avoid the interstate. And it wasn’t even noon.

I had a couple of stops on my drive to Dallas. First was Jerry’s Artarama store just north of Austin. Wow! What a place!!!! It was a HUGE art supplies store. I found the brands on pencils and markers I was looking for plus a couple of other bits and pieces, then wandered over to the Office Depot store across the car park. There’s just something about stationery stores…

Getting back on to the interstate was difficult as I had to cross three lanes of exit ramp/frontage road traffic, all banked up because of the traffic holdup a little further south ( which I wasn’t aware of at the time). But the car and I got out unscathed… it’s amazing what a courteous wave can do!

There was quite a bit of construction between Austin and Waco, though it didn’t impede the traffic flow too much. I pulled in to a Best Buy to look for a couple of things, which they didn’t have, then got back on the road again. The weather was just perfect for driving. About 80F outside, clear sunny skies, dry roads.

A couple of observations from the drive:

  • Seen on a billboard: Lonely billboard. Looking for a new relationship. [Clever!]
  • Seen on several billboards: Stessed? Questions? cowboyfaith.org
  • US drivers are invariably polite about indicating and getting over once they’ve passed. I encountered some exceptions, but overall I like driving in the US as you don’t get the road rage you see in Perth, in particular. They do like to tailgate at speed, though, so I guess it’s no wonder there are several signs saying there have already been 436 road deaths in Texas alone so far this year.

My final fuel stop was close to DFW airport. Then I was at the rental car centre there, and on the bus to my terminal… and very soon on the same bus back to the rental car centre! Why? Because I couldn’t find my phone in my bag!!!! And suspected I’d left it in the car. When I’d grabbed my bag from the front seat, I assumed the phone was in it as I remember taking it off the charger and putting the charger in the bag.

My phone had been plugged into the car’s power for drive from New Braunfels back to DFW. Close to DFW, I removed the portable Bluetooth device from the windshield, and the power cord from the cigarette lighter. I also put the phone (I thought) with those two things in my bag… But obviously I didn’t. I must’ve just left the phone on the passenger seat and it slipped under the rental car map. When I got to the rental car return place, I just grabbed my bag and water bottle from the passenger seat and left the map. And the phone. I was on the bus ride from the rental car centre to the terminal when I went to check my mail. No phone. I hunted through my bag about four times, and checked my carry-on too, while silently freaking out! Then I stayed on the bus and returned to the rental car centre. All that took about 30 mins. While waiting in line at the Budget counter I asked the guy behind me to call my phone #, in case it WAS in my carry-on or handbag. No sound. He then sent the phone a text message saying that it was mine and that I’d lost it and would the finder please return it to the Budget counter. Meantime, the lady behind the counter was now free and I said that I thought I’d left the phone in the car about 40 mins ago when returning it. I gave her the receipt from the rental (the car make, model and rego was on that) and the phone # so she could call it. She found it and returned it to me. She said it had slipped in the groove between the seat base and back…

I gave her a BIG hug and sent the good samaritan guy a text message thanking him for trying to find the phone for me too. (Cherrie — I think the phone loss was part of the ‘can’t find my phone’ episode from yesterday 😉 )

After all that running around, I finally got to Terminal D (international) at 5:30 pm. The Qantas check-in opened at 6:00 pm so I was all checked in and through security and into the elevator for the Qantas Lounge by 6:08 pm! I’d like to see you try THAT at LAX!!

I’ve now had a shower and a bite to eat (I didn’t have lunch today), and a wine, and am writing this as one of the last things I’ll do on this trip to the US. It’s been fun, but now I have to get back to work and my normal life 😉

One final thing… one of the ladies gave me an unpicker to see if I could take it through security and unpick my stitching on the plane. I had it in my handbag and it went through the X-ray scanner without question. That said, it was one with a very short shaft and point (maybe an inch long) and a long handle.

See also:


Quilting Adventures Spring Seminar: Day 4: 14 March 2013

15 03 2013

Our last full day today…<sad>

For some, this was their last day as they had to leave before the official finishing time on Friday.

Most of the day was spent consolidating our pieces, getting as much advice from Velda as we could, joking around, enjoying each other’s company, etc. Velda helped me add some more shadow and depth to my piece, using Copic Sketch Markers (great tools!), then I put a piece of very light batting on the back as a stabiliser (the on-site pop-up shop didn’t have any stabiliser, so I made do with the batting), and stitched around all the main pieces in invisible thread, then stitched the lesser petals also in invisible thread. Either the sewing machine, me, or the thread didn’t like each other, so I stopped sewing after doing the lesser petals and decided to wait until I got home and on my own (familiar) machine before continuing. I might even unpick all the stitching done so far and start again with a better, more solid stabiliser, as the batting caused quite a lot of puckering, which I don’t want just yet.

By 4 pm we were all cleaned up ready for the end of seminar ‘walkthrough’ where we wander into all the other classes and check out what everyone’s been doing. And have a good look at what the fellow students in our own class have been working on. I also had a guest with me — Karel had joined me from San Antonio, and had as much fun as me marvelling over the work that everyone has done this week.

After the walkthrough, it was time for drinks and an early dinner, then the final tutor presentation of the seminar series, this time by Velda. She got a rousing reception from her students 😉 And deservedly so too. If everyone has learnt as much as I have this week, then we will all go home buzzing with new ideas and inspirations. And a much greater respect and admiration for humble cheesecloth! Karel had to leave immediately after the presentation as she wanted to get home before dark if she could (it had taken her over an hour to drive the 40 miles from her home…)

Food today:

  • Breakfast: Scrambled eggs, bacon, link sausage, pancakes, syrup, cereals, fruit, fruit juices, toast, etc. (only cereal and half a bacon sandwich for me)
  • Lunch: Make-your-own chicken burger or hamburger, salad, all the mustards, pickles, onions etc. for the burgers, fries, some sort of pie with pecans on top (it was ‘Pi Day’ today in all countries that use the mm/dd/yyyy date system)
  • Dinner: Fettuccine with chicken and/or meatballs, various sauces, various grated cheeses, salad stuff, garlic bread, strawberry cheescake

I’ve commented on the photos, as appropriate; click on a photo to view it larger.

Rayna’s class

Rayna’s students did a lot of slicing and dicing. They were to bring in old, unloved, blocks and scraps of fabric and convert the blocks into something vibrant and new. Everyone succeeded at that task, in fascinating and inspirational ways. In each of these photos, the ‘ugly’ block(s) are displayed, as well as what came out of slicing and dicing and rearranging those blocks and adding extra fabrics to them. Who said some blocks were so ugly they were only fit for throwing out? In some cases, it’s hard to see where the remnants of the old blocks are, but look carefully and you’ll find them.

There first four photos are of the students’ work; the last one’s in this section are Rayna’s work.

qa_day4_29

qa_day4_32

qa_day4_31

qa_day4_30

qa_day4_35

qa_day4_34

qa_day4_33

qa_day4_38

Robbi’s class

All of Robbi’s work with this class with with fusible applique. It looks really difficult, but the students I spoke to said it was actually pretty easy to do.

qa_day4_41

qa_day4_40

qa_day4_36

Back of one of Robbi's sample quilts

Back of one of Robbi’s sample quilts — she always matches her bobbin thread to the top thread

Another of Robbi's sample quilt backs

Another of Robbi’s sample quilt backs

qa_day4_43

Very cool and simple binding technique from Robbi

Very cool and simple binding technique from Robbi

qa_day4_39

qa_day4_37

Velda’s class

We were all busy little beavers today…

qa_day4_08

qa_day4_07

qa_day4_06

qa_day4_05

Cherrie discovering the power of Copic Sketch Markers

Cherrie discovering the power of Copic Sketch Markers

Sue's cabbage -- in progress

Velda signs and labels her quilts in an unusual way

Velda signs and labels her quilts in an unusual way — she hand stitches the details onto the backing fabric after the quilt has been quilted

Most of us also displayed the photo that was our inspiration, along with our practice pieces from Monday.

Sara's lily

Sara’s lily

Paula's butterflies

Paula’s butterflies

Cherrie's azaleas

Cherrie’s azaleas

Rosann's lily

Rosann’s lily

Harla's alligator gar

Harla’s alligator gar

Harla's alligator gar - fin

Harla’s alligator gar – fin; note the iridescence from the white iridescent paint she used

Kay's foxgloves

Kay’s foxgloves

Suzanne's butterfly

Suzanne’s butterfly

Close-up of Suzanne's butterfly

Close-up of Suzanne’s butterfly

Yolanda's frangipani (plumeria)

Yolanda’s frangipani (plumeria)

Sue's vegetables

Sue’s vegetables — that cabbage looks good enough to eat!

Patricia's vegetables

Patricia’s vegetables

Barbara's autumn leaves

Barbara’s autumn leaves

Victoria's shells

Victoria’s shells

Susan's mossy log and leaves

My progress

After Velda's help in adding more shadow and depth

After Velda’s help in adding more shadow and depth

After initial outline stitching/stitch in the ditch in invisible thread

After initial outline stitching/stitch in the ditch in invisible thread

After adding stitching on  lesser petals in invisible thread

After adding stitching on lesser petals in invisible thread

Today’s food

Breakfast

qa_day4_01

qa_day4_02

Lunch

qa_day4_09

Tomato ketchup with pecan pie???

Tomato ketchup with pecan pie??? No, Cherrie didn’t see the need for another plate, so she put the ketchup for her fries on the plate with the pie. She shifted the pie to another plate when she got back to the table, but not before I took this photo to ‘prove’ the Americans eat strange combinations of food 😉

See also:


Quilting Adventures Spring Seminar: Day 3: 13 March 2013

14 03 2013

Day 3 was a consolidation of our work started yesterday. We didn’t learn any new techniques, but that was fine as we had plenty of opportunity to apply the techniques already learnt, and to ask Velda for help at any time. Velda is a great teacher and very giving of her time and knowledge. If you ever get the opportunity to take a class with her, do so.

It was another gorgeous day today, but we were inside for most of it, so couldn’t really appreciate it except on the walks to and from the dining area and the work area, and to the bar at the end of the day (the bartender makes a MEAN margarita — you only need one!).

I handed out the Tim Tams I had brought and the little koalas to all the students in the class I was in, to the three tutors (Velda, Rayna and Robbi Joy), and to Kim and Deb (the organisers). They seemed to be much appreciated 😉 Yolande, who was in my class last year, immediately swooped on her Tim Tams and got stuck into them as she remembered them from last year.

This evening, Kim announced the schedule for the rest of next year and 2014. The spring seminar week will be March 2 to March 7 and the two tutors I’d be most interested in are Sharon Schamber and Esterita Austin. The others are doing more traditional work, which doesn’t interest me as much. The one I’d REALLY like to go to is in June this year, when Susan Brubaker Knapp will be doing a multiple day workshop. But a big Lotto win would have to come before I could do two trips to the US in such a short time frame. The other feature of this evening’s meeting was the display of 30 SAQA 12×12″ quilts. I quite liked some of them.

The food today was as good as usual. Breakfast was the full scrambled eggs, bacon, sausage, hash potatoes, cereal, toast, fresh fruit, fruit juices etc. I had oatmeal and a bacon half sandwich. Lunch was pizza, salad, soup and all the accoutrements, with some sort of dessert (which I didn’t have, but it looked like a cannoli [sp?] filled with a cheesecake filling). And dinner was a pecan crumbed baked chicken breast, with wild rice, carrots, all the salad bits and pieces, and some sort of chocolate, pecan (?), baked pudding/cake dish that was ‘OMG delicious’.

I’ve commented on the photos, as appropriate; click on a photo to view it larger.

Student progress and other photos

Cherrie working on her azaleas

Cherrie working on her azaleas (Becky in the background)

Sue's pepper (capsicum)

Sue T’s pepper (capsicum); the stalk has been tucked and stitched

Susan L and her log

Susan L and her log; the bark is painted cheesecloth, creating an amazingly realistic effect of moss — in fact, it seems to blend with the carpet.

Susan L's log

Susan L’s log; the mossy bark is painted cheesecloth.

Sue's cabbage in the first stages of creation

Sue T’s cabbage in the first stages of creation

One of several shells

One of several shells — see the photo on the left

Garfish under construction

Garfish under construction

Autumn leaves

Autumn leaves

Yolande's frangipani

Yolande’s frangipani (plumeria) — Velda helping Yolande with the centre

Butterfly wings

Butterfly wings

Lily

Lily

Scallop shell

Scallop shell (on Stonehenge fabric)

Becky's prickly pear cactus pads

Becky’s prickly pear cactus pads

Sara's lily

Sara’s lily (with measles!)

Velda and Cherrie 1

Velda and Cherrie — blackmail photo #1 (they know what this means!!)

Velda and Cherrie 2

Velda and Cherrie — blackmail photo #2 (they know what this means!!)

My progress

Painted pieces laid out ready for centre bottom piece

Painted pieces laid out ready for centre bottom piece

Painted bottom piece added

Painted bottom piece added

Pieces machine basted and laid out ready for stitching together

Pieces machine basted and laid out ready for stitching together

All the pieces stitched together to make one orchid piece

All the pieces stitched together to make one orchid piece

Shading added to the entire piece

Shading added to the entire piece

Some of the SAQA quilts

qa_day3_20

qa_day3_19

This one was amazing, in my opinion

This one was amazing, in my opinion

qa_day3_24

qa_day3_23

Three layers of reverse applique

It’s hard to see in the photo, but the little batik squares were two or three layers of reverse applique

qa_day3_21

See also:


Quilting Adventures Spring Seminar: Day 2: 12 March 2013

13 03 2013

Today was busy, but nowhere near as full of new stuff as yesterday. We got to see another of Velda’s amazing art quilts (the pelican quilt below), chose the photo for our own art quilt (with Velda’s help), and got started on the pattern making, stitching, tucking, and painting process.

After dinner, we had some ‘show and tell’ followed by the presentations/trunk shows from two of the tutors: Rayna Gillman (New Jersey) and Robbi Joy Eklow (Chicago). Some of us then went back to the classroom to do some further work on our pieces — I still had some painting to do that I wanted to be dry by tomorrow morning, so I did that for an hour or so.

The meals today were a little healthier and lighter than yesterday, thank goodness! I just had some cereal and fresh fruit for breakfast and passed on the ham and egg croissants, muffins, toast, etc. For lunch we had soup and salad (all choose/make your own, so if you didn’t want dressing you didn’t have to have it), plus a chocolate brownie/cake for dessert (again, optional). For dinner, we had roast pork, broccoli, and an amazing corn ‘souffle’ dish, and cheesecake for dessert if you wanted it, and salad makings for those who have salad before the meal.

Oh, and it was just a PERFECT day — cold and crisp and clear first thing, then about 25C maximum, clear and sunny all day.

I’ve commented on the photos, as appropriate; click on a photo to view it larger.

Accommodation wing, early morning

Accommodation wing, early morning

Classroom through the trees

Classroom through the trees

Front of our classroom

Front of our classroom

Our classroom

Our classroom

First flowers

First flowers

The wall of apples from yesterday

The wall of apples from yesterday

Velda's vegetables

Velda’s vegetables

qa_2013_day2_velda_pelican01

qa_2013_day2_velda_pelican02

qa_2013_day2_velda_pelican03

Lunch

Lunch

Dessert and lemonade at lunch

Dessert and lemonade at lunch

Dinner

Dinner

Photo I chose to do  (thanks for your permission, Wade!)

Photo I chose to do (thanks for your permission, Wade!)

Outline drawn on plastic, ready for overhead projector

Outline drawn on plastic, ready for overhead projector

Master pattern traced

Master pattern enlarged and traced. From this pattern, I traced, cut out and labelled individual pattern pieces, then used them as templates for cutting out the fabric pieces and deciding where to put the tuck and stitching lines.

One petal tucked and stitched, ready for painting

One petal tucked and stitched, ready for painting

Two petals painted

Two petals painted

Technique for making crunched/folded petals

Technique for making crunched/folded/textured petals, such as peony or azalea petals. Wet the fabric, lay it down on some fusible/freezer paper, iron it dry with the folds etc. in it.

Rayna Gillman’s quilts

qa_2013_day2_rayna01

qa_2013_day2_rayna02

qa_2013_day2_rayna03

qa_2013_day2_rayna04

qa_2013_day2_rayna05

qa_2013_day2_rayna06

Robbi Joy Eklow’s quilts

qa_2013_day2_bobbi_joy01

qa_2013_day2_bobbi_joy02

qa_2013_day2_bobbi_joy03

qa_2013_day2_bobbi_joy04

qa_2013_day2_bobbi_joy05

qa_2013_day2_bobbi_joy06

See also:


Quilting Adventures Spring Seminar: Day 1: 11 March 2013

12 03 2013

My head is spinning! In a good way…

We learnt SOOO much today from our tutor, Velda Newman, that it’s hard to process it all. That said, we weren’t rushed… it was just a lot to take in. So, where to start?

I think I’ll start by showcasing some of Velda’s amazing art quilts, just so you can see the sort of work she does and that we aspire to do as a result of what we learn this week. Where I know something about each of her quilts, I’ll add it in the commentary. Click on a photo to view it larger.

Velda’s amazing art quilts

Velda explaining how she did her African baskets quilt

Velda explaining how she did her African baskets quilt

African baskets quilt

African baskets quilt. Each basket was created, stitched, painted etc. separately, then they were composed with each other. No background in this quilt — just the baskets spilling into each other.

Trout quilt

Trout quilt. This piece is about 6 ft long. The fins of the trout were folded and stitched (like pin tucking); the white spots of the top trout were created using a Jacquard (sp?) resist; the fish were painted after most of the stitching was done and before being appliqued on to the quilt; the trout species’ names are hand quilted onto the background fabric.

qa_2013_day1_velda_newman24

qa_2013_day1_velda_newman21

qa_2013_day1_velda_newman22

Blue heron quilt

Blue heron quilt. This is only part of the quilt — it’s about 4 ft long. Lots of stitching on the bird, then the colours were painted on the white fabric of the bird. The effect at the top of the beak was created using cheesecloth. The species’ name was hand quilted.

 qa_2013_day1_velda_newman13

qa_2013_day1_velda_newman14

Prickly pear quilt

Prickly pear quilt. Each ‘pad’ was a separate piece in duck cloth (lightweight canvas), initially painted then appliqued to cover the entire section (no background fabric). Once each piece was added, further painting was done to add colour, shadow etc. The ‘prickles’ on this cactus were tied pieces of wax linen thread, and shadows painted on. The ties stick out from the canvas, adding a very three-dimensional effect.

qa_2013_day1_velda_newman07

Tulip quilt

Tulip quilt. Each petal section was pleated and stitched (pin tucked) down the middle, then appliqued and painted, Dark shadows were added last.

Leaf quilt

Leaf quilt. Dyed/painted cheesecloth was used to create the leaf. It was then stitched down and extra paint embellishments were added.

Blue bird quilt

Blue bird quilt. The lighter colours on the black fabric were bleached, including the area around the eye. The eye was done in three applique pieces. All the wings were appliqued on separately.

Artichoke quilt

Artichoke quilt. Each leaf piece was pintucked to create the central vein, then appliqued on to the background. The stem was also pintucked. Paint and marker colours were added later to create shadows and depth.

Seagull quilt

Seagull quilt. Lots of stitching on the white part of the bird. Paint added to enhance the eye and the beak. Hand quilted stitches on the blue background.

Techniques we learned today

Velda started today by showing us how to create roundness with just stitching. Using her African Baskets quilt as an example, she showed us the stages she went through to create a single basket, from drawing the lines and concentric curves, to stitching them, to painting them. Then how she added the black opening as a separately stitched piece and cut away the excess to prevent bulk.

qa_2013_day1_velda_newman02

qa_2013_day1_velda_newman03

Then it was our turn. We used a 12×12″ white fabric square with some thin batting (NO backing) and had to draw some curving lines, then stitch them. That was easy enough! My effort is below.

qa_2013_day1_velda_newman19

The next technique built on from this one and was to create texture on a lemon shape just through stitching. Normally, we’d do this on yellow fabric with yellow thread, but Velda wanted us to stitch on white with a dark thread so we could see what were were doing.

Here’s her piece, followed by mine.

qa_2013_day1_velda_newman17

I didn’t do mine correctly — we were meant to stitch off the edge of the lemon shape, whereas I stitched ‘within the lines’. I called this technique ‘divide and conquer’ as all we were doing was halving the lines as we went to end up about 1/8″ squares.  qa_2013_day1_velda_newman18

The next technique we learnt was using 1/16″ stitching (like pintucking) to give the appearance of a pieced leaf. The first leaf we did just had a single vein, then she showed us how to do leaves with several side veins and a centre vein — ironing the veins in the same direction is critical for getting the shadow right, as is stitching the centre vein AFTER the side veins and catching all the side veins in the central vein.

Leaves and lemons

Leaves and lemons. The four stages of the lemon, and demonstrating the leaf veins created with stitching.

Leaves

Leaves. The leaf on the far left with the orange vein has a piece of orange fabric attached on the bias to create the vein!

We followed that with creating a shell shape using two pieces of fabric, one on top of the other (like reverse applique). The light fabric went on top and the dark underneath. We drew curved lines on the top, then double-stitched right on/near those lines, then marked the sections to cut away to reveal the dark fabric, then cut them away. The last stage was to cut away the dark  fabric on the  back so that it didn’t show through the light fabric on the front, or add bulk.

Here are my leaves (you can probably tell which side Velda cut for me!) and cutaway ‘shell’ (which looks more like a butterfly’s body than a shell to me!), plus the other projects from earlier in the day.

qa_2013_day1_velda_newman26

Our last stitching technique before we attempted painting was working with cheesecloth. Cheesecloth is like a fine gauze. Here’s what it looks like when it’s purchased:

qa_2013_day1_velda_newman33

Velda showed us how to pull it apart to ‘get rid of the grid’, how it added texture (see the cantaloupe/rock melon piece below), and one way of stitching — using pebbling — to enhance the texture even more. She said this texture worked really well for reptiles, as well as fruits — and bird beaks!

qa_2013_day1_velda_newman28

Again, she wanted us to put it on fabric in a contrasting colour, such as black, and stitch it using yet another a contrasting colour — I used orange.

qa_2013_day1_velda_newman32

My friend Cherrie stitched hers onto a mottled green fabric — I reckoned it looked like water cascading over rocks in a stream; she thought of a frog:

qa_2013_day1_velda_newman34

Here we are, hard at work on some of our stitching pieces:

qa_2013_day1_velda_newman16

Before Velda got us painting, she showed us how she used some of the techniques she had shown us to create a variety of vegetables.

Asparagus

Asparagus. The asparagus spears started out as a green fabric that she bleached the bottoms of to get the lighter gradation. The individual leaf buds (is that what they are called?) were appliqued on, then painted with a purple marker.

Corn

How the piece of the corn go together. Strips of green fabric with close parallel stitching for the leaves, concentric curves with scallops for the cob. Pintucked base for where the corn joins on to the main stem.

   qa_2013_day1_velda_newman30

The last few hours of Day 1 (yes, we’re still on Day 1!!) were spent learning about some of the paint mediums Velda uses, how she uses those paints to add depth and colour to her quilts, and how to paint an apple!

I haven’t got my notes with me at the moment (they’re in the classroom), but I’ll try to remember what each of the mediums are.

Derwent Inktense sticks

Derwent Inktense sticks. I reckon this image would make a great ‘modern quilt’!

Various paint mediums

Various paint mediums.Windsor and Newton, Dick Blick, and Matisse artist acrylics in the tubes; Derwent Inktense sticks; NeoArt water-soluble oil pastels; Derwent Inktense watercolor pencils. Velda also showed Copic markers (permanent).

Blending the colour with a damp cloth

Blending the colour with a damp cloth

We got to play with her paint mediums (not the acrylics or the markers yet), blending various types of paints onto our damp fabric in our quilting hoops. I particularly liked the effect of the Derwent Inktense sticks and the NeoArt oil pastels. My effort:

qa_2013_day1_velda_newman38

She then showed us how to paint an apple. It looked super simple as there were only two colours — yellow and red. Velda demonstrated first (upside-down for her!).

qa_2013_day1_velda_newman39

We went to our workstations and got started on outlining the apple, damping the fabric, then applying the yellow paint. Then Velda demonstrated each of the red strokes again, one at a time, while we made the same marks on our fabric with our red paint and big brushes. After we’d done one apple together, we had to create another one on our own. Here’s the progression on my first apple:

Outline and yellow background done

Outline and yellow background done

First red stroke

First red stroke – note after top curve it goes straight down, and you start just under the mark of the hole in case there’s any bleeding

Second red stroke

Second red stroke – note after top curve it goes straight down

Third red stroke

Third red stroke – straight down (looks a bit like a reverse MacDonalds’ sign!)

Filling in the back

Filling in the back — start outside the lines and pull and release the brush to give the wispy strokes; the front is filled in with straight downward strokes

Filling in to the hole

Filling in to the hole — use a smaller brush to fill in the gap between the marked line and the hole after the fabric has dried a bit.

Adding the final strokes

Adding the final strokes. Once finished, use a hair dryer (or the sun… or just time) to dry the piece before cutting it out on the lines (for raw edge applique) or cutting it just outside the lines (for needle-turn applique).

Finished apples

Finished apples. Here are all the pieces I finished today, including the two apples, which weren’t fully dry and will need a press once they are.

So endeth Day 1! We started at 9 am, broke for lunch for 45 minutes, and finished at 4:30 pm. We got a lot done and learnt a LOT. At 4:30 it was time to kick back and share a drink or two with new and old friends.

Drinks after a full day - Rayna Gillman and Deb

Drinks after a full day – Rayna Gillman (one of the other tutors) and Deb (organiser)

Kaye (student)
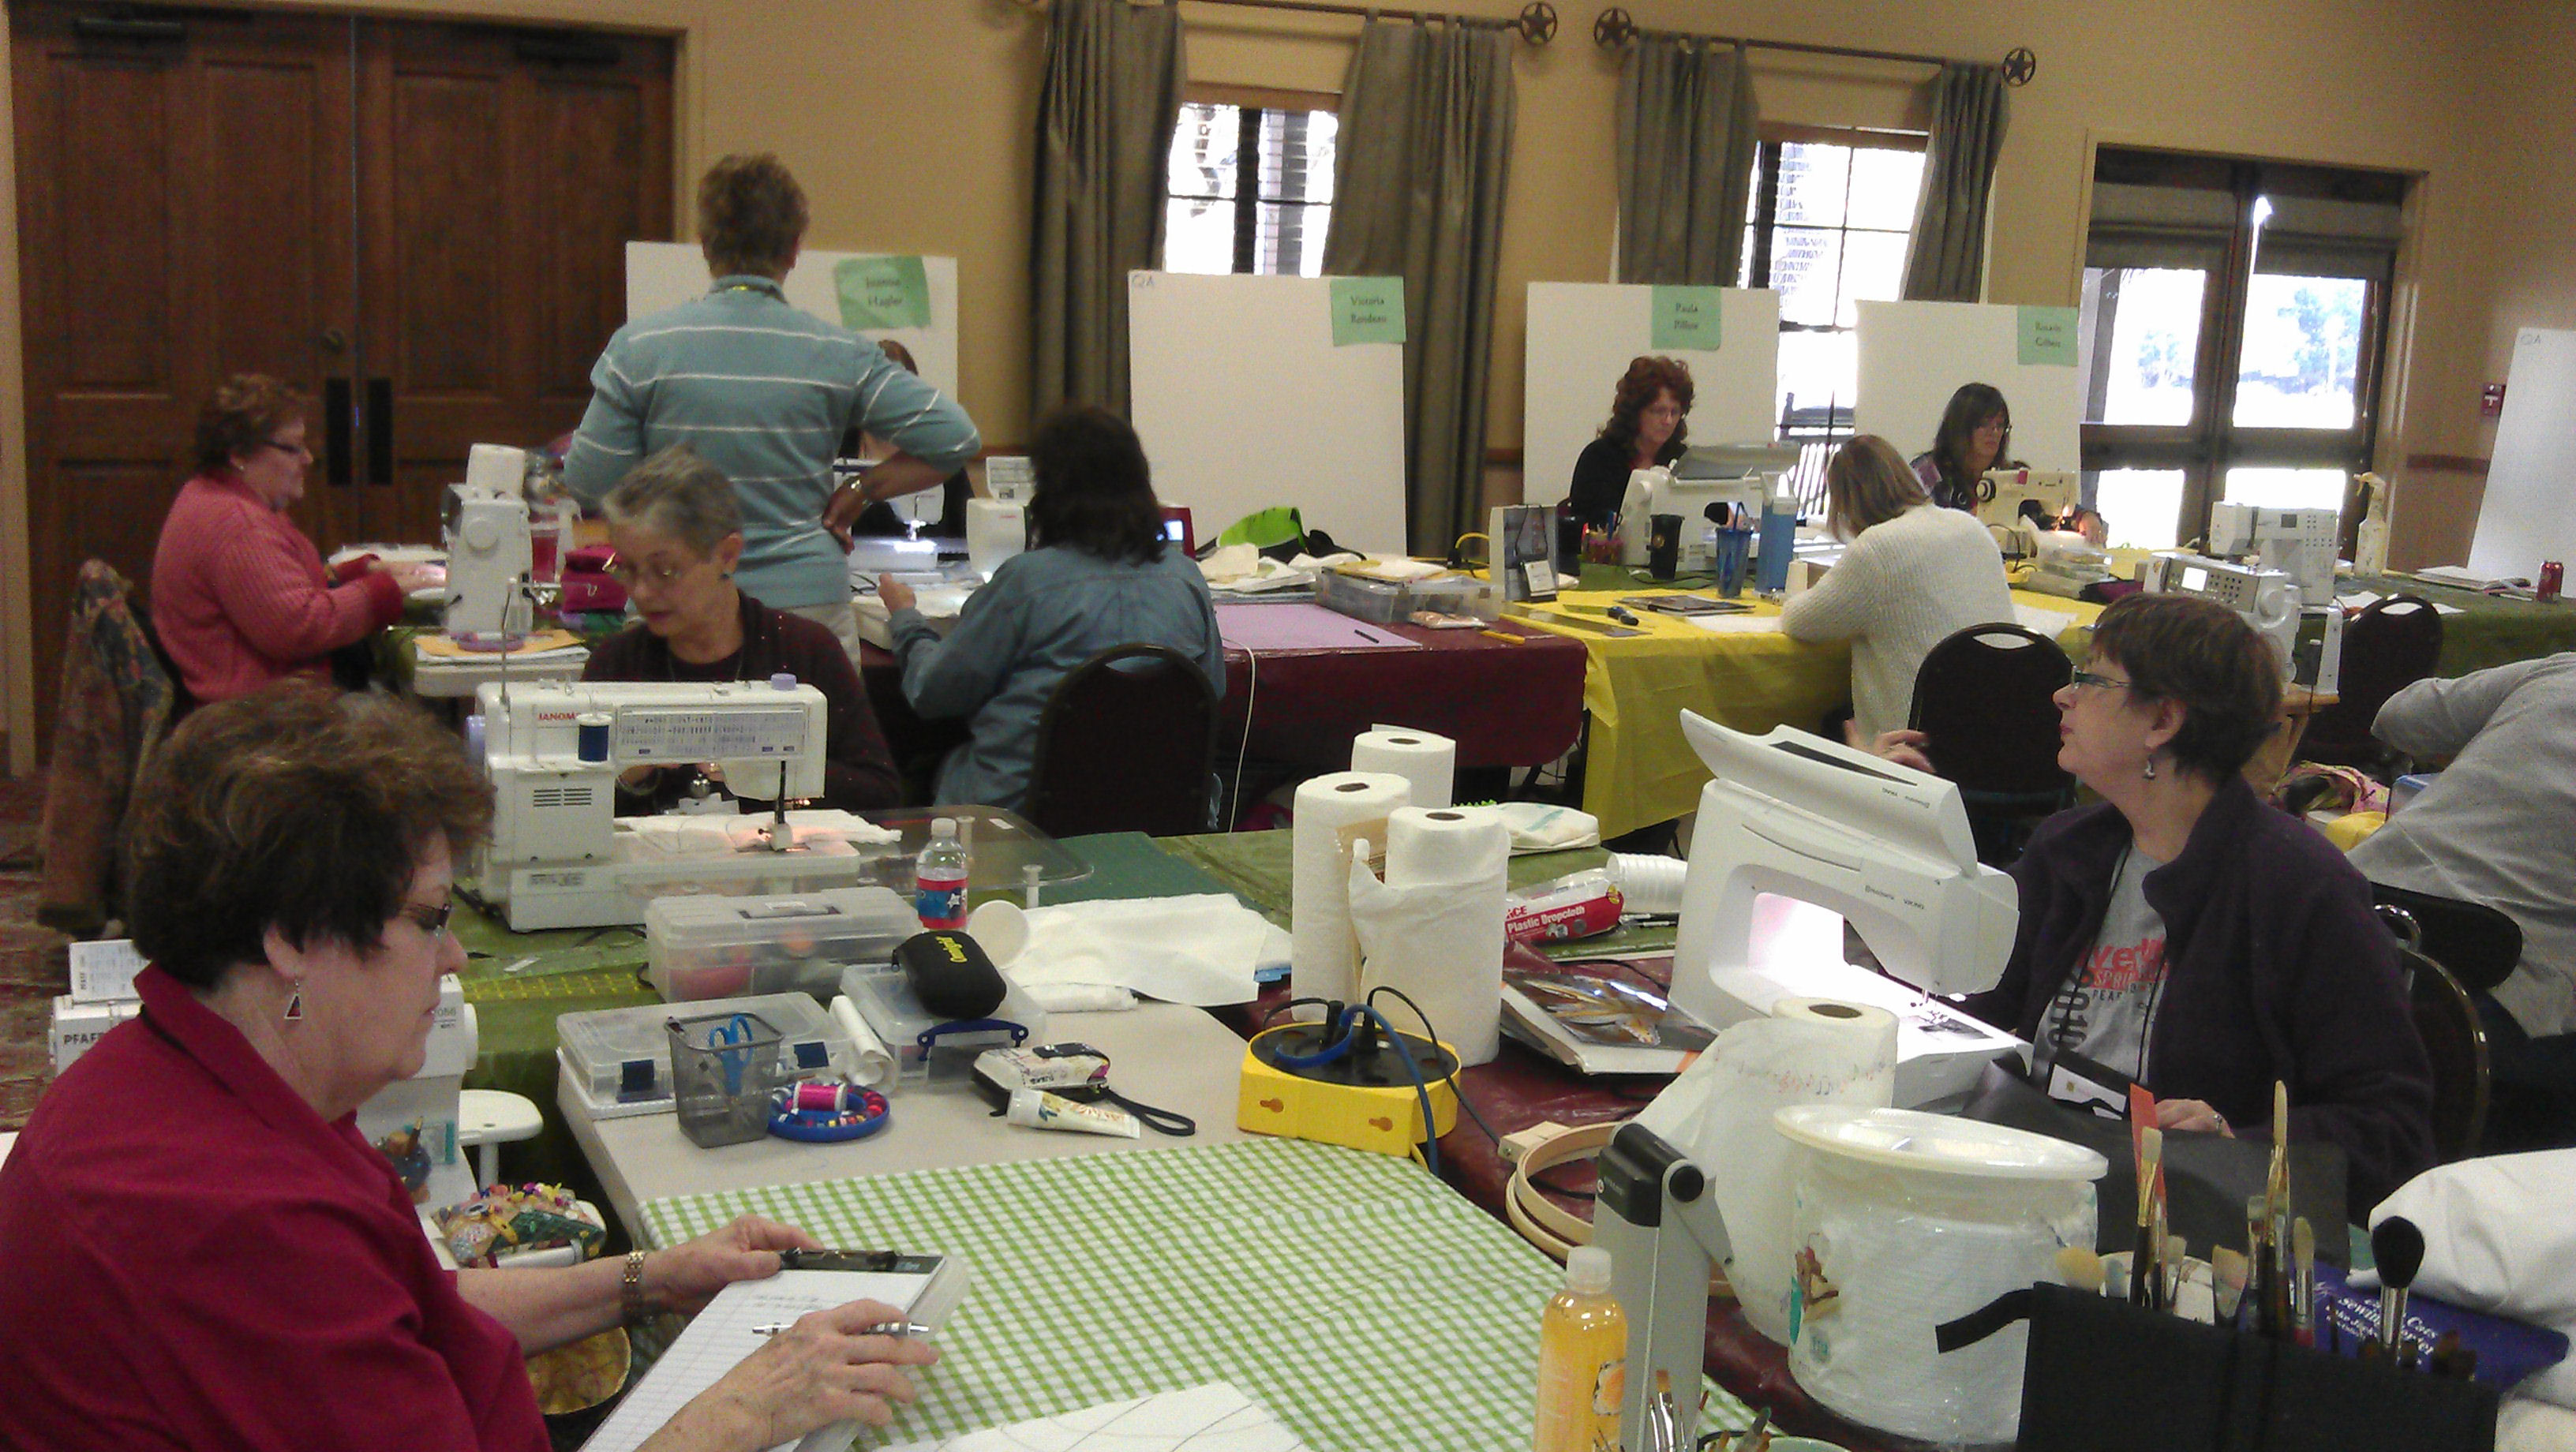
, Robbi Joy Eklow (one of the other tutors), Yolande (student), and Velda Newman

Kaye (student), Robbi Joy Eklow (another tutor), Yolande (student), and Velda Newman

The Quilt Haus

After dinner, many of us drove into town to go to The Quilt Haus, one of two local quilt stores and one of the sponsors of the week. They have a mini store at the retreat, but their store in town has a huge range of fabric (more than 5000 bolts!). They had some door prizes, and I won a 40 piece 5×5″ charm pack of Tonga Treats batik fabric! Thanks gals!

Food

I can’t finish without talking about the food here. It is great — in both quality and quantity. They sure know how to put on a spread… and a spread is what I’ll have if I ate everything they had on offer! We’re talking three FULL meals a day…

  • Last night’s dinner: Texas BBQ brisket, 1/4 BBQ chicken, green beans, hot sauce, salad makings and dressings, peach cobbler and cream, and other stuff I can’t recall.
  • Breakfast: cereal, yogurt, fresh fruit, toast, variety of fruit juices, pancakes, maple syrup, scrambled eggs, crispy bacon, link sausages, and some other stuff I can’t remember!
  • Lunch: Stir-fry beef, stir-fry chicken, peas, vege medley, salad makings and dressings, variety of freshly baked warm/hot cookies, plus more…
  • Dinner: Chicken cordon bleu, mountains of asparagus, quartered roast potatoes, hollandaise sauce (or similar), salad stuff, dinner roll, carrot cake, and more….

And now to bed. Day 2 starts with breakfast at 7:30 am tomorrow, with our class officially starting at 9, though I suspect many will be starting earlier to finish off their second or third apples.

See also:


US trip 2013: Day 10: Sunday 10 March

11 03 2013

Daylight saving switchover meant the alarm went off at 6:00 am (5:00 am in real time; 3:00 am in Seattle time!). It was pitch black outside when I loaded up the car. I had breakfast downstairs (it’s provided free at Hampton Inns, as is the WiFi, and a dreamily comfortable bed!!!) and was on the road south (I-35E) by 7:45. I had to be in New Braunfels by 11:30 to meet a friend from San Antonio for lunch.

Three observations from the drive: oh how I’ve missed the smell of dead skunk in the morning! (NOT…); there is road construction going on for miles and miles between Dallas and Austin; there’s nothing quite like pumping up Bon Scott (AC/DC) on ‘Highway to hell’ and singing along while passing numerous churches 😉

I ended up running a tad early, so I stopped in at the HUGE outlet mall in San Marcos to pick up some stuff on my list. After getting a bit lost, I eventually found the Huisache Grill in New Braunfels (it’s hidden behind other shops/buildings) and I found my friend. We both had the grilled blackened catfish, which included the sides PLUS a cup of chicken tortilla soup and a hot sourdough dinner roll, all for $13.95! Compared to Australian prices, that was an absolute bargain. It was really delicious too.

huisache_grill

After we said our goodbyes, I went on to the resort where the quilting retreat is being held all this week. My room was ready, and it is a much bigger and nicer than the room I had last year. The room air conditioner is much quieter than last year’s too, so I shouldn’t need to wear my ear plugs 😉

I caught up with Kim (the organiser) and another lady (Cherrie) I sat next to last year — we’re going to sit next to each other again this year too. She’s here with her husband and 86-year-old father — they will be exploring this area while Cherrie is quilting. Another person I met at drinks was Rayna Gillman, one of tutors (the other tutors this week are Robbi Joy Eklow and Velda Newman.

After drinks and dinner, we had a general info session with Kim, then all went to our respective classrooms with our tutors. I’m in Velda’s class, and she got us to sit close to her and we introduced ourselves one by one, which was good — we didn’t do that last year. There are a few people I remember from last year, and they all remembered me (being the only Australian, and all 😉 ) It looks like a good group, with a real mix of talents and interests and backgrounds. Most are from Texas, with one from Oklahoma and one from Georgia. Another lady I met at drinks is from Colorado.

This year I’m going to try to take photos of all the processes and techniques we learn/try out — last year, I didn’t start to take photos until close to the end so hope to redeem myself this year.


US trip 2013: Day 9: Saturday 9 March

10 03 2013

Last night, some of us stragglers from the conference took a cab to Blue Moon Burgers in Capitol Hill, Seattle.

We’d been told that they had awesome burgers — including a burger with peanut butter!!! Yes, you heard that right… a burger with peanut butter. Amber and I both had the El Diablo Azul burger — a burger with jalapeno and other chili things on a ciabatta bread roll — and shared a side of chili cheese fries. Let’s just say that Australians have NO IDEA how to make chili! (as in chili con carne). The burgers were great, but very filling.

El Diablo Azul burger

El Diablo Azul burger

Chuck and Dave both had the Code Blue burger — two huge burger patties, with slabs of thick crispy bacon, cheese, and peanut butter smeared over the bread roll. No, I didn’t taste that heart-attack-waiting-to-happen (maybe that’s also why they called it ‘Code Blue’), but Dave said it was delicious.

Code Blue burger

Code Blue burger

Needless to say, we were all STUFFED after our burgers, so we walked back to the hotel (a good mile, but all downhill, and much easier to do with a chatty group of friends). Oh, and I stupidly also had a malt thickshake (mint flavour) with my meal. ‘Stupidly’ because that thickshake was a meal in itself! Decades ago, Kris, my US roommate, bagged Australian milkshakes and tried to make me a malt thickshake to prove how ours were so pathetic. I’ve never had a proper American malted shake before, and she was SOOOO right! So right that I sent an email to her in Australia to tell her how fabulous they were and how right she was all those years ago 😉

This morning I was up bright and early to catch the 8:00 am shuttle to the Seattle-Tacoma Airport. Dave was also on the same shuttle; he was flying Alaska Airlines to San Diego, while I was on American Airlines to Dallas Fort Worth.

I checked in at the American counter and asked where the lounge was — the check-in lady laughed as she sputtered that they didn’t have a lounge at that airport and hadn’t had for 13 years. She said American only had two gates at Sea-Tac. So I wandered into the food and shops area and had a breakfast quesadilla from a Mexican place — scrambled eggs, minced chorizo, and sprinkling of cheese on a half tortilla, folded over and put in a sandwich press. Within a minute it was done, and cut into three, ready for me to eat with some hot salsa and sour cream. It wasn’t bad!

Sea-Tac provides power to the waiting areas at the gates really well. Unfortunately, I didn’t take a photo, but in essence, they have a set of seats with power outlets and USB power in a panel under the seats; the power is supplied to several of these panels in a set of seats from a single cord off a pillar. This means that quite a few people can power devices at the same time and not fight over a power outlet.

The plane I was on

The plane I was on

The flight took off pretty much on time, and I chatted with the chap next to me — he lives in Spokane, WA and works for Boeing. He was on his way to Seville in Spain to do an audit on one of Boeing’s suppliers. As we were flying along he was pointing out the various mountains, ranges, rivers, etc., which was great as I would’ve only been guessing what was what. It was a perfectly clear day and Mt Rainier was in all its glory. We also passed over the very wide Columbia River and the Snake River in Idaho, and the chap (I never did get his name) told me some of the geological history of some of those landforms. He’s hiked in many of the areas he was pointing out, and he swapped seats with me a few times when we were near Mt Rainier so I could get some photos.

mt_rainier02

mt_rainier01

mt_rainier04

mt_rainier03

Columbia River

Columbia River

As an aside, American Airlines First Class (equivalent to Business Class in Australia) served us a hot meal of blackened BBQ prawns (they were really nice and fresh, which is hard to do with prawns if they’ve been cooked or left sitting too long) and grits and a corn and bean mix — all on proper china and with metal cutlery and a real glass for wine! I thought all US flights had banned all that years ago, so it was nice to see its return.

The flight was uneventful — those 4 hours sure go by faster if you have someone interesting to talk to. When we were about 175 miles out from Dallas (the pilot told us how far — I sure didn’t know!), the pilot told us we’d be circling round a big storm and coming in from the south instead of the north-west and that would add about 10 minutes to our trip. Very soon after we were skirting alongside a MASSIVE cloud formation and could see why we were going around it. Put it this way, the clouds were higher than we were, and we were flying at 35,000 ft. They were BIG anvil-shaped clouds, probably 40,000+ ft high (no pictures, unfortunately). I think everyone who saw those clouds was really pleased the pilot went around! Our landing at Dallas Fort Worth was through some very thick lower level cloud, and it was grey and threatening on our arrival.

After picking up my bags and getting on the shuttle bus to the rental car centre, I got my rental car and got on the road heading south out of the Dallas/Fort Worth area. It was still very grey and threatening, with very low clouds. Those clouds got darker and darker, and yes, the day was ending too, but those clouds were quite ominous.

As I was driving and wondering where to pull in for the night, an emergency alert came over the car radio about severe thunderstorms, quarter-sized hail (about 20c piece), 60 mph (110 km/h) winds etc. It was for a particular county, but I figured if my car radio had picked it up then it might be close-ish. So I beetled on down the Interstate until I saw a hotel chain I’ve stayed at before, in Waxahachie. My intention was always to stay somewhere south of Dallas and north of Waco, so that fitted. I’m pretty sure the storm that the radio had warned those in the area about was the same one we’d gone around an hour or so earlier in the plane.

I’m now ensconced in my room with NO intention of going out until I leave tomorrow; I’m on the second floor of a 4-storey hotel, and my car is parked away from trees with its nose just under an awning right up close to the building, so here’s hoping the storm warning was for somewhere else and that all is safe tonight and in the morning. That said, in the past few minutes there have been some decent thunder rumblings….

Oh, and someone has WAY too much time on their hands… this was in the bathroom of the hotel I stayed at in Waxahachie:

hampton_inn_elephant02

Yes, it was a towel folded into an elephant. Not sure about the tap position though… 😉


US trip 2013: Day 4: Monday 4 March

4 03 2013

No doubt today’s missive will be quite a bit shorter as we start the first day of the first conference today. I’ll be posting my conference summaries on my professional blog: http://cybertext.wordpress.com.

After the brilliant sleep I had on Saturday night, last night’s was terrible. It took ages to fall asleep, and the sleep I did have was in fits and starts — it seemed like I was awake most of the night, but in a semi-conscious state, not fully awake as jet lag tends to do. Anyhoo… I’m up now and showered and almost ready to wander downstairs for breakfast and conference registration. The first session starts at 9, in an hour’s time.

More later…

Well, as it happened, there wasn’t much more to my day. It was filled with conference stuff. I ended up having one of the OMG plums for dinner as I had eaten well all day, wrote up my blog piece about the conference and went to bed.