Community Quilt 182

25 01 2015

Sometimes a quilt just sings to you — this was one of those. I loved its simplicity and how the quiltmaker had used all solids in graduated colour ranges in each rail fence block. And the use of various widths in the white sashing strips.

I decided to quilt it with a yellow thread — enough to show up on the white, but not enough to be overbearing and dominate the simple beauty of the coloured strips.

First, I stitched in the ditch around each coloured strip. Then it took me a while of looking at it to figure out how best to quilt it. I went through lots of options in my head and drawing over it with my finger 😉 Eventually, I decided on an all-over squared stipple motif and was about to start, but at the last moment I decided on really big swirly spirals, with about a half inch between the lines in each spiral.

I didn’t mark anything — all these spirals were free-motion.

I really like how it turned out. And I liked how the yellow added just a bit more life to an already vibrant and colourful quilt. The back looks pretty awesome too 😉

(Click on a photo to view it larger)

quilt182_01
quilt182_02

Back:

quilt182_03

Threads used:

  • Top: Isacord (40 wt, trilobal polyester, colour 0600)
  • Bottom: Fil-Tec Magna Glide Classic pre-wound bobbin (light tan)


Community Quilt 181

25 01 2015

This was a very ‘busy’ quilt, with lots of tiny half-square triangles and many many different fabrics, including an equally busy fabric in the border.

How to quilt it? I realised that doing anything other than a simple all-over motif would be lost in the ‘busy-ness’ of this quilt, so I opted for a variation of my ‘go to’ open headband motif. Instead of arcs, the centre part of each motif is a paisley (or a really big comma!).

I used a variegated thread in autumnal colours in all parts of this quilt, including the stippling in the border.

(Click on a photo to view it larger)

quilt181_01

quilt181_02
quilt181_03

Threads used:

  • Top: Fil-Tec Harmony ‘Autumn’ (40 wt, cotton, colour 14081)
  • Bottom: Fil-Tec Magna Glide Classic pre-wound bobbin (gray)


Community Quilt 180

25 01 2015

I liked the colours in this quilt — they were very cool and calming. And fresh.

How to quilt it? As usual, I started by stitching in the ditch around the main elements — the white strips in the middle and the borders. Then I tackled the white strips. I emulated the diamonds in the coloured strips stitching straight lines (with my Line Tamer ruler) from point to point (matching the side points of the diamonds in the coloured strips). Then I did a tight up and down ribbon stitch in the ‘background’ of these diamonds, causing them to ‘pop’.

Next, I did a wavy matrix in each coloured diamond (on-point square) in the coloured strips. But the setting triangles were too puffy, so I stitched a 3-petal flower in those to subdue the puffiness.

In the white border, I repeated the up and down ribbon motif, and then did a very large version of it in the widest border. In that border, I didn’t want the outermost points to be even, so I varied their length.

In the other borders I either stitched straight lines about a half inch from the seam lines, or left them unstitched (all the spotted green borders).

I was pleased with how it turned out — this was quite a ‘modern quilt’, and I hope my stitching showed that. And the back looked pretty awesome too 😉

(Click on a photo to view it larger)

quilt180_01


quilt180_04

quilt180_03

quilt180_02


Back:

quilt180_05


Threads used:

  • Top: Fil-Tec Glide ‘Linen’ (40 wt, trilobal polyester, colour 10WG1)
  • Bottom: Fil-Tec Magna Glide Classic pre-wound bobbin (white)


Community Quilt 179

25 01 2015

This was a big quilt with a lot of empty space. Each block was different but most had stars or diagonal lines, which helped me decide how to quilt the empty blocks.

First, I stitched in the ditch around each of the blocks, then around the main elements within each pieced block. To make these elements ‘pop’, I quilted the background only, in a simple smallish stipple.

To give definition to the empty blocks, I echo quilted about half to one in from the joining seam lines, then stitched a wonky 8-point star in each to stop them puffing too much. Finally, I did a large stipple in the main border and left the green framing border unstitched.

(Click on a photo to view it larger)

quilt179_01


quilt179_02


Back:

quilt179_03

Threads used:

  • Top: Fil-Tec Glide ‘Linen’ (40 wt, trilobal polyester, colour 10WG1)
  • Bottom: Fil-Tec Magna Glide Classic pre-wound bobbin (white)


Community Quilt 178

25 01 2015

Someone had spent a lot of time cutting out and carefully appliquing all those little hearts and big bows to create wreaths inside each block of this quilt.

How to quilt it? I started by stitching in the ditch around all the blocks, then I echo stitched about a quarter inch out from each heart and bow. Next I used my Line Tamer ruler to stitch diagonal lines inside each heart ‘wreath’, then stippled in the remaining white space.

I kept the border simple, just stitching a straight echo line a half inch from the seams.

(Click on a photo to view it larger)


quilt178_01


quilt178_02

Threads used:

  • Top: Fil-Tec Glide ‘Linen’ (40 wt, trilobal polyester, colour 10WG1)
  • Bottom: Fil-Tec Magna Glide Classic pre-wound bobbin (white)


Handi Quilter Sweet Sixteen: Needle Sensor Failure

19 01 2015

Occasionally you might get this message on your machine. Stop stitching immediately and investigate the cause.

In my experience, it’s almost always caused by something caught in the bobbin area — a piece of thread (it can be TINY), or a broken needle tip.

If you broke a needle, have you found the needle tip? It might be jammed inside the bobbin area. Mine was and my machine wouldn’t work (see https://rhondabracey.com/2013/04/22/oh-no/). I had to take it back to the dealer for them to get the tip out and to reset the timing. A broken needle jammed into the bobbin case invariably throws out the timing, which means your stitches may not form correctly even if you can get the tip out and the ‘needle sensor failure’ message goes away.

However, the most common reason I’ve found for the ‘needle sensor failure’ message is that some thread is caught inside the bobbin area, which is stopping the bobbin mechanism from moving.  If it’s thread, try these:

  1. Turn off your machine and turn it back on again – do you still get ‘needle sensor failure’? If yes, go to the next step; if not, try stitching again but be aware that if you get badly formed stitches (or no stitches), your timing is likely out and you’ll have to take your machine to a technician.
  2. Remove the needle plate and dust out any lint. Look for and remove any thread caught in the bobbin area.
  3. Remove your bobbin and bobbin case. Again, look for and remove any thread caught in the bobbin area.
  4. Slowly turn the handwheel at the back of the machine while looking down into the bobbin area – you’re looking for any piece of thread that might be stuck in there. If the handwheel is jammed, apply some pressure but don’t force it – if you can’t turn it at all, take your machine to the technician.
  5. Assuming you can turn the handwheel, turn it back and forth (slowly) looking for anything caught in the bobbin area mechanism. If you see any thread, remove it with tweezers.
  6. Turn the machine off, then back on again, replace the bobbin/bobbin case, and try to stitch. If you still have ‘needle sensor failure’, take your machine to your technician.


Making koala mittens

10 01 2015

The call went out after the devastating bushfires in South Australia for cotton mittens for koalas to cover the bandaged burns on their paws. The mittens were to be 100% cotton (easy for a quilter — that’s pretty much all most of us sew with), a pattern was provided, and an address was provided for us to send the completed mittens to.

It took me no time at all to find some old fabric scraps and pieces of fabric I no longer cared for that were big enough to make mittens from. I ironed and cut out all the pieces, then dusted off my overlocker (serger), which I hadn’t used in several years. After rethreading it (fun… not!), I got sewing.

First I serged the straight bottom edges that were to remain open, chain stitching those.

P1030172

Next, I put two pieces together right sides out and serged around the edges. The reason I put the right sides out and left the stitching on the outside was two-fold — first, it was easier than stitching then turning each one, and second, I figured that having ragged seam joins inside wouldn’t be good for the koalas as their claws could get caught in any loose threads.

P1030174

P1030175

After I’d made 48 of them, I stitched on a piece of yarn to tie the mittens as per the instructions (which don’t tell you what length yarn — I used pieces about 10 to 12 inches long).

P1030176

And then I modelled a completed mitten on my polar bear 😉

P1030177

They are now all packed up and ready to send to the other side of Australia. I’m sure these mittens will be used for other animals too and/or distributed to other animal welfare agencies if they receive too many — I can see them being perfect for cats and smaller dogs too, as well as for the front paws of kangaroos.


The warmth of a human body

9 01 2015

I had to go in for a minor medical procedure today — just some tests that required a local anaesthetic to the region, a small nick and then the taking of a couple of tissue samples. The room had a nurse, the doctor who performed the procedure, and a sonographer who manipulated the ultrasound thingummy so the doctor could tell where to take the samples from. The procedure itself was painless, but it was a bit scary lying there by myself while all these things were happening around me. Sure, they told me every step of the way what would happen and when, but still… it’s not the most pleasant situation to be in.

What was a comfort, however, was the close presence of the sonographer who had to stand on one side of me while leaning over to manipulate the ultrasound for the doctor. The warmth of that human body was incredibly comforting and helped me relax.

I have no idea who she was, but just that touch and her warmth soothed me. At the end of the procedure, I mentioned to all three women in the room how comforting that was.

I hope medical professionals don’t shy away from such contact in the future for fear of litigation or accusations of inappropriate touching. It was amazing how calm an inadvertent touch such as this made me feel. I can now see why it’s so important to touch the hands or body of someone who is dying.

(Update: Results are all clear!!)


Losing tourist dollars

6 01 2015

I’ve been meaning to write this post since mid-December, but a house guest, Christmas, summer holidays etc. got in the way.

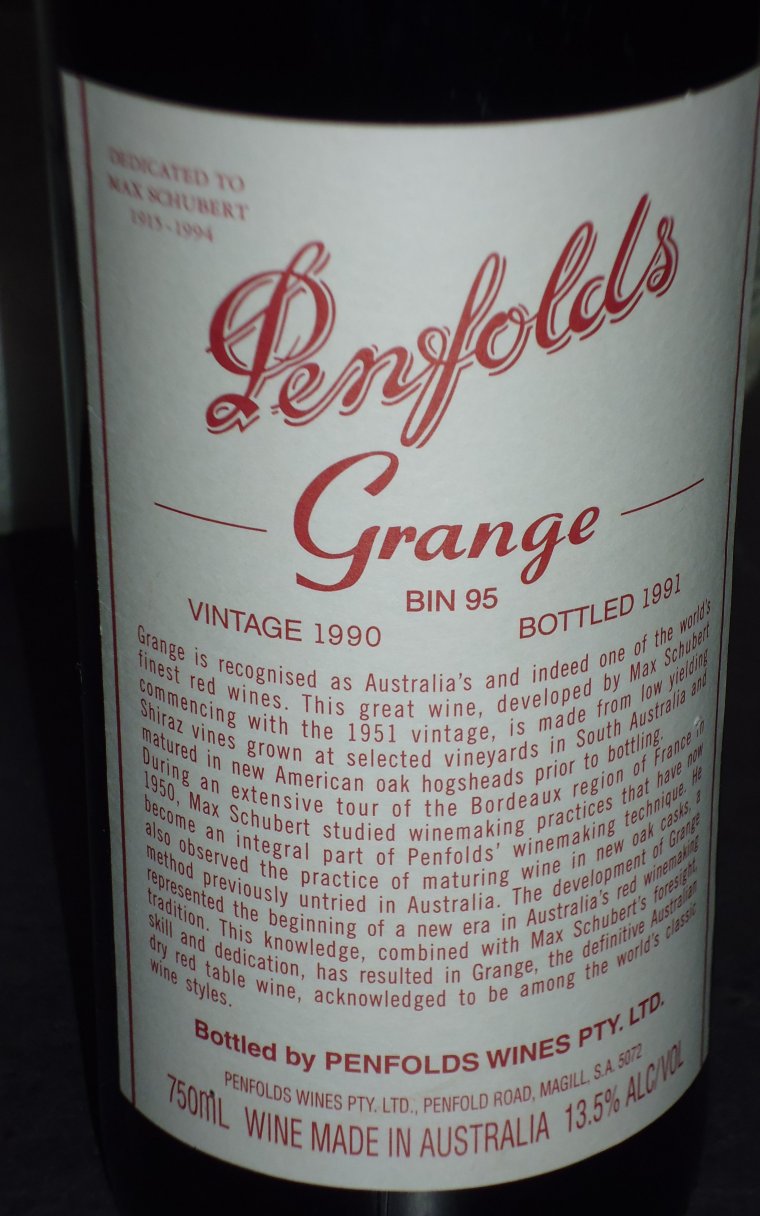
I had a significant ‘zero’ birthday in December, and to celebrate, we intended opening and drinking a bottle of 1990 Penfolds Grange for the occasion (I had purchased it in the early 1990s and we kept it for this birthday). This is a significant wine, and reputedly one of the best Grange vintages ever produced.

P1020215 P1020216

The obvious food to go with such a red wine is steak, and we have a couple of favourite steak restaurants that we like to go to. One of our favourites for special occasions is a steakhouse in Albany, a 750 km (approx 8-hour) round trip from where we live.

As Albany is so far away, we only go there about once a year, and we always stay at least one night, usually two. While in Albany, we eat breakfast along the cafe strip in York St, and often purchase clothes for one or both of us from local businesses. And of course, we purchase fuel on the way there and back, and have our meal at the steakhouse one night and at another local restaurant the other night. All up, I’d guess we would spend well over $500 in Albany if we stay two nights, and potentially more than $1200 if we also buy clothes and local wine.

But this year Albany missed out on all those tourist dollars. Why? Because of one restaurant’s policy in no longer allowing us to bring our own wine (BYO), despite their website menu saying that we could (http://www.rustlers.com.au/images/user-images/documents/Rustlers-Drink-Menus-2013.pdf — see the item for ‘corkage’ at the bottom of the second page). Yes, we were prepared to pay corkage to drink our own wine (for those not familiar with Australian restaurant lingo, corkage pays for any serving of your own wine by waitstaff and providing/cleaning the glassware), but we were prevented from doing so by their policy.

I called the steakhouse to find out if we could bring this special bottle of wine for this special occasion. I was told no (their website — but not the drinks menu — says ‘Strictly no BYO’, so there was a mismatch of information there and I queried them on it). I was told that as they now had a tavern license the Liquor Act prevented them from allowing BYO. I was surprised, as I didn’t think any restaurant in our state could legally prevent a customer from bringing their own wine. Yes, they could actively discourage it, but I didn’t think they could stop it. I checked the Liquor Act and found NOTHING in there that prevented this, although I did find a clause that said a licensed premises could make some decisions about BYO for ‘commercial reasons’. That’s NOT the same as blaming the Liquor Act for this policy, which is what the restaurant did.

The upshot of this commercial decision by the restaurant is that the Albany region lost out on more than $1200 tourist dollars, just for the sake of a single bottle of wine. Where do I get this figure from? Let me break it down, based on past experience:

  • $120 for the meal for two people at the steakhouse
  • $320 for 2 nights’ accommodation
  • $80 for two breakfasts for two
  • $60 for fuel, plus more for drinks/food from the service station
  • $200 for clothing for my husband
  • $200 for clothing for myself
  • $100 for a meal in another restaurant on the second night
  • $200 for wine from the cellar door of a local winery

We were just two people. Extrapolate this $1000+ to other couples or families and you can see that a single policy such as this one could have negative flow-on effects to the local economy. Instead of injecting $1000 or more into local Albany region businesses, we spent nothing there at all.

By the way, our local steakhouse (also a tavern, so if there was something in the Liquor Act they would have said so) allowed us to bring the wine and so they got our business for the evening, which was just $100 as we went home after dining there and spent nothing more on other activities that you participate in as a visitor to a region.


Yummy yoghurt ice creams

4 01 2015

Making these is SUPER simple and requires about 2 minutes preparation, then waiting a few hours (or overnight) for them to harden. I’ve made heaps this summer, and they are a great healthy snack. The only equipment you’ll need that you may not already have is a set of ice cream/popsicle moulds — many kitchen stores sell them for about $10.

Ingredients:

  • 500 g of yoghurt (my preference is Greek yoghurt, or Greek Vanilla yoghurt for a creamier and less sharp taste)
  • whatever else you want! I decided to go healthy with fried fruits and nuts. I chopped up some nuts (cashews, almonds, macadamias), some dried fruit (apricots, a date) and added some more dried fruit that was already in small pieces (cranberries, sultanas). For the batch I’ve photographed below, I also added a few dark choc bits (used for chocolate chip cookies) and some passionfruit pulp. You could use fresh fruits like blueberries, strawberries, stone fruit, mango, banana, or whatever you like.

yoghurt_icecream01

Method:

In a bowl mix all the ingredients using a spoon (this takes only seconds).

yoghurt_icecream02

Spoon into the ice cream moulds leaving a small air gap. If the mould allows it, tap the base on the counter a few times to release any air bubbles and settle the ingredients into a solid mass. Add the sticks. Place into the freezer for several hours or overnight.

To eat, run the mould under some hot water for a few seconds then wiggling the stick slowly, carefully loosen and release the ice cream from the mould. If it’s stuck, run it under a bit more hot water.

Enjoy!


yoghurt_icecream03