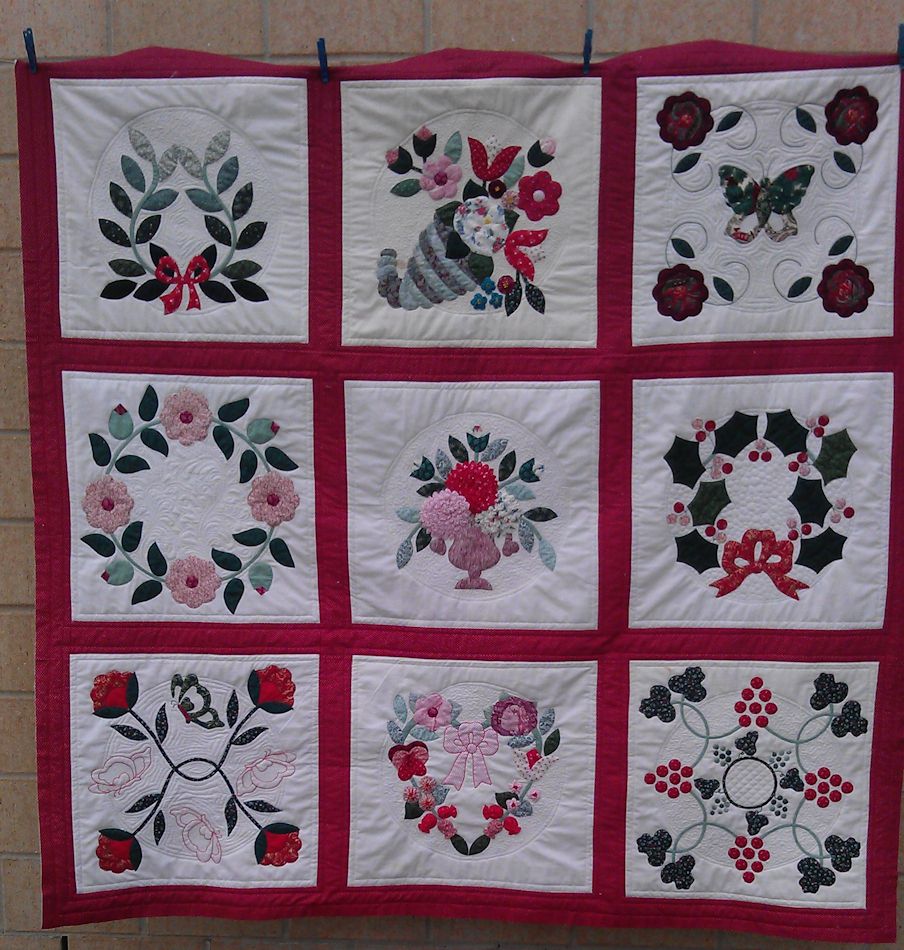
This pretty quilt was a real challenge. The first challenge was how to quilt it, the second was how to deal with some of the very bulky 3D objects, and the third challenge was what to do about the unfortunate rust-type staining on some of the blocks.
Before I stitched any of the main designs, I stitched in the ditch with invisible thread around EVERY single applique motif. Yes, there were a lot… This took several hours.
I tried removing the worst stain with some dishwashing liquid, but while that dulled the stain a little, it didn’t take it out. I sure wasn’t going to wash this quilt as there were a LOT of red fabrics in it and also red thread used for hand embroidery — if only one of those reds ran, I’d be in a worse situation than when I started. So I decided to leave the stains and hope that someone else has a good idea on how to deal with them, or that no-one else will notice them 😉
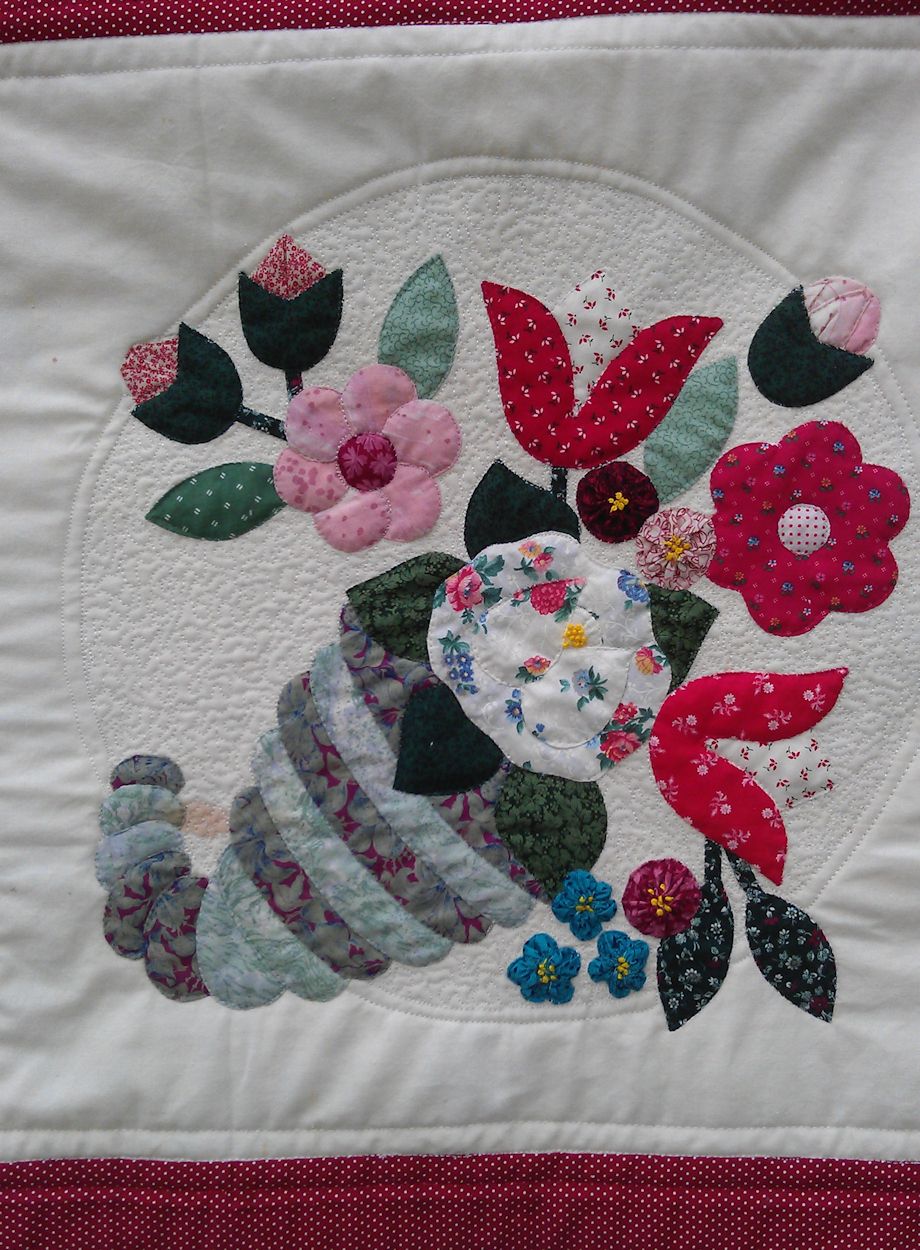
The very bulky 3D objects (especially the chrysanthemums in the centre block) were hard to get around and I got my open-toe hopping foot caught in them a couple of times, so, where I could, I backed into these objects to avoid creating havoc.
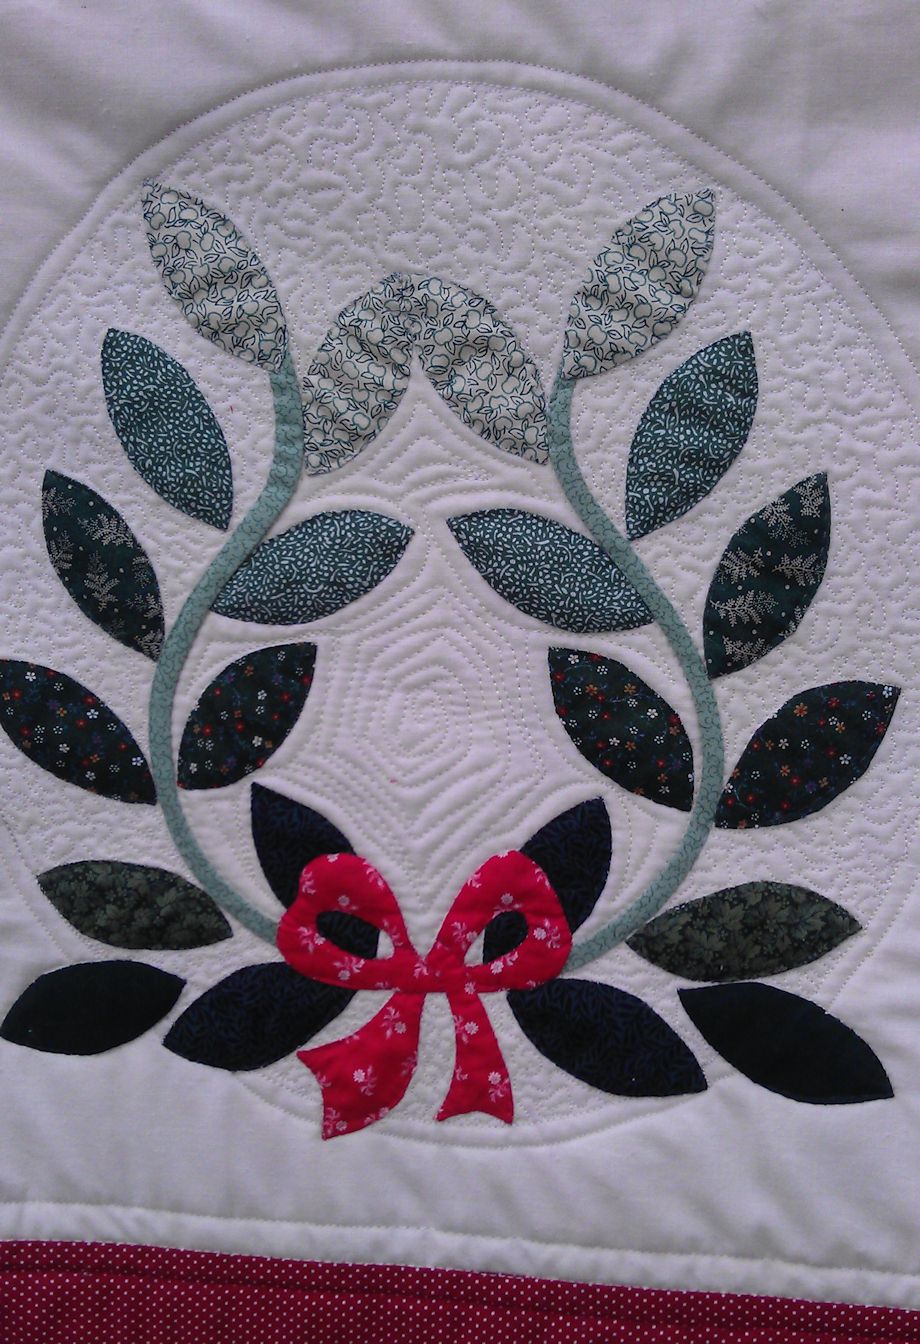
But the big challenge was how to quilt this quilt. The blocks were really big (18″ square) and there was a lot of white space surrounding each of the hand-appliqued motifs. I decided on a circle around each, but puzzled over what circular household object I had that was big enough for me to make a circle template. Nothing… So I sent my brain further afield to the shed where I remembered that we had a rock/soil sieve that was large and circular. Off to the shed… Yep — that worked! I pulled apart a 30-pack Diet Coke carton and drew two circles on it with a Sharpie — one for the larger circle at the top of the sieve (nearly 16″ diameter) and the other for the smaller base of the sieve (~13″ diameter). I then cut the templates out of the cardboard and laid them over the motifs. Initially I was going to use the larger one, but decided on the smaller one as I could get an under/over effect with it on almost all the applique designs; with the larger one, almost every design was going to be inside the circle.
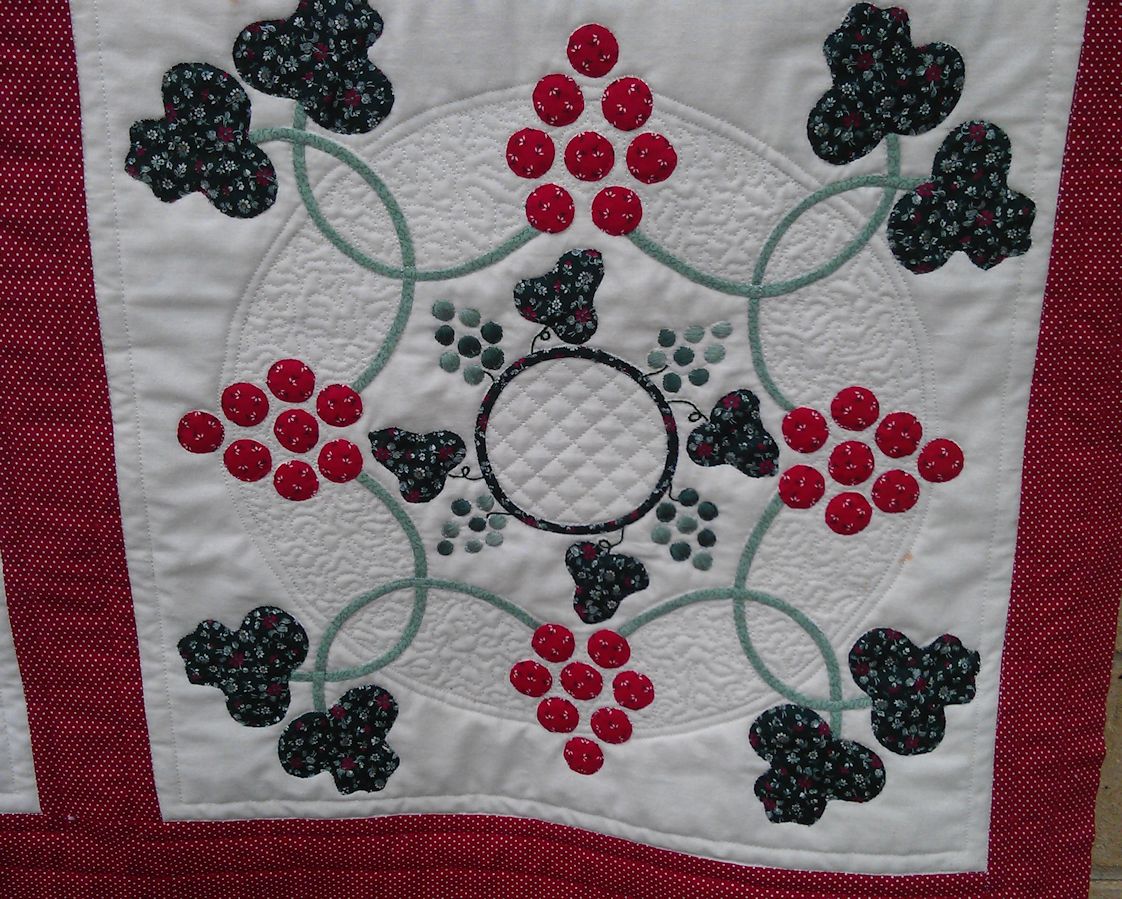
I then used an ordinary 2B pencil to lightly trace around the template on each motif — light enough to see the pencil lines when I was stitching, but not enough for them to show once stitched. Then I used an off-white thread to stitch each circle along the marked lines. Then I braved ‘winging’ it by eyeballing a stitching line 1/4″ outside the main circle, thus creating a circular border. Some of the lines were a little wobbly, but I was pretty pleased with them overall.
Next came the decisions about how to quilt inside each circle — or whether to leave the insides unstitched and only stitch the areas outside the circles. I decided on stitching inside the circles, and while I initially thought I’d quilt outside the circles too, I decided not to once I’d quilted the insides, as I thought it would be overkill. Of course, each motif was different — should I use the same quilting stitch inside every circle, or vary it according to the design of the motif?
The end results are below. I’m pretty please with how they turned out, but they took much longer than I thought they would — I guess I spent about eight to twelve hours quilting all the blocks, in addition to the time spent stitching in the ditch.
Finally, what to do with the red sashing and the borders… I went with something very simple here so as to not draw the eye away from the centres of each block, and just did a straight line box around each block, some 1/2″ inside the block (in off-white), stitch-in-the-ditch at each seam (also in off-white), and 1/2″ outside the block (in red thread).
(Click on a photo to view each block in detail)


Threads used:
- Top: Off-white: Fil-Tec Glide (40 wt, trilobal polyester, colour ‘Linen’ #10WG1); Red: Fil-Tec Glide (40 wt, trilobal polyester, colour ‘Cardinal’ #70001); Green (for the holly stems): Robison-Anton (40 wt, rayon, colour ‘Evergreen’ #2315)
- Bobbin: Invisifil (100 wt, beige)


After looking at these most recent finishes, I definitely love, love, love this one!!! The stitching is so awesome and fits so perfectly! Well done!!!! Looks like your “Sweetie” is performing well! Hugs, D
Hi Rhonda, This quilt looks great – a lot work went into this one – it is lovely. One thing you might be able to help me with – I’m have put a deposit on a Sweet Sixteen but I wasn’t going to get the True Stitch Regulator. Do you use a true stitch regulator? Would it help with doing stitch in a ditch? I wondering now perhaps I should have got the True Stitch Reg? What are your thoughts? Any comments? Thanks in advance. Donna in Brisbane. Email:: donnamchambers@gmail.com.
Hi Donna
No, I don’t use the Tru Stitch. I bought my Sweet Sixteen before it was available, and as I already had some experience FMQ’ing by the time it came out, I decided not to (it was about an extra $1000 when it came out).
My stitches aren’t perfectly even, but that’s what makes my quilting unique 😉 I also don’t aim for perfectly even stitches as I don’t quilt for shows/exhibitions where that might be important to the judges. Any quilts I’ve entered into competitions have been art quilts with a lot of thread work, so perfectly even stitches aren’t an issue.
Stitch in the ditch stitches rarely show, so perfect stitching there seems a bit pointless to me — but that’s my opinion only.
What I have found very useful for stitch in the ditch is the Line Tamer ruler (see https://rhondabracey.com/2013/01/28/using-the-line-tamer-ruler-with-the-handi-quilter-sweet-sixteen/). For about $30 plus postage, you’ll find this ruler super cheap (compared to the Tru Stitch!), and easy to use. It will keep those lines nice and straight, and you can set you speed on the Sweet Sixteen for whatever feels comfortable for you when using it. Some people use this ruler at about 10% speed; I use it somewhere between 50 and 70% speed as I’m really familiar with using it now.
I hope you love your Sweet Sixteen as much as I love mine!
–Rhonda