Adventures in plumbing

26 10 2023

Back in Feb/Mar 2023, we had our en suite bathroom renovated. The first step in that process was stripping out all the old bathroom fittings, tiles etc. (https://rhondabracey.com/2023/02/13/bathroom-renos-day-1/), and as part of that process, the now-open pipework was capped or covered to prevent things falling down it or smells coming up from it.

Fast forward to September and I started to notice some occasional issues with the en suite toilet and hand basin—the water in the toilet would rise almost to the rim on flushing, then disappear fairly quickly, coming to rest at a lower level than usual in the pan. And while this happened, the hand basin would gurgle and occasionally spit up water from the trap (it smelt of toothpaste!). It was disconcerting to say the least but it only happened a couple of times. But over the next few weeks, it became more regular. So it was time to call the plumbers.

I’d pretty much diagnosed that the issue was somewhere in the line from the en suite to the main line to the septic tank (we’re not on sewerage here). No other areas of the house had flushing or water dispersal issues, and nor did the shower in the en suite—no gurgling from there. When I looked at the house plans (which only had rudimentary and indicative markings for the plumbing), it appeared that the en suite shower was on a different line, which fit with my layperson’s assessment of where the problem was,because there seemed to be no issue with the shower.

The plumbers tried many things to free the blockage on their first visit—plunging the toilet and putting an acid down the pipes to be left for 24 hours. They told me that if that didn’t fix it, they may have to cut out part of the concrete path outside or remove the (new) toilet pan. These sounded like drastic measures! Putting a drain snake down from the toilet wasn’t really an option as it’s motorised and thus very powerful and could smash the toilet or damage the floor tiles. This did not sound like a good option. After 24 hours, I flushed the toilet 3 times and had the hand basin running at the same time—all appeared to be well. Until I had to flush solid matter, and the problem resurfaced.

On the second visit, the plumber they sent (Bryce) was fantastic in trying to diagnose the issue—he tested one variable at a time and tested multiple times to emulate the problem. At one point he removed the trap from under the hand basin and suddenly everything seemed to work well. He thought it was a venting issue because as soon as he put that trap back on, the issue returned. He installed a new trap with a vent on it, but that made NO difference. The problem remained. He asked me about the renos and what was done—I showed him the pictures I took each day, which proved that the strip-out guys and the renovation company had capped all pipe openings and put a large sponge into the toilet water pipe. I doubted it was a problem that stemmed from the renos because the reno had happened more than 6 months ago, and surely any issue would’ve made itself known long before now. Bryce was as baffled as me.

He decided to look for the inspection opening (IO) outside the bathroom window. But there wasn’t one! We discovered that ALL 6 IOs that were on the house plan I had from the previous owners (who built the house) were ALL under the concrete path! Who does that???? I contacted the building company to see if they had better plumbing drawings, but they didn’t. They also confirmed they did none of the concreting/paving etc. around the house—it was all done by the original owner (and he was in the construction industry contractor so I’m pretty sure he did it all himself). I also contacted the Shire to see what they had—they found a 7 page document from the septic tank installers, which had a bit more detail than the house plans, but not a lot. I also spoke with the manager of the reno company—he was as baffled as me and the plumber, especially with the time since the reno—we all agreed it couldn’t possibly be as a result of that.

The weekend came and I continued to use the other bathroom as I’d been doing for nearly a week. First thing Monday morning, the reno manager called and asked if he come and take a look (he’s an ex-plumber) because it had been nagging at him all weekend. He also did various things to try to dislodge whatever was blocking the line (BTW a mop is a handy thing to use to plunge the toilet if the water is fresh), and we talked at length about the possibilities. He confirmed that everything had been capped, and I agreed—I’d watched every step of the process and had photos to confirm this. We both agreed that it was extremely unlikely to be a result of the renos, but as I don’t have kids, grandkids, or pets, there was no way anything else could have got into the pipework other than the usual toilet paper and solid and liquid waste. Also, the toilet is a ‘smart’ one, with bidet functions, so toilet paper usage is far less than for a standard toilet (https://rhondabracey.com/2023/04/02/using-a-smart-toilet-for-the-first-time/). Looking at the plans and using his knowledge, we identified where we thought the pipe exited the house and thus where the IO was likely to be. He said he COULD remove the toilet pan, but was reluctant to do so, except as a last resort, and I agreed.

Meantime, the plumbing company arranged for Bryce to come out again on Wednesday (I was away on Tuesday, and on Monday I was still waiting on plans from the Shire etc.). I showed him the newer plans I had and where the reno manager and I had calculated the pipe exited the house. So he cut a square of concrete out of that section of the path and started digging. And digging and digging. He went down >500 mm and under the sides almost a similar amount (he had to be careful as there was a heavy heat pump for the hot water system [HWS] sitting right next to the hole and he didn’t want to undermine the structural integrity of that piece of concrete). Nothing. No pipe, and you really can’t miss a 100 mm pipe! And because no pipe, no IO. Where was it??? There was no point going deeper as he was already level with or below the level of the opening into the septic tank, and the pipe would have to be higher than that to have the appropriate fall to the septic. He and I were baffled as to where the pipe could be.

Digging the first hole, but nothing found

I came inside and related this to my husband. He said it would be great if there was geophys (ground-penetrating radar) they could use to find pipes underground. And then it came to me—why not listen for the sound of water flushing through the pipe? I suggested this to Bryce and he was willing to try, because he was rapidly running our of options and I was despairing that we’d never find it and get the blockage cleared. He lowered half his body into the pit he’d dug and I flushed the toilet. He couldn’t hear the water (too much ambient traffic noise from the highway) but got me to do it again. This time he put his hand on the sand and felt the vibration of the gurgling! It was about 500 mm to the right of where he’d already dug and certainly NOT where the plans indicated it would be.

Bryce cut another hole in the concrete further along (past the dry floor waste opening and a rainwater downpipe) and found the pipe and the IO! The IO was partially covered by the downpipe’s pipework (who does that??), but that pipe (40 mm?) was flexible enough to be gently moved aside. As soon as he took the IO cap off, he came inside to get me to show what he’d found. There was matter clogging up to the top of the IO—yuck. So he donned a chemical glove and started to remove it. A couple of minutes later he called me outside again—he’d found the culprit! It was a piece of curved and broken off ceramic that looked like it had come from a toilet. And so it was (as confirmed by the reno manager when I sent him the photos). After clearing everything out, we test flushed the toilet many times, along with filling the hand basin to confirm that everything was now flowing as it should.

IO and angles of the pipework where the blockage was

Blocked pipe

We think what happened was that when the strip out was being done, the toilet pan had broken and a piece (not small—it was about 140 mm long) had fallen into the toilet waste pipe before it was capped. The strip-out guys wouldn’t have heard it fall (it was the noisiest time of the whole reno) or seen it in the pipe, and then they capped the pipe, which was later further blocked off with the sponge and then the new toilet was installed over the top of the pipe. It likely lay in situ for a while, gradually moving down the pipe until it hit the (small) angled bend and could go no further. It took 6+ months to do this. Meantime, because of its shape, most waste had gone past it without a problem. Until it didn’t. Once it got to the bend (where the IO was), it lodged there, and while some waste passed it by, not everything did, so there were times when it was fully blocked and so the water backed up the pipework, causing the gurgling and spitting in the basin and toilet. And then it would drain away, to a degree.

The sense of relief at finding the cause was palpable and Bryce revealed that he was at a complete loss as to what to do next if he hadn’t found the IO and that piece of ceramic. My sense of relief was equally as great as his!

I sent photos off to the reno manager—he’d asked me to keep him in the loop. And he and the strip-out people agreed to pay a third each of the bill (I paid the other third because had the previous owners done the right thing, all the IOs would have been accessible).

Bryce filled in the hole where nothing was found and concreted it over again, and put in a cast iron IO box above the IO and pipe, with a removable lid, and concreted around it so at least one of the IOs is now accessible if there are any future problems with that pipe.

You can see from the photos below why he couldn’t just extend the hole he’d already dug (the one on the left)—there was too much immovable infrastructure around it (HWS heat pump on the left, electrical wiring in the metal box, dry floor waste opening, downpipe, electrical outlet, and then the HWS itself. Oh, and we think, based on where this IO was, that the one for the shower is likely UNDER the HWS. Great…

Bonus: I now know more about plumbing, and specifically this house’s plumbing, than ever before!


Back in the groove

6 10 2023

I knew my sewing/quilting mojo would return eventually! I’ve been on two 4-day retreats this year and both times I’ve sewn.

July 2023 retreat

The first retreat was in July 2023, and I did some repairs to a jacket of my Dad’s so it would fit me, added the borders to a quilt top I started 2 or more years ago, made some bowl holders, made a set of 3 bags using fabric I’d created from scraps, and a zipped project folder. When COVID lockdowns were on, I did a class with Sheila Frampton-Cooper where I learned how to sew improvisational curves etc. I didn’t know what to do with the new pieces of ‘fabric’ I’d created, but when I decided to make the bags, that fabric seemed perfect for it. The pattern I used for the bags was Open Wide 2.0 from http://www.byannie.com (https://www.byannie.com/open-wide-2). I learned a lot about working with mesh, soft and stable, Wonder Clips, and zips. I learned even more about zips in the most recent retreat in October (below).

Some of the photos from the July retreat:


October 2023 retreat

In the most recent retreat, I ventured a bit further into bag making. Here’s a tip—if you find a locally handmade large fabric bag in a market for less than $100, the maker is LOSING a lot of money. Why? The cost of the materials (pattern, zips, soft and stable, mesh, fabric, bag hardware etc.) was well over $100 and that’s not counting the skills and labour involved (the travel bag alone took me 20+ hours to make, including several hours of prep time).

This time I made another set of 3 bags, a caddy for carrying stuff (e.g. for a baby, for yarn, for fabric, whatever… [https://www.byannie.com/catch-all-caddy-2]), and a large travel bag suitable as a carry-on (https://www.byannie.com/ultimate-travel-bag-2). All the patterns were from By Annie. And I also stabilised a grocery bag for my Mum that was starting to fall apart. I learned even more about zippers, particularly a useful trick for adding zipper pulls to a long length of zipper tape (I can buy it in 4 m lengths, with about 20 pulls in the packet, but NOT inserted onto the zipper tape. See below the photos for this trick!

Zipper tape and pulls

When you buy zipper tape by the metre, you have to add the zipper pulls yourself to create the zip. Fortunately, zipper tape and pulls for bag making are bigger than those for dressmaking, so it’s easier to work with them. And they have plastic teeth that make them easy to cut. There are YouTube videos on how to use a fork for adding a pull, but the technique I was shown doesn’t require any tools. The most important thing is that you have a length of tape that has at least one ‘good’ end—which is where the zipper part finishes and there’s just a fabric end (2 bits) with no teeth. Always preserve the good end and only cut from the other end.

The other critical bit of information is identifying the ends of the zipper pull, which is the bit (usually metal) that goes onto the tape and creates the zip. There are two ends—the flat end (the ‘bum’) and the pointy end (the ‘head’), and there’s the puller itself. You’re only concerned about the heads and bums! If the zipper tape is closed, then you start with the bum end of a pull; if it’s open, you start with the head end.

  1. Go to the good end of the zipper tape.
  2. Make sure the zipper tape is facing up (i.e. the teeth are facing you) and decide if you need to insert the puller bum first (if the tape is closed) or head first (open tape).
  3. For closed tape: Make sure the zipper pull is also facing up. Insert the good ends of the tape into the flat (bum) end of the pull until they won’t go any further. Hold the two good ends and split them apart—this should open the zipper and force the pull down the zip. You now have an open good end, so it’s time for the head end.
  4. For open tap: Again, make sure the zipper tape and pull are facing up. Insert the head end of the next pull into the open good ends until it won’t go any further, then hold the good end and push the zipper pull down the tape. This will close the tape and you’re ready to insert another bum end of a pull.
  5. Add as many of these as you want (I added all 20 pulls, just moving each further down the 4 m length of zipper tape).
  6. When you ready to cut your zipper tape to length, make sure there is at least one pull along that length (some bags require 2), and ONLY CUT from the non-good end. Always preserve the good end as that’s the only thing that makes this technique easy.


Air fryer: Reheating pizza

31 08 2023

I confess—I LIKE cold pizza and will have leftover slices for lunch the following day. But today I decided to reheat 2 slices from last night’s pizza in the air fryer for my lunch. And I’m not sure I’ll go back to cold pizza again! Not when this was so quick and gave a lovely crispness.

For my future reference:

  • Put pizza slice(s) on some baking paper and into air fryer basket(s)
  • Max crisp setting (240C) for 3 minutes ONLY. Any longer and they would have burnt.

Delicious!


Air fryer sausages

24 08 2023

It’s a been a long time since I wrote a blog post, and yes, I’ll get to the air fried sausages soon. After our bathroom renos and my appendix operation earlier in 2023, our world was turned upside down when my Dad passed away. He lived—and died—on his own terms, and while it was an immediate shock, his death wasn’t unexpected. I’m Executor, so there’s that.

Anyhoo…. back to the air fryer… A few weeks ago I decided to bite the bullet and join the revolution and get an air fryer. I realised it was the first major change I’d be making to my cooking practices in 40 years (I bought my first microwave oven in 1982 or 1983). At the time, I paid about $800 for that beast, and it was still going strong when we moved to the country in 2007, but there was NO counter space for it in the house we moved into, so I had to get a much smaller microwave. After 20+ years of faithful service, that microwave went to a new home and is probably still going! Microwaving changed how I cooked and added a new tool to my repertoire of techniques. 40 years on and I expect the air fryer to do the same.

The air fryer I bought certainly wasn’t the cheapest around (RRP AU$499, but I got it for $379), but it had 2 big baskets that could be controlled independently or synched, or matched (if you were doing the same thing in each), and that was a big selling point for me. The model I bought was a Ninja Foodi Max XXXL Smart Dual Zone Air Fryer (model AF450). It’s also very quiet, unlike many others, and puts out very little residual heat.

I haven’t used it a lot yet, but suffice to say that it does frozen chips and meat pies really well! I’ve also used it for pork chops and lamb burgers, and last night I tried sausages in it. They were brilliant! Normally, I’d cook sausages in a frying pan (we don’t have a BBQ, for reasons…), starting with caramelising a mixture of onions, mushrooms, and fresh chillies, then adding the sausages and cooking them on a fairly high heat until they were cooked and the onion mix was fairly mushy. My concern was how to get the caramelised onion mixture right in the air fryer—a few YouTubers showed various techniques, but none seemed to give the result I was looking for, so I decided to try something different—par cook the onion mix in the microwave then add to the sausages near the end of the cooking time. And it worked brilliantly!

Here’s what I did:

  1. Optional: Remove the base rack of basket 1 in the Ninja and place a piece of bread on the bottom of the basket, then replace the base rack. (I learned this bread trick on YouTube, where the presenters recommended it for things like sausages and bacon as it helps absorb the fat, making the basket easier to clean and helping prevent potential smoke because of the high heat cooking off the excess fat).
  2. Put 7 breakfast sausages onto the rack (just a single layer).
  3. Set basket 1 to Air Fry setting for 15 mins at 200C.
  4. Optional: Cut up one onion, half a big mushroom and 3 bird’s eye chillies, put in a bowl and microwave for 30 seconds at a time, for a total of 90 seconds. This par cooks and softens the onion mixture.
  5. At around 7 mins, remove the basket and turn the sausages over/shake them. Replace the basket and continue cooking. (They were looking GOOD! I put in the meat thermometer and they seemed to be cooked through already.)
  6. At around 11 mins, I removed the basket again, moved the sausages a bit, then tipped the onion mix over the sausages, spreading it evenly with silicon tongs, then replaced the basket to continue cooking.
  7. Every minute or so, I checked and turned/re-spread the onion mix so as to prevent any bits possibly burning. (I probably wouldn’t do this as often next time.)
  8. At 15 mins, everything was done. The sausages had a wonderful colour and appearance, as did the onion mix, and the thermometer indicated they were well cooked.
  9. I’d pre-cut the hot dog rolls, added sauce and cheese, so I put 1 sausage and some onion mix in each roll, then put the rolls back into the basket after it was turned off to heat through and melt the cheese (there was still some residual heat), while I finished prepping the salad.

Verdict: They were DELICIOUS and I’d use this method any day over doing them in the pan. My husband said they were the best I’d ever cooked! (he hadn’t been as keen on the pork chops or the burgers cooked in the air fryer). Personally, I don’t think the onions were as sweet as doing them in the pan, but it was only a very minor difference in flavour.

Update: I thought the bread under the rack would’ve have absorbed a lot of fat, but these sausages must’ve been lean because the bread was just dried out on the side facing the heat and had almost no fat. The base of the basket was super clean.


Using a smart toilet for the first time

2 04 2023

Regular readers will know that we had our en suite bathroom renovated recently, and as part of that renovation, we had a ‘smart’ toilet installed (an Arcisan Neion Intelligent Toilet NEO41005; details:
https://www.streamlineproducts.com.au/neion-wall-faced-intelligent-toilet-with-remote-and-arcisan-concealed-cistern).

So, what’s a ‘smart’ toilet? Why did we buy one? And what advice do I have for anyone, like me, who is using one for the first time? Read on… (content warning: I won’t get too graphic, but naturally, I’ll have to talk about bodily functions at times)

Bottom line (sorry!): Would I get one again? Yes!

What is a ‘smart’ toilet?

In a nutshell, it’s a toilet with built-in cleaning (bidet) functions. But unlike classic European bidets (that I’ve read about, but never used), it’s not a separate item in the bathroom that you straddle (facing the wall). Instead, you use it as you would any other western-style toilet, with the cistern at your back.

The built-in bidet functions of the one we have includes settings for women and men (for the anal, perineal, and perhaps vaginal areas only, not for the urethral area on women), adjustments for cleaning wand position, temperature and flow rate of the water, temperature of the drying function, self-cleaning and deodorising functions, and the ability to program different sequences of settings for 2 users (not tried yet). There may be more functions I haven’t tried.

It’s operated by a battery-powered remote control (see image below) and/or a knob on the side of the toilet seat that you push or turn in various directions for the various cleaning and drying functions (I haven’t tried the knob yet).

In the case of the one we have, it also has an built-in night light so that you don’t have to turn on an overhead light in the middle of the night and thus cause your eyes to adjust both to the brightness and then back to the dark as you go back to bed after a middle of the night pee. A light may not be as necessary for women, but it’s very necessary for men.

Notes:

  • None of the functions relates to flushing—that’s still done manually. One of the biggest questions I had when I was investigating the toilets was ‘What happens if the power is out?’ and the answer is that you still use the toilet as per any other manual toilet because the flush mechanism is manual and not connected to the power at all. You just can’t use the cleaning and drying functions during a power outage.
  • The electrics for this toilet had to be hard-wired behind the scenes (there are strict rules in Australia about water and power in bathrooms and how close they can be), and I think the electrician installed a junction box inside the wardrobe of the spare room behind the en suite bathroom. He also added an on/off switch for the entire toilet underneath the light and fan switches inside the toilet (also not used—we just keep it turned on, but if we were going away for more than a day, we’d consider turning it off because you don’t need the light etc. to remain on).
  • This brand/model doesn’t have a heated seat function, which really isn’t necessary where I live in Australia—there might only be a couple of days a year where I’d think that would be ‘nice to have’. Speaking of the seat, the seat and the lid are ‘soft close’, so no worries about dropping the seat in the middle of the night and waking up anybody else.
  • The water usage for the 3-minute (default, but you can stop it at any time) cleaning function is between 350 and 650 mL/min, depending on the flow rate chosen, so between 1 and 1.9 L of water. I haven’t measured the power usage as yet, but when I do, I’ll report back.
Handheld remote control for the smart toilet, showing the icons for each function

Handheld remote control for the smart toilet, showing the icons for each function

Why did we get one?

These smart toilets aren’t cheap—in fact, they cost quite a bit more than a high-end standard toilet, so why did we get one? In simple terms—age.

No-one is getting any younger and the aim of our bathroom reno was to make our en suite bathroom as accessible as possible to cater for us as we age (we’d like to ‘age in place’ in this house for as long as possible).

That meant:

  • having doors wide enough to cater for a wheelie-walker, wheelchair, someone on crutches etc.
  • adding a grab rail to help someone with an injury or disability or just plain wonky on their feet to help themselves onto the toilet or in getting up from it
  • adding a toilet that could help someone who has difficulty twisting to wipe themselves, or little power in their hands to do that for themselves, or who has temporary or long-term continence issues. No-one likes even thinking about the idea of having to help their life partner with toileting, cleaning up after them, etc. And the person this has to be done for may find it very difficult and ‘undignified’ to give control of something so personal to someone else.

One scenario we hadn’t considered was recovery from an abdominal operation and the resulting bowel issues that came with the effects of the drugs, and then the laxatives to make toileting easier so that constipation and straining didn’t cause the surgery to tear and create a hernia. But less than a week after the bathroom renos were finished, I had an emergency appendectomy. I was extremely thankful for the grab rail in the toilet as it meant I could get myself up and down without assistance. I was also extremely grateful for the cleaning functions of the toilet because I couldn’t twist my body easily without the fear of tearing anything, and because the violence of some of the diarrhoea I experienced meant that my bum was red raw, and even the thought of using a very soft toilet paper wasn’t appealing. The gentle warm-water wash of that toilet was a godsend!

Advice for new users

I’ve now been using our smart toilet for almost 3 weeks, so I’m still a new user. I certainly haven’t tried all the functions, but I have settled into some of those that seem to work for me. Everybody’s body and how you sit on a toilet is slightly different, so trial and error is the name of the game for the first few weeks or so. Read the operating manual and try each function—you can’t break it.

Other advice and general comments:

  • The remote control is a bit finicky to respond. I’ve tried hard presses, soft presses, medium presses and still haven’t figured out what the optimum is. In some cases I’ve had to press a button 2 or 3 times before it activates. I’m sure with time I’ll get better at figuring this out, but for someone who has limited hand mobility or arthritis this may be a problem, in which case it may be easier to learn the controls on the side-mounted knob.
  • The remote control is a beige colour and the icons are medium-grey outlines—there isn’t good contrast, and for someone whose eyesight is not particularly good, this could be a big issue as they can’t see the icons clearly. This is a design issue, where the manufacturers seem to have gone for fashion over function. It would be good to have an optional overlay (or a choice of remote styles at the time of purchase or later) so that the contrast is far better than now.
  • When a function is activated on the remote, it beeps and then is lit from behind with a blue LED, which is reasonably easy to see.
  • The lid and seat beep anytime you open or close them, or sit down and cover the sensor. There’s only a couple of beeps and they aren’t too loud, but they’ve been a bit disconcerting and I’d prefer to turn them off, but I can’t find any information on whether I can or how to. Again, I’ll likely get more familiar with them over time and eventually I may not even hear them.
  • For the first couple of weeks, every time I sat on the toilet (even just to pee), there was a noise that sounded like the cistern was filling with water or a motor starting up. I had assumed this was in preparation for the cleaning function, and it was annoying to hear it when I just wanted to pee! However, this got solved a little later once the flushing issue got sorted out (see below) and the noise stopped completely.
  • Flushing: The bathroom reno project manager told us that after we’d had a bowel movement to push the full flush button in and hold it in until we heard the tank fully empty. We did that, but it just wasn’t enough. In most instances, we had to do a second (full or half) flush, which was counter to the idea of conserving water. (For non-Australians: Australia has mandated dual flush toilets for several decades, and over time the amount of water for each flush has also decreased—initially it was 11 L for a big flush and 5.5 L for a small flush, but modern toilets sold in Australia these days are now around 6 L and 3 L respectively, though some are set for 4.5 L and 3 L [see https://en.wikipedia.org/wiki/Dual_flush_toilet ]). After we complained about having to do 2 flushes almost every time, the project manager (he’s an ex-plumber) came out and adjusted the float in the cistern—it had been set by default to 4.5 L, so he raised it to the maximum 6 L, and the issue with having to flush twice has gone away (and that refill noise when we sat down has also gone too!). He did say that the government (and industry?) push is for making 4.5 L and 3 L the standard, and he believed that all new toilets would go to that in time. Fortunately, ours was one where 6 L was still a possibility.
  • Usage advice:
    • Remember, I’m still getting used to this, so my advice may change over time. Remember also, that your body shape and how you sit on a toilet is likely marginally different to someone else. Manufacturers do their best to cater for the most common shapes and positions, but they aren’t the same for everybody. You will need to trial the settings and adjustments to find what’s right for you.
    • I initially tried the ‘anal wash’ setting only (the one with the male icon), but found it wasn’t for me. Then I tried the female setting—that was a bit better, but I’ve had to drop the flow rate a tad and activate the oscillation icon to suit me better. No matter which setting you choose, the water flow (even at the highest rate) is comfortable and not at all unpleasant. Same for the temperature (which I’ve adjusted down a tad for the drying function).
    • Because all bodies are different, you may need to wriggle around a bit on the seat or lean forwards or backwards to get the coverage you need. With luck you’ll find settings that can cater for that, over time.
    • You don’t have to let it run for the maximum 3 minutes for either the washing or drying, and you might only want the wash not the dry. It’s completely up to you. You can press stop at any time.
    • The big one: toilet paper! When do you use it (before or after), how much do you use, do you use it at all? Well, of course, there are as many recommendations as there are people. Again, you’ll have to trial this for yourself. A US friend of mine who is a BIG bidet fan, suggests a quick wipe before the wash, while the project manager suggested a quick wipe after (for drying mostly, especially if you haven’t used the drying function). Some say a little before and after. Some website articles suggest you’ll never (or rarely) need to use toilet paper again (some even compare the ‘cost’ in water etc. of making toilet paper with the amount of water and electricity used in operating a bidet once or twice a day—the manufacture of one roll toilet paper comes out as far less environmentally friendly). All state that you WILL use less toilet paper, though few claim you’ll use none at all.

Bottom line (sorry!): Would I get one again? Yes!

[Links last checked April 2023]


A ride in an ambulance and a short stay in hospital

25 03 2023

Short summary: I had an emergency appendectomy on Saturday 18 March 2023, after being taken to hospital by ambulance late the day before. This post is a compilation of notes, emails, and Facebook posts I wrote at the time and in the days following, plus my memory of what happened.

Friday 17 March 2023

There’s always time for new experiences! Today I had an ambulance ride to hospital and tomorrow I get my appendix removed!

Around 2pm I had some abdominal cramping and thought it was my guts/wind. At 3.30pm I went to pee and had bad pain in my lower right side when getting up from my office chair, and even worse pain when trying to get up from the toilet. It was a sharp pain like I’ve never felt before, and a pain I certainly couldn’t ignore—this was not going away, it was getting worse. I asked my dear husband (DH) to confirm where my appendix is (he knows far more about anatomy than me). Yep, the appendix was right where I was having pain and I knew I’d never had mine out. He offered to take me to the doctor, but that could be 2 week wait! I said I’d call the ambulance. He said he could take me but I refused because an ambulance will do an initial assessment, give drugs for the pain, let the hospital know I’m coming and what their initial assessment is, and admit me to emergency via a different route. If he took me, we could be in triage with the general public for hours before getting seen.

I called the ambulance just after 4pm, and, based on where we live, I knew it would be 30 minutes at least before it got to me. I stood for the entire time while I was waiting as sitting or moving was excruciatingly painful. The ambulance arrived around 5pm (from the Brunswick Junction subcentre) and the volunteer ambos (the angels called Rodney and Wendy) did an initial assessment, measured my blood sugar and blood pressure, asked me lots of questions, took lots of notes on their iPad, and gave me the ‘green whistle‘ (a device that dispenses a pain inhibitor straight to the brain), then rolled me into the ambulance on their fancy collapsible gurney and I was at Bunbury Regional Hospital’s emergency department by 6pm (no sirens and no fast speed, thank goodness). Fortunately, ours was the only ambulance in the ambulance bay (BONUS: no ramping at 6pm on a Friday!) and I was the only one in the triage area at the ambulance entrance, which meant it didn’t take long for the handover to the hospital (into a wheelchair) and they could depart for other calls. At home I’d told my DH NOT to come in until I called once I knew what was going on—there was nothing he could do, and until we knew what it was and how long I might be in hospital (if at all), there was just no point.

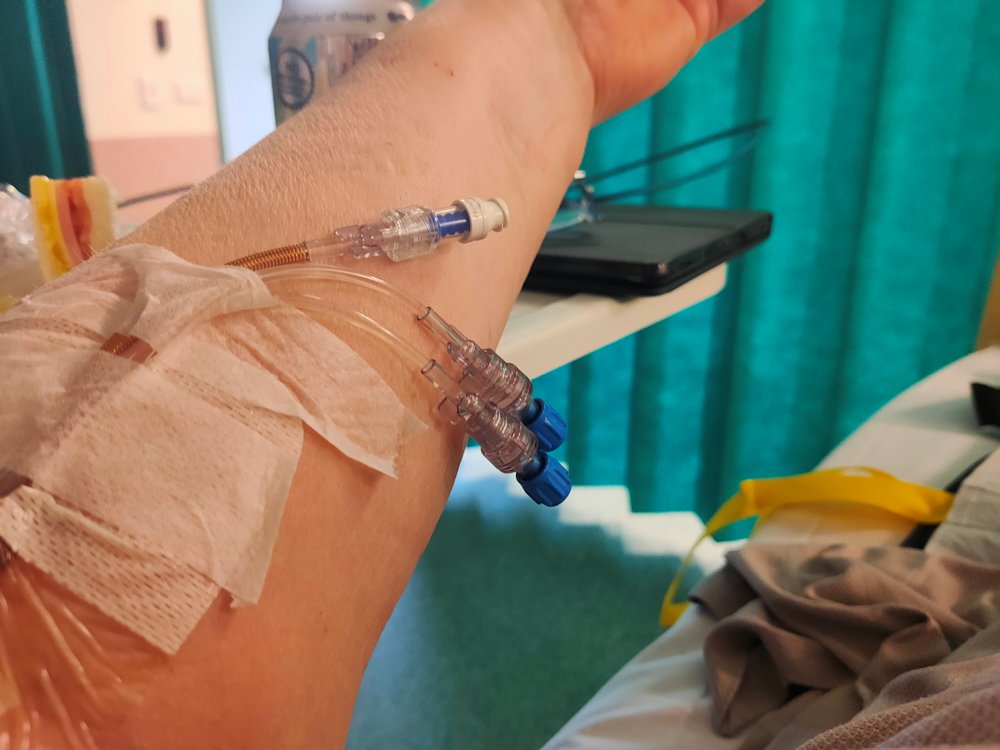
Despite an easy entry into the hospital, and then past the main triage area to the ‘fast track’ area, much of the rest of the night was spent waiting (and sucking on the green whistle). I estimate it was about an hour before I saw a doctor (Dr Rachel), who drew blood, put in an IV line, prodded and poked around my belly (she was very gentle), got me to pee in a tiny container** then set me to wait in another area. After more waiting, I was taken further into the hospital to wait some more, this time for a CT scan. The operator told me he’d inject a dye into my IV line and that it would feel like I wanted to pee (yep!), but that was the drug/dye marker. I had to hold my arms over my head (while lying on the narrow platform), which is not something I found easy (2 shoulder surgeries will do that). After several trips in and out of the CT scanner, I was left outside to wait in my wheelchair (not one I could propel myself) for someone to collect me and take me back to the previous waiting area. I asked the operator what the dye did and he explained that it goes into the blood and quickly goes to all areas of the body. If there are areas of infection/inflammation, the dye will concentrate there because the blood is trying to fight the nasties. If the dye was really obvious at my appendix, then that would confirm my initial self-diagnosis. (BTW, the ambulance people had said that while it may be appendix, it could also be something like kidney stones or a twisted bowel or something else entirely.)

The nurses then put me on a drip for pain and hydration (but I wasn’t able to have any food in case they needed to operate that night—not that I felt hungry!) while they waited for the results of all my tests (the CT scans had to be checked by people in Perth—thank goodness for the internet!). Around 10:30pm a nurse came out and told me it looked like it was my appendix, but that would be confirmed soon by a doctor. Around 11pm or later, the emergency surgeon (Dr Natasha) sat with me to explain what would happen next and to get my consent, and to ask many of the same questions I’d already been asked numerous times since I made that call to 000 some 7 hours before (I know they have to do this to cover their asses, but really?? When you’re in pain and drugged up and can’t think clearly, this is the last thing you want). The scan had confirmed the appendix hadn’t burst, which they likely knew because I didn’t have the symptoms of a burst appendix. And I was told they’d do surgery tomorrow to remove the appendix (likely laparoscopic surgery, with 3 small incisions, though she warned me that in about 10% of cases they have to cut you open). She also said that I would have to curtail my activities for at least a week, possibly two or more—rest and Netflix were to be my priorities, no cooking or cleaning, no lifting anything (possibility of a hernia), no driving for 1-2 weeks (an emergency braking situation could also cause a hernia), etc.

Somewhere in there I called my DH and asked him to bring a bag of stuff in for me (I’d phoned him throughout the night as I’d found out various things, so while he was worried, I don’t think he was panicking as I was keeping him up-to-date). Oh, and someone brought me a very welcome sandwich (I hadn’t eaten for 12+ hours by then and could have it prior to surgery in the morning as it was outside the fasting times). My DH arrived around midnight and soon after I was taken to a bed on the day surgery ward. The nurse quickly shooed him out (I think he got lost getting out of the hospital and ended up in the private hospital next door and exited via their front doors!) and asked me to have a pre-op shower with a special soap, got me prepped with drugs, IV drip (delivering painkillers too), oxygen prongs, ear plugs, and a compression socks to combat DVT etc. I think she did an ECG as well.

The operation is scheduled for first thing in the morning. I tried to sleep but even in the middle of night, hospitals are noisy places with all the different beeps of the various machines—the ear plugs certainly helped, but I was limited in how much I could move, what with the pain (masked) and the various bits and piece sticking out of me.

** About tiny urine collection containers… Really? 50% of the population is female and those collection bottles just don’t suit the female anatomy, especially when you’re in excruciating pain if you move. It’s 2023 yet we women still have to suffer the indignity of peeing over ourselves while trying to position a tiny container underneath ourselves to try to get a urine sample into the container. They want mid-stream? They’re lucky they get ANYTHING! Challenge to inventors: Devise a urine collection container for female anatomy.

Saturday 18 March 2023

Next morning I was told I was first on the surgical list and that the operation would happen around 8am. One of those doing the surgical rounds about 7am was Dr Natasha from the night before, which was comforting. From what she said, I was under the impression she’d be doing my surgery.

By 9am nothing had happened. I was still in bed waiting. And the reason was that the scheduled anaesthetist had called in sick because his 2 kids had gastro and he didn’t want to give it to anybody else. The hospital had to call in an emergency anaesthetist but he wasn’t due until after 10:30am (it’s a regional town so there aren’t many around—with those times, it’s possible he had to come from Busselton, Mandurah or even Perth). Eventually, I was wheeled into theatre at 11:00am, so my surgery (and everyone else’s that day) was pushed back for 3 hours. Which means Dr Natasha didn’t perform my surgery, even if she’d been scheduled to, because her shift would’ve ended by then.

One thing I recall before I went into surgery is that they put sticky things on my forehead (as well as around my heart). I was told the ones on my forehead were to measure my brain activity—normal is 100% and when it drops to 30% with the anaesthetic, I’d be well under and they can start the surgery.

Of course, I have no memory of the surgery at all, just being wheeled into the operating theatre and squirming painfully onto the table from my bed, trying not to get any of the IV lines etc. caught up. Then nothing.

I recall people talking to me as I was coming to, but I couldn’t respond with anything intelligible, so I held my thumbs up to let them know I was hearing them and responding. By 3:45pm I was fully awake and in the day surgery ward, though in a different bay. There was lots of post op monitoring by the nurses for the first 6 hours, and a huge number of different beeps. And painkillers into the IV line. And a visit from my DH.

I slept well—lots of drugs in my system plus ear plugs. No pain… and no appendix either!

Sunday 19 March 2023

All clear to go home this morning, with strict instructions from the nurses and doctors about what I can and can’t do, which includes no cooking! My DH is so pleased….. Not! 😁
Basic rules are rest and Netflix! Have emailed my clients that I’m not available all this coming week and possibly the following week, and why.

Moving very gingerly and carefully, mouth tastes like crap no matter how many times I clean my teeth (drugs?), showering is interesting as the dressings, which I can’t see, have to be changed (DH has been wonderful). I’m taking all the drugs (including antibiotics) but not the heavy painkillers—just Panadol and Nurofen as advised. Can’t use the foot thingy on my recliner as it was super hard to push in with my legs before the operation and would no doubt rip things apart inside if I tried now, so I’m sitting fairly upright in the chair and using a footstool for my feet (new powered recliners are in our future?). Getting into and out of the car is done super carefully. For the first few days post-hospital I slept at least 3 hours in the afternoon, in addition to normal sleep at night—I never do that, so obviously my body needs that extra sleep to heal.

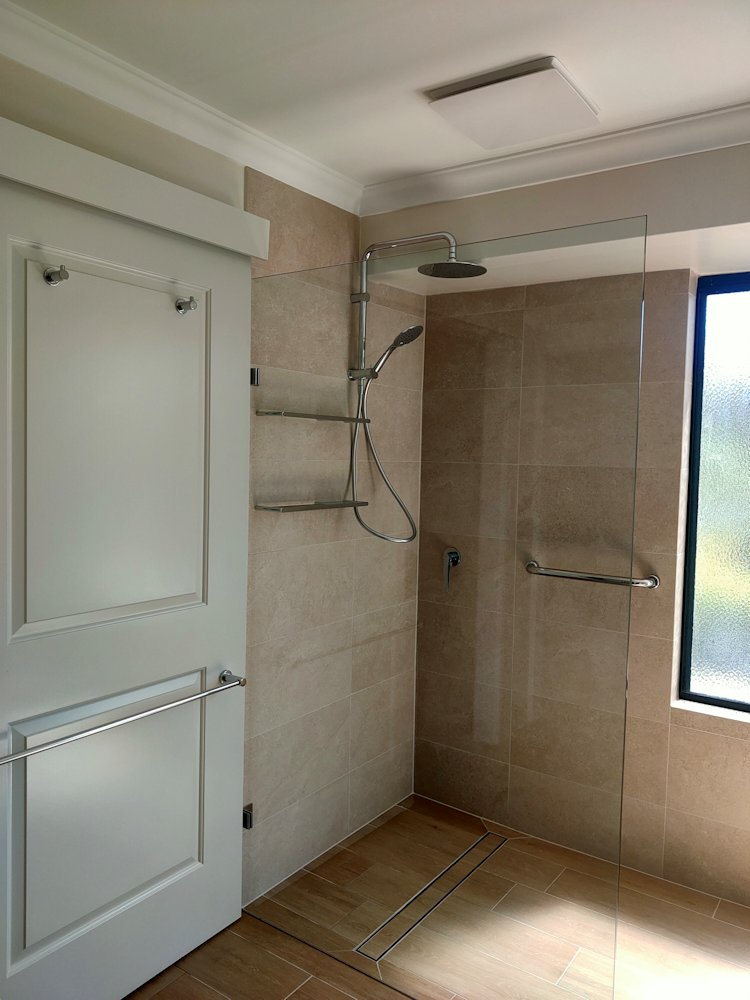
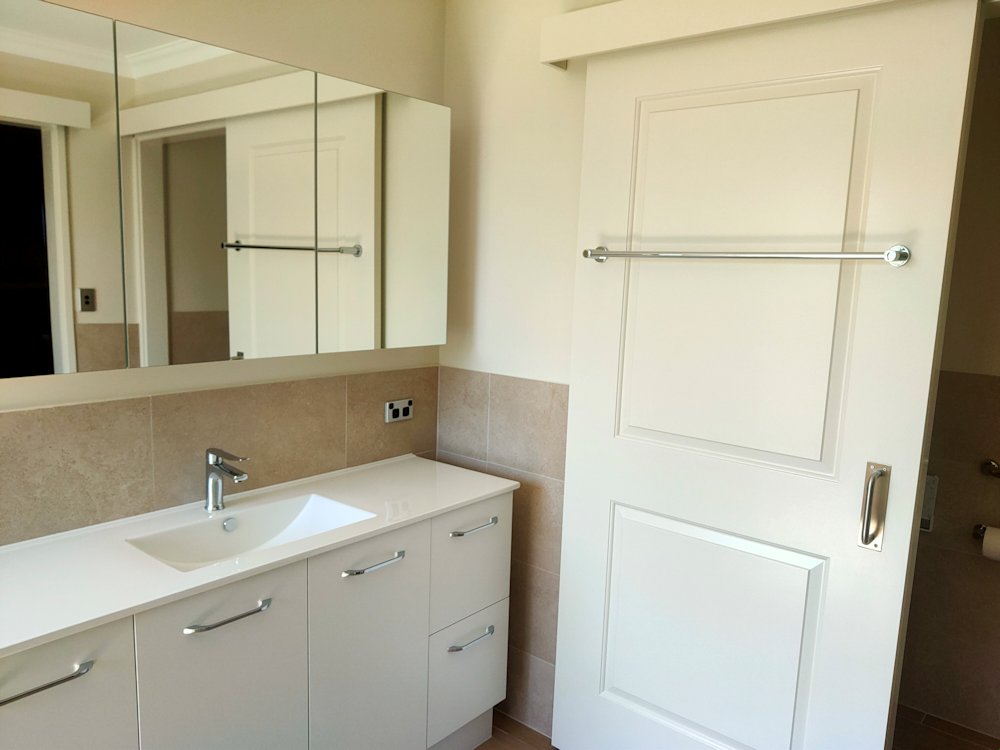
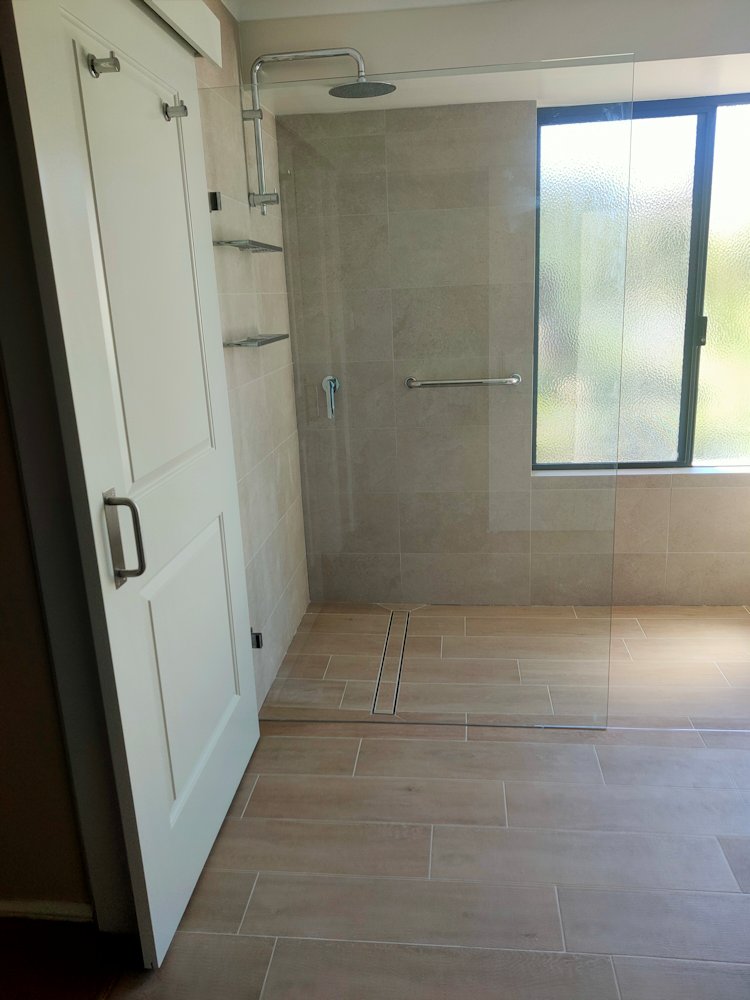
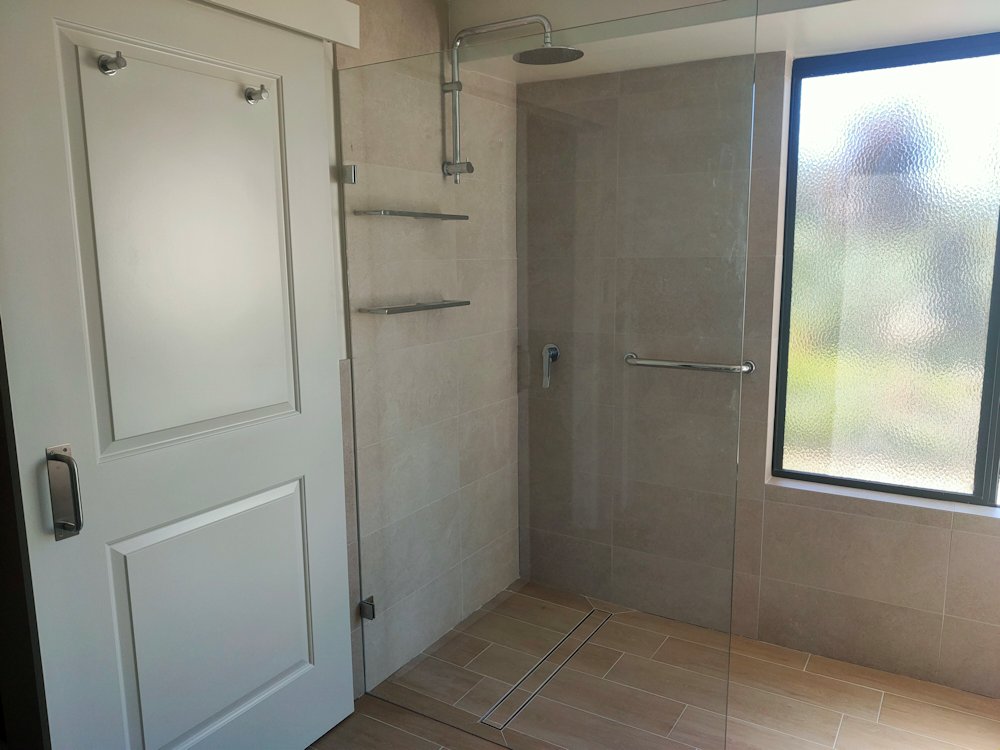
And I’ve given thanks for the smart toilet and grab rails that were only installed a couple of weeks ago as part of our en suite bathroom reno! The grab rail certainly came in useful the first few days, as did the toilet’s in-built bidet function, which meant I didn’t have to twist my body to wipe (yeah, TMI!) and thus put my healing body in danger of herniating. Another reason for getting a bidet I hadn’t thought of…

Days since

Each day the pain has been abating, and what I can do gets a little easier. To get me out of the lounge chair, DH took me to see my parents on Tuesday, and we went for another drive on Wednesday too, stopping for a lovely lunch overlooking the Dawesville Cut near Mandurah. By Thursday I could sit at my computer for a short time, and by Friday 24 March the horrible taste had all but gone (thank goodness—it was very metallic and put me off eating or drinking anything other than water), and I could spend more time in my office chair. Sitting at the dining table is still a bit sore, because I’m bent forward to read the newspaper, do the crosswords etc.

Silver lining

I had a realisation that all this was incredibly well-timed (you’ve got to look for a silver lining, right?). The conference I’ve been attending and speaking at in the US since 2015 (except COVID years) started this week (23 March) in Columbus, Ohio. Some 6 months ago, which is usually about when I book airfares, accommodation etc. and make plans for visiting friends and family or doing a course, I decided that I was still COVID-shy and still wasn’t ready to get on a plane. Besides, the airfares to the US were horrendously high in all classes, AND Qantas still owed me several thousand dollars, which I’d been trying to get from them since August 2022 (they eventually paid up earlier this month). So I decided not to go this year’s conference. Which was bloody lucky for me!

Had I decided to go, I either would’ve already been in the US when this happened, OR somewhere in the many flights between Western Australia and Ohio, one of which is about 17 hours non-stop. I cannot IMAGINE what either of those scenarios would’ve been like. Neither would have had good outcomes. Having appendicitis on a long flight across the Pacific would likely have meant either dealing with the pain with whatever the flight crew (or a doctor) had on board and hoping my appendix hadn’t burst or that bursting wasn’t imminent, or causing the plane to detour to a Pacific island to get medical attention for me, and thus likely being offloaded somewhere from where I would find it hard to move onward or return home one I’d received medical attention. As it was, I really only experienced that excruciating pain for a couple of hours before getting suitable drugs—that certainly wouldn’t have been the case on the plane. And had I had appendicitis on a US domestic airline, I can’t imagine what would’ve happened or even if anyone would’ve believed me (I certainly don’t have much faith in US domestic airlines). Travel insurance would’ve kicked in (NEVER leave home without travel insurance, particularly if you’re going to the US), but I doubt I’d have been in a fit state to contact the insurance people, and there’s a possibility my luggage wouldn’t have been with me either.

The other scenario is this happening after I arrived in the US. And that’s almost as unthinkable, because I have no idea how I would’ve got treated as a foreigner in another country where all my usual medical safety nets didn’t exist, and where I may have got treated but only after getting the travel insurance to kick it, assuming I was in a mental state to follow that up. How would I have got medical attention and an ambulance anyway? This could’ve happened in a hotel room and I may not have been able to contact anyone to help me (I would’ve been a single traveller). And that’s not considering that I have NO medical insurance (except travel insurance) to cover the costs of the US hospital system, which means that I may not have got treatment in a timely manner and could’ve waited days or weeks for surgery and then be left with an eye-watering bill at the end of it, assuming I survived, or had to pay in full upfront before I got treated.

Which brings me to cost…

Cost of all this

I’ll get a bill for the ambulance (probably about $1000; Update: It was $300 with the 50% rebate applied), but my private health insurance should cover that in full (if I didn’t have private health insurance, I could’ve opted for full ambulance cover for less than $100/year).

I may get some minor bills from the hospital, but that’s unlikely. Most likely, this whole experience (drugs, dressings, IV lines, surgery, doctors, surgeons, nurses, anaesthetists, bed in a public hospital for 2 nights etc.) will cost me absolutely NOTHING. My tax dollars at work!

Why? Because Australia has universal health care for all, which we call Medicare (same name as the US scheme, but a totally different model).

One of my US friends asked how this works, because something like this (or worse), could bankrupt many Americans. So here’s a quick (simplistic) summary of how the Australian health system works:

  • Universal health care is a federal responsibility of the Australian Government (states are responsible for providing and staffing public hospitals etc.)
  • All Australians who earn above a certain amount (from wages, salary, investments etc.) pay a Medicare levy of between 0 and about 2% on top of their income tax, depending on their taxable income each year. If you don’t earn much, you don’t pay the levy, but you still have access to public hospitals etc. If you earn a lot, you pay around 2% extra on top of your income tax rate, so if you were on the 30% tax rate based on taxable income, you’d actually pay 32%.
  • Income tax (and the Medicare levy) is a federal responsibility, so Medicare is for ALL Australian citizens and permanent residents. States raise their taxes in other ways, such as license fees, land tax, etc.
  • Public hospitals and some GP visits for some people (such as concession card holders) are funded by our Medicare system, which means we pay nothing for them. BUT for things like elective surgery (knee, hip replacement etc.), the wait lists for such procedures in a public hospital can extend many months and even years, and you won’t get your doctor/specialist of choice, just whoever’s on duty at the time. NOTE: Except in an emergency situation, you cannot see a specialist without going to your GP first and getting a referral—this stops people just calling up a surgeon, for example, and saying they want surgery. Your GP has to assess you first, then refer you to the specialist. The referral letter typically explains their assessment, and in most cases it expires after 12 months, so you have to revisit the GP if you need to see the specialist again at a later date (a real pain for lifelong conditions that need monitoring).
  • Emergency department (ED) waits at public hospitals can also be long and as with many EDs around the world you get seen based on medical need (triage), not on your ability to pay. I only know of one ED in a private hospital in my state, though there could be more now—all are in Perth, some 2 hours away.
  • Private hospitals also exist, and some specialists and GPs charge well above the set Medicare fee for their services. If you attend any these WITHOUT having private health insurance, or concessions (e.g. pension, veterans card), you would be up for the full cost, which COULD bankrupt you.
  • Private health insurance is an option for all Australians, but it NOT compulsory—like any other insurance, you can choose to pay it or not, and how much you pay depends on the level of cover you want. In my case, I’m on top hospital and top ancillary (e.g. dental) cover and I pay about $240/month (just under $3000/year) for that private health insurance. I don’t HAVE to have private insurance… I choose to for the ability to get (elective) surgery done in a hospital of my choosing and with a specialist of my choosing and not be in a very long wait list for similar surgery in the public hospital system. Emergency is a different thing altogether… you need it and need it now. No wait list.
  • Depending on your cover, private health insurance may cover you for a stay in a private hospital (often in a private room), specialist attendance while in hospital, some of the gap (co-pay) between the scheduled Medicare fee and what a specialist charges, and other ancillary services, such as dental, optical, physiotherapy etc. Even if I’d had this appendix operation done in a private hospital (most don’t have EDs, so that’s a moot point), it would’ve only cost me $150 co-pay (we call it excess) based on my private health insurance cover plus perhaps some (small) co-pay for anaesthetists etc. Oh, and that $150 excess I’d pay for private hospital surgery? That’s $150 for the year, no matter how many surgical procedures I had to have. Most years I’ve never needed it, but in 2015 I had 3 surgeries (shoulder, eyes, and breast lumpectomy and milk duct removal) and it cost me $150 TOTAL for the 3 hospital procedures, and maybe a bit of co-pay for some of the specialists, but not much (certainly well under $500).
  • No health cover in Australia (private or Medicare) is tied to your employer. Employers have NOTHING to do with whether you have coverage or not—the Medicare levy is only based on your income at tax time and the federal government doesn’t care who pays you that income. Private health insurance is your CHOICE and the government doesn’t care about that either. My understanding is that in the US many jobs have the ‘benefit’ of employer-paid health and/or dental insurance—to me, that’s just a very heavy chain to keep you locked in to an employer, never allowing you the freedom to leave that employer, especially if you have sick kids, a disability etc. as you are unlikely to get similar cover with another employer. And god forbid you have your own business or are a freelancer, or are unemployed, or are single and thus have no spouse who has those ‘benefits’ for the whole family!

It would be extremely rare that getting sick in Australia (as an Australian citizen) would come anywhere close to bankrupting you. Our health care system certainly isn’t perfect, but getting sick won’t cost you your home, except in very rare cases. As I said, it’s not perfect, but it sure beats everything I hear about the US system.

Ambulance

In Western Australia, the ambulance system is run by St John Ambulance (SJWA) (other states have different systems). I believe the state government subsidises ambulance costs (50%?) for those meeting certain criteria. In my case, my private health insurance will cover whatever isn’t already covered or subsidised and I should effectively pay nothing.

In regional areas, especially smaller towns, SJWA is purely a volunteer organisation, staffed by angels called community members. I emailed the subcentre that looked after me to thank them for their care, and I got this reply:

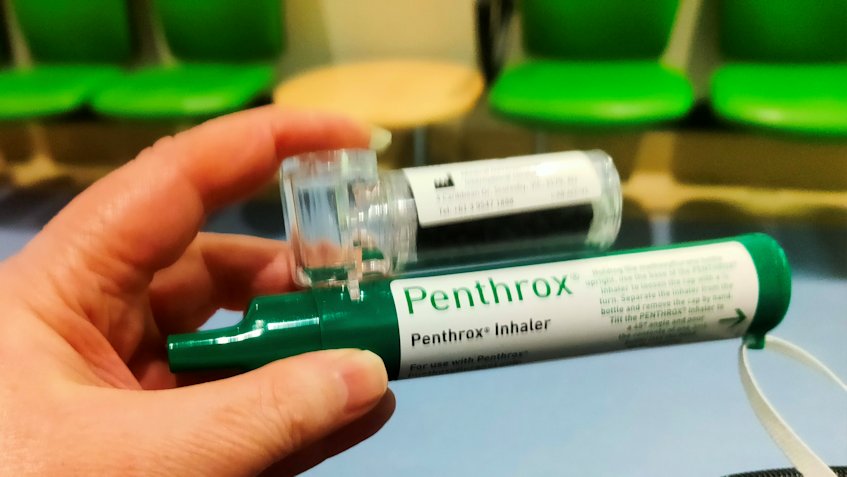
Thank you for your delightful email. You made my day and I’m sure all our volunteer ambulance officers will be just as delighted to read your lovely words, especially Wendy and Rodney. It’s not often we get feedback. I’ve never tried the ‘green whistle’ personally but we’ve all seen the magic it can work.

You are why we choose to volunteer. I can’t imagine what the ambulance service would be like without so many dedicated volunteers adding value to the delivery of an ambulance service in a state as vast as WA. Our subcentre is self-funded—we get no direct funds from SJWA nor the State Government. Our funds come from our capacity to invoice our patients and from fundraising by attending events, both of which are set up by SJWA and the WA Health department. Our subcentre does not pay honoraria or wages to any of our workforce—we are all volunteers. We are about to take delivery of a brand new ambulance from monies the subcentre has raised over many years. We are very excited and looking forward to delivery of the ambulance.

And yes, I’d asked about donating to them specifically, and have now done so.


Bathroom renos: List of fittings etc.

13 03 2023

For my own reference in case I ever need to replace anything…

Bathroom reno done by Armanti in Bunbury, Western Australia. All warranties etc. held by them.

[Links last checked March 2023]


Bathroom renos: Day 19 (final day!)

13 03 2023

All done! Final tweaks and washdown done, carpet reinstated to doorway, and final payment made. I got the PM to install the old towel rails I’d salvaged from the strip-out to the backs of the sliding doors. Two towel rails only hold 2 towels, but not a damp bath mat, face washers, old towel to mop up excess water after squeegeeing the shower, etc. You can never have too many power points or towel rails!

I’m looking forward to a decent night’s sleep back in our own bed after a month in the spare bedroom!


Bathroom renos: Day 18

10 03 2023

The frameless shower screen got fitted today (the silicone has to dry for about 24 hours) and the PM was here for several hours refitting the fittings he’d taken off for the painter, adding door furniture, hanging the siding doors, siliconing the toilet area (it’s now ready to use!), aligning the doors on the vanity and overhead cabinet, washing down the walls and floors to remove any chalky residue from the grout etc.

On Monday, the carpet layer comes to re-lay the bedroom carpet that was pulled up 4 weeks ago, then the PM will do the final silicone joints in the shower and the rest of the main bathroom, do a final clean and check, and then it will be ours, though we won’t be able to use the shower for another day while the silicone joint filler sets.

It’s been a long journey, but the initial design and every expectation that was set by the PM has been met, with no SANFUs along the way. I’m really pleased with how it’s turned out, the quality of the workmanship, the professionalism of everybody, and the respect they showed our property. I’d certainly use them again if I was to ever do this again.

Note: Some of the photos show the tiles darker than they actually are. They’re all quite light.


Bathroom renos: Day 17

9 03 2023

By noon today the first coat of paint had been applied, and the second coat was done by 2:30pm and I said goodbye to the painter. I’m very pleased with the colour I chose. And the bonus is it’s the same colour as used in the other bathroom, laundry, and 2nd toilet! That was a bit of serendipity—I chose the paint swatch for the new bathroom, then found out it was the same as those other rooms. Now it all has to dry fully, ready for the shower screen installation tomorrow.