Threads and tension: Practise before quilting

26 04 2014

On the Yahoo! Groups forum for the HQ_Sit_Down_Model, J asked for some advice on what sort of threads (top and bobbin) I use in my Sweet Sixteen, and how I get the tension right. She also wanted to know whether I used the same size/colour/weight thread in the top and bottom threads.

Here’s my (long) reply… You might want to get yourself a coffee…

***************

I know that the purists say to use the same colour top and bottom, and even the same thread top and bottom. But I wasn’t taught by a purist and I didn’t know ‘the rules’, so I do what works for me. The bottom line (no pun intended!) is that I use whatever thread I want in the top and whatever thread I want in the bottom. I always stitch on a small practice sandwich first to make sure the tension is right, and then off I go.

So with that said, here are some of the things I do when deciding on a thread to use and then testing it out:

  • I pick one or more colours for the top thread. I don’t really care what brand – it’s the colour I’m looking for. I tend to favour the trilobal polyesters over cotton (far less lint!), and favour Glide and Isacord over other brands. But if the colour I want to use is only in a rayon or cotton, then I’ll use that. I’ve even used DECADES OLD overlocker/serger thread in the top! See also: Threads I’ve used in my Sweet Sixteen
  • Most of my top thread stash is 40 wt thread, no matter what variety.
  • I’m lazy so I don’t like winding/changing bobbins too often. So I’ll try to use either a pre-wound Magna Glide Classic (no cardboard sides) bobbin (made by Fil-Tec; 60 wt, size M), or a bobbin filled with a lighter weight thread (a bobbin takes a lot more light weight thread than 40 wt, for example). I’ve used these sorts of threads in the bobbin – Deco Bob (80 wt) and Invisifil (100 wt) from Wonderfil; Bobbinfil (70 wt I think); and 40 wt threads as per the top. My preference is the Magna Glide Classic pre-wounds (I only have their ‘white’, which is really a light creamy colour when you look at it; part # 12445), followed by Bobbinfil, followed by Deco Bob and then Invisifil. I’ve never used Bottom Line in my bobbin as it’s hard to get where I live and is very pricey compared to the others.
  • Mostly, my top and bottom threads are totally different in brand, weight, and type – as I said, I’m not a purist.
  • My top and bottom threads often aren’t the same colour either. Depending on the quilt, I may try to match the bottom thread with the backing fabric. But I find that except for really dark backs, the white Magna Glide Classic pre-wound just disappears into the backing fabric and is hardly noticeable. Then again, I’m not quilting show quilts, so I’m not so fussed about the colours being slightly different.
  • If I’m using a dark thread on top and the top is also dark, I might use a darker bobbin thread (e.g. black Bobbinfil), but only if the bobbin thread starts to show on the top.
  • I ALWAYS drop-test my bobbin thread tension before threading the top of the machine. I use Jamie Wallen’s method and it works every time for me. Once I have the bobbin tension adjusted, I rarely, if ever, have to change it for that bobbin.
  • I thread the machine using 1, 2, or 3 of the holes, depending on the thread. Cottons and trilobal polys seem to do OK through 3 holes, but the rayons mostly do best through just 2 holes. Metallics, monofilaments, or fine threads like 80 wt or 100 wt, seem to do best for me through just one hole.
  • I use a thread net over the cone/spool for fine threads and metallics to help prevent them spooling off too quickly and getting tangled.
  • I brush out the bobbin area at every bobbin change, and put one drop of oil in the bobbin area then too. But with the Magna Glide Classic pre-wounds, there’s not a lot of lint in the bobbin area.
  • I try to change needle with every quilt I do (but if I have a couple of small quilts, I might use the same needle for a while).
  • I mostly use a size 16 or 18 needle. I have 14s but I only use them for very fine thread.
  • I usually have the needle in the 5:30 position – that seems to work best for my machine; 6:30 position sometimes works too, but I don’t have a lot of luck with the 6:00 position.

Once all that’s done (hopefully I didn’t forget anything!), I grab my practice sandwich and:

  1. Stitch a couple of loops and points at the speed I’m likely to use on the quilt.
  2. Pull the sandwich away from the needle and turn it over to see the back – I’m looking for looping thread and eyelashes at this stage. Looping thread (see 2 and 3 in the photo below) and eyelashes (1 in the photo below) mean my top tension is too loose, so I turn the top tension knob at least one turn (depending on how much loopiness/eyelashes) to the right (away from me) and test again. And repeat until I can’t see any top thread on the back (actually, that’s not quite true – I use a cream practice sandwich mostly, so if I see tiny pinpricks of the top colour, I’m OK with that as my practice sandwich is a usually a little thinner than the actual quilt)
  3. Once I can’t see top thread on the back, I’m pretty sure that everything on the top will be OK, but I look at it anyway. If the top is puckering or I can see more than a dot of bobbin thread at the points, there’s a good chance that my top thread is too tight, so I turn the knob a little to the left (towards me) to lighten off a little. And test stitch again. And loosen. And stitch. And look at the front and back. And adjust the top tension knob in smaller increments until I have stitches that lay flat on both top and bottom and that don’t pucker the quilt.

And then I’m ready to put the quilt under the needle. Even so, I start stitching on the quilt and after a few inches, I stop, lift the quilt to see the back and check my stitches (it helps if you have excess border fabric etc. to do this test stitching in). If the top thread is looping/eyelashing on the back, then I tighten the tension knob (and if it’s bad, I pick out the stitches and start again), and start stitching again. And then I check the back and front again to make sure it’s all lying flat. Once I’m happy with my test stitches on the quilt, I’m off and running.

loops_eyelashes

Yes, all this sounds an awful lot to check/test, but in reality it might take me just a minute or so.

That’s not to say that I don’t get frustrated with tension issues at times, but the worst of those have usually been related to something else, like the timing going out as a result of a needle breakage/jam, and thus the machine can’t make a proper stitch.

When nothing seems to work, I try a new needle, different thread top and bottom, and switching the power off and walking away for a while. Wine helps too 😉

If all that doesn’t work for you, can you take your machine back to your dealer and get them to use it (in front of you) and you use it in front of them to see if it’s you or the machine. Sometimes it’s the machine! And it may need a service or the timing adjusted.



Community Quilt 137

21 04 2014

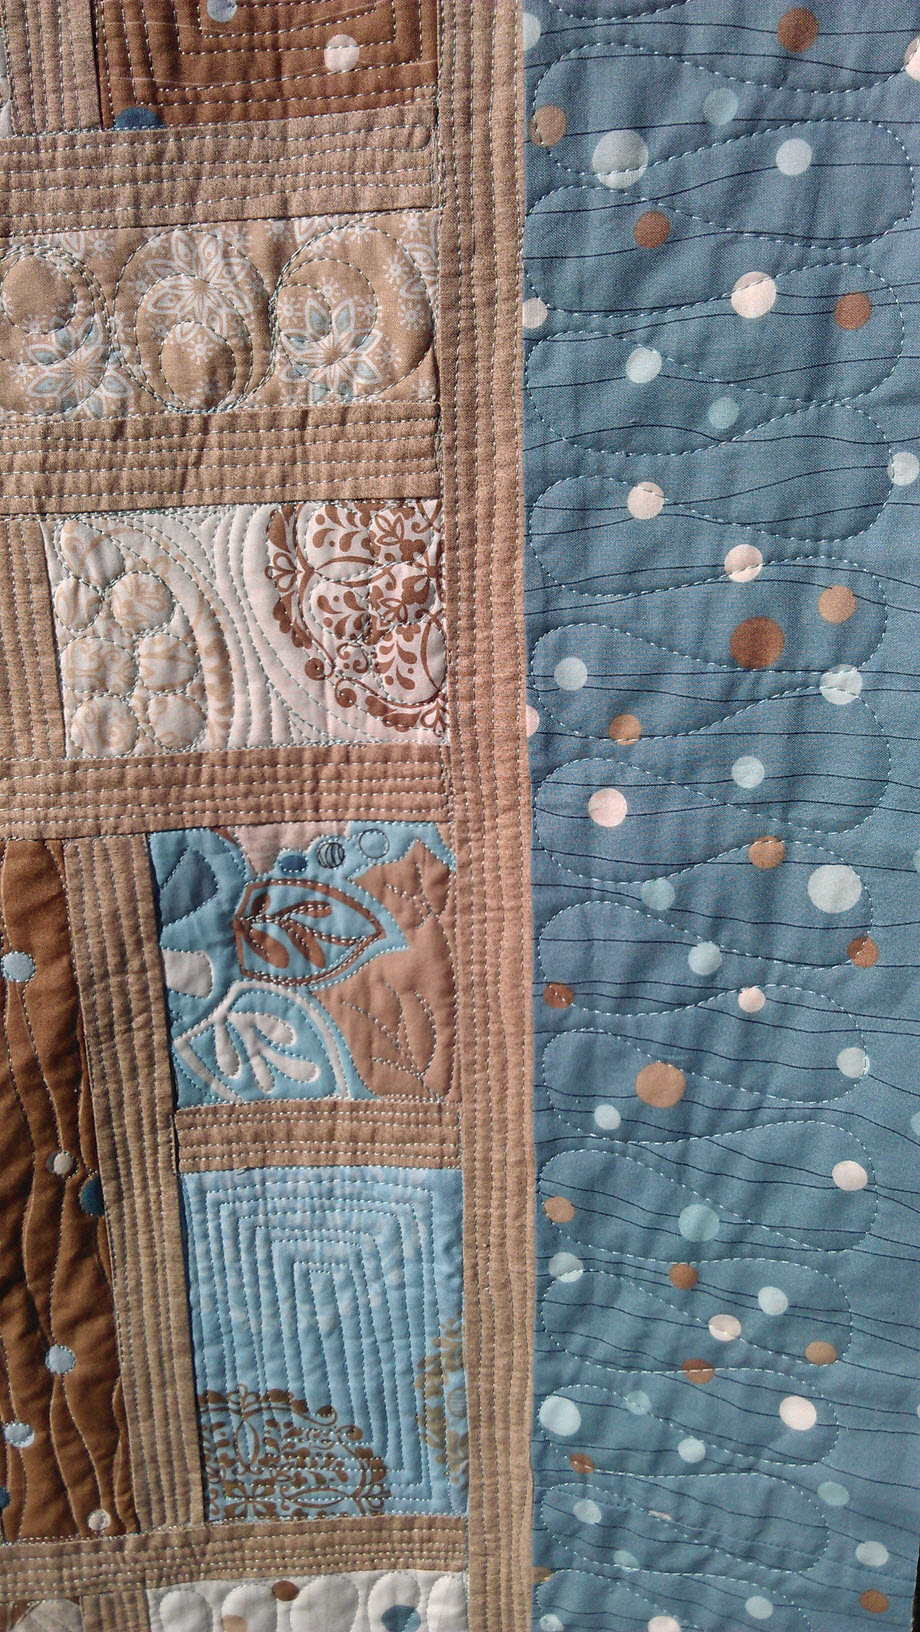
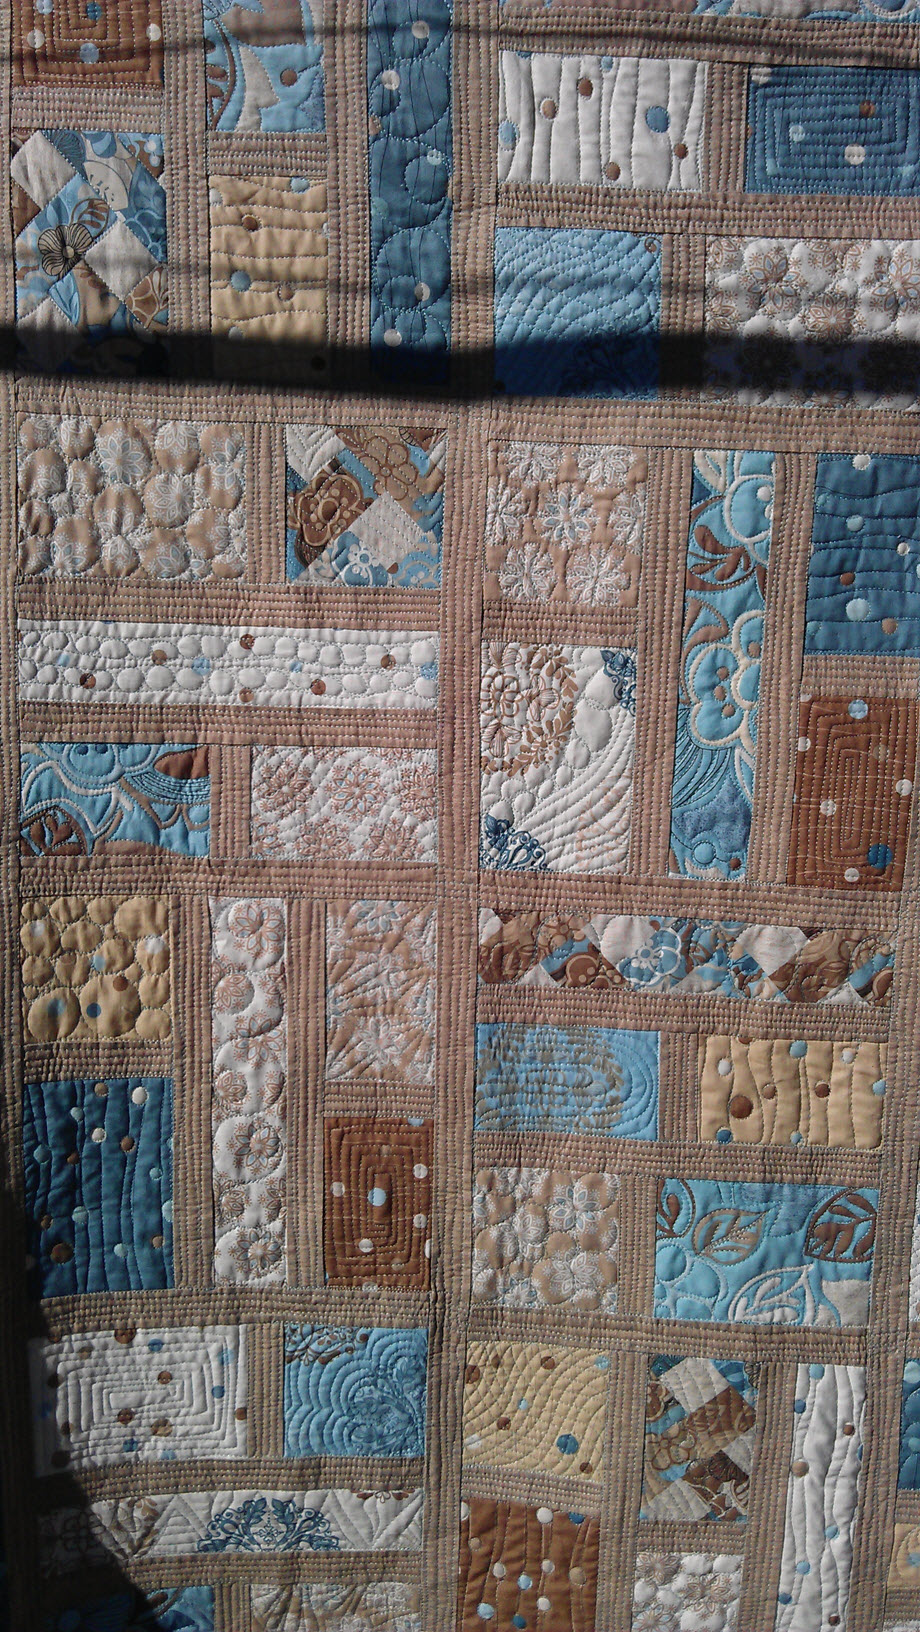
I loved this quilt! If you’d told me about a quilt in aqua/teal blue and tans, I’d have said ‘Yuck!’, but I just loved how these colours played so well together.

It was a big quilt, with lots of rectangles of various sizes, and multiple coordinating fabrics, some of which were curvy lines with dots/circles in them. That became my overall theme for quilting this quilt.

Because the edges were all so straight, I decided NOT to use any rulers for any of the quilting. Even the so-called ‘straight’ lines in the sashing strips are wonky free motion lines. That was a deliberate choice. I wanted the quilting on this quilt to be organic and not to rigidly follow the straight lines of the blocks. I quilted a different motif in each block — some with wonky lines, some with circles, some curvy lines, some with a combination… I repeated some motifs (e.g. the rectangular spiral), but avoided two motifs the same in any one block or two the same next to each other. I used the same soft blue thread throughout.

For the border, I did big loopy things, sort of like figures of eight/infinity symbols, but without any crossing lines.

It took me about 10 hours to quilt this quilt, running at 50% speed on my Sweet Sixteen for all the stitching (and with very few thread breakages – that might be because I used a new size 18 needle). Had I been using rulers, it would’ve taken much longer.

(Click on a photo to view it larger)

quilt137_02

quilt137_03

quilt137_04

quilt137_05

quilt137_01

Threads used:

  • Top: Robison-Anton (40 wt, rayon, colour: ‘Sprite’)
  • Bottom: Fil-Tec Glide pre-wound in white


Community Quilt 136

13 04 2014

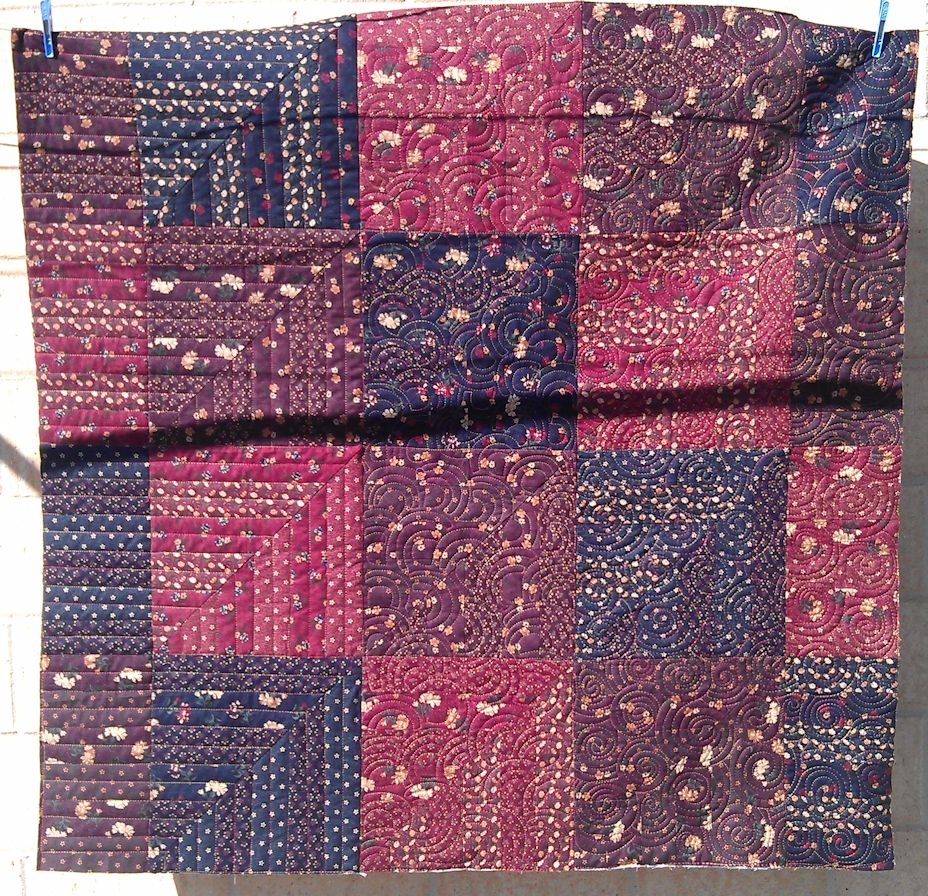
This small dark quilt was a challenge. How to quilt it to enhance the depth of the colours, while not overpowering the quilt with the quilting?

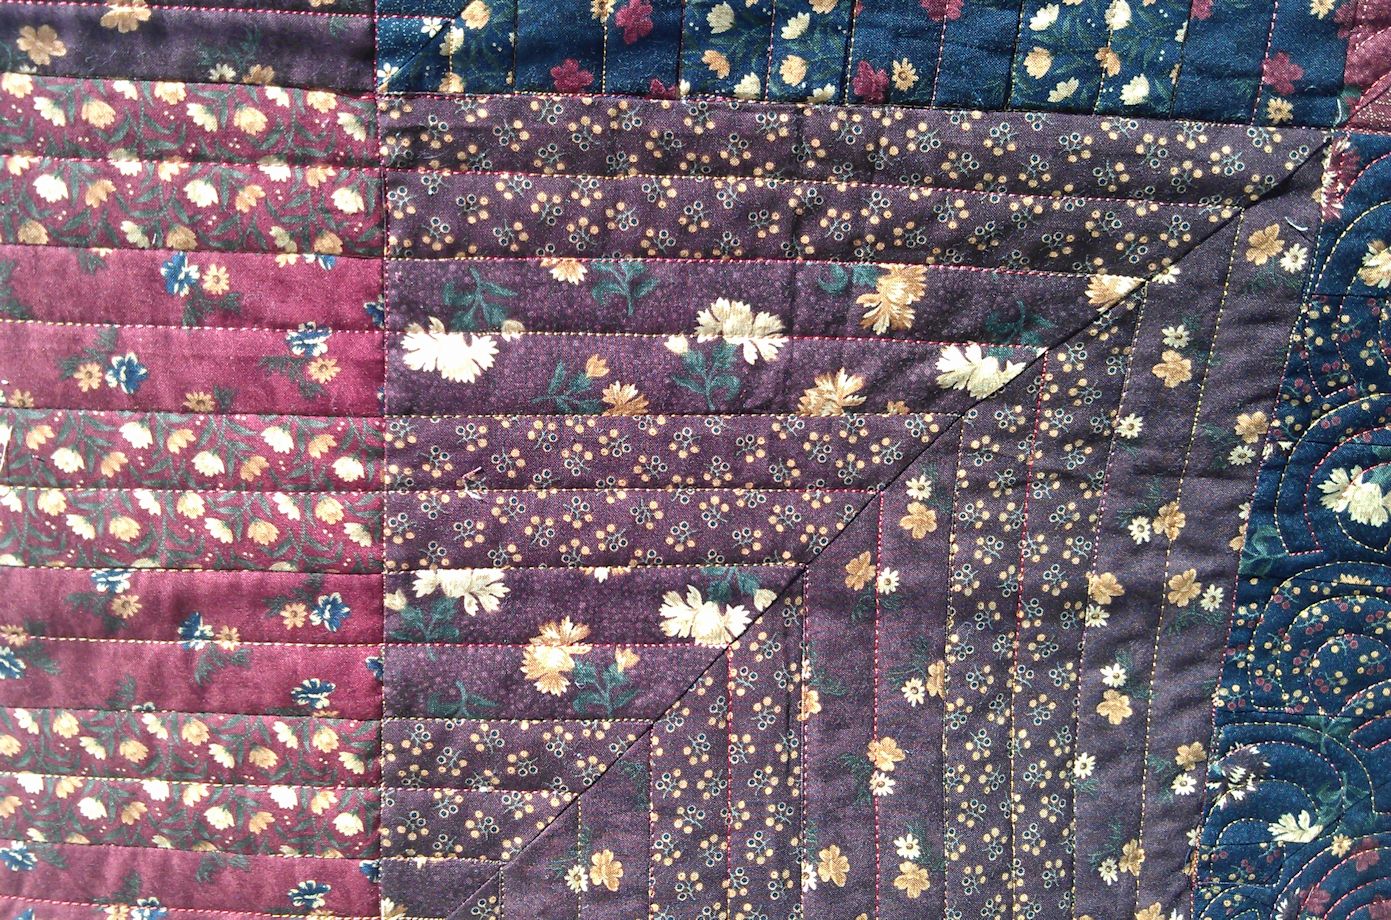
The first decision was what thread to use. I didn’t want a very dark thread as that would’ve hidden the quilting, so I opted for a variegated thread in rich orange, copper, ginger, red, and peach tones.

I started by doing straight line quilting from the piano key border into the adjoining row of blocks, following the existing seam lines of those blocks. But when I looked at the other side’s piano key border, it didn’t marry up with the seam lines of those blocks, so I had to abandon that idea for the other side. What to do?

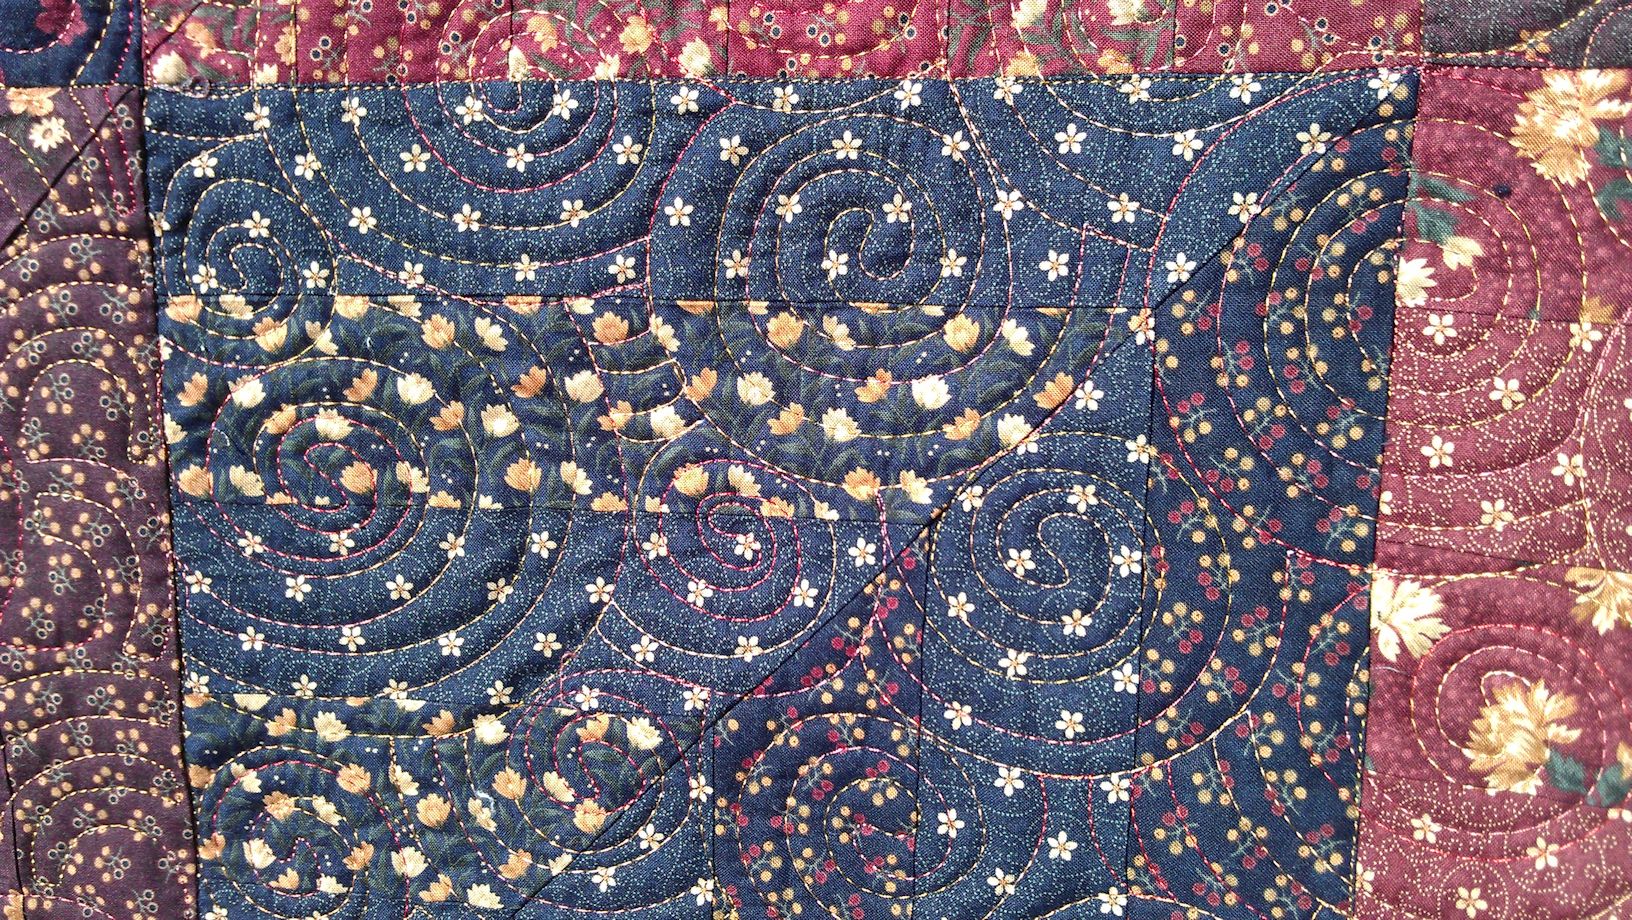
I’d seen quilts that blended one motif into another but hadn’t tried it myself, so I sort of did that. The motif I used for the blocks next to the straight line blocks was a curved open headband motif with squared off edges, and then the one for the blocks and piano key border adjacent to that was a full circular spiral design, thus varying the quilting from one edge to the other from straight lines to circular lines.

(Click on a photo to view it larger)

quilt136_04 quilt136_03

quilt136_02

quilt136_01


Community Quilt 135

13 04 2014

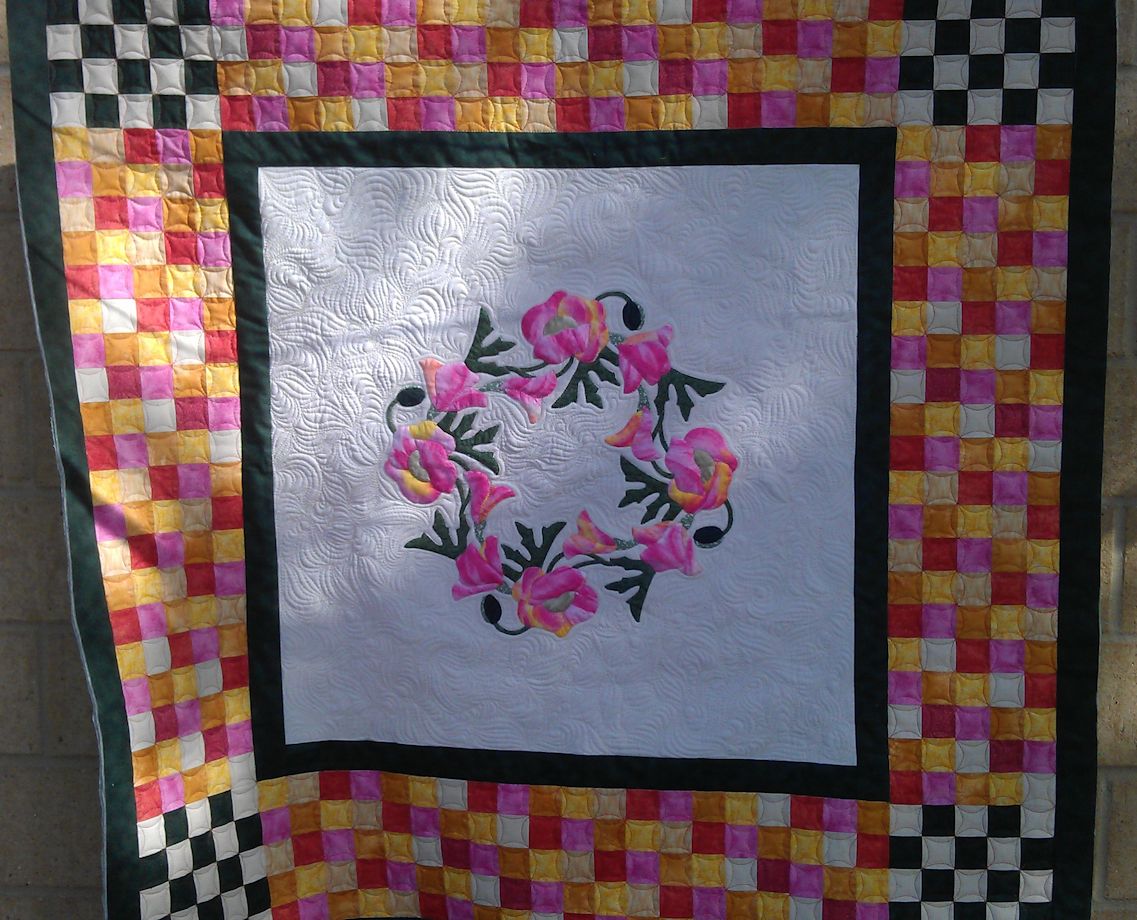
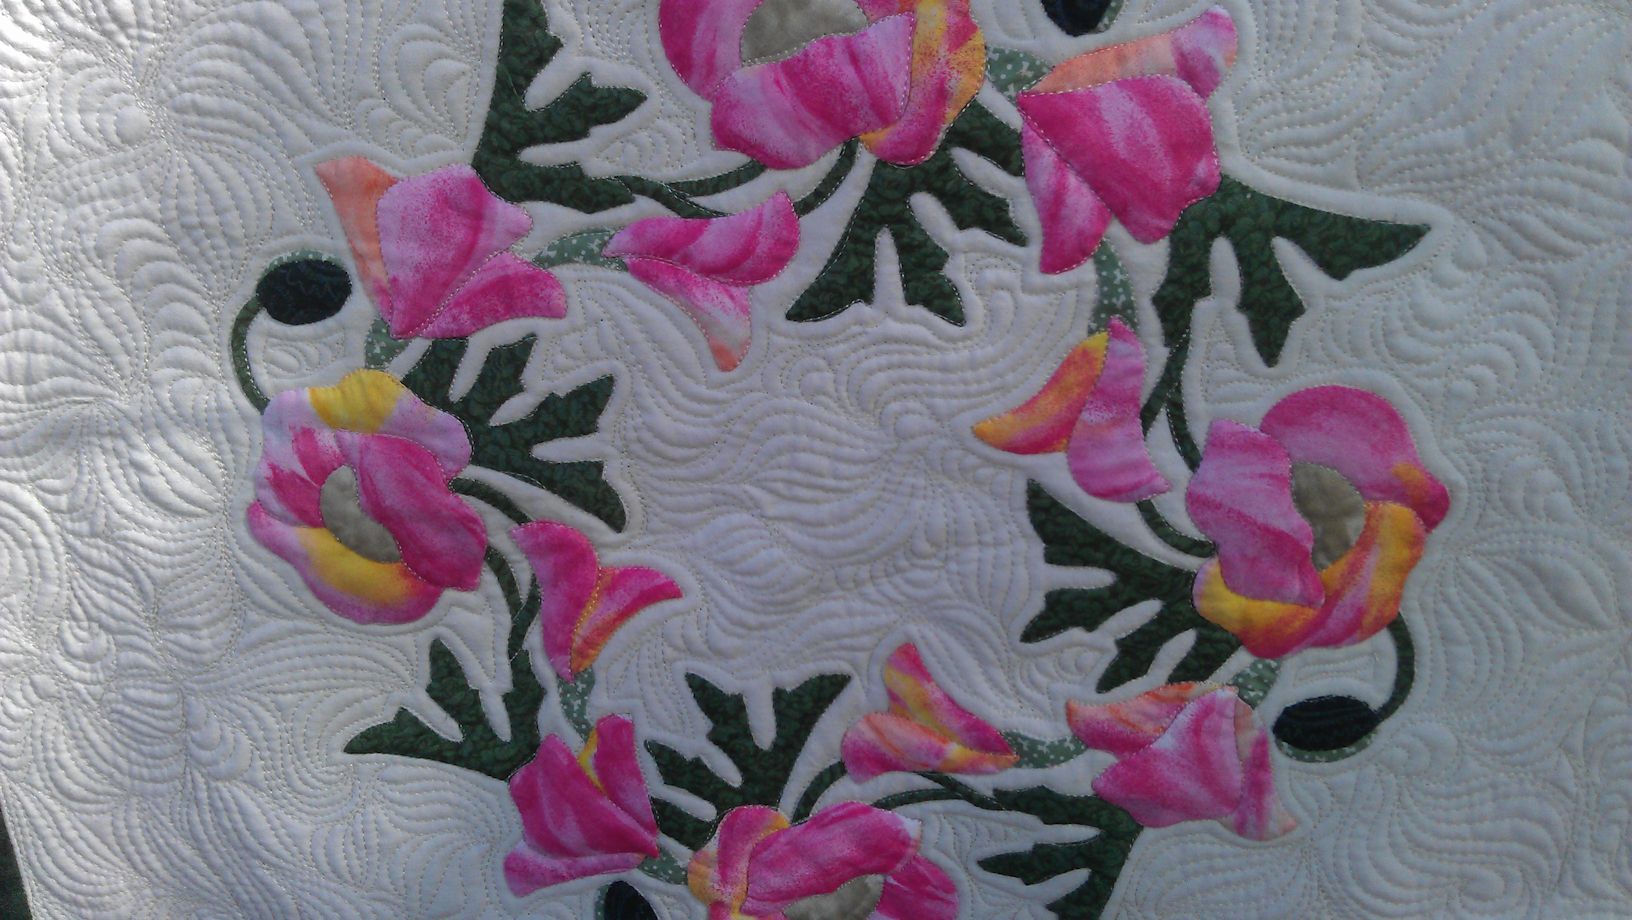
I loved the colours in this quilt! And as soon as I pulled it out of the bag, the cream centre just screamed ‘McTavishing!’ to me, so that’s what I did. I also stitched around the main parts of the appliqued flowers in the centre to make them ‘pop’ even more.

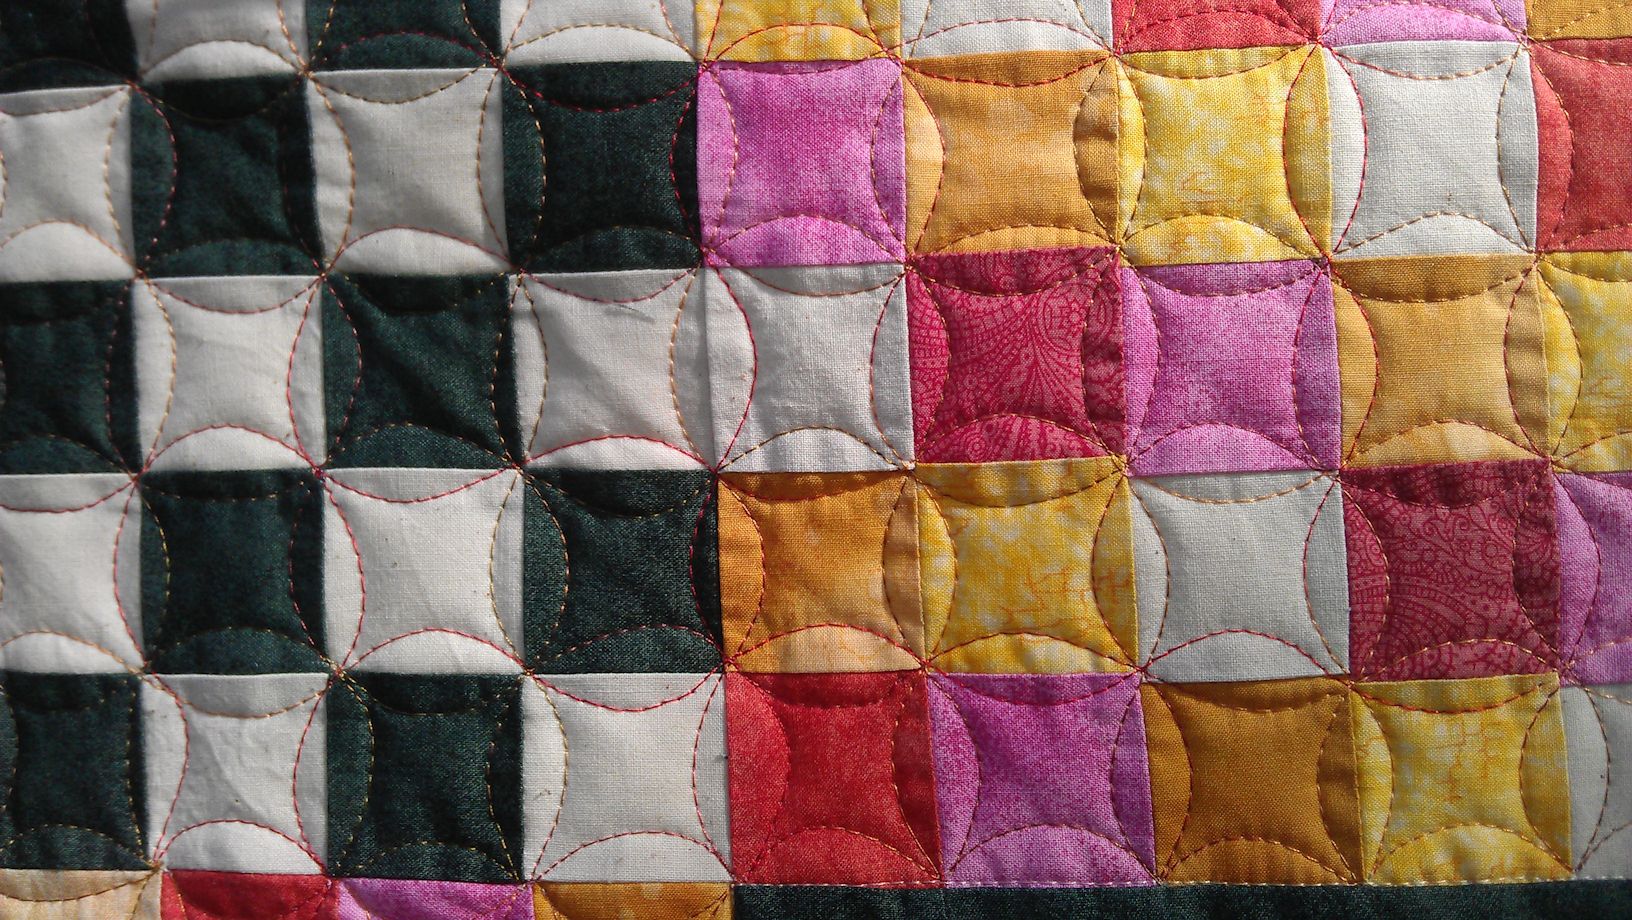
I left the dark green borders unquilted, and did my quick and easy cathedral windows motif in the checkerboard borders using a variegated orange/copper/pink/ginger/peach rayon thread.

I was really pleased with how this quilt looked after I’d quilted it.

(Click on a photo to view it larger)

quilt135_01

quilt135_03

quilt135_02  quilt135_05

quilt135_04

Threads used:

  • Top: Fil-Tec Glide ‘Cream’ (40 wt, trilobal polyester, colour 20001) and Wonderfil Mirage (30 wt, rayon, colour SD31)
  • Bottom: Fil-Tec Glide pre-wound bobbin (white)


Community Quilt 134

13 04 2014

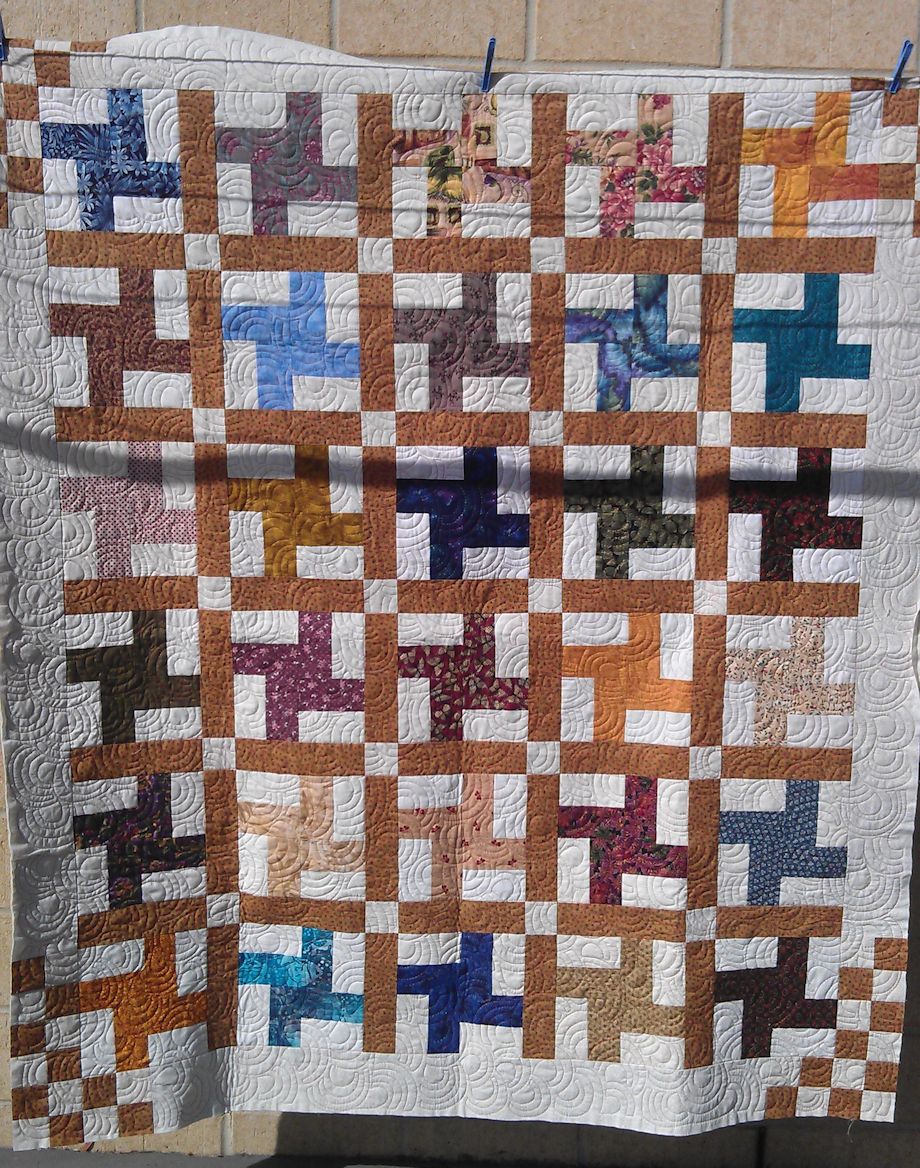
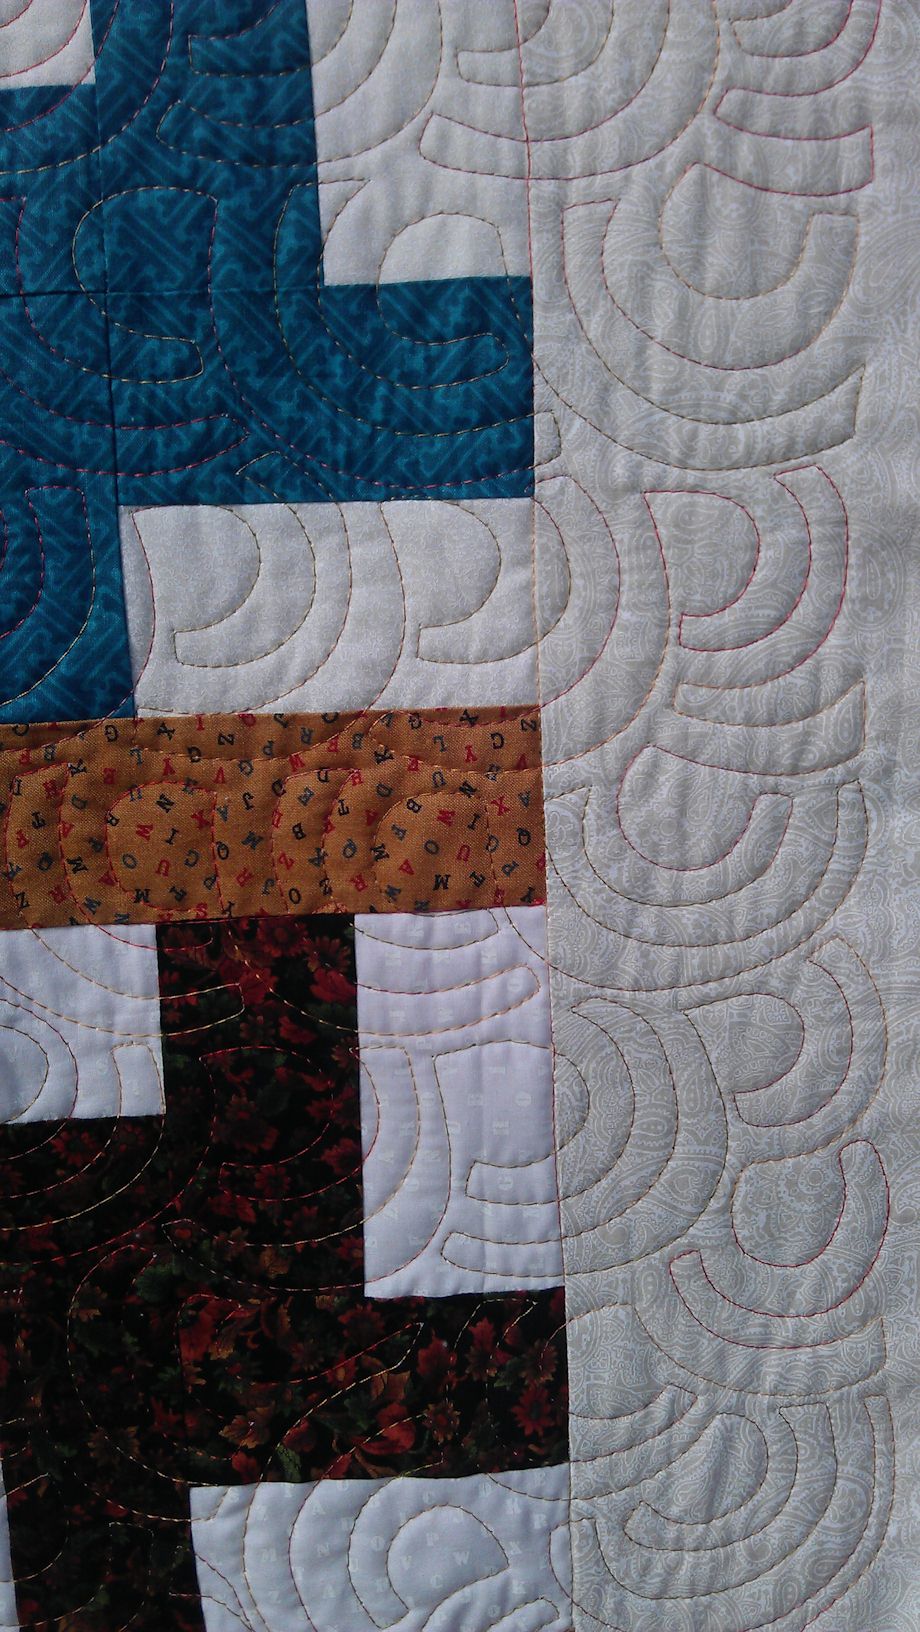
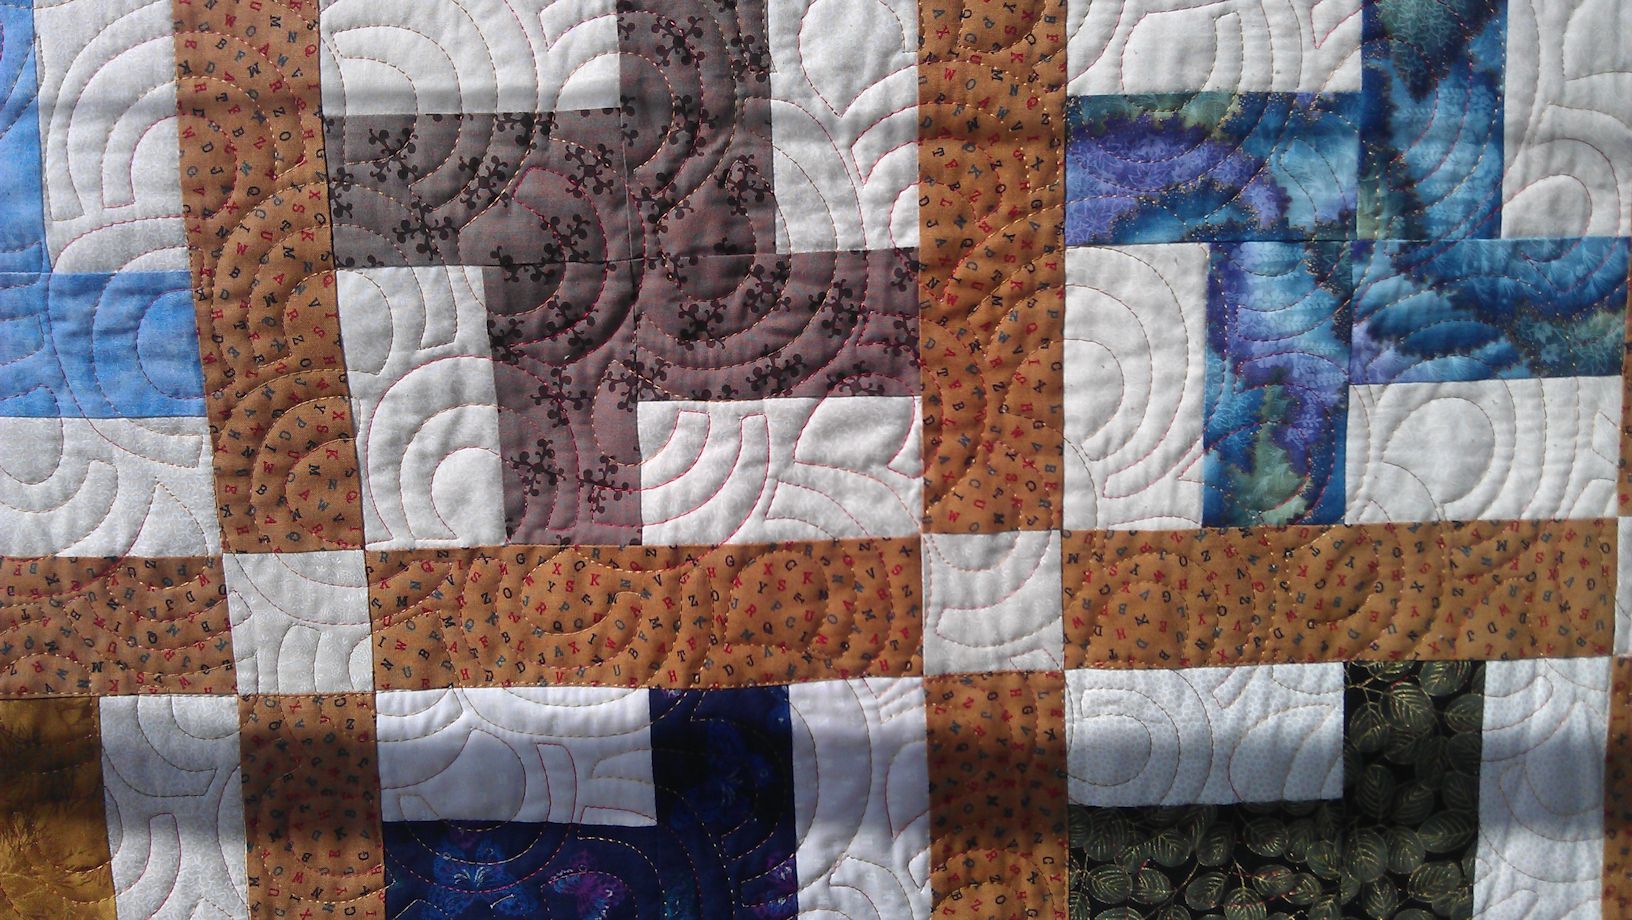
I thought this very geometric quilt top needed something to soften the edges a bit, so I quilted it in a squared-off variation of the ‘open headband‘ motif I’ve used many times before. I stitched this design all over the quilt, using a cream thread.

(Click on a photo to view it larger)

quilt134_01

quilt134_03

quilt134_02

Threads used:

  • Top: Fil-Tec Glide ‘Cream’ (40 wt trilobal polyester, colour 20001)
  • Bottom: Fil-Tec Glide pre-wound bobbin (white)


Jim’s ride

7 04 2014

Background

Our friend (let’s call him Jim) has just cycled – yes, on a bike – from Adelaide to Perth. That’s a HUGE undertaking and an amazing journey to do on a bike. I cannot imagine the mental and physical strength required. Jim is from Edmonton in Canada, and his wife (let’s call her Sue) is on teacher exchange in Adelaide. We know Jim and Sue as Jim was on teacher exchange from Edmonton to Perth in 1989 and taught at the school where my husband taught. Some 25 years later, they’re back, and this time Jim is the ‘house spouse’ and Sue is the breadwinner. They didn’t have kids in 1989, and now both their children are grown and have left home. Their son is currently studying at the University of Western Australia in Perth.

Prior to this amazing trip, Jim went on regular 85 km rides in the hills around Adelaide. And when in Edmonton, he cycled very regularly, participating in a 1000 km kids cancer charity ride.

Jim had a three-day break with us almost at the end of his journey, and I took the opportunity to interview him about his amazing ride.


jims_ride02

Walking in the front door of our house


jims_ride03

The bike before Jim unpacked it

The numbers

  • It’s ~2900 km from Adelaide to Perth going the route Jim took from Adelaide to Perth (i.e. via Esperance). For those in the US, that’s just a bit under 2000 miles… About the distance from New Orleans to San Diego.
  • He rode between 150 and 200 km per day, on average, for about 17 days straight; the longest distance he covered in one day was about 220 km. (Again, for those in the US, 160 km = 100 miles.)
  • He was in the saddle for at least 6.5 hours a day for most days; his longest day was more than 10 hours riding. He would start riding at least one hour before sunrise, and stop around 2pm on most days, in time to organise accommodation and to rest.

The route

jims_ride01


Jim left Adelaide (A on the map) on March 19. His route and timing comprised:

  • 2 days from Adelaide (A) to Port Augusta (B) (1 day off sick in Port Augusta)
  • 3 days from Port Augusta (B) to Ceduna (C) (220 km to Kimber, 90 km to Wirilla)
  • 1 day from Ceduna to Nundroo (D) (roadhouse only, not a town)
  • 1 day from Nundroo to Nullarbor (approx. E) (roadhouse, not a town; with a 26 km round trip detour to the head of the Great Australian Bight)
  • 1 day from Nullarbor to Eucla (F)
  • 1 day from Eucla to Madura (G) (up really early, descended to ocean plain; 65 km to Mundrabilla roadhouse for breakfast, then 115 km to Madura)
  • 1 day from Madura to Caiguna (H) (Cocklebiddy was a nice break point at 90 km, with another 65 km to Caiguna)
  • 1 day from Caiguna to Balladonia (I) (got up early as it was the 90-mile straight stretch of the Eyre Highway across the Nullarbor Plain; 190 km that day)
  • 1 day from Balladonia to Norseman (J) (broke a spoke, spent 30 mins doing running repairs and rebalancing load to account for imbalance from broken spoke, computer logging device stopped working [low battery?]; NOTHING from Balladonia to Norseman – no roadhouses, no nothing)
  • 1 day from Norseman to Esperance (K) (stopped at Salmon Gums for breakfast, then the wind hit; rode 200 km against the wind)
  • 1 day from Esperance to Wagin (L), but on the bus! Wind was expected to be bad, so spent $66 on a one-way ticket to Wagin (included $10 for the carriage of the bike)
  • 1 day from Wagin to Bunbury (M) (Coalfields Highway down from Collie to the Southwest Highway was terrifying – traffic, culverts cut into road to divert water are a real hazard for cyclists as they cut through the shoulder area)
  • 1 hour from Bunbury to our place
  • To come: 2 short days to Perth (N)


Physical challenges

  • Heat stroke on Day 1, when it was 38C (100F) coming out of Adelaide, resulting in headaches, stomach cramps, etc. He had a rest day the next day to deal with that.
  • Hills. Although as he said, ‘there’s always a top, and sometimes there’s a down too’, so hills aren’t really a big deal to Jim (he does cycle in the Rockies at home…)
  • Wind. Constant, relentless, sometimes behind you, sometimes in front, often buffeting you at the sides. Unlike hills, there’s no ‘top’, and you don’t know when it will get worse or calm down.
  • Traffic. Big trucks on the highway. If one was coming from behind and one from in front at the same time, he pulled off the road and stopped to let them pass. Likewise, if going up a hill and a truck was coming from behind, he stopped to let it go past so that it wouldn’t have to swerve out on the crest of a hill. So he did the right thing by the traffic.
  • Broken spoke somewhere between Balladonia and Norseman. Created imbalance, so had to rebalance his load, and do some running repairs enough to get to Esperance where he got it fixed at the local bike shop.
  • Crap on the road shoulders. Lots of debris that can make cycling dangerous – bolts and screws, broken glass, sticks, small rocks, etc.
  • Variable road shoulders. Shoulder widths vary from up to a metre wide to absolutely nothing, when you have to mix it with the traffic. And the state of the shoulders varies greatly too, with lots of breakaways at the edges, unrepaired potholes, sharp drop-offs etc.


Mental challenges

  • ‘Why am I doing this?’ – he still doesn’t know why!
  • Handling the frustration and anxiety as a result of the broken spoke
  • Loneliness and being by yourself. Strips away everything and all the normal barriers you put up to thinking; you become more pure in your thinking, more emotional, and more emotionally vulnerable.


Logistics

Although he carried a small tent and blow up mattress, he only camped out for one night, when the South Australian town he was in was closed up (it was a Sunday…). Other nights were spent in roadhouse motel rooms, on-site caravans, small hotels, etc. It was basic accommodation (though often expensive because it was the only accommodation for a couple of hundred km), but a bed, a shower, fridge, and toilet facilities were all he needed.

Everything was packed onto the bike, except for the stuff he mailed ahead to himself. His main water supply was his ‘Camelback’ strapped to his body and with a mouth tube. He carried ~4.25 L water – 2 L in the Camelback, and 3x 750 mL bottles, each of which also contained powdered electrolyte. He would only drink from the bottles when he stopped, and would sip from the Camelback about 4x per hour. He never ran out of water. He also started cycling very early in the day, and as it was cool in the mornings, he wasn’t drinking too much water.


Miscellaneous

  • As he was travelling from east to west, he didn’t wear sunscreen or lip balm, and often not sunglasses either because the sun was at his back for much of the time. However, some mornings he wore sleeve things to cover his arms from the sun (and the cold in some places!).
  • The relentless nature of the wind coming from Norseman to Esperance and especially after Salmon Gums, plus a spoke that had broken causing the balance to be off, resulted in him catching the bus from Esperance to Wagin (some 500 km).
  • He lost perhaps 2 kg the whole trip from Adelaide to Bunbury! One reason perhaps is that he didn’t get his heart rate up into the burn zone – instead of riding hard and fast for the 180 km in a day, he took it at a pace that allowed him to manage the distance without burning too much.
  • Regular stops. He got into a routine of stopping every 50 km for about 10-15 minutes break.
  • Most cycling was done from 6 to 11 am, with a bit more from 11 am to 2 pm, which is when he tried to finish most days.
  • Food. He ate roadhouse food, as greasy and fatty as he could get, for the calorific value. And had a couple of beers each night where he could get them. The worst food he had was a tough-as-old-boots beef schnitzel he had at Nundroo. He supplemented his food with gel energy packs.
  • Roadkill. Kangaroos, emus, a feral cat, a camel! Stench…. Didn’t see many live animals – just a couple of foxes, a couple of dingoes, some emus, and one rabbit.
  • No flat tires at all! However, he wasn’t using standard tires with inner tubes. From how Jim described it, he had these special tires and the ‘tube’ contained some sort of sealant that expanded and closed the hole if a puncture was detected.
  • Signage sucks, especially close to towns as assumes local knowledge which tourists don’t have.
  • Phones. He carried two phones – his iPhone (WiFi only), and a Telstra ‘burn’ phone – and a camera (though he said he really didn’t need the camera as he should’ve used just his iPhone camera). Telstra had coverage for almost everywhere he stayed (exception: Nundroo, where there was a pay phone).
  • Supplies. Prior to leaving Adelaide he had mailed packages of electrolyte powder, Hammer gel energy packs, etc. to Ceduna and Balladonia and had contacted them by phone to book accommodation and let them know about the packages on their way. However, as he was running a day late because of illness on the first day, he had to call to change his accommodation dates. He said the packages were waiting for him when he arrived at both places. He also mailed clothing to our place so he had something decent and clean to wear when he got here.
  • Routine at the end of each day’s riding – would finish around 2-3 pm to avoid the worst heat of the day and would try to get accommodation straight away before there were no vacancies for the night. Accommodation varied from roadhouse motel units (of varying degrees from fleapits to OK, varying costs — $90 to $130 per night, and varying facilities, though most had air conditioning, fridge, and a TV), to old-style hotels (Wagin, Bunbury), to on-site caravans ($50-$100/night; Port Augusta, Ceduna, Norseman, Esperance; some with own bathroom, but most with shared ablution block; fridge, TV), and only one night did he have to sleep in his tent/sleeping bag. He would keep his bike in his room, even in the upstairs rooms at some of the older hotels. He would partially unpack the bike, and his first priority after checking in and unpacking the bike would be to get some food as he rarely had breakfast or lunch. The first food would be junk food, potato chips (crisps), choc milk or iced coffee or lemon squash (loads of sugar), but no Coke or Pepsi. Then he’d shower and relax a bit, sometimes sleep for an hour, then get up and have his main meal of the day – often a counter meal at a pub, a couple of beers (rarely more than two) if there was a bar, then stock up on snacks (e.g. more hot chips [fries] with lots of salt and vinegar) and drinks for the evening. During the evening he’d watch a bit of TV, and charge up his devices – camera, phones (he carried two), battery backup for his devices, head and tail lights for the bike (all charged via USB into a power outlet adaptor). And sleep.
jims_ride13

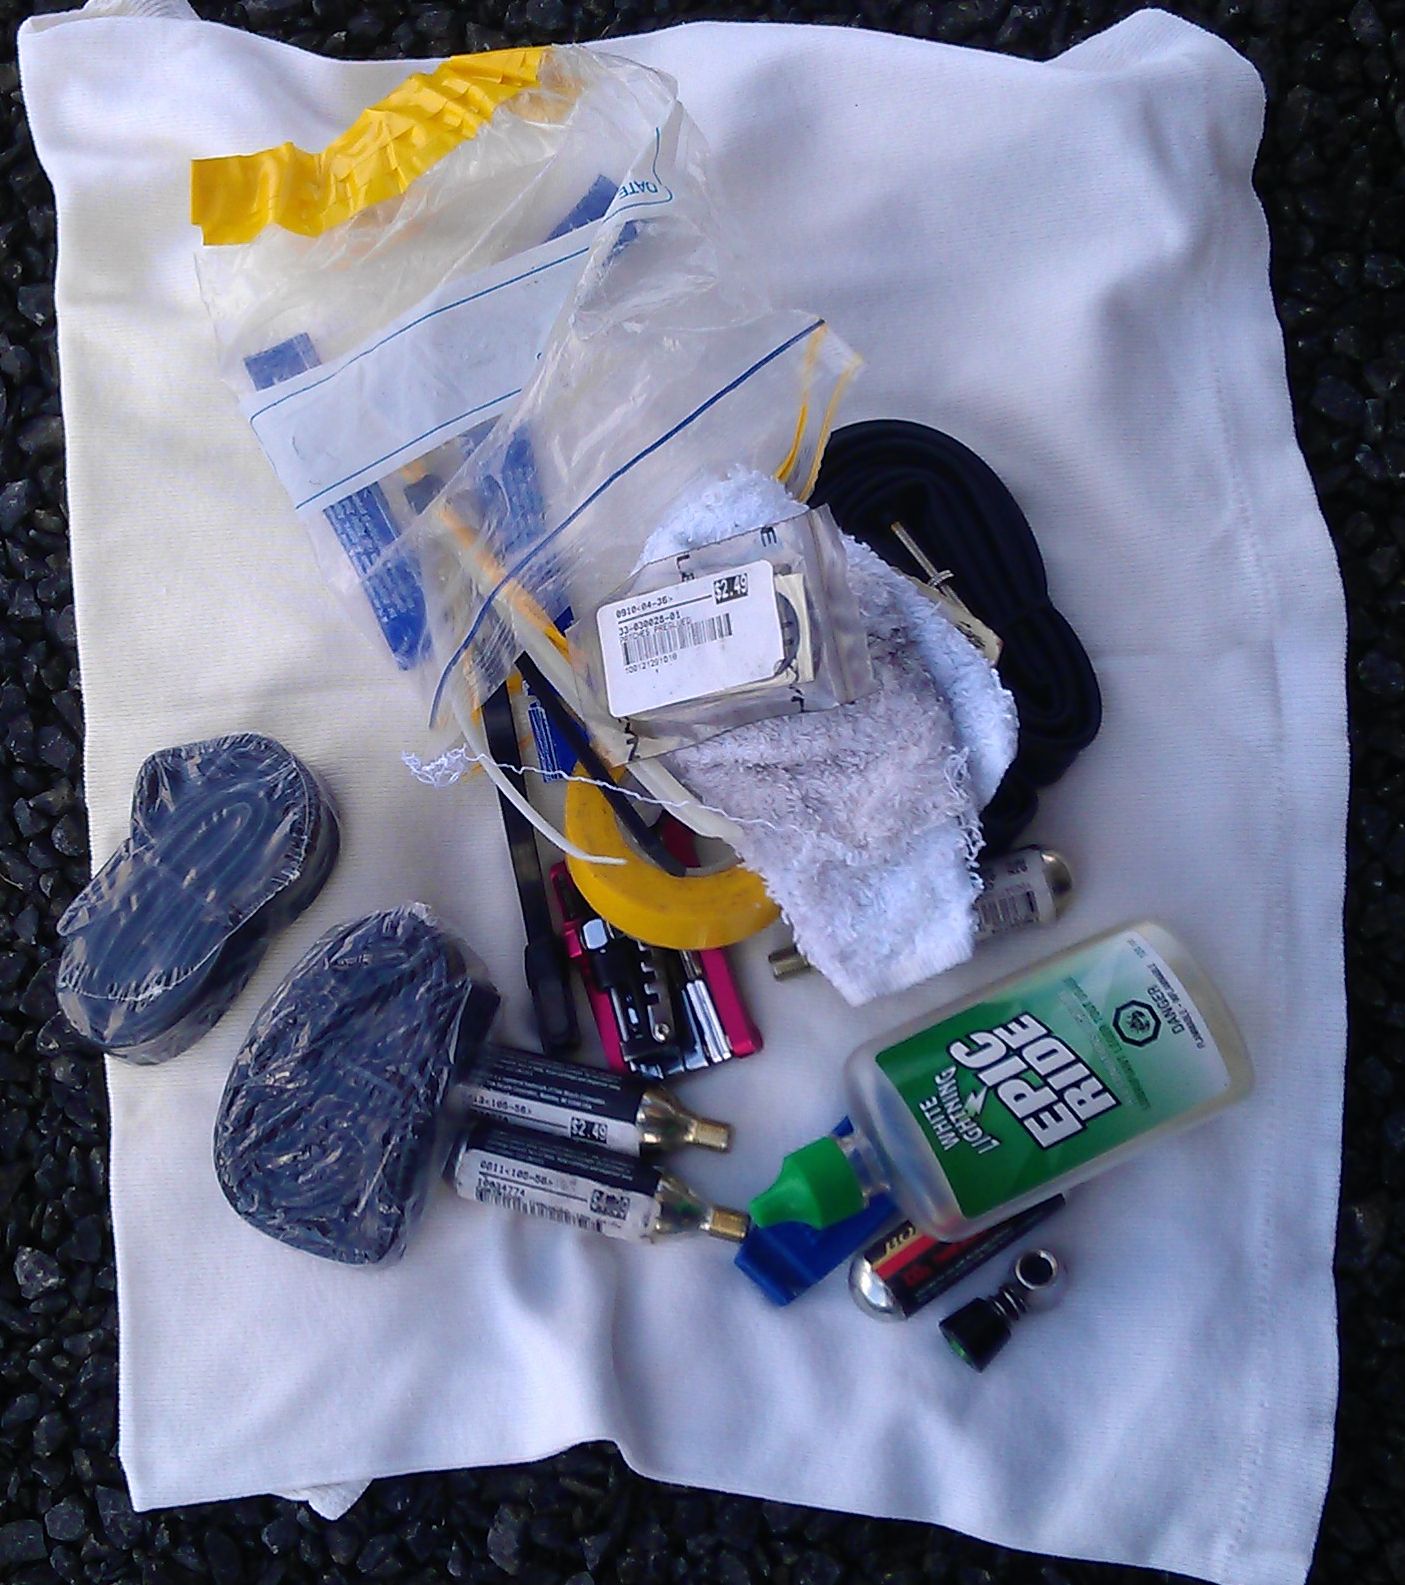
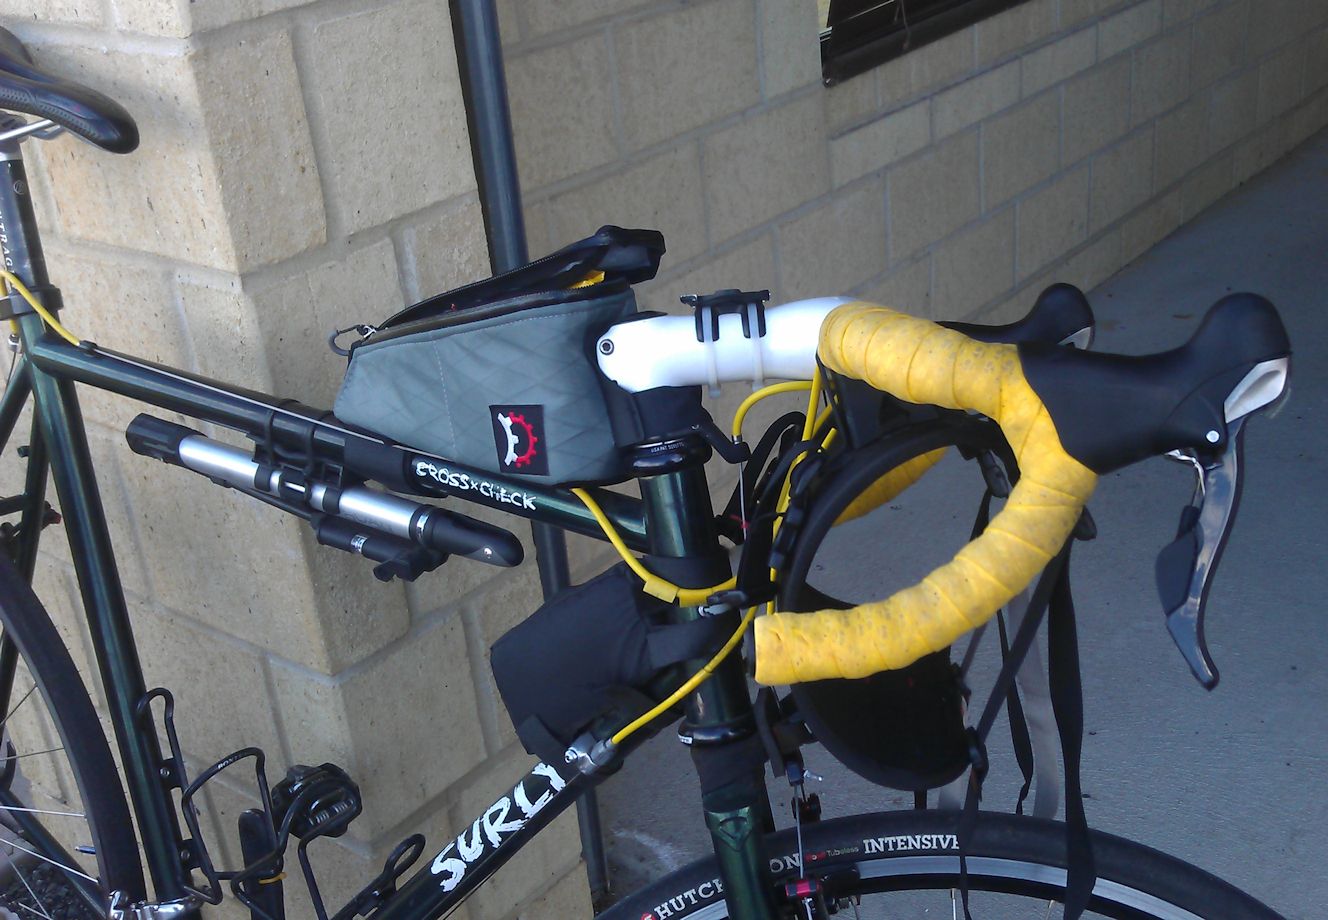
Most of contents of toolkit

jims_ride12

Basic repair tools and compressed air for tires

jims_ride11

‘To hand’ pack, toolkit below, foot for Polar computer device on handlebar


jims_ride10

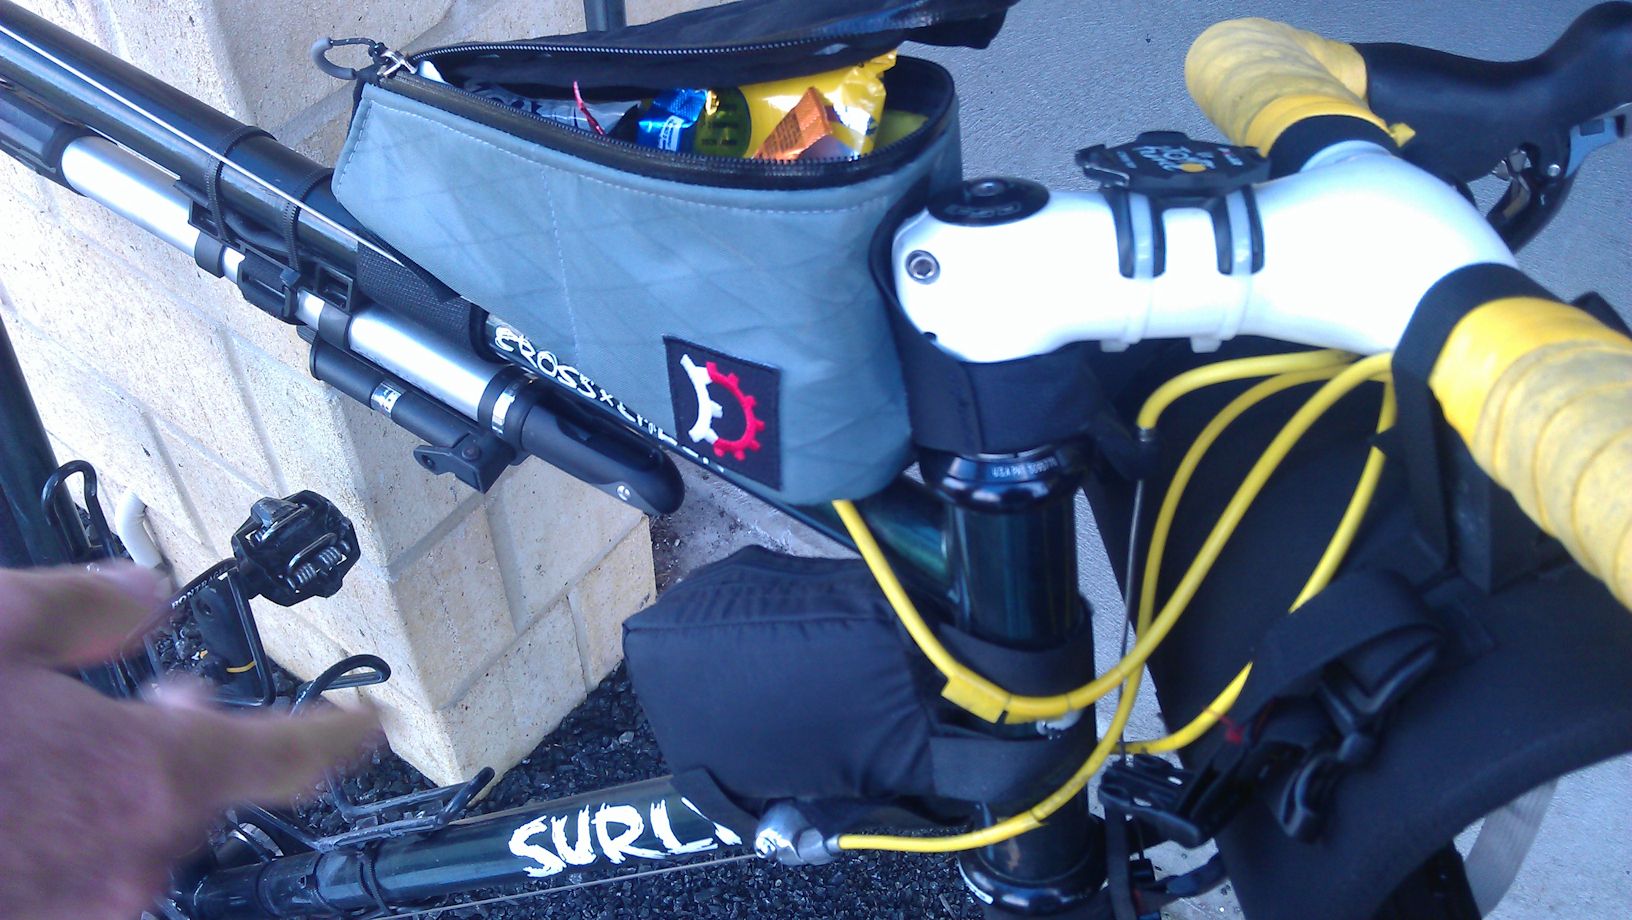
‘To hand’ pack on top of bar, pump, toolkit below bar

jims_ride08

Emergency ‘food’ pack contents in case of no food options for purchase (e.g. places closed for the night)

jims_ride07

Gel energy supplements

jims_ride06

The 3 water bottles to supplement the Camelback

jims_ride09

After 3 days rest, prepping the bike the day before the final ride into Perth

jims_ride14

Final prep for the final push; bike all loaded up with gear

jims_ride15

I’m outta here!


Community Quilt 133

29 03 2014

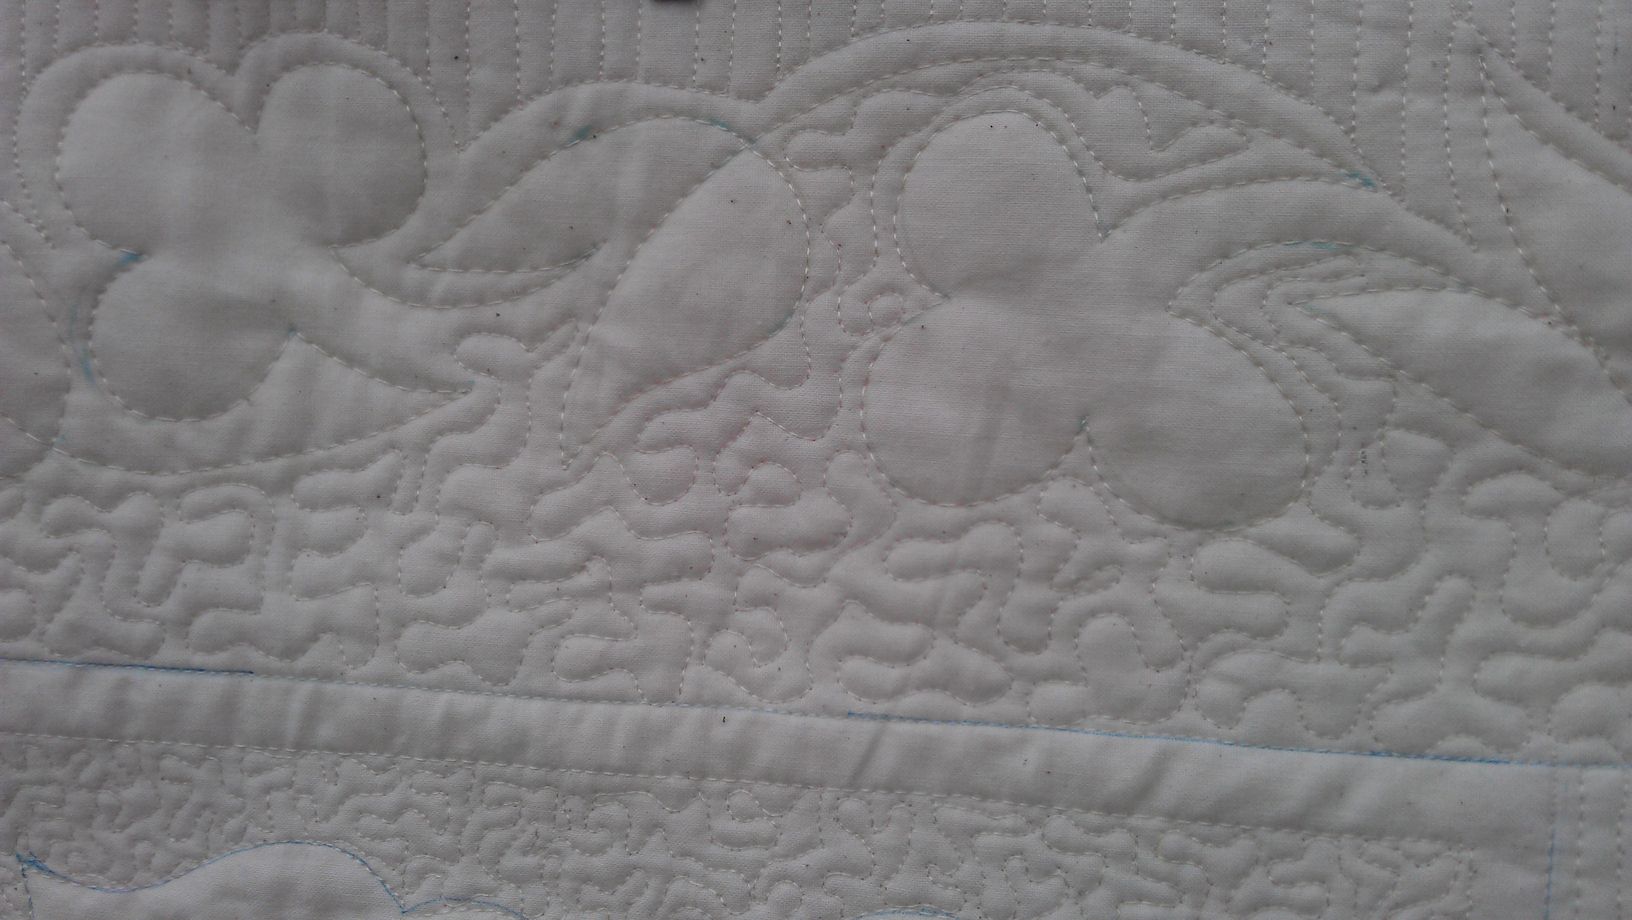
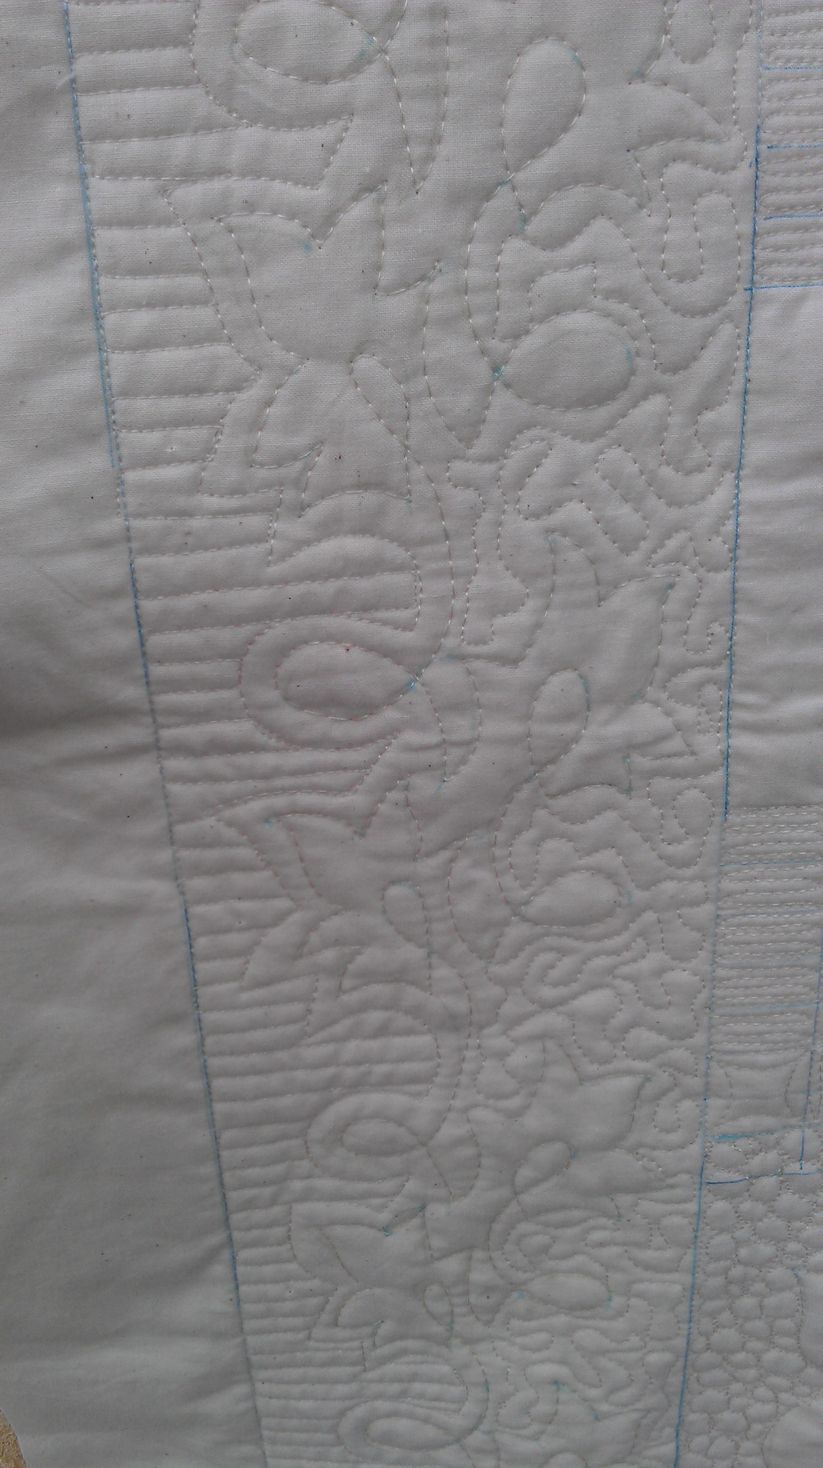
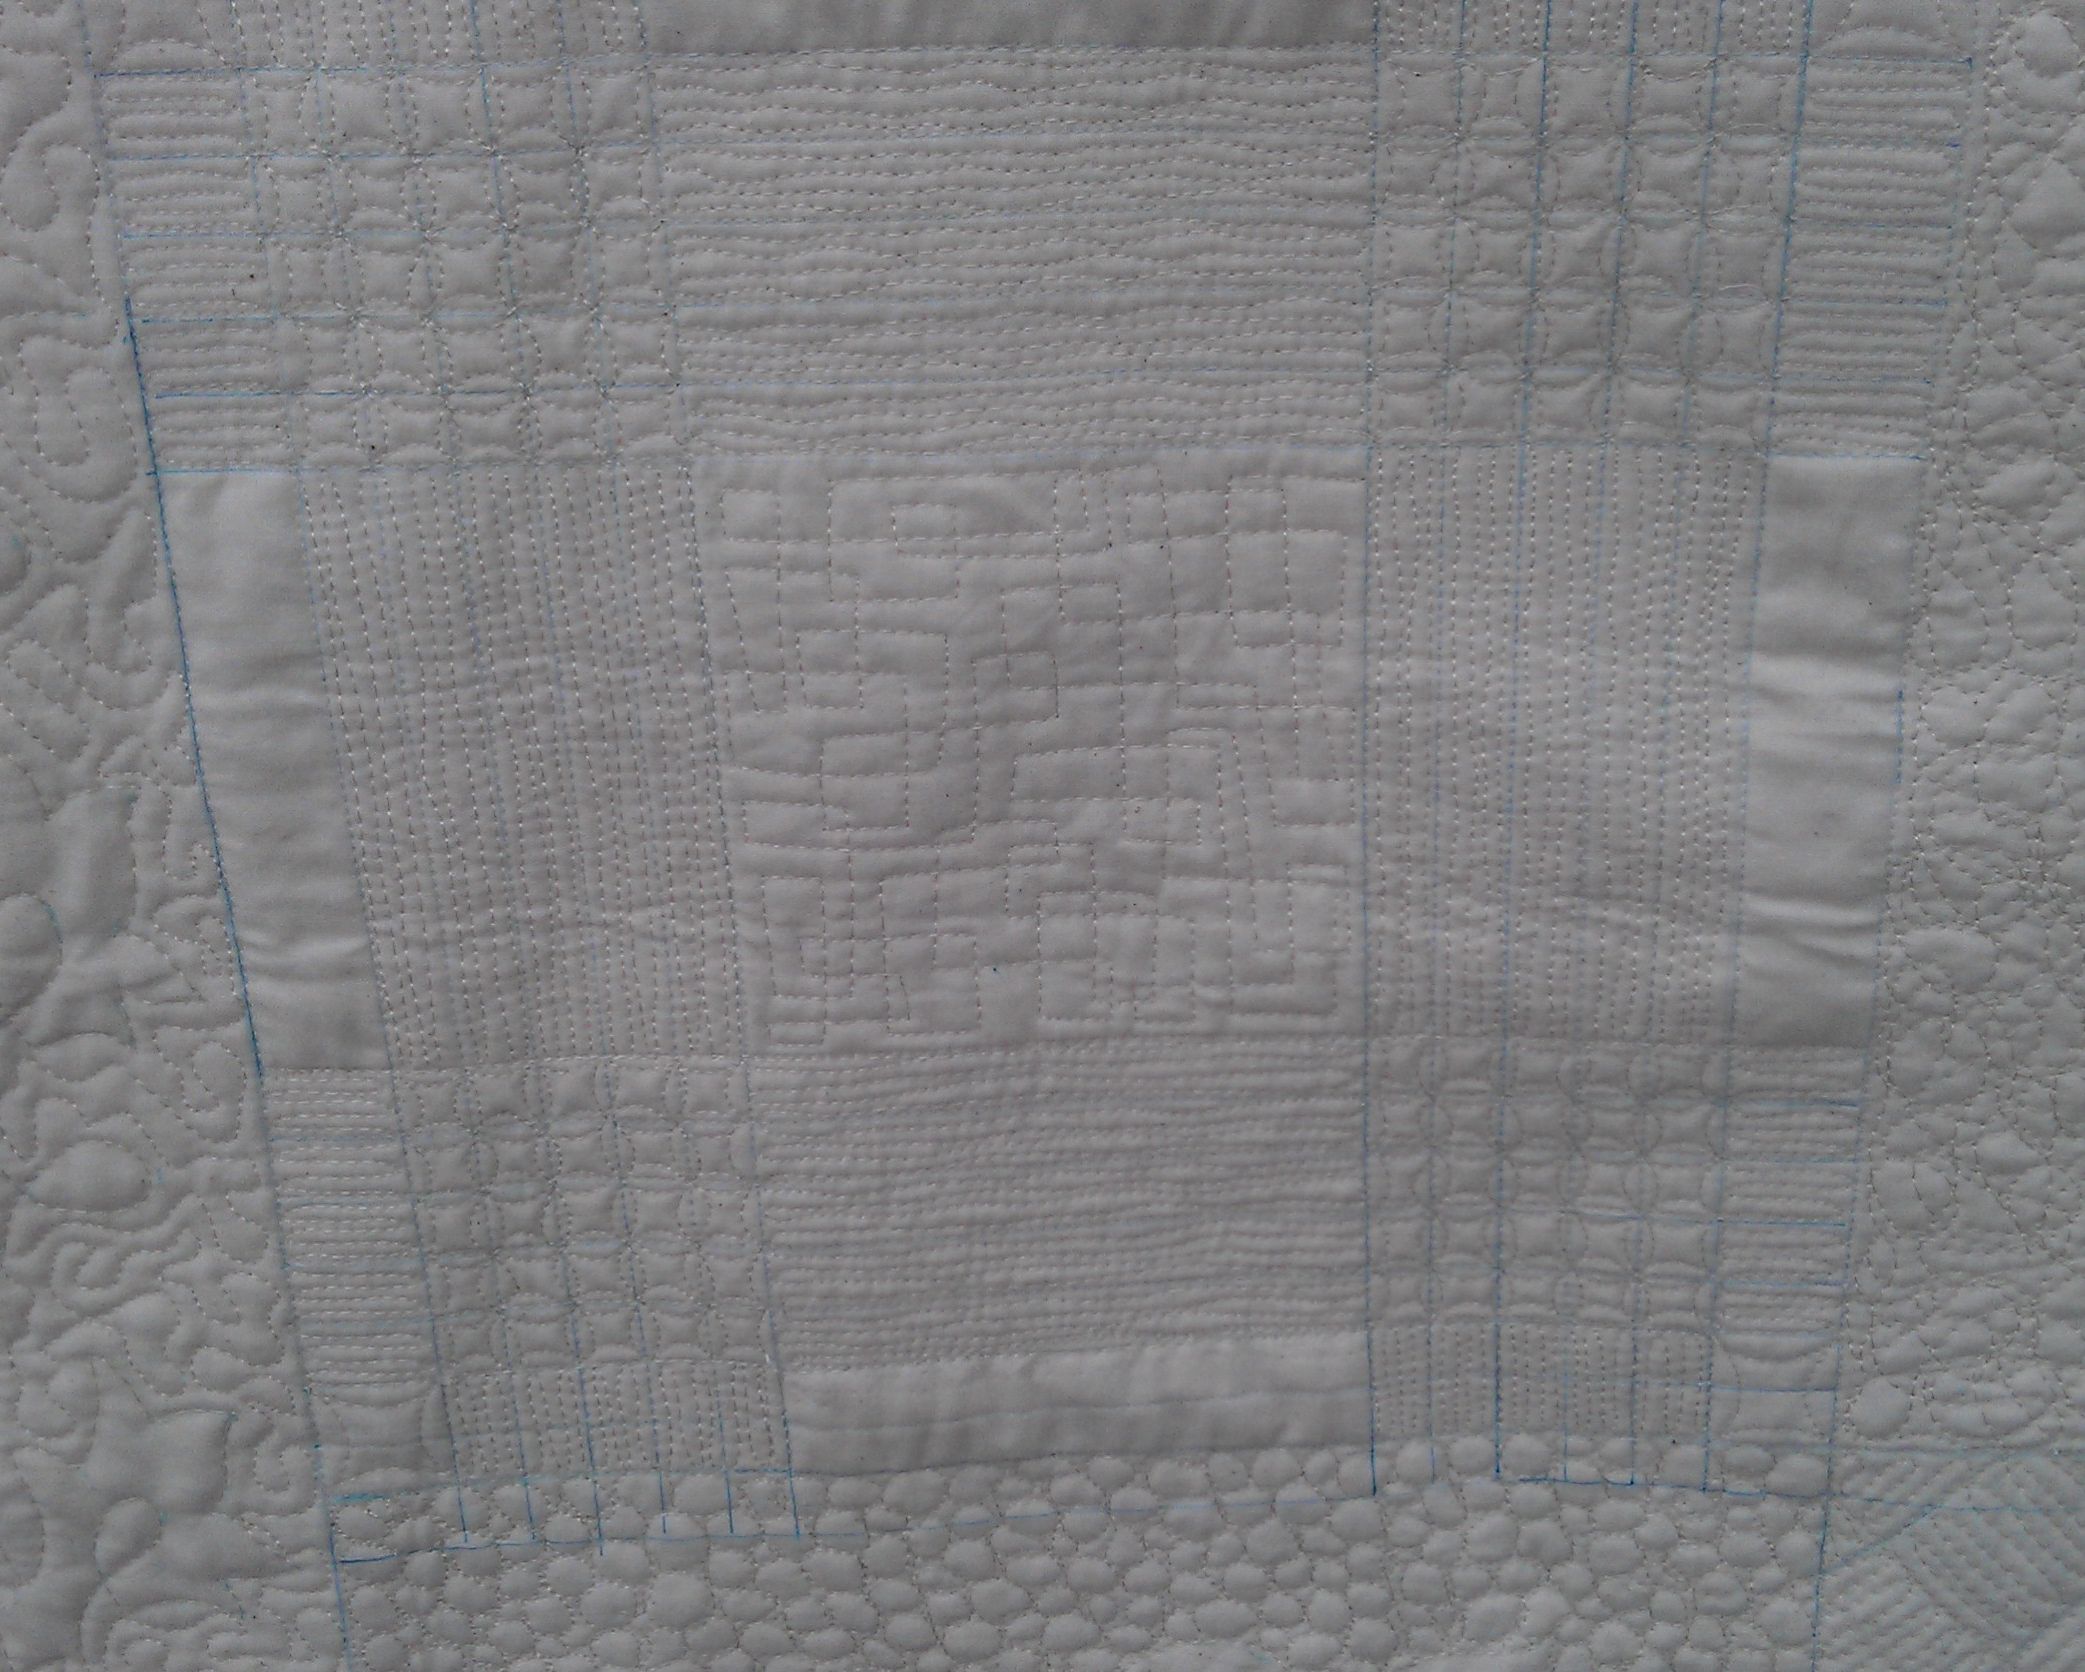
I’ve never done a ‘whole cloth’ quilt before, though I’ve admired those I’ve seen. For those not familiar with the term, a whole cloth quilt is created from one piece of fabric for the top — no piecing, no blocks sewn together, no applique. Typically, the single piece of fabric is one colour with no pattern in it, often a light colour like cream or white, though I have seen some stunning whole cloth quilts done in black. The decoration comes from the quilting.

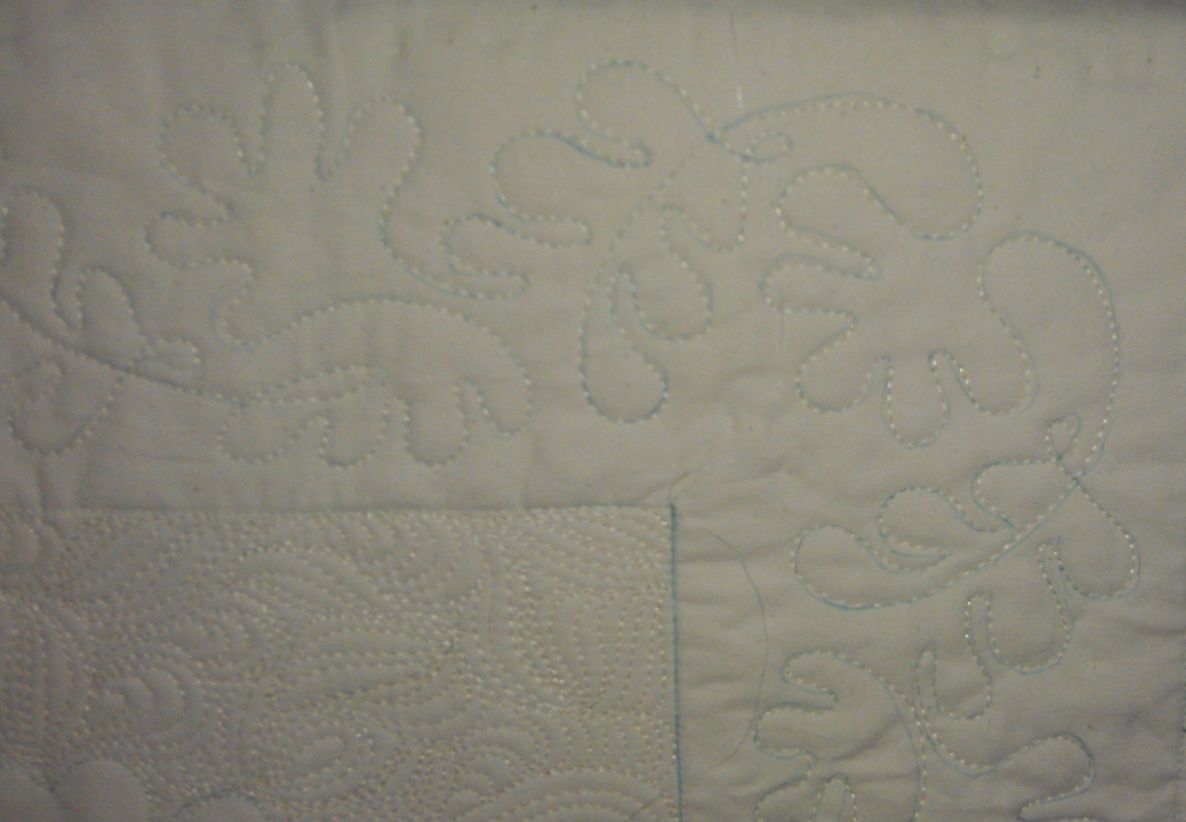
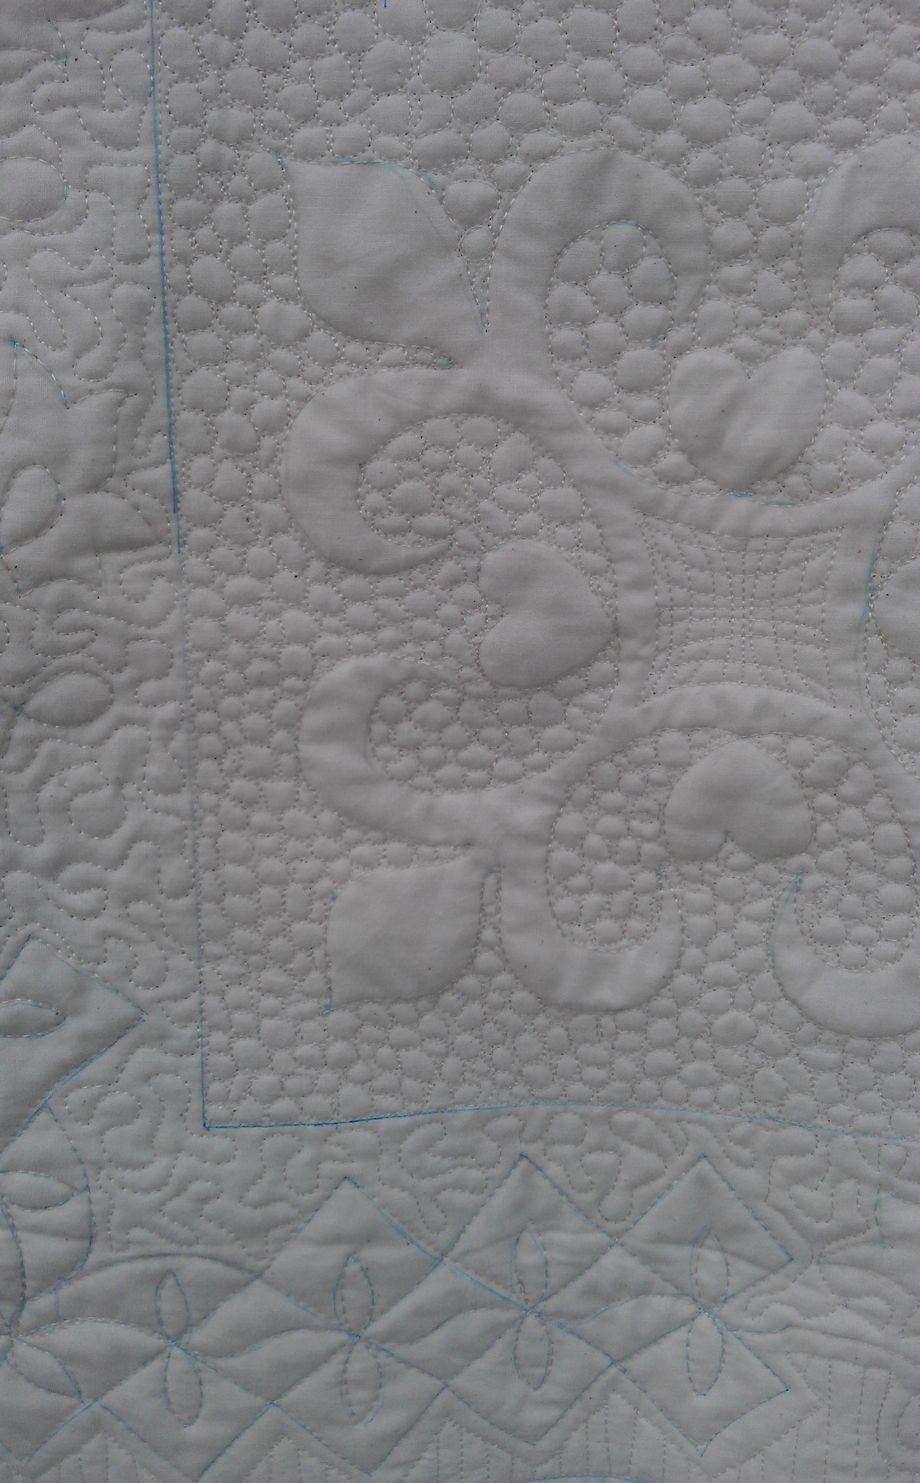
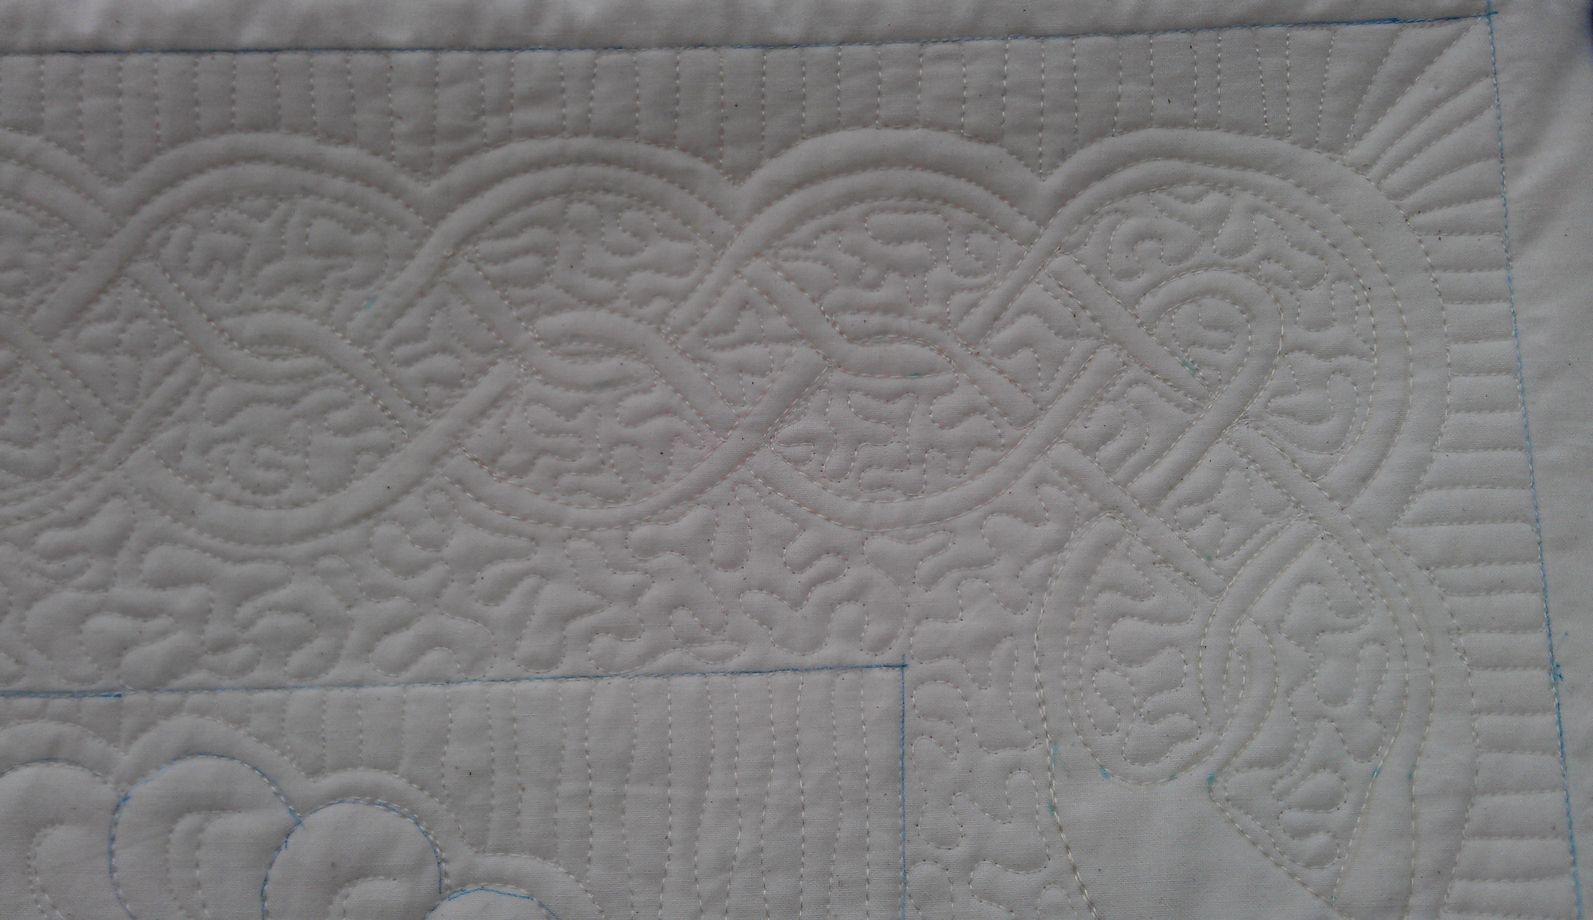
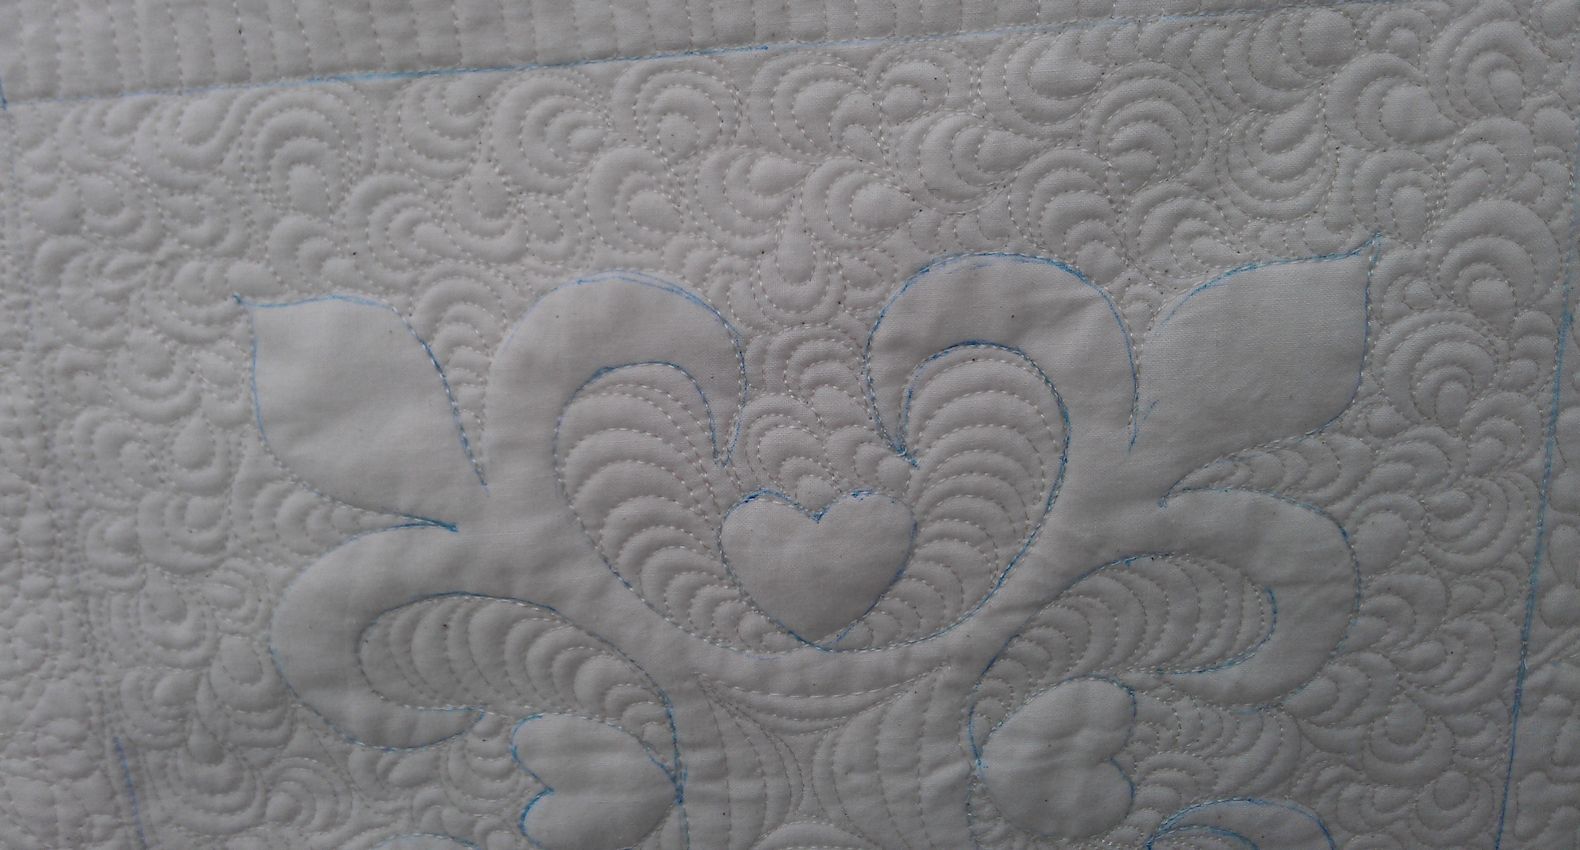
My challenge with this quilt was to take someone’s whole cloth top that they had carefully marked (the blue lines) in 12″ squares and a 4″ (?) border, and make something of it. Instead of trying to reinvent the wheel, I followed the markings the creator had made, then added fills where I thought they were necessary. I didn’t do ANY ruler work in this piece — all the ‘straight’ lines are either deliberately wonky, or are done by ‘eyeballing’ an imaginary straight line.

The centre square was the only one that didn’t have any markings, so I found a picture of a square Celtic knot and printed it out then marked it up with orange chalk.

The person who marked up this quilt did an awesome job in the ‘borders’ as she segued from one design to another in a seamless manner.

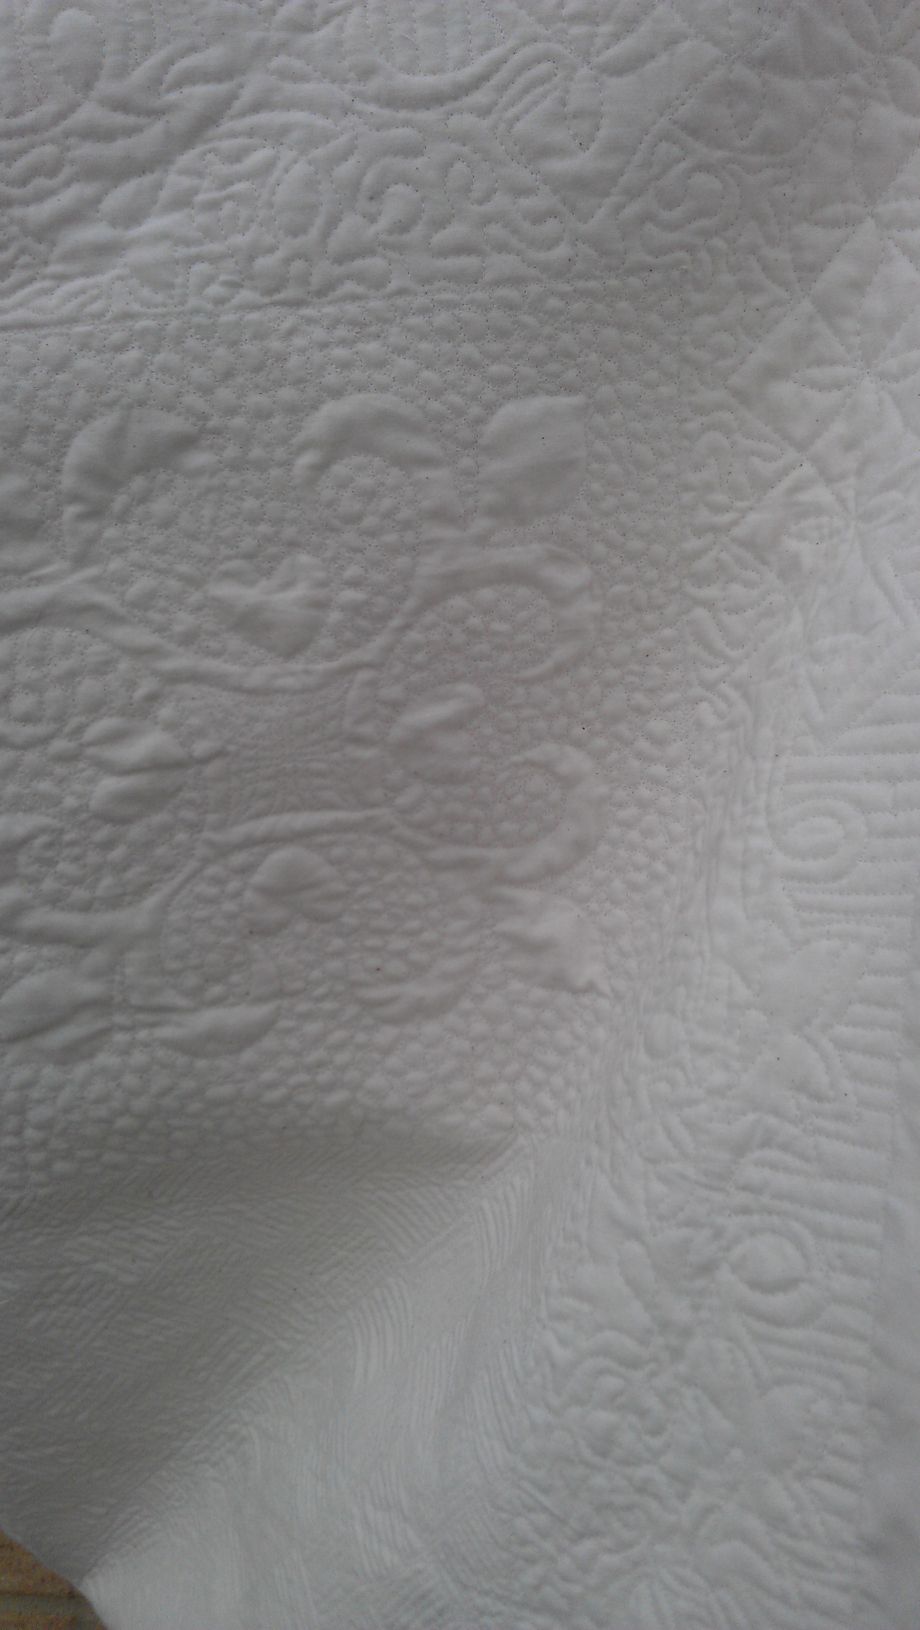
I REALLY REALLY hope that when this quilt gets washed before it gets given away that the marks come out! That said, the back looks pretty stunning too! 😉

(Some of the photos weren’t as good as I’d like — it was pretty windy outside and rain was threatening)

(Click on a photo to view it larger)

quilt133_06

Some of the designs after I had only stitched the marked lines:

quilt133_04

quilt133_05

And then I quilted each square….

I started with this one, as I figured that 1/8″ straight lines creating a checkerboard effect of about 1″ diamonds would suit the markings:

quilt133_19

quilt133_15

quilt133_16

quilt133_18

quilt133_09

quilt133_22

quilt133_07

quilt133_02

With the central Celtic knot design, I did some very tight scribble stitching inside the background areas, then less and less tight stitching heading out to the edge to the 12″ square. I was really pleased with how it came out, as my original intention was to do tight scribble stitching for the entire square. However, I thought it might pull the quilt out of shape if I did that, so I changed tack and made the outer areas far less tight, though it’s still scribble stitching.

quilt133_17

Detail of some of the border designs:

quilt133_10

quilt133_11

quilt133_12

quilt133_13

quilt133_14

And this is the back:

quilt133_21

Time taken: About 6 hours or so (maybe 10??? — I wasn’t keeping track…)

Threads used:

  • Top: Fil-Tec ‘Glide’ (40 wt trilobal polyester, Cream, colour 20001)
  • Bottom: Fil-Tec Glide pre-wound bobbin (white)


Community Quilt 132

23 03 2014

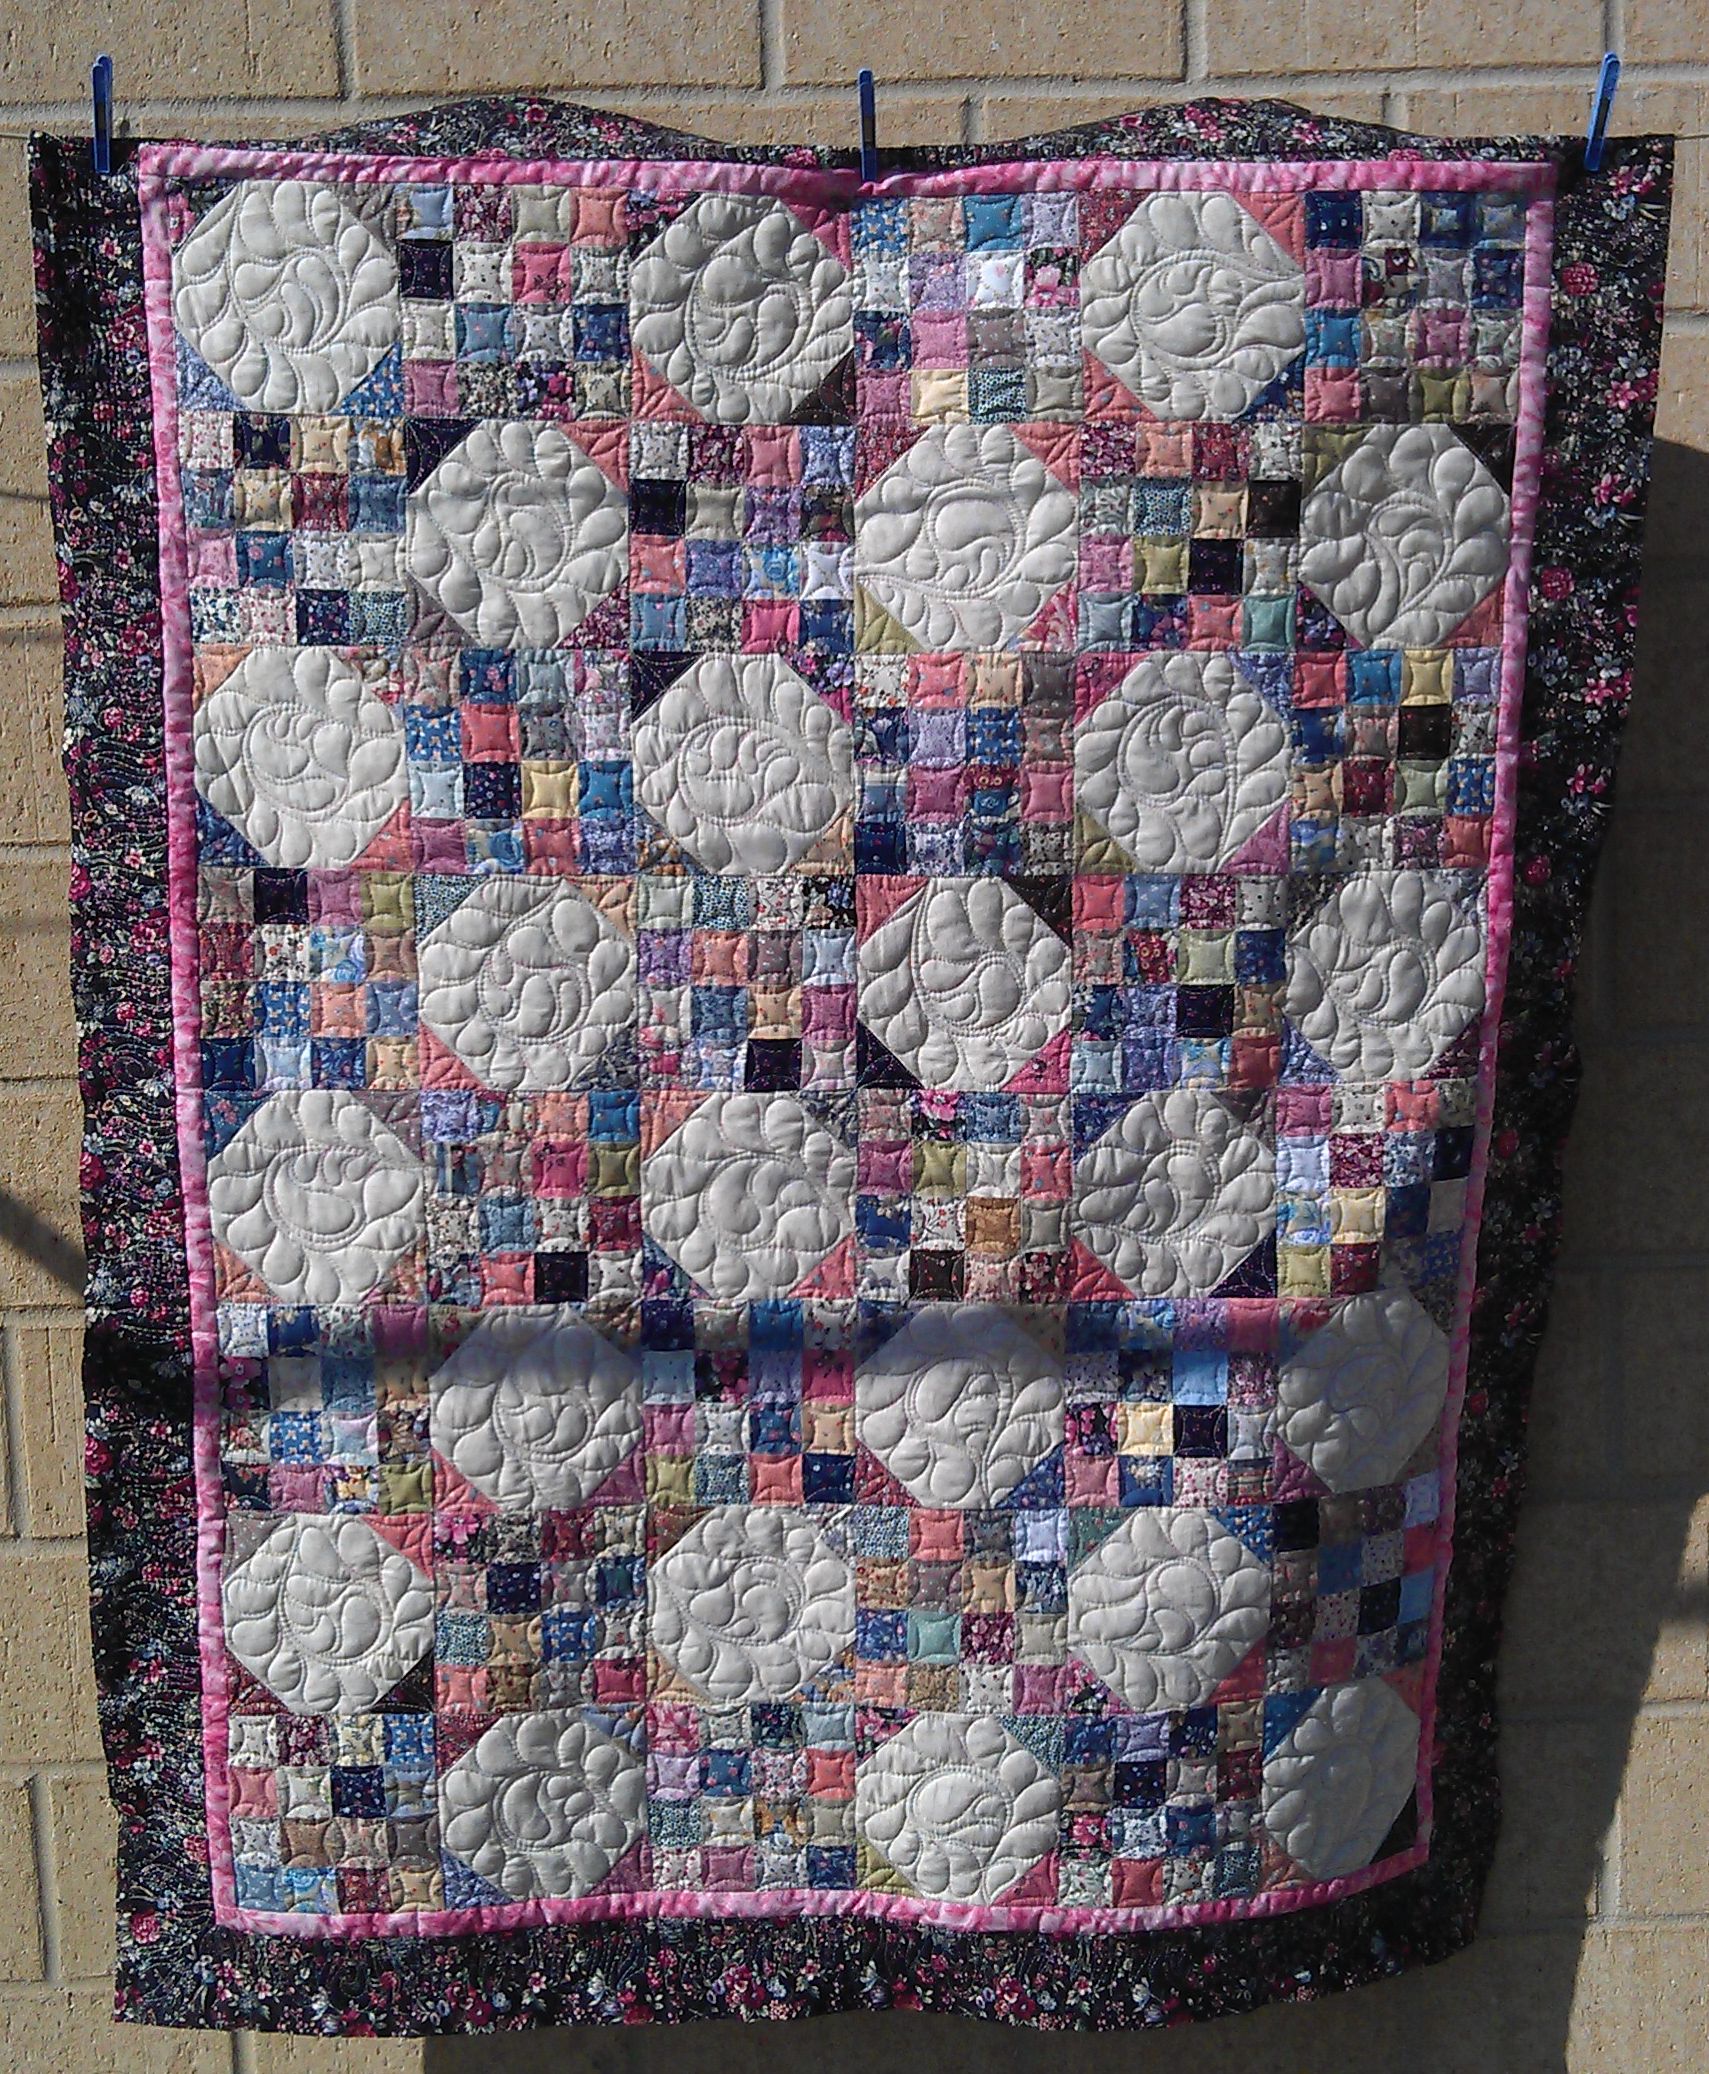
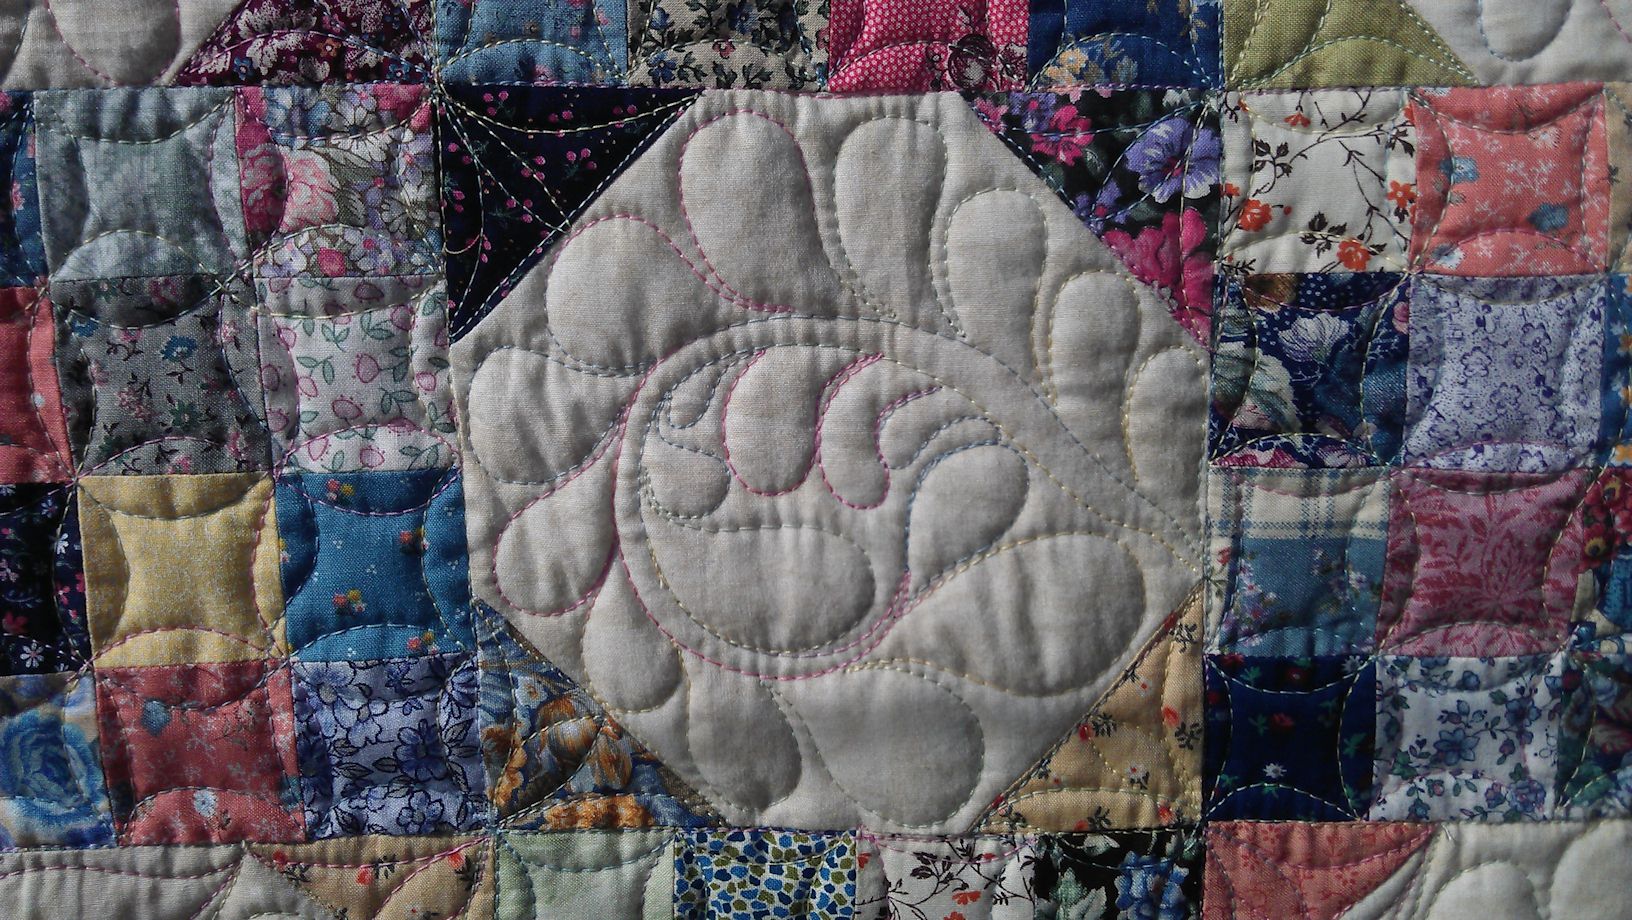
This was quite a traditional snowball block quilt, with lots of small floral fabrics used in all the scrappy squares.

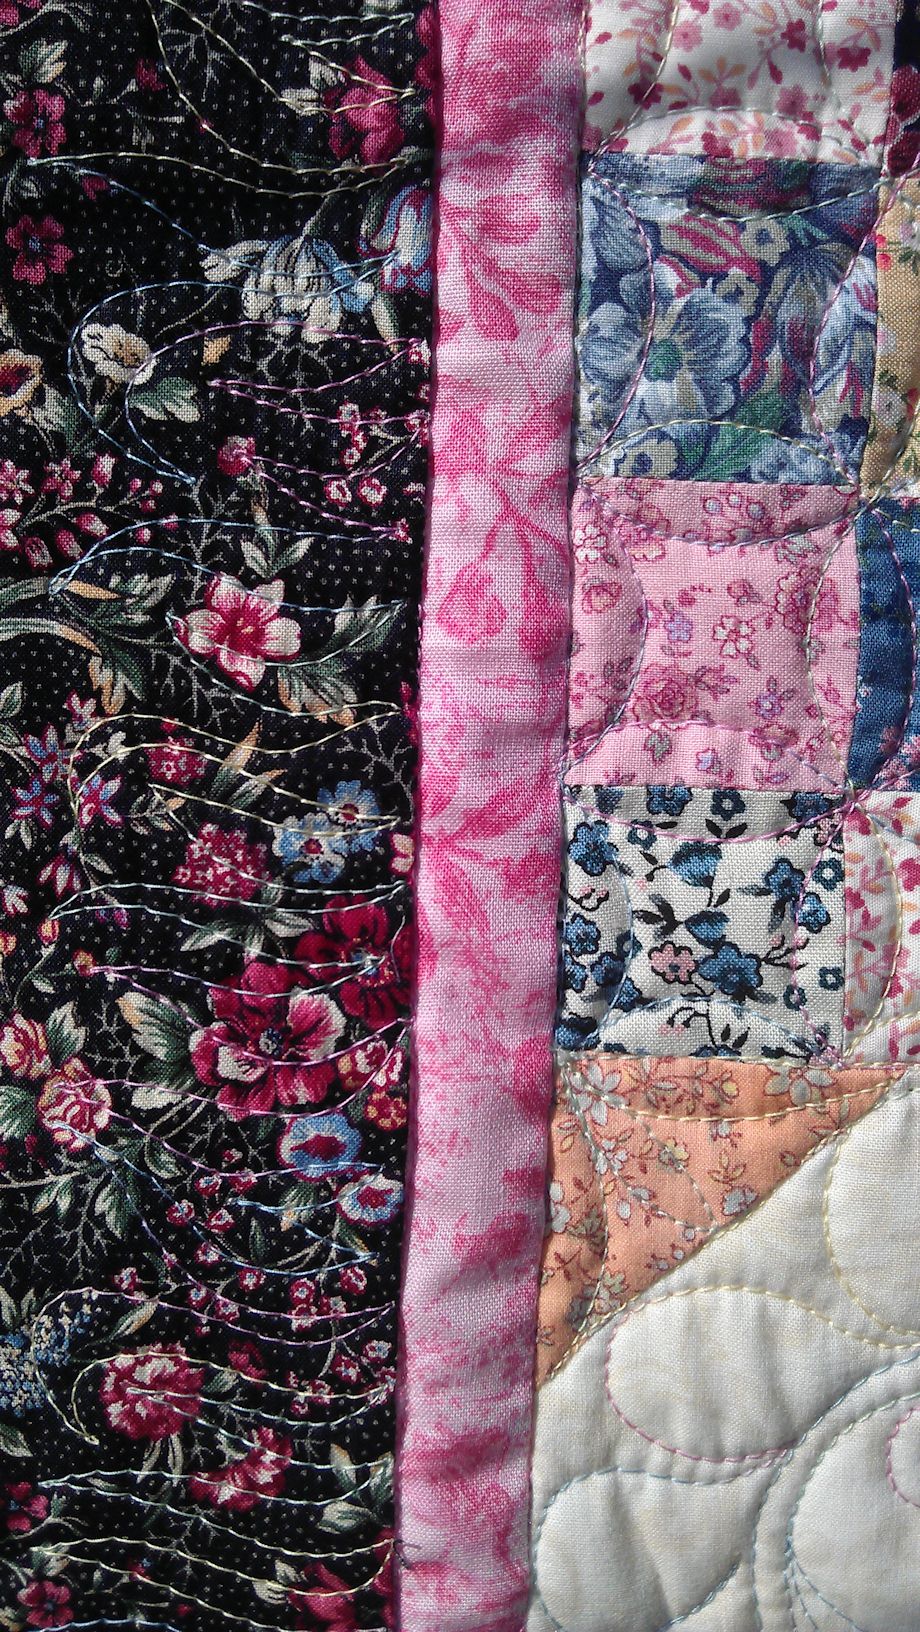
I stitched in the ditch around all the blocks first, then did the cathedral windows/orange peel motif in all the blocks of little squares (each scrap square was about 1.5 inches square),with a half flower in the half square triangles setting off the snowballs. In each snowball, I did a single loopy spine and bulbous feathers. All stitching was done in the same variegated pastels (pink, yellow, green, blue, and cream) thread. In the black floral border, I did flames all the way along. I didn’t stitch the pink border.
(Click on a photo to view it larger)

quilt132_01

quilt132_02  quilt132_04

quilt132_03

Threads used:

  • Top: Fil-Tec ‘Harmony’ (‘Spring’, colour 14062; 40 wt cotton)
  • Bottom: Fil-Tec ‘Glide’ pre-wound bobbin in white


Community Quilt 131

23 03 2014

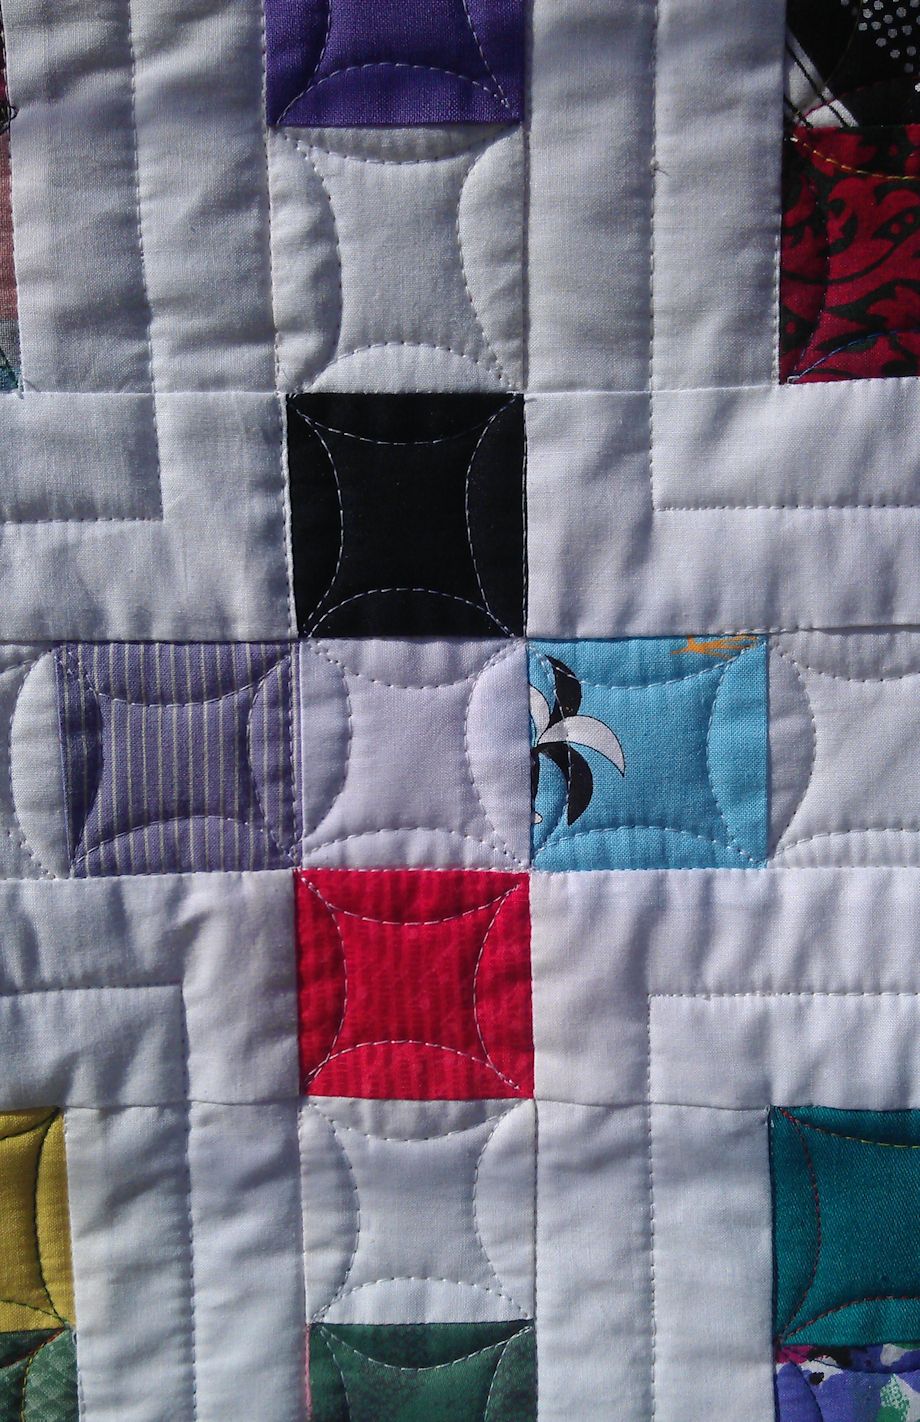
I liked this bright scrappy quilt! The crisp white set it off perfectly. I think this pattern was used (http://weddingdressblue.wordpress.com/2012/09/24/tutorial-film-at-five-quilt/) or a variation of it.

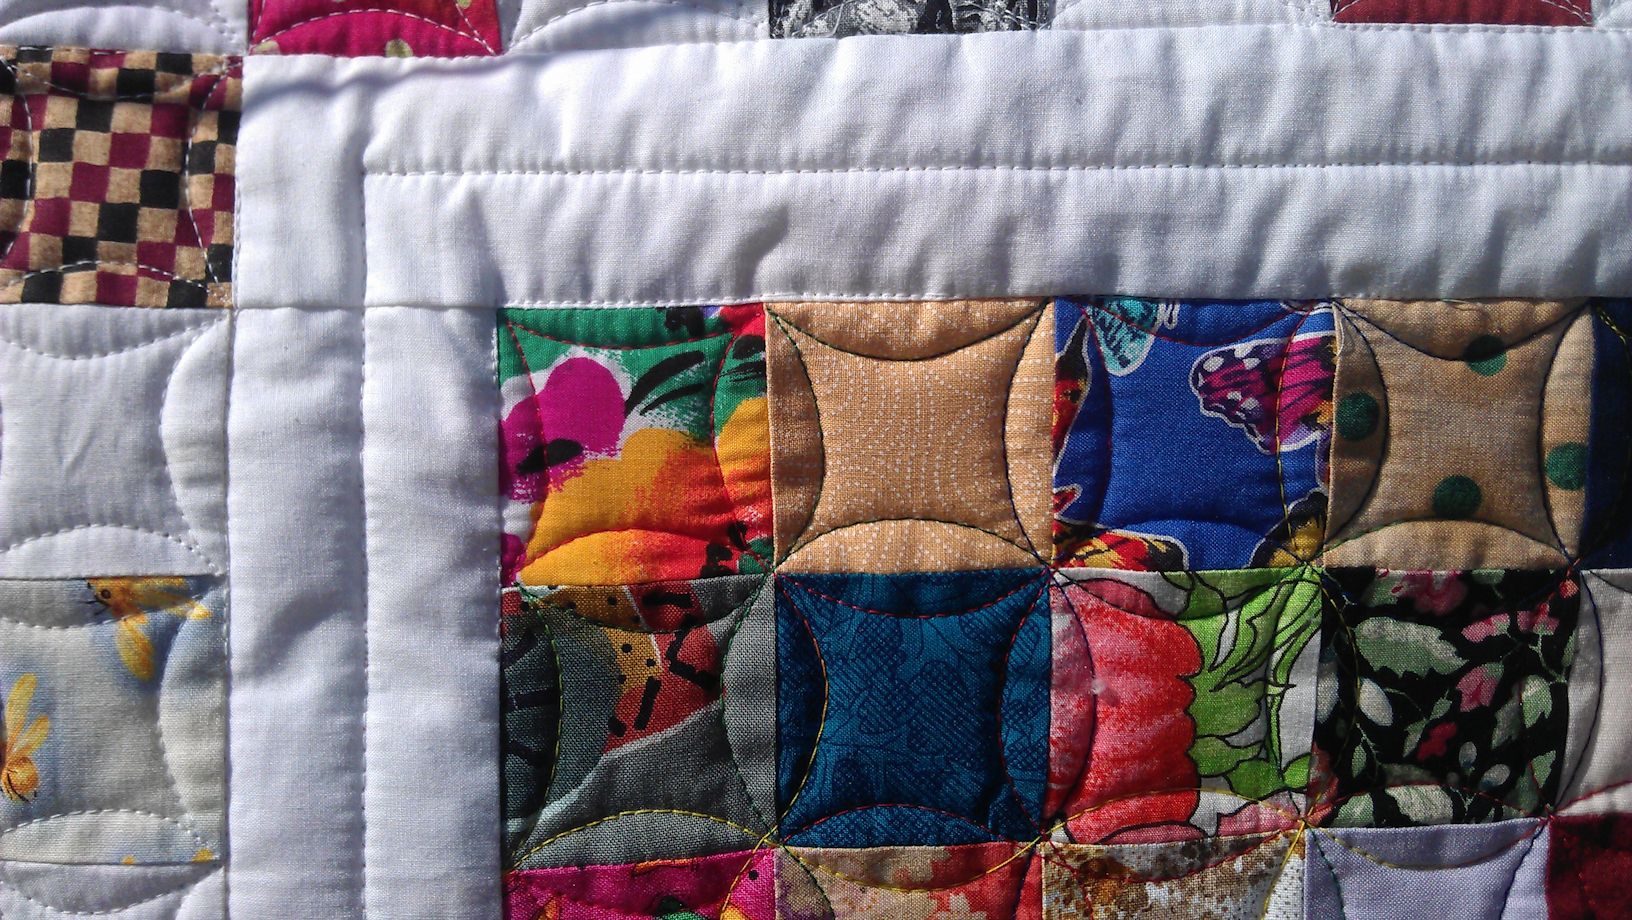
How to quilt it? First I stitched in the ditch around all the blocks to stabilise the quilt. My next thought was ‘modern’ with lots of straight lines, but then I decided to just do the straight lines in the centres of the sashing and border strips, using white thread. Once that was all stitched, I tackled the small squares. This time I decided to do the cathedral windows/orange peel motif as it’s quick, easy, and gives a great effect of circles and/or flowers. I used a variegated red, yellow, blue, and green thread for these sections. And I finished off the sashing/borders with the scrappy squares using the cathedral windows motif, but in white thread.

(Click on a photo to view it larger)

quilt131_01

quilt131_03

quilt131_02

Threads used:

  • Top: Confession: ANCIENT cotton overlocker thread in both white and a variegated red, yellow, blue and green! Using up my thread stash…
  • Bottom: Fil-Tec Glide pre-wound bobbin in white


Designs, signs, and other oddities

14 03 2014

This post is full of miscellaneous signs, oddities, patterns/designs, I came across in the US.

Patterns/designs

I’m starting to see patterns/designs everywhere — maybe it’s my quilting eye? Here are a few:

Acrylic_wall_hanging_Renaissance_PalmSprings01

Layered acrylic pieces in black, white, grey. I can see this as a quilt…

Acrylic_wall_hanging_Renaissance_PalmSprings02

More quilty goodness — licorice allsorts, anyone?

Carpet_HiltonGardeInn_Monterey

This is DEFINITELY a free motion quilting pattern in the making!

Carpet_Renaissance_PalmSprings01

More potential quilty goodness…

Carpet_Renaissance_PalmSprings02

These circles look like alien spacecraft when looking at them at an angle up the hotel corridor. The centre section looks like another quilt… I like the ‘borders’ too.

light_Renaissance_PalmSprings

IMG_4251

Weird signs

IMG_4281._Asilomar

I guess no-one told the crow about the restricted parking.

IMG_4282_Asilomar

I don’t know how you can report a mountain lion that doesn’t retreat to the Park Headquarters when it is threatening you!

IMAG1853_Renaissance_PalmSprings

Other than the need to reword this sign (I’m always editing!), I have to wonder WHAT made them put it up… Not something I want to think about for too long…

IMAG1854Renaissance_PalmSprings

Two things — 3199 people is a very specific number. Why not 3200? Will an extra person cause the courtyard to collapse? Secondly, ‘adult in attendance’ is not going to help children under 14. There could be 3198 adults in attendance, but it doesn’t mean that any one of them is watching out for a child under 14. I think they meant an adult with a supervisory/parenting/guardianship role over their children under 14.

IMAG1862

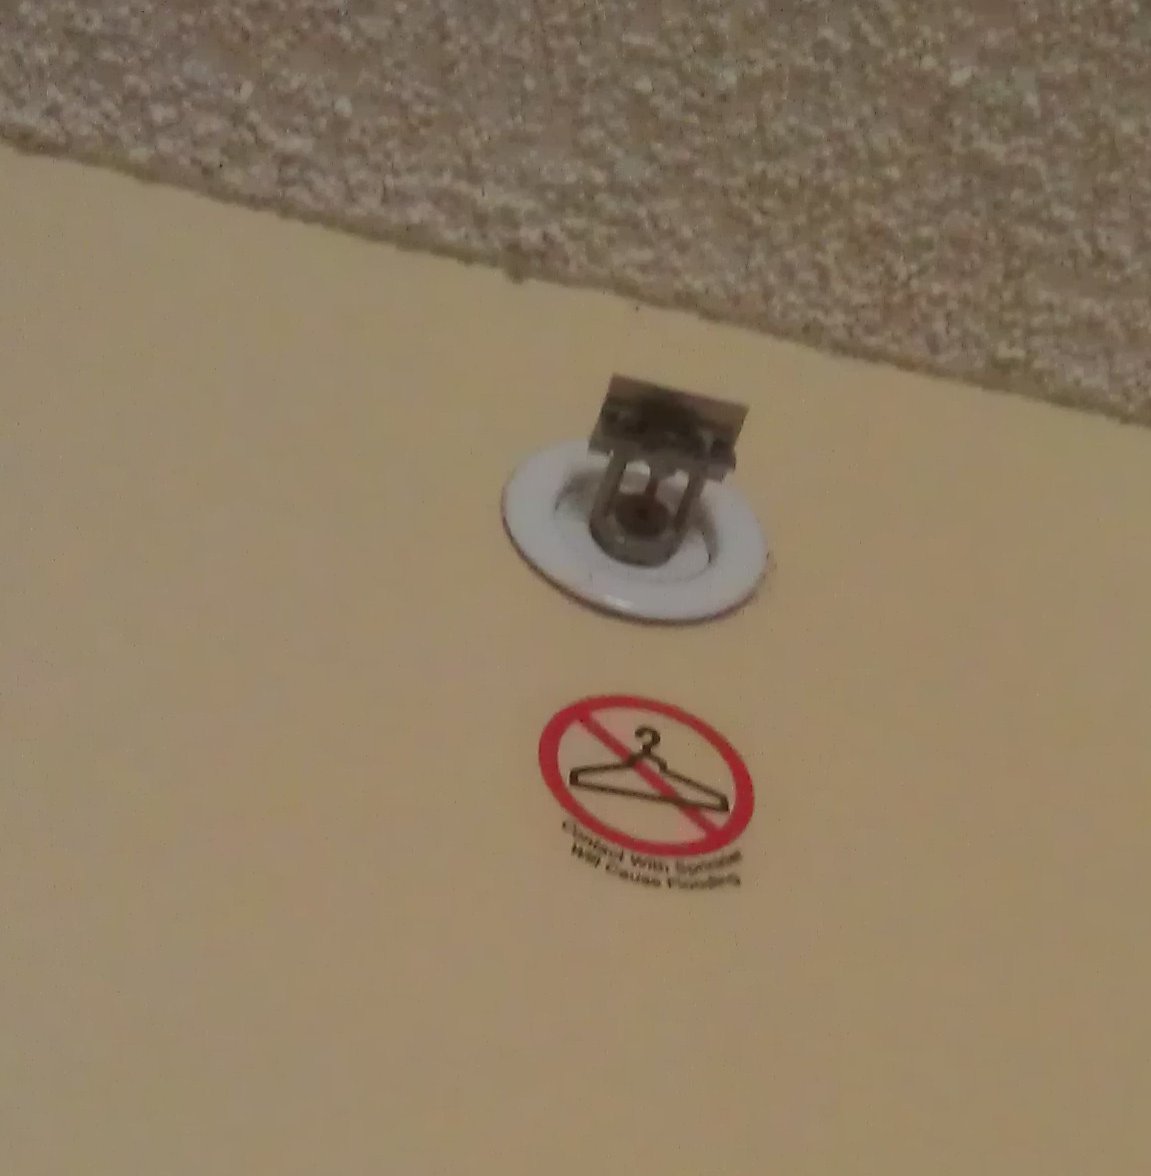
Again, what prompted the hotel to put up this sign a few inches from the ceiling? Did someone once hang their clothes on the room’s fire sprinkler? The sign says ‘Contact with sprinkler will cause flooding’.

Oddities and bits and pieces

IMG_20140304_172555

Yes, seriously! Two people were parading their dogs advertising their doggie sunglasses business. This one had these chic red sunglasses on, and was wearing a little dress (with a frilled skirt!) in a pink and cherry pattern. Only in Palm Springs… or Venice Beach!

IMAG1835

‘How humiliating!’

IMAG1856

I know it doesn’t rain very often in Palm Springs, but from the size of this downpipe outlet, I suspect when it does, it rains VERY heavily and for a short duration. That outlet could sure push out a large volume of water very quickly.

IMG_4242

Love the rustiness and flaky paint on this fire hydrant and the one below, but I wonder if they are still active?

IMG_4241