Enjoying the green grass

11 05 2014

We had our first decent rains this week, and almost overnight the landscape went from dry yellow/brown to lush green shoots.

And the kangaroos are loving it! I see lots on my drive into town, but this week they’ve been much closer to the road, so I took a few photos, especially for my US friends 😉

roos02 roos01 roos04 roos03


There and back again

11 05 2014

On one of our trips to the US (2006) we visited family in Michigan. And as the weather was so nice, we drove up to the Mackinac Bridge and across it to the Upper Peninsula. However, despite the nice weather, pretty much everything in the little town on the other side of the bridge was still closed for winter.

On our drive north, we passed a tiny general store place with gas pumps and a sign that showed they sold Penfolds wines. Penfolds? In a little dot of a place in the middle of northern Lower Michigan? Penfolds is a HUGE wine brand in Australia and we’d previously brought over bottles of Bin 389 to give as gifts to friends only to find that Costco in Monterey, California sold them cheaper than we could buy them in Australia! Go figure.

So on the way back from the bridge trip, we stopped in at this little store to see what they had. And back in the liquor section, at the back of a shelf, we found two bottles of 2001 vintage Penfolds Bin 389! For $21.50 each (USD). Even with the exchange rate at the time, that was still MUCH cheaper than we could buy it in Australia (it was about $50 a bottle in Australia then). So we bought the two bottles. I checked first with the clerk that the price was correct and he said it was. After he’d completed the transaction, I told him that it was half the price we’d pay in Australia, which is where the wine was from. Unbelievable. (See https://rhondabracey.com/2006/04/16/pricing/ for the full story)

We bought these bottles back to Australia with us on our return. And put them away.

Last night, some eight years on we pulled one out to have with a lovely roast pork dinner I was cooking for my parents for Mothers Day. My husband filtered and decanted it in the afternoon so it had plenty of time to breathe.

And it was amazingly good. Not a lot of nose, but the taste. OMG. The taste! Smooth, with hints of black pepper (I’m not much into flowery wine language!). It went down an absolute treat.


bin38901

Decanted and ready to pour

bin38902

Still had the price sticker from the US on it!


bin38903

And proof that this Australian wine was purchased in the US. Australians purchased it in the US for less than half the price Australians pay for the same wine in Australia. Go figure.


Community Quilt 140

5 05 2014

This smallish scrappy quilt had a lot going on — different blocks, various colours and shapes. How to quilt it?

I started by stitching in the ditch around each block in a dark brown to match the sashing. Then I did the same to each diamond in the border, using a tan poly-cotton thread. Then I added detail to the border free stitching ‘straight’ lines from the centre point of each triangle to the centre point of the join, creating a chevron effect.

Next, I tackled the heart blocks, McTavishing around each heart in an off-white/cream thread. I left the hearts unstitched so they would puff. I also left the dark brown sashing unstitched. Then I changed to a variegated brown thread and did cathedral windows in the 9-patch blocks. Finally, I did some large and small stars in the centre 9-patch blocks, also in the variegated brown thread.

(Click on a photo to view it larger)

quilt140_01

Centre block:

quilt140_03

quilt140_02 Border:

quilt140_05

quilt140_04

The back:

quilt140_06

Threads used:

  • Top: Dark brown: Robison-Anton ‘Best Brown’ (40 wt rayon, colour 2566); Variegated brown: Fil-Tec Affinity ‘Brunette’ (40 wt, trilobal polyester, colour 60291); Cream: Superior Masterpiece (50 wt cotton, colour 151); Blue: Isacord (40 wt trilobal polyester, colour FB3842); Tan: Rasant (40 wt poly/cotton, colour 0862)
  • Bottom: Fil-tec Magna Glide pre-wound (white)


Community Quilt 139

3 05 2014

This was a big, pretty quilt. All those soft pastels that matched perfectly, even though when you look closely at the fabrics, you’d wonder how checks and florals and other patterns would go together. But they did.

I quilted this with a variegated pastels cotton thread (and generated a LOT of lint in the process).

My initial thought was to do square and round spirals in alternating blocks, but I ended up doing something more rounded — a variation on the ‘open headband’ motif with flower shapes around each inner arc. I stitched in the ditch around all the blocks first.

(Click on a photo to view it larger)

quilt139_01

quilt139_02

The back:

quilt139_03

Threads used:

  • Top: Fil-Tec ‘Harmony’ (40 wt cotton; ‘Spring’ colour 14062)
  • Bottom: Fil-Tec Magna Glide pre-wound bobbin (white)


Lint. The reason I don’t like cotton thread.

3 05 2014

Some of my favourite threads to use in my Handi Quilter Sweet Sixteen are the trilobal polyesters, specifically Isacord and Fil-tec’s Glide thread. Why? They run through my machine like a hot knife through butter, rarely shred or break, and leave very little lint to gum up the bobbin case, the bobbin area, the tension disks, or the thread path. And thus they are less likely to throw the timing on my machine out, or cause the top or bottom thread to gain or lose tension while I’m in the middle of quilting. However, in my experience, cotton thread leaves a LOT of lint, and it can gum up your machine pretty bad and very quickly, potentially causing all sorts of problems.

Some people swear by cotton thread and won’t use anything else to quilt with, but I’m not in that school. Some also believe that if you have a cotton quilt, then you HAVE to use cotton thread. I’m not in that school either. (And if you want evidence why that ‘belief’ is a fallacy, go to Superior Threads website and take a look at the thread videos by Bob Purcell [Dr Bob]: http://www.superiorthreads.com/videos/thread-therapy-with-dr-bob-educational-videos/.)

I quilted my most recent community quilt with cotton thread as it was the thread with the colour that best matched quilt top. And I had all sorts of tension issues at various times; ALL were related to the accumulated lint from the cotton thread. I had to clean the machine at least five times while I quilted this quilt.

Here are some photos I took of the lint prior to one of these cleaning sessions, with some advice on what bits I cleaned and how.

lint09

I try to clean and brush from the top down, so that any bits of lint and fluff that come off the top areas get swept up when I do the lower areas. I start with the tension disks. Although the thread is in in this photo, I usually remove the thread, loosen the tension disks as far as possible, then give the disks a good brush — and a short sharp blow with my breath (compressed air would work too). This picture doesn’t show a lot of fluff, but one of the cleaning sessions I did earlier had this area heavily coated in fluff.

lint05

Next, I brush up under the metal housing where the lights are, then down the two shafts, around the needle screw, the needle, and the foot. There doesn’t appear to be a lot of lint on these areas, but you’ll be surprised how much comes out with a good brushing.

lint02

Now I pull out the bobbin. Note the fluff at the opening. What you can’t see is the flattened gunk behind the spring where the thread comes out.

lint01

Another view of the lint inside the bobbin case as seen through the opening.


lint03

I remove the bobbin (and blow off any lint on the bobbin), then slide an old pin in the small gap between the spring and the case (NOTE: A business card works really well too and is less likely to scratch). Jiggle the pin (corner of a business card) around in there and slide it all the way to the right to get out any squashed gunk. You might also have to put the pin inside the bobbin case and run it up the slit as there may be some lint stuck in there too, and that’s bad as it WILL affect your bobbin’s tension.


lint04

View of the small gap where I slide the pin. After cleaning the gap, I brush out the inside of the bobbin case to get rid of the all the accumulated fluff in there.

lint08

Next, I tackle the area around the bobbin housing. Look at all that nasty lint! I took this photo less than an hour after the previous cleaning. I give the bobbin housing area a good brush from underneath to remove what I can.


lint07

Because there was so much lint/fluff below, there’s likely to be even more inside the bobbin housing area. So remove the needle plate and brush out any visible gunk.

lint06

Gunk seen from above that brushing out from underneath didn’t get. I usually single press the presser foot a couple of times to turn the bobbin housing and get any more that’s hiding underneath.

lint10

The brush gets pretty gunky too, so remove as much as you can by hand.


lint11

However, every so often you’ll have to clean the brush so that all the accumulated gunk doesn’t prevent the brush from doing its job. I run a pin up from the bottom to the top several times to get out the embedded gunk.

You can see why I don’t like quilting with cotton!

See also:


Community Quilt 138

30 04 2014

This big quilt offered its share of challenges. It was nice and square, which was great. But the cream fabric used for the sashings and border was very hard, thick, and stiff as it was impregnated with gold flecks — I suspect it wasn’t a ‘quilting cotton’. As a result, all the needle punches through the three layers created fairly large holes, which I hope will close up and ‘self heal’ over time.

How to quilt it? Well, the rich colours of the fabrics in the blocks and the gold flecks in the cream fabric lent itself to gold metallic thread, but I ended up only using that for the outer straight lines around each block as I had trouble with the metallic thread. So I used an ‘old gold’ rayon thread for the in-the-ditch stitching, the inner straight echo lines for each block, and for the cross-hatching inside the centre of each block, which followed the cross-hatching in the pattern of this centre fabric.

I decided to leave the rich paisley fabrics unquilted, instead stitching the sashings and borders in a fairly dense spiral motif, in a matching cream thread (though it’s called ‘Khaki’ on the thread cone!).  That way the blocks ‘pop’ and add a little puffiness to the quilt.

While I was quilting this quilt, I set up my suspension system and it worked a treat in reducing drag.

(Click on a photo to view it larger)

quilt138_01

quilt138_02

quilt138_03

quilt138_04

quilt138_05

Threads used:

  • Top: Robison-Anton (40 wt, rayon, ‘Old Gold’ colour 2201; used inside the blocks including the cross hatching in the centres of each block); Fil-tec Glisten (metallic, ‘Gold’ colour 60088; only used for the outer straight lines around the large blocks) ; Fil-tec Glide (40 wt, trilobal polyester, ‘Khaki’ colour 24525; used in the sashings and borders)
  • Bottom: Fil-tec Magna Glide pre-wound bobbin (white)


Handi Quilter Sweet Sixteen: Working with metallic threads

29 04 2014

sewers_aid_metallic

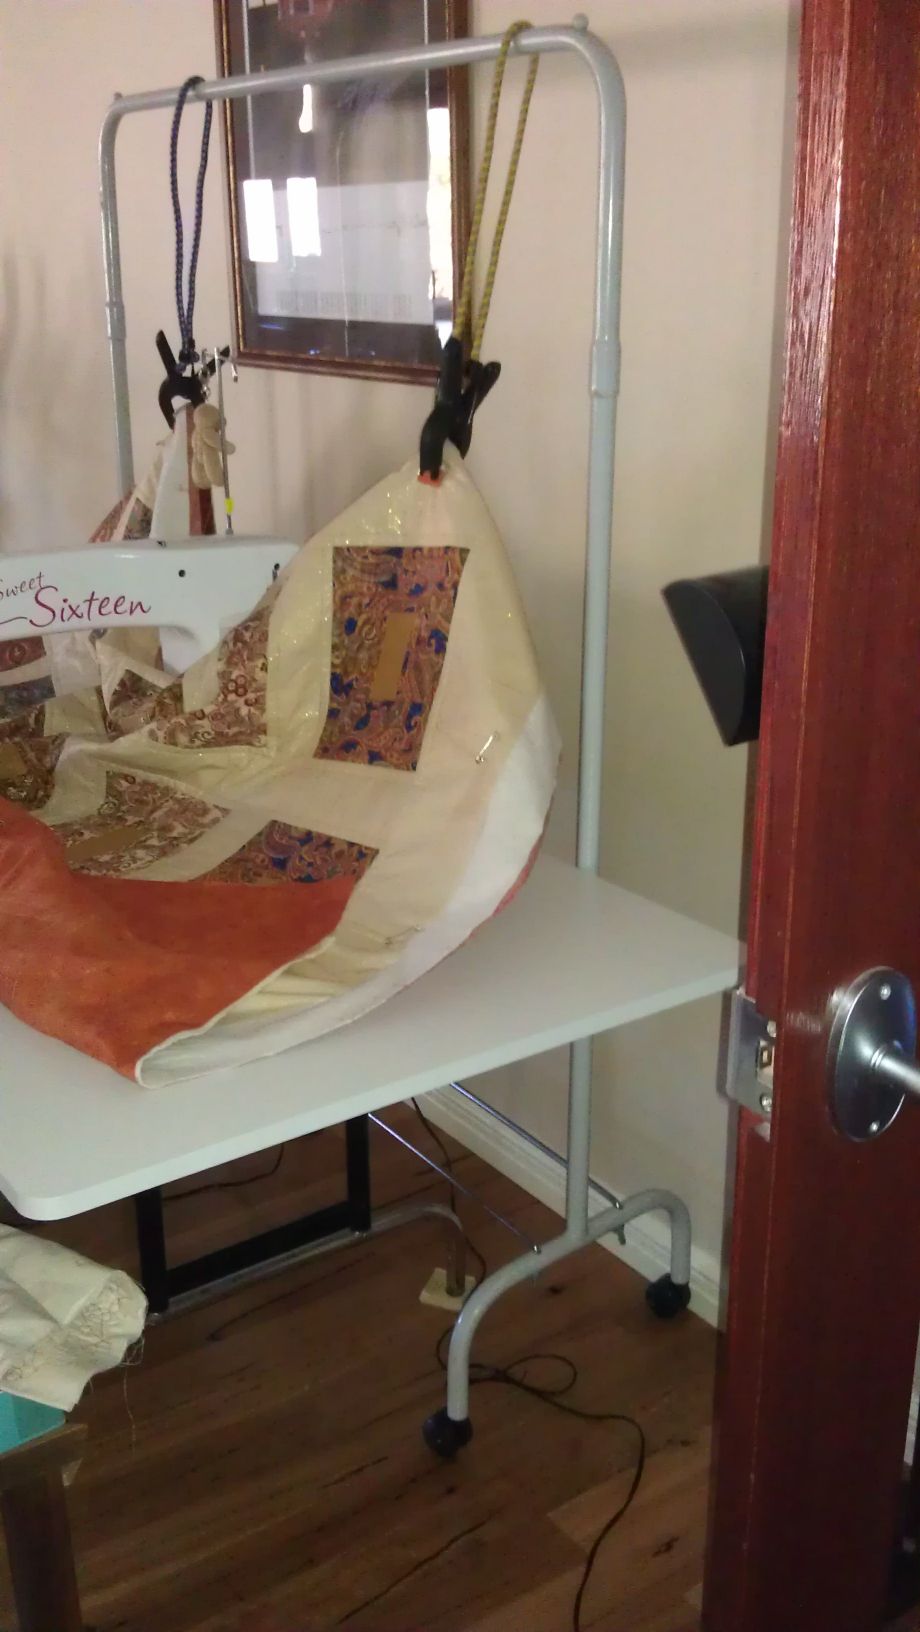
I don’t have a good history with metallic threads. They are oh so pretty, but many’s the time I’ve wanted to throw the thread in the trash as it just won’t work for me in either my domestic sewing machine or my Sweet Sixteen. I follow all the rules and guidelines, and occasionally… just occasionally, it will work. And then there will be several months before I’m willing to try it again, knowing that there will be frustration and that angry words will be spoken 😉 I’ve watched Helen Godden demo HQ machines at quilt fairs and she often uses metallic thread and she seems to have no issues with it so I figure it has to be tamed somehow.

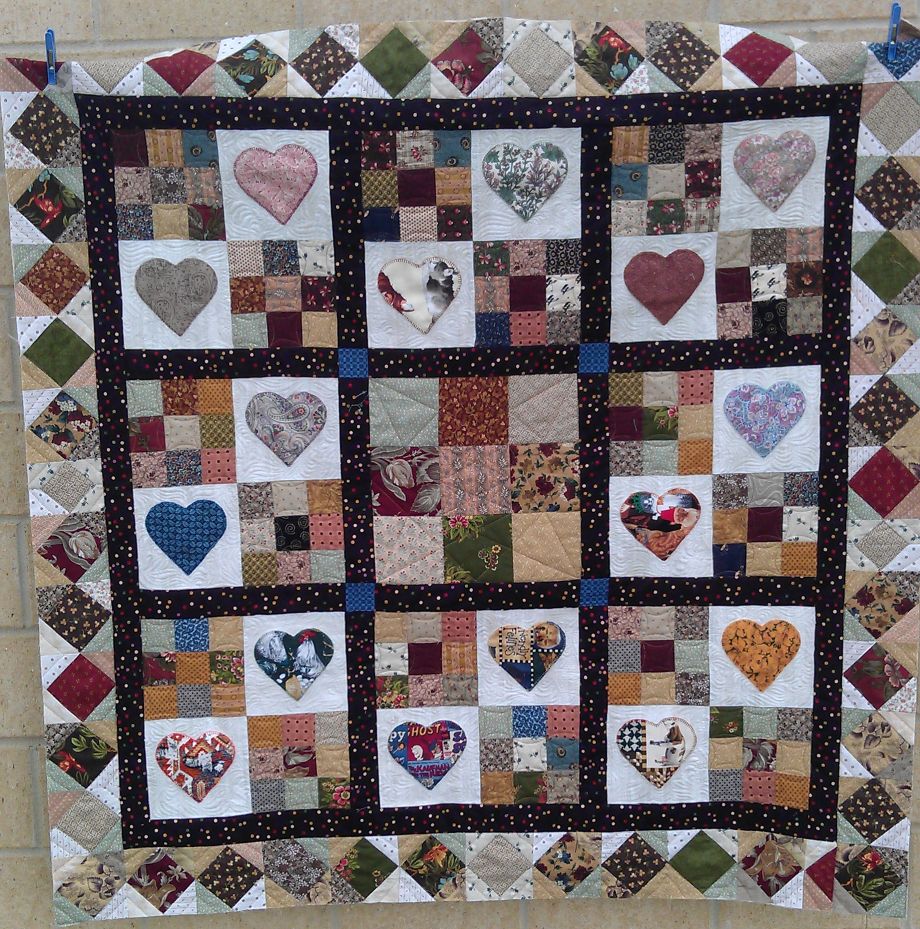
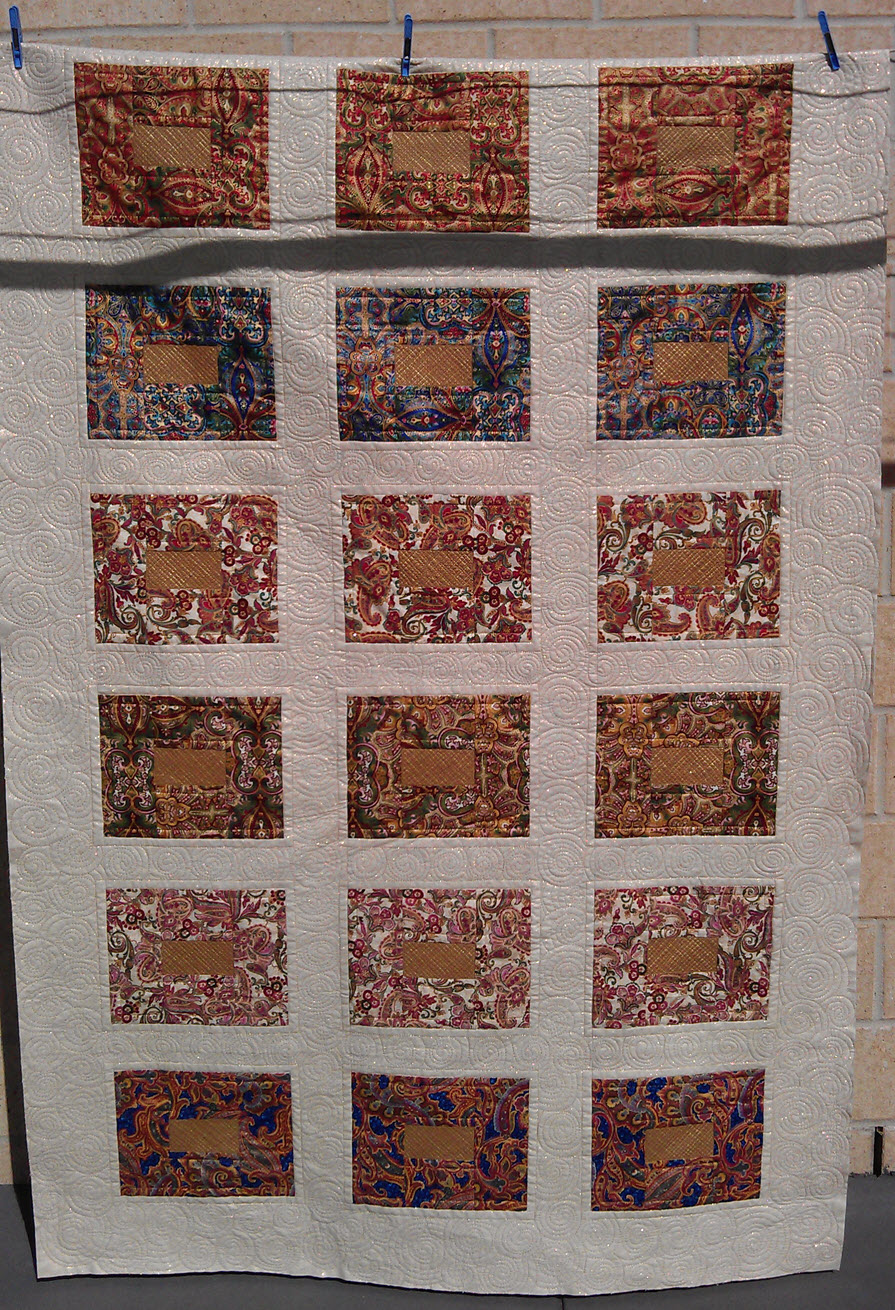
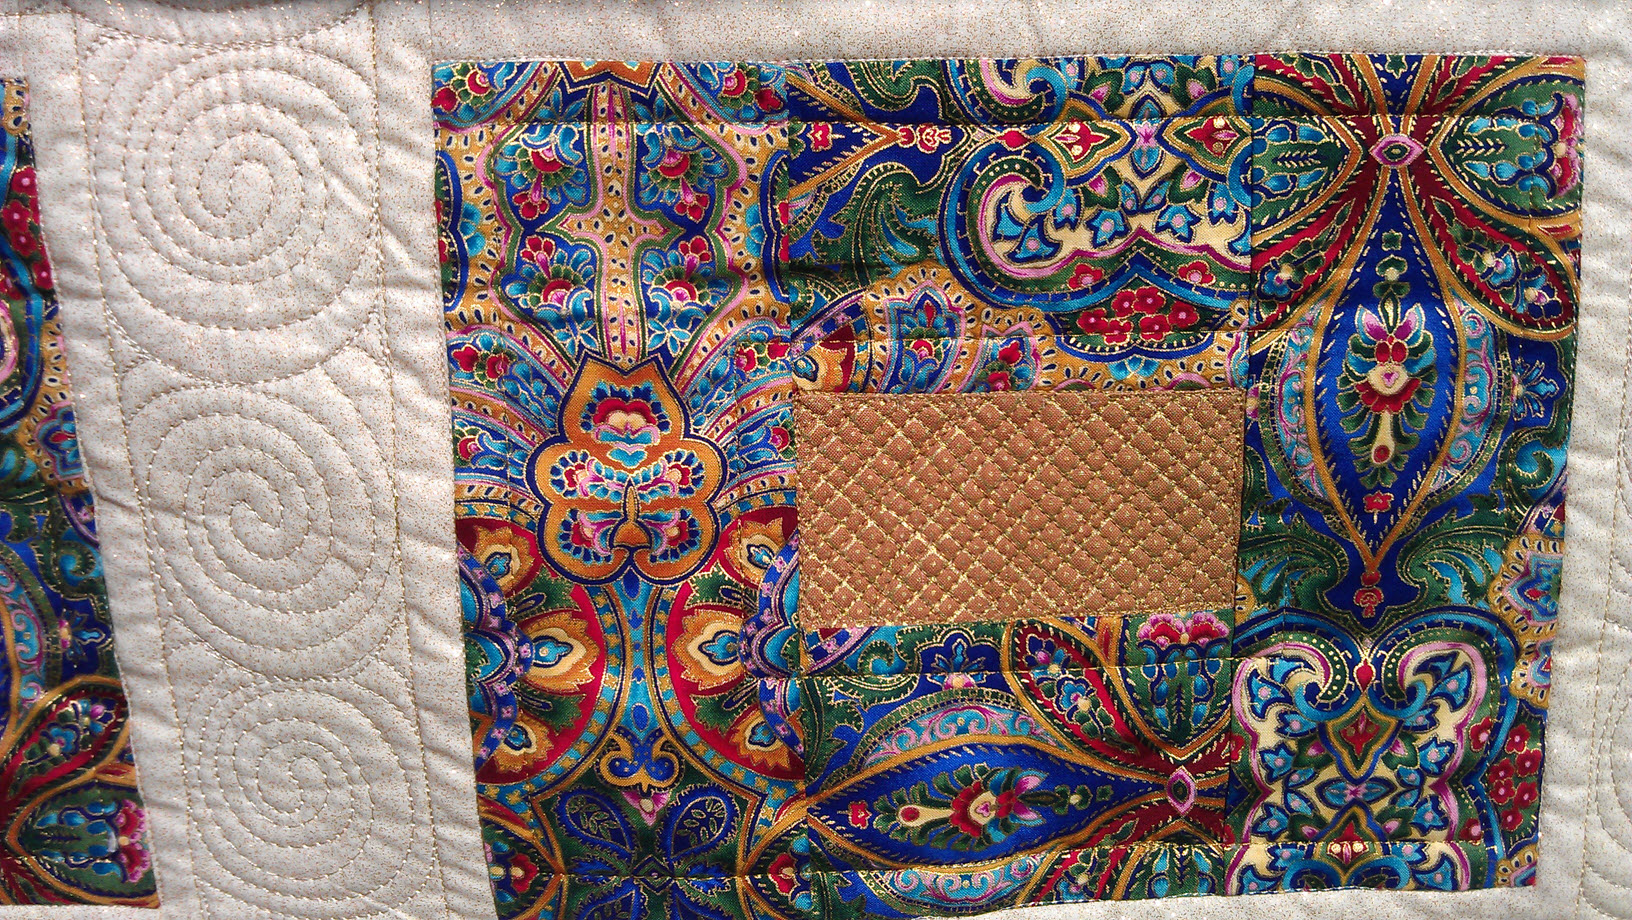
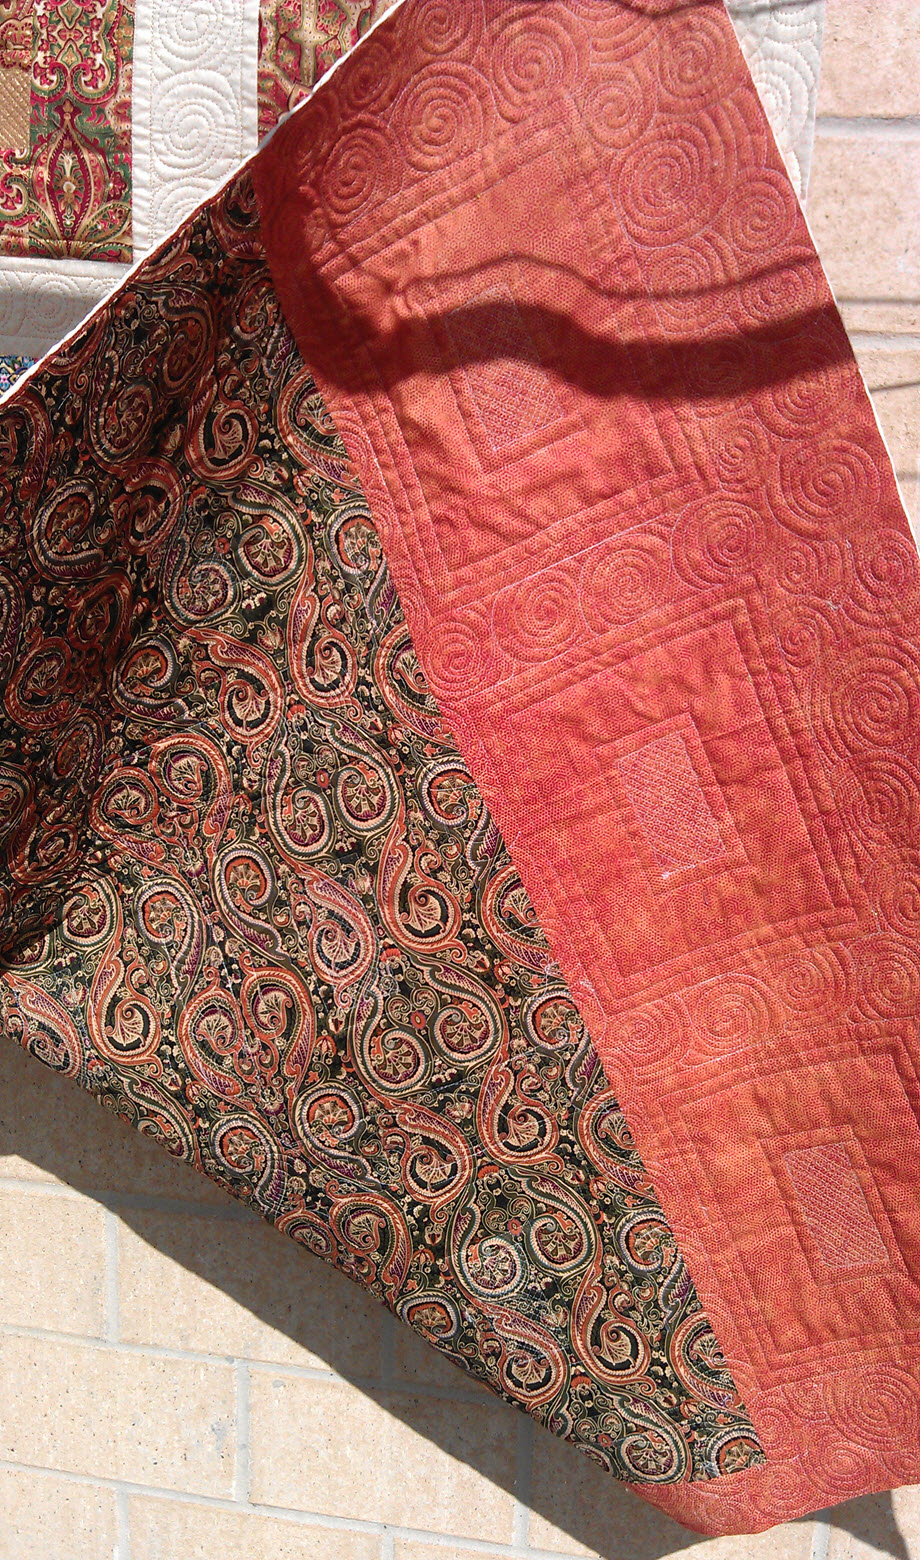
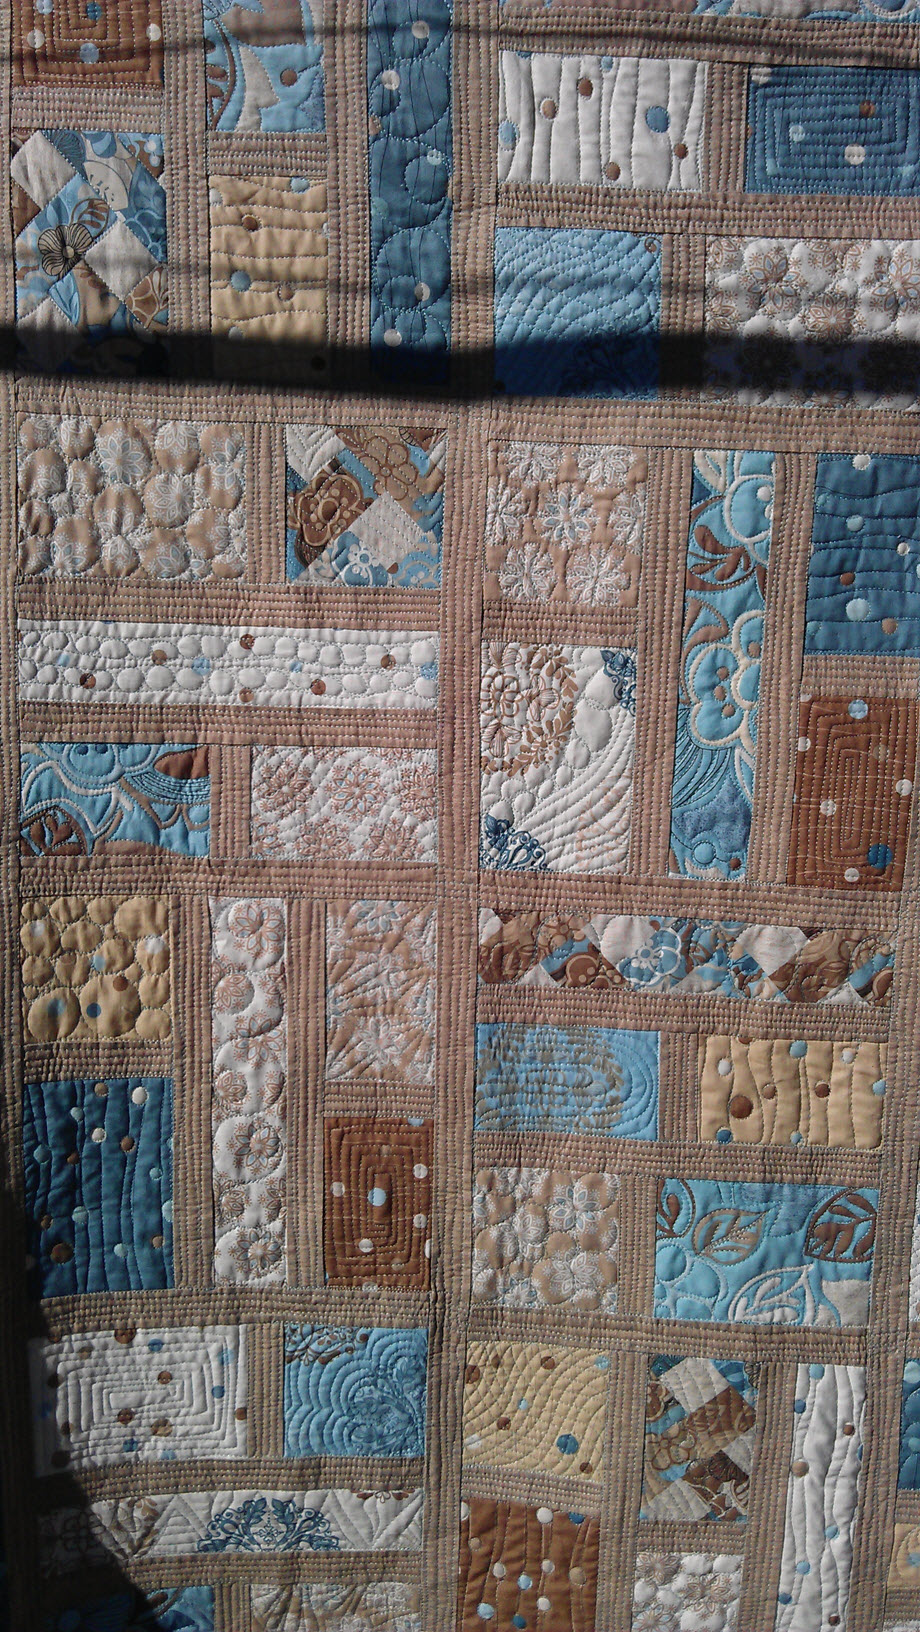
My latest foray into metallics was using a Fil-tec ‘Glisten’ metallic thread in gold. It was such a pretty thread and the quilt top begged to be stitched in gold… I had Fil-Tec Magna Glide in the bobbin.

But I went crazy trying to get this metallic thread to work without snapping every inch or so or stitching.

Here’s my litany of frustrations and what I tried, as I emailed to my dealer:

Top thread settings and things I tried:

  • one hole only in the 3-hole thingy
  • loosening top tension to the point that I had to unpick as I had scrunchies on the back
  • horizontal spool holder and upright (it’s a cross-wound spool), with and without a thread net.
  • slowing down from 50% to 25%
  • Size 18 Groz-Beckert needle set at 5:30 and then 6:30 position (I have very little success with ANY threads at 6:00 position). HQ’s website says the size 18 needles ‘work well with metallic thread’.

I’m trying to use it with a ruler but it keeps snapping. If I’m lucky I get to stitch about 2 inches, then SNAP. Changing from 5:30 to 6:30 helped a bit, but not for long.

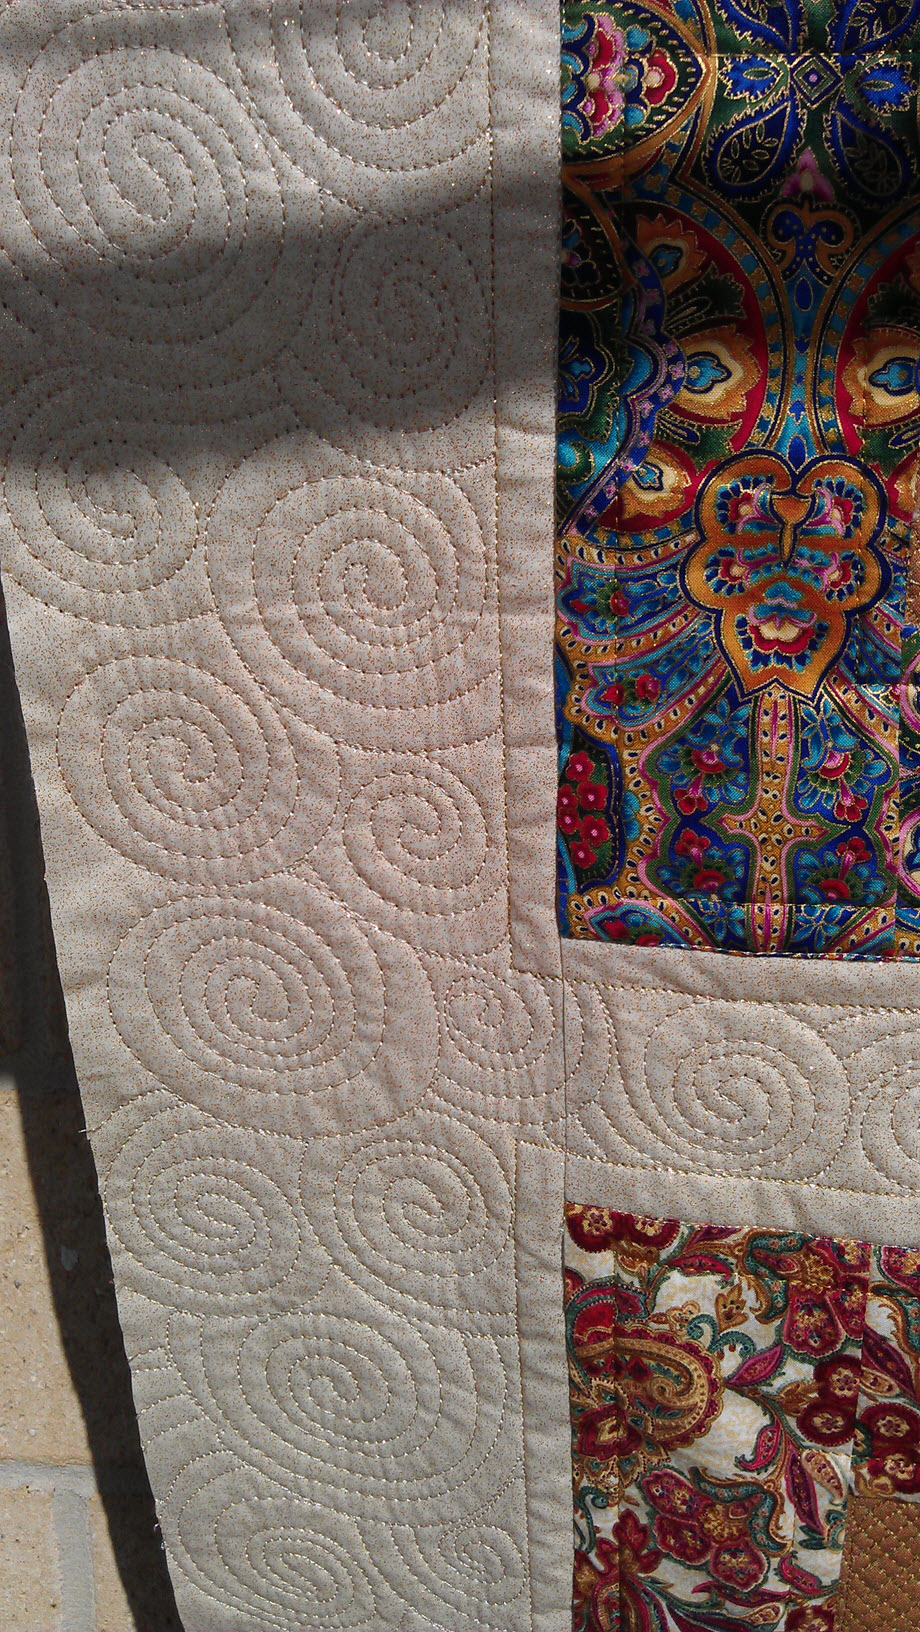
My test piece worked fine – no ruler for that though, and it was only to check tension. However, I need to use the ruler as I need to get straight lines around 18 blocks. I haven’t even finished ONE block after nearly an hour….

I don’t have much luck with monofilament either, but that’s not today’s issue.

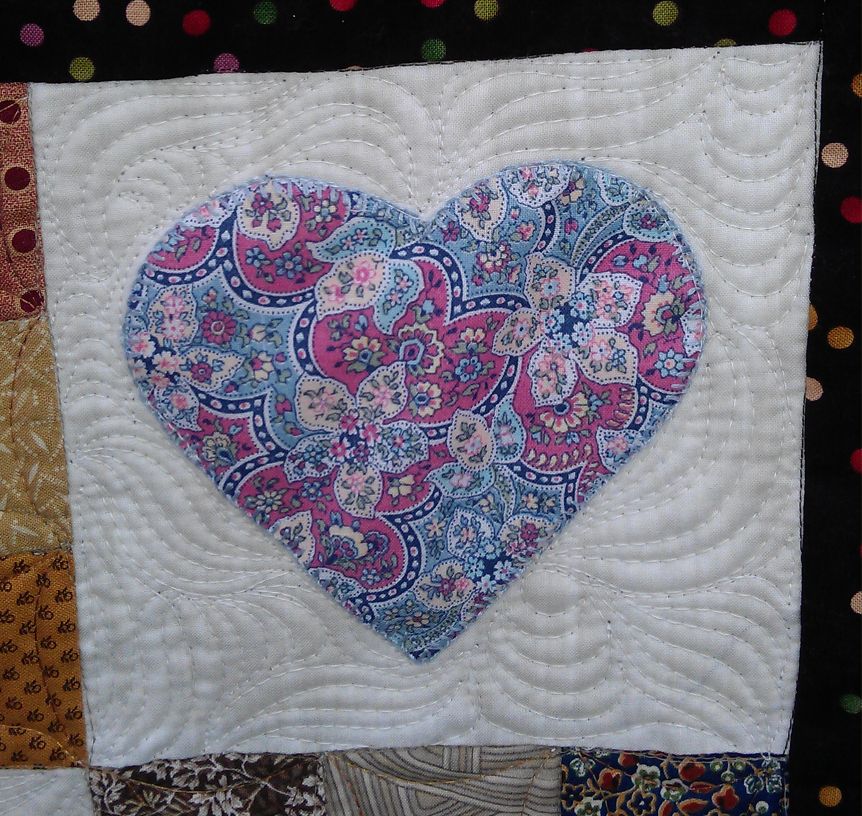
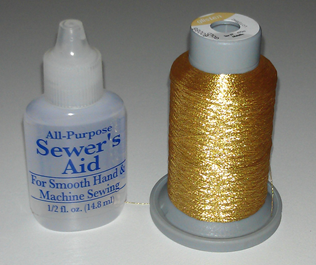
While I was waiting for her reply, I checked the archives of the forum I’m on and found that some people had luck with putting a few drops of Sewer’s Aid onto the spool of thread. I had some of that, so I tried it and it worked SO much better. Not perfect, but a LOT better, though not enough for me to continue with the metallic thread after I’d finished the outside stitching around each block. By dribbling three drops of Sewer’s Aid onto the spool, I was able to complete the ruler lines around a block without a single break – it took 2 minutes instead of the hour of frustration for the first block! I put another two sets of three drops in total for the rest of the blocks, so this isn’t a one-off fix — you do have to reapply it. But it worked so much better than doing nothing.

My dealer also got back to me with these suggestions:

I quilt all the time with metallic both FMQ and with rulers.  I don’t have any troubles.  Here is what I do:

  • Use a thread net.
  • Reduce the tension in my bobbin slightly so that I can back off the tension on the top
  • I usually quilt at around 35-45% depending on what I am doing.
  • I will use either size 16 or 18 needle (whatever is in usually suits)
  • Mainly I use 2 holes (but have gone to 1 if thread performance is questionable)
  • I don’t look at my needle position – whatever position it is in is fine.

Recently at Helen’s workshop she demonstrated in metallic.  Of course everyone wanted to sew with that.  Most people had trouble.  But honestly the thing that will tame metallic thread is a thread net!!  It is an essential when using metallic in my book (cannot be used on horizontal spool holder though).

The thread net will add tension however, so you will have to compensate with the tension and reduce it a little.  If you are getting looping underneath, then back the tension off on the bobbin case.  You can tweak this a fair bit.  Each wrap in the 3-hole guide will also add tension, so you might find that with all of the above you still have to drop back to threading through one hole.

Also, you must consider wadding types.  Thread performance is also affected by different types of wadding.  Was your sample piece the same as your quilt you were working on?

After all that.. I am out of ideas.  I would have to sit and work with the thread myself to get it going… Sometimes – the thread just has to be filed.. in File 13 (trash!)

I have no trouble with monofilament either – but see if the abovementioned helps you to use mono as well.  All the same principles apply.


Improvise! Bungee cord system to hold up quilt

27 04 2014

One of the ladies on my quilting forum has designed a system for holding up quilts to prevent drag when the quilt falls off the edge of the table, as any large quilt will do unless you have a HUGE work area. You can buy her system from here: http://www.jennoop.com/suspenders.html. However, because the shipping costs for such as system to Australia would be HUGE, she’s also suggested that we develop our own. So I did.

I remembered that we had an old portable hanging rack that we’d dragged around from previous houses, and that had been very useful in the day. But I didn’t know where it was as we’d either given it away or stored it after we last moved some four years ago. But my husband said that it should be in the shed (I’d looked) if we hadn’t given it away, and he thought we might have dismantled it. After some hunting around in the shed, I found it in pieces on top and behind a couple of storage racks. He also said we had bungee cords in the stuff for the bike rack, so I found those too, and grabbed two of the clamps I use on my basting table, and voila! I had a suspension system for my large quilts made from stuff I already had.

Here’s my setup after I’d finished putting it together (30 minutes to find the stuff, 10 minutes to put it together).

bungee03

bungee02

bungee01

The only downside is that I had to move the table out from the wall about 6 inches to accommodate the legs (my Sweet Sixteen is in the main living room). I’ve yet to use it, but will report back once I have. If it doesn’t work for me, then I’ll just dismantle everything again and put it back in the shed 😉

And yes, that’s an Eagles ‘Hotel California’ poster on the wall. And note the 1980s grey of the hanging rack 😉

Update later the same day: Well, these are brilliant! I didn’t realise how much drag I had put up with, as I thought I puddled my quilts pretty well. But once the drag was taken away, the quilt moved effortlessly across the table top/sewing bed without much shoulder/neck/arm movement and no death grip grabbing and pushing/pulling. Yes, I had to reposition the clamps every so often, but I had to reposition the ‘puddle’ much more when I was doing it that way. This is a winner!!


Threads and tension: Practise before quilting

26 04 2014

On the Yahoo! Groups forum for the HQ_Sit_Down_Model, J asked for some advice on what sort of threads (top and bobbin) I use in my Sweet Sixteen, and how I get the tension right. She also wanted to know whether I used the same size/colour/weight thread in the top and bottom threads.

Here’s my (long) reply… You might want to get yourself a coffee…

***************

I know that the purists say to use the same colour top and bottom, and even the same thread top and bottom. But I wasn’t taught by a purist and I didn’t know ‘the rules’, so I do what works for me. The bottom line (no pun intended!) is that I use whatever thread I want in the top and whatever thread I want in the bottom. I always stitch on a small practice sandwich first to make sure the tension is right, and then off I go.

So with that said, here are some of the things I do when deciding on a thread to use and then testing it out:

  • I pick one or more colours for the top thread. I don’t really care what brand – it’s the colour I’m looking for. I tend to favour the trilobal polyesters over cotton (far less lint!), and favour Glide and Isacord over other brands. But if the colour I want to use is only in a rayon or cotton, then I’ll use that. I’ve even used DECADES OLD overlocker/serger thread in the top! See also: Threads I’ve used in my Sweet Sixteen
  • Most of my top thread stash is 40 wt thread, no matter what variety.
  • I’m lazy so I don’t like winding/changing bobbins too often. So I’ll try to use either a pre-wound Magna Glide Classic (no cardboard sides) bobbin (made by Fil-Tec; 60 wt, size M), or a bobbin filled with a lighter weight thread (a bobbin takes a lot more light weight thread than 40 wt, for example). I’ve used these sorts of threads in the bobbin – Deco Bob (80 wt) and Invisifil (100 wt) from Wonderfil; Bobbinfil (70 wt I think); and 40 wt threads as per the top. My preference is the Magna Glide Classic pre-wounds (I only have their ‘white’, which is really a light creamy colour when you look at it; part # 12445), followed by Bobbinfil, followed by Deco Bob and then Invisifil. I’ve never used Bottom Line in my bobbin as it’s hard to get where I live and is very pricey compared to the others.
  • Mostly, my top and bottom threads are totally different in brand, weight, and type – as I said, I’m not a purist.
  • My top and bottom threads often aren’t the same colour either. Depending on the quilt, I may try to match the bottom thread with the backing fabric. But I find that except for really dark backs, the white Magna Glide Classic pre-wound just disappears into the backing fabric and is hardly noticeable. Then again, I’m not quilting show quilts, so I’m not so fussed about the colours being slightly different.
  • If I’m using a dark thread on top and the top is also dark, I might use a darker bobbin thread (e.g. black Bobbinfil), but only if the bobbin thread starts to show on the top.
  • I ALWAYS drop-test my bobbin thread tension before threading the top of the machine. I use Jamie Wallen’s method and it works every time for me. Once I have the bobbin tension adjusted, I rarely, if ever, have to change it for that bobbin.
  • I thread the machine using 1, 2, or 3 of the holes, depending on the thread. Cottons and trilobal polys seem to do OK through 3 holes, but the rayons mostly do best through just 2 holes. Metallics, monofilaments, or fine threads like 80 wt or 100 wt, seem to do best for me through just one hole.
  • I use a thread net over the cone/spool for fine threads and metallics to help prevent them spooling off too quickly and getting tangled.
  • I brush out the bobbin area at every bobbin change, and put one drop of oil in the bobbin area then too. But with the Magna Glide Classic pre-wounds, there’s not a lot of lint in the bobbin area.
  • I try to change needle with every quilt I do (but if I have a couple of small quilts, I might use the same needle for a while).
  • I mostly use a size 16 or 18 needle. I have 14s but I only use them for very fine thread.
  • I usually have the needle in the 5:30 position – that seems to work best for my machine; 6:30 position sometimes works too, but I don’t have a lot of luck with the 6:00 position.

Once all that’s done (hopefully I didn’t forget anything!), I grab my practice sandwich and:

  1. Stitch a couple of loops and points at the speed I’m likely to use on the quilt.
  2. Pull the sandwich away from the needle and turn it over to see the back – I’m looking for looping thread and eyelashes at this stage. Looping thread (see 2 and 3 in the photo below) and eyelashes (1 in the photo below) mean my top tension is too loose, so I turn the top tension knob at least one turn (depending on how much loopiness/eyelashes) to the right (away from me) and test again. And repeat until I can’t see any top thread on the back (actually, that’s not quite true – I use a cream practice sandwich mostly, so if I see tiny pinpricks of the top colour, I’m OK with that as my practice sandwich is a usually a little thinner than the actual quilt)
  3. Once I can’t see top thread on the back, I’m pretty sure that everything on the top will be OK, but I look at it anyway. If the top is puckering or I can see more than a dot of bobbin thread at the points, there’s a good chance that my top thread is too tight, so I turn the knob a little to the left (towards me) to lighten off a little. And test stitch again. And loosen. And stitch. And look at the front and back. And adjust the top tension knob in smaller increments until I have stitches that lay flat on both top and bottom and that don’t pucker the quilt.

And then I’m ready to put the quilt under the needle. Even so, I start stitching on the quilt and after a few inches, I stop, lift the quilt to see the back and check my stitches (it helps if you have excess border fabric etc. to do this test stitching in). If the top thread is looping/eyelashing on the back, then I tighten the tension knob (and if it’s bad, I pick out the stitches and start again), and start stitching again. And then I check the back and front again to make sure it’s all lying flat. Once I’m happy with my test stitches on the quilt, I’m off and running.

loops_eyelashes

Yes, all this sounds an awful lot to check/test, but in reality it might take me just a minute or so.

That’s not to say that I don’t get frustrated with tension issues at times, but the worst of those have usually been related to something else, like the timing going out as a result of a needle breakage/jam, and thus the machine can’t make a proper stitch.

When nothing seems to work, I try a new needle, different thread top and bottom, and switching the power off and walking away for a while. Wine helps too 😉

If all that doesn’t work for you, can you take your machine back to your dealer and get them to use it (in front of you) and you use it in front of them to see if it’s you or the machine. Sometimes it’s the machine! And it may need a service or the timing adjusted.


Community Quilt 137

21 04 2014

I loved this quilt! If you’d told me about a quilt in aqua/teal blue and tans, I’d have said ‘Yuck!’, but I just loved how these colours played so well together.

It was a big quilt, with lots of rectangles of various sizes, and multiple coordinating fabrics, some of which were curvy lines with dots/circles in them. That became my overall theme for quilting this quilt.

Because the edges were all so straight, I decided NOT to use any rulers for any of the quilting. Even the so-called ‘straight’ lines in the sashing strips are wonky free motion lines. That was a deliberate choice. I wanted the quilting on this quilt to be organic and not to rigidly follow the straight lines of the blocks. I quilted a different motif in each block — some with wonky lines, some with circles, some curvy lines, some with a combination… I repeated some motifs (e.g. the rectangular spiral), but avoided two motifs the same in any one block or two the same next to each other. I used the same soft blue thread throughout.

For the border, I did big loopy things, sort of like figures of eight/infinity symbols, but without any crossing lines.

It took me about 10 hours to quilt this quilt, running at 50% speed on my Sweet Sixteen for all the stitching (and with very few thread breakages – that might be because I used a new size 18 needle). Had I been using rulers, it would’ve taken much longer.

(Click on a photo to view it larger)

quilt137_02

quilt137_03

quilt137_04

quilt137_05

quilt137_01

Threads used:

  • Top: Robison-Anton (40 wt, rayon, colour: ‘Sprite’)
  • Bottom: Fil-Tec Glide pre-wound in white