Qantas food

16 07 2017

In the past two days, I travelled on Qantas and American Airlines (AA) from Perth, Western Australia to Burlington, Vermont (via Sydney, Dallas, and an unexpected night in Washington DC owing to an AA flight cancellation). I wrote last year about the points of difference between Qantas and AA (https://rhondabracey.com/2016/10/14/comparing-qantas-and-american-airlines/). This time I’ll talk about the food on Qantas, both on their domestic and international flights, and in the Qantas lounge.

NOTE: I travelled Qantas Business Class domestically — AA call this class ‘First’, but there’s nothing ‘first’ about their meagre food and drink offerings compared to Qantas for similar length journeys! And as a Qantas Platinum Frequent Flyer, I had access to the Qantas International First Lounge at Sydney Airport.

Domestic flight Perth to Sydney, approximately 4 hours

On this afternoon flight, we were fed dinner — see the menu for the food options. I had the soup (with sourdough bread), the lamb chops (two of them!) and the citrus baba.

Qantas lounge

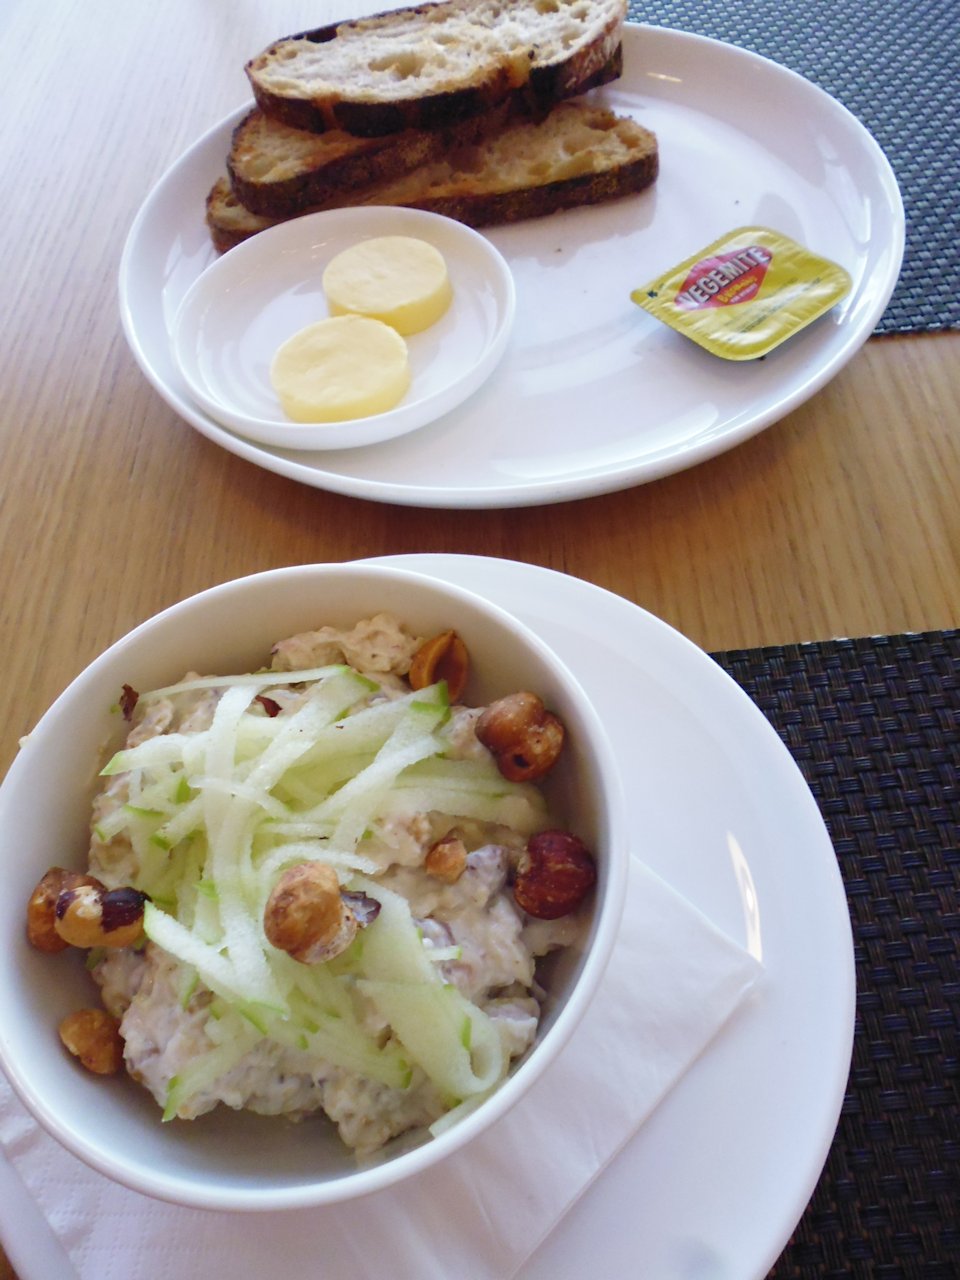
After staying overnight in Sydney, I forgo the breakfast at the hotel, instead choosing to eat at the Qantas lounge. My choices from that menu — eggs benedict with smoked salmon, bircher muesli with hazelnuts (?) and apple, an apple julep (delicious! [non-alcoholic]), and sourdough toast with Vegemite. All very yummy!

Flight from Sydney to Dallas, 16+ hours

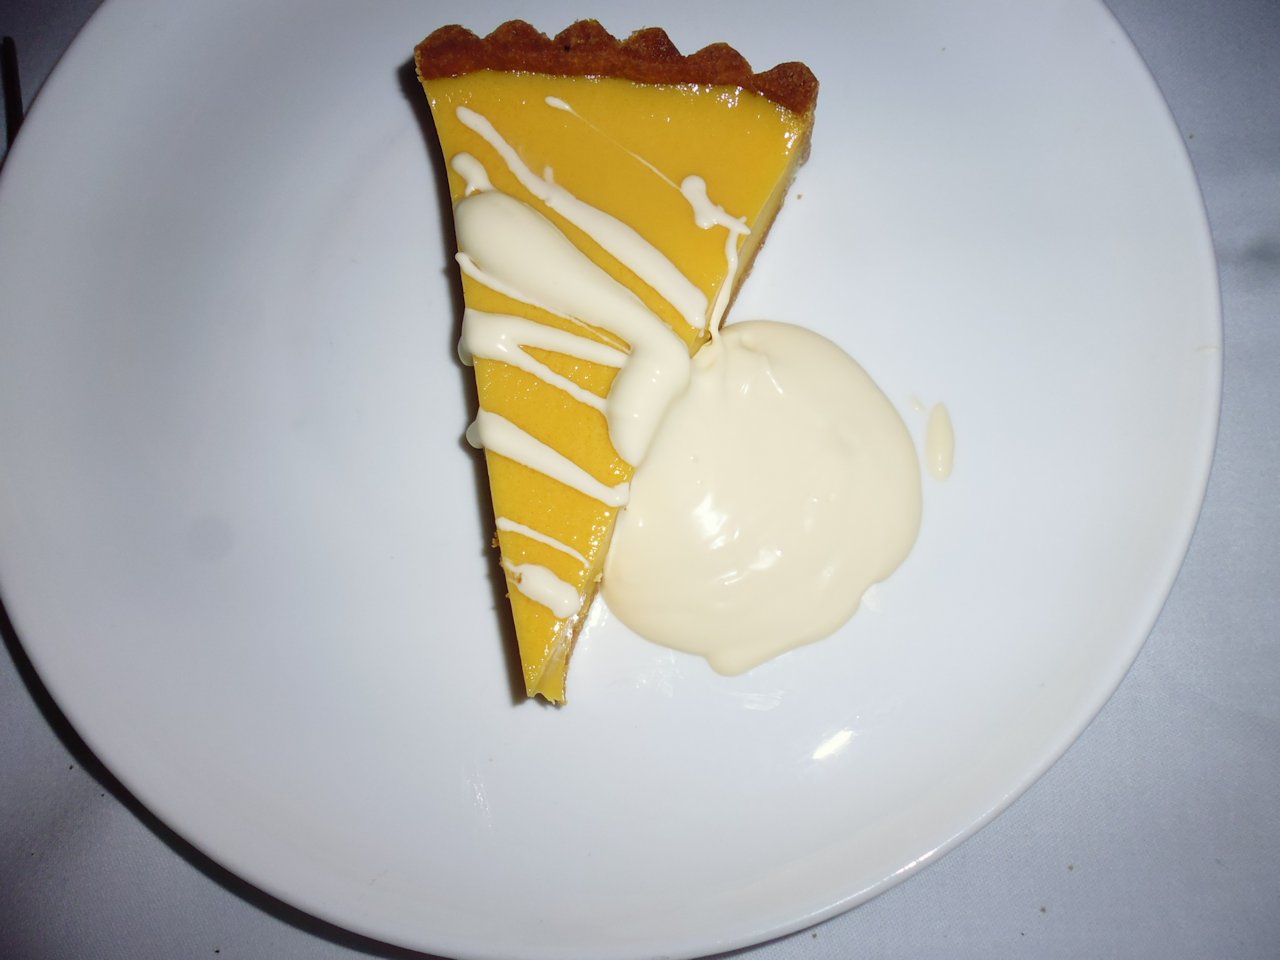
Next was the flight from Sydney to Dallas. We get served dinner on that flight not long after taking off, and then breakfast some 12 or 13 hours later, about 2 hours before we land. Because I’d had such a big lunch, I opted for soup (cauliflower I think), the ‘light’ steak sandwich dinner offering, followed by the MOST AMAZINGLY DELICIOUS passionfruit tart with fresh cream. It was SOOO good, I asked if I could have another — and I’m NOT a dessert person. The sharpness and acidity of the passionfruit perfectly balanced the creamy sweetness of the tart. (I didn’t take any photos of my breakfast.)


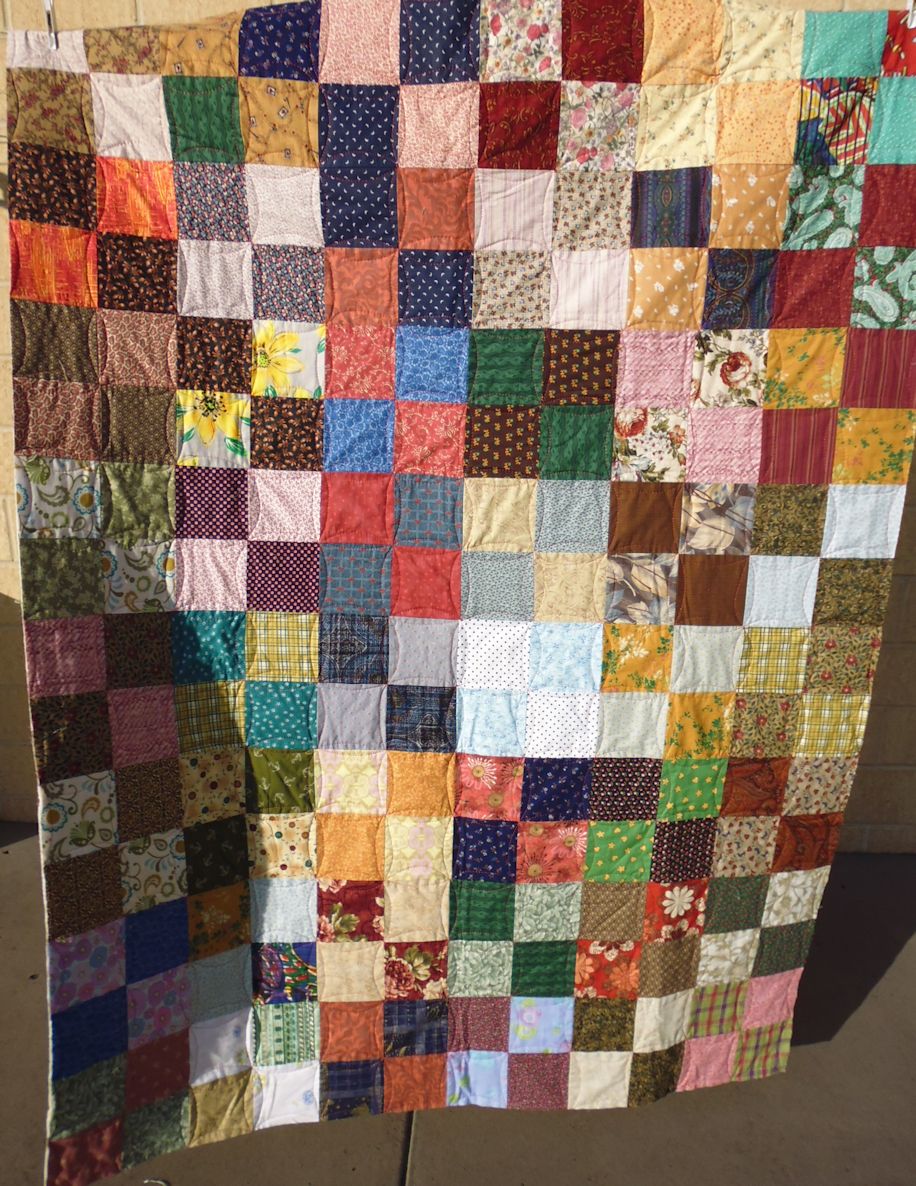
Community Quilt 333

26 06 2017

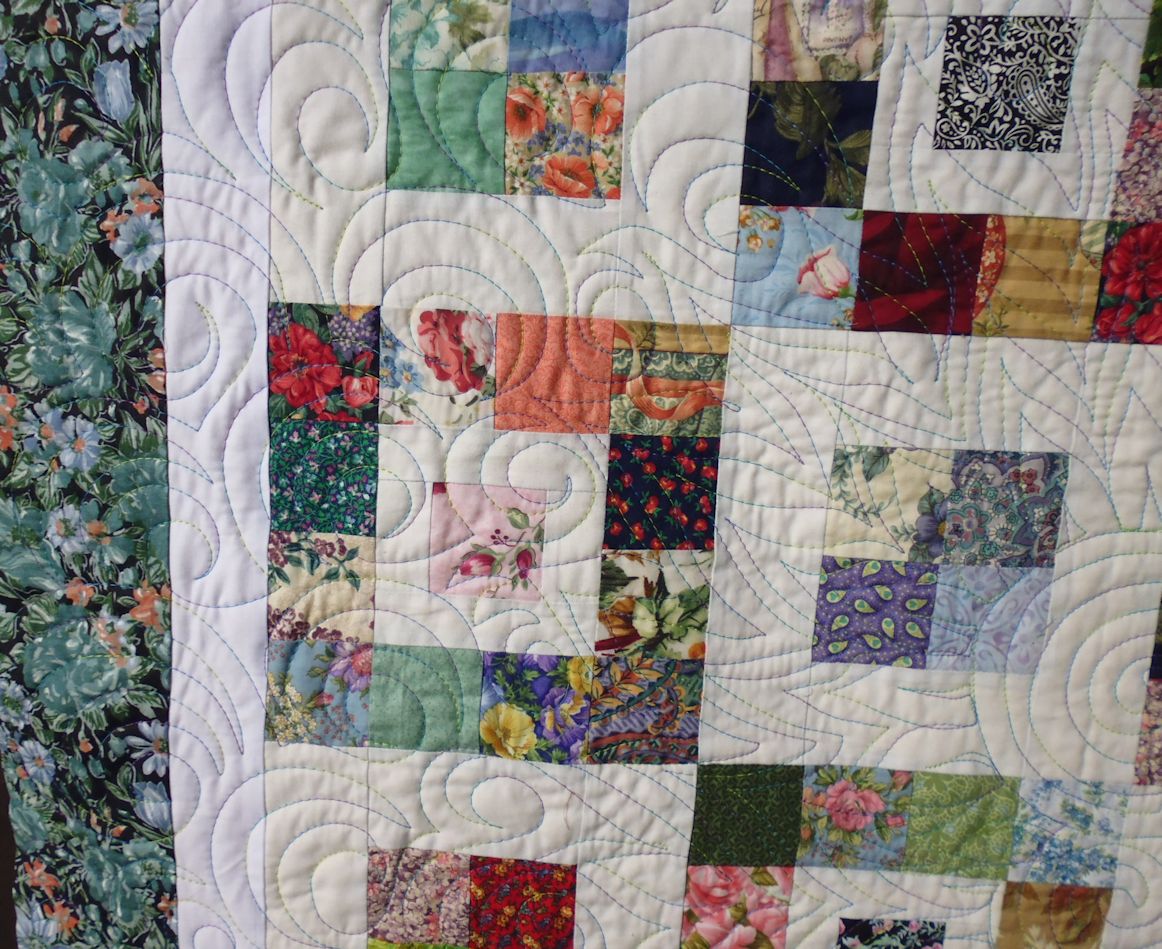
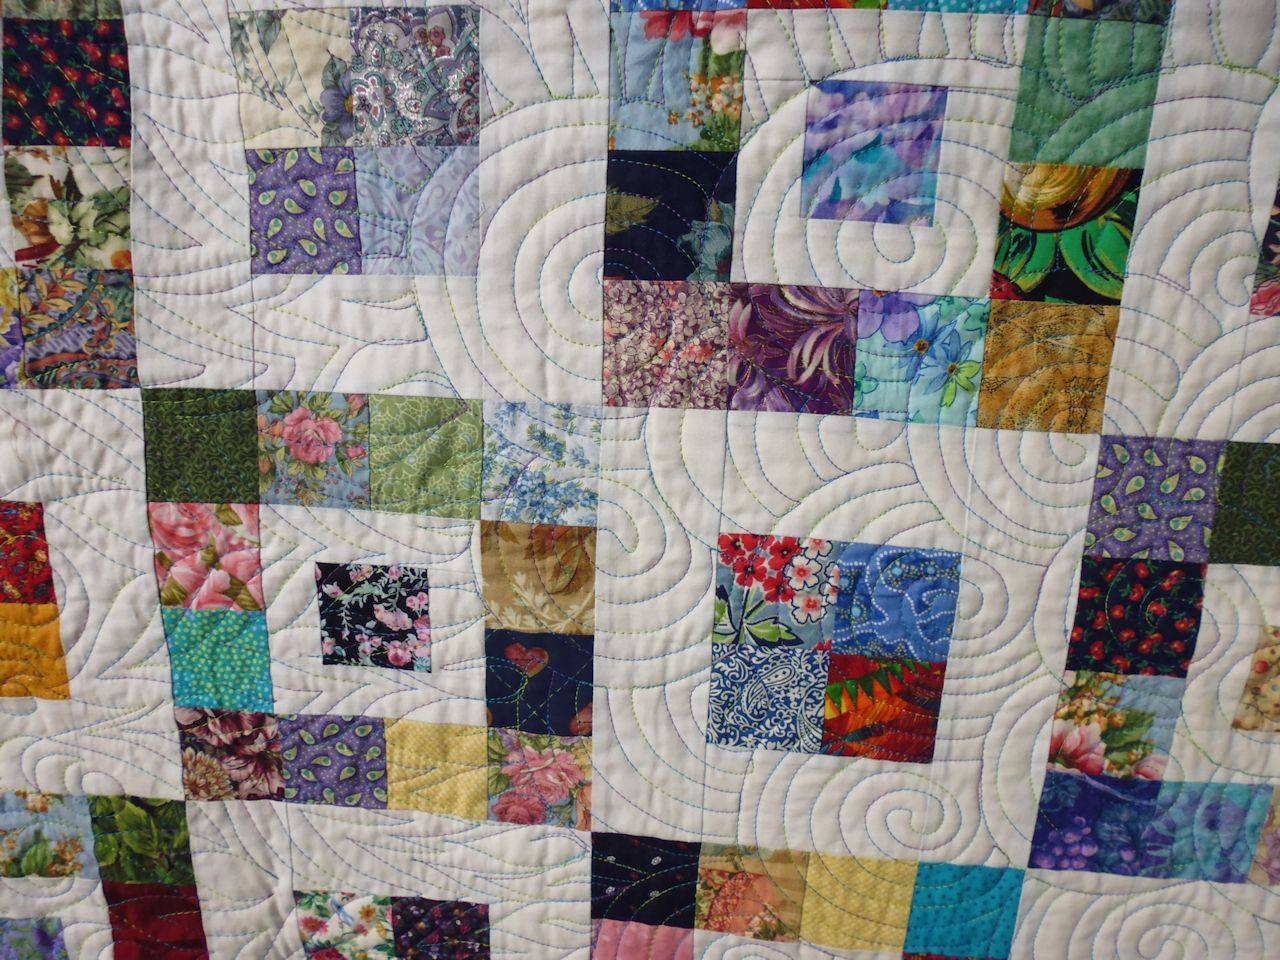
How to quilt this very geometric and colourful scrappy quilt? I thought about straight line ‘modern’ quilting, then decided to do a variation of ‘graffiti’ quilting. I started in the centre with large overlapping spirals, then a whole slew of flame-style stitching, finishing at the outer edges with a open headband motif. I used a variegated thread in blues, greens, yellows, and purples to match the vibrant colours of the squares.

(Click on a photo to view it larger)

Threads used:

  • Top: Superior King Tut ‘Cairo’ (40 wt, cotton, colour 932)
  • Bottom: Fil-Tec Magna Glide Classic pre-wound bobbin (lead gray)


Community Quilt 334

26 06 2017

Hexies! Lots and lots of hexies! But how to quilt hexies like this???

I decided to do arcs, as per a cathedral window motif, using matching thread colours for each hexagonal ‘flower’. The inner dark green hexies were too puffy after doing this, so I stitched them down too. And for the outer border, I just did a meandering stipple in a variegated dark green thread.

(Click on a photo to view it larger)

Threads used:

  • Top: Fil-Tec Affinity ‘Mauve’ (40 wt, trilobal polyester, colour 60149);  Robison-Anton ‘Paris Blue’ (40 wt, rayon, colour 2283); Fil-Tec Glide ‘Seafoam’ (40 wt, trilobal polyester, colour 97494); Mettler Poly Sheen (40 wt, polyester, colour 9405); Gutermann Sulky (40 wt, rayon, colour 2131); Fil-Tec Affinity ‘Forest’ (40 wt, trilobal polyester, colour 60293)
  • Bottom: Fil-Tec Magna Glide Classic pre-wound bobbin (white and lead gray)


Community Quilt 332

26 06 2017

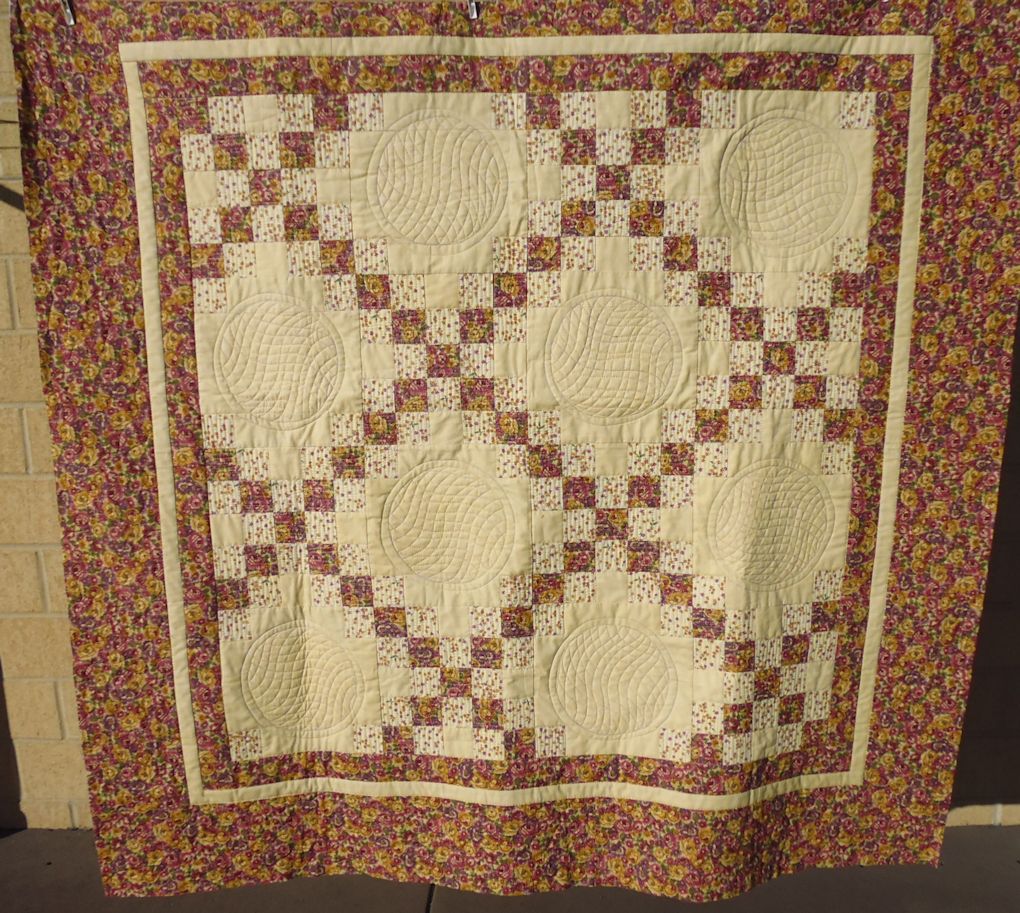
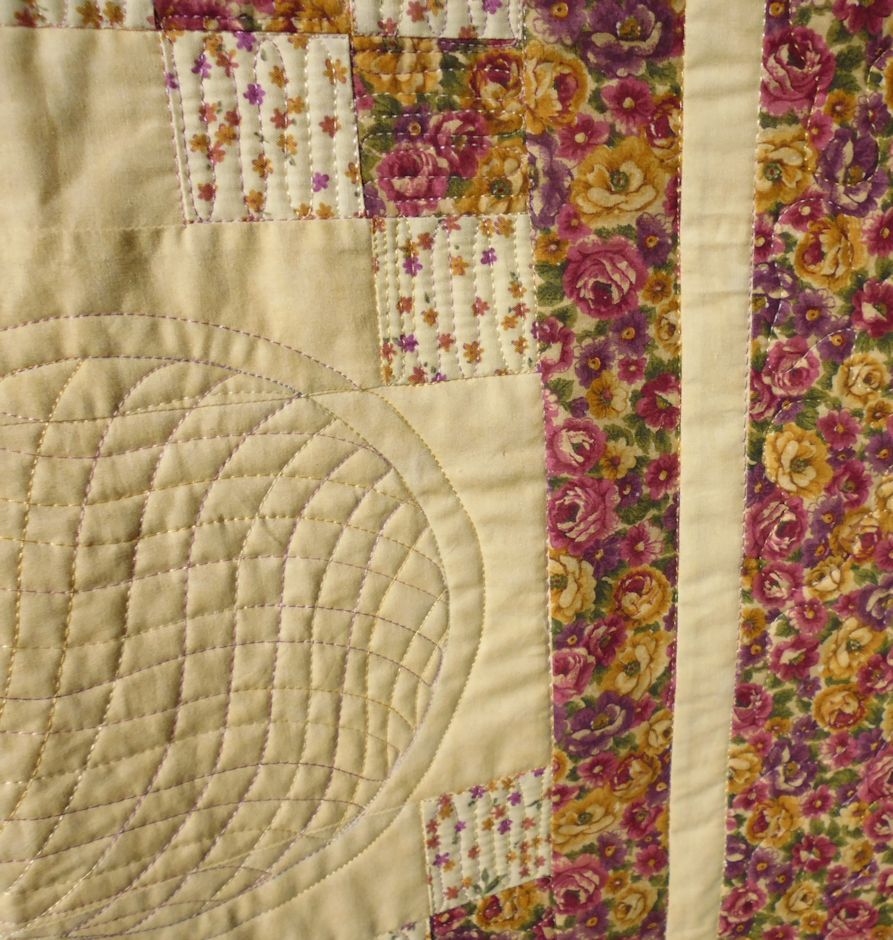
Hmmm…. how to quilt this one, with all that ‘white space’ in the centre of the blocks? First, I stitched in the ditch around ALL elements, then decided on a free motion checkerboard effect for the small squares, with the dark squares going in one direction and the light squares in the opposite direction. The busy fabric of the outer border was simple — just a meandering stipple was enough. But what to do about those big open spaces?

I grabbed two different size bowls from the kitchen, then marked around each in chalk to create my circles. Then I stitched the circles along the chalk lines and did a flowing continuous-line, cross-hatch matrix inside them. I used a variegated cream, yellow, and mauve thread for all the quilting.

(Click on a photo to view it larger)

Threads used:

  • Top: Wonderfil Mirage (30 wt, rayon?, colour SD 32)
  • Bottom: Fil-Tec Magna Glide Classic pre-wound bobbin (light tan)


Community Quilt 331

20 06 2017

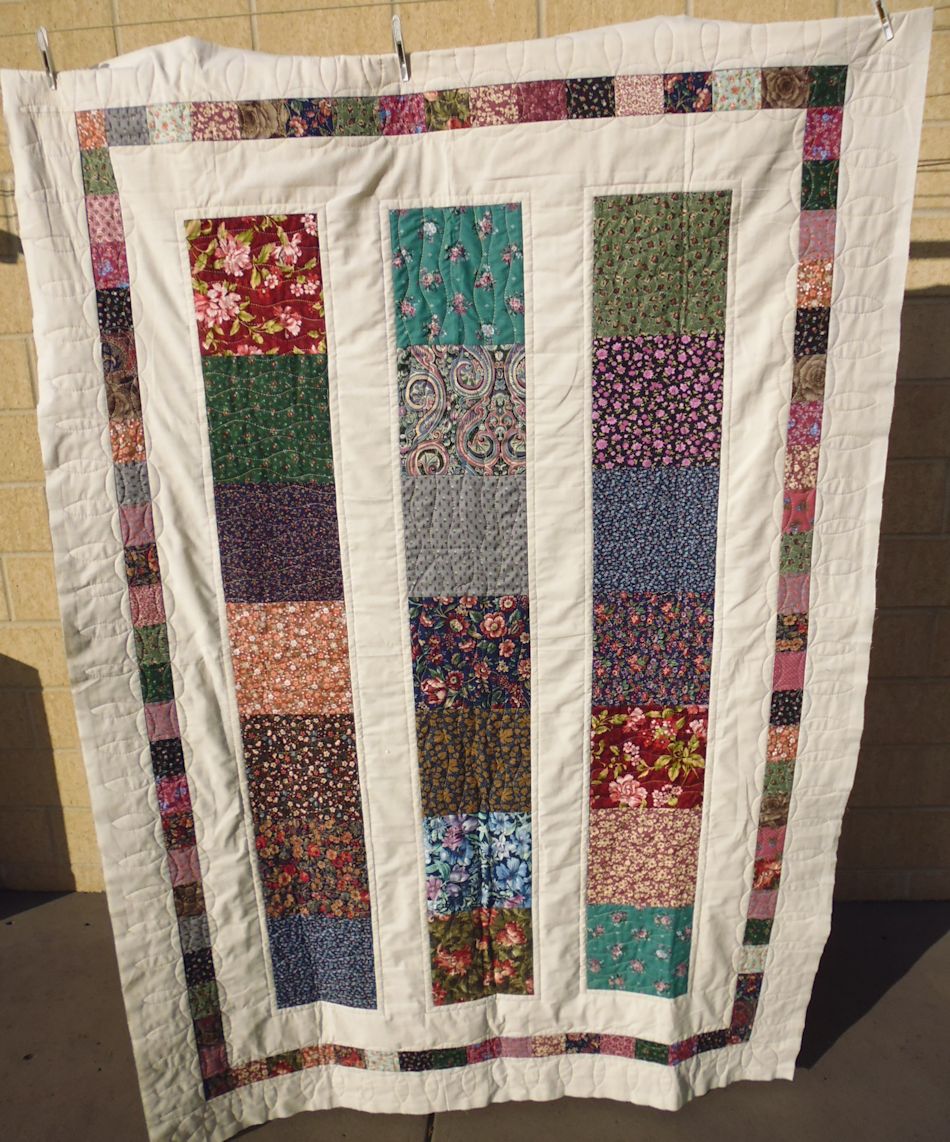
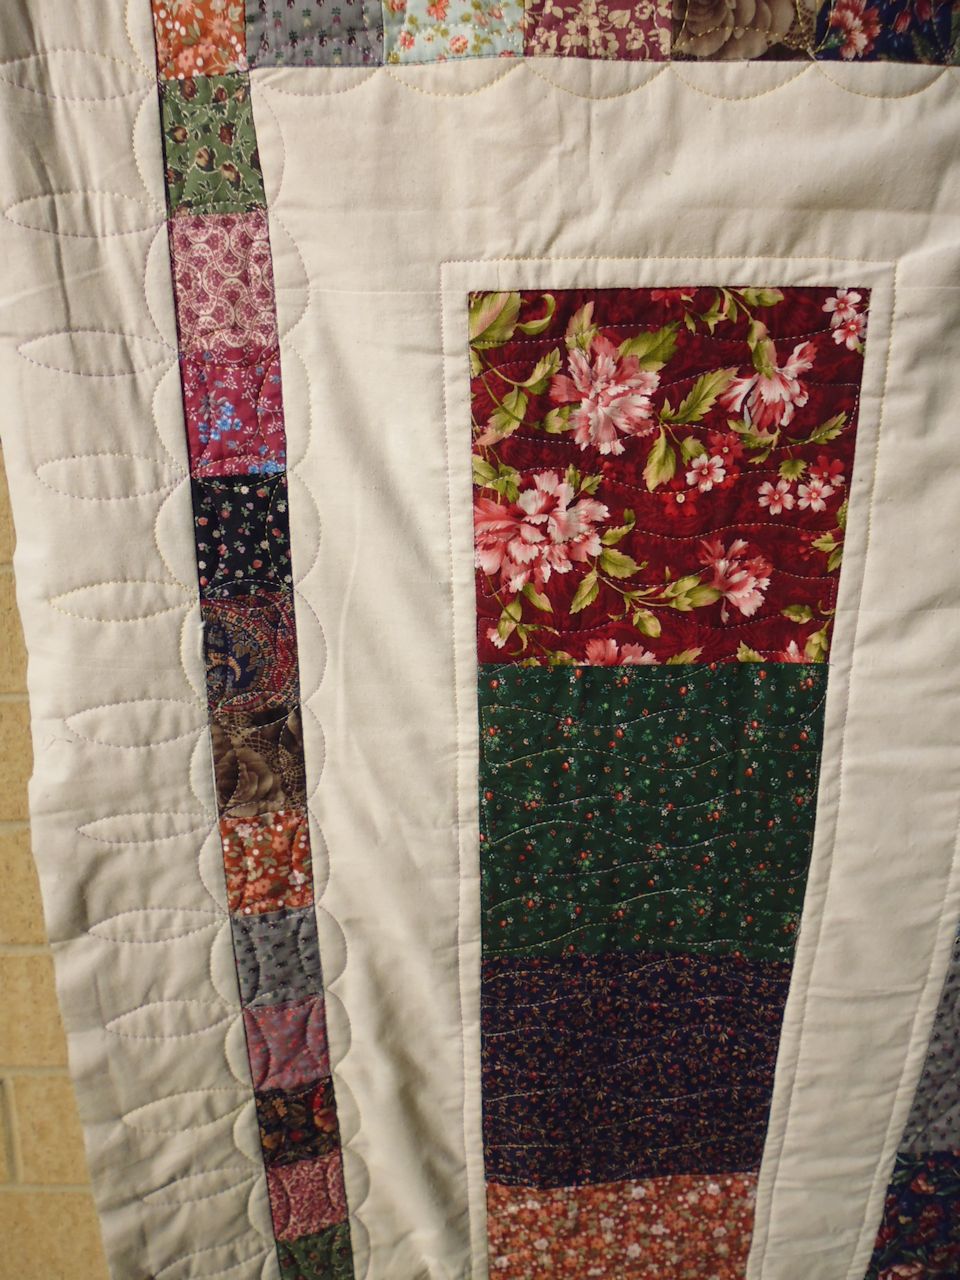
Another scrappy quilt. How to quilt it? I started by stitching in the ditch around all the blocks, then did cathedral windows in the outer border strips, followed by extending that motif into the outer cream border. Next I did straight line echo quilting around the central strips, and finished up by doing horizontal and vertical wavy lines through those strips. I used a variegated cream, yellow, and pink/mauve thread.

(Click on a photo to view it larger)


Threads used:

  • Top: Wonderfil Mirage (30 wt, rayon?, colour SD 32)
  • Bottom: Fil-Tec Magna Glide Classic pre-wound bobbin (light tan)


Community Quilt 330

20 06 2017

Even though this looked like a red, green, and white Christmas-themed quilt, the fabrics actually contained Hawaiian motifs! I quilted it with overlapping spirals, using two different red and green variegated threads (the first one, a cotton, ran out about halfway through the quilting!).

(Click on a photo to view it larger)

Back: 

Threads used:

  • Top: YLI ‘Festival’ (40 wt, cotton, colour 14V); Wonderfil Mirage (30 wt, rayon?, colour SD 21)
  • Bottom: Fil-Tec Magna Glide Classic pre-wound bobbin (candy apple)


Community Quilt 329

20 06 2017

A scrappy quilt made up of many 5″ squares. How to quilt it? I opted for a large cathedral window motif (all free motion, no rulers) using a deep red thread.

(Click on a photo to view it larger)

Threads used:

  • Top: Floriani (40 wt, rayon, colour PF 188)
  • Bottom: Fil-Tec Magna Glide Classic pre-wound bobbin (candy apple)


Community Quilt 328

20 06 2017

What a bright quilt this was! The fabrics were so busy that only minimal basic stippling was required.

(Click on a photo to view it larger)

Threads used:

  • Top: Floriani (40 wt, rayon, colour PF129)
  • Bottom: Fil-Tec Magna Glide Classic pre-wound bobbin (candy apple)


Invading roots

31 05 2017

Guarding the entrance to our house are two massive strelitzias (Strelitzia nicolai). They have the most enormous flowers, and are just beautiful. But they have a dark secret — a root system that’s pretty invasive.

Magnificent white flowers of the Strelitzia nicolai

Magnificent white flowers of the Strelitzia nicolai

I’d suspected them of causing some driveway problems — cracking the asphalt, splitting the kerbing — but internet searches weren’t conclusive. One camp said these things had invasive roots and not to have them in your garden; the other camp said they were fine and no problem.

Over time I’ve noticed more cracks in the driveway near these plants and more recently, raised bumps and split kerbing (where there’d only been a hairline crack before). I also read a gardening article in our state’s main newspaper where someone had Strelitzia nicolai plants excavated (!) and was concerned about the roots and whether they’d sprout or if they needed to be dug out too. The gardener’s response was that no, they wouldn’t sprout, they didn’t need to be dug out, and she could plant something else in the hole.

I spoke to my garden guy and he suggested the cheapest solution for me as a first step was to prune the huge old branches, leaving the newer branches intact. He said that would likely stop the roots from invading any further, at least until the newer branches got as big as the old ones. The more expensive option was to get them cut out entirely and the roots ground out, ready for another plant species to take their place. I decided to go with the less drastic measure as a first step, and see if that solves the problem for the next few years. If I get no further cracking of paving or kerbing, I’ll take that as success, and make sure the older branches get pruned every few years.

During pruning - look at the height of that plant!

During pruning – look at the height of that plant!


Before pruning

Before pruning


After pruning – we can see the house over the road now, but have lost the magnificence of these big plants


Ratty McRatface

31 05 2017

Rats! Yes, real rats. In our shed. One of the ‘advantages’ of living in a semi-rural location.

I’d seen evidence of them in the shed before, and had put down RatSack. Some time later there was a god-awful smell that could only have been a decomposing rat somewhere in the shed. We couldn’t find it, but eventually the smell went away (it’s a BIG shed — 6 x 12 m).

I was in there a few weeks ago and vacuumed up more rat scat, but when I went in there a week or two ago there was a whole heap of rat scat, particularly in one place. Ewwww! I swept it up (I wasn’t using the vac for that!), then discovered more in the shelves above. These shelves house my gardening supplies and chemicals. Most of the stuff is in lidded plastic tubs, but some taller items are in small open tubs. And these tubs had lots of rat scat. The worst was the tub that had two packets of green snail pellets.

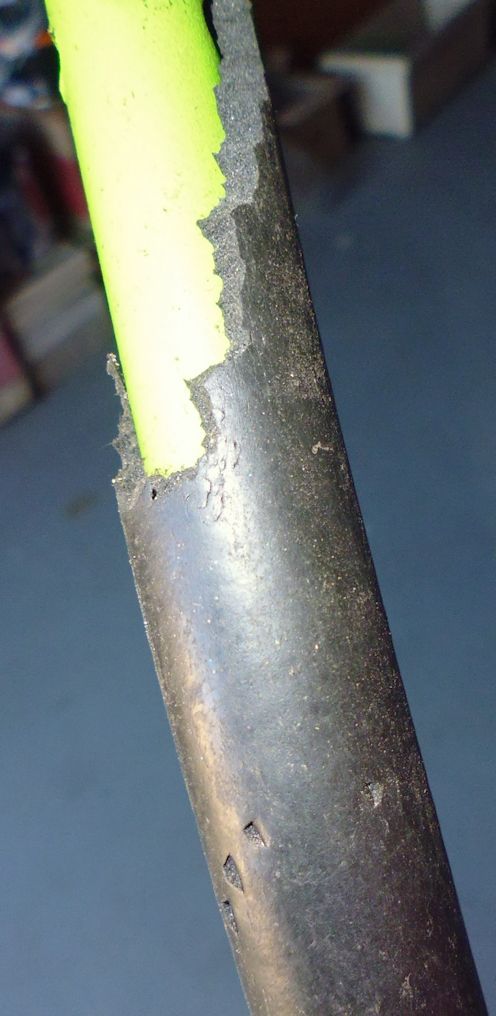
And then I discovered that the dirty rat had eaten a big hole in the snail pellet packet and had left his (I don’t know if it’s a male or female, but use ‘his’ here) scat INSIDE the packet. That explained why some of the scat was dark green… He’d started to attack the other packet, but no doubt was still feasting on the first one. He’d also eaten part of the foam handle of a gardening tool — there were teeth marks and tiny little claw marks where he’d held it! Little bugger.

Teeth marks at the top of the handle, and claw marks in the foam grip

Teeth marks at the top of the handle, and claw marks in the foam grip

Teeth marks at the top of the handle, and claw marks in the foam grip

Teeth marks at the top of the handle, and claw marks in the foam grip


I cleaned everything up and tossed out the snail pellets (how they didn’t kill him, I don’t know — obviously he found them very tasty!). I also put down more RatSack.

Two days later I went back into the shed. The RatSack packets I’d tossed onto the floor were gone! The little sod had taken them somewhere, so I put down three more packets. The next day they were all gone too. I didn’t put down more. I figured that 5 packets of RatSack should be more than enough.

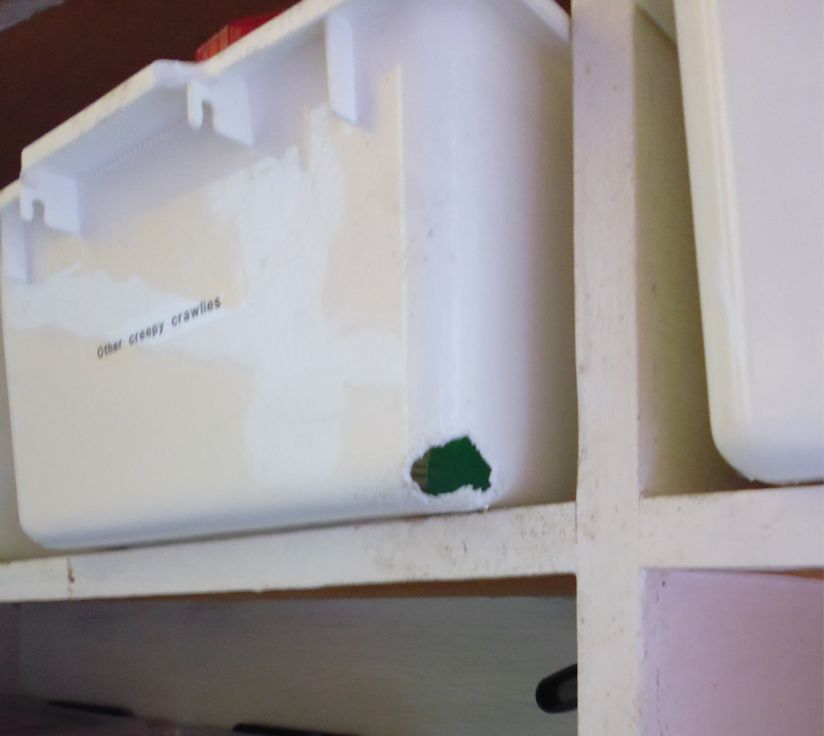
What I did notice when I went back into the shed after putting down the first lot of RatSack was that instead of rat scat, there was a small pile of white stuff below the benches where the tub was that had held the snail pellets. It wasn’t rat poop, and then I saw that it looked like white plastic. I looked a little closer and at the shelves and saw that this rat had chewed through an entire corner of a hard-plastic tub and had started work on another one! Unbelievable! I thought storing stuff in tubs would prevent vermin getting in, but not so. This was one determined rat — and possibly one crazed rat from the RatSack it’d eaten.
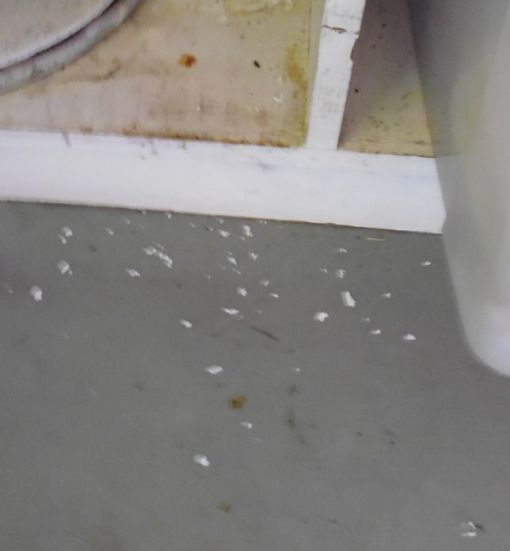
Hard white plastic bits on the floor below the shelves

Hard white plastic bits on the floor below the shelves


How on earth did he eat this? It's hard plastic and it's three shelves up from the floor, and there's nothing he could stand on to reach it. Unless he ate it from inside, but that would've been a feat to get his teeth into that rounded corner.

How on earth did he eat this? It’s hard plastic and it’s three shelves up from the floor, and there’s nothing he could stand on to reach it. Unless he ate it from inside, but that would’ve been a feat to get his teeth into that rounded corner.
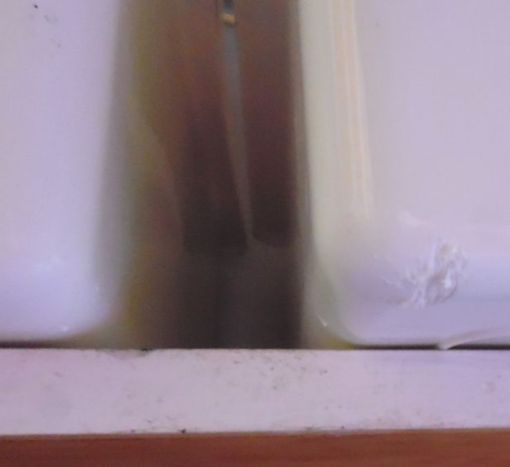
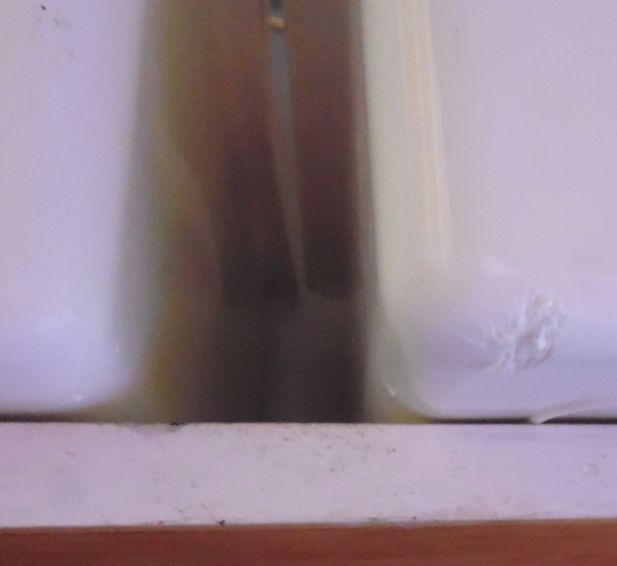
He started chewing on another tub, also 3 shelves up and nothing to stand on. It's clear he's attacking it from outside, not inside the tub.

He started chewing on another tub, also 3 shelves up and nothing to stand on. It’s clear he’s attacking it from outside, not inside the tub.

I left everything for a week, then ventured into the shed again. This time there was a faint odour of decomposing flesh, which I can only assume was the rat. A couple of days later the smell was stronger, but we couldn’t find the rat’s body. Oh well, it will eventually decay, dry out, get eaten by ants, whatever.

I think we got it. And I’m not going back into the shed until the smell has gone 🙂 Fortunately, it’s not summer, when the pong would be unbearable.

Update 25 June 2017:

Operation Rat – over? Since I wrote the blog post above more have ‘passed away’ with the help of RatSack packs. Then on Friday my wonderful handyman discovered where they were getting in (not where I thought) and has now concreted those openings and another set of openings where I thought they might be getting in. I thought it was over…

But this morning (Sunday) I went into the shed to get some gardening tools and noticed 2 packs of RatSack (which were there earlier in the week) were gone, and there was more dead rat smell. My DH used his nose to hunt the dead rat and found it inside a big empty box – with a live rat!!!! After much to-ing and fro-ing, the live rat is now a dead rat, is buried with the other dead rat and a dead baby in the no-man’s land behind the shed, and the box (which stunk of dead rat and was likely their nest) has now been burned.

I think the rat problem is no more, but just to be sure, I’ve put down another 3 packs of RatSack… Stay tuned…