Log Cabin Quilt: 3

25 08 2008

Actually, this post is about a couple of mini log cabin quilts—variations on the big one I have yet to start.

Remember those blue plaid blocks I didn’t like and replaced with the dark batik blue? Well, I decided to make a couple of mini quilts out of them.

My first thought was for a laptop tote bag/sleeve for my new 17″ laptop to go inside my rollaway laptop bag. And I may still do that. This is the first mini quilt, using the furrows layout for the log cabin blocks. The binding isn’t too good—I wanted to use the last of the plaid and it’s a very soft fabric. To make it into a sleeve, all I have to do is fold it over, stitch the sides, and perhaps add a fabric handle or two. But I really don’t like that fabric. It’s getting worse the more I look at it, as Bobbie and Michelle indicated would happen. My husband just said, “Why don’t you just throw the fabric out?” The next section will tell you why not, and why I may keep it as is and not fold it over and stitch it…

Mini log cabin quilt 1

Mini log cabin quilt 1 (final size approx 18" x 24")
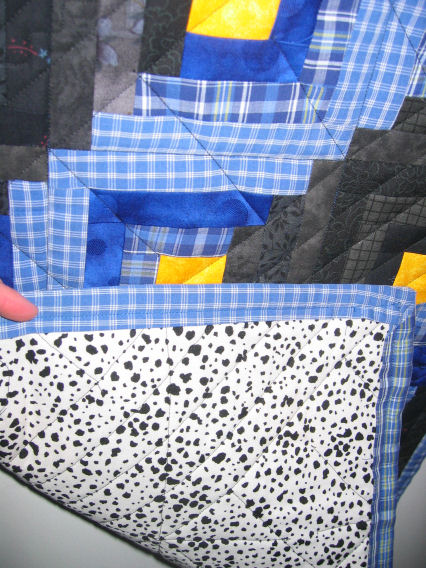
Dog print on back of mini log cabin quilt 1

Dog spot print on back of mini log cabin quilt 1

My other thought was for a small quilt to donate to the RSPCA. A lady in the Perth office of the Queensland company I’ve been working for volunteers at the RSPCA, and she put out an appeal for some blankets and towels to help keep the animals, such as the dogs and cats, warm and dry over winter. So I figured that making small quilts for the animals at the RSPCA might be a good way to use up scraps and to try out new skills. Any excuse! 😉

So here’s the second mini log cabin I put together with that disliked fabric. I already had the blocks so it was just a matter of sewing them together (this time using a large diamond arrangement) and adding a border. Then deciding on a backing.

Mini log cabin quilt 2

Mini log cabin quilt 2

I decided to try out a “Disappearing 9 Patch” for the backing fabric of one of the mini quilts (I only decided this late yesterday afternoon so the backing quilt is not finished yet!). It’s super easy, and a great technique for making a quilt really quickly. Below is a picture of the initial block.

Disappearing 9 patch - initial block

Disappearing 9 patch - initial block

I’ve made four of these to make the background fabric for the second mini log cabin quilt. The individual patches are 5″ square—and each fabric was from bits and pieces in my stash. The next step is to cut this block in quarters through the center, rotate the blocks, then sew them back together again (yeah, I know—even my Mum wonders why you’d take perfectly good fabric, cut it up, then sew it back together!). I’ll upload the photos once I’ve done this so you can see what the effect is.

In the meantime, if you want to find out more about the Disappearing 9 Patch, Anne G’s Mom’s blog pointed me to this website that shows this very simple but effective technique.

Update 25 August 2008… later: I got a bit of time today to cut these blocks up, do the rotation thing, then sew them back together again. Here’s the back before doing the sandwich thing with the top, then the quilting.
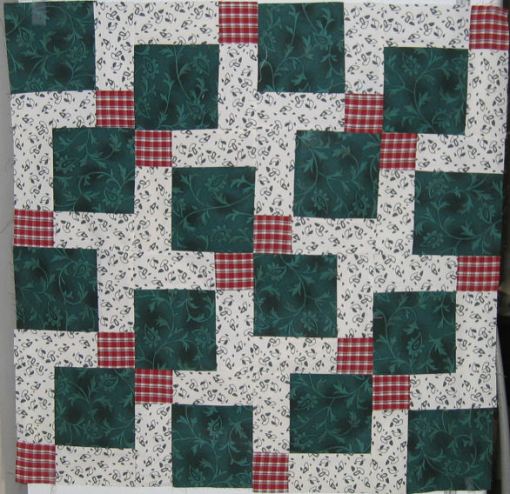
Disappearing 9 patch blocks - cut, rotated, and sewn back together

Disappearing 9 patch blocks - cut, rotated, and sewn back together

Update 12 September 2008: I took the opportunity to try out some free motion quilting techniques on this little quilt, and to learn how to do mitred corners properly. Later today I’ll send them both off to my friend who does volunteer work at the RSPCA.

Free motion quilting and mitred corner

Free motion quilting and mitred corner

See also:


Log Cabin Quilt: 2

16 08 2008

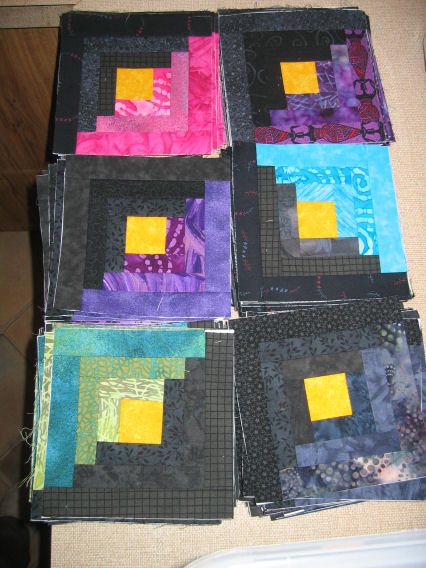
I forgot to post a pic of the various colour ways for the 144 blocks I’ve made ready to put together for the log cabin quilt. There are 24 blocks of six different colour themes; I still haven’t decided on a pattern…

Oh, and for those who saw the other blue blocks, you’ll notice that I’ve replaced them with darker, more batik-y blue blocks (bottom right).

144 blocks, 24 of each colour

144 blocks, 24 of each colour

See also:


Craft, Quilt, and Stitch Show

2 08 2008

I drove to Perth yesterday to take a look at the WA Craft, Quilt, and Stitch Show, and to attend my nephew’s 5th birthday party. I had a few things I wanted to do at the Show:

  • View the quilt exhibitions—there were the quilts made by locals, and then there was the Eyeline Exhibition, a stunning collection of art quilts from the ACT (see the pictures below for some examples).
  • Check out the booths to see what’s new, what goodies were on sale (I only bought a couple—honest!), and to say hi to the lovely Michelle from Raggedy Stitches and to my good friend Bobbie from The Quilt Mouse, both of whom had booths and were running workshops over the three days. Bobbie had her brand new CDs for sale—these are of her Foundation Paper Piecing blocks, in various patterns and sizes. You can purchase a CD (or the complete set) and can print as many of the blocks as you want, either on your paper, or the thin, easily-tearable paper she can supply. Those CDs were selling like hotcakes! She doesn’t have them up on her website yet, but if you email her, she can send you the details.
  • See if I could get a demonstration of, and a chance to play with, the only sewing machine I’ve yet to investigate—a Bernina 440 Quilters Edition. I did, and I was disappointed. In my opinion and based on the features that I want, this machine was a poor second to the Husqvarna Sapphire 870, while being some hundreds of dollars more expensive! The guy at the booth said they’d give me a $500-600 trade-in on my existing Bernina, but while the price after trade-in is now comparable with the Husqvarna, it still doesn’t have the features I’m looking for, like auto thread cutters etc. My heart has always been with Berninas as they are incredibly reliable machines (my Mum had one when I was a kid and it was the first electric sewing machine I ever used, then I purchased one for myself as a 21st birthday present, then Mum got another one about 10 years after that which I now have [she swapped me hers for mine a few months back]), but Bernina really missed the boat with the 440. The Husqvarna’s 10″ throat and the auto thread cutters, in particular, have swung my decision towards Husqvarna. I eliminated Janome, Pfaff, and Brother some time ago, and getting access to a Bernina was a problem—the closest store (in Bunbury) hasn’t had one on display each time I’ve been in there, which didn’t augur well. The other reason for choosing the Husqvarna is that I can get it locally, so if there are issues with servicing, repair, etc. I only have to take it in to the local shop.

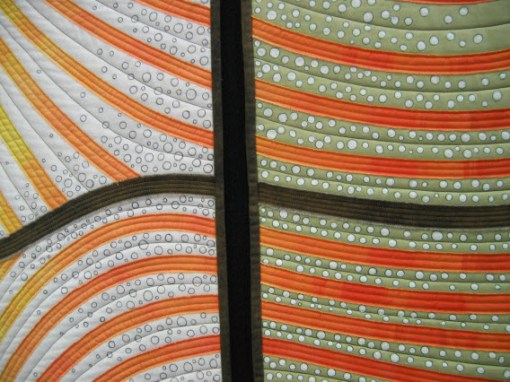
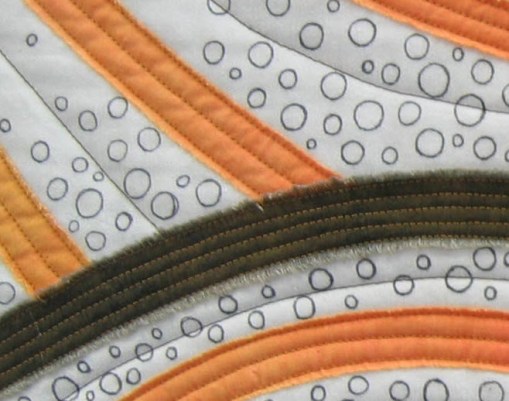
Here are a couple of pictures I took of two of the Eyeline art quilts:

Small section of one quilt in a triptych from the Eyeline exhibition

Small section of one quilt in a triptych from the Eyeline exhibition. Thread 'painting' was used to create the grass and trees, as well as the contours.

Eyeline Exhibition 2

Small section of a panel of about 6 art quilts. This is the right edge of one and the left edge of the next.

Eyeline Exhibition 3

Close-up showing stitching and construction techniques


Log cabin quilt: 1

26 06 2008

OK, I said it’d be a few days… well, it’s been a few minutes!

I’ve had a log cabin quilt in mind for a while, and I thought that one with black as the solid would look good with the jewel colors at the cooler end of the color wheel—the pinks, purples, blues, and greens. I started making blocks some weeks ago, and have made a few at a time. To make a Queen Bed size quilt, I need 144 blocks… and that’s just the start. Then there’s the border, backing fabric, quilting, binding, etc.

I chose six major color themes, raided my stash to find appropriate fabric (three of each color theme, and three different blacks), purchased some foundation paper pieces from my friend Bobbie at The Quilt Mouse, and started making my 6″ blocks.

Making a log cabin with foundation piecing is not the quickest way, but it’s accurate. I know that my finished blocks will be the right size and will fit together exactly. If I was making a log cabin quilt using chain piecing I couldn’t guarantee that. Also, with chain piecing, the cutting and 1/4″ seams have to be absolutely accurate. With foundation paper piecing that’s not the case—I don’t have to be 100% accurate with my cutting and as I stitch on the printed lines and cut the 1/4″ seam using an Add-a-Quarter ruler, it’s easy.

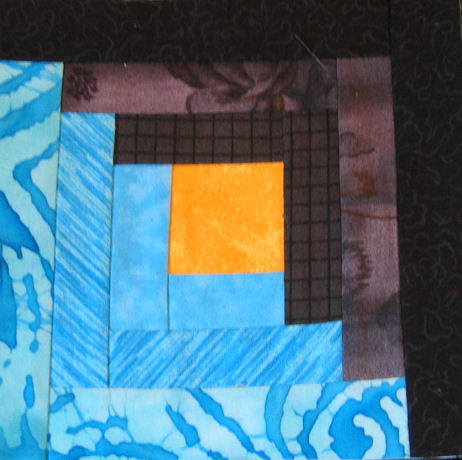
Here’s part of a completed block—each ‘log’ in the cabin is a finished 3/4″ wide, and the ‘log fire’ for all blocks is a yellow square.

So far I’ve made well over 120 blocks—I’ve nearly completed the first stage! Today it was time to go to Bobbie’s new house and play with the blocks on the design wall in her quilting studio. My original thought was to do a furrows pattern, but after she played with a few variations on her computer (using EQ6), I saw one I really liked. It’s still a furrows pattern, but while the blocks run in one diagonal direction, the color bands run in the other.

That sounds more difficult than it is, so here are some photos. The first is my original plan (not all the blocks are laid out, just enough to get a sense of the pattern and color combinations):

Then we tried the pattern I liked on the computer. Notice how the diagonal patterns run in two ways—there’s the furrows (top left to bottom right diagonal), and then there are the colors running in the opposite (top right to bottom left) diagonal direction:

I’m not happy with the dark blue. Most of the other color-themed fabrics have batiks in them, or something that looks like a batik. But the dark blue has plaids. And I don’t like it. It doesn’t suit the rest of the fabrics. But after making 24 of these blocks (approx. 15 mins per block, so that’s about 6 hours of work), I sure didn’t feel like doing them again! However, Bobbie said something that stuck—she said if I don’t like the blue now, I sure won’t like it in a couple of years time. She said that every time I look at this quilt, I’ll focus on the blue plaid and how much I don’t like it. She’s right. So I got some more fabric this afternoon! I’ll redo those blue blocks and use the old ones for something else where they’ll be more suitable (anyone want a set of blue and black place mats? 😉 )

One other variation I tried was the large diamond blocks. It’s never been a preferred option, but I’ll show you what it looks like anyway:

I still don’t like the blue plaid any way I look at it! It has to go!!

So, your thoughts? Which design takes *your* fancy?

See also:


Evolution of a quilt: 11

26 06 2008

It’s done!

I finished hand stitching the binding in front of TV earlier this week, then tried my hand at some hand sewing with gold metallic thread on the label. I decided that the label should be a grape leaf, so I fused one on the back of the quilt, then did a wobbly blanket stitch around the raw edge and a straight stitch for the veins. After doing that, I remembered why I don’t like hand sewing! All I have to do now is add the provenance details about this quilt—I think I’ll follow the veins of the grape leaf.

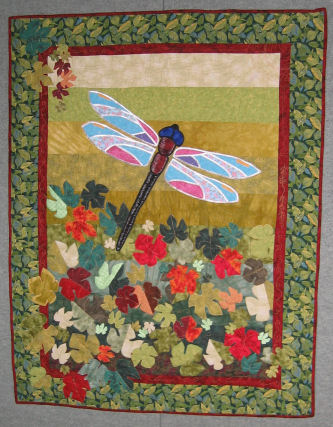
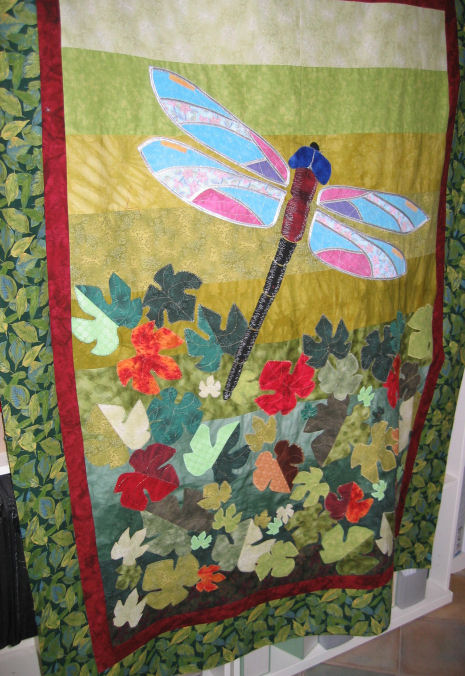
Final pics are here, and below is the final quilt pinned on my friend’s design wall, and a close-up of the label.

And you’ve gotta figure that’s not the end of it… While I was waiting for this quilt to come back from Judy (it was away for about 3 months—I was away for 6 weeks of that time too), I got started on a log cabin quilt. But that’s a series of posts for another day!

Links to all posts about this quilt


Evolution of a quilt: 10

7 06 2008

It’s back!

I gave Judy—a local quilter—my dragonfly quilt before I headed off overseas in March. I knew she couldn’t do it for a while and I was OK with that. I got a call from her on Wednesday telling me she’d finished quilting it on her long arm quilting machine (I should have taken some photos of her but I totally forgot to ask her!).

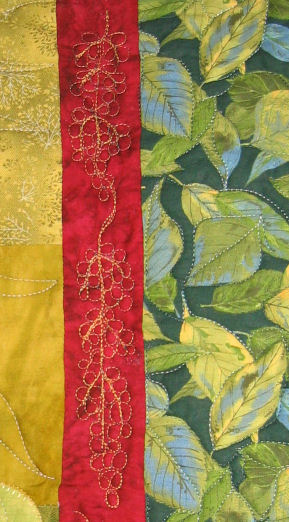
When I’d given her the quilt, we’d talked about some ideas for the quilting—perhaps some sun’s rays, some grapevine tendrils—but I left it in her creative hands. She told me she let the quilt ‘talk to her’ and I’m really pleased with the result. I’ve added a couple of photos at the end of this blog post, but click here for all the photos.

So now I’m down to the last stages—squaring up the quilt, trimming the excess batting and backing, adding a hanging sleeve and doing the binding. I think we’ve got a craft afternoon tomorrow, so maybe I’ll get some of it done then—I’ll need the big tables that the function centre has to get it done properly. My kitchen counter just isn’t suitable!

Oh, and if you’re looking for a good professional quilter, Judy’s details are:

Judy Bland, Blue Rose Quilting, Bridgetown, Western Australia
judy.bee1@bigpond.com
Ph: +61 8 9761 4546

Links to all posts about this quilt


Material girl

29 03 2008

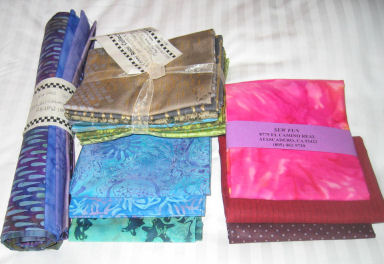
The bed at the Hong Kong hotel had a nice white cover – a perfect background to show off some of the fabric I bought. I couldn’t buy yardage (weight, space in the suitcase), but I could buy fat quarters as they can easily slot into nooks and crannies in the baggage!

Here are the photos of the neutrals and the batiks and brights I purchased; I’m not sure what I’ll make with them, but I need to have a stash to choose from, right?

Neutrals

Batiks and brights


Mmmm… new fabric!

21 02 2008

Like I need more fabric! NOT. We have two fabric stores in our small town of less than 5000 people, but still I had to go online and look… I bought a whole heap of fabric for my stash from Busy Thimbles a week ago, and it arrived safe and sound early this week.

I lasted about a half day before succumbing to the lure of it, and washing and ironing it ready for whenever I need it.

Memo to self: DO NOT buy fabric unless you are ready to use it! ‘Topping up the stash’ is not a valid excuse.

Fabric flapping in the breeze

More fabric

I just counted them—35 fat quarters and 4 metre lengths (two are Aboriginal prints—one in blues and black, the other in ochres and purples). The browns and greens were in 10-fat quarter packs, but I chose the rest myself.


Evolution of a quilt: 9

2 02 2008

After spending some hours cleaning my Mum’s old sewing machine, testing stitches, thread tensions, making samples, etc., I FINALLY got back to working on the quilt today. I took my friend Bobbie’s advice (and superior quilting knowledge!) and outlined the dragonfly body in black bias tape. And decided to cover the silver separator for the head/eyes and make that black too. There are no rules, so it doesn’t matter!

Oh, and I’ve also uploaded ALL the quilt pictures (to date) to a separate album on Webshots.

To get some idea of the size of this quilt, my husband is holding it and he’s 6’3″…

Dragonfly with black bias tape

Links to all posts about this quilt


Evolution of a quilt: 8

13 01 2008

Further progress this weekend… I picked up 5 metres of silver adhesive bias tape earlier in the week, expecting it to be enough. Well, it was only *just* enough for the wings and even then I had to fudge it a little using some offcuts to make up the full length.

I really liked the look when I ironed it on, but then I had to stitch it down—even though I used monofilament (invisible) thread, the holes made by the needle still show. I think that takes a little away from it. Anyhow, the wings are done. I still have to add bias tape to the body—I’m waiting on an order of some black bias tape, so I’m not sure if I’ll do it in that or continue the silver theme. I’m tempted to stay with silver, just for continuity, but black will be more like the colour of a real dragonfly’s body.

Silver wings

Close up of silver bias tape on wings

Because I was out of bias tape, I decided to start on the borders. But what fabric/colours to use? Off to the two fabric stores in town! The first didn’t have anything that ‘sang’ to me, so I decided to try the second store. (Yes, our town is only small—about 5000 people—but we have TWO fabric stores!)

After ‘auditioning’ a lot of fabric bolts (‘auditioning’ is the term you use when you’re trying out other fabrics against those you have, to see what matches, contrasts, fits, etc.), I chose a deep burgundy for the first border (the ‘frame), and a green leaf border for the main border. Here’s how it came together:

Corner with borders

Corner with borders

The next steps are to:

  • Add more leaves, possibly with some falling in to the border.
  • Add the bias tape to the dragonfly when I receive it.
  • Decide whether or not to add gold thread tendrils before it gets quilted, or after, or not at all—suggestions gratefully appreciated!
  • Decide on a backing. My initial thoughts are to do a plain backing (I have plenty of the burgundy fabric used in the frame, or I can get more of the leaf fabric), perhaps with a leaf or two appliqued on. The other thought is to use similar colours/tones to the front and piece another quilt as the back—maybe large log cabin blocks. But that will take a LOT more time!
  • After finishing the top, add the batting and the back, then either quilt it myself, or take it to a local lady (Judy) to quilt for me on her long arm machine. She did a terrific job on my “South of the Border” quilt, and she doesn’t charge a lot so I’m tempted to get her to do it as the finish will be very professional.

When we went over to see my parents a week or so ago, Mum offered to swap sewing machines with me. We both have old Berninas, but hers is a more featured model than mine and about 10 years younger (making hers about 25 years old!). Hopefully the swap will happen this week as we’re meant to be meeting them for lunch later in the week. I doubt she’s used her machine much, so it should work well. And my Bernina feet will work with it too.

Links to all posts about this quilt