Actually, this post is about a couple of mini log cabin quilts—variations on the big one I have yet to start.
Remember those blue plaid blocks I didn’t like and replaced with the dark batik blue? Well, I decided to make a couple of mini quilts out of them.
My first thought was for a laptop tote bag/sleeve for my new 17″ laptop to go inside my rollaway laptop bag. And I may still do that. This is the first mini quilt, using the furrows layout for the log cabin blocks. The binding isn’t too good—I wanted to use the last of the plaid and it’s a very soft fabric. To make it into a sleeve, all I have to do is fold it over, stitch the sides, and perhaps add a fabric handle or two. But I really don’t like that fabric. It’s getting worse the more I look at it, as Bobbie and Michelle indicated would happen. My husband just said, “Why don’t you just throw the fabric out?” The next section will tell you why not, and why I may keep it as is and not fold it over and stitch it…

Mini log cabin quilt 1 (final size approx 18" x 24")
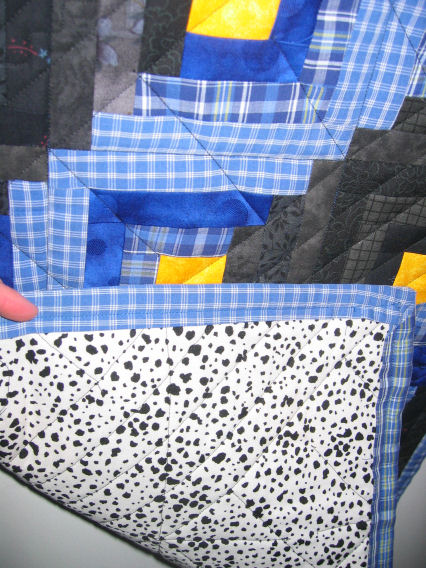
Dog spot print on back of mini log cabin quilt 1
My other thought was for a small quilt to donate to the RSPCA. A lady in the Perth office of the Queensland company I’ve been working for volunteers at the RSPCA, and she put out an appeal for some blankets and towels to help keep the animals, such as the dogs and cats, warm and dry over winter. So I figured that making small quilts for the animals at the RSPCA might be a good way to use up scraps and to try out new skills. Any excuse! 😉
So here’s the second mini log cabin I put together with that disliked fabric. I already had the blocks so it was just a matter of sewing them together (this time using a large diamond arrangement) and adding a border. Then deciding on a backing.

Mini log cabin quilt 2
I decided to try out a “Disappearing 9 Patch” for the backing fabric of one of the mini quilts (I only decided this late yesterday afternoon so the backing quilt is not finished yet!). It’s super easy, and a great technique for making a quilt really quickly. Below is a picture of the initial block.

Disappearing 9 patch - initial block
I’ve made four of these to make the background fabric for the second mini log cabin quilt. The individual patches are 5″ square—and each fabric was from bits and pieces in my stash. The next step is to cut this block in quarters through the center, rotate the blocks, then sew them back together again (yeah, I know—even my Mum wonders why you’d take perfectly good fabric, cut it up, then sew it back together!). I’ll upload the photos once I’ve done this so you can see what the effect is.
In the meantime, if you want to find out more about the Disappearing 9 Patch, Anne G’s Mom’s blog pointed me to this website that shows this very simple but effective technique.
Update 25 August 2008… later: I got a bit of time today to cut these blocks up, do the rotation thing, then sew them back together again. Here’s the back before doing the sandwich thing with the top, then the quilting.

Disappearing 9 patch blocks - cut, rotated, and sewn back together
Update 12 September 2008: I took the opportunity to try out some free motion quilting techniques on this little quilt, and to learn how to do mitred corners properly. Later today I’ll send them both off to my friend who does volunteer work at the RSPCA.

Free motion quilting and mitred corner
See also:
- Log Cabin Quilt: 1
- Log Cabin Quilt: 2
- Log Cabin Quilt: 3 (this post)
- Log Cabin Quilt: 4 (sewing the blocks together)
- Log Cabin Quilt: 5 (putting the top together)
- Log Cabin Quilt: 6 (making the back)
- Log Cabin Quilt: 7 (the completed back)
- Log Cabin Quilt: 8 (finished!)


Hey Rhonda!The backing you made up from the 9 patch looks fabulous. It’s a great way to use up scraps and by cutting them up they look far better than a regular 9 patch and look less like scraps thrown together badly. I love it.
Definitely will do that binding lesson with you soon.
I’m really into cutting things up more since doing the Ricky Tims convergence.
I wonder what would happen to your log cabins if you cut them up?
Bobbie
They are great. I especially love the 9-patch quilt. They were my last favorite, and the last quilt I made (many years ago). It was a radiant 9-patch. I’ve never done the disappearing version. Very nice!!
I sent them to my colleague who volunteers at the RSPCA. Here’s her response:
OH MY GOODNESS
Thank you so much!
They are amazing!
I will keep them for my little favourites!!!!
I told my mother, who is a quilter, and knowing just how much work goes into these, We blessed you out loud!
Your are now a Doggy angel too!
[…] Log Cabin Quilt: 3 (mini quilts—side project) […]
[…] Log Cabin Quilt: 3 (mini quilts—side project) […]
[…] Log Cabin Quilt: 3 (mini quilts—side project) […]
[…] your stash, scrap fabrics, spare batting etc. to make small quilts for your local animal shelter, as I did earlier this year. It’s a great way to use up leftover fabric, to practice free motion quilting, and your gift […]