Feeling chuffed

22 11 2008

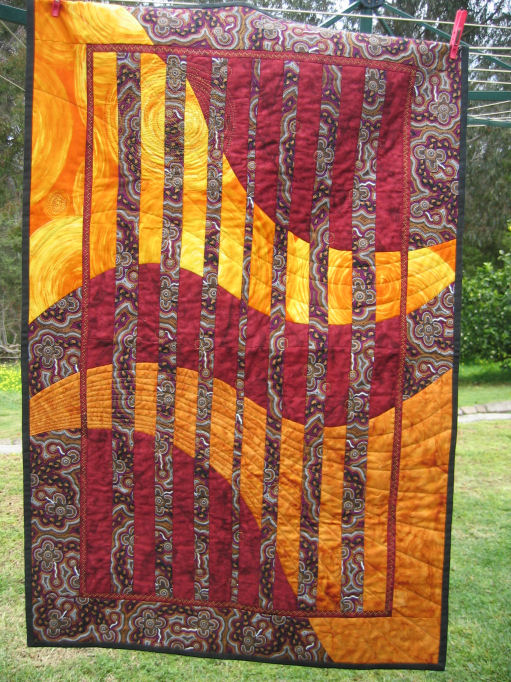
I entered five completed quilts into this year’s Bridgetown Agricultural Show (like a town fair for my American friends), and every one won a prize! I got three first prizes and two seconds. And I got two of the four ‘special prizes’ for the overall ‘Handcrafts’ category, which means I was up against entries in nearly 80 categories ranging from crocheting, knitting, sewing, doll and bear making, tapestry, cross stitch, embroidery, and everything in between. To get two out of the four possible special prizes was pretty good — I was chuffed!

The two special prizes ($25 cash each) were for my dragonfly quilt and the Japanese meshwork table mat; they also won first prizes ($4 cash each). The other first prize was for the convergence quilt, and the two seconds ($1 cash each) were for the ‘blanket of love’ and the ‘scrappy’ cushion cover.

As it only cost $1 to enter each item, a $64 return is not too bad! 😉 Better than the stock market is paying these days… (though, of course, the cost in fabric, thinking and creating time, workshops, is not factored in at all in calculating this ‘return’).


Log Cabin Quilt: 4

10 11 2008

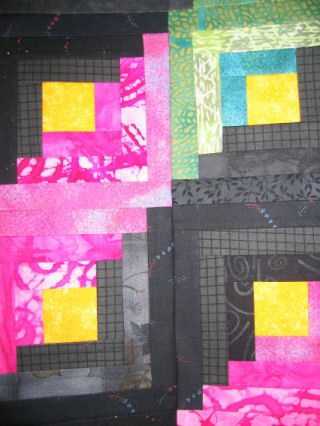
Now that I’ve got my new sewing machine, it was time to put the 144 log cabin blocks together. I had a printout of the layout and thought I’d do a square/rectangular section at a time, then join the sections. Not so easy with this layout.

Because I’d chosen layout number two, the only way I could do the initial joins was to join 12 blocks together in one long strip. That gave me 12 strips (of 12 blocks). I then sewed strips 1 and 2 together, strips 3 and 4, 5 and 6 and so on. Next step was to sew the 1 and 2 strip to the 3 and 4 strip; the 5 and 6 to the 7 and 8, and so on.

One good thing about foundation paper piecing is that the joins are accurate! The bad thing is the extra time it takes to sew the blocks (15 mins each – that’s 36 hours alone just for sewing the individual blocks!!), then to tear off the strips of 1/4″ paper after finishing each seam.

Joins

Joins

So now I have three strips 4 blocks wide that still need to be sewn together. I’ll wait until the next craft afternoon near the end of the month before I do that as I’ll need a really large table area to work on. Once that’s done the main top is finished. Then comes the border fabric and the backing, then the quilting, which I’ll get Judy to do on her long arm machine — there’s no way that I could fit that size quilt into any domestic sewing machine!

Two-block strip of 12 blocks

Two-block strip of 12 blocks

See also:


Quilt: Blanket of Love

9 11 2008

I finished my first ‘blanket of love‘ quilt last night. This was the one that we did as a learning project at the craft group.

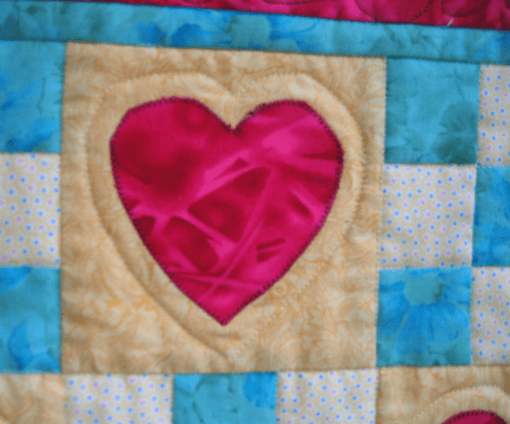
The nice thing about doing these sorts of projects to give away is that you can try fabric combinations that you wouldn’t normally use (I used a yellow polka dot, a gold floral, a blue/green floral, a deep cyclamen pink, pale pink for the backing, and deep green for the binding), and try out new techniques (large free motion stippling in the border, echo quilting around the hearts, blanket stitch — with new machine — for the raw edge applique around the hearts).

The finished quilt size is just under 24 x 24 inches.

Blanket of love

Blanket of Love quilt

Detail of Blanket of Love quilt

Detail of Blanket of Love quilt

Update 25 November 2008: Someone asked about who this Blanket of Love quilt was for.

My reply: No-one in particular. That’s the whole point of the ‘Blankets of Love’ (BOL) program.

The BOL quilts go to maternity hospitals and are offered to parents of stillborn babies, or babies that die very soon after birth. Some parents wrap the child’s body in the quilt and it goes into the coffin; others wrap the child in the quilt then take the quilt home as a memento. According to some stuff I’ve read, the quilt often retains the smell of the baby. And according to a friend, often it’s the father who will pick a quilt out for their child as it’s too upsetting for many mothers.

The quilt gets a label that doesn’t identify me – I still have to label it, but it will be something like “Made with love by Rhonda” and I’ll leave enough space for the baby’s name and a date if the parents wish to add that information later.

Update 3 November 2009: I just got an email from my friend Bobbie, which said:

“Just spoke with Maureen [the owner of a fabric store in town]. She said someone lost a baby last week at the hospital and has chosen your BOL.

She has decided to keep it as a memento and told Maureen how much it means to her to be able to hold it.

She doesn’t know who you are but Maureen of course guessed with your little tag on it.”


Japanese Meshwork: Finished

26 10 2008

My new sewing machine (Husqvarna Viking Sapphire 870) arrived a week ago (yay!), and I’ve been trying to find time to play with my new toy! (Work has been REALLY busy… and then there was the funeral to attend in Perth last Monday, and I’m off to Sydney for 5 days on Tuesday).

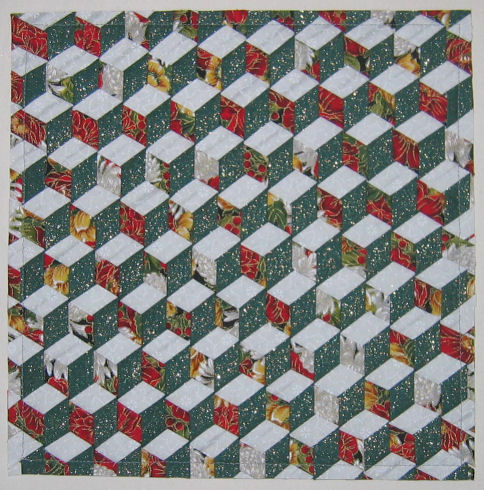
One of the first things I did as part learning how the new machine works was add frames, borders, a back and binding to the Japanese Meshwork piece I made at a workshop a few weeks back. The ‘batting’ I used was very stiff as I wanted to make this piece into a placemat for a Christmas table.

I quilted along the diagonal lines between the stars in the red border fabric, and ‘stitched in the ditch’ around the green and white ‘frames’. The backing fabric is the same chrysanthemum Christmas fabric I used in the meshwork ‘boxes’ and instead of adding a backing then adding the binding separately, I added enough extra to the backing to fold it over to the front and do the hand stitching on the front, giving the illusion of a ‘proper’ binding. The mitered corners weren’t hard—they were a bit like doing the corners on gift wrapping.

Here’s the finished product:

Japanese meshwork - Christmas table mat

Japanese meshwork - Christmas table mat


Japanese Meshwork

27 09 2008

I spent part of today at a quilting workshop in town learning how to do Japanese Meshwork. Earlier in the week I spent a few hours making the bias strips I used in my ‘tumbling blocks’ piece. A word about these bias strips—they aren’t made from the bias of the fabric. They’re cut on the straight grain, then put through some type of bias tape maker to create the double-fold strips.

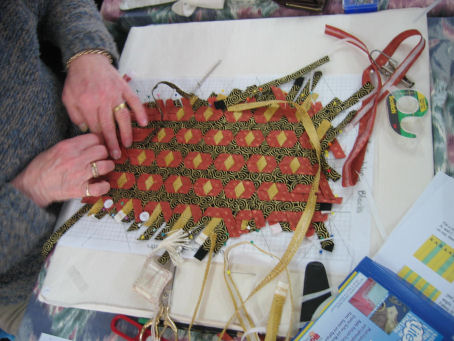
Japanese Meshwork has no sewing in it, until you need to add borders etc. It’s all about weaving the fabric. And it takes some time to get the technique right. However, within a few hours all five of us at the workshop had a handle on it, though whether I could repeat the technique at a later date remains to be seen!

Here are some of our efforts:

My Christmas Japanese Meshwork piece - 9 in square

My Christmas Tumbling Blocks - Japanese Meshwork piece (9 in square)

Bobbie's Cafe Blocks

Bobbie's Cafe Blocks (9 in square)

Jane's stars and diamonds

Jane's stars and diamonds (6 x 12 in)

Flora's lattice

Flora's lattice - in progress (6 x 12 in)

Using the bodkin to weave the strips

Using the bodkin to weave the strips

See also: Japanese Meshwork: Finished


Free issues of Down Under Quilts magazine

24 09 2008

You can get a free 6-month subscription to the electronic version of Down Under Quilts, the Australian quilting magazine.

Just go to The Quilt Mouse (http://www.thequiltmouse.com.au) then scroll to the bottom of home page and click the link. You only have to enter an email address and you’ll get access to past issues and a free sub for the next 6 months.

BTW, this is my friend Bobbie’s website. It’s been revamped recently—her son set it up for her using Joomla, and her daughter did the graphics. It was their Christmas present to her last year, but was longer in the making than they’d all expected. But it’s up now, and you can even see one of the quilts I’ve made with Bobbie’s blocks in the Photo Gallery.


Sewing machine fairies

22 09 2008

Funny how things happen… As regular readers of this blog know, I’ve been considering purchasing a new sewing machine since we moved here 18 months ago and I started quilting again.

I staved off that purchase by trading my 33 year-old Bernina in on my Mum’s slightly newer 25 year-old Bernina, at her suggestion. But as my skills have developed and my needs have grown, I realised that I needed a machine that was better able to do things such as free motion embroidery and the like.

I’ve done some investigation and had decided on the Husqvarna Sapphire 870. I was all ready to put in my order when my friend Bobbie offered to loan me her Sapphire 830 for a while. It was 12 months old but virtually brand new as she’d hardly used it while they were building their house, but she was thinking of upgrading to the latest Pfaff, which has just been released. However, she had to find out from the Pfaff people whether a particular part she’d bought for the Husqvarna would work on the Pfaff. She offered me a good price on her 830, should I decide to buy it *if* she decided to purchase the Pfaff.

Anyhow, long story short… Last week, Di from the fabric store asks if I’m still interested in the 870, Bobbie finds out that the new Pfaff will work with the part, and my Mum calls to say my old machine has died! So, Mum picks up her old machine, I decide to purchase the Sapphire 870 at Di’s ‘good deal’ price, and Bobbie decides not to get the new Pfaff, so I return hers to her. Phew!

I think the sewing machine fairies were at work last week making sure that this all happened the way it was meant to happen! Mum keeps her machine, Bobbie keeps hers, and my old now-dead machine gets replaced with a Husqvarna Sapphire 870! Meantime, my old machine is going to an ex-electrician at my folks’ retirement village who will see if he can fix it and then Mum will donate it to charity or one of the people in the retirement village.

BTW, my Mum has taken up basic sewing again. My niece (her granddaughter) visited an orphanage in Africa a couple of months ago and one way that she can help is to get people to make cloth nappies (diapers) and bibs for the babies out of old towels. So Mum’s doing a lot of that.



Quilting: Easy double-fold bias tape

22 09 2008

I’m off to a Japanese Meshwork workshop this coming weekend and had to cut the fabrics and make double-fold bias strips from it. Bobbie lent me her 1/2″ bias tape maker, but I wasn’t happy with the results on my first few tries. I just couldn’t get the folds even, and on the lighter fabric, I got puckering in the centre, even when using spray starch to ‘crisp’ up the fabric.

So off to the internet to see if there was an easier way! I couldn’t find anything on YouTube but I did find an easy method here:
http://creativelittledaisy.typepad.com/creative_little_daisy/2007/11/diy-version-of.html

In case that blog post ever goes missing, here’s my variation on it (apologies for the blurriness of some of these photos).

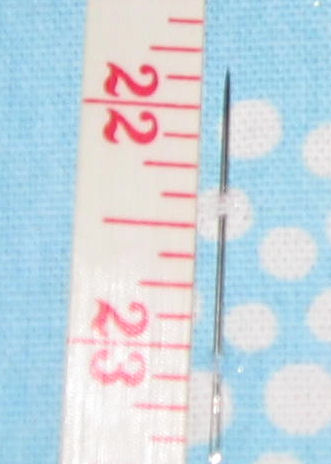
Position a needle on the ironing board so that the gap between the ‘grabs’ of ironing board fabric is 1/2″.

Needle on ironing board with 1/2" gap

Needle on ironing board with 1/2″ gap

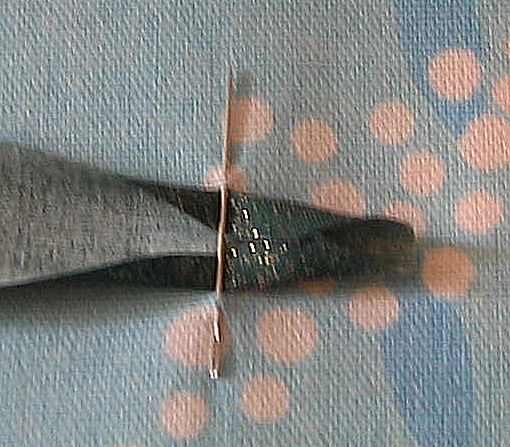
Clip one end of a 1 inch fabric strip to a point so that it can slip under the needle easily.

Snip the end and pull through gap

Snip the end and pull through gap

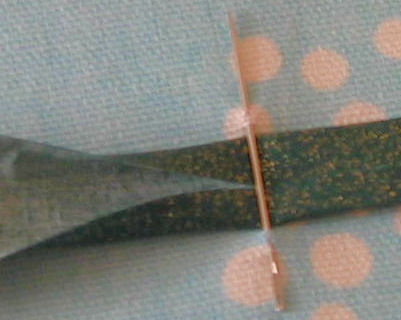
When you gently pull the fabric through, you may need to wiggle it a bit to get the folds even.

Wiggle the folds to make even, if necessary

Gently pull the fabric through, about an inch or two at a time. Watch that the folds remain even, and help guide the fabric through if necessary. I found that with some fabrics I had to use my left hand on the lower fold to keep it even—the upper fold sorted itself out when I did this.

Pull through gently

Pull through gently

Iron as you go. Press each inch or two as you pull it through the needle. Be careful you don’t burn you fingers—the fabric gets pretty hot with all that pressing.

Iron as you go

Iron as you go

End result—perfect 1/2 inch double-fold bias tape strips! Give the strips a squirt of spray starch and a final press, then, if you’re not using them straight away, roll them around a cardboard tube and pin until you need them. The folds will separate if you’re not using them immediately.

Perfect 1/2 inch double-fold bias tape

Perfect 1/2 inch double-fold bias tape


Quilt workshop: Cosmic Curves convergence quilt: Finished

20 09 2008
Sun and Earth convergence quilt

Sun and Earth convergence quilt

I finished quilting and binding the “Cosmic Curves” convergence quilt the other day. So it’s done.

Sun - free motion embroidered in metallic gold thread

Sun - free motion embroidered in metallic gold thread

I used a lot of gold metallic thread and did free motion embroidery for the sun and around every little circle (waterhole) on the Aboriginal-style fabric.

Gold metallic embroidery

Gold metallic embroidery

And I used the same gold metallic thread for the ‘animal tracks’ in the frame, as well as to outline all the ochre lines in the border. You can’t see it in the photos, but I used a maroon thread to outline all the purple lines in the border.

Contours on the earth

Contours on the earth

I tried to make the earth more ‘earthy’ by adding ‘contour lines’ in a matching thread.

More photos…


Quilt binding: Joining the ends

17 09 2008

I’ve always fudged joining the ends of the bindings on my quilts, but decided it was time to learn how to do it properly so you can’t see where the join is. There’s a great video on how to do this on YouTube (see below). I’ve used it a few times now, and my bindings are now perfect!

Update: There are printable PDF instructions of the same technique here: http://www.heatherbaileydesign.com/HB_QuiltBinding.pdf