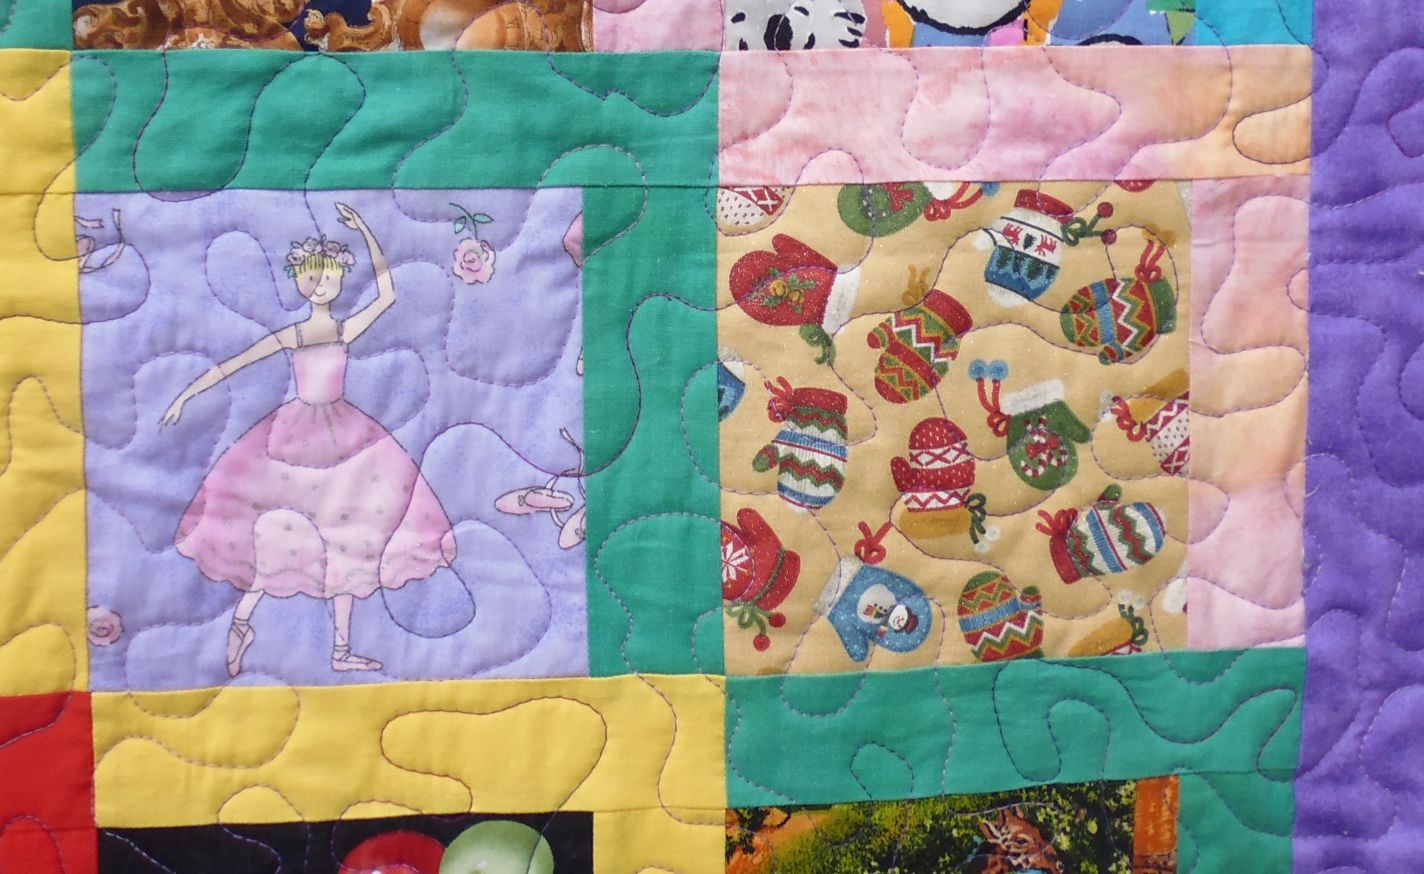
This ‘eye spy’ quilt was SO busy with all those fabrics and colours that the simplest thing to do was a big meandering stipple! No stitch in the ditch at all — I just started from about the centre and worked my way out and around until it was all done.
I used a variegated thread in multiple shades of purple and it worked well, I thought.
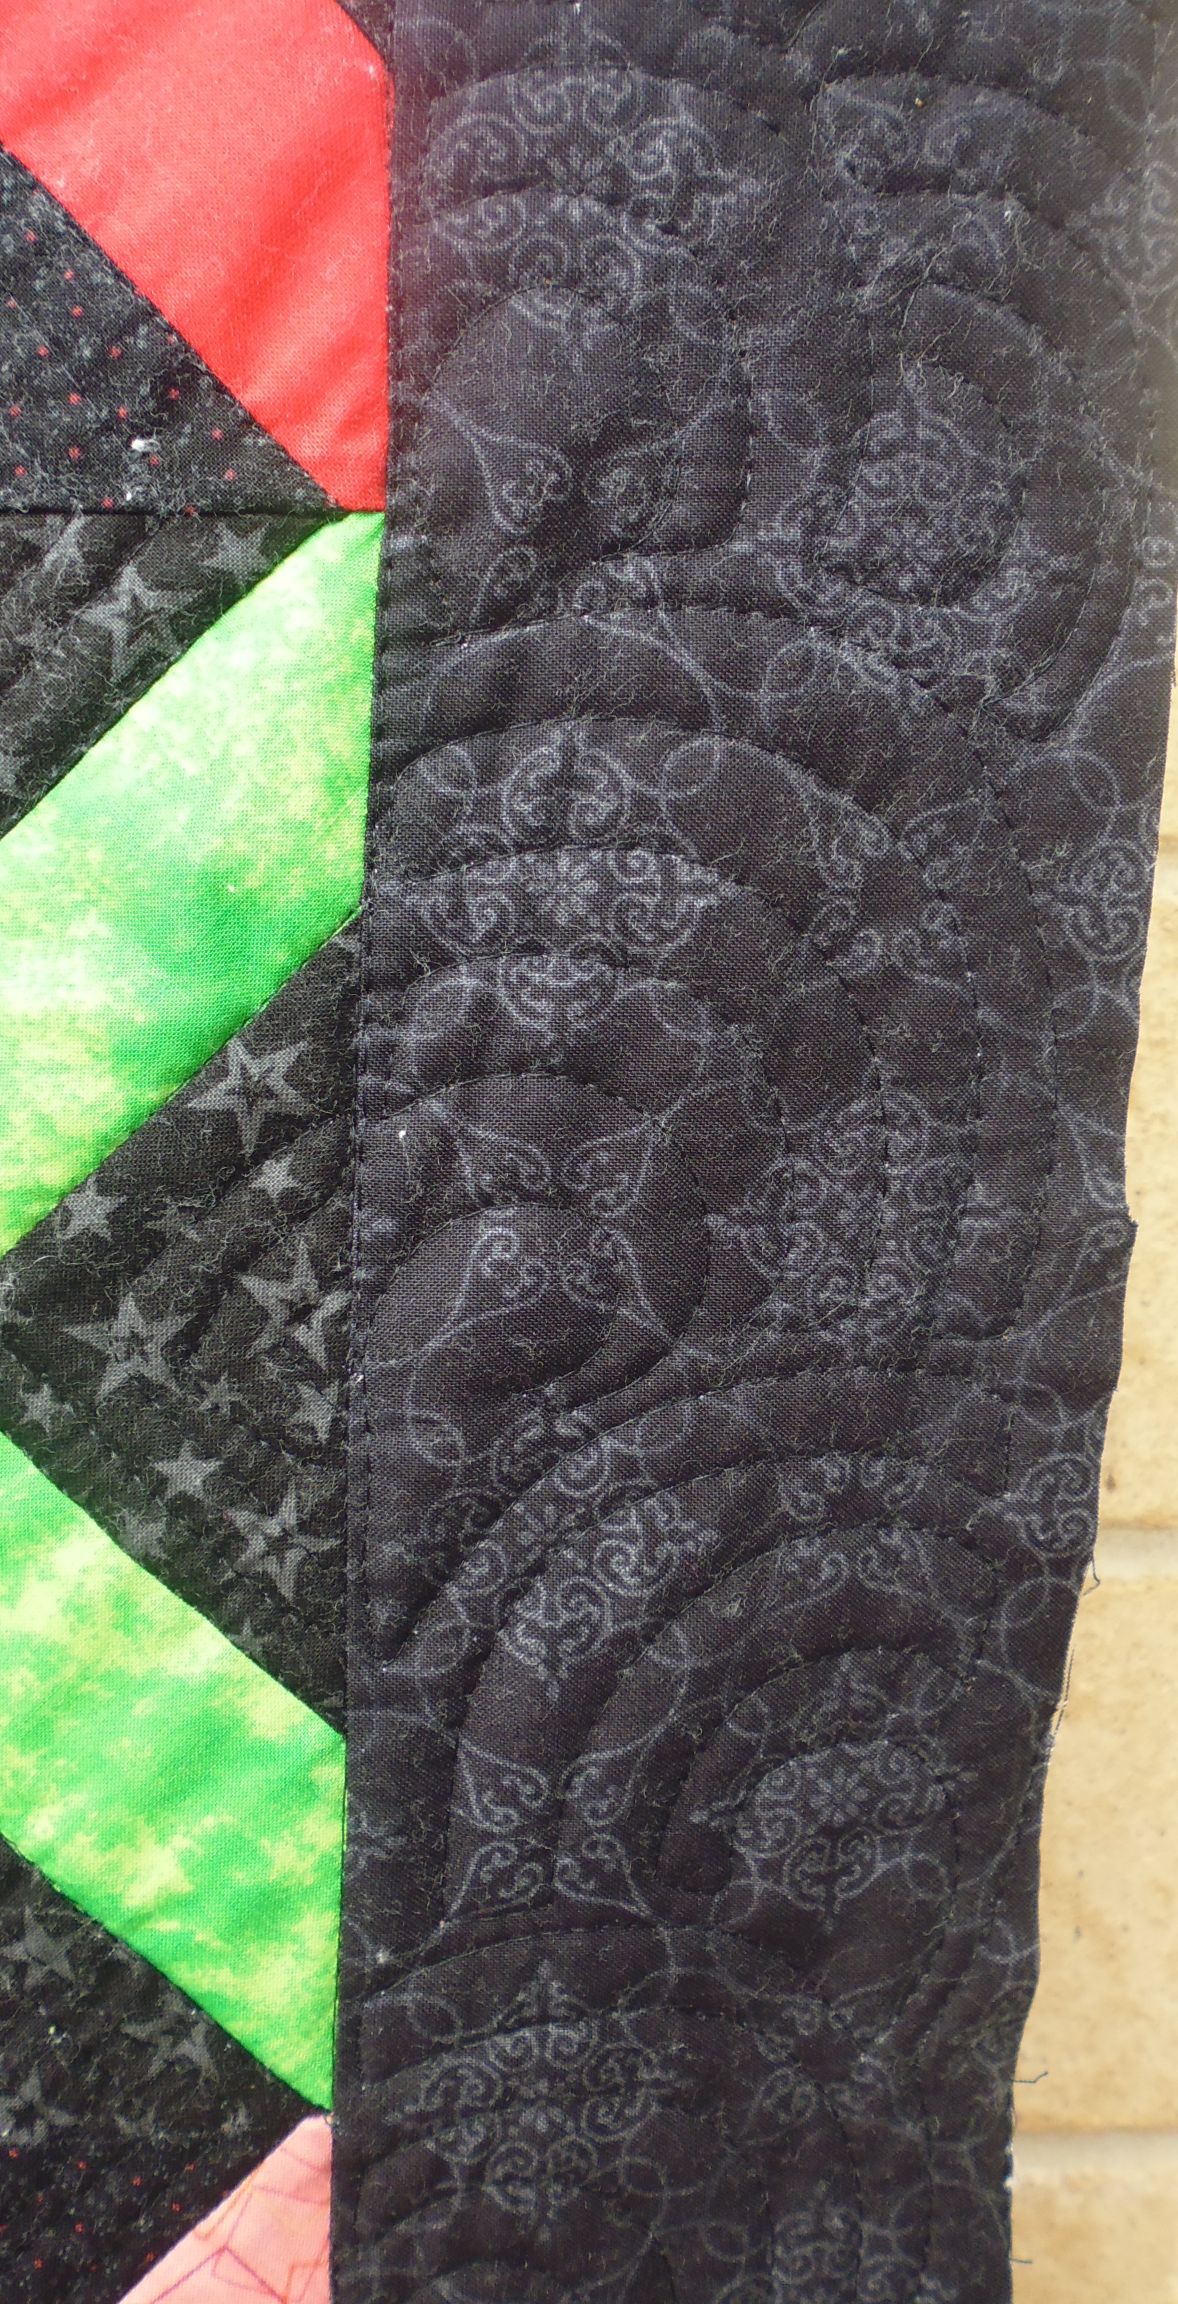
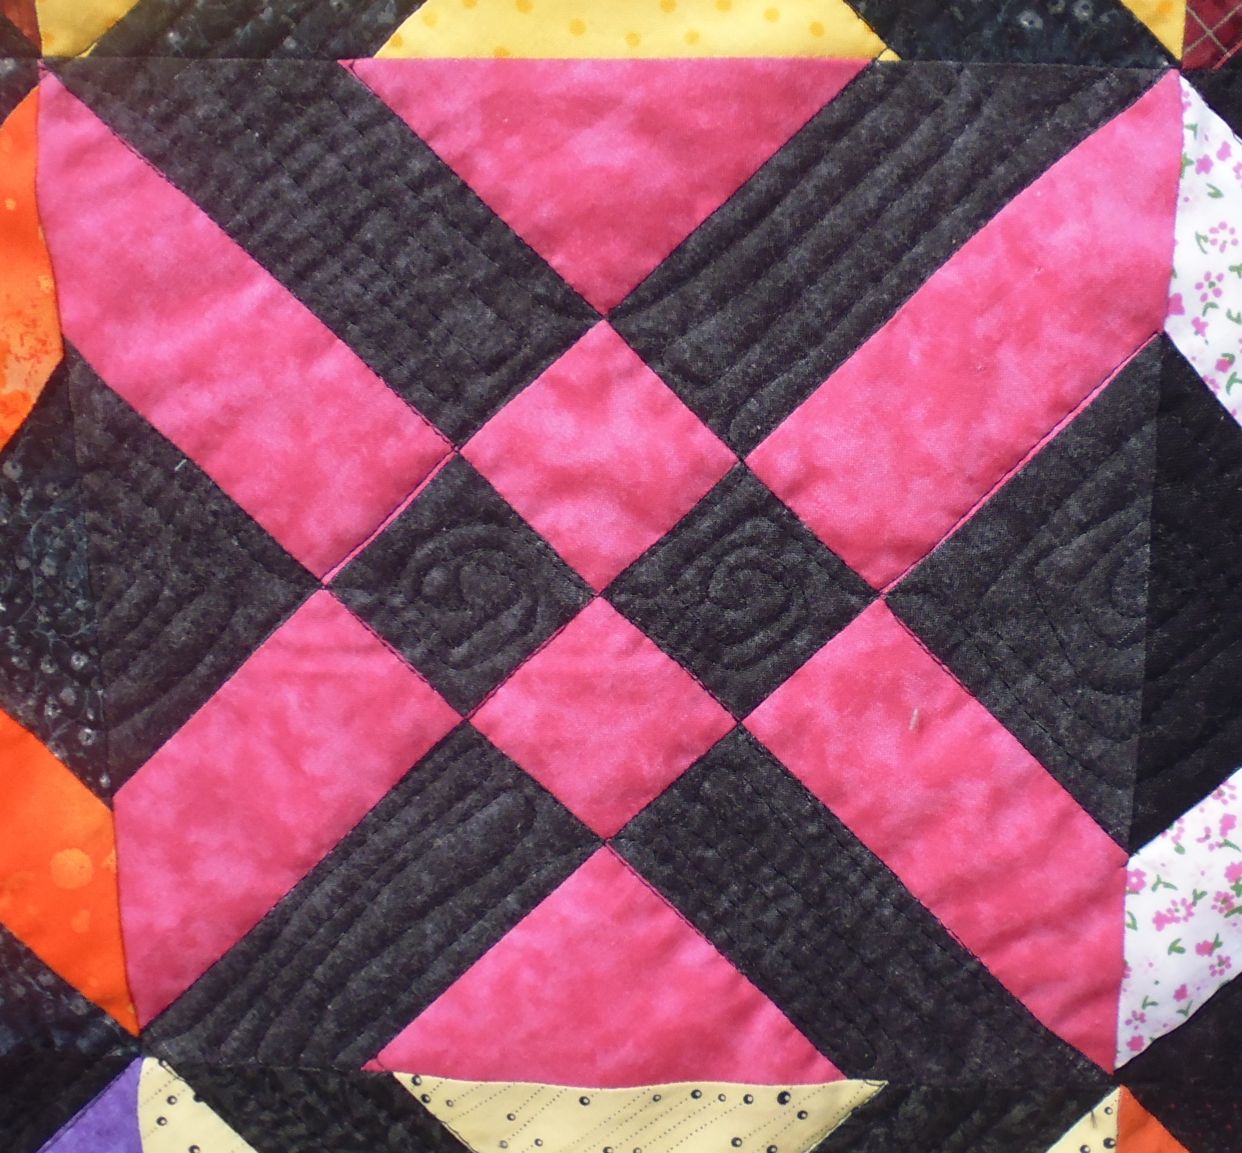
I started by stitching in the ditch along all the seams in this quilt. Then to make the colours pop, I stitched ‘wonky’ straight lines in the black bars and a sort of squared off spiral in the large and small on-point squares.
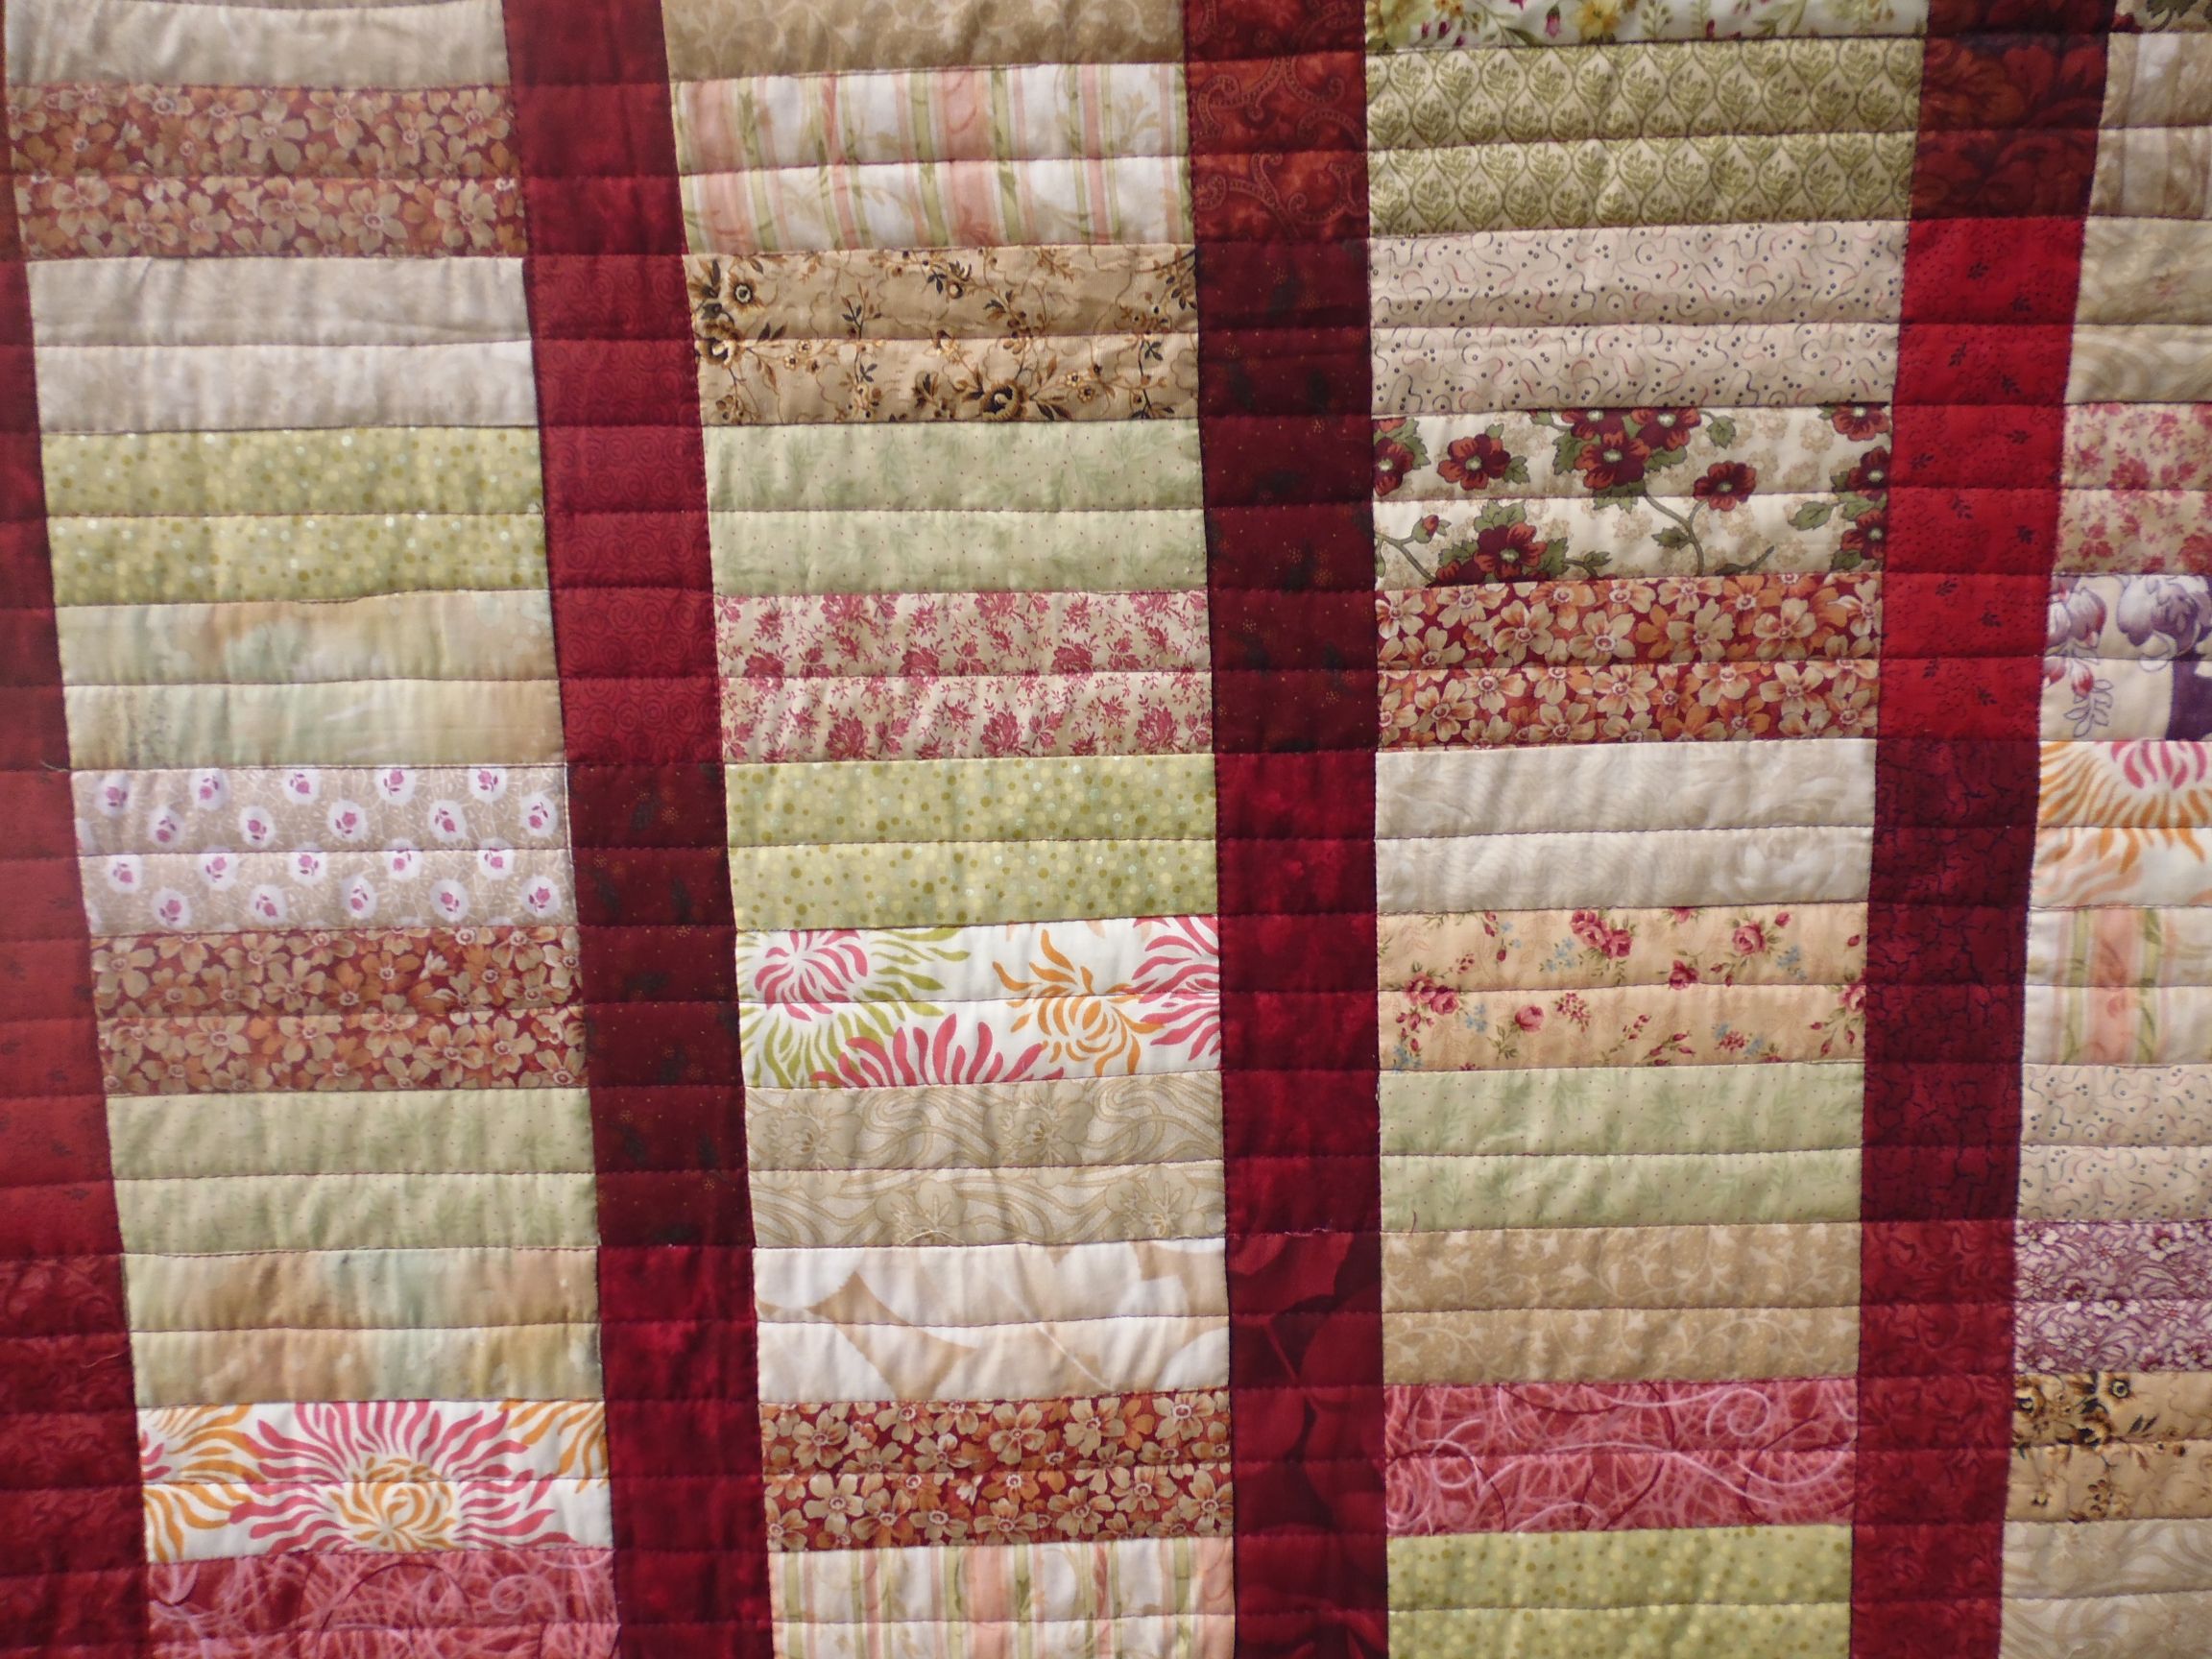
This ‘Chinese coin’ quilt just called out for some straight ‘modern-style’ stitching across it, so that’s what I did after first stitching in the ditch around each of the dark borders. My Line Tamer ruler got a decent workout on this quilt!
I liked the final effect of the dark burgundy thread on the lighter fabrics.
(Click on a photo to view it larger)
Threads used:
Top: Robison-Anton (rayon, 40 wt, maroon/burgundy colour of some sort)
Bottom: Fil-Tec Magna Glide Classic pre-wound bobbin (lead gray)
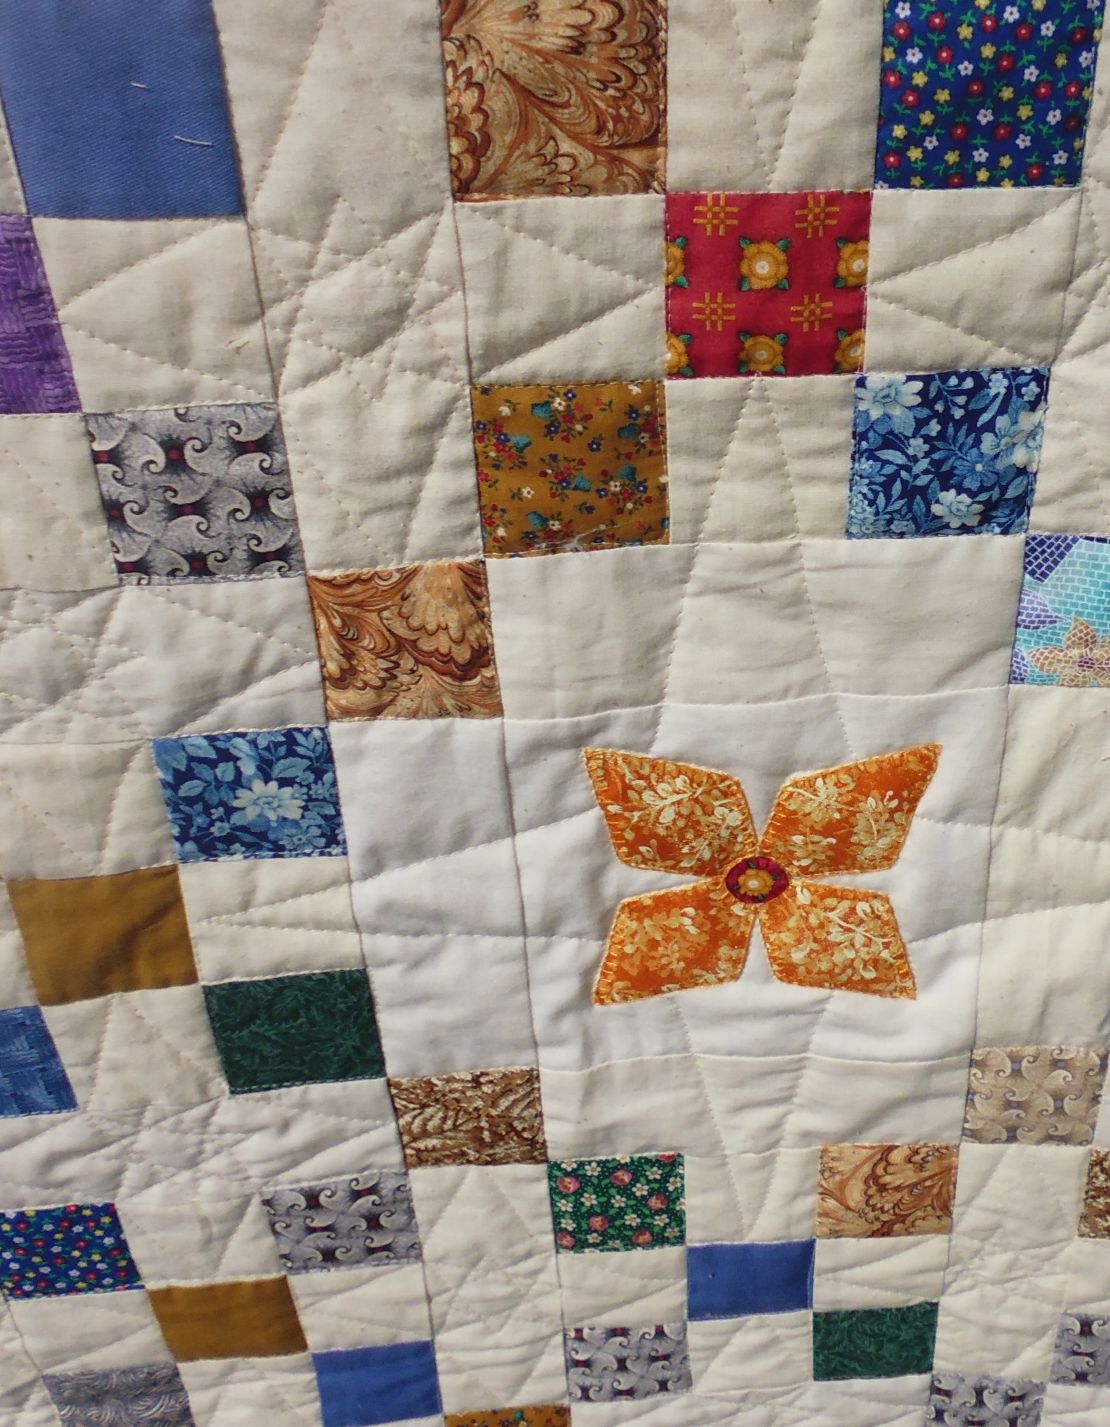
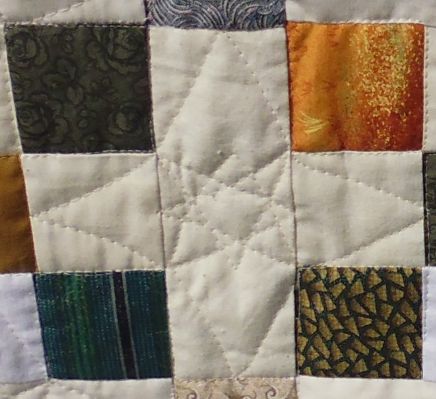
This quilt just didn’t ‘sing’ to me and I took ages trying to figure out how to quilt it. It sat on the back of a sofa for a couple of weeks first, with me hoping to get inspired every time I passed it. It wasn’t to be…
I knew I’d have to stitch in the ditch around all the scrap fabric squares, so I started with that. The empty white spaces were then quite puffy, so I did a simple point-to-point star effect, but still the middles were too puffy, so I did an eight-pointed star inside each one of the big white spaces.
Not my favorite quilt to quilt, and it was BIG too.
(Click on a photo to view it larger)
Threads used:
Top: Mettler Metrosene Plus (polyester, colour 0781)
Bottom: Fil-Tec Magna Glide Classic pre-wound bobbin (white)
This was a BIG quilt, all in a striking arrangement of pretty batiks. The orange squares really set off the blue/green/aqua batiks, so a neon orange became my thread colour choice for the quilting.
As this quilt pattern was so geometric, I decided to do a squared off stipple all over the quilt. Unlike other types of stippling, this one requires you to cross lines 😉
And if you look closely, you’ll see my lines aren’t perfectly straight — and that’s OK. The overall look is of rectangles and squares, even though I suspect there’s not a perfectly straight line anywhere on the quilt. If I’d wanted perfectly straight lines, I’d have used a ruler, but that would’ve added about 10 hours to this quilt.
As it was I had a few issues with the Glide thread — the first issues I’ve ever had with Glide. For some reason, the top thread was very tight at times and snapped. I couldn’t figure it out, but it wasn’t enough for me to abandon the thread and go with something else. It’s possible the thread and the batik fabric didn’t play nice together, and it may not have been the thread alone (I’ve used this thread spool on other quilts without a problem).
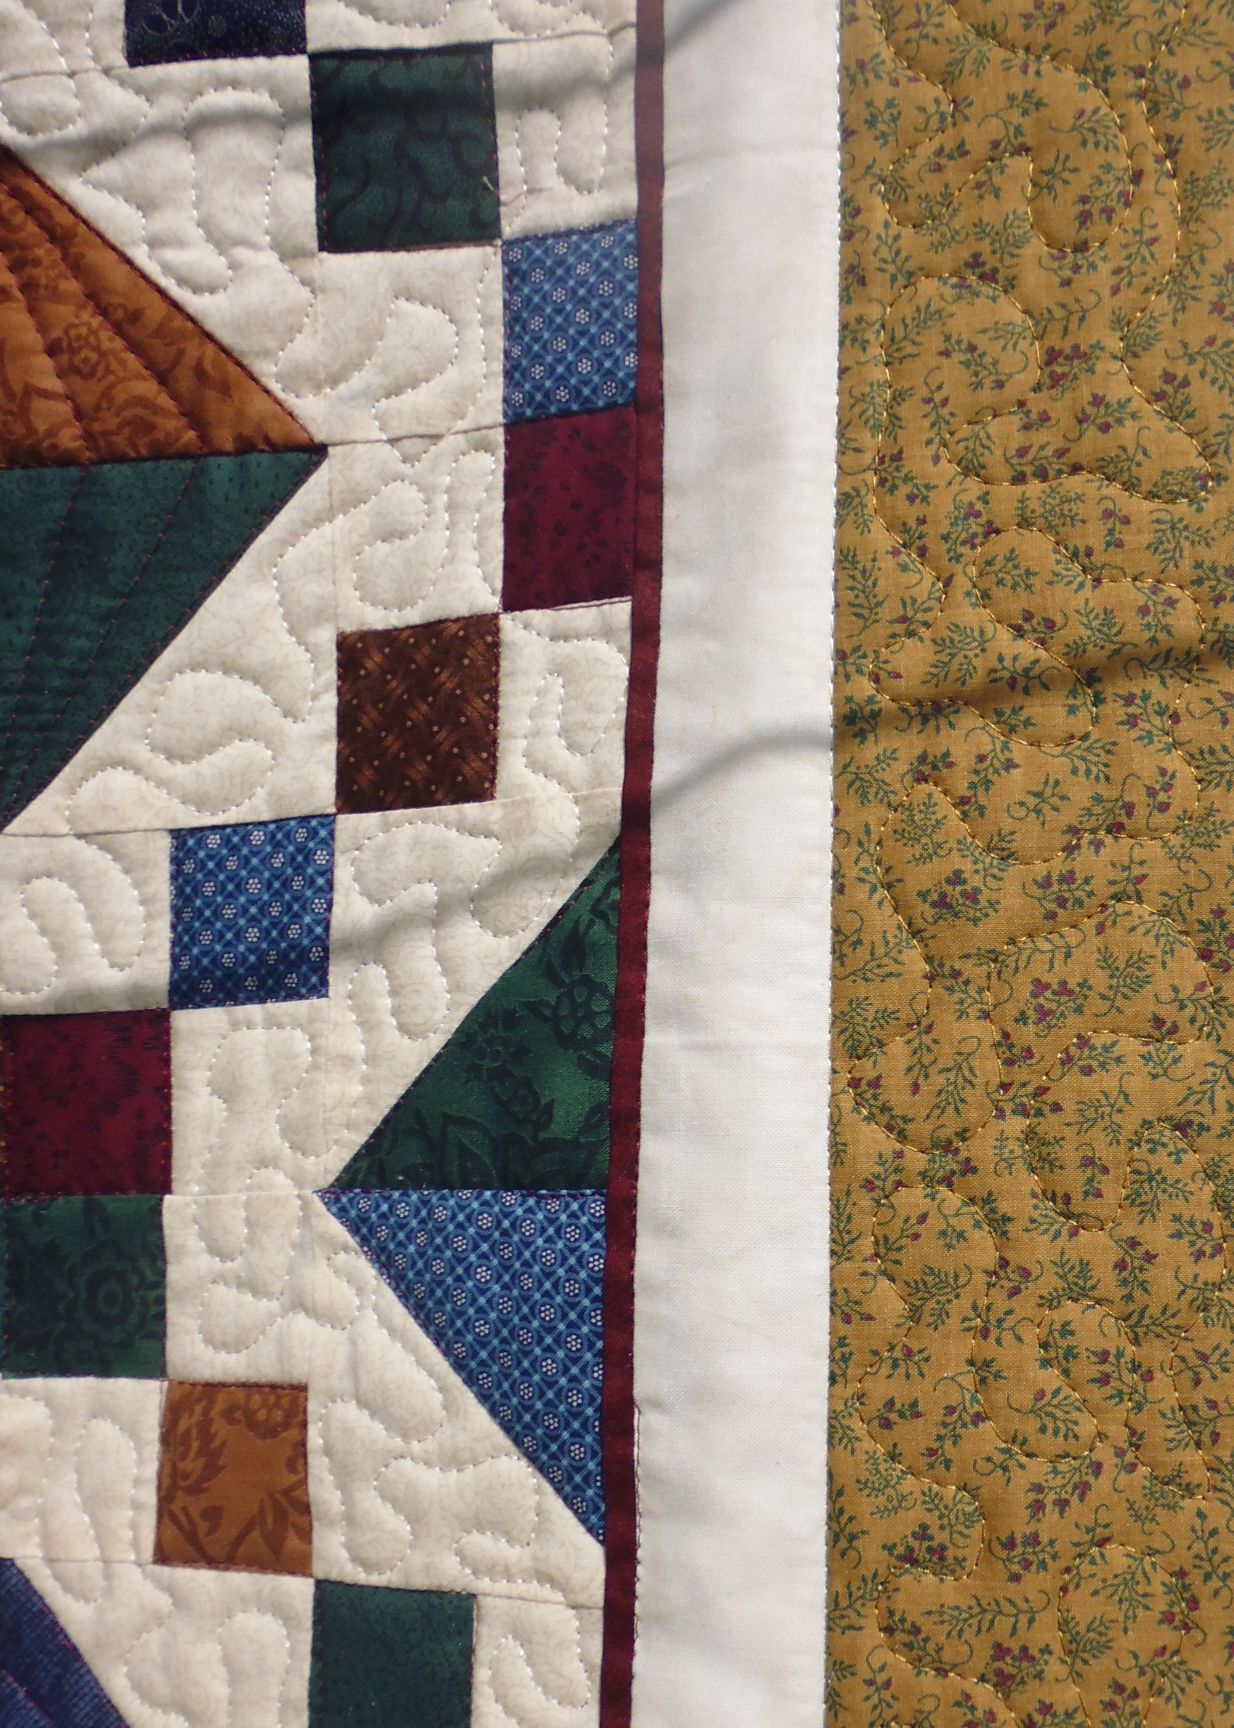
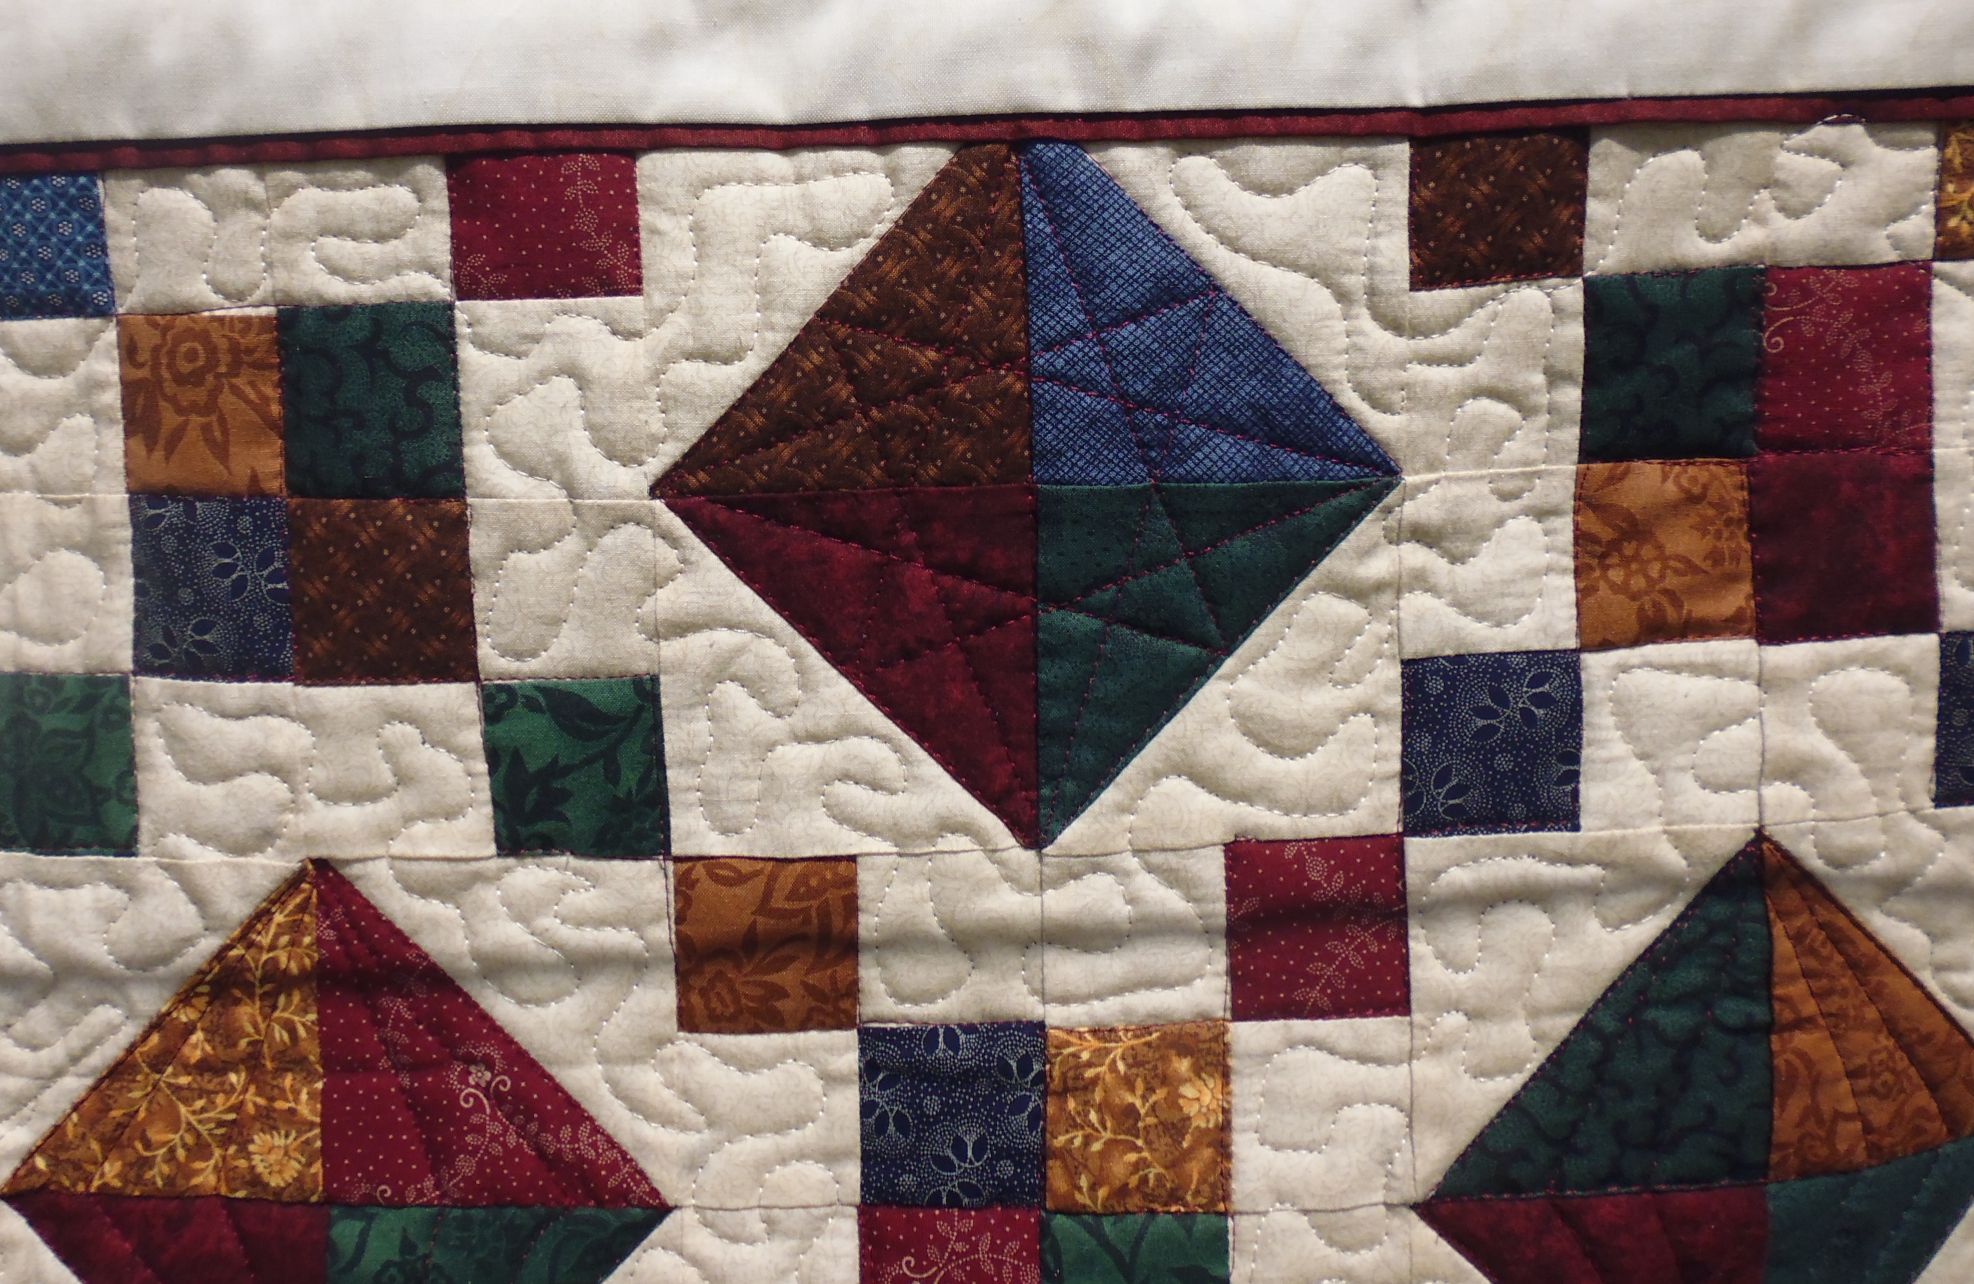
This smallish quilt took ages to quilt, as I stitched in the ditch around EVERY coloured square and the borders. Once I’d done that, I stitched various largish motifs inside each large on-point square, then did a simple meandering stipple in the white space and in the border.
Just some simple stuff.
(Click on a photo to view it larger)
Threads used:
Top: Robison-Anton (40 wt rayon? maroon/burgundy for the stitch in the ditch, and ‘Old Gold’ for the stippled border); Fil-Tec Glide for the white space stipple (40 wt trilobal polyester, ‘Cream’ colour 20001)
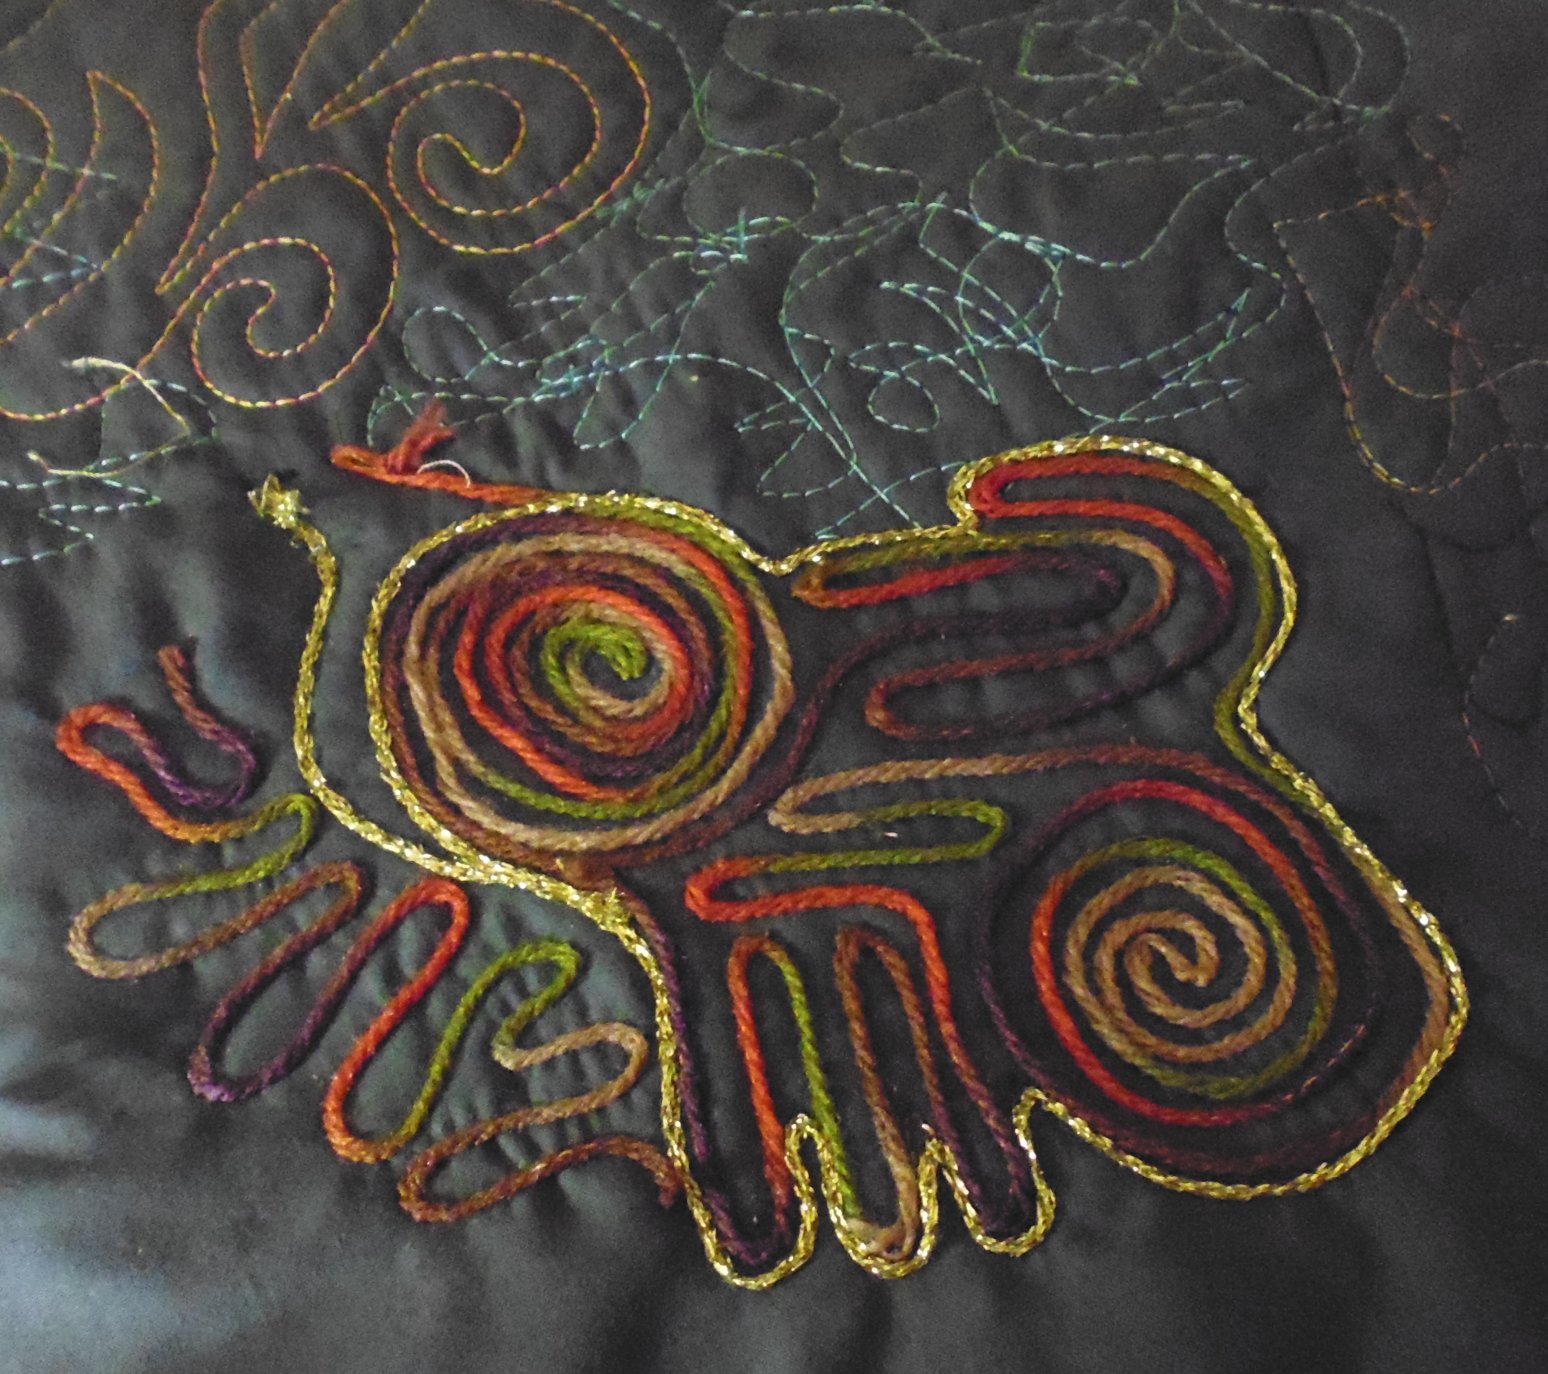
I purchased the conversion kit and couching foot kit for my Handi Quilter Sweet Sixteen a few weeks back, and had my first ‘play’ while on my annual quilt retreat with the girls a month ago. Life has sort of got in the way since then, so today was my first time back playing with the couching foot.
In the interim I’d bought some cheap yarn from Spotlight, so it was time to try it out.
First, here’s a video from Handi Quilter on using the couching foot. The instructions for starting off are around the 5-minute mark and again at the 8-minute and 10-minute marks. However, the instructions give you NO information on how to tie off/bury the yarn at the beginning/end of your stitching.
Here’s my first practice piece with both a variegated yarn and a gold metallic yarn. I was going too fast initially and thus my yarn wasn’t always caught by my needle — once I slowed down (25% speed or less), I had no trouble. I used the middle couching foot (2 mm, I think)
After I’d finished that piece, I decided to do something on a spare quilt sandwich I had in a navy linen-like fabric. I’d seen an image of a boomerang and thought it would quilt well, so I did all the inner couching with the variegated yarn, and the outer edge with the gold metallic yarn. Some practice still required!
It all looked a bit plain, so I filled in the inner part of the boomerang with a scribble stitch just using the brown variegated thread I had in the needle for the couching. Then I made up some elongated curved lines and spirals for the rest of the small sandwich, emulating the spiral pattern inside the boomerang.
It was fun! I’m not sure how much I’ll use it, but it’s good to know how. However, I still have to find a quick and easy way of tieing off at the beginning/end without doing it by hand, and without the cut ends of the yarn fraying.
It’s really very easy — you go from the middle of one side to its opposite corner, then to the opposite middle, then the opposite corner etc. until you get back to the beginning. It’s easier to explain in a simple diagram!
You can start at any mid point or corner point — in this diagram I’ve started at a mid point. Follow the arrows and the numbers (1 to 8) to create your own 8-pointed slightly wonky star!
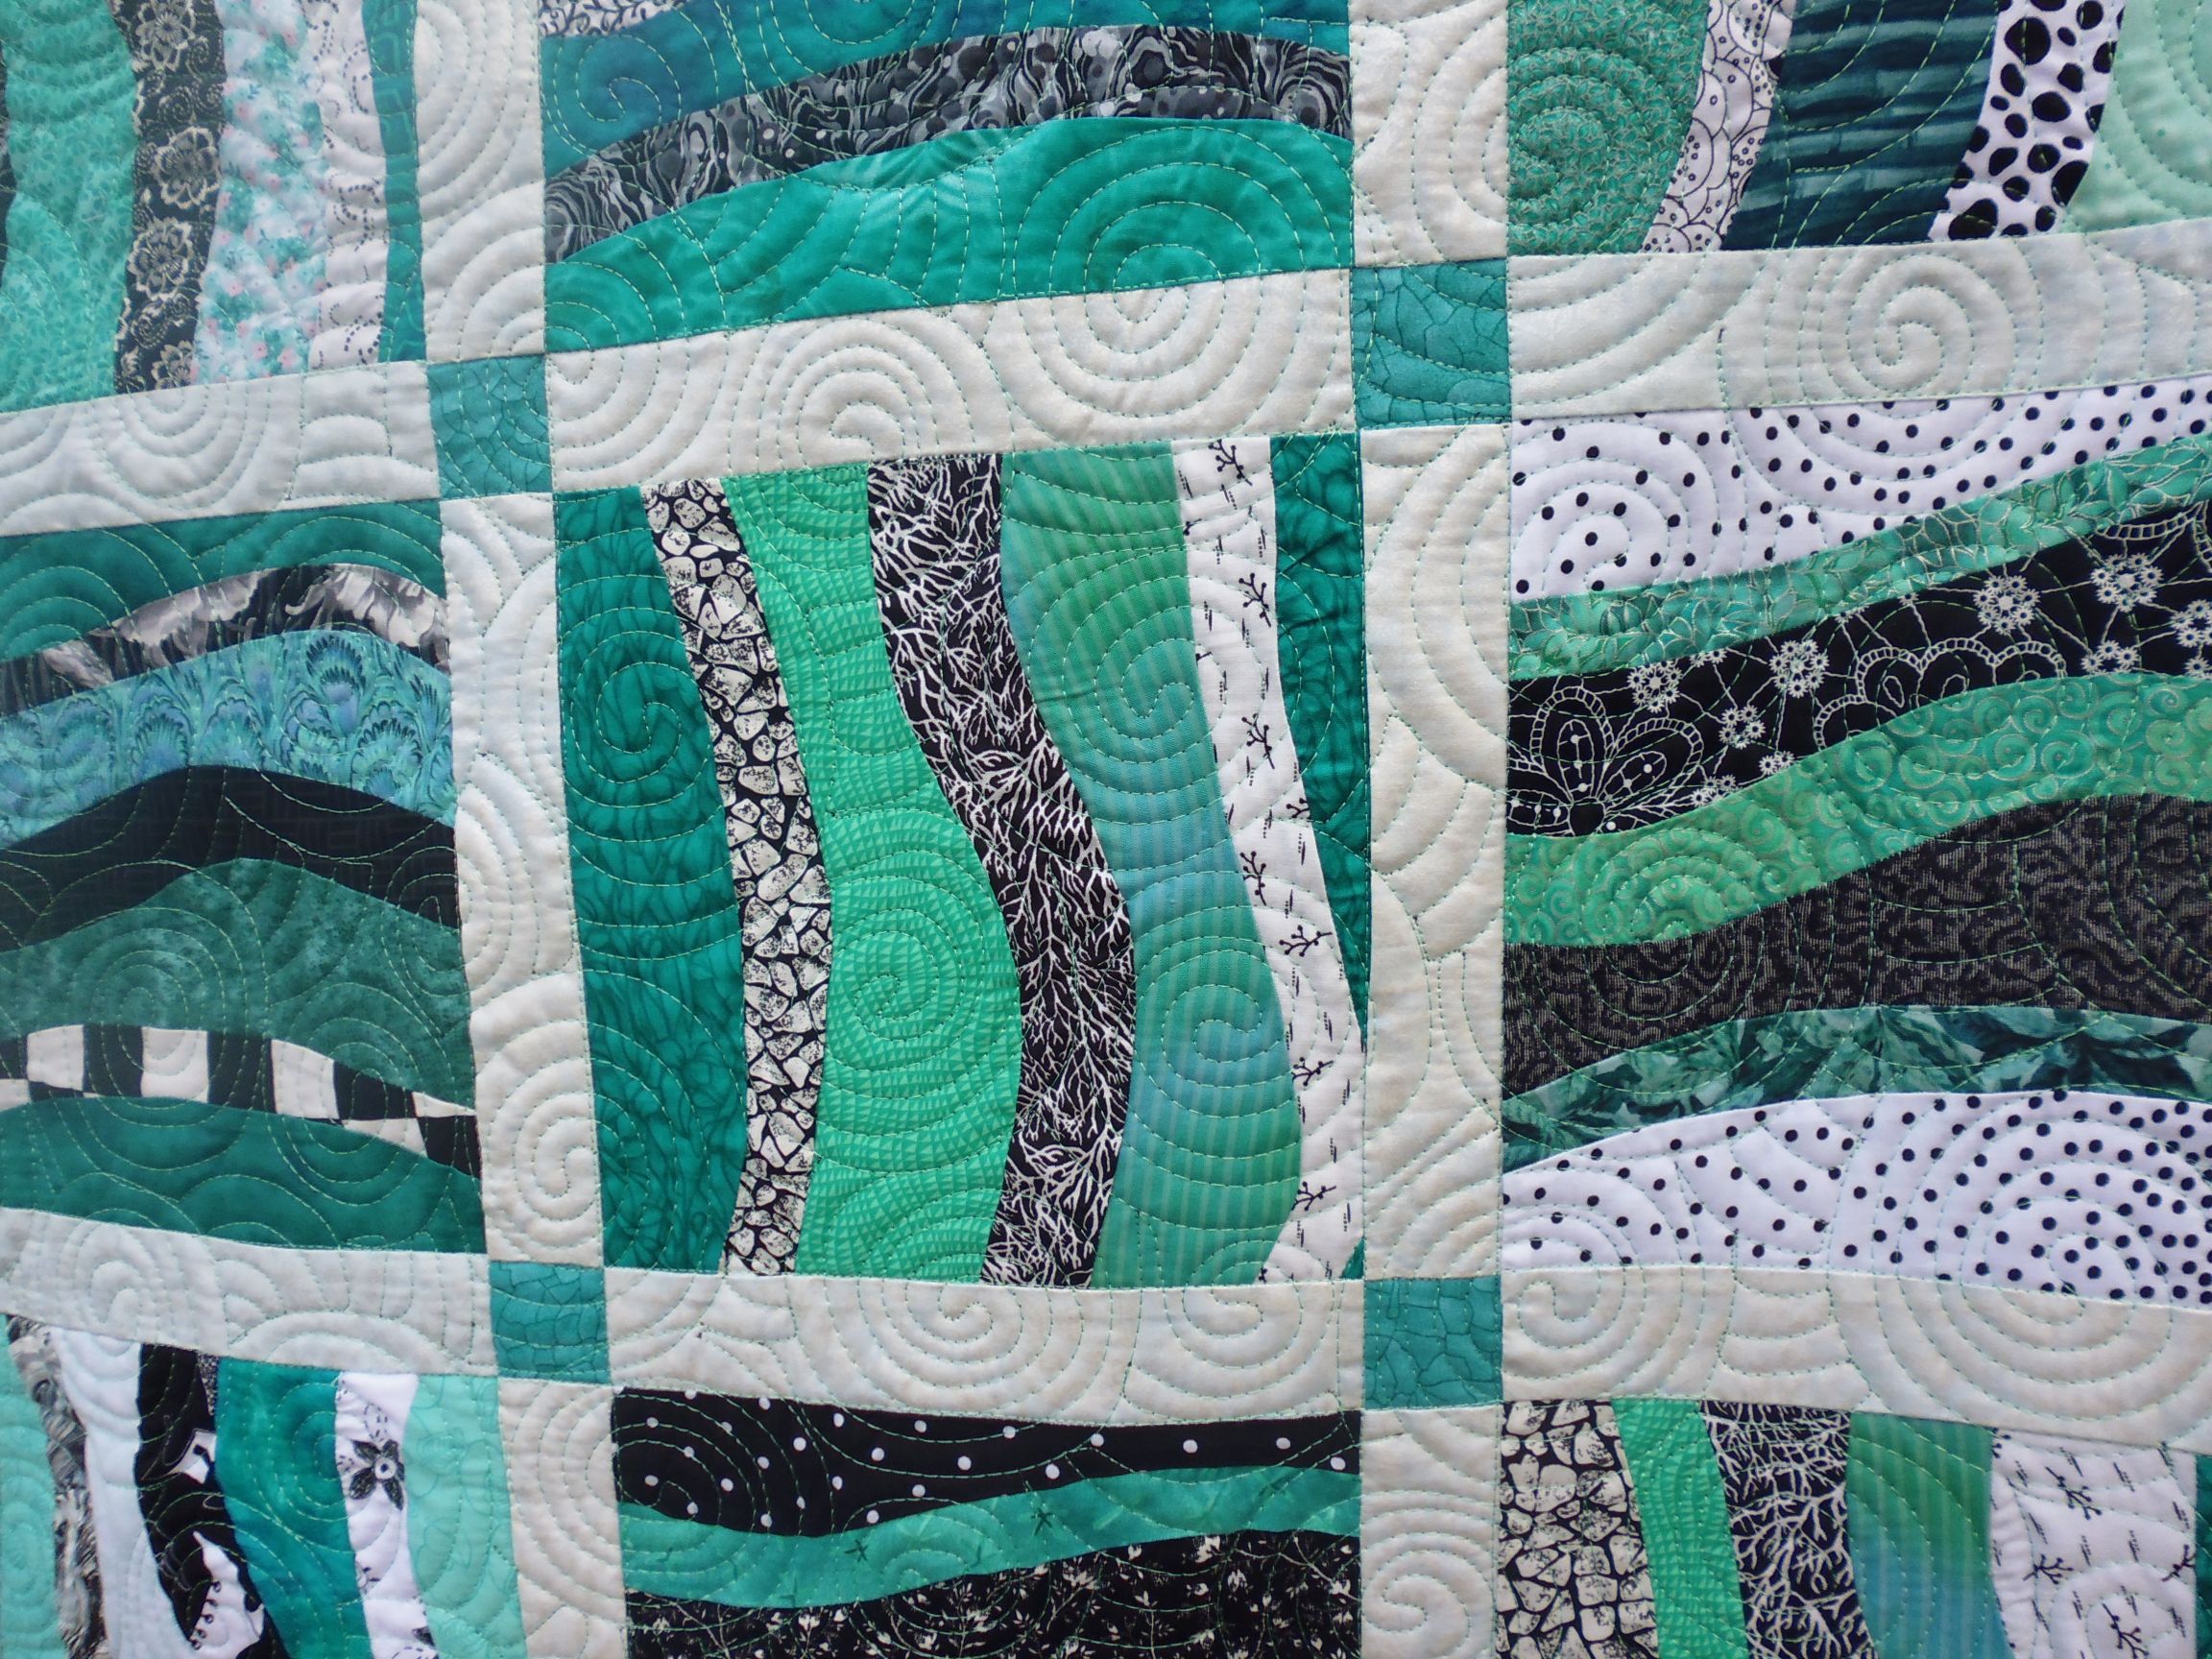
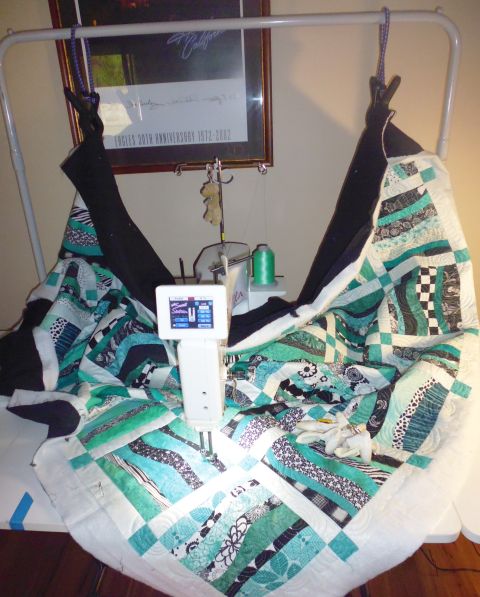
I loved the colours of this quilt! The aqua and black and white were so fresh and crisp, and set off perfectly by the plain black backing fabric.
With the colours and the wavy blocks, my first thought was to quilt it with parallel lines (with curved ends) emulating water, then I thought perhaps large bubbles (as in breaking waves), but decided on large spirals to emulate waves and water turbulence as I was on a deadline to finish this one and needed to quilt it with something that was big and that covered a lot of area fairly quickly.
It was a big quilt, so I used my bungee cord system to reduce drag and the weight of the quilt when moving it under the needle.
It took about 2 hours to stitch in the ditch around each block first, then about another 2 hours to do the spirals.
At our annual quilt retreat this year (first weekend in July), we didn’t have any challenge pieces to present to each other as we had a year off from challenges! But we still had ‘show and tell’ to show some of the work we’d collectively produced over the year. I haven’t included everything in these photos as some are unfinished gifts for others and to show them publicly now would spoil the surprise. I also haven’t included my ‘show and tell’ as I didn’t take photos of my own (and some are for gifts too). Unfortunately, the photos aren’t the best — I was using the camera and flash on my phone and everyone moved around too much as they enthusiastically explained their work 😉
Some of the works feature fabric painting and couching in metallic yarns, using the new couching foot on the Handi Quilter Sweet Sixteen.
(Click a photo to view it larger)
These are all just squares. The optical illusion is from the placement of the small black and white squares inside the larger squares
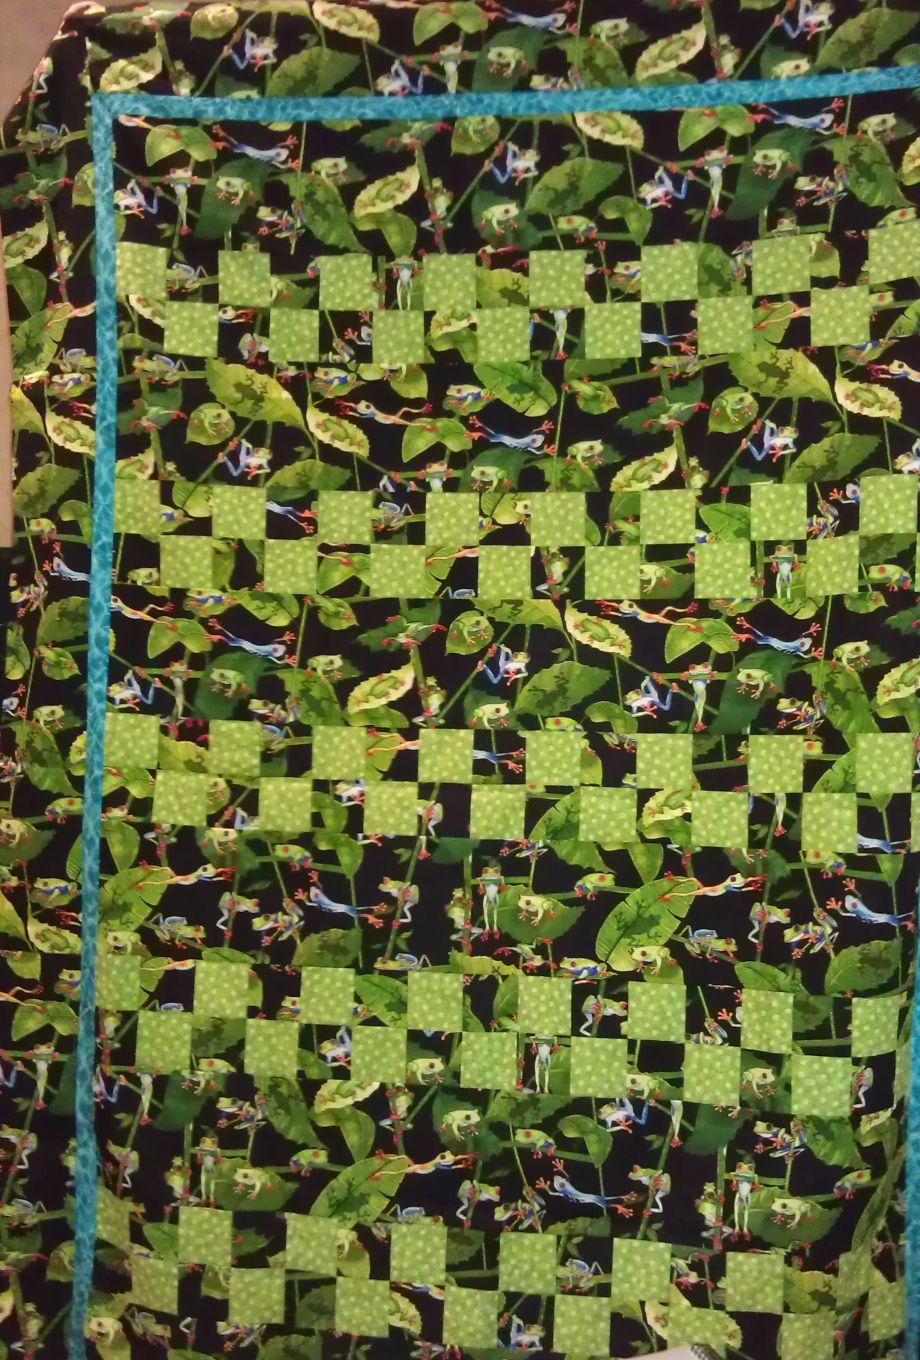
Frogs everywhere!
More frogs…
Cracked Pots from a Helen Godden class
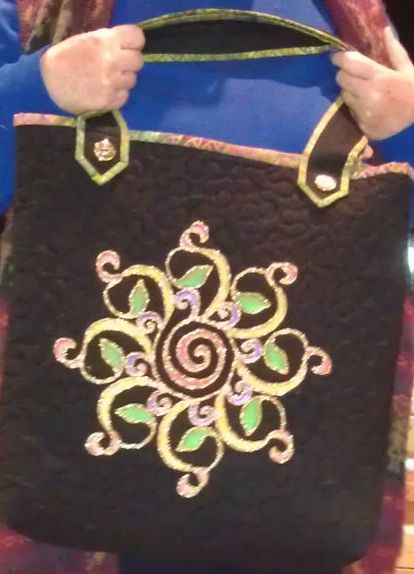
Fabric painting and gold yarn couching on a bag
Other side of the bag
Very organic… and STUNNING quilting (also with some couching in gold yarn)
STUNNING quilting!
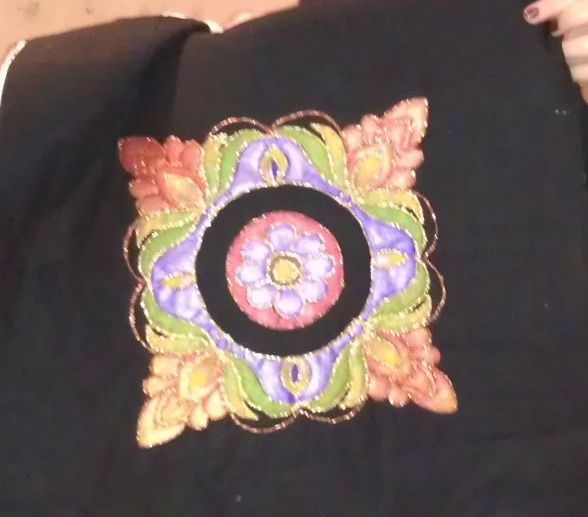
More fabric painting and gold yarn couching
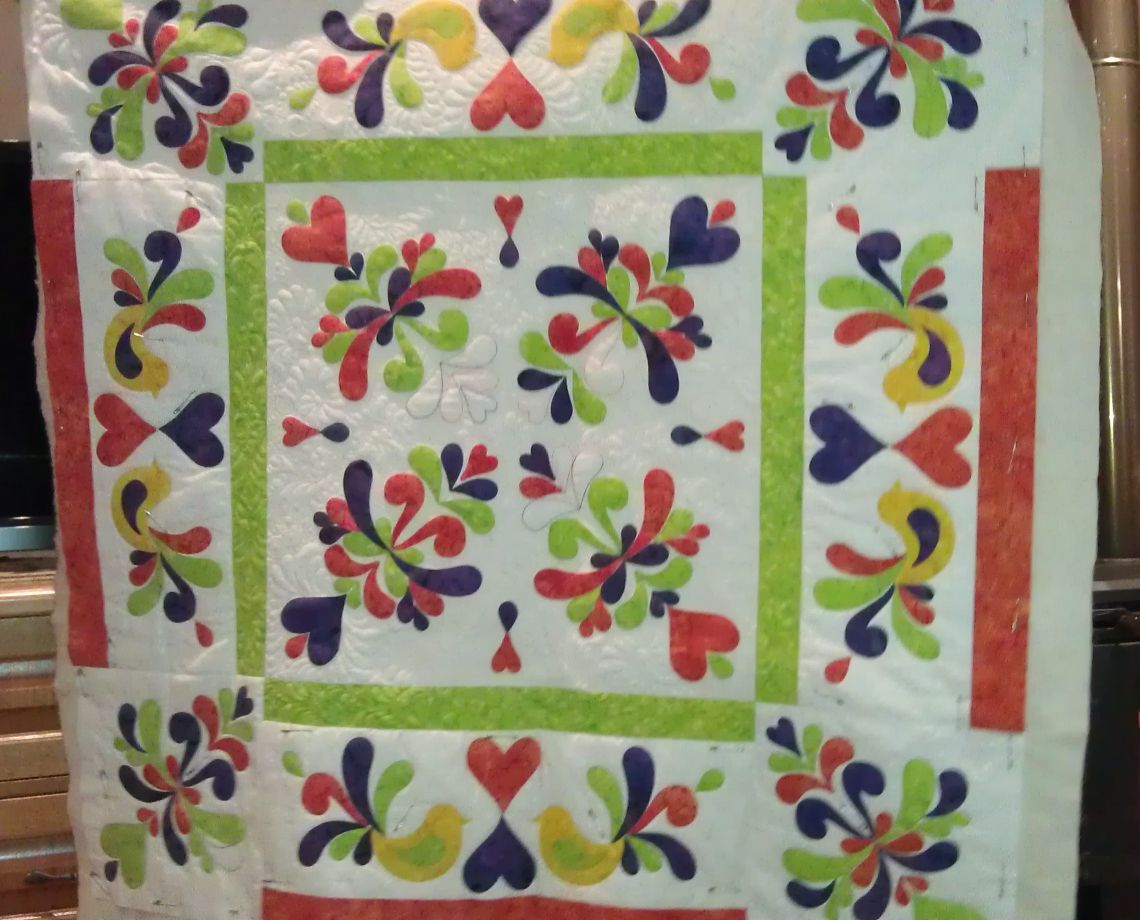
All applique pieces cut with an Accuquilt Go! Cutter die