If only chemistry was this interesting when I was at school

11 10 2019

My last two days’ of classes at the Quilt Symposium in Auckland were held in the chemistry lab at St Cuthbert’s School (the venue for the entire Symposium). We were surrounded with inspirational sayings, women role models, soft toys (I’m still not sure why they were there), and chemistry info sheets that were fascinating because they pertained to the real world.

If chemistry had been like this when I was at school I may well have continued on that path into university. Alas, chemistry in my day was dry, dull, and not at all relevant to ANYTHING as far as I could tell.

Here’s a small sample of some of the stuff that surrounded us in this chemistry lab.


Heating a sandwich when you don’t have a sandwich press

11 10 2019

At the Quilt Symposium in Auckland, NZ, last week, ‘brown bag’ lunches were provided. For most of the classes I was in, we got sandwiches, which were pretty fresh. But on the last day, we got stodgy rolls, which were dense, slightly stale, and really only suitable for toasting in a sandwich/cafe press. So what do you do when you don’t have such an appliance? You improvise!

We used both baking paper (a staple for any quilters who do fusible applique) and brown paper bags to protect the irons, and the end result was slightly toasted bread—toasted enough to make these rolls far more palatable. We didn’t apply heat long enough for the heat to get all the way through, but it was enough to take away some of the stodginess! MacGyver would be proud!


Quilt Symposium, Auckland, October 2019: Claire Smith’s Quilt-as-you-go Bag class

11 10 2019

I’m a bit late posting this as I had paid work to do as soon as I got home from NZ.

My last two days of classes at Quilt Symposium were both with Claire Smith (a Kiwi), and they were very different. The first was monoprinting, and the second was making a ‘quilt-as-you-go’ bag.

This bag was easy to make, and is fully lined. I even had time to add an outside pocket and two inside pockets. I also modified her design a little to add long handles, suitable for carrying this bag over your shoulder. I chose beachy colours—it would be perfect to take to the beach or have beside the pool, or even for more mundane things like shopping!

Some of the bags produced by the class


Quilt Symposium, Auckland, October 2019: Claire Smith’s Monoprinting class

11 10 2019

I’m a bit late posting this as I had paid work to do as soon as I got home from NZ.

My last two days of classes at Quilt Symposium were both with Claire Smith (a Kiwi), and they were very different. The first was monoprinting, a technique I’ve never tried before. I really enjoyed the process and the variations of what you can produce. I’ll likely use it again.

By definition, monoprinting means getting a single print from a painted surface. Here’s a summary of the steps:

  1. Lay down a paint medium on a surface (we used old x-ray films [with foam rollers], and Gelli plates [with a special brayer]; the paint was a thick acrylic paint like that used by school children).
  2. Optional: Use various objects and textures to make designs in the paint (I used everything from clothes pegs to the end of paint brushes, to notched baking scrapers, to bubble wrap, to fronds and leaves). NOTE: If you want to write something, you’ll have to write it backwards on the painted surface so that it prints ‘right side up’.
  3. Lay a piece of plain fabric over the top of the painted/marked surface.
  4. Gently rub the fabric to transfer the paint and design onto it.
  5. Remove the fabric from the surface and allow to dry.
  6. Once dry, repeat with different paints/patterns to create various print layers, or, if you’re happy with the result, iron the fabric to heat set the acrylic paint.
  7. Repeat for each other piece of fabric you want to print.

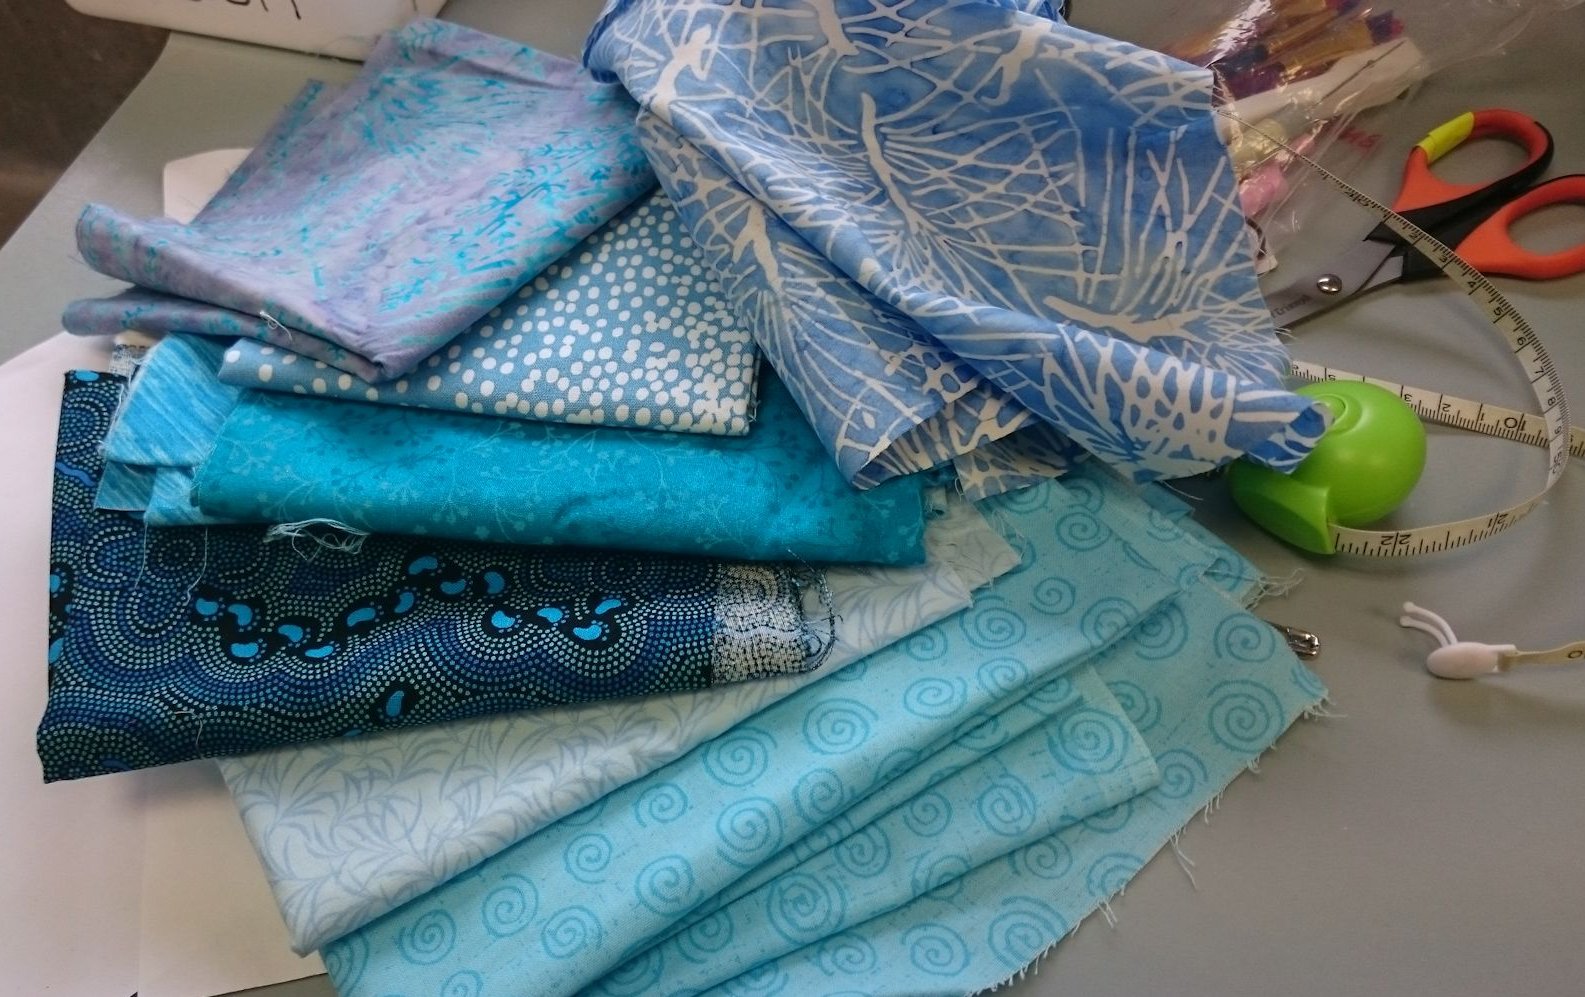
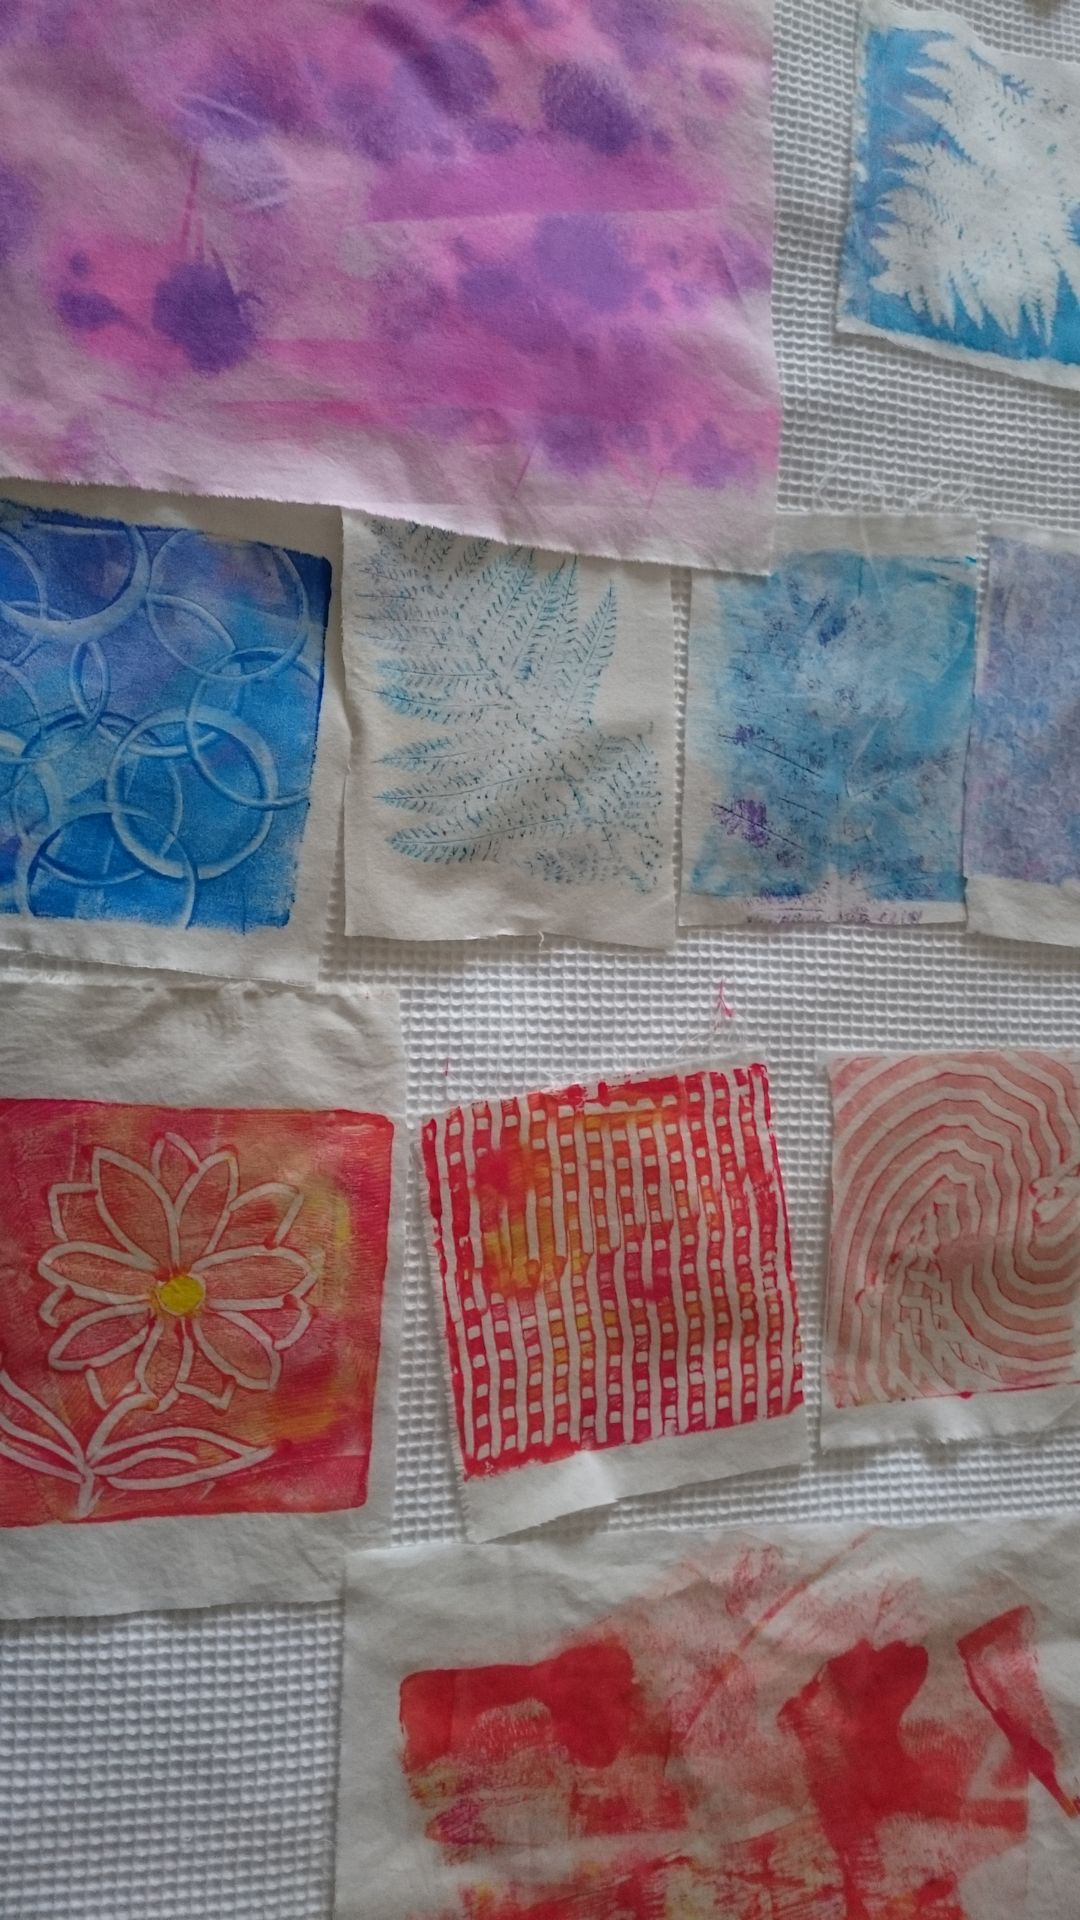
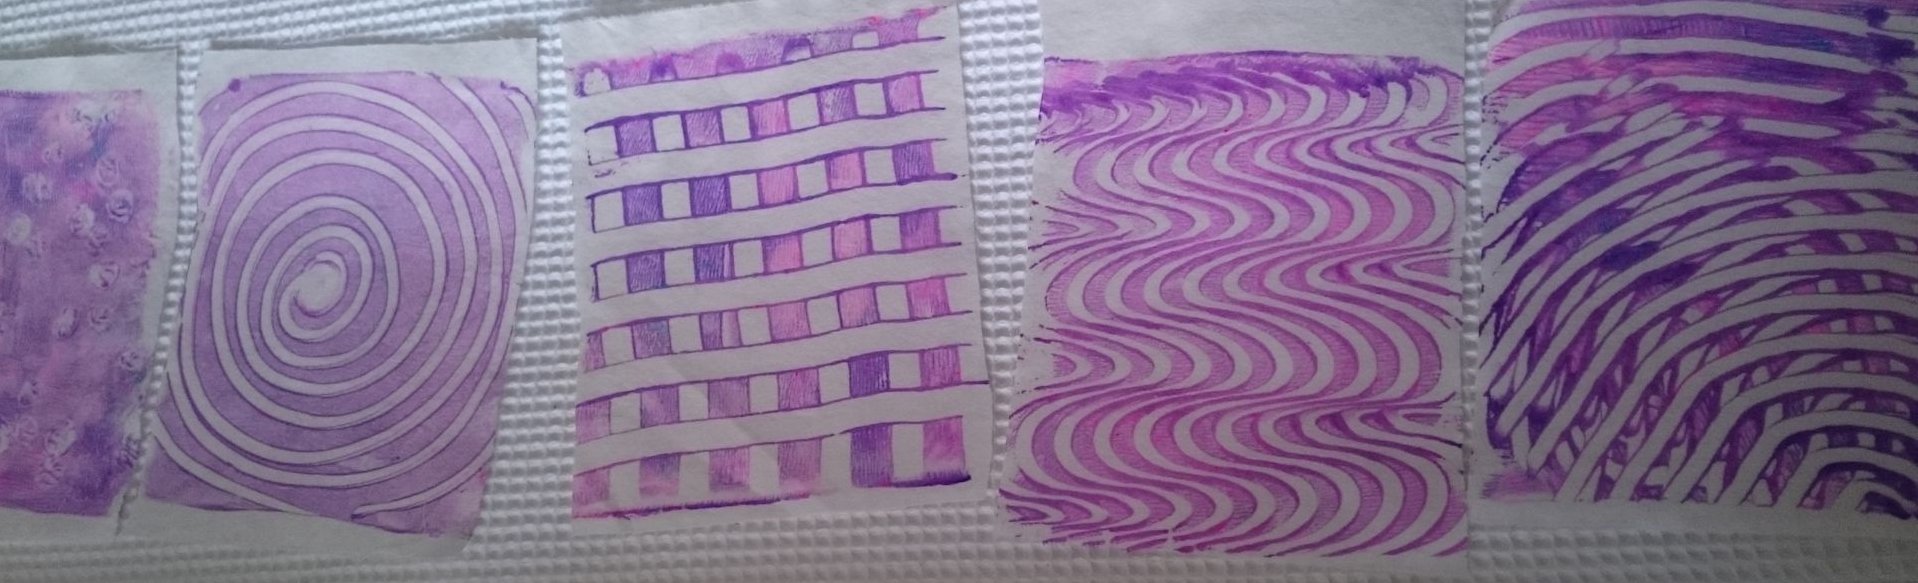
Some photos of the MANY pieces of fabric I produced during the day—most of the small ones are about 6″ square:

Plastic sheeting to protect the table, newspaper, x-ray film, small Gelli plate, foam rollers, brayer, pots of acrylic paint, fern for making a pattern on the paint

My first efforts, drying. The two large pink pieces were the result of rolling the excess paint off the roller onto spare pieces of fabric—you can get some amazing extra pieces this way and there’s no way to predict how they will turn out. The circles in the blue were created from the bottom of a drink cup.

Most, but not all, of the pieces I printed

The large pieces were all created by rolling off excess paint onto spare pieces of fabric