This YouTube video shows a ‘foolproof’ methods of miter-joining quilting binding. The relevant info is between about 7 and 11 minutes in.
And another one:
This YouTube video shows a ‘foolproof’ methods of miter-joining quilting binding. The relevant info is between about 7 and 11 minutes in.
And another one:
This was a BIG quilt — 85 x 65 inches according to the slip of paper that came with it. And it wasn’t very inspiring as far as colours or pattern go (at least, not in MY eyes). I suspect that this quilt will go to an adult male at one of the homeless shelters or transitioning into housing. The centres seems to be made of cotton shirting fabrics, or quilting fabrics that looked like shirt fabrics used for male shirts.
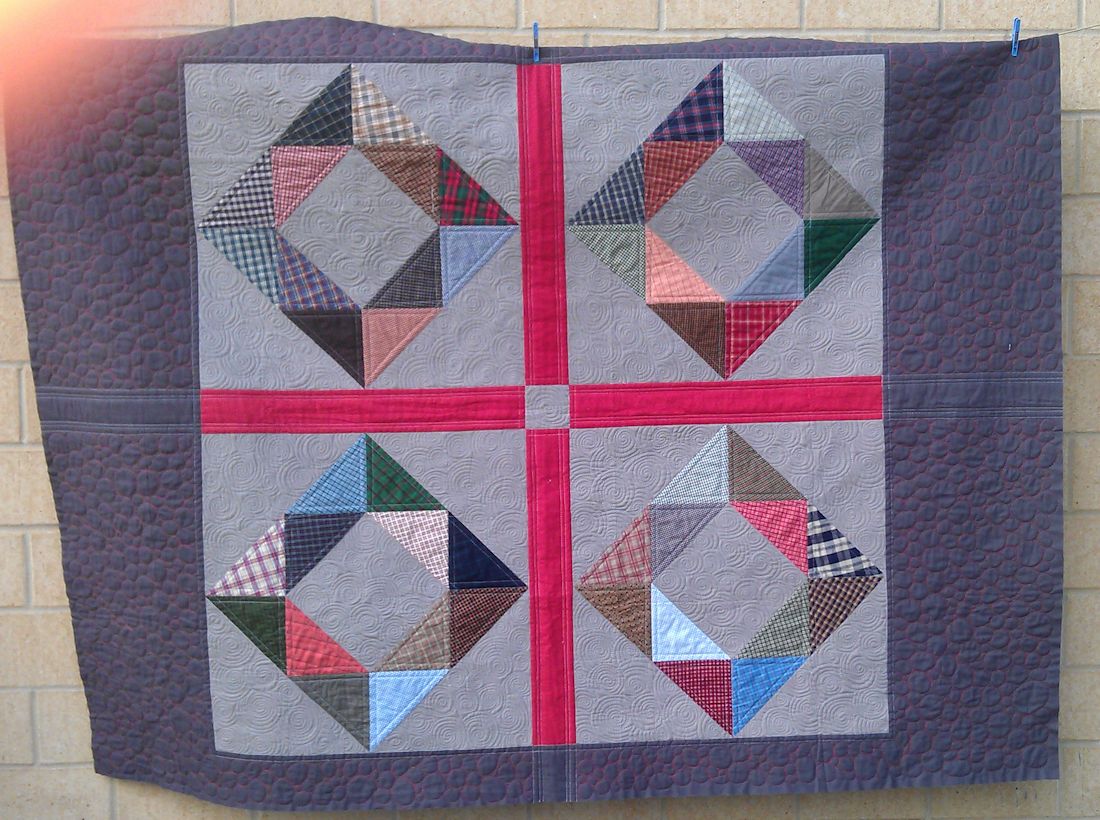
How to liven it up with quilting, while not making it ‘girly’ with loopy feathers or flowers and the like?
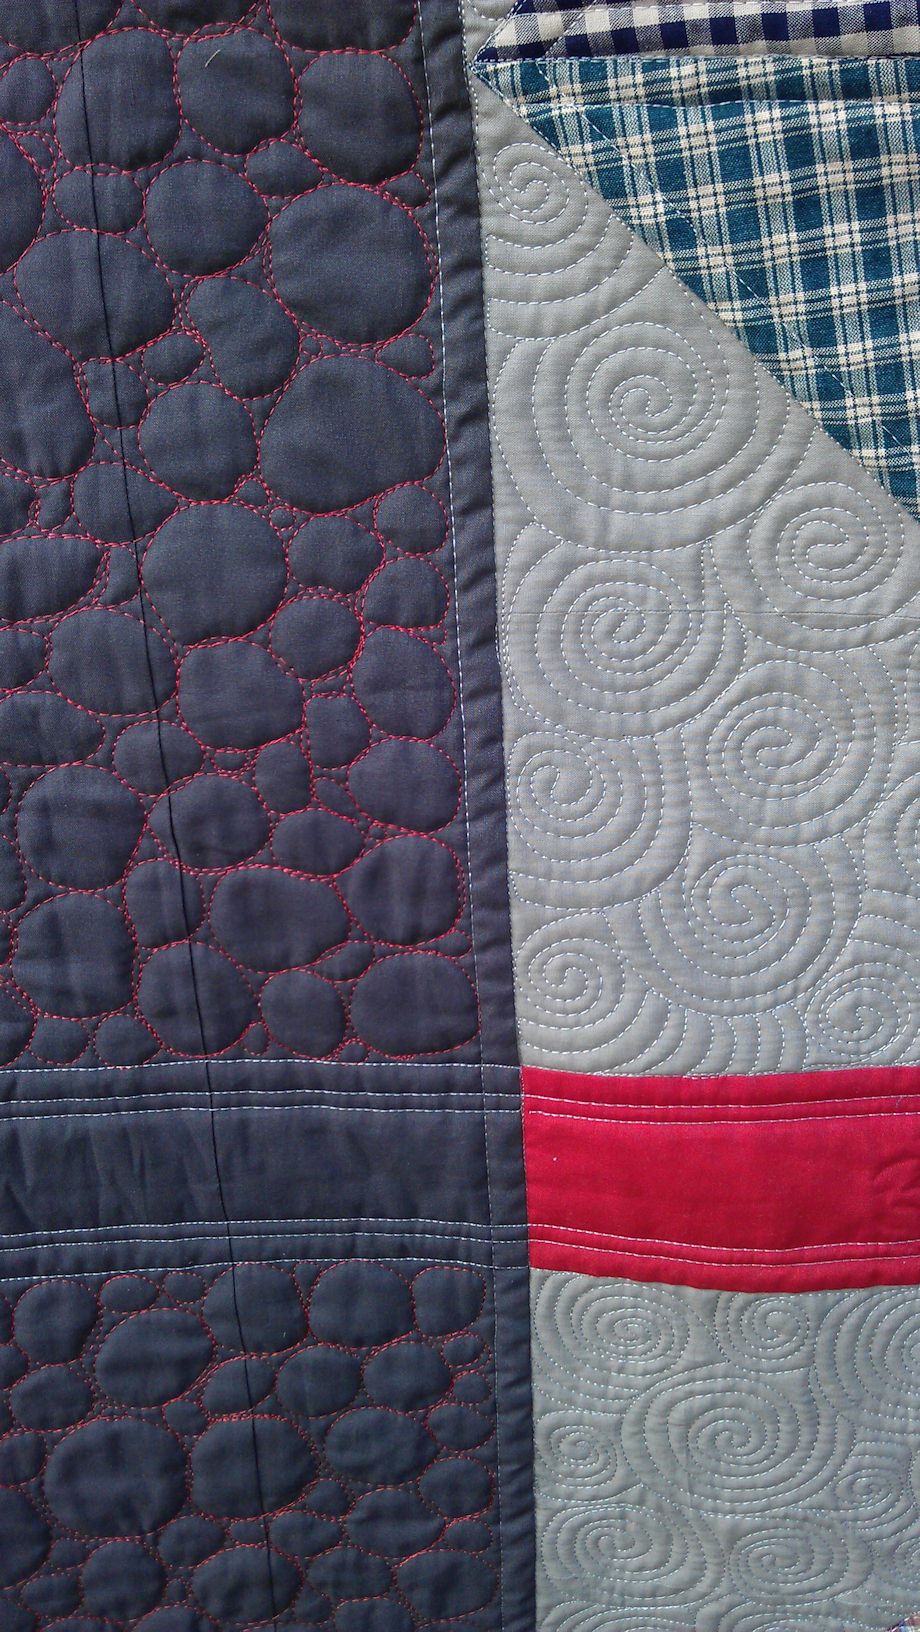
After stitching around each on the four blocks and their centres, I decided to focus on the negative space of this quilt. To make the centres ‘pop’, I quilted fairly heavily in the light grey background, using a spiral swirl (a la Angela Walters — see this blog post for my first efforts at this motif: https://rhondabracey.com/2013/10/14/community-quilt-115/). I really like how the swirls seem to ‘overlap’ each other even though they don’t; it’s actually quite easy to do — it just looks complicated 😉
I kept the same motif for all the light grey — centres and outer setting triangles, as well as the centre block between the red strips — so that the centres appeared to float on top. I just stitched the centres with straight lines 1/2 inch from the seams (using my Line Tamer ruler), and didn’t worry about crossing lines. I think the crossed lines add extra geometric effect.
For the red bits, I thought about doing another design, but then decided it would be overkill as I already had in mind what I wanted to do for the dark grey borders. So using the same light grey thread I used for the light grey sections, I stitched straight lines 1/2 inch in from each seam line in the red, than another 1/4 inch line echoing the first lines. To add a bit of interest, I also crossed those lines with a perpendicular line 1/2 inch from the perpendicular seam line, and extended the lines out into the dark grey border (like racing stripes!).
For the border, I wanted to try something other than matching the thread colour to the fabric, so I chose a red thread the same colour as the red strips and then stitched bubbles/pebbles all over the grey border, leaving the racing stripes empty of any further stitching.
I quite like how it turned out and how I turned this reasonably plain quilt into something with some life.
I took about 8 hours to quilt this quilt.
(Click on a photo to view it larger.)



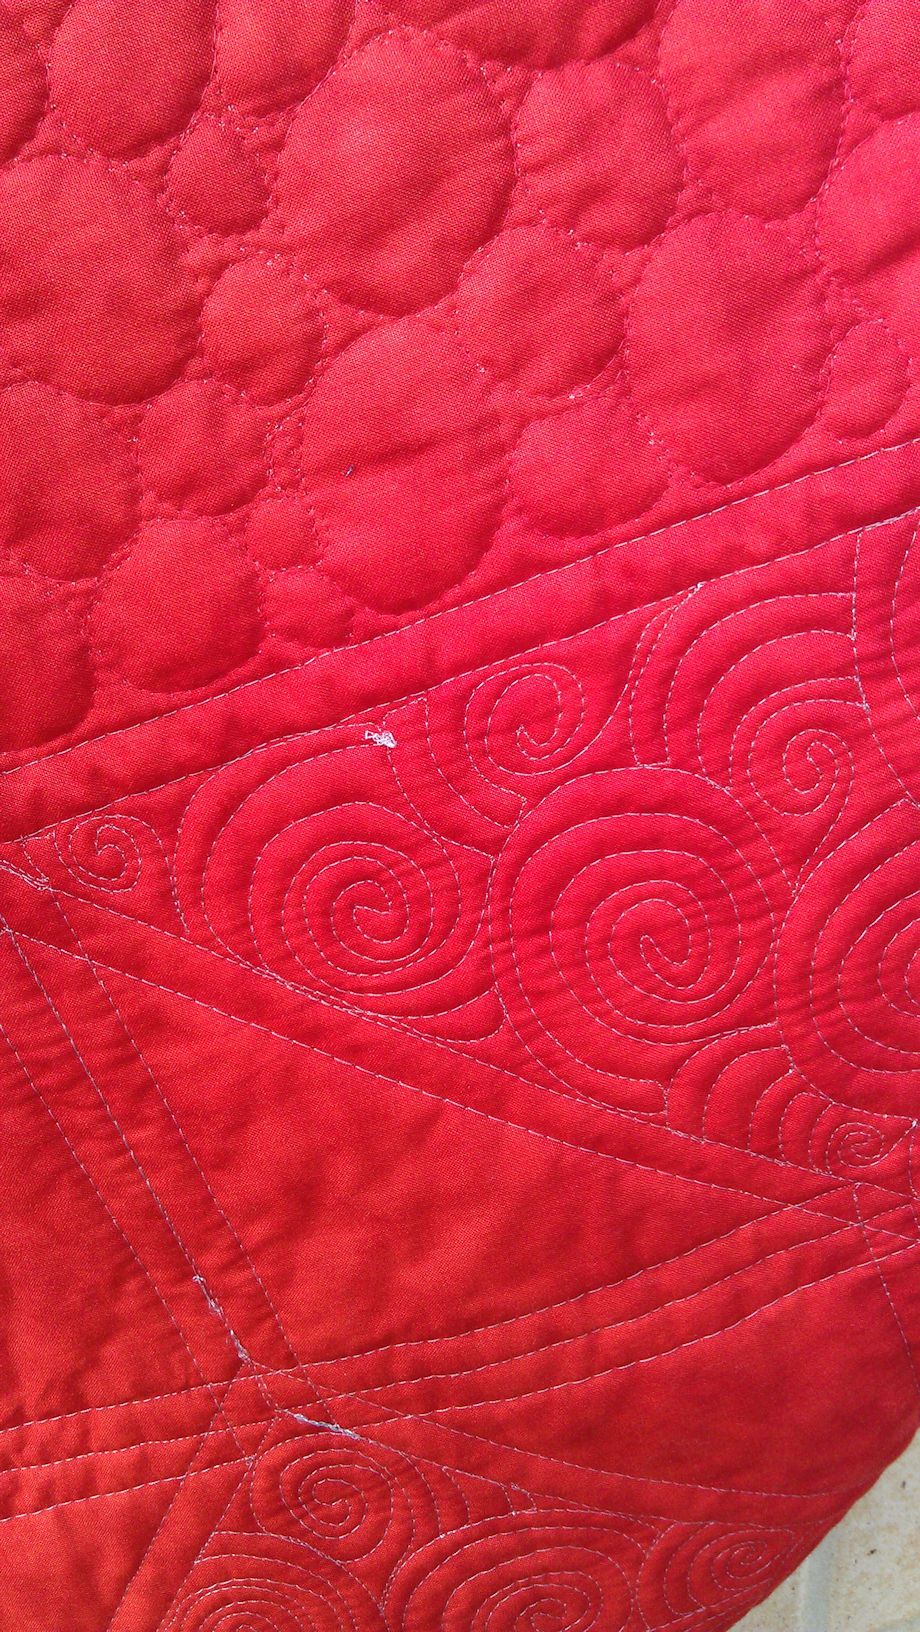
Little thread clumps on the back of the quilt:
A couple of final comments:
Threads used:
When we were coming home from a nearby town last weekend, I spotted what I thought was a black rubbery thing on the side of the road. As we drove past, I realised it was a tortoise turtle — I thought it was dead, but when I got out of the car to take a photo and put it on the verge, I realised it was very much alive.
It took off back over the road towards the wetlands, and I shepherded it across the road in case other cars came along (it’s a quiet street, but you never know). The poor thing must have been really terrified as it started to pee copiously while heading back over the road and continued peeing all the way to the other side.
The next day I mentioned it to a friend who used to live in the area — she said they came across the road from the wetlands to lay their eggs in the sandy soil on the other side of the road. So perhaps I was too eager to shepherd her (I assume it was a female) back to the wetlands as she may not have laid her eggs yet 😦
I wanted to find out what sort of turtle she was, so off to the internet where I found out that she was a snake-necked turtle (Chelodina oblonga); this species is also know by other common names. The species is endemic to the south-west corner of Western Australia and is found nowhere else. It is listed as ‘near threatened’ on the IUCN global endangered species list.
I decided to submit a request to the local shire council to see if they could place ‘turtle crossing’ signs on this stretch of road, and to be honest, I didn’t expect to hear back from them. But today — one week later — I got copied in on an email from a council supervisor to a worker: ‘Please arrange to obtain a couple of these signs and erect on the lower portion of [XYZ] Drive.’ FTW!!!
BTW, I never did get a photo of her as I was so surprised to see she was still alive and I was keen to make sure she wasn’t run down by any other vehicles.
I’ll post an update once the ‘turtle crossing’ signs are installed. It’s nice to know that my local government authority takes notice of requests like these. Maybe quoting the IUCN classification and how these turtles are ONLY found in this area helped…
(Correction: I misnamed her! She’s a turtle, not a tortoise! Thanks for your comment on Facebook, Leah, which made me check. I’ve always had in my head that those that live in the sea are turtles and those on land are tortoises. And I’m partially right, except that those that live in *water*, whether at sea or on land, are turtles.)
Update 21 October 2103: The turtle signs are installed! I noticed them yesterday when driving home from town but couldn’t take a picture. Now that was quick. What a great response from the Shire.
Update 28 October 2013: The sign is up!

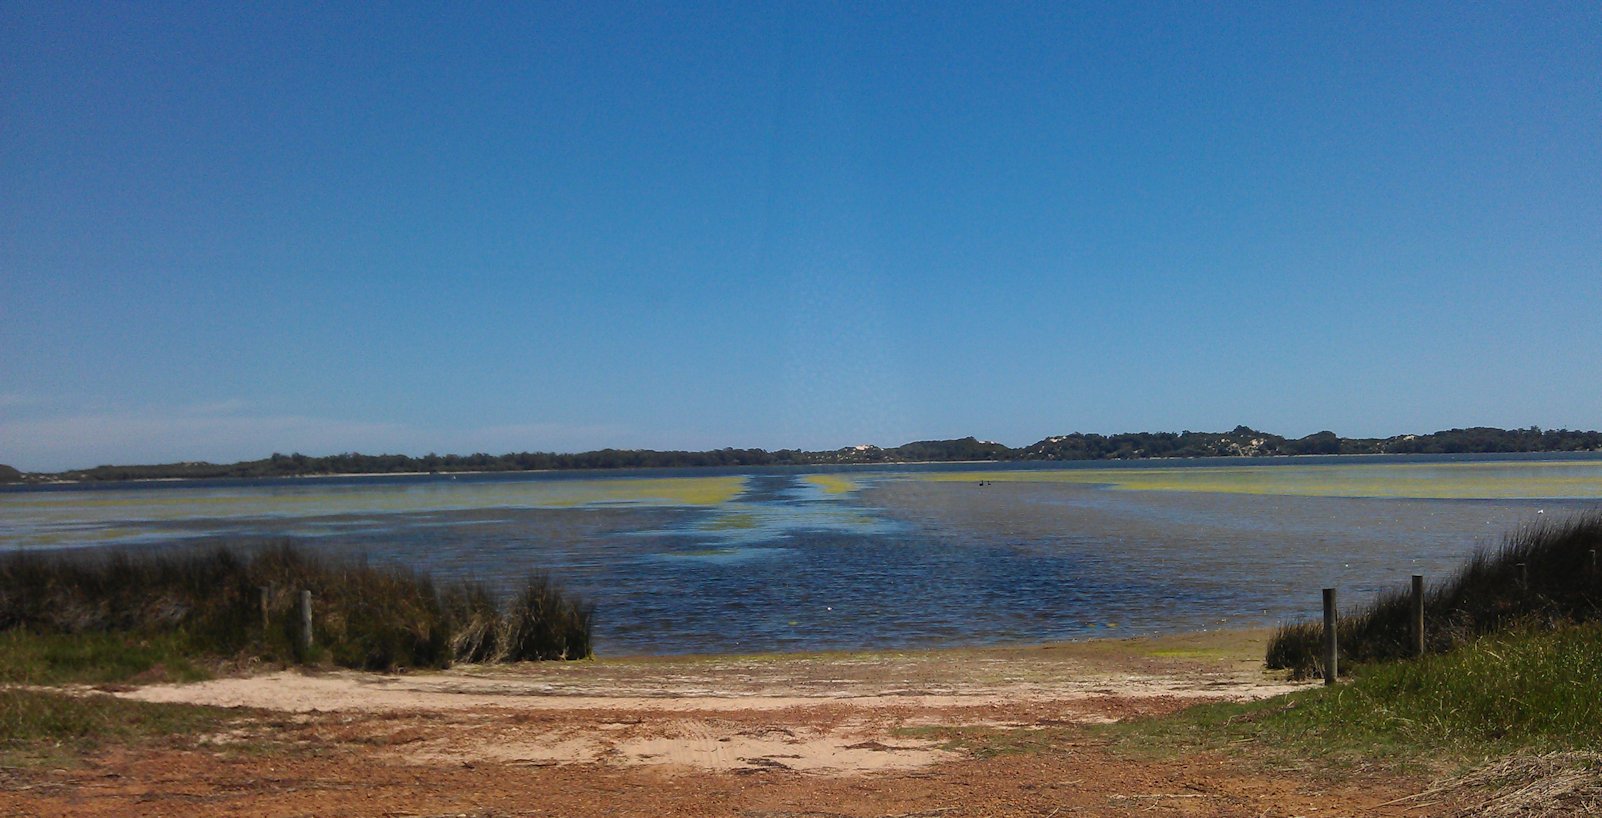
We had record rainfall in September, which was great for the farmers, the garden, etc. But it won’t be good for the bushfire risk over summer, which will be heightened with all that growth. And it hasn’t been good for the estuary. You’d think that record rainfall would flush the estuary, and no doubt it has, but it’s also flushed out a lot of nutrients from the land, such as from fertilisers etc. and dumped them in the estuary.
As a result, there are massive yellow-green algae blooms covering big amounts of the surface area. These (toxic?) blooms may well harm wildlife living, nesting, and breeding on or alongside the estuary, and thus causing loss of life. A LOT of bird species call the estuary home — black swans, pelicans, egrets, herons, spoonbills, ducks — and a lot of other bird species live close to the estuary (ibis, magpies, wagtails, etc.), as well as crabs, fish, even dolphins in the deeper parts, and tortoises in the wetlands surrounding the estuary (the wetlands are covered in algae too).
We’ve been in our current house for more than three years and I drive by the estuary at least four times a week. In all that time, I have never seen algae like I’ve seen in the past two weeks.Actually, I can’t recall seeing algae at all.
Here’s a photo I took today — the blue bits are the ‘clear’ water, the brown bits are the sand bars (the estuary is quite shallow), and the yellow-green bits are the algae floating on the surface of the water. And the black dots are two black swans (click the image to view it larger).
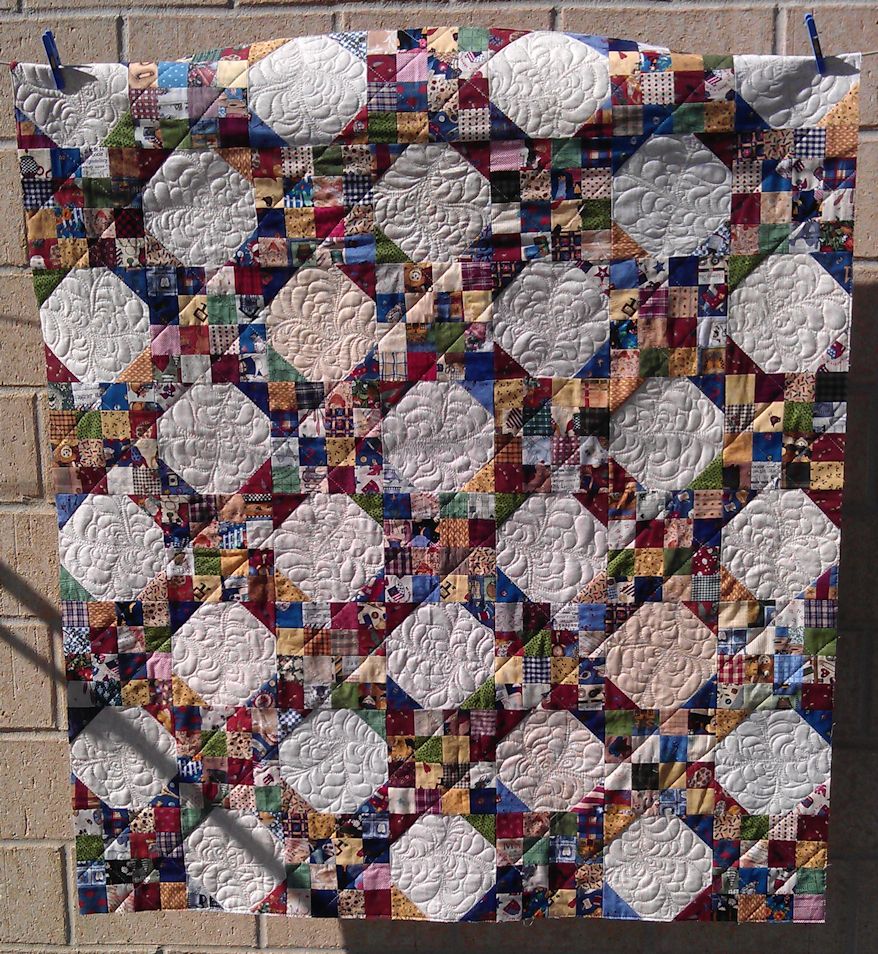
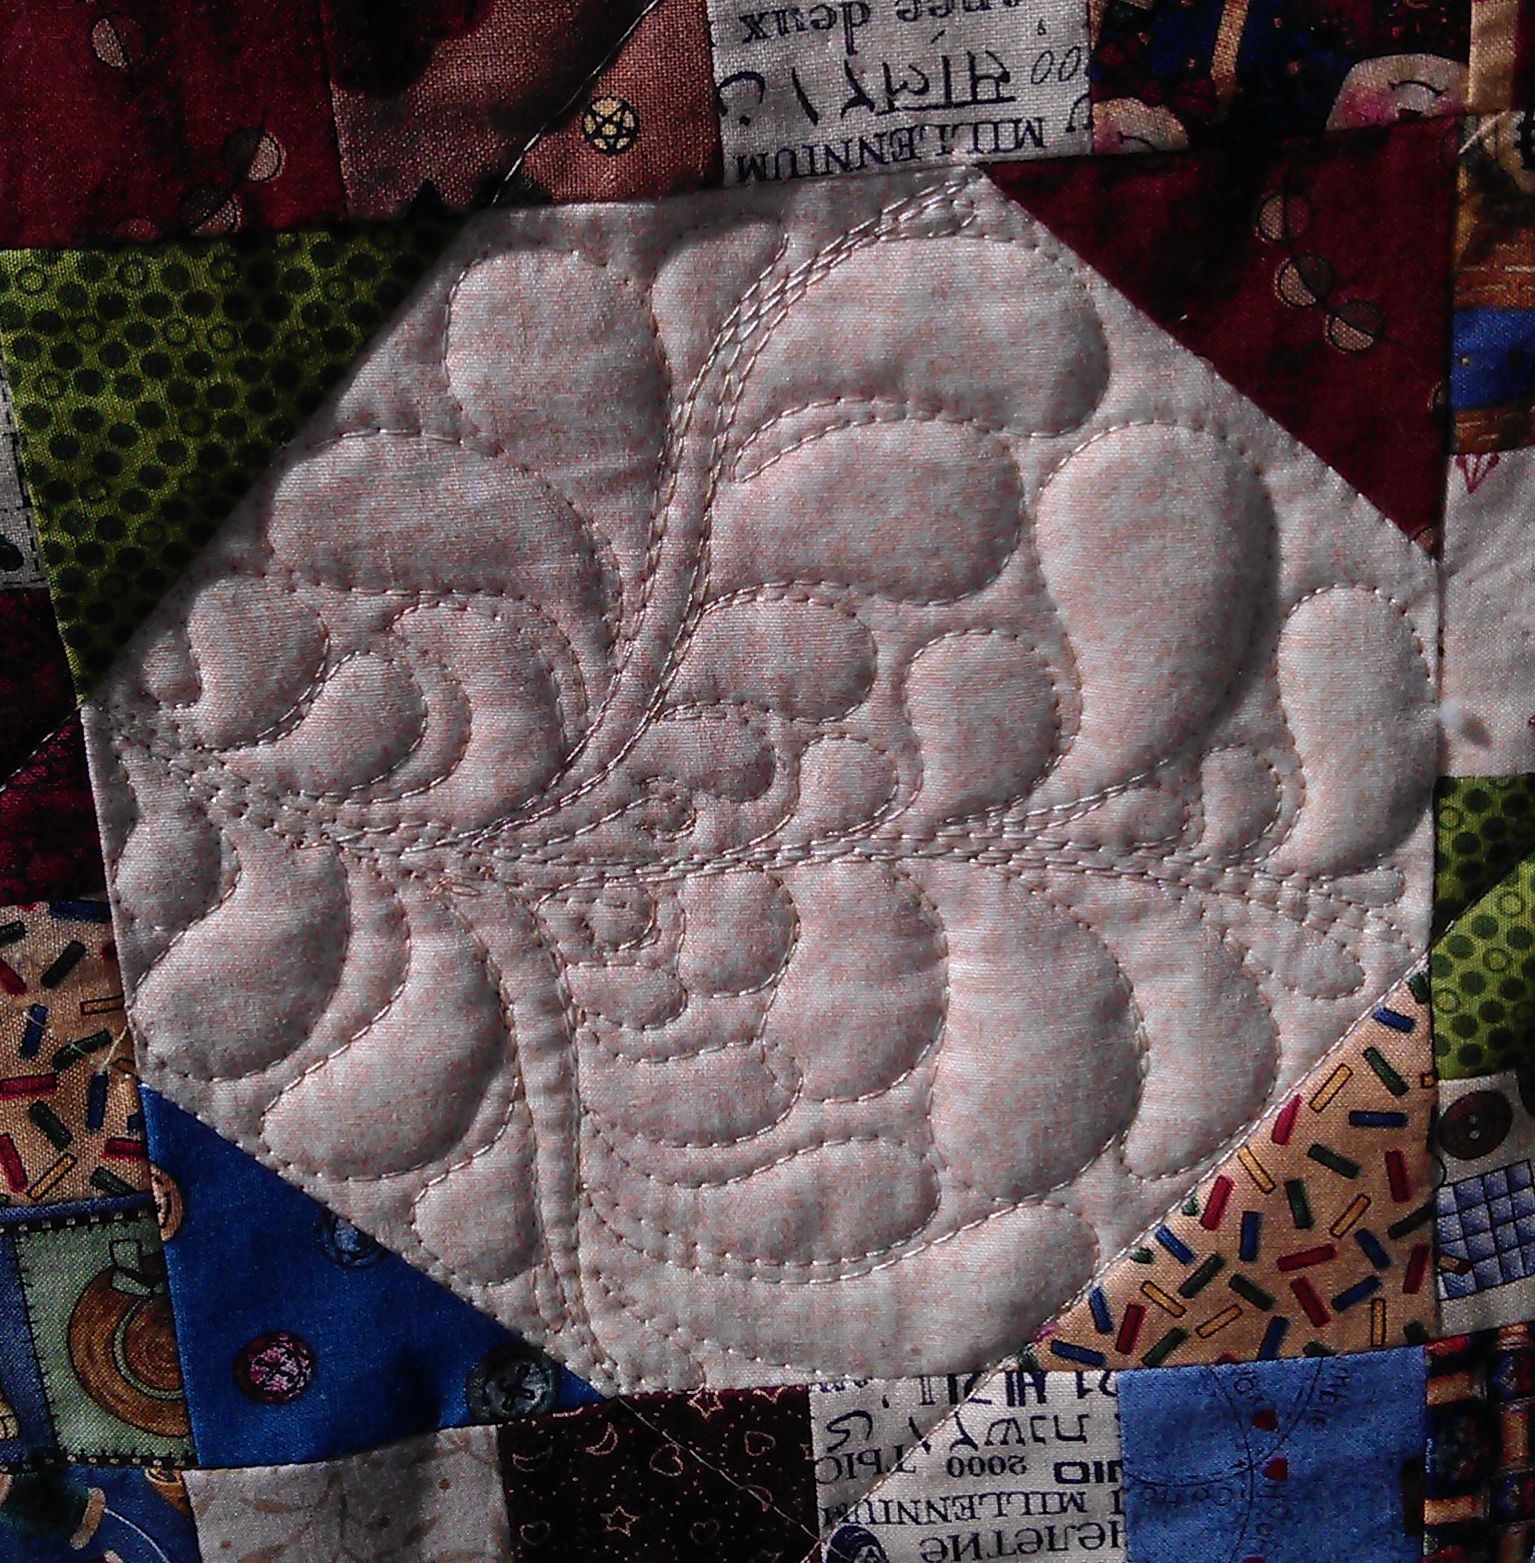
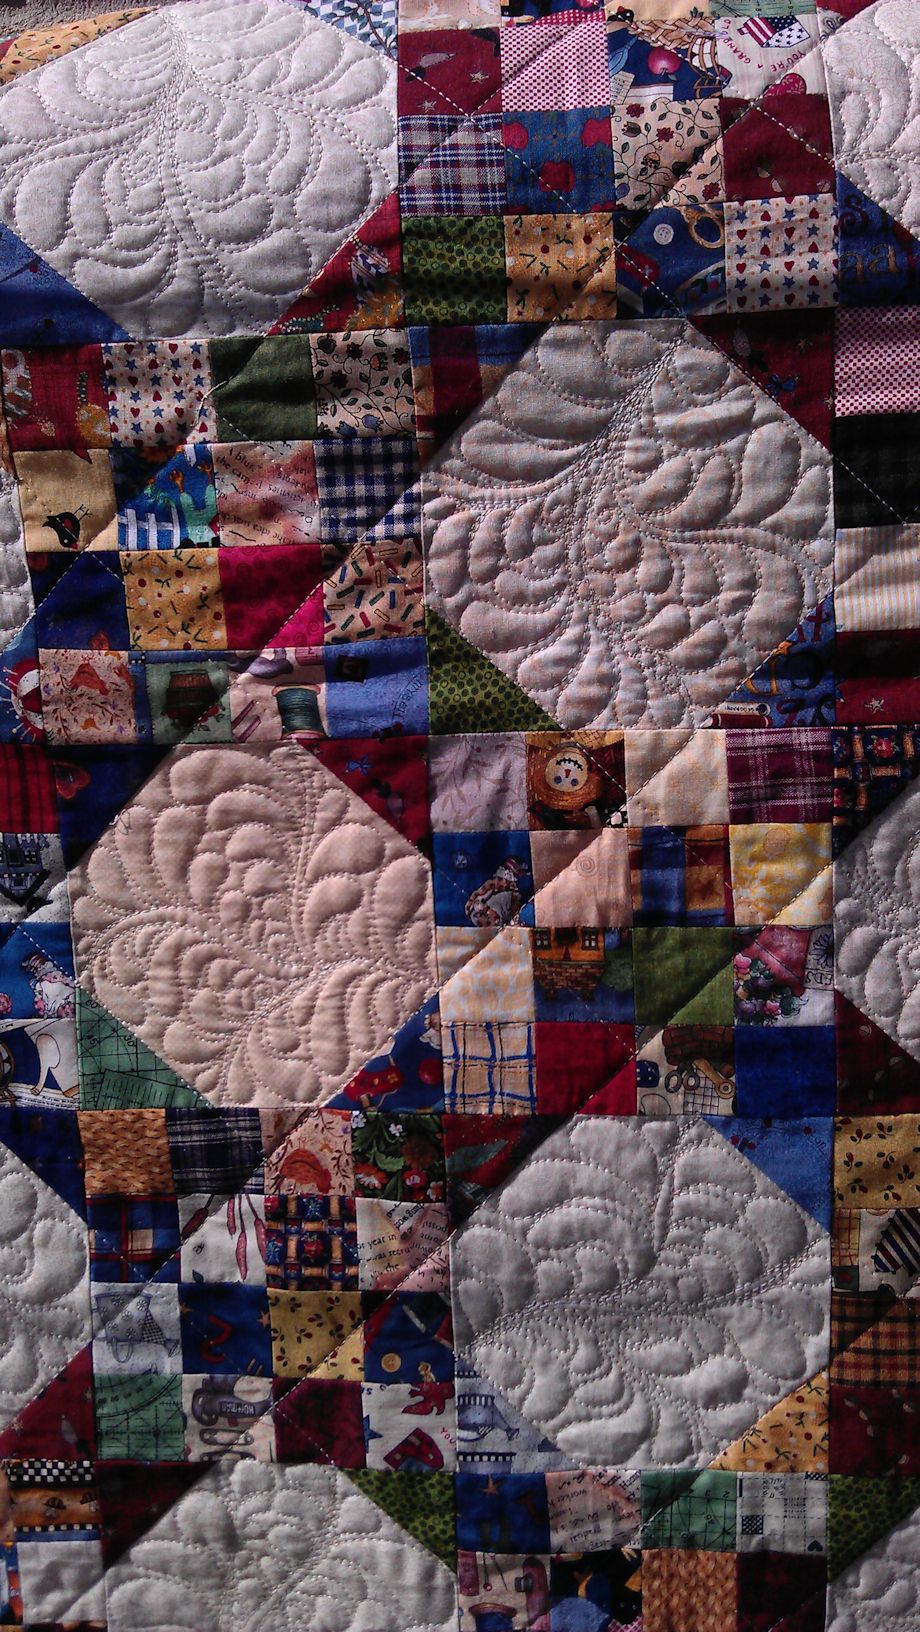
This pretty little quilt had some big snowball blocks of plain beige. How to quilt it to show off the snowball blocks but without detracting from the design created by the small squares and setting triangles?
First, I stabilised it by stitching long straight lines along the edges of the snowballs and continuing them to the next one. And I decided that that was all the busy little squares needed.
Now, how to quilt the beige snowballs? I decided on feathers, but stitching feathers in an octagonal shape isn’t easy, so I had to devise a way to do so that showed the feathers off and that didn’t create massively large and odd-shaped feathers. I’ve written a tutorial (with pictures) on how I feathered these octagonal shapes — it’s really quite easy once you get the basic structure of the spines done.
I used a variegated beige, yellow, soft green, light tan thread for all the stitching.
(Click on a photo to view it larger.)
Threads used:
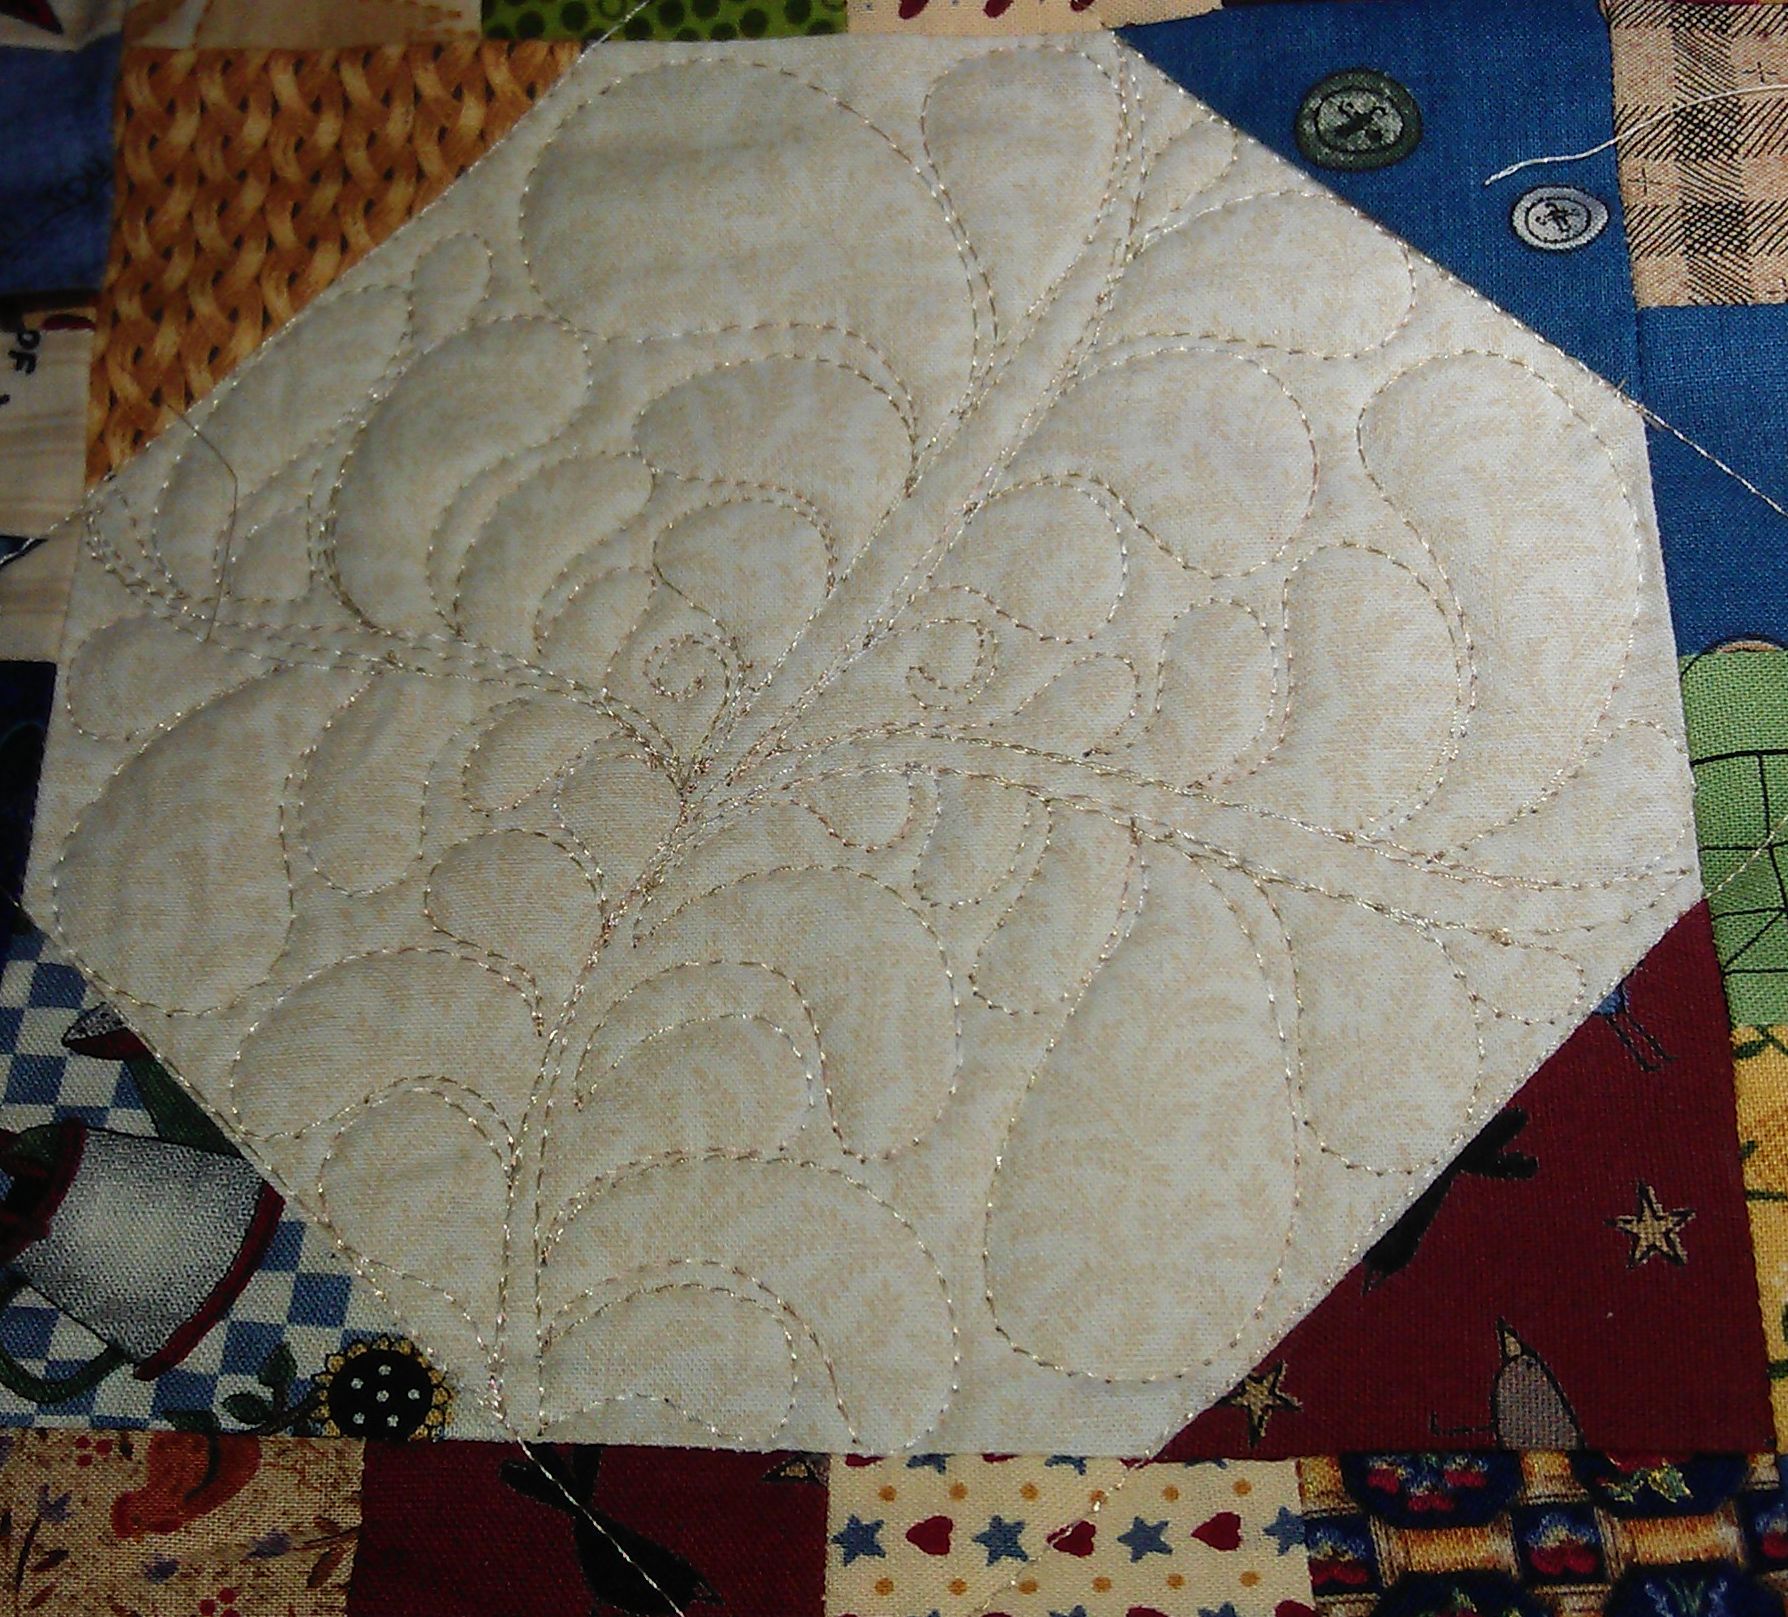
When I was faced with the octagonal snowball blocks in one of the community quilts I quilted, I decided to stitch feathers. But making feathers flow nicely in an octagon is a challenge because of the odd angles. Here’s the end result, and how I did it.
(Note: I use a Handi Quilter Sweet Sixteen machine, but you can use this technique on any domestic sewing machine, mid- or long-arm quilting machine, or even hand stitching.)
The finished feathers inside an octagon:
Stitch a long sweeping curve diagonally across the block from one corner to its diagonal opposite.

Echo stitch back down that line to about the halfway point. This is the main spine.
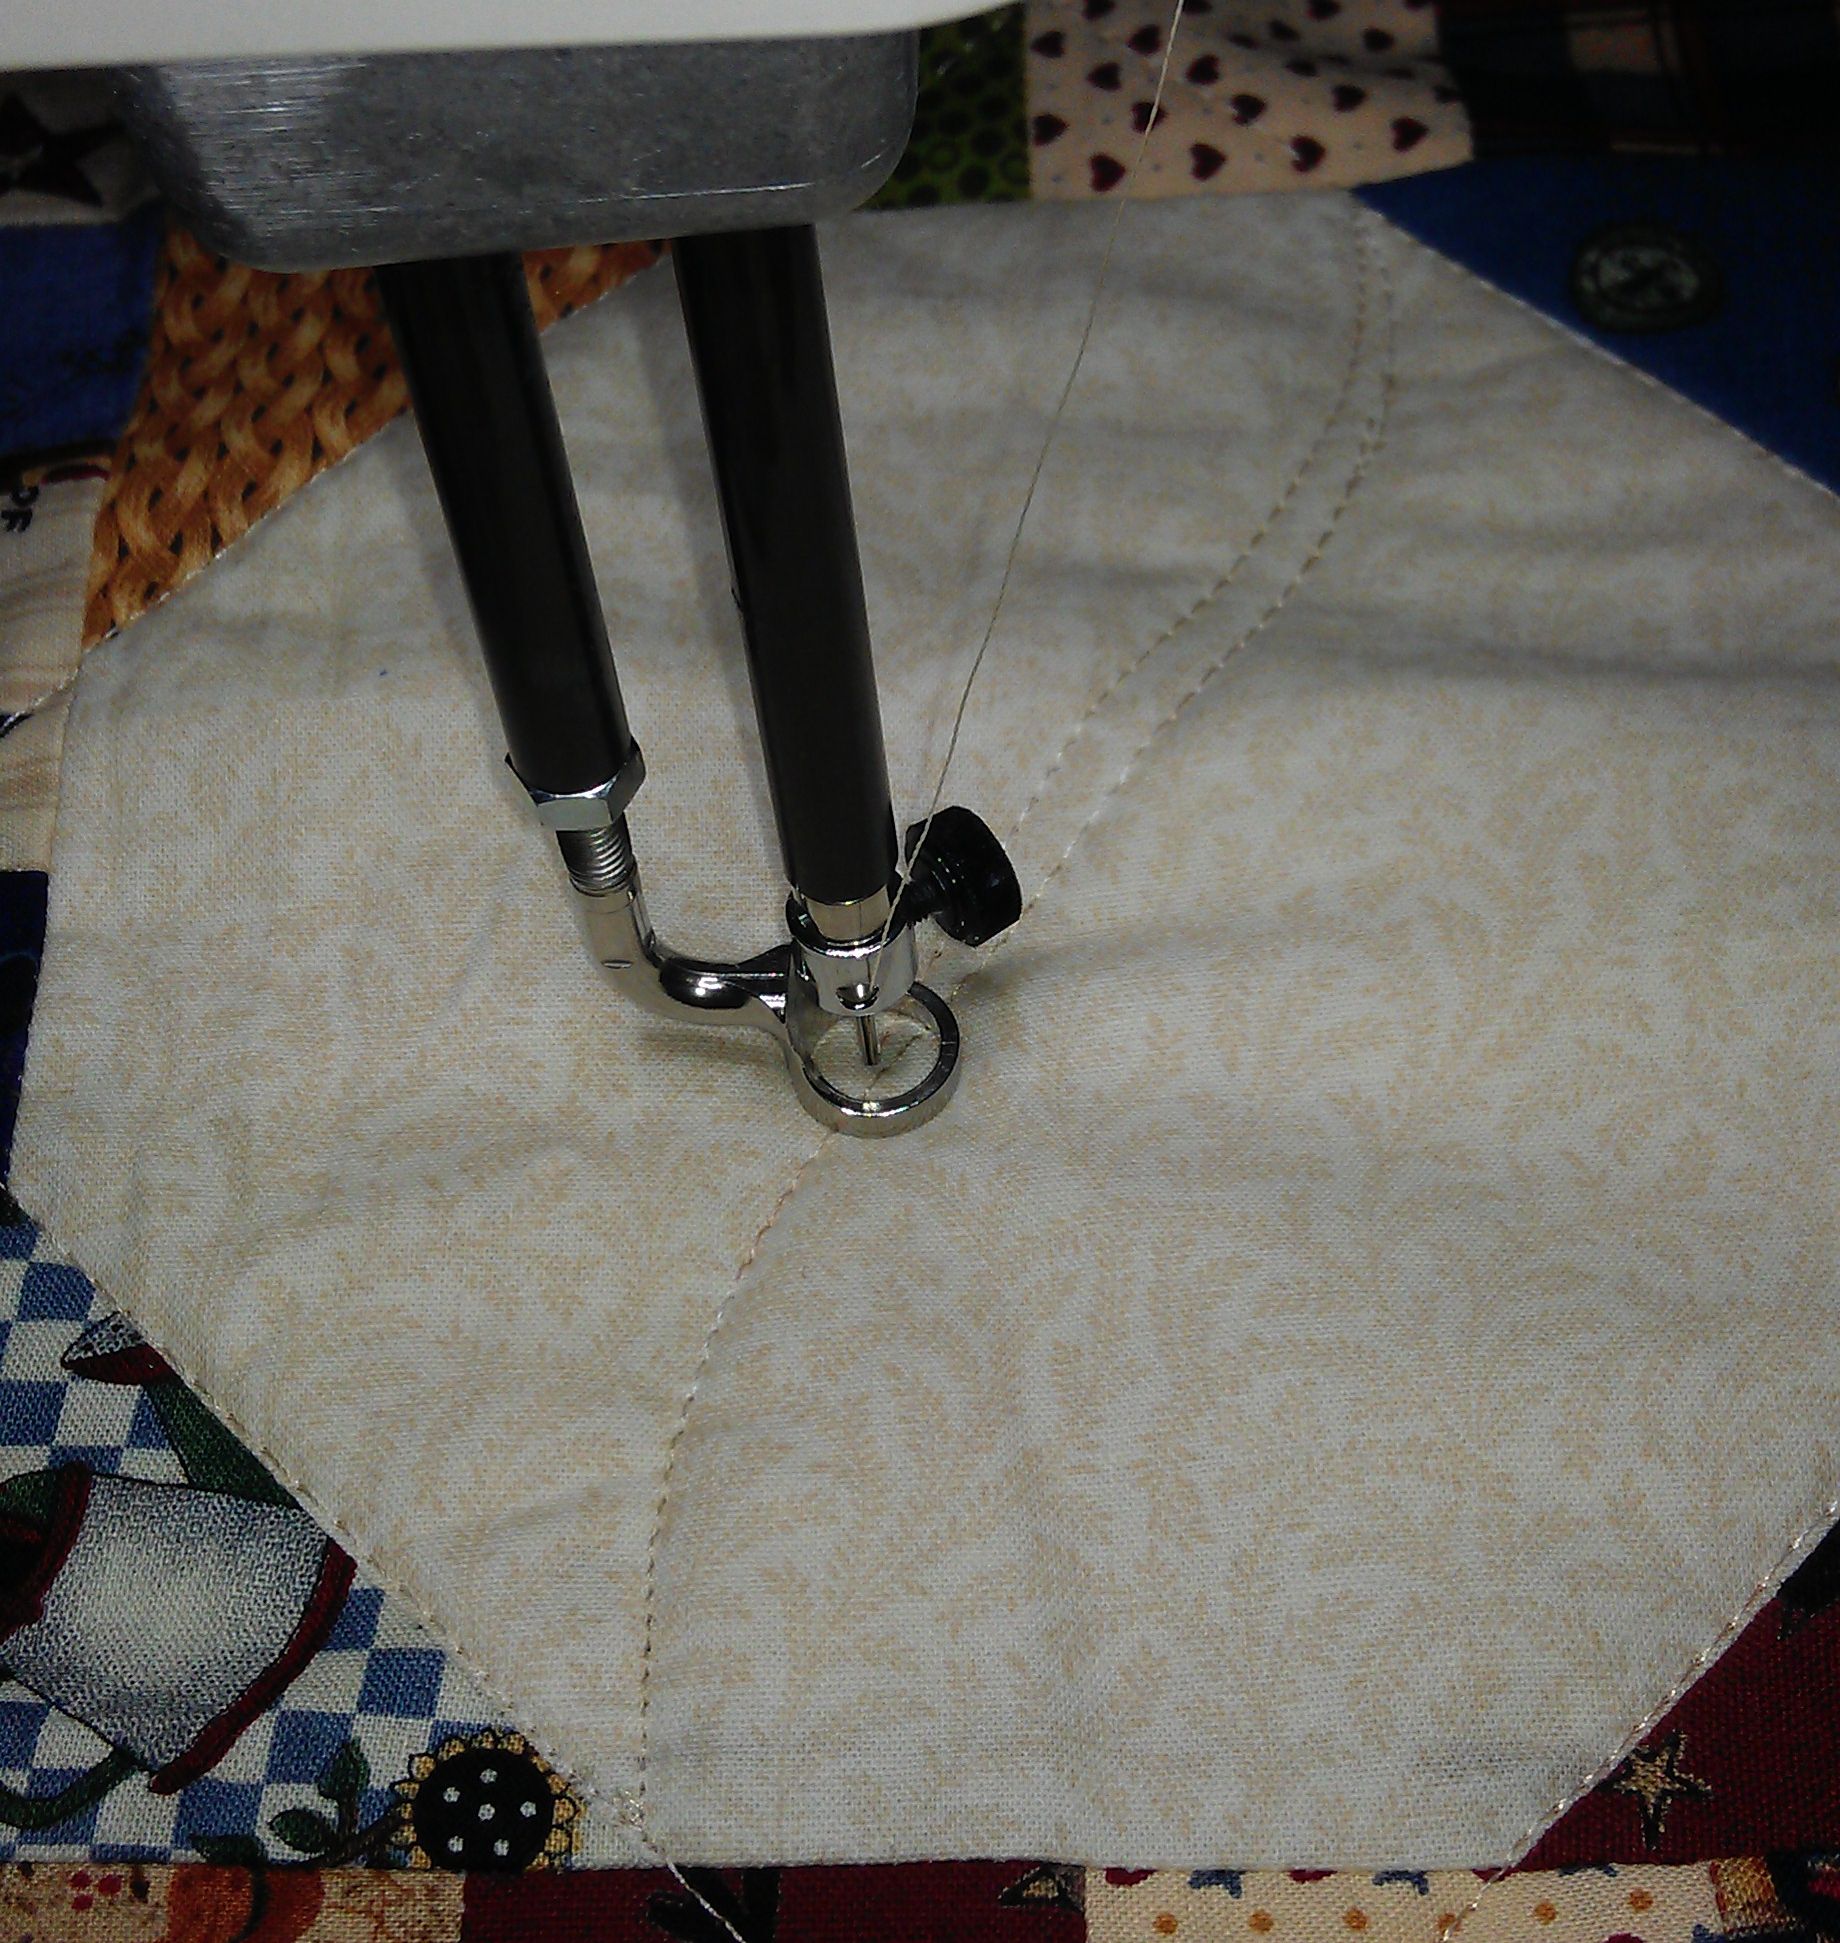
At about the halfway point, stitch out to another point on the octagon with a sweeping curve, then echo stitch back to the main spine. This creates one of the two minor spines.

Where the spines join, stitch a little curl.
I can’t remember where I learnt this trick, but it’s a good one as it gives a curved shape ready for the feathers to curl around and avoids the issue of which side of the feather to start stitching, and thus which feather will dominate that space. And once the feather is finished, you really can’t notice that there’s a little curl in there unless you look hard for it. (Note this photo is taken from the side so I could get a clear photo of the curl.)
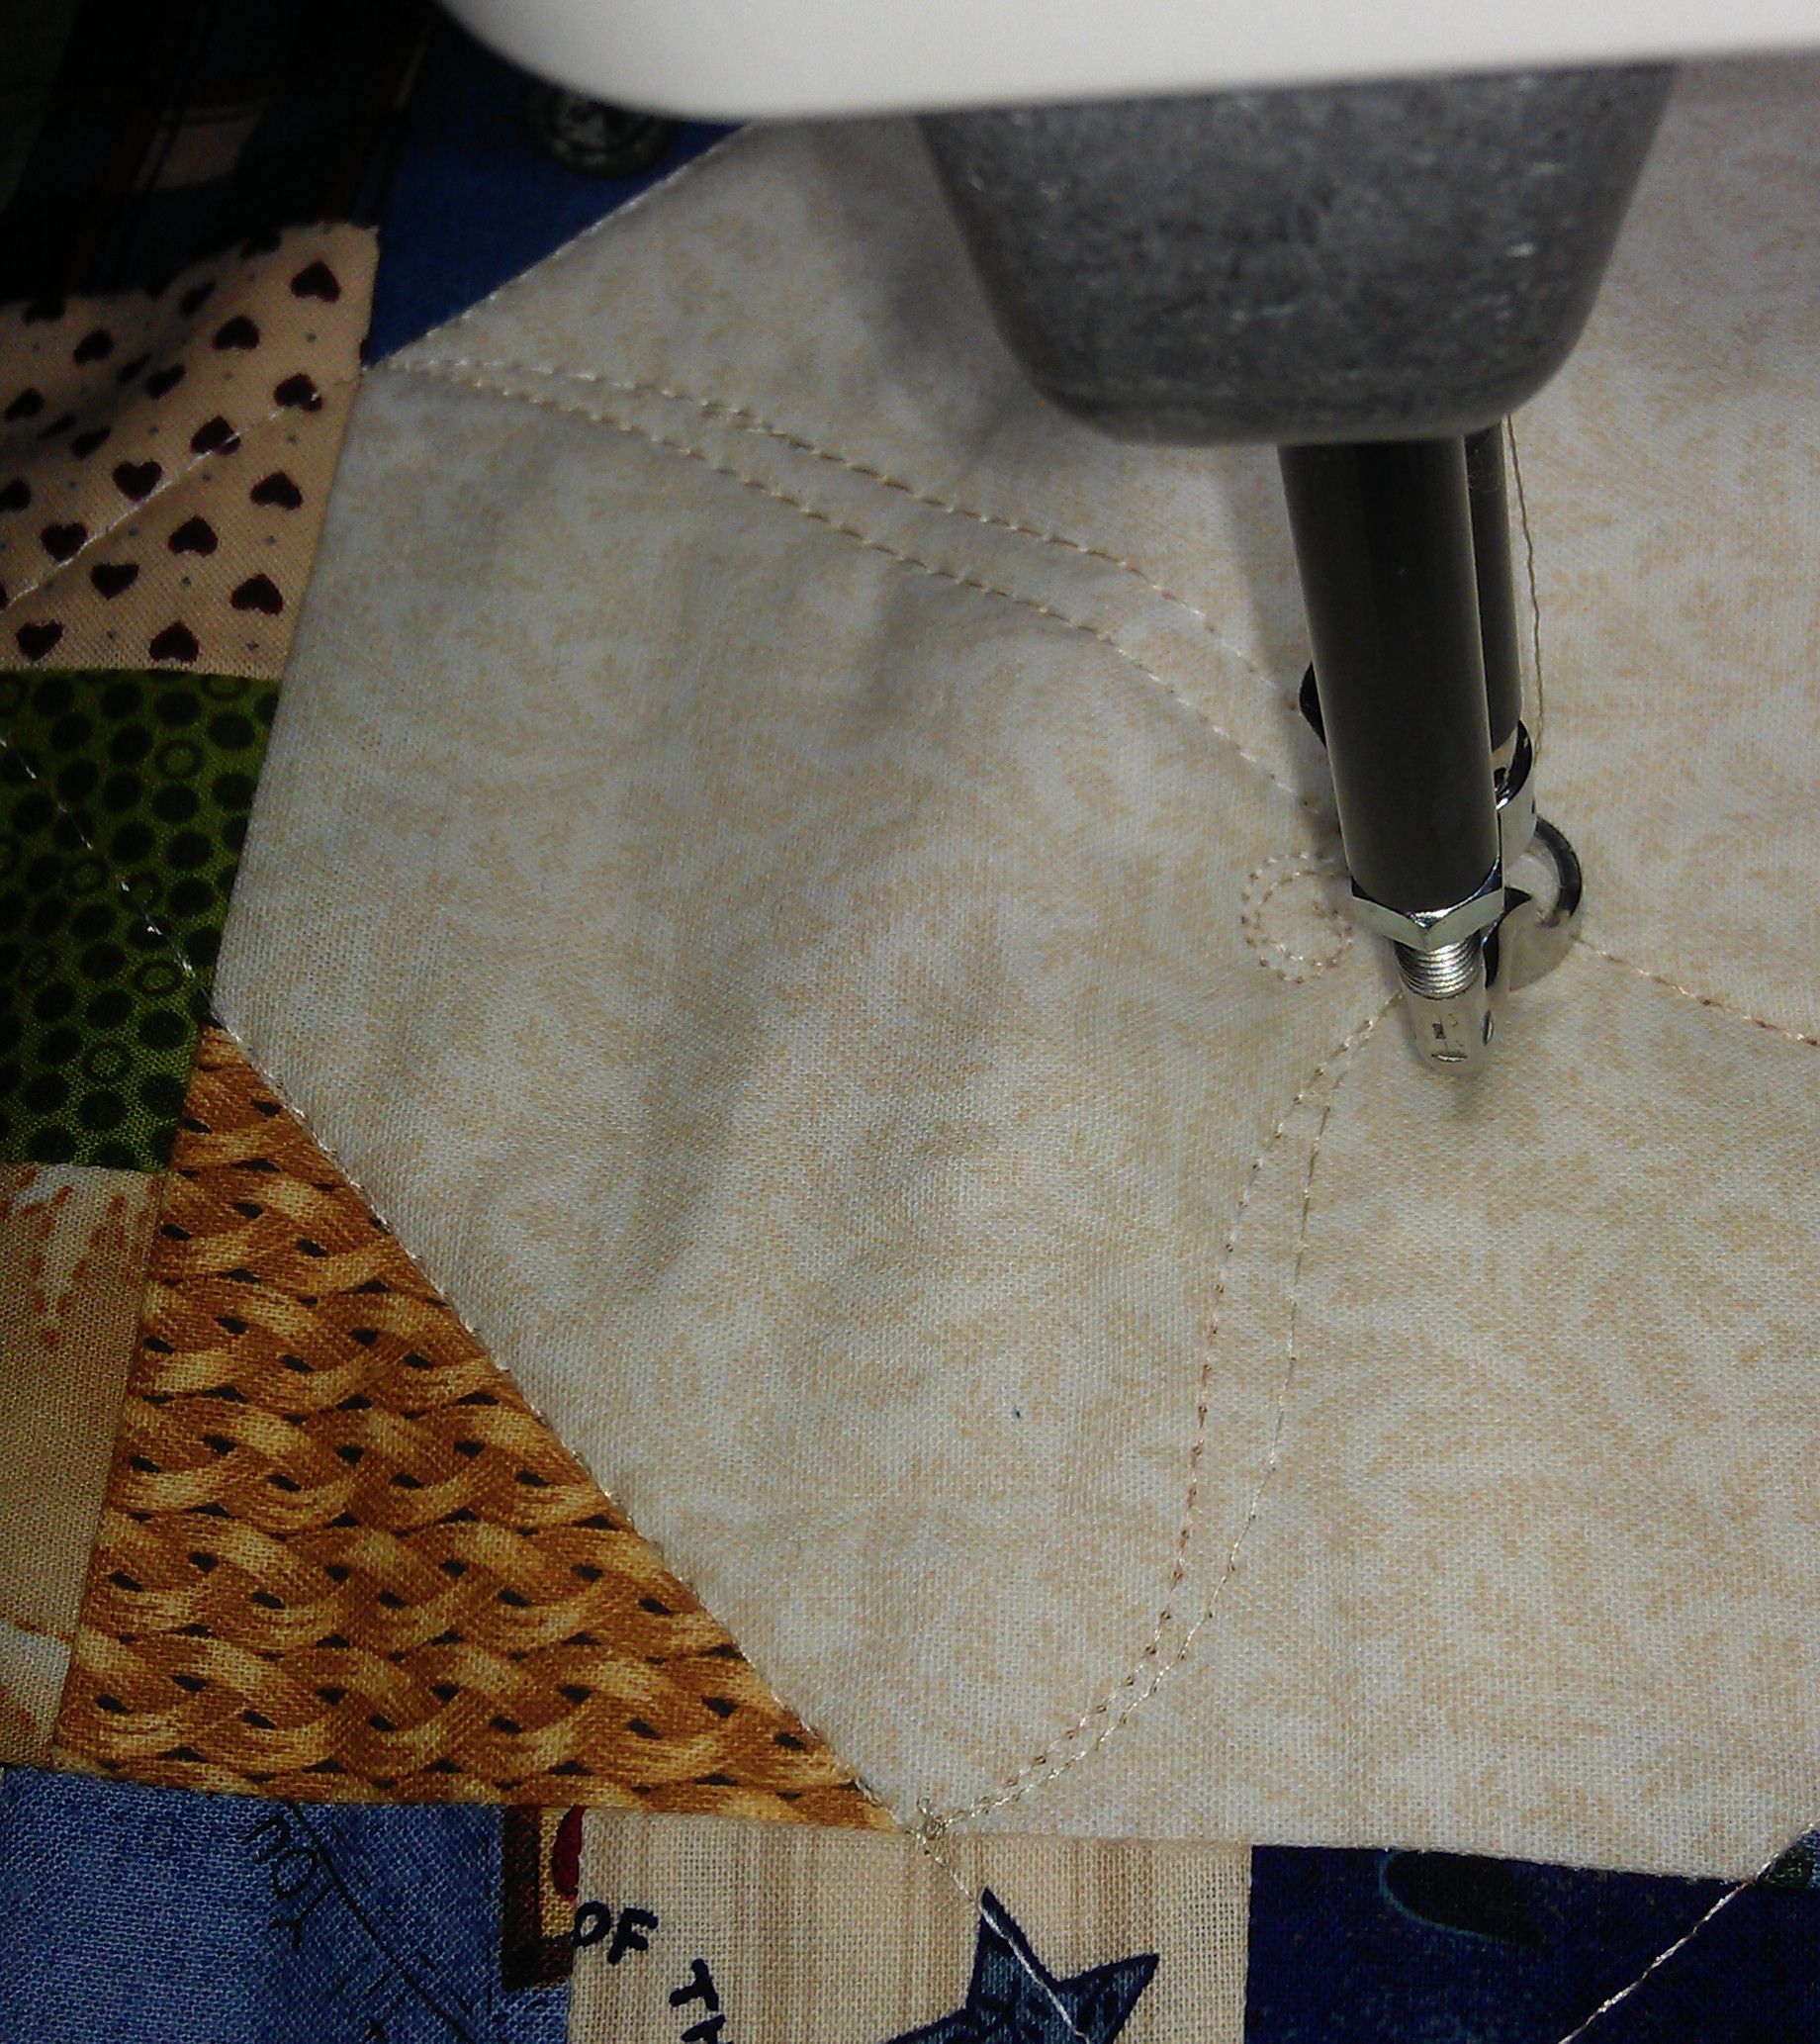
Start stitching your feathers up one spine, using the curl to give your first feather its curve — it doesn’t matter which side of the space between the spines you start stitching. Don’t go too far over into the other half of the space, or leave too much space for the other side to fill — imagine about a halfway point and stitch your feathers to there.
When I’m stitching feathers, I think of commas — some people think of half hearts, but bulbous fleshy commas work for me 😉 I also leave a slight gap between my feathers and complete each one in its entirety — I don’t use the ‘bump’ method of stitching feathers, but that’s a personal preference, so use whatever method you like to stitch your feathers.

After you’ve finished stitching the feathers along the first spine, stitch back down that spine to the curl, then start stitching the feathers on the other spine, again using the curl as your starting point. Try to make the feathers ‘kiss’ (or ‘air kiss’) the feathers on the other side of the space. When you’re finished, travel stitch back down the spine to the central area.
In the photo below, see how the curl looks like a feather once it’s surrounded by other feathers? And see how I have a small gap between the feathers and how each gap is a little different? And notice that some feathers just touch (kiss) the ones on the other side, and some don’t? You don’t have to be perfect! You’re looking for an overall effect, not a perfect feather every single time. Life’s too short…
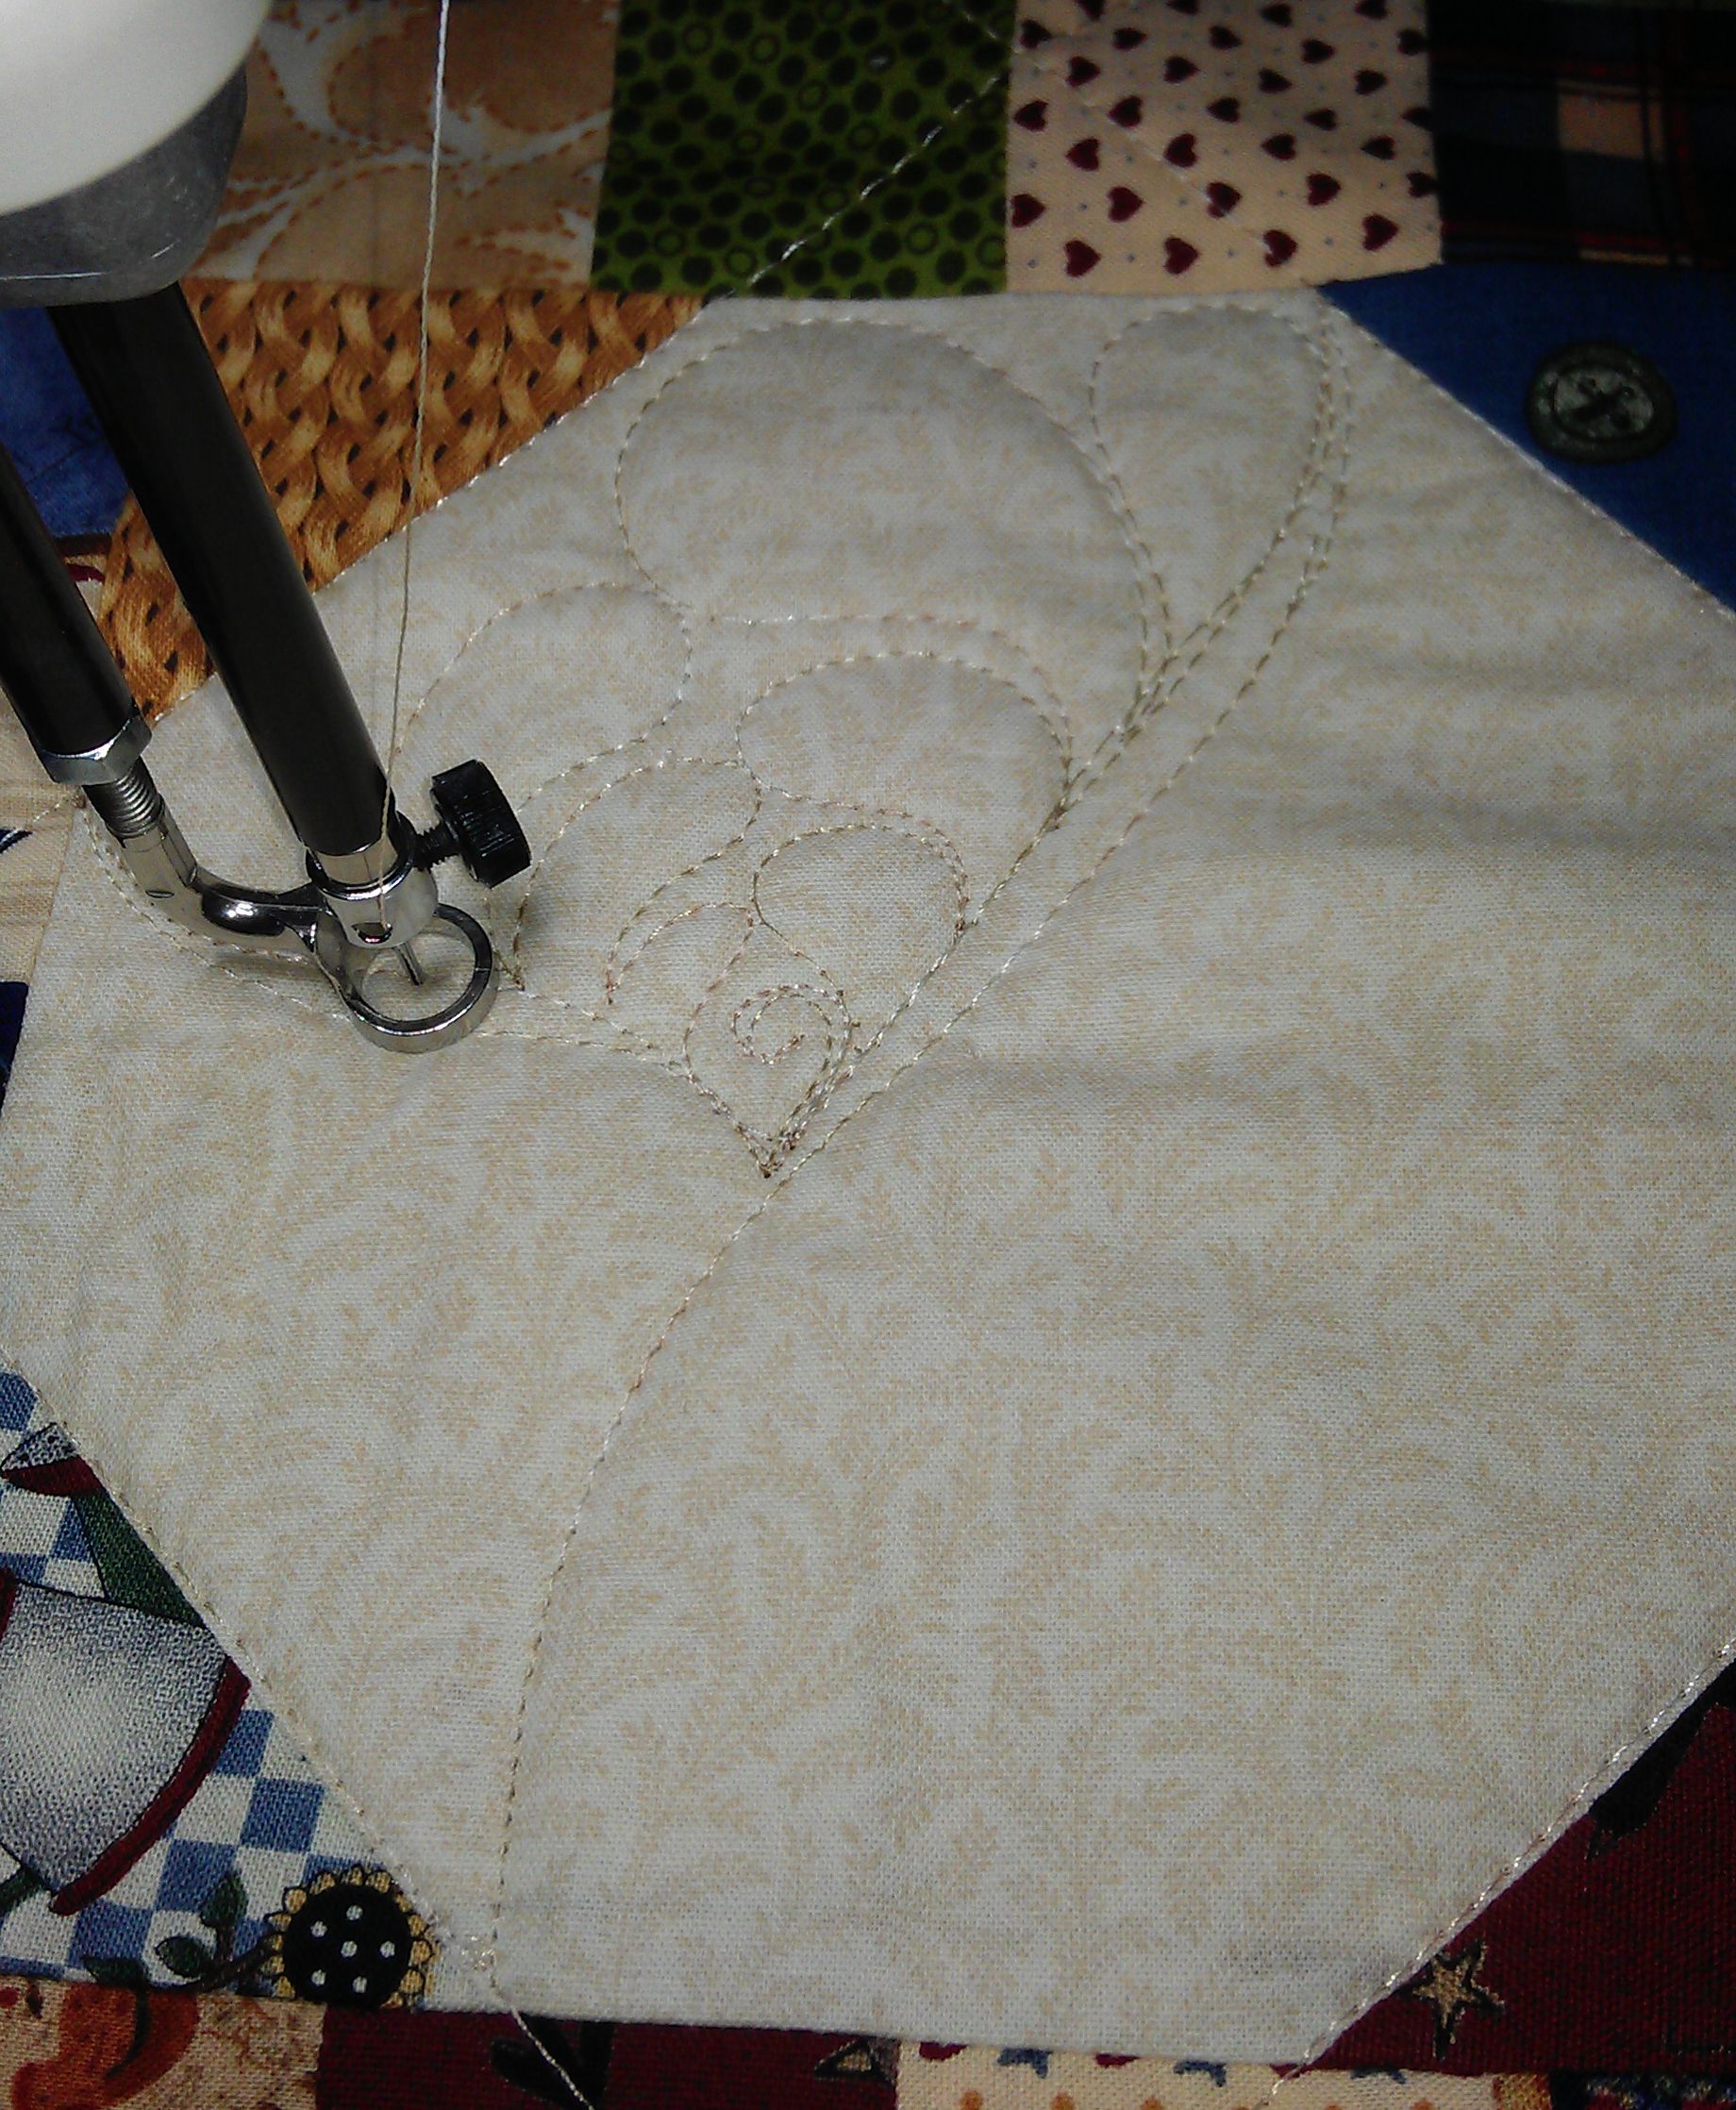
Your first inside space is now complete. That wasn’t so hard, was it? Now it’s time for the next space.
As before, from about halfway down the main spine, sweep out and echo stitch back in to create the second minor spine. You can add some interest by NOT starting the next minor spine from the same place as the first one.
The reason I create three spines (one major, two minor) is to break up the space, and because using an odd number is more pleasing to the eye than an even number (e.g. most [all?] flowers have an odd number of petals — 3, 5, 7, 9, etc. so if it works in nature, it has to work in quilting, right?).


As before, stitch a curl at the junction of the spines, then stitch the feathers up one spine, then travel back down the spine, and stitch the feathers up the other side of the space, kissing (or air kissing) the feathers on the other side.
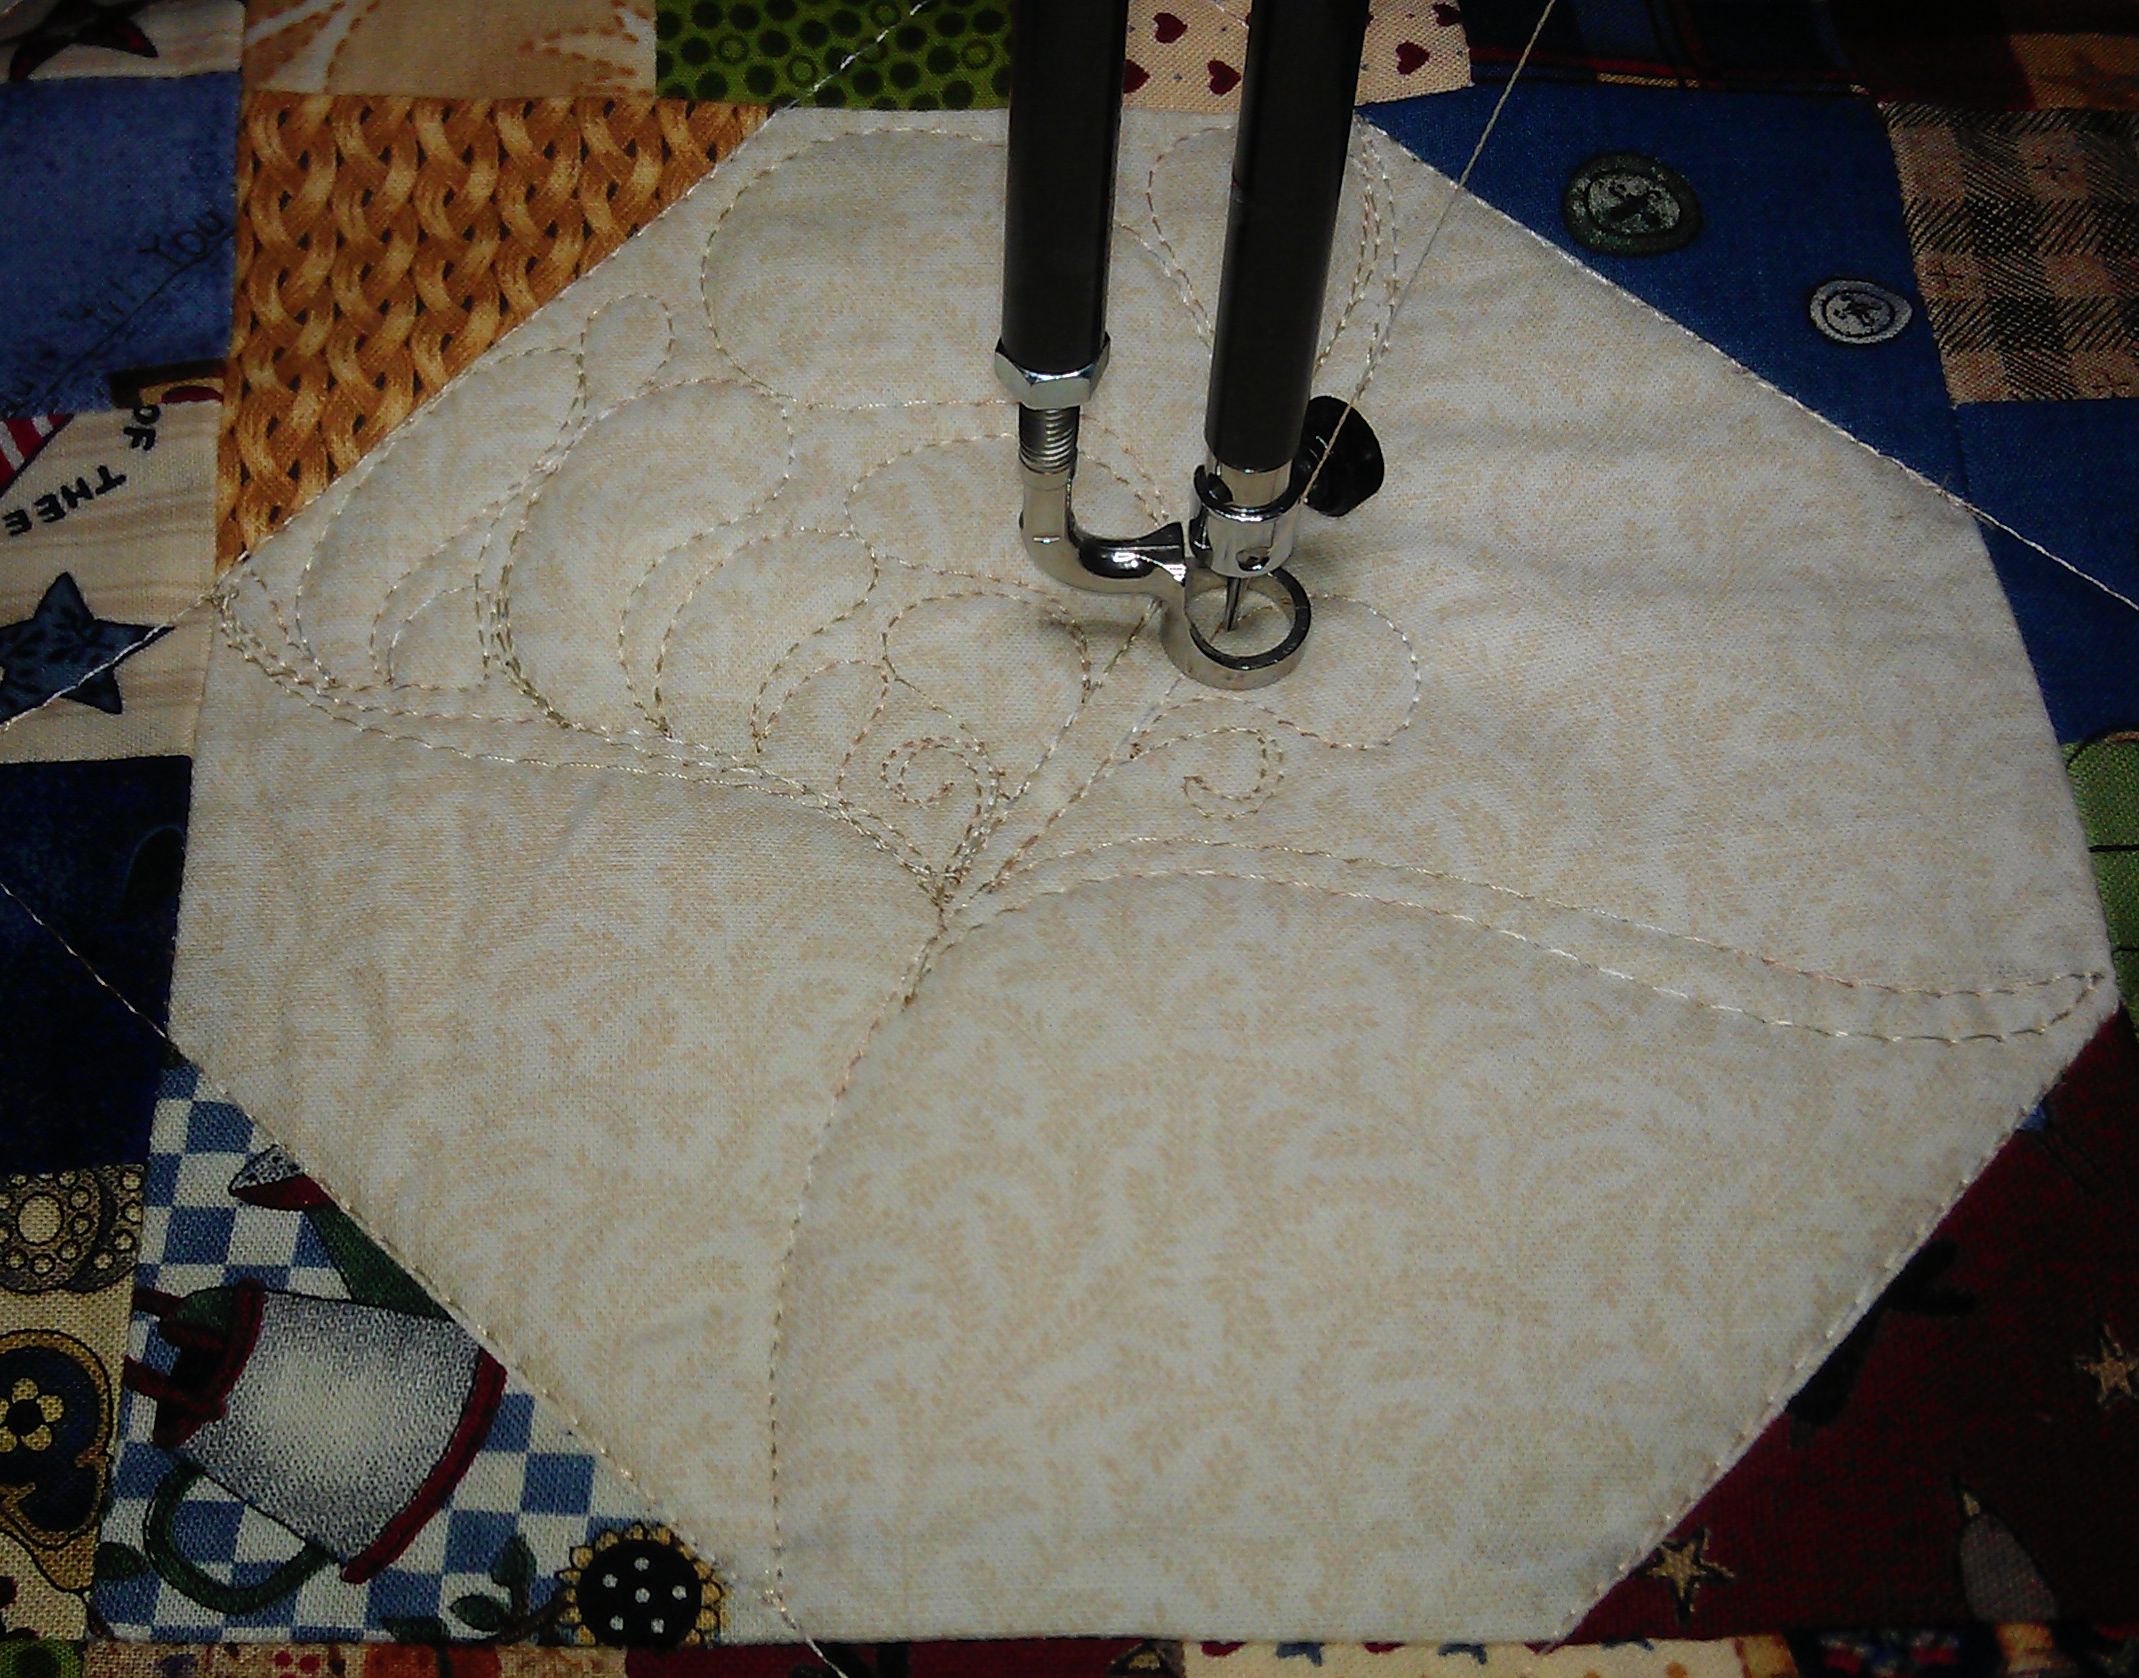
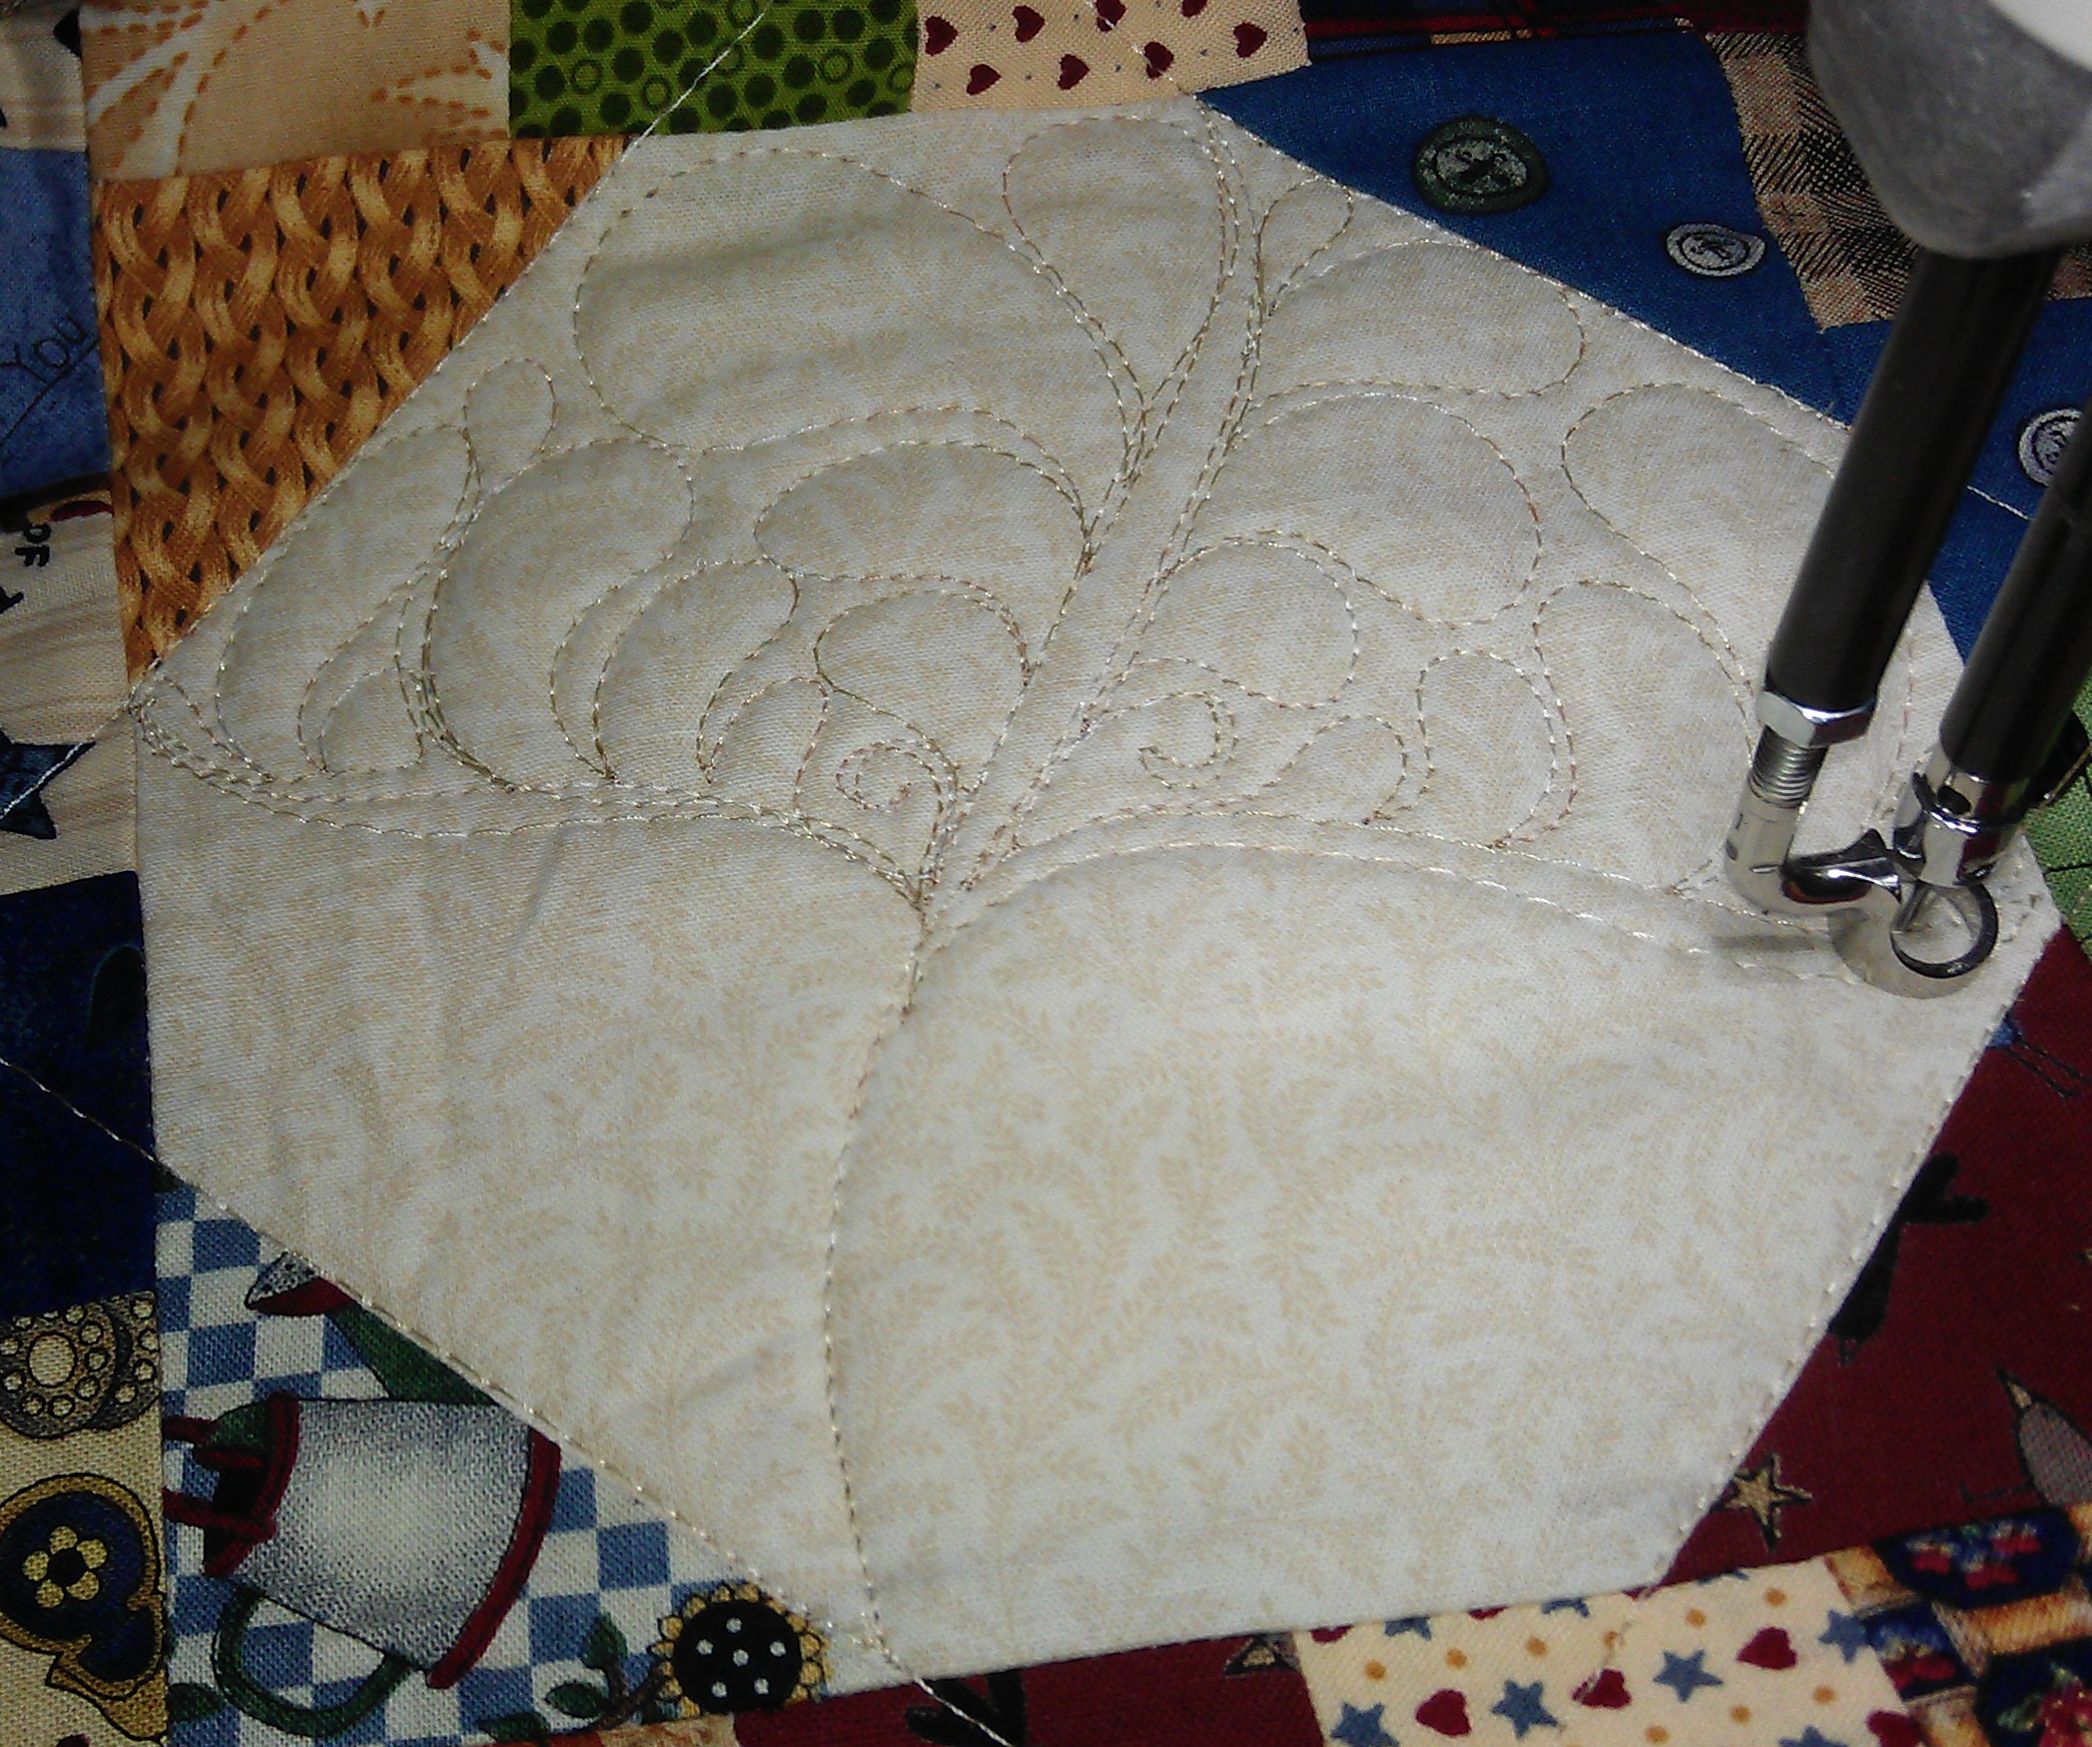
Stitch back down to the beginning of the main spine (where you first started), echoing the first line of stitching.
Start stitching the next lot of feathers from the base, working your way up the spine and curving around the outside of one of the minor spines. Your aim is to fill the entire space.
When I’m stitching these feathers, there’s a temptation to create big feathers to fill the space. But these can look odd. So I just try to keep creating similar sized feathers to the previous ones. How? By adding *little* feathers in between the normal size ones, and by curving over those little feathers to kiss the *side* of another feather, not its ‘nose’, as shown in the second photo below.
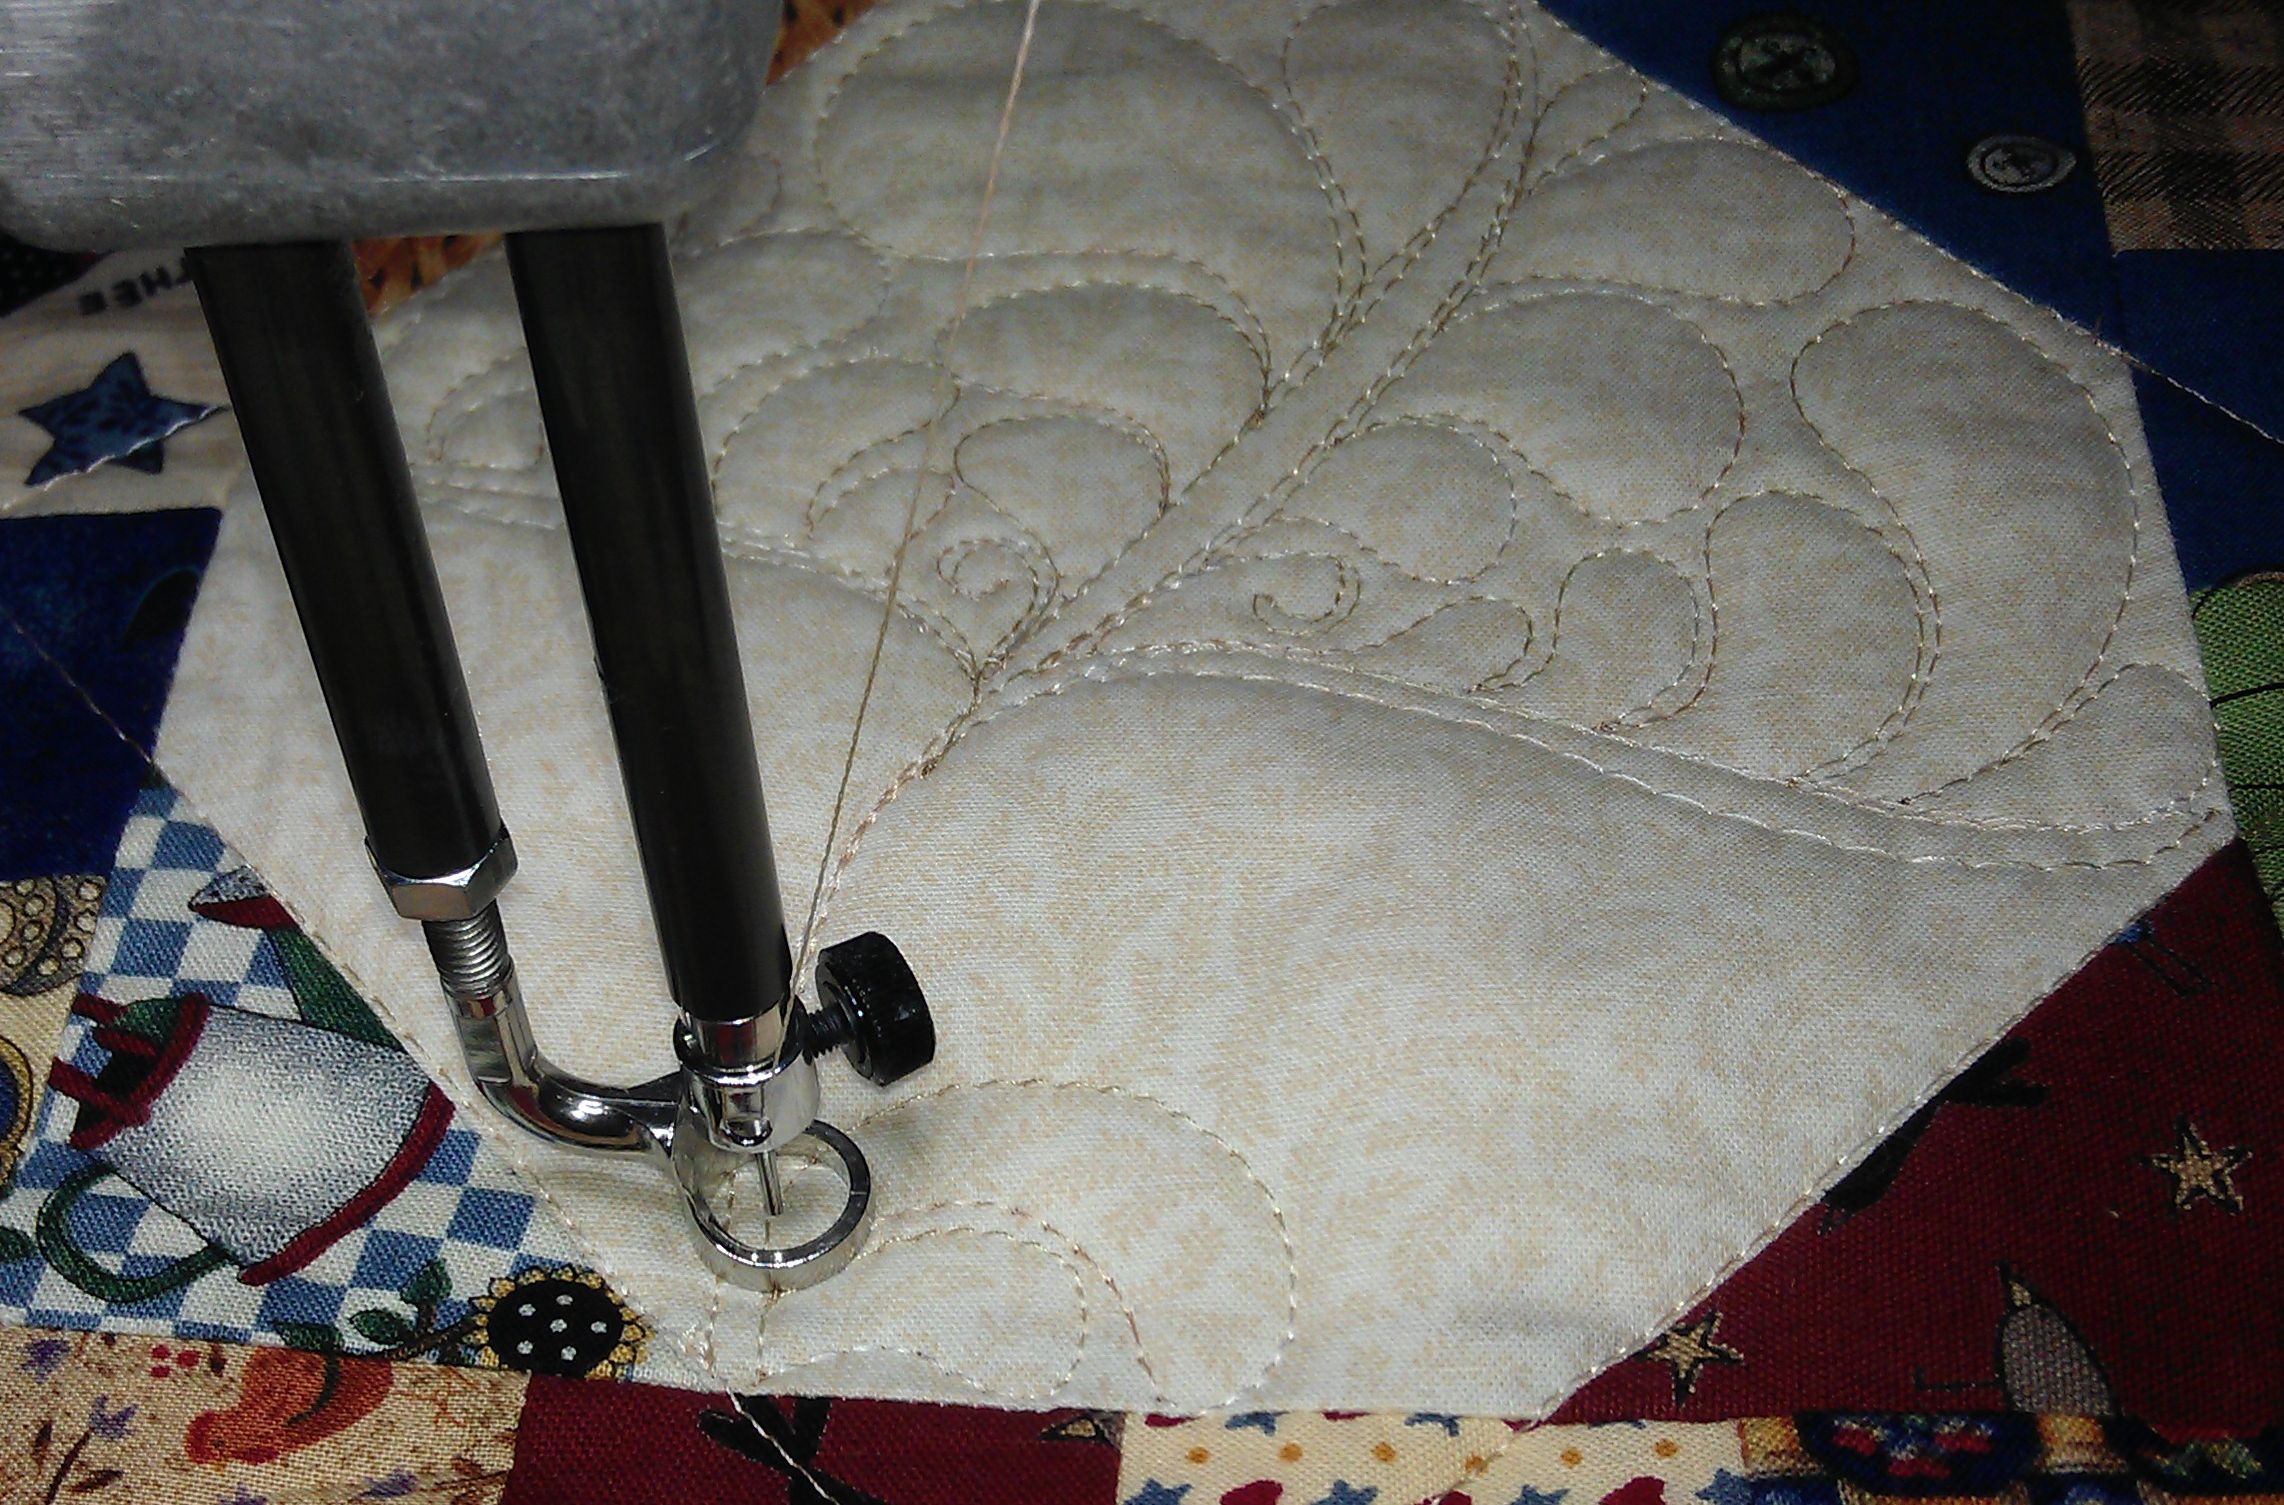
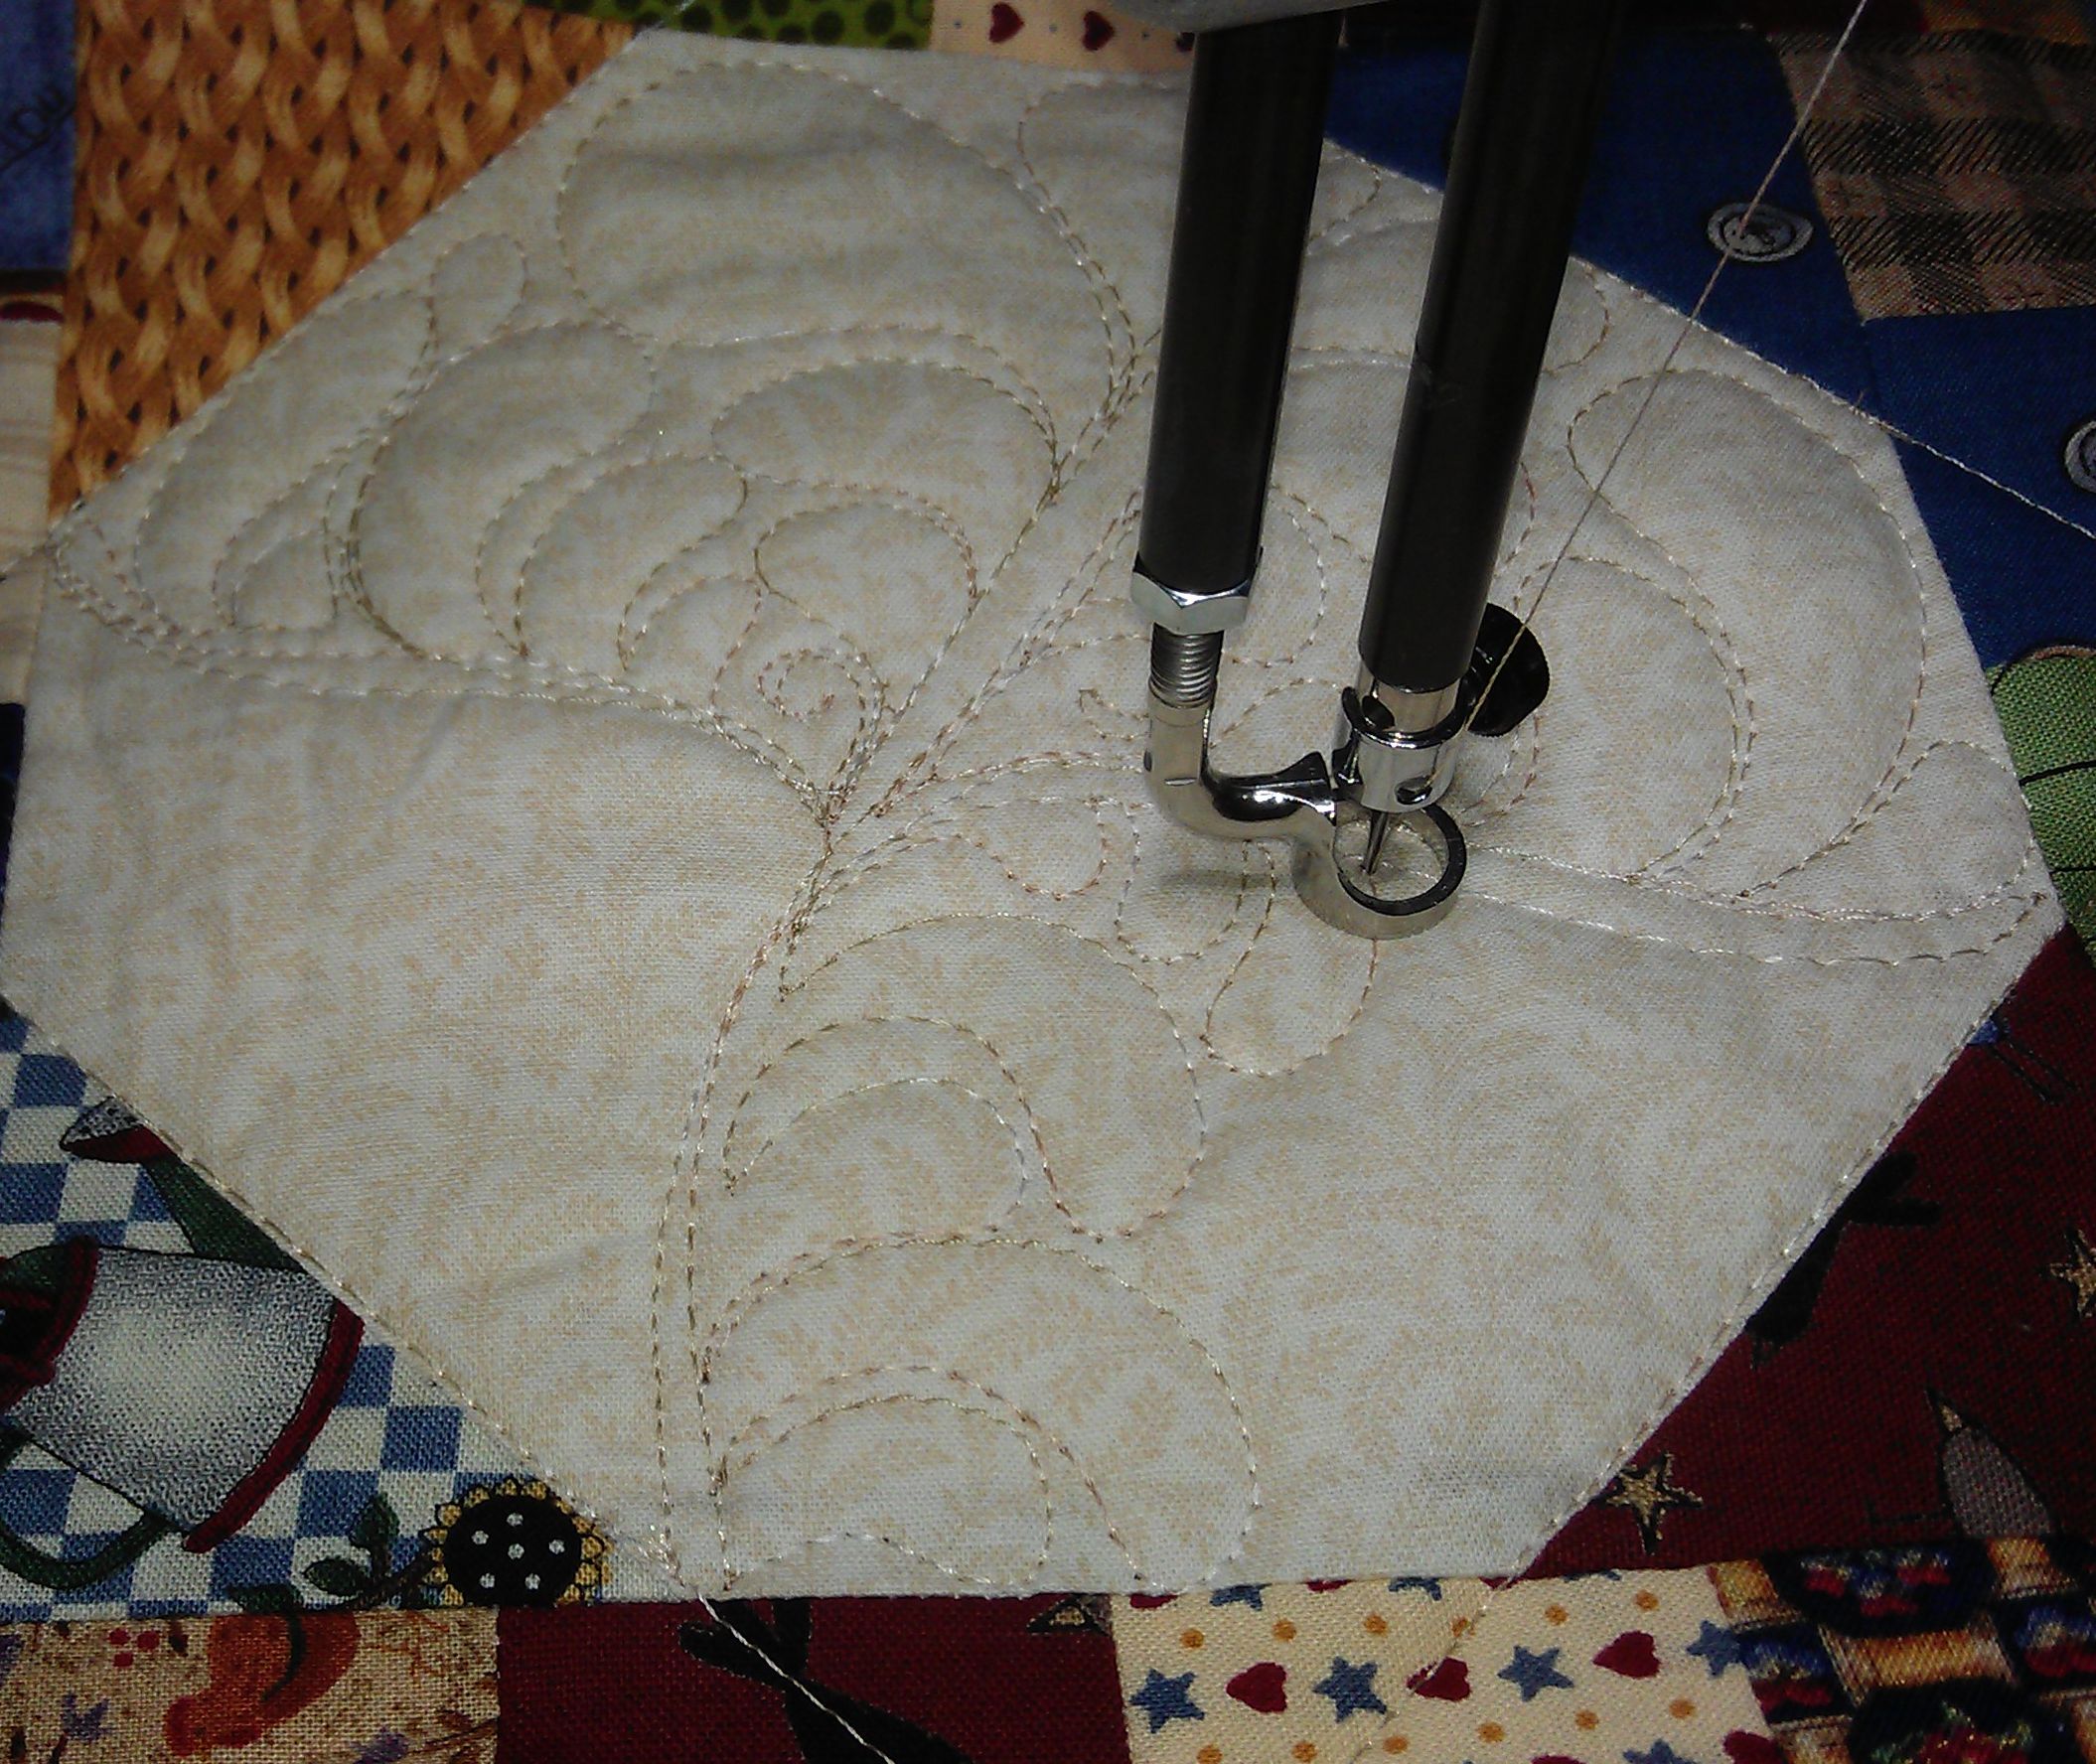

When you’ve finished filling the space, travel stitch back down the spines to the starting point and stitch feathers up the empty main spine and curve around to finish the feathers on the other minor spine, just like you did in Step 9.
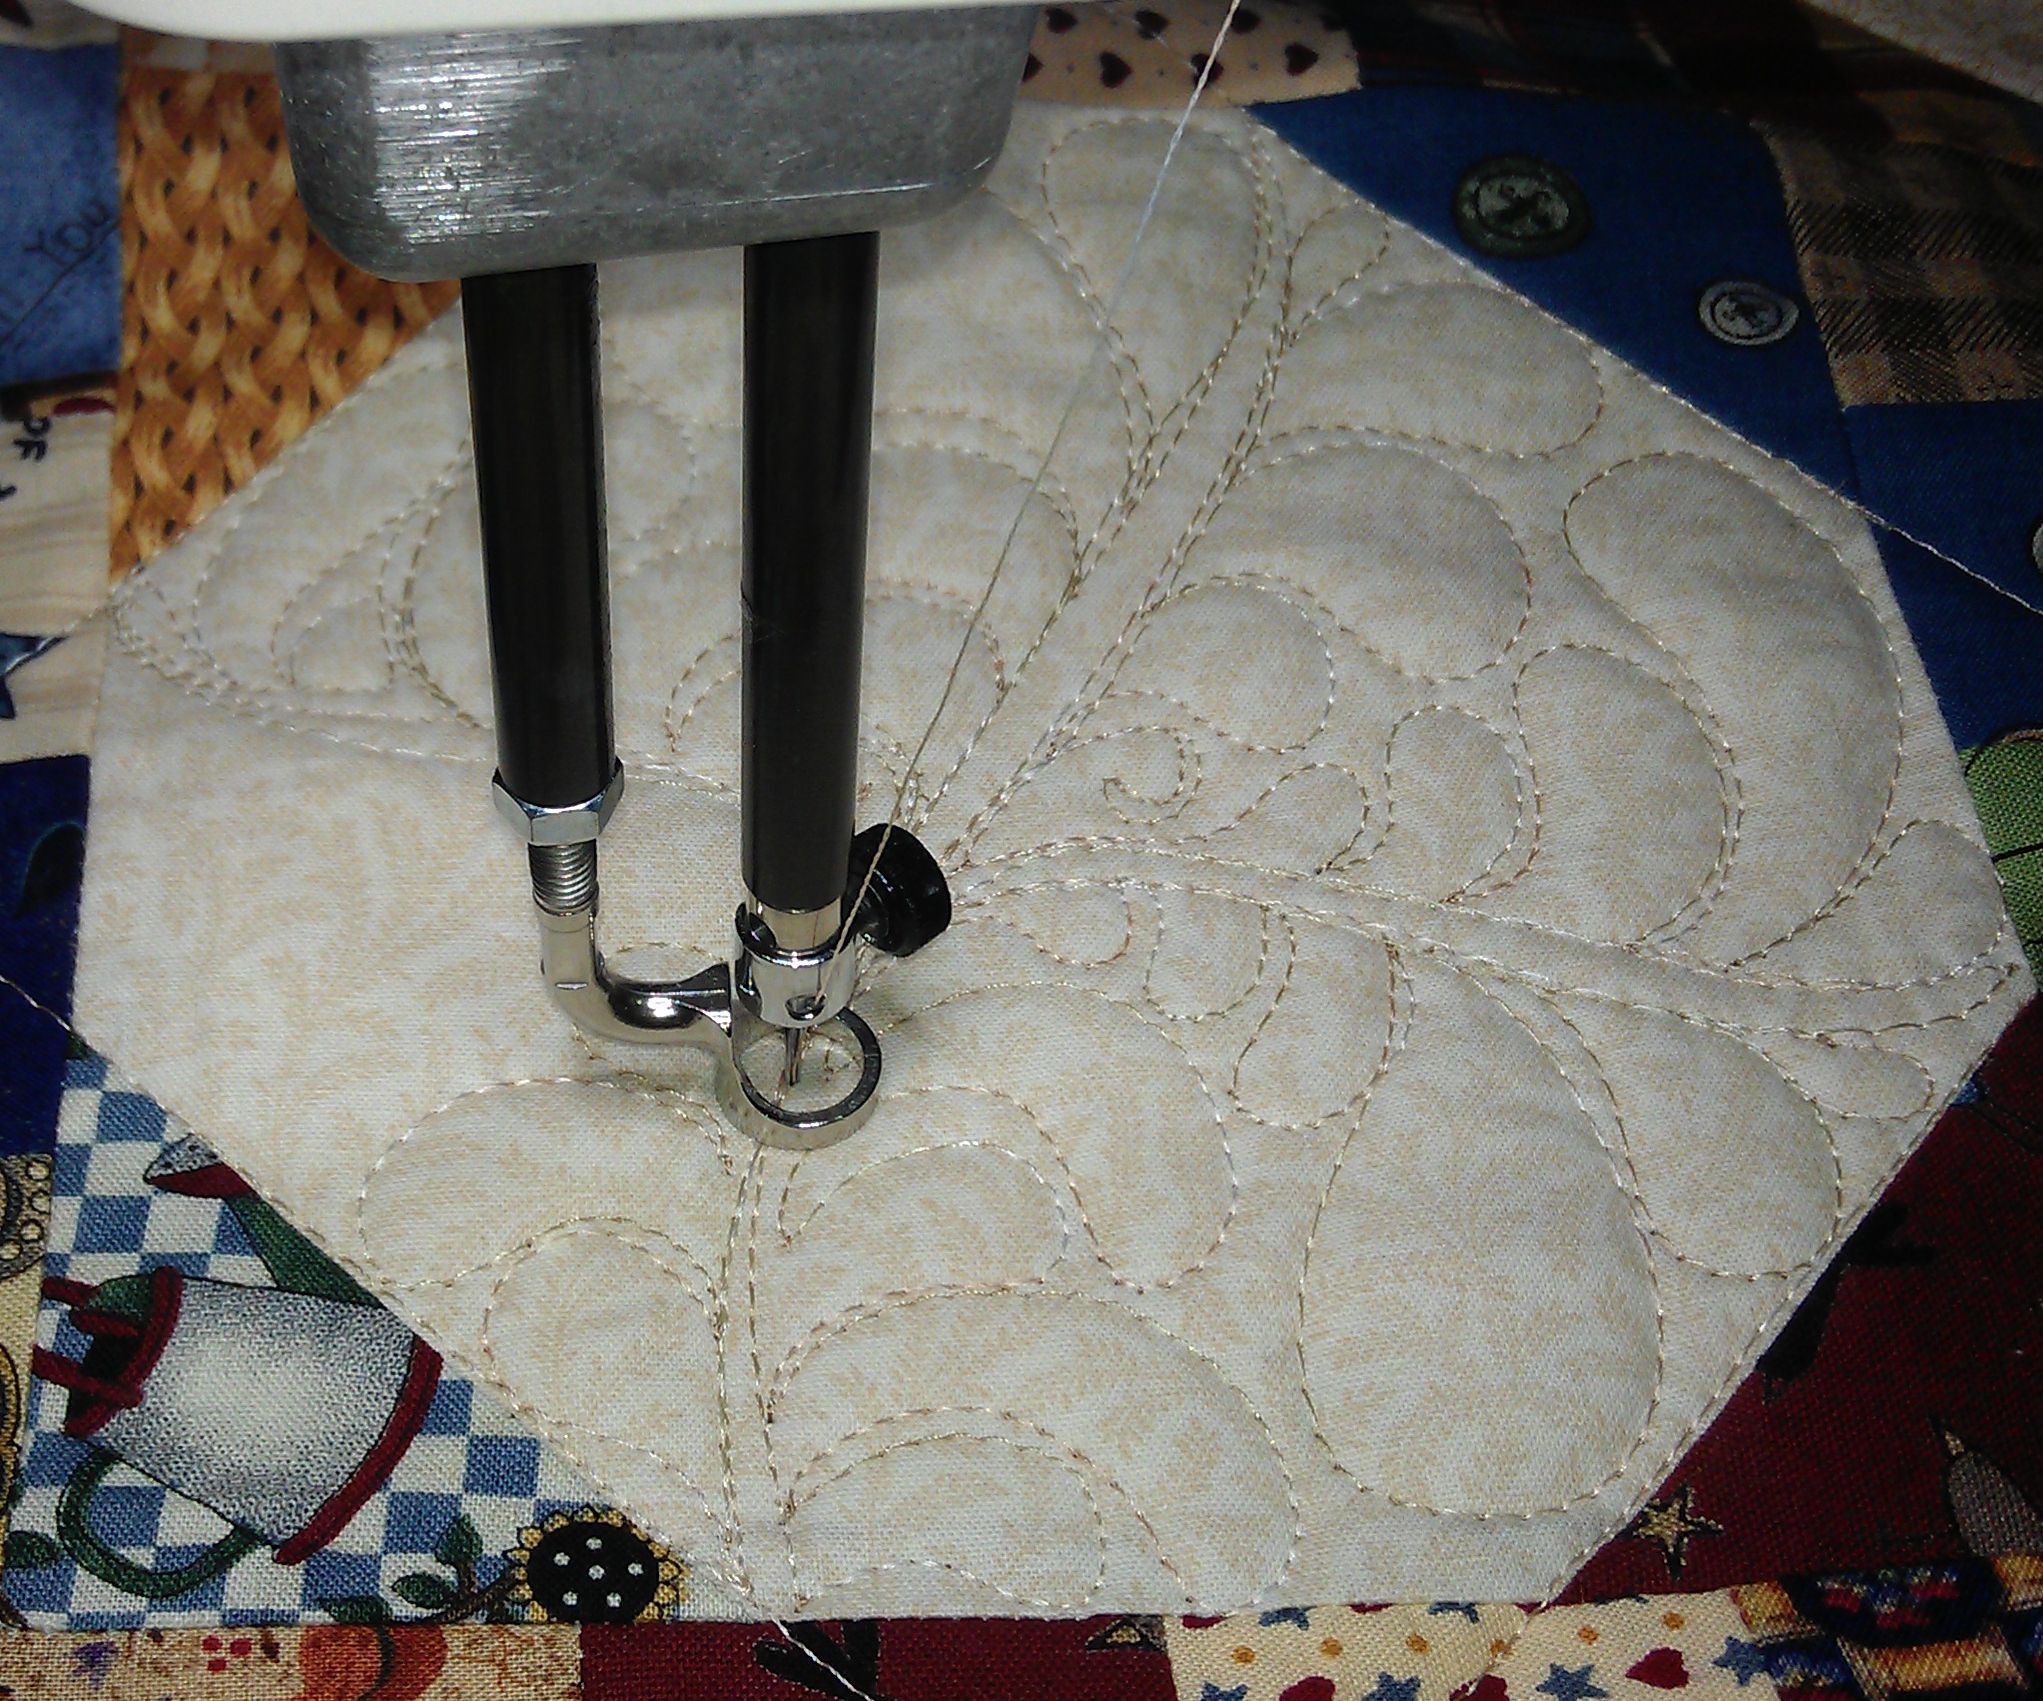
And you’re done! One octagonal shape filled with feathers:
Have fun!
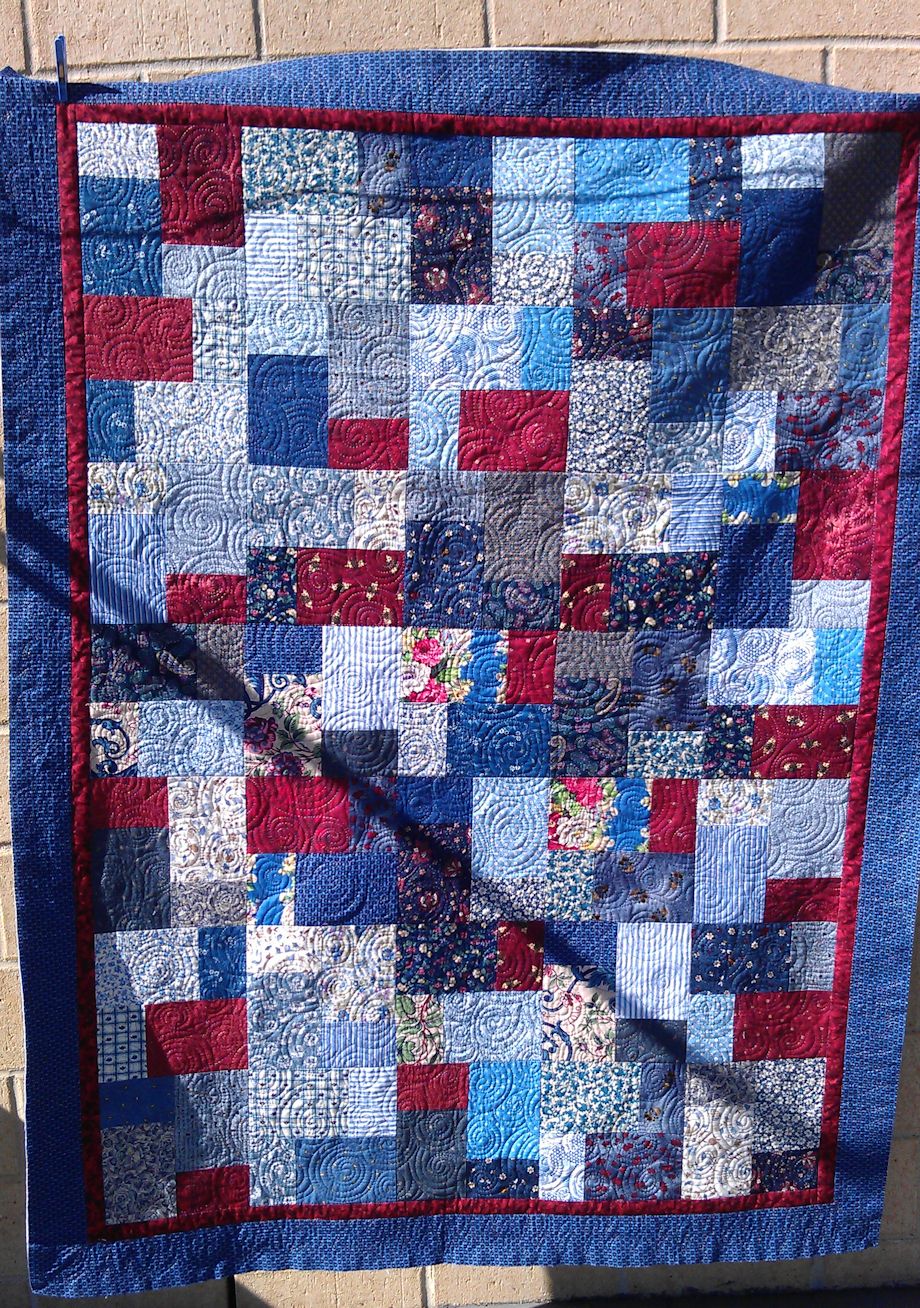
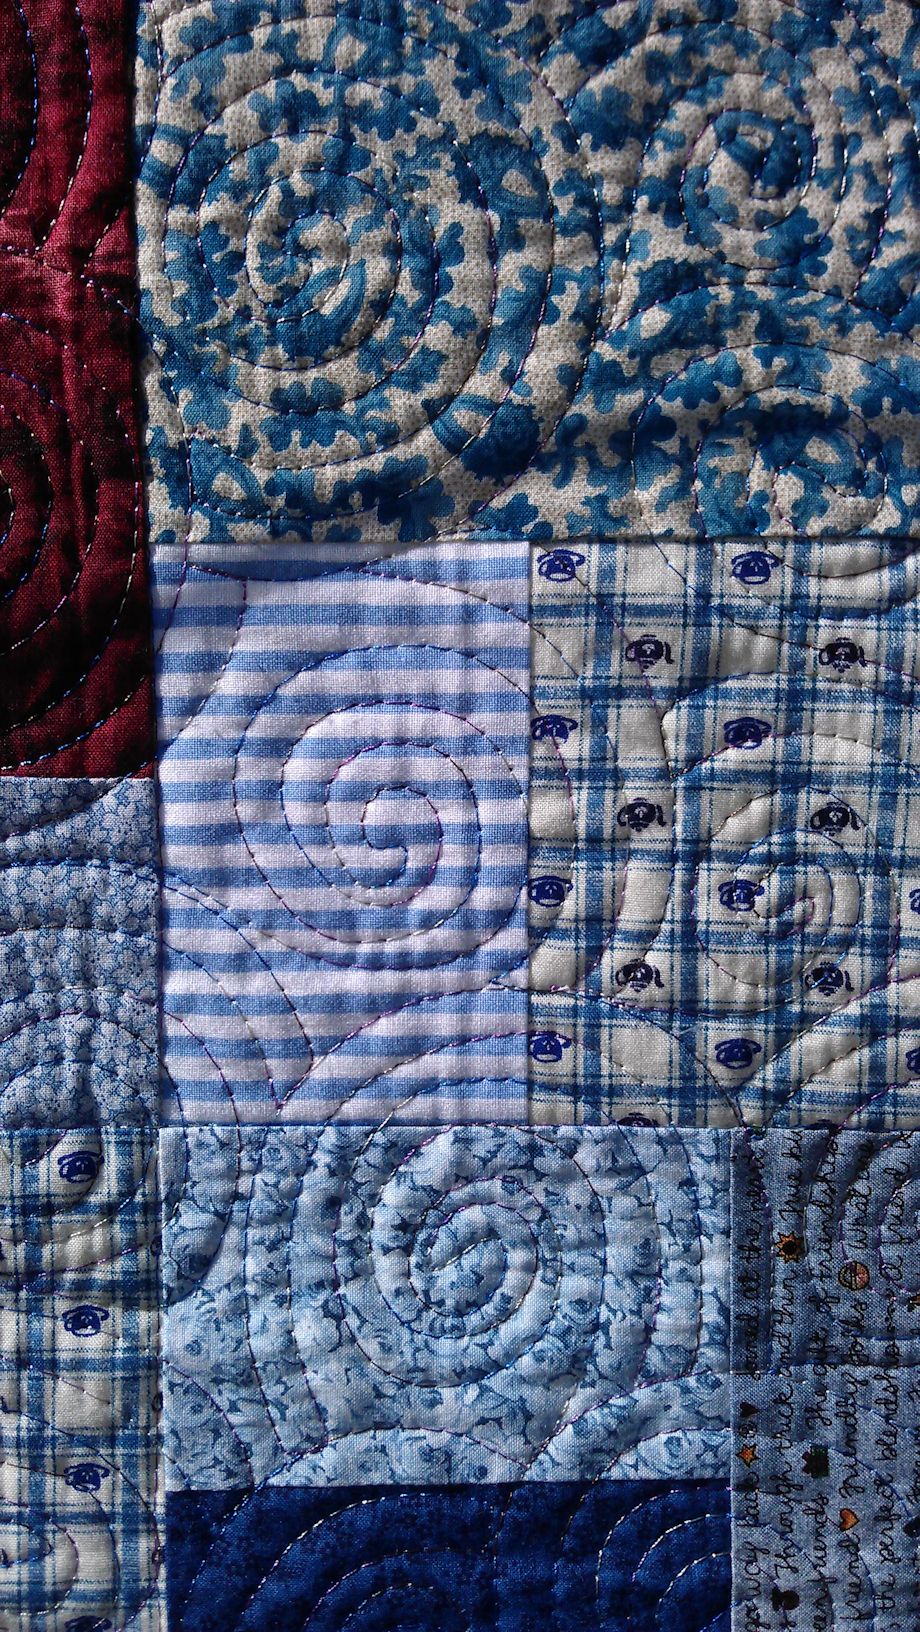
How to quilt this very geometric blue and red quilt? Circles! Well, spirals/swirls a la Angela Walters, as seen on her Craftsy class on machine quilting negative space.
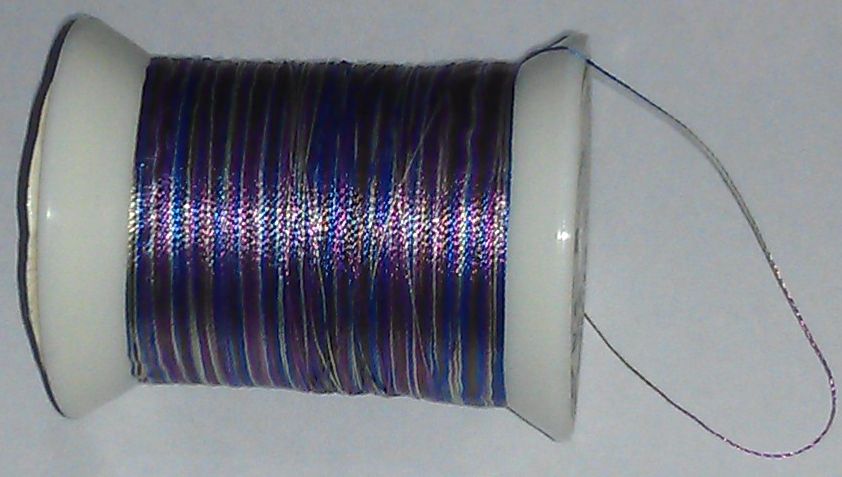
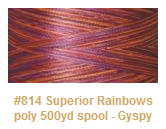
I used a red, blue, purple, and cream variegated thread for all the top stitching. When I checked online for the name of the thread colour in the Superior Rainbows collection, I found that #814 (the label on this thread and another spool of it I had) didn’t match the colour of the thread I used, so I suspect that I was using old stock with a number that’s now used for a different colour.
I really liked how the circular elements juxtaposed the rectangles and squares used in the quilt.
In the border, I stitched some ‘sort of’ flames (or petals), with an inner flame/petal and an outer one, and then echoed all round. I used the same thread in the border as I used for the main part of the quilt.
And yes, in case you were wondering, I stitched all those swirls ‘freehand’ — no rulers, no marking.
(Click on a photo to view it larger.)


This is the thread I used — it was labelled #814 and is from the Superior Rainbows range:
This is what the current catalog has as #814 in Superior Rainbows thread — they are QUITE different colours:
Threads used:
Warning! Don’t call your parents’ bluff!

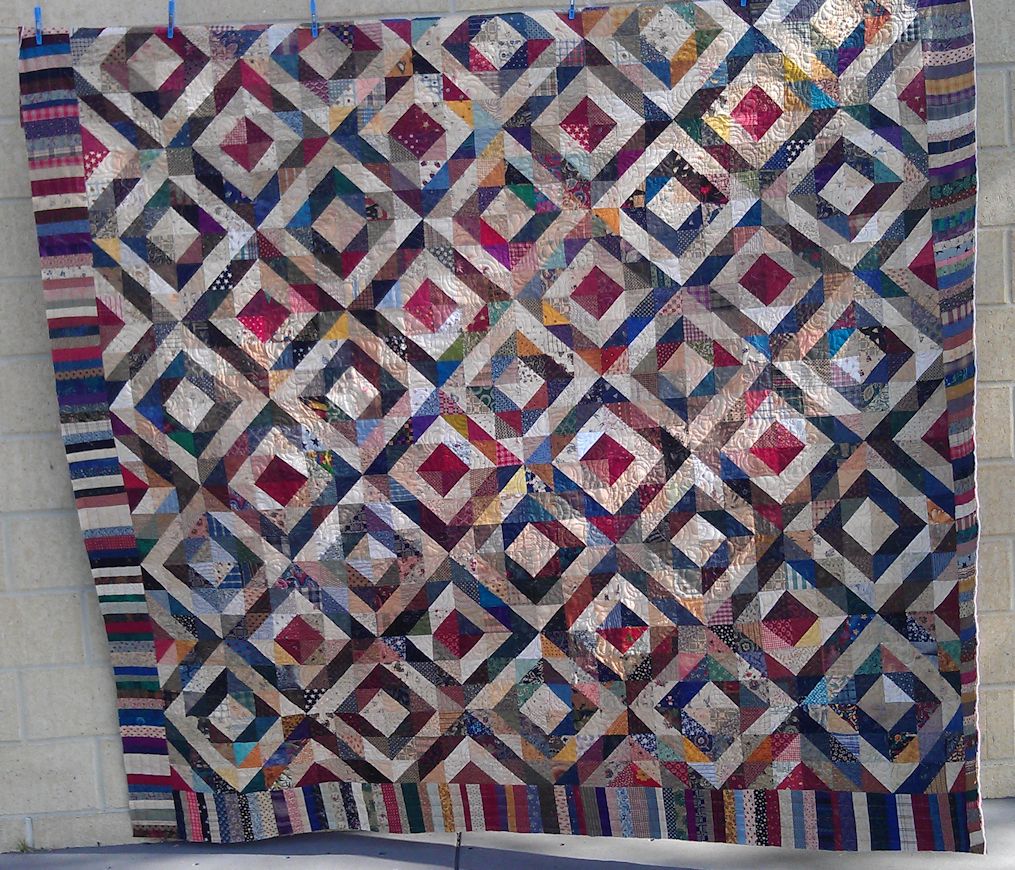
This was a HUGE scrappy quilt! I had to fold it quite a bit over the clothesline to keep it off the ground when I took the photos. The person who created this quilt top used a massive range of scrappy fabrics to make her half-square triangles and the overall effect is quite lovely (though not ‘my’ colours).
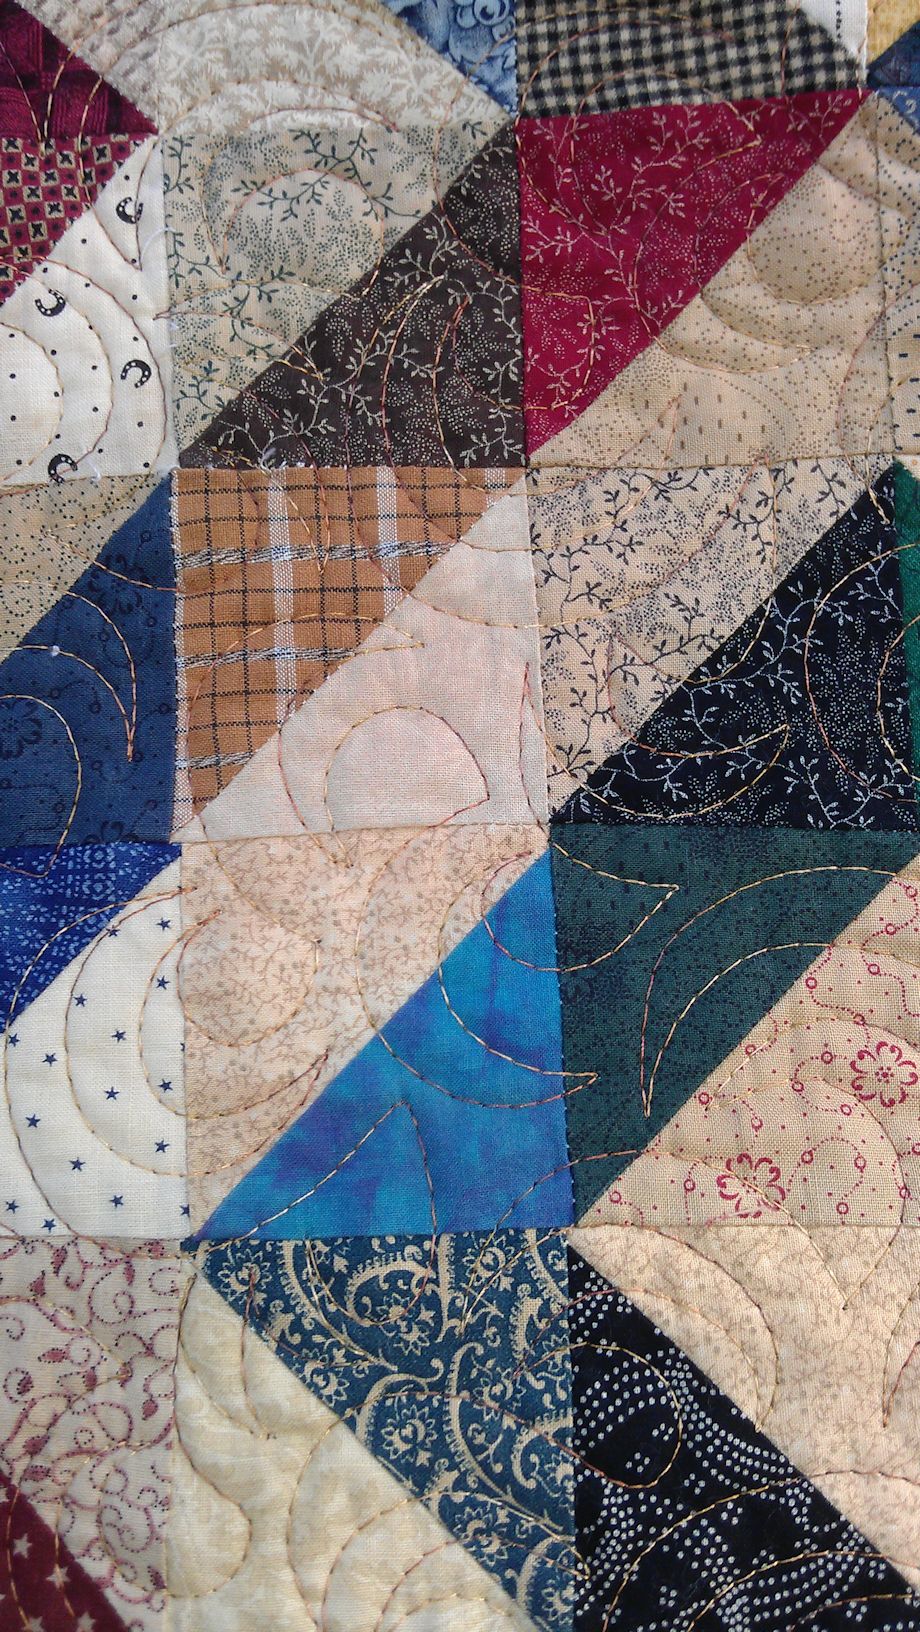
How to quilt it? Well, stitching in the ditch for ESS wasn’t an option I relished! So I decided to fall back on an old stalwart design I haven’t stitched for a while — open headbands. I used a lovely Affinity thread (from Fil-Tec) in variegated browns and it was perfect for this quilt. It also stitched like a dream and didn’t break or shred once in the entire quilt.
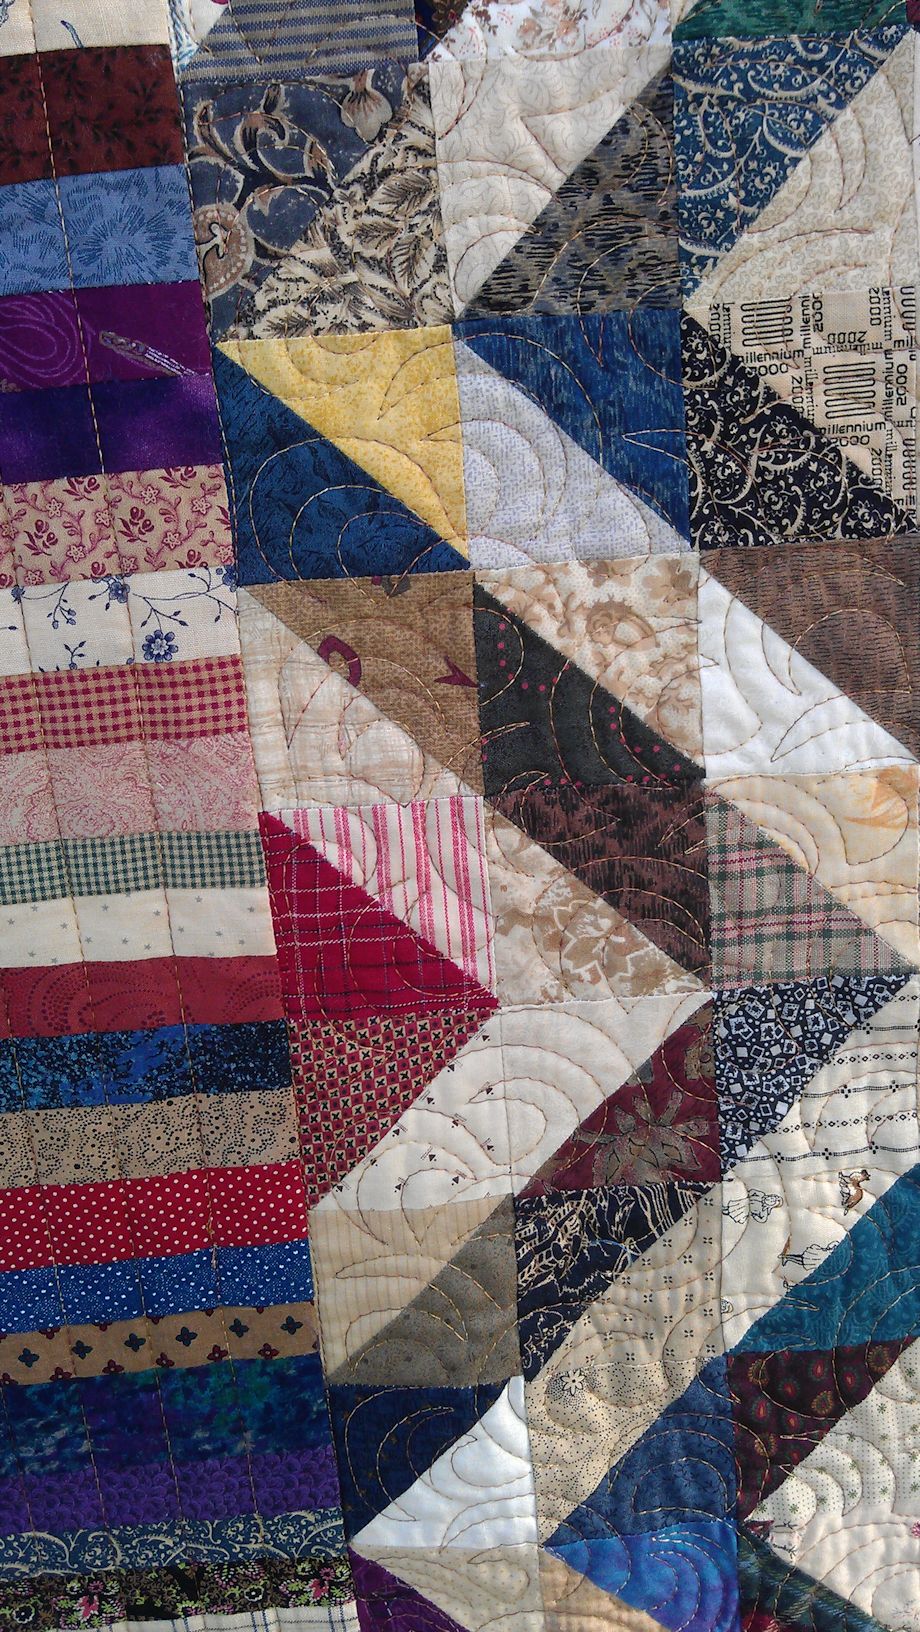
The edges of the border were starting to pull apart so I used Elmer’s washable school glue to hold them down. Originally I was going to do ‘piano key’ stitching in the border, but realised that as soon as the quilt was trimmed, the stitches would be cut and start pulling apart again. Instead, I decided to stitch perpendicular to the border fabrics, about 1″ away from the main part of the quilt, then echoed those stitches every 1″ to near the edge of the border. That seemed to work, and once trimmed, the stitches all stayed in place.
The only problem I had with this quilt was its sheer bulk — even with my extension tables and the large throat of my Sweet Sixteen, I struggled to pivot and turn this quilt. It WAS big.
(Click on a photo to view it larger.)
Threads used:
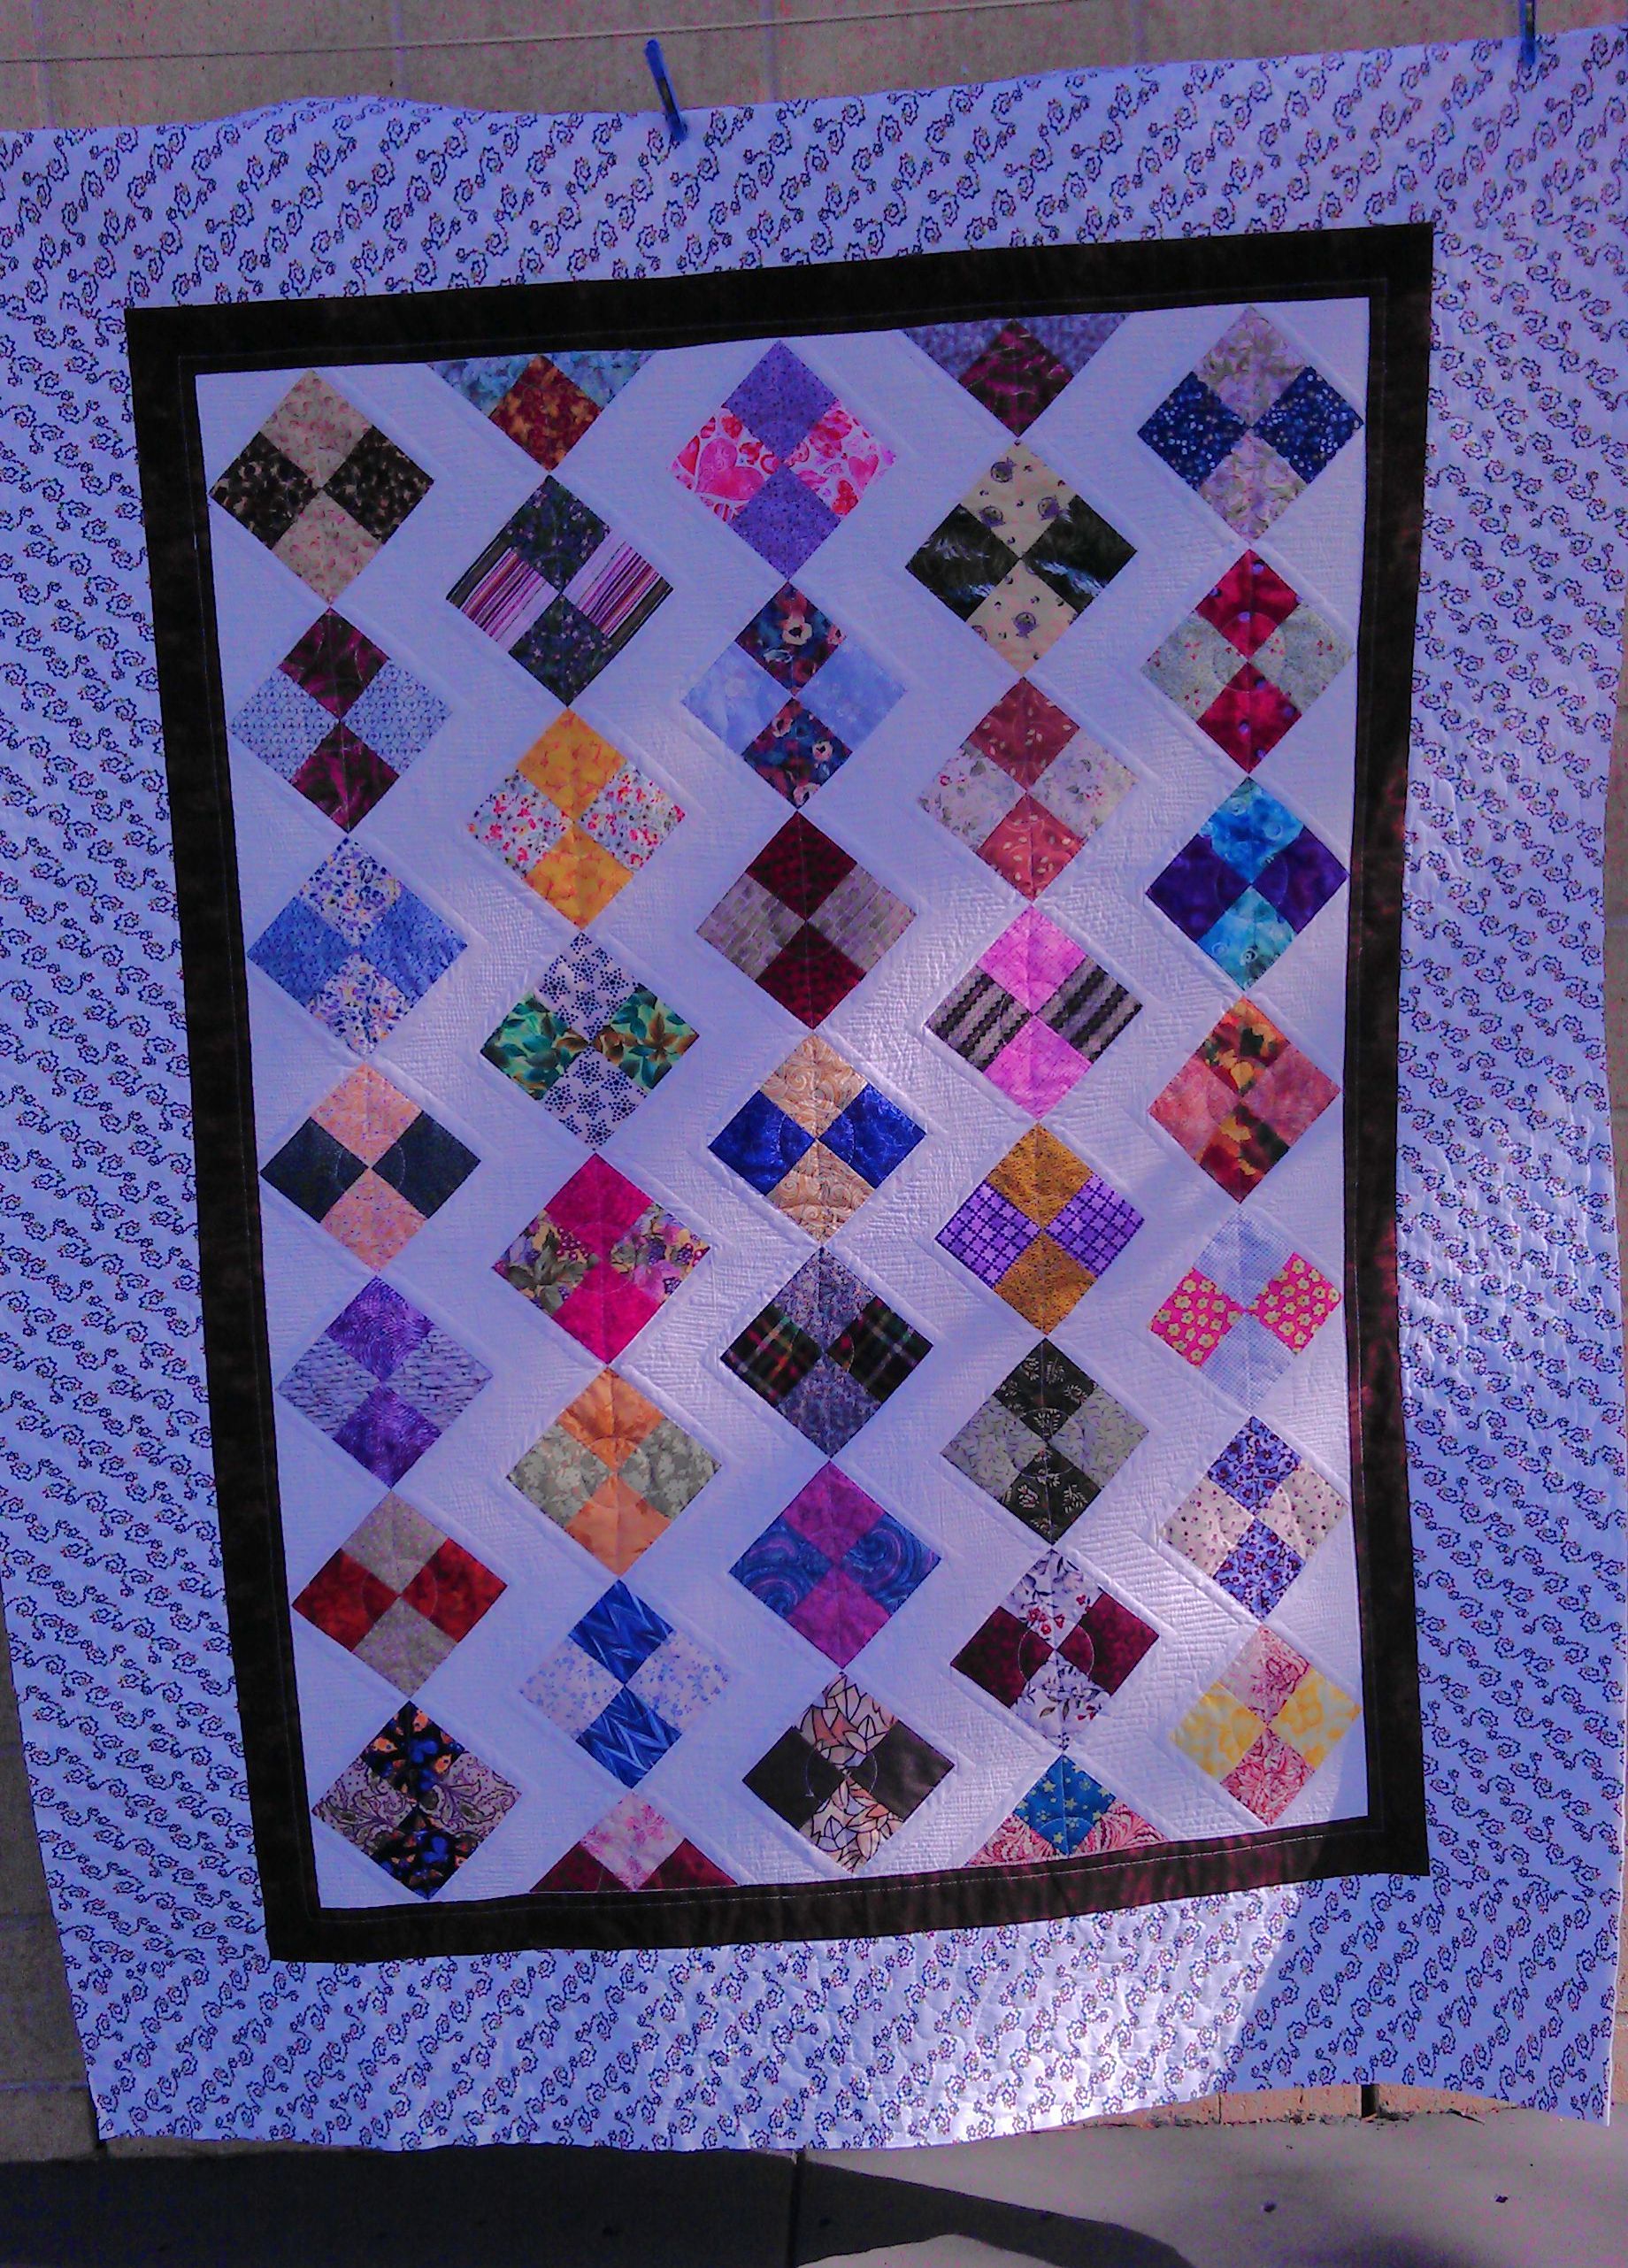
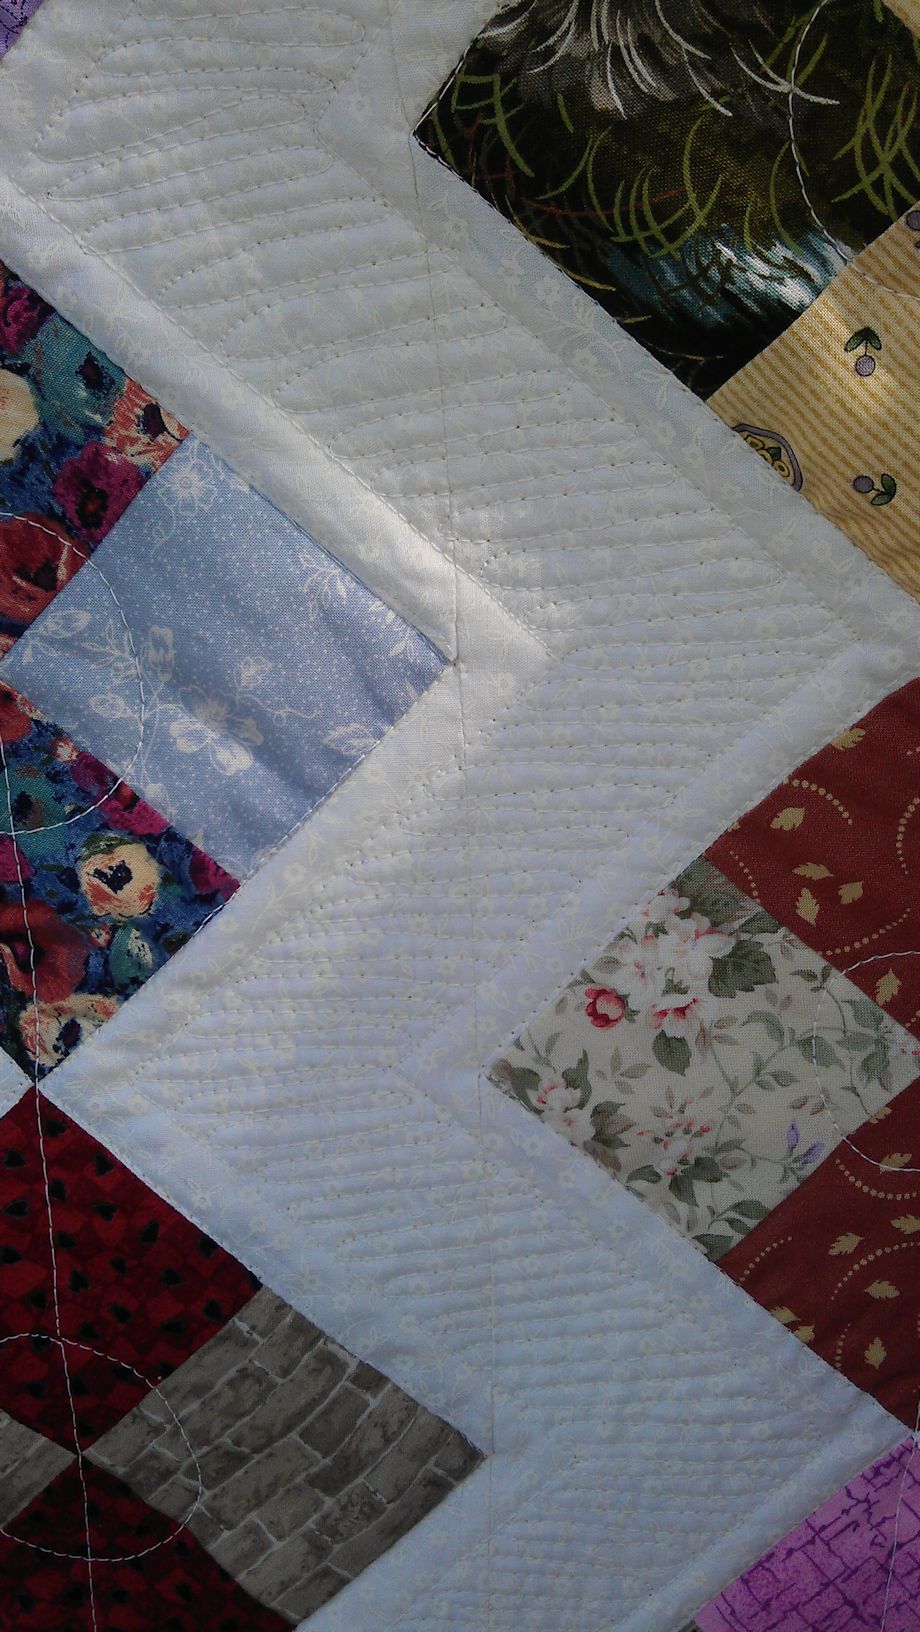
This was a fairly ordinary scrappy quilt (MY opinion only — others may love it), but that white space just screamed out for some chevron-style quilting I’ve seen a lot of recently.
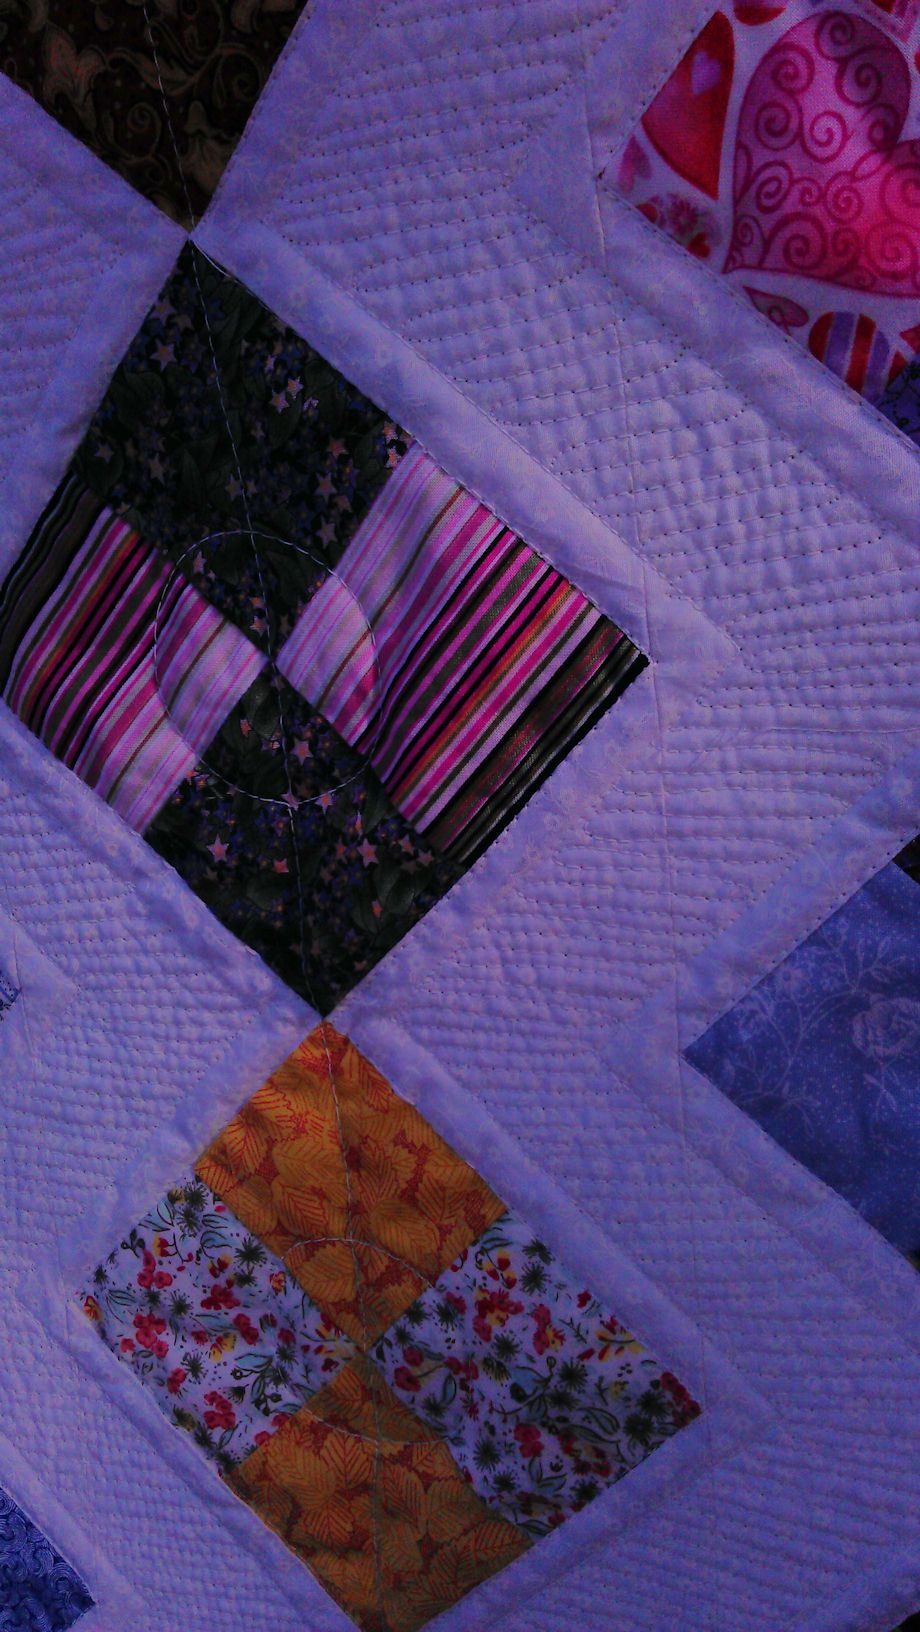
I stitched echoing straight lines 1/2″ from the edges of the 4-patch blocks, then filled those white areas with a continuous line ‘zigzag’, with the lines between 1/8 and 1/4″ apart. No I didn’t measure them or mark them or use a ruler — I just free motion stitched those lines. Perfection wasn’t my aim — the effect was. And I think I achieved that.
After I’d finished the white areas, I had some quite puffy 4-patches, so I just free motion stitched a sort of circle with a line going through it through each of them. That idea came out of my head and I take full responsibility for it ;-).
For the brown border, I used the same white thread to add a single line of straight stitching (this time I used my Line Tamer ruler!) to give the effect of a picture frame. And then I did big meandering stippling in the outer border.
(Click on a photo to view it larger.)


Threads used:



