I’m a bit behind in doing my blog posts! July was filled with quilting workshops and retreats, plus my trip to Vermont. Oh, and work. August had another quilting workshop (with Jamie Wallen), plus work, plus quilting Community Quilts, plus four full days (over weekends) thoroughly cleaning EVERYTHING in the shed to get rid of the rat scat, body marks left behind as they used out shed as their luxury winter apartment. So, I have a few blog posts to catch up on!
The first weekend in July was spent in Perth at Handcrafters House doing a great workshop with the lovely Melissa Sobotka, an award-winning art quilter famous for her immaculate attention to detail in her photo-realistic applique work. Take a look at some of her pieces here: http://www.msfiberart.com/
Because it was only a 2-day workshop, we all worked on the same piece — a bunch of tulips, cut from fabric, fused, and enhanced with Tsukineko All-purpose Inks (part of the workshop fee was a kit with the fabric range, Soft Fuse, and access to Melissa’s inks). But before we started on the tulips, Melissa taught us some basics of using the Tsukineko inks (liquid and blocks) and watercolour pencils to apply colour, shadow, depth etc. We used paintbrushes with the inks, not the Fantastix applicators that are traditionally used with them.

Then on the tulips. I’m going to reach back into my memory to see if I can recall the steps we did. The first step was to trace an outline of the main shapes and colour areas — light, medium, and dark — onto freezer paper, and label each one with its tonal value (e.g. ML for medium light).


After doing this, we put our master photo underneath the tracing and taped it down, laying and lightly taping the tracing on top.
Next, we started looking at how various parts of our first tulip hid behind and overlapped other pieces, and cut out the freezer paper bits for each part one at a time. It’s important not to cut everything out unless you have another tracing that shows which bit goes where and number the pieces — it’s super easy to get messed up, so Melissa’s advice was to do one small section at a time, using the photo underneath the tracing as your reference. After cutting out the freezer paper pieces for one tulip, we fused them to the FRONT of our selected fabrics, leaving about a 1/4-inch of extra fabric along all edges (rough cut — some of this gets cut off soon). On the back of the fabric we fused some soft fusible (e.g. Soft Fuse, Misty Fuse).

Cut and fused pieces for one tulip, the photo of which is showing through the hole in the freezer paper made when cutting out the individual parts of the flower
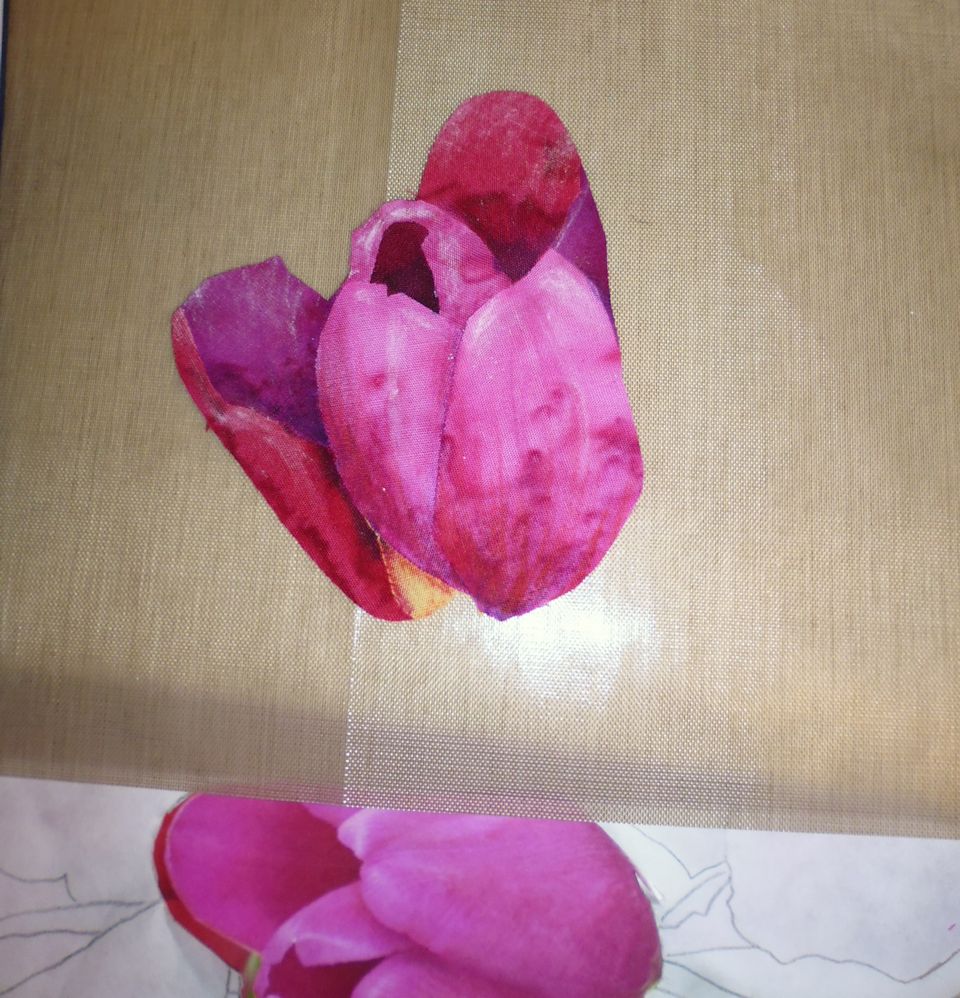
Next, we cut the excess fabric off each piece EXCEPT WHERE ANOTHER PIECE WOULD OVERLAP IT and fused the pieces together, starting from the piece representing the area furthest away. After several hours, we had one tulip done and could remove the freezer paper from the front of it. We continually referred to the photo to get it right.
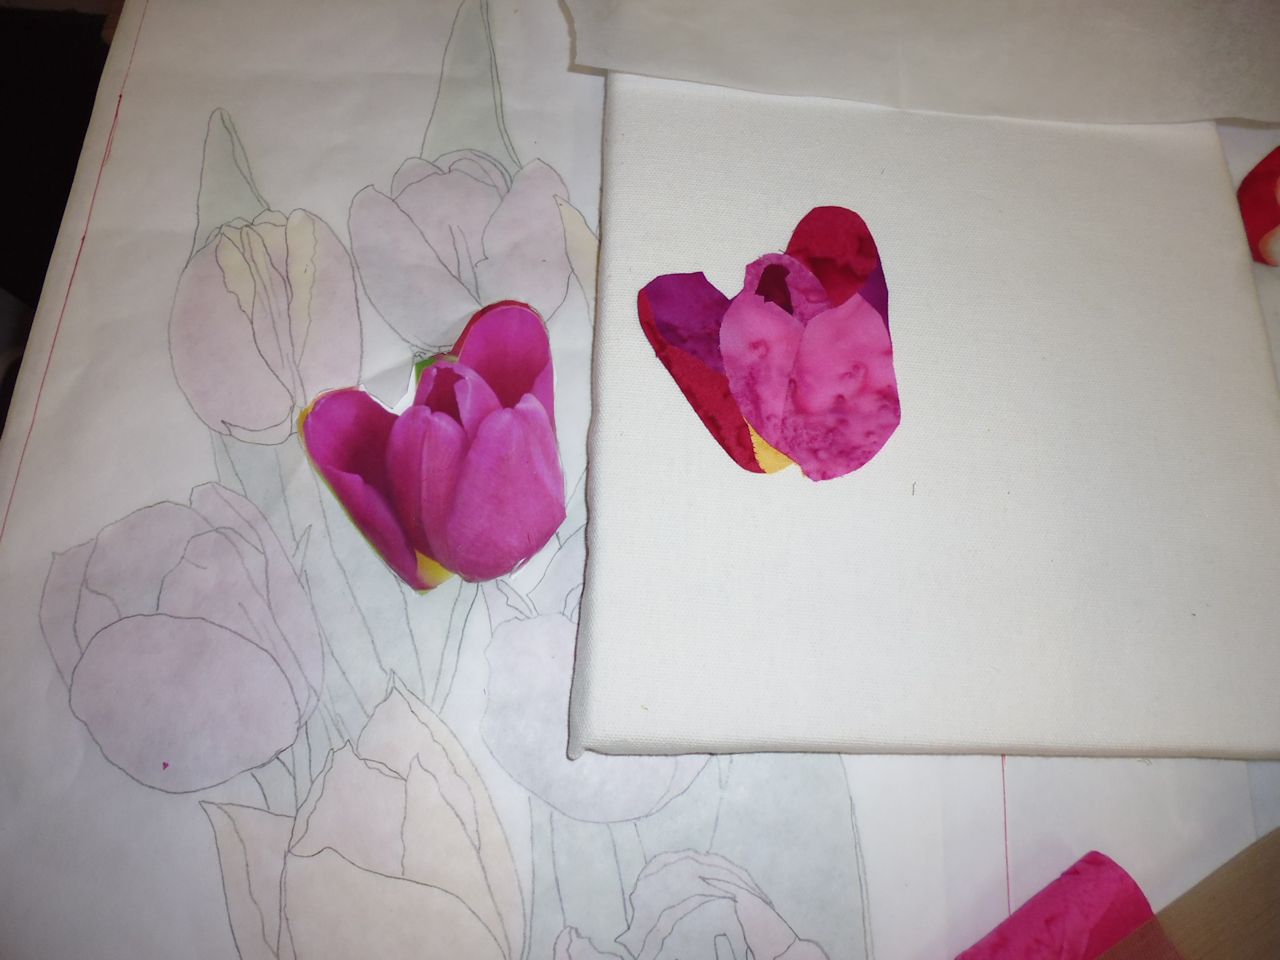
At this point, the tulip looks pretty flat. The colours are there in the fabric, but it doesn’t have much depth and shadow yet. This is where the inks come in. After applying various shades and colours my first tulip started to come to life.

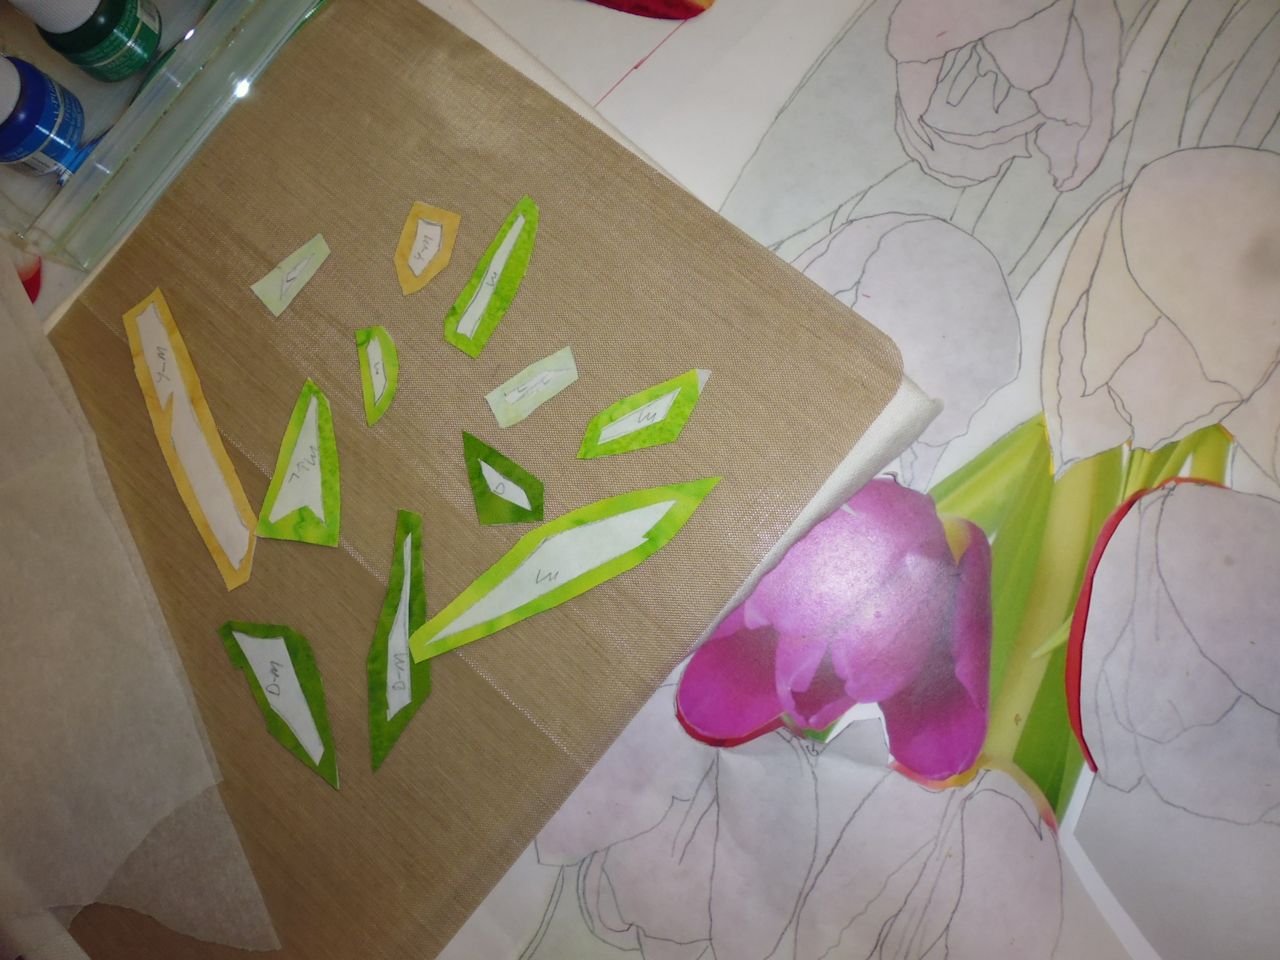
With so many tulips to do, I decided to try some leaves next, just to have a change of pace and to take advantage of asking Melissa any questions if I got stuck. Same process as for the tulips — cut, fuse, rough cut, fuse, ink.
By the end of the second day, I had two tulips I was happy with, a bunch of green stems joining them, and a tulip I definitely wasn’t happy with — so much so, I threw it in the bin! (However, one of my friends grabbed it and it was proudly displayed on her design wall when I went there the following weekend for my annual retreat!)
I haven’t finished the piece, and doubt that I will. In fact, I think I gave my finished tulips and stems to my friend as it’s doubtful I’ll ever finish it or have the patience to do so. I enjoyed learning the technique (it was similar to Lenore Crawford’s technique I learnt in 2012), but it’s too fiddly and precise for me. And it takes an enormous amount of time.
Melissa’s award-winning pieces are HUGE and take her up to a year to create. She must have the patience of Job! I certainly don’t…


Leave a comment