Challenge 2011: Other monochromatic quilts

15 10 2011

One of the delights of our annual retreat is seeing how the other gals met the challenge set the previous year. Their friendship and general awesomeness is pretty great too ;-), but this post will just focus on the quilts made by the five of us to meet the monochromatic challenge set by Flora.

Considering how many colours there are, it was a complete surprise that we’d all created pieces using the same sector of the colour wheel — there were two blue quilts, two purple quilts, and one pink one (mine).

The entire piece (except for the batting) had to be created using one colour only — top fabric, backing fabric, all threads. And there was to be no other colour in the selected colour — so no creams, greys, blacks, whites, silver, gold, or any other colour that contaminated our chosen colour. However, we could use as many shades of our chosen colour as we wanted, as long as it was ONLY that colour.

Here are the quilts we made to meet the monochromatic challenge; click on a small image to see the larger size.


Challenge Quilt 2011: The finished quilt

15 10 2011

I got back to my challenge quilt in April after trying out a Handi Quilter Sweet Sixteen machine at the Eleanor Burns Quilting Academy in California, and after my most generous friend Bobbie lent me hers for two weeks. I actually did all the quilting on it using Bobbie’s machine, then bought my very own Sweet Sixteen at the end of April as a result of stitching this quilt (and others).

Because the challenge was monochromatic, all the threads in this quilt are also in pink tones. Most were rayon threads, which added an extra sheen. All stitching in all blocks is done free motion — no rulers, no patterns, no drawn designs, just stitching where my hands and brain took me. Drawing zentangles on the plane to and from the US and at the conference really helped! As did the confidence I gained from working through all the Leah Day designs (see also My personal Leah Day project).

There are a lot of photos here as I wanted to preserve for posterity all the different stitching I did in the blocks, the sashing, and the borders — remember, I’ll be giving this quilt away (no, not to you, Sue!!). Click on a small photo to show it larger, then click on the larger version to show it full size.

Oh, and the reason why it’s taken months for me to post these articles and pictures is that our challenge piece is meant to be a secret from the others until we have our annual retreat in late September/October. We had our retreat last weekend, so I can now post my photos!

See also:


Challenge Quilt 2011: Piecing the top

15 10 2011

After deciding on the design, the colour, and the fabrics, then doing all the cutting, it was time to start putting the main part of the quilt top together.

I stitched a sashing strip to one side of all the squares in a each row (70 squares in total). I chain pieced these so that I kept the squares in each row together, and in the order in my ‘design wall’ photos.

Then I stitched a sashing strip with a ‘key’ square to the adjacent side of 6 of the 7 squares in each row (the last square didn’t get one as I didn’t want the key squares in the border area). I only stitched these sashing/key strips to 9 of the 10 rows — the last row didn’t get them either as I didn’t want the key squares in the border area.

Here’s what one row looked like chained together:

Next, I stitched all squares in a row together, and pressed them alternately — I pressed the seams of the even rows towards the sashing pieces, and pressed the seams of the odd rows away from the sashing pieces (into the square).

Here are all the rows pressed and laid out ready to piece together (notice the use of numbered pins to indicate the rows):

Finally, I stitched the rows together. To avoid warping and skewing, I stitched rows 1 and 2 together in one direction, then row 3 to row 4 in the same direction, then 5 to 6, 7 to 8, and 9 to 10 all in the same direction. After pressing the seams, it was time to join rows 9/10 to rows 7 /8 — this time stitching in the OPPOSITE direction. Likewise, I stitched rows 1/2 to rows 3/4 in the opposite directions, then rows 5/6 to both large pieces.

This ‘stitch in the opposite direction’ was a technique Michelle Pearson (at Handcrafter’s House in Midland, Western Australia) showed me at a quilting workshop a few years ago — it stops large joined pieces from skewing… and it works! One way to know which direction you’ve stitched is to leave a decent amount of thread either at the beginning or end of a stitched row (but NOT at both ends!). I leave the thread at the beginning of my stitching. That way, after I pin the next rows together, I can tell which end to start stitching from (the opposite end is the one without the long threads).

A final press and the main top was all done — the only thing to do was stay stitch about 1/8 inch in from the edges just to hold everything in place as it may be some weeks before I get back to this quilt.

No need for a design wall this time — I just hung it over the door with some skirt hangers!

See also:


Challenge Quilt 2011: Preparation

15 10 2011

I wrote this post in November 2010, knowing it wouldn’t be published until late September/early October 2011, AFTER we’ve had our quilting retreat at Bobbie’s house. The reason: Our challenge piece is to remain secret from the other ladies — which is part of the fun of the challenge!

Flora set the 2011 challenge — and what a challenge it was! We are to make a monochromatic piece. That means ONE colour from the colour wheel only, with no blacks, whites, greys, creams etc. in the fabric. So, if you choose purple as your colour, then every fabric you use must ONLY have purples in it — no silver or gold flecks, no little black dots to make the purple darker, no reds in with the purple etc. Sounds easy. Yeah, until you have to actually choose your fabrics! Then you realise how many have other colours in them, often as part of a minute print.

So the first part of the challenge is choosing your colour, then your design, then your fabrics.

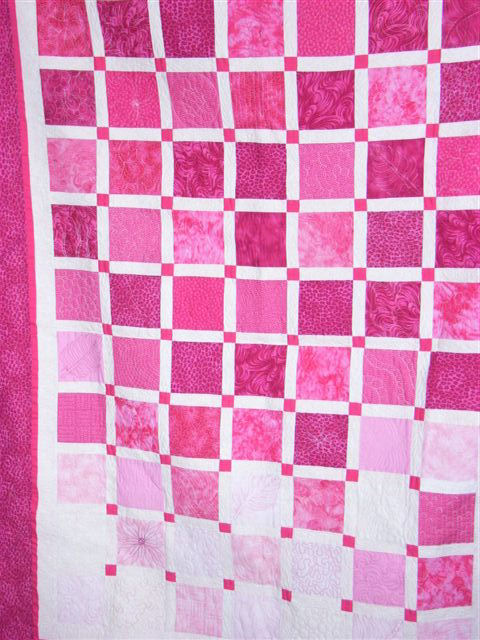
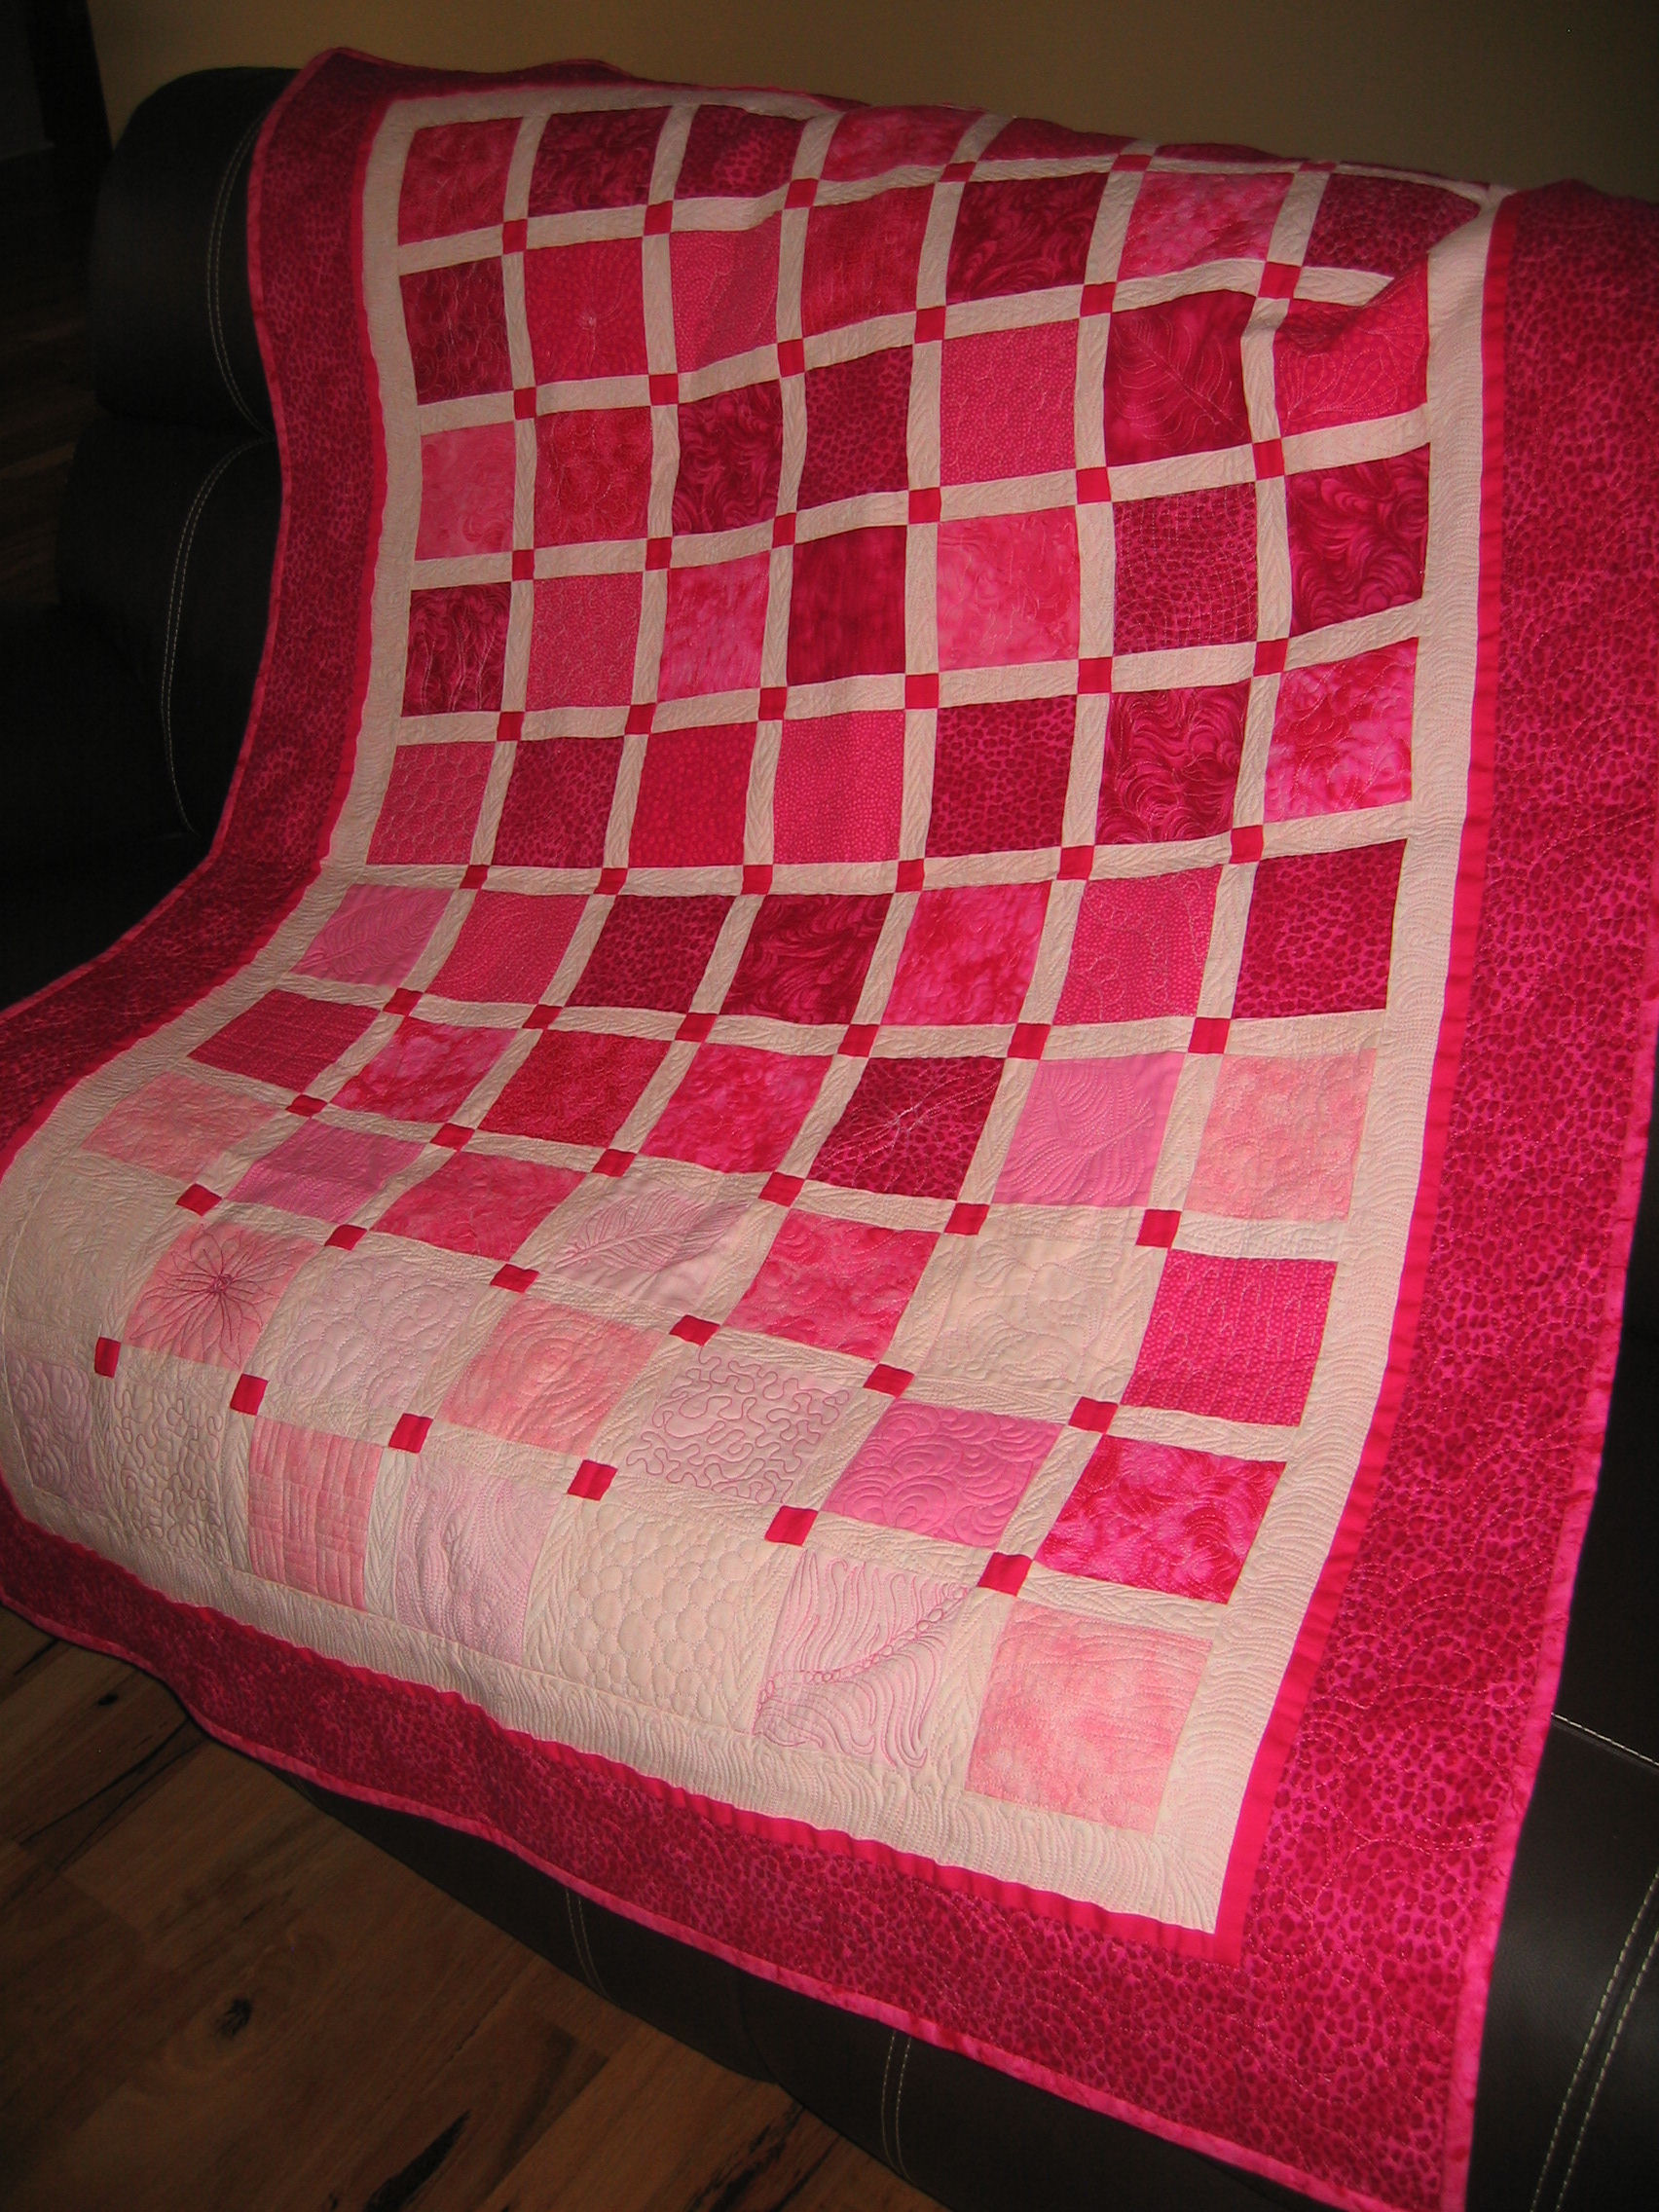
Early on I settled on pink as my colour, and I found a design that I liked that I adapted to suit the large lap quilt (more like a body quilt!) I wanted to make. I have a person in mind for this quilt, but that’s not to be revealed yet (and Sue — it’s NOT you! 😉 )

I had many pinks in my stash, but I bought a few more just so I could get the colour range right.

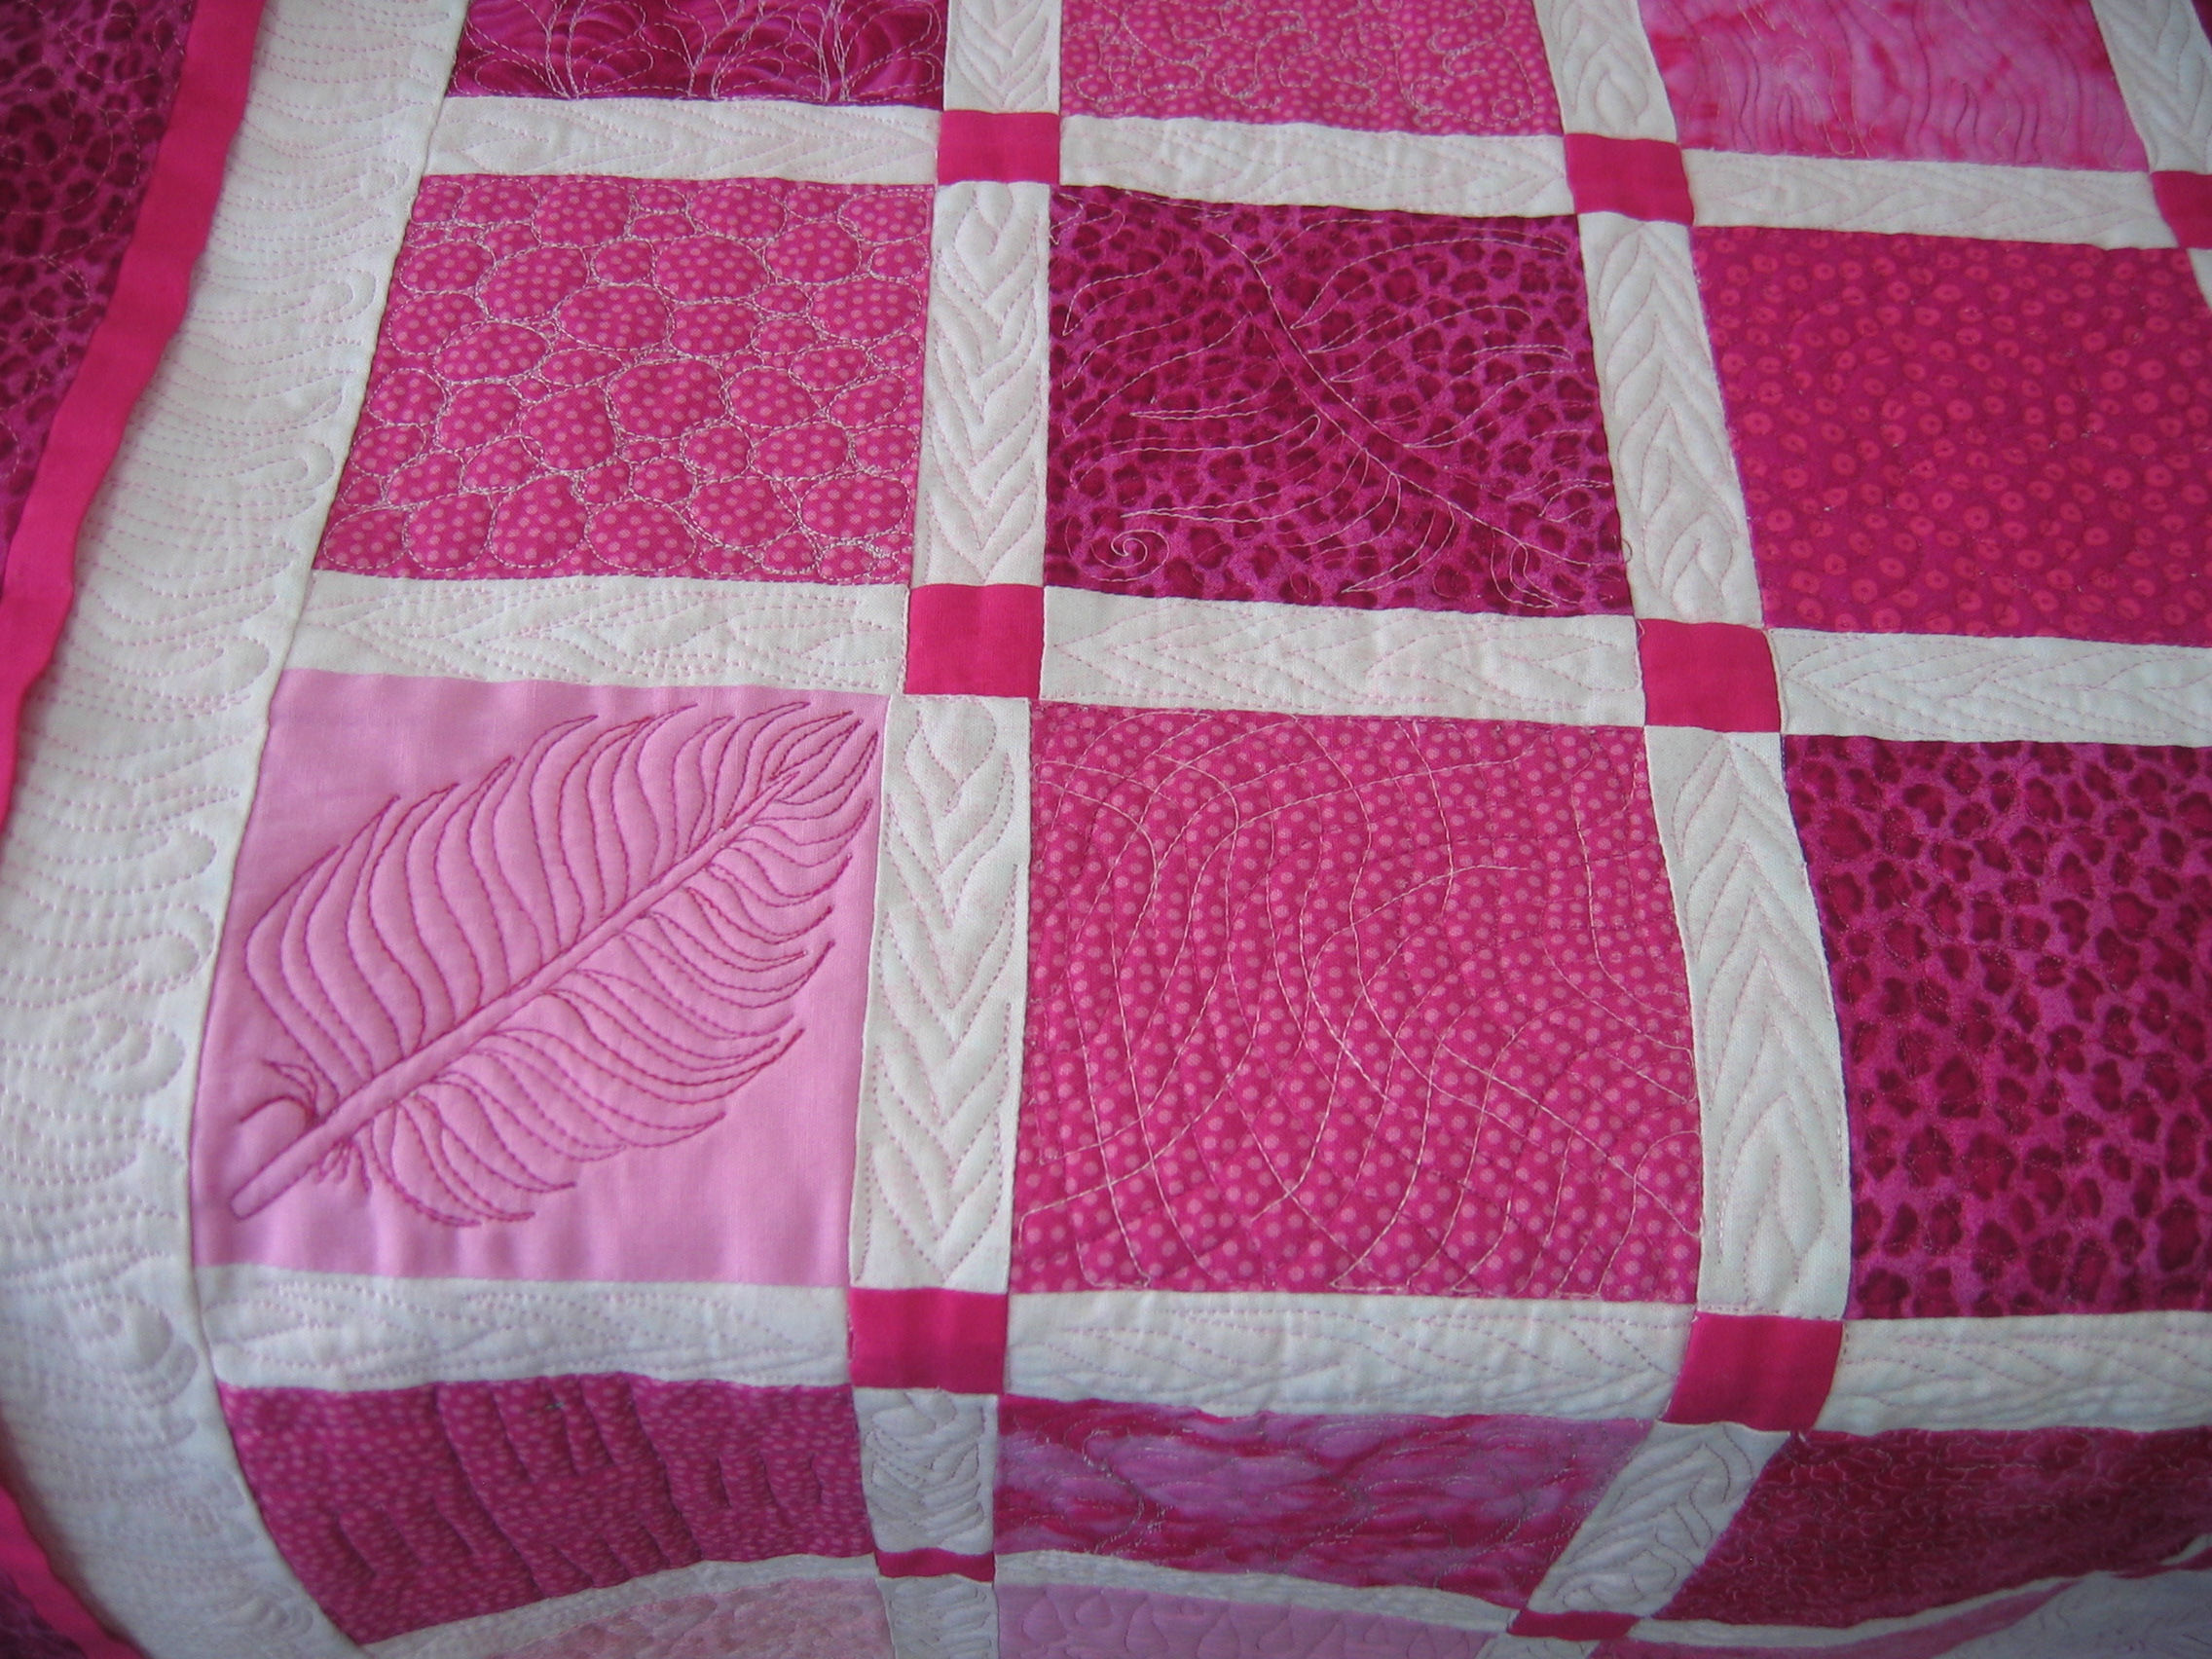
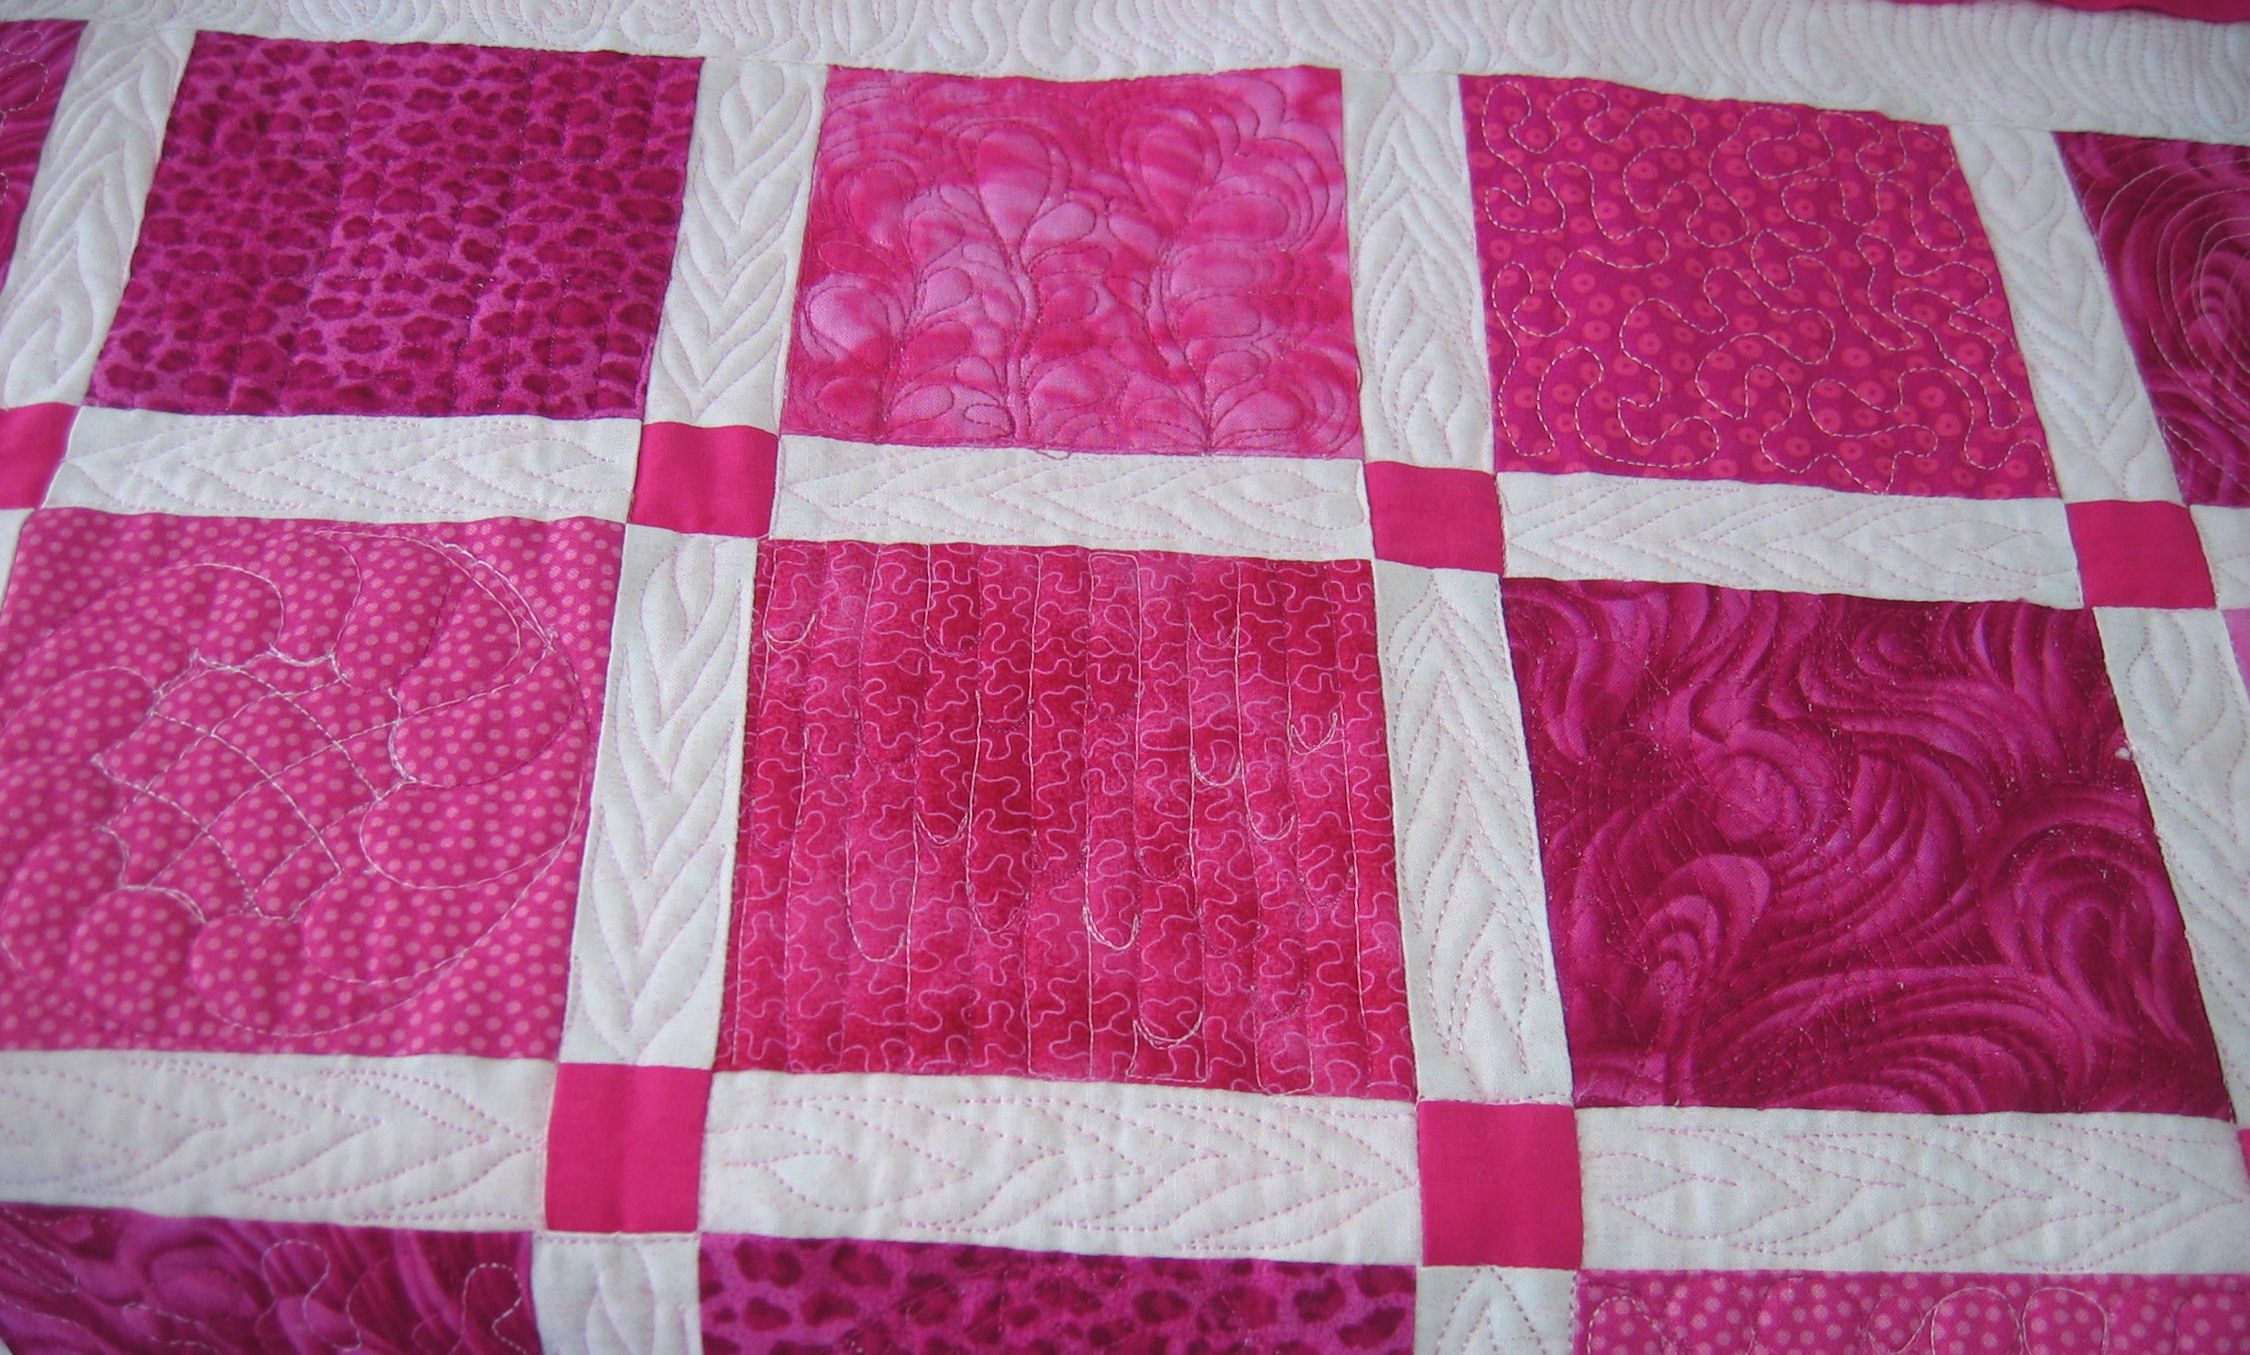
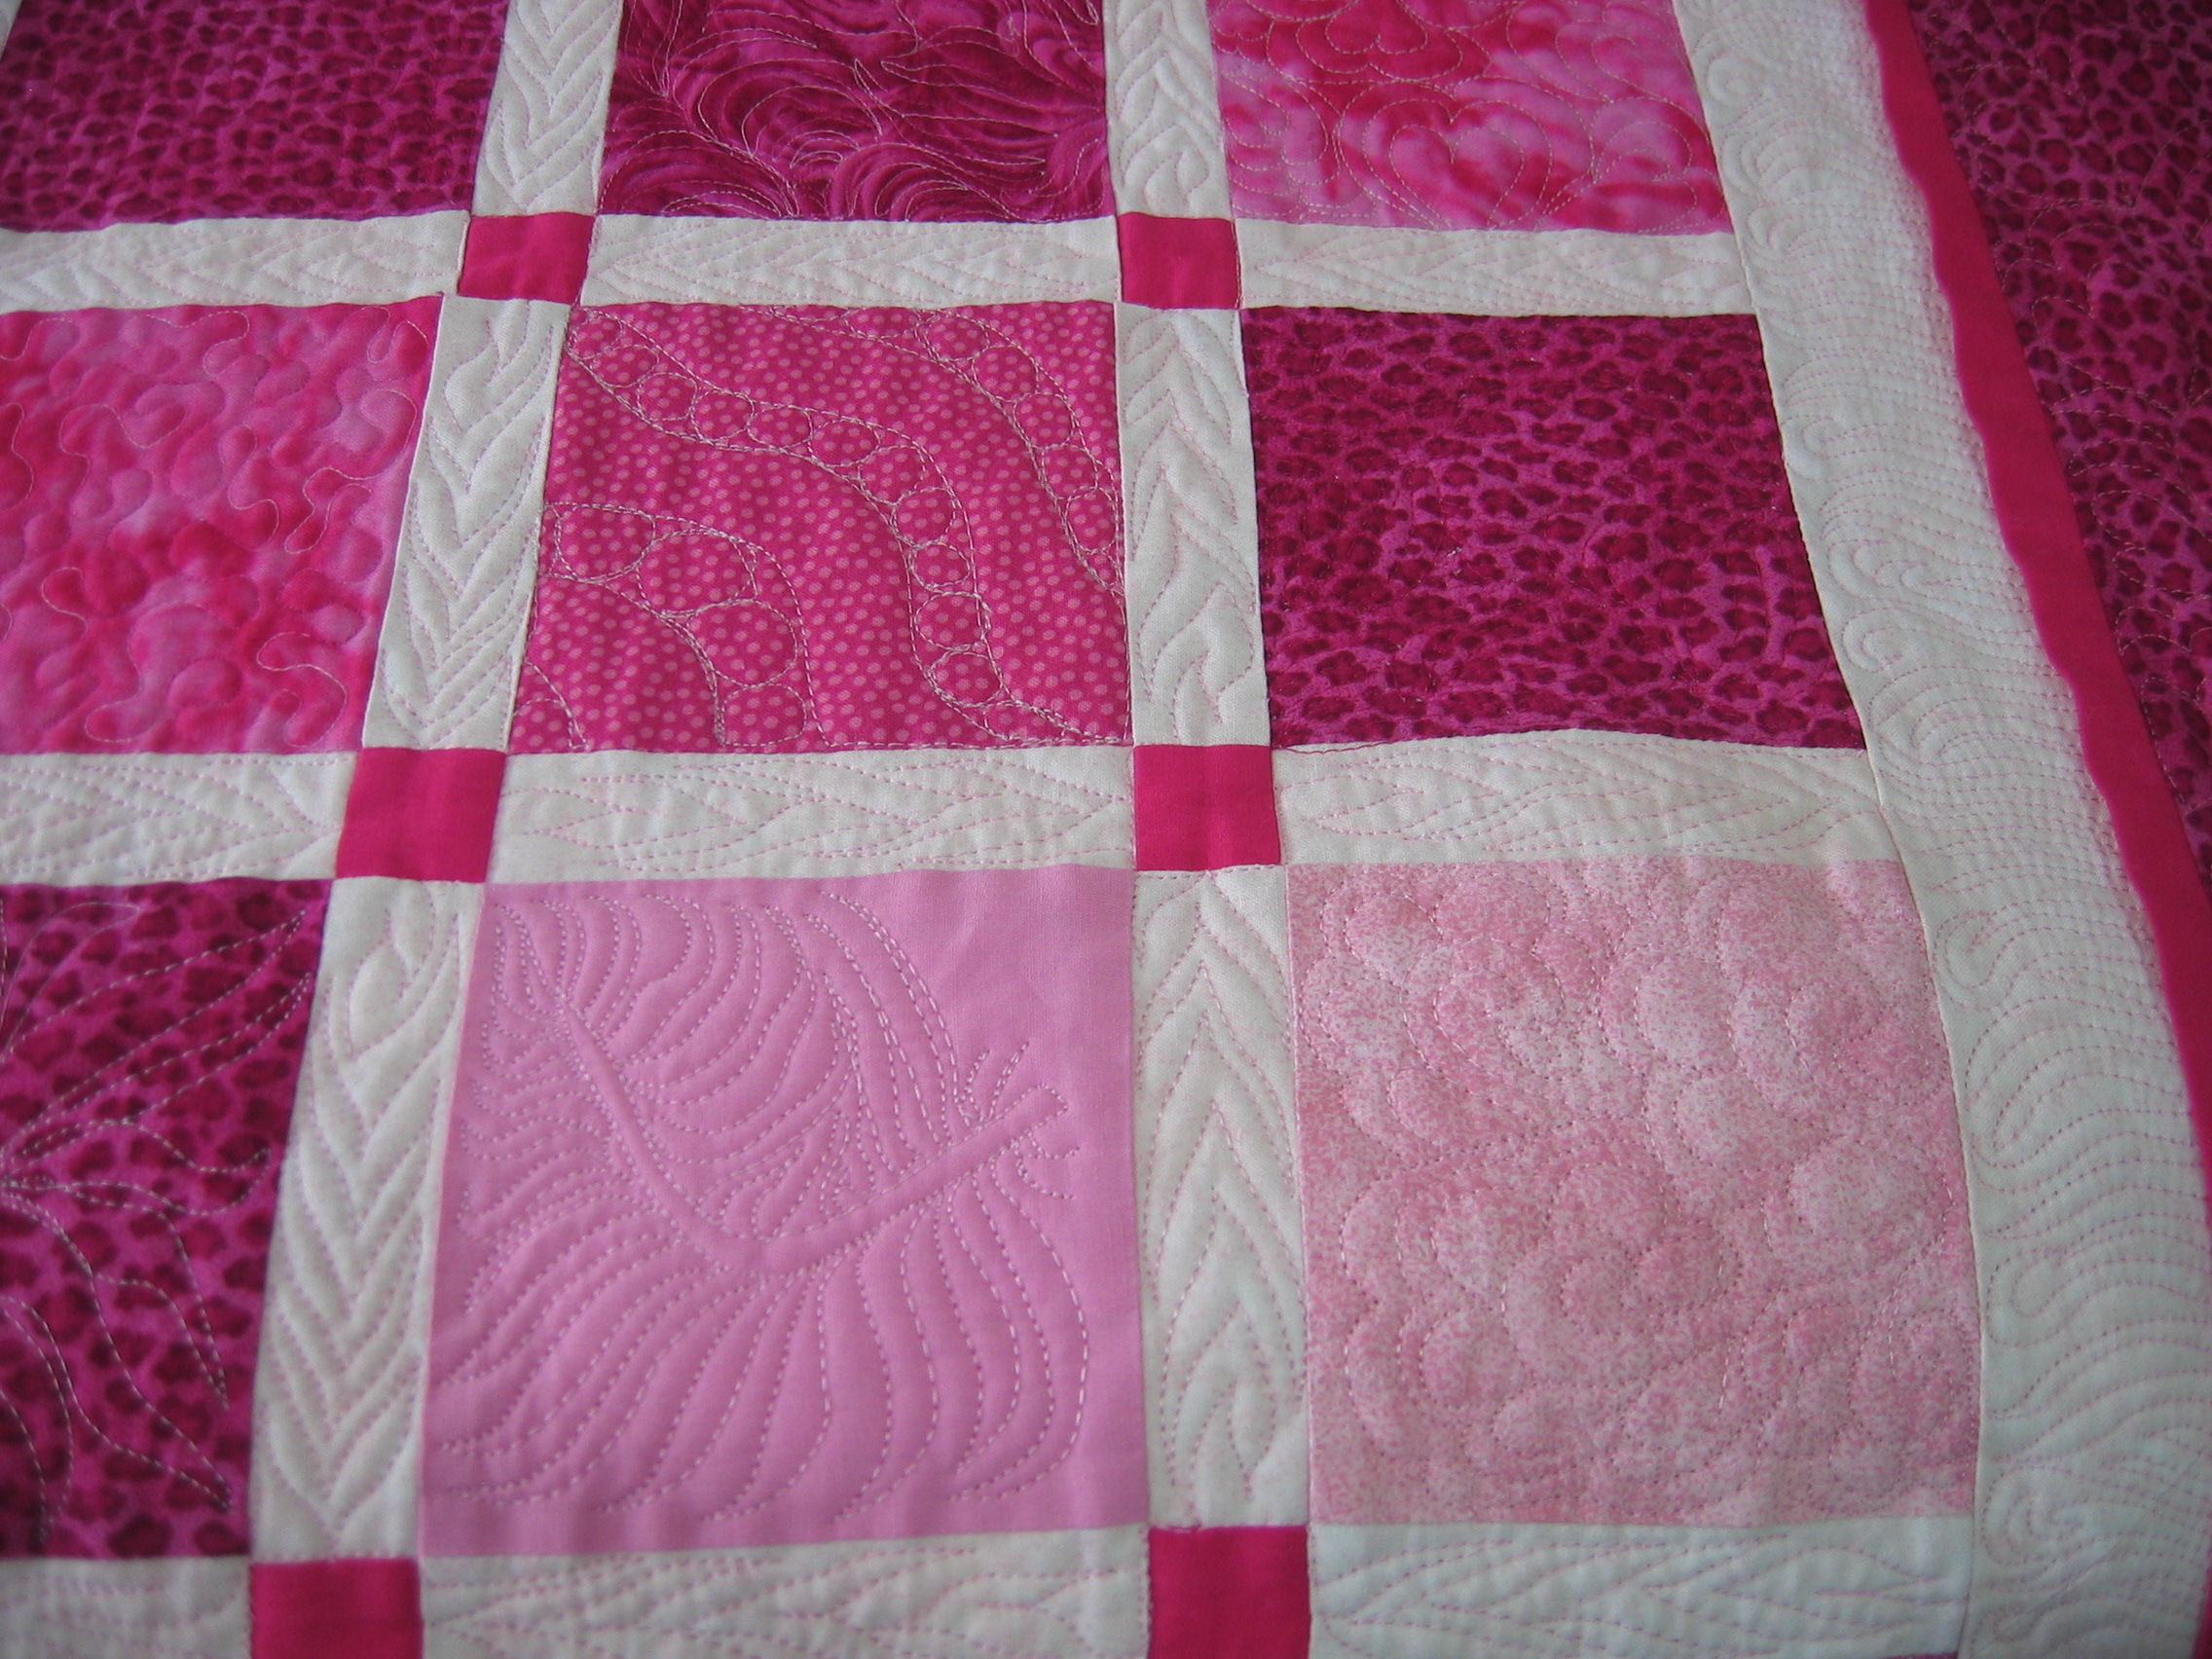
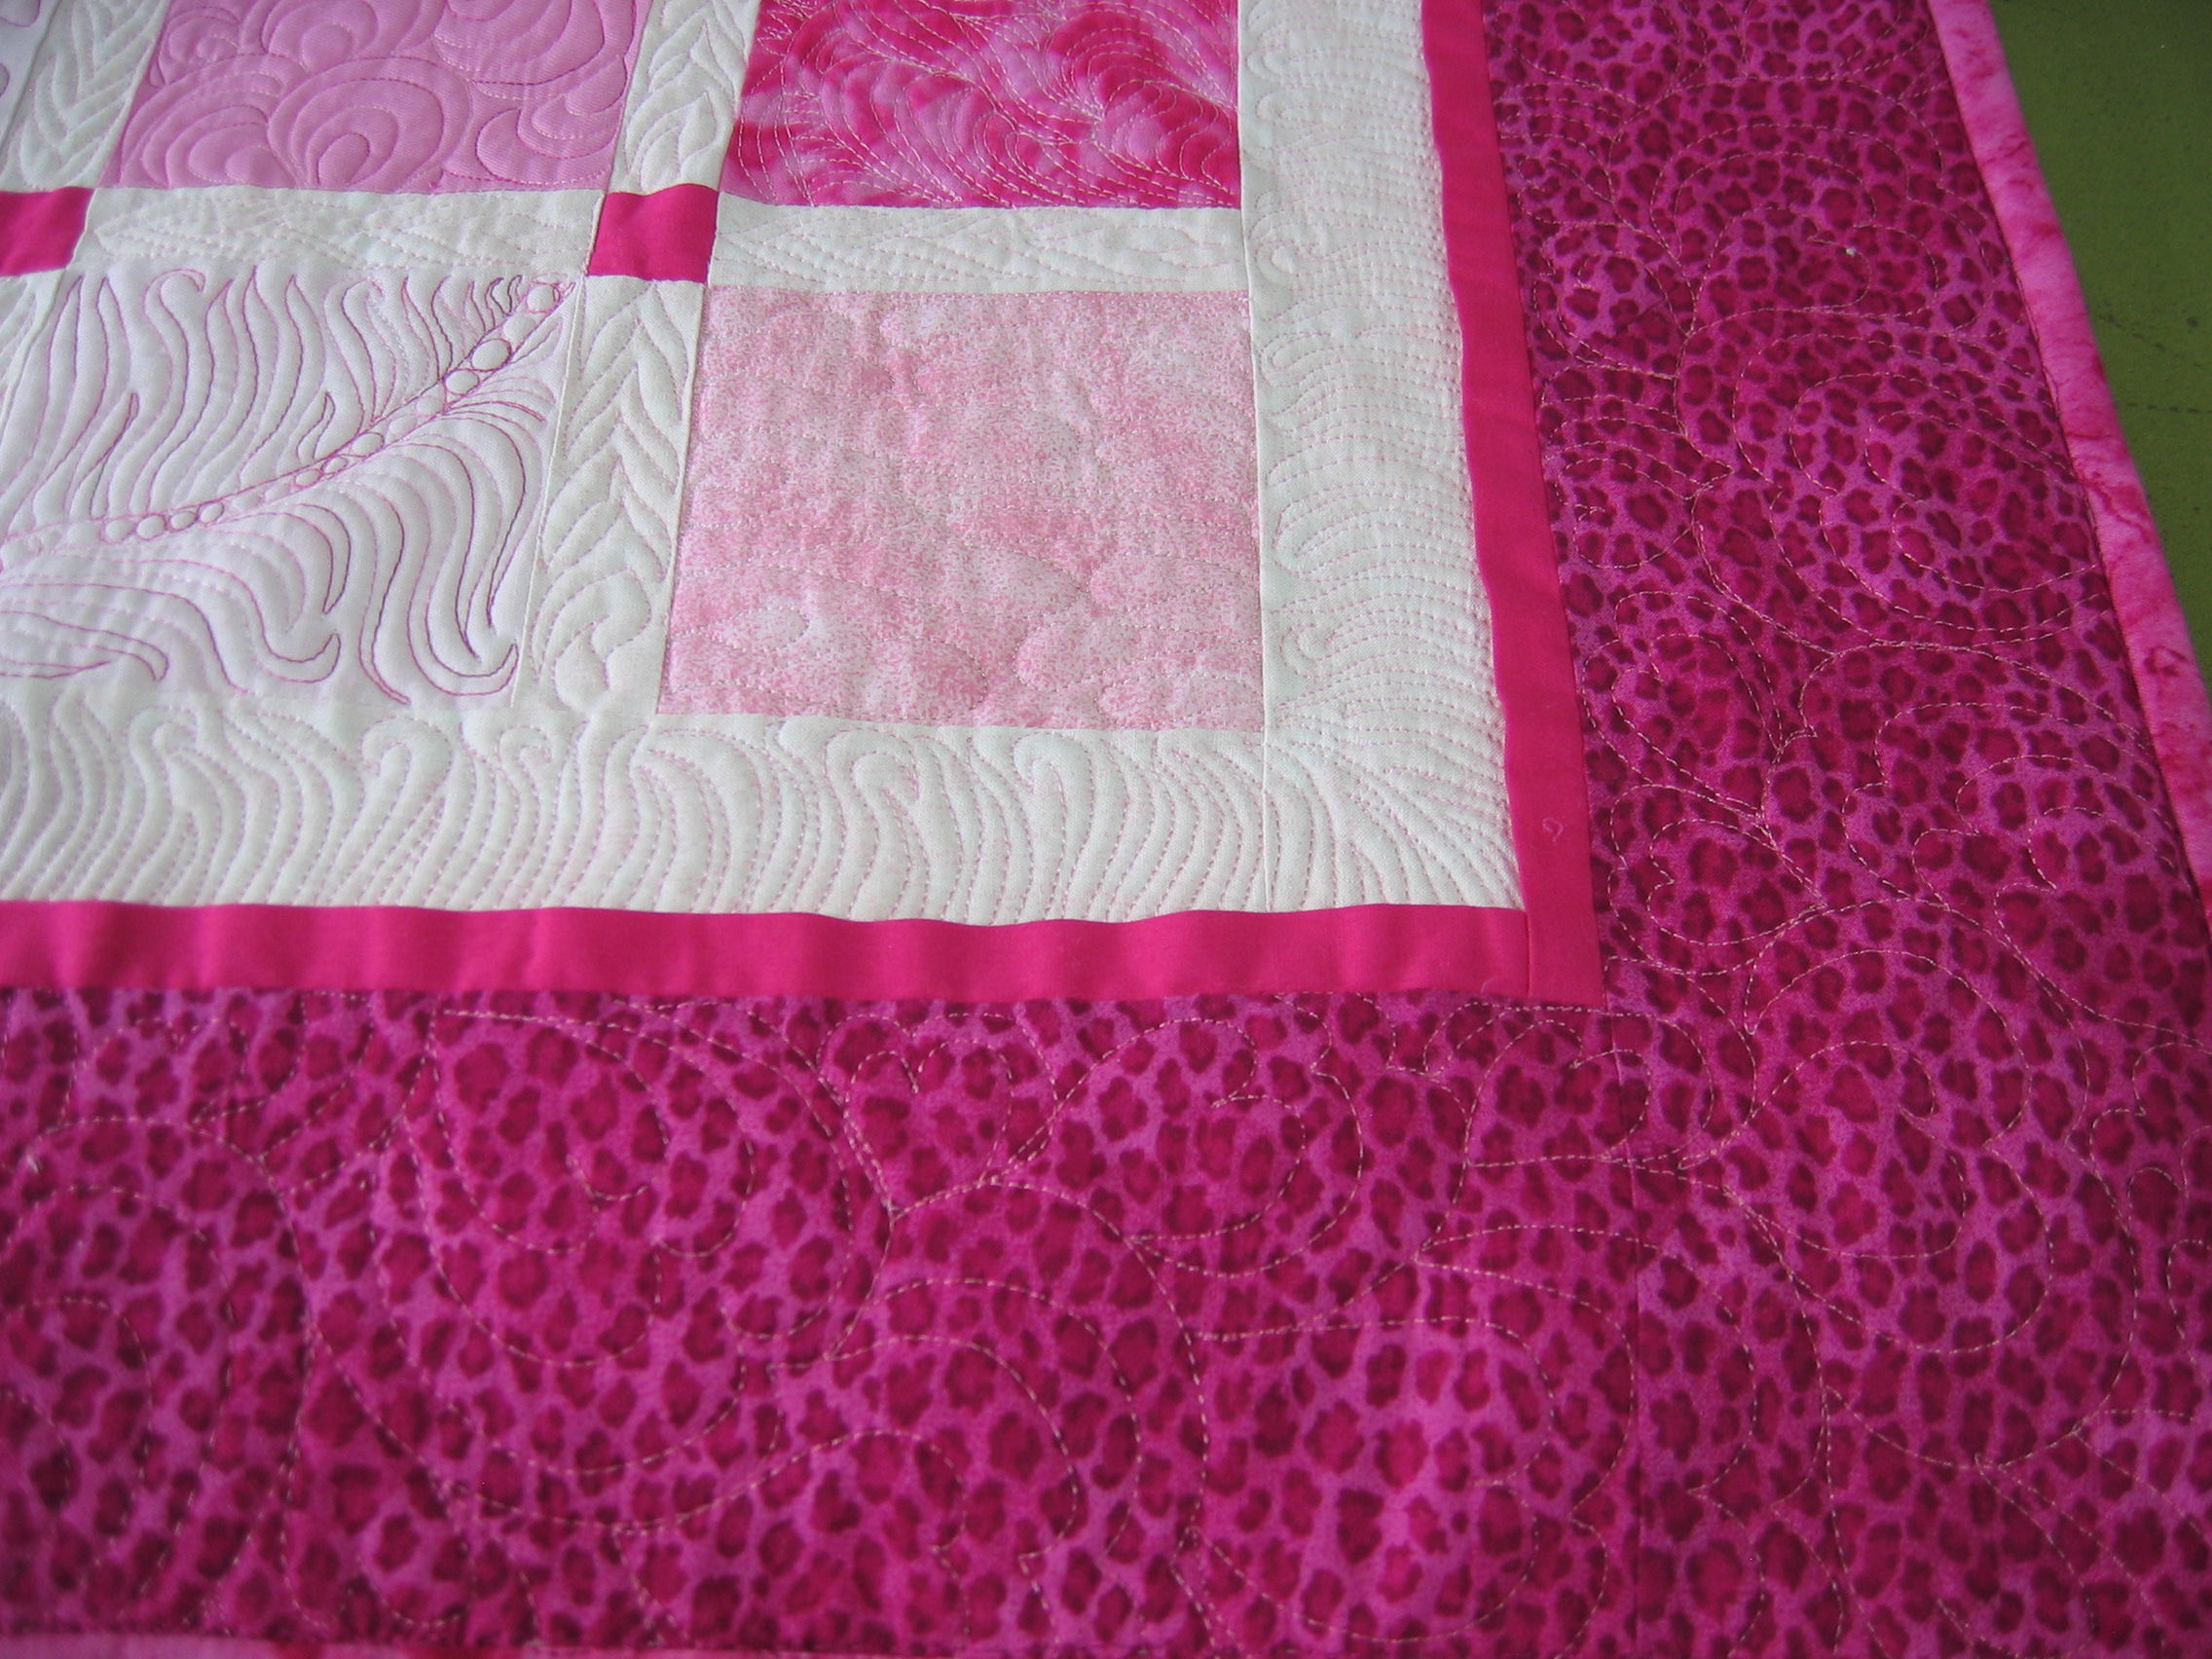
Here are my fabrics — I’ve used 12 different shades of pink from very deep pink to the lightest of pinks.

Here’s the design I had in mind:

And here’s what 70 four-and-a-half inch squares look like loosely pinned to the ‘design wall’:

Now comes the fun part… cutting all the sashing strips and ‘key’ squares, then sewing all the bits together.

A day or so later…

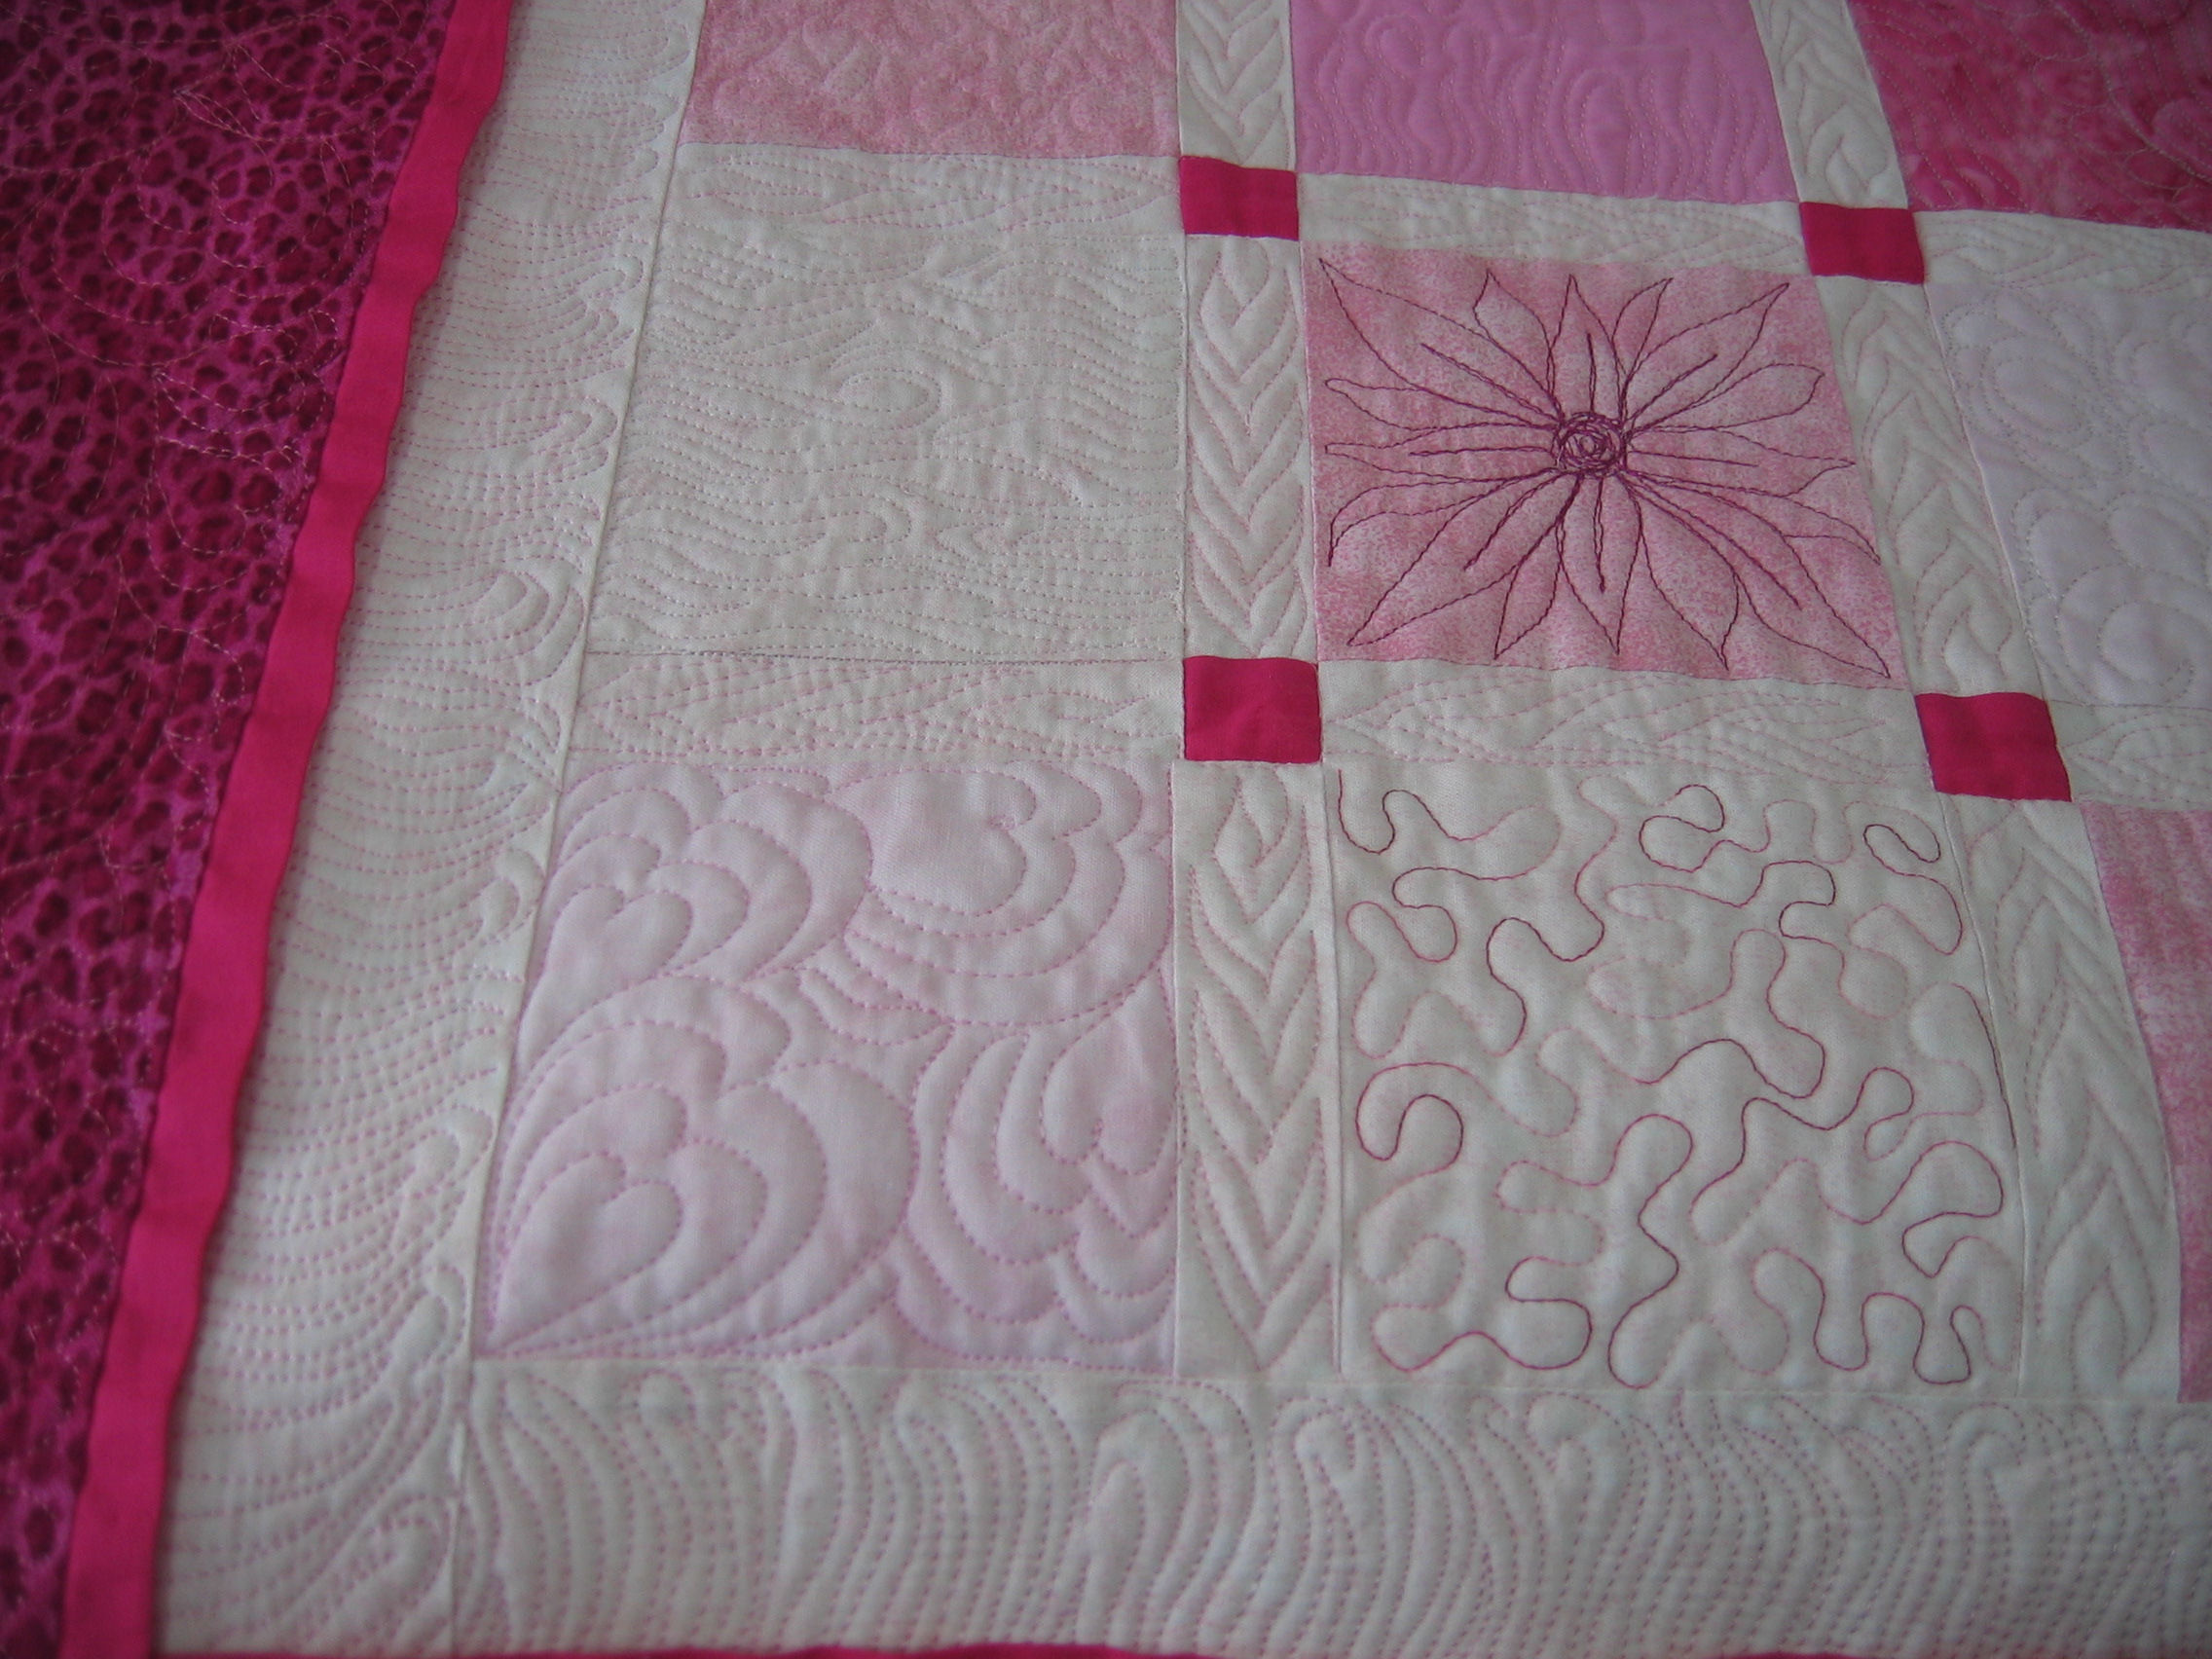
Here are the sashing strips (1.5 in x 4.5 inch) and sashing strips (1.5 x 4.5 in) stitched with the ‘key’ squares (1.5 x 1.5 in).

No, I didn’t cut out those individual ‘keys’ one by one — I’m not a masochist! 😉 I cut a long, 4.5 in wide, pale pink strip and a long 1.5 in wide dark pink strip, then sewed them together along the long edges. I then pressed the seams to the dark, then cross-cut many 1.5 in wide strips from the joined strip.

Next comes piecing the main top…

See also: