Community Quilt 134

13 04 2014

I thought this very geometric quilt top needed something to soften the edges a bit, so I quilted it in a squared-off variation of the ‘open headband‘ motif I’ve used many times before. I stitched this design all over the quilt, using a cream thread.

(Click on a photo to view it larger)

quilt134_01

quilt134_03

quilt134_02

Threads used:

  • Top: Fil-Tec Glide ‘Cream’ (40 wt trilobal polyester, colour 20001)
  • Bottom: Fil-Tec Glide pre-wound bobbin (white)


Community Quilt 133

29 03 2014

I’ve never done a ‘whole cloth’ quilt before, though I’ve admired those I’ve seen. For those not familiar with the term, a whole cloth quilt is created from one piece of fabric for the top — no piecing, no blocks sewn together, no applique. Typically, the single piece of fabric is one colour with no pattern in it, often a light colour like cream or white, though I have seen some stunning whole cloth quilts done in black. The decoration comes from the quilting.

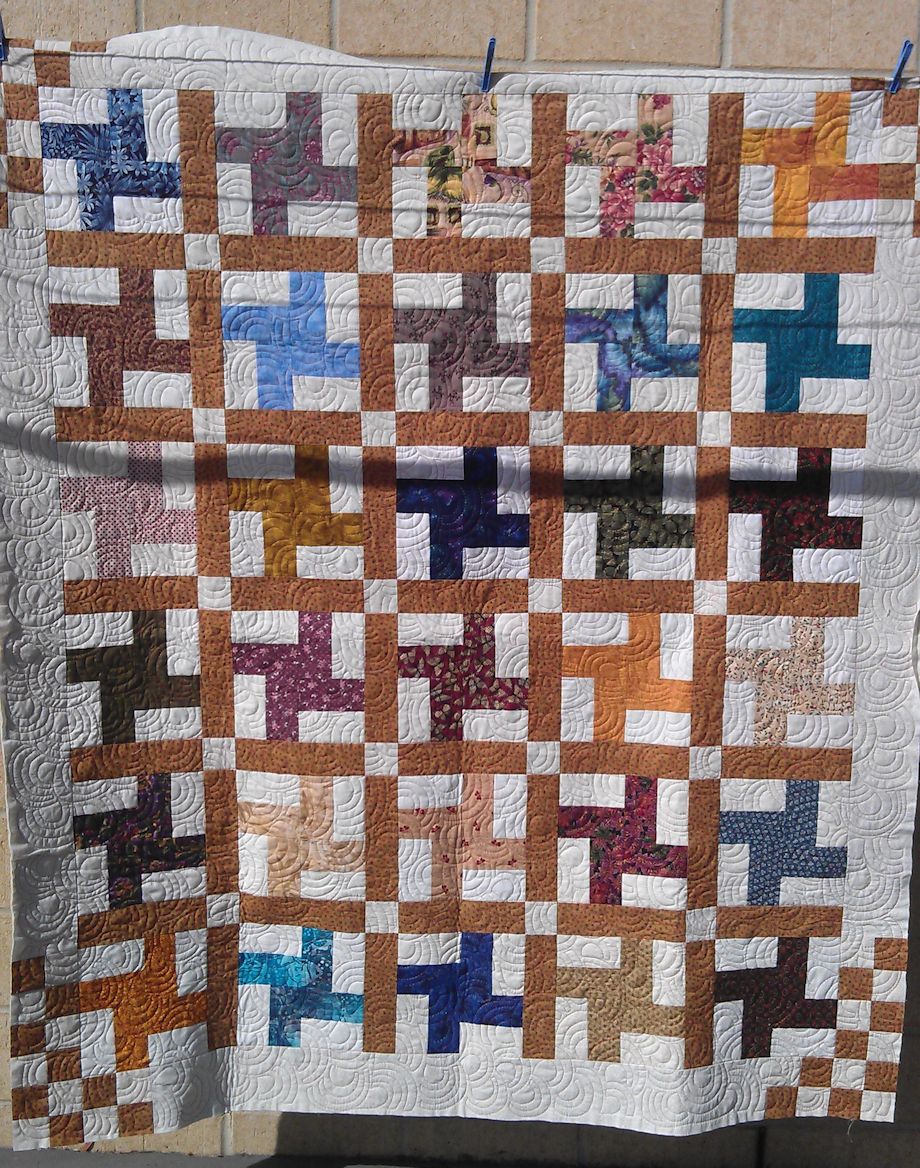
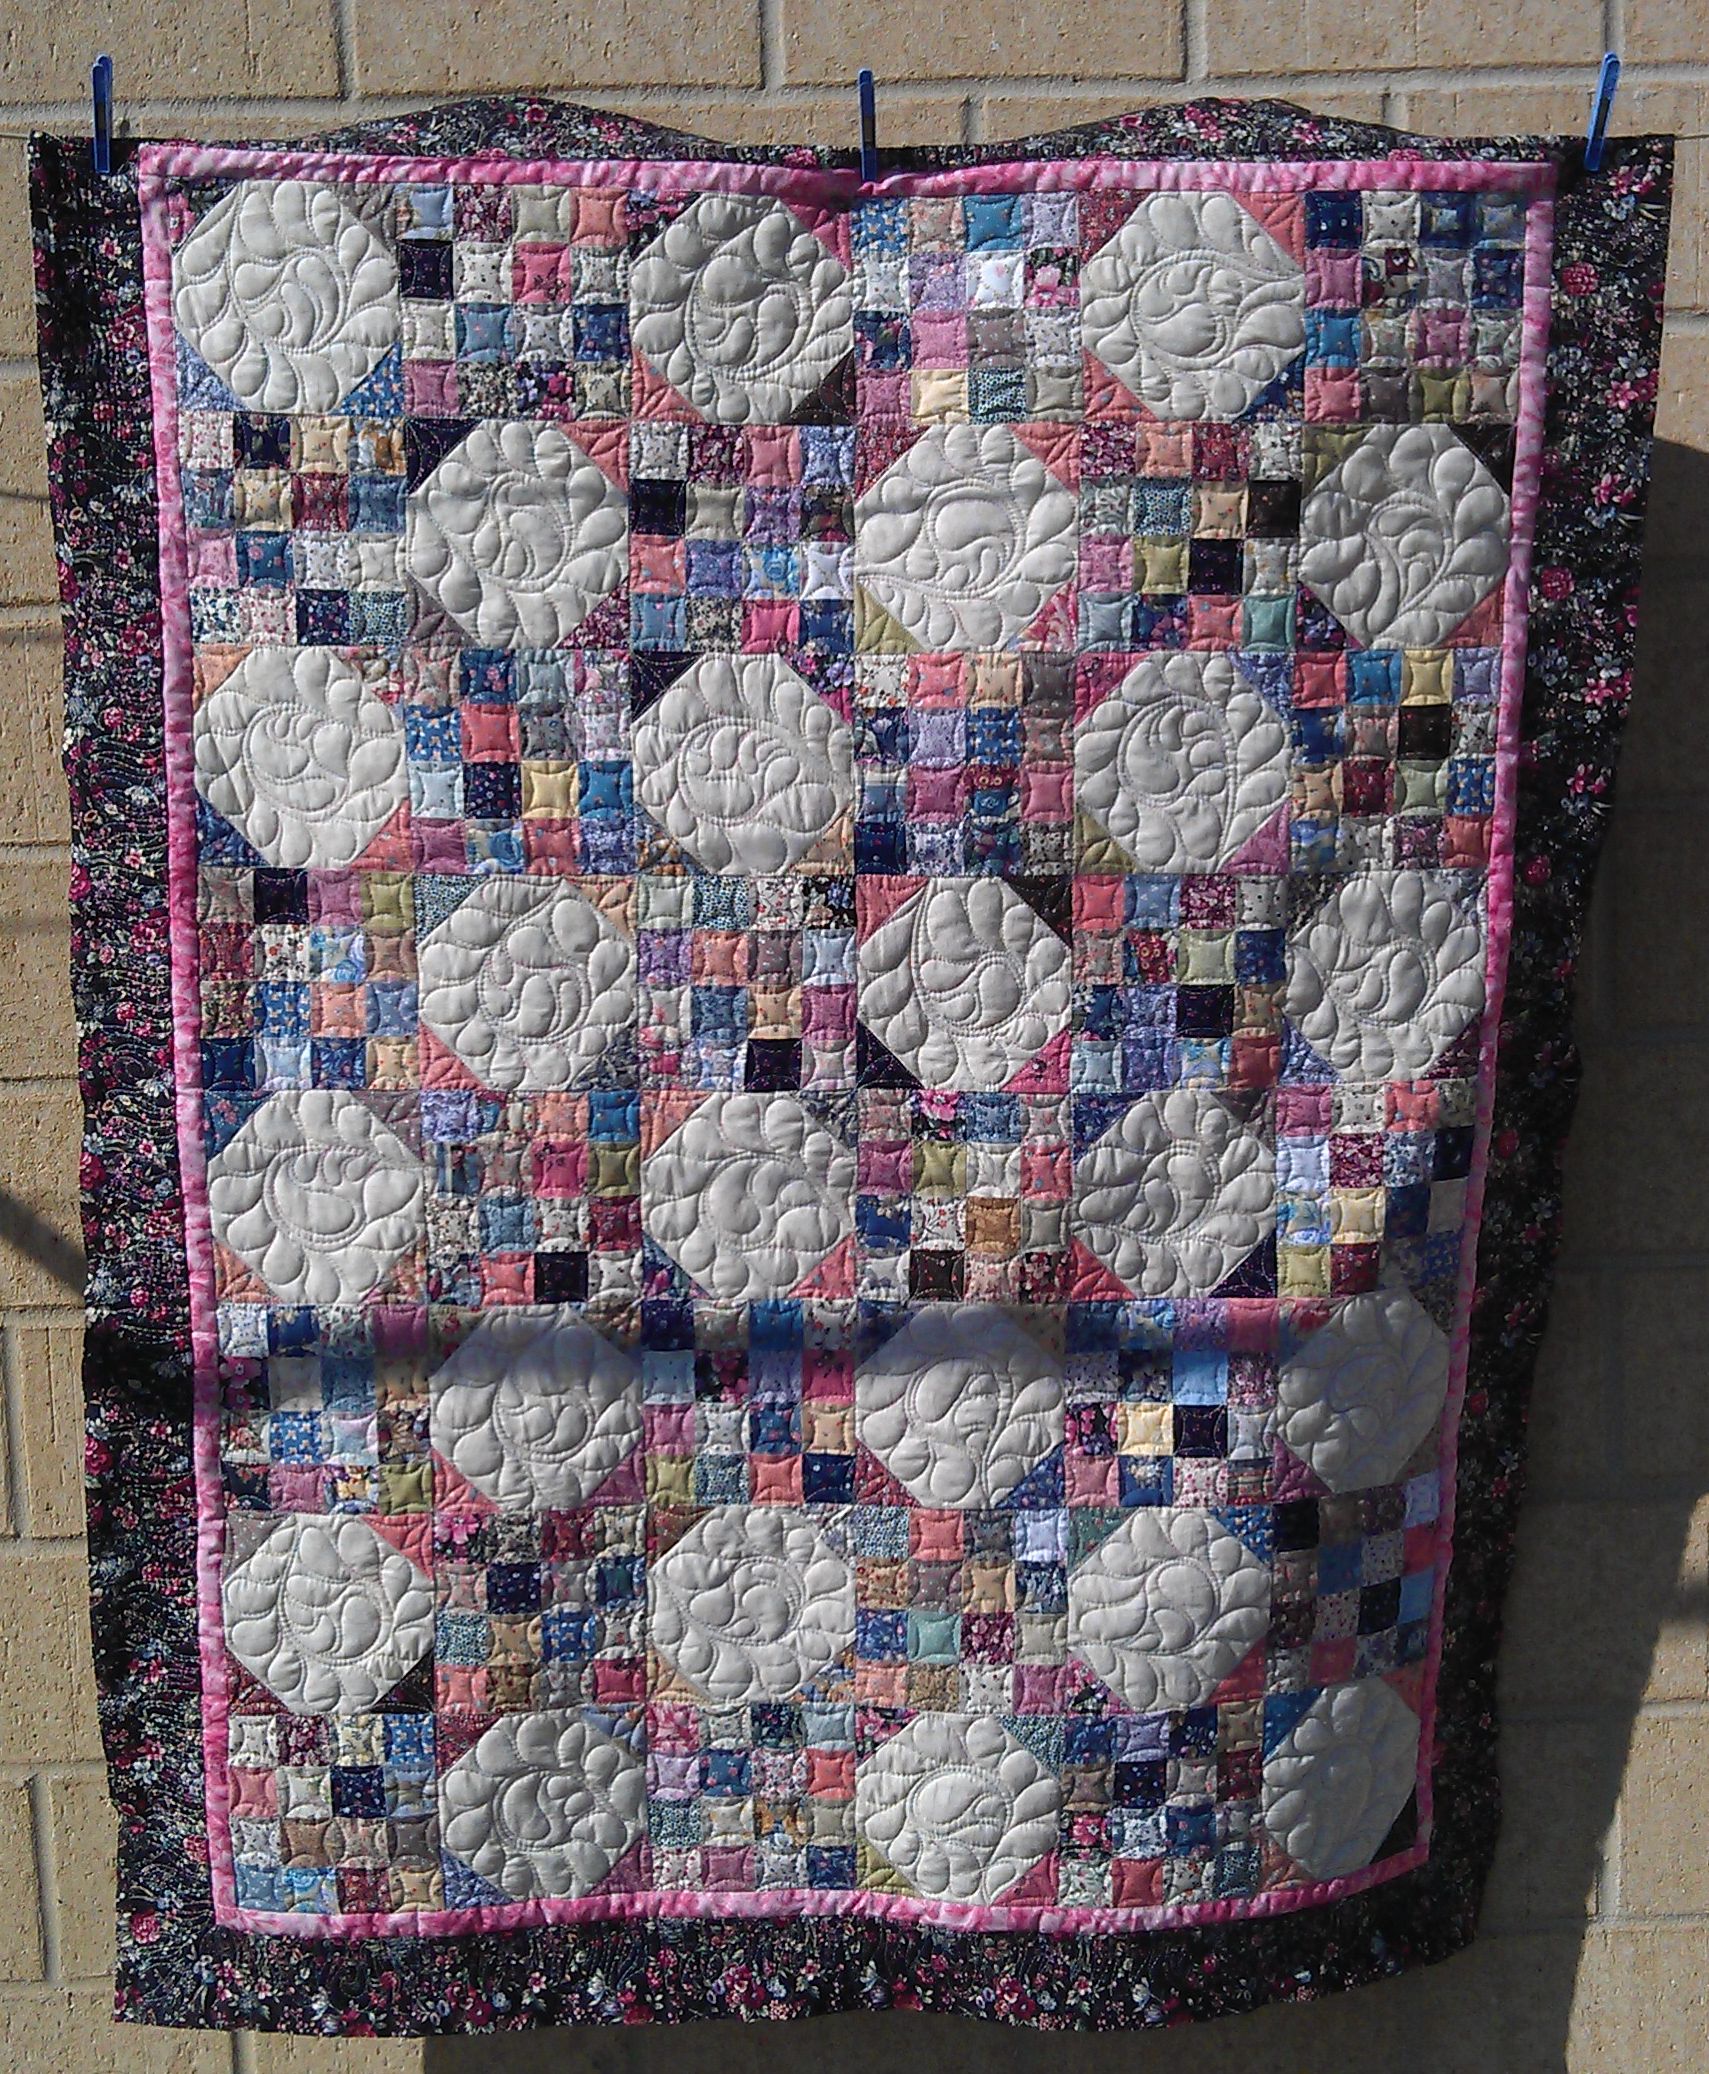
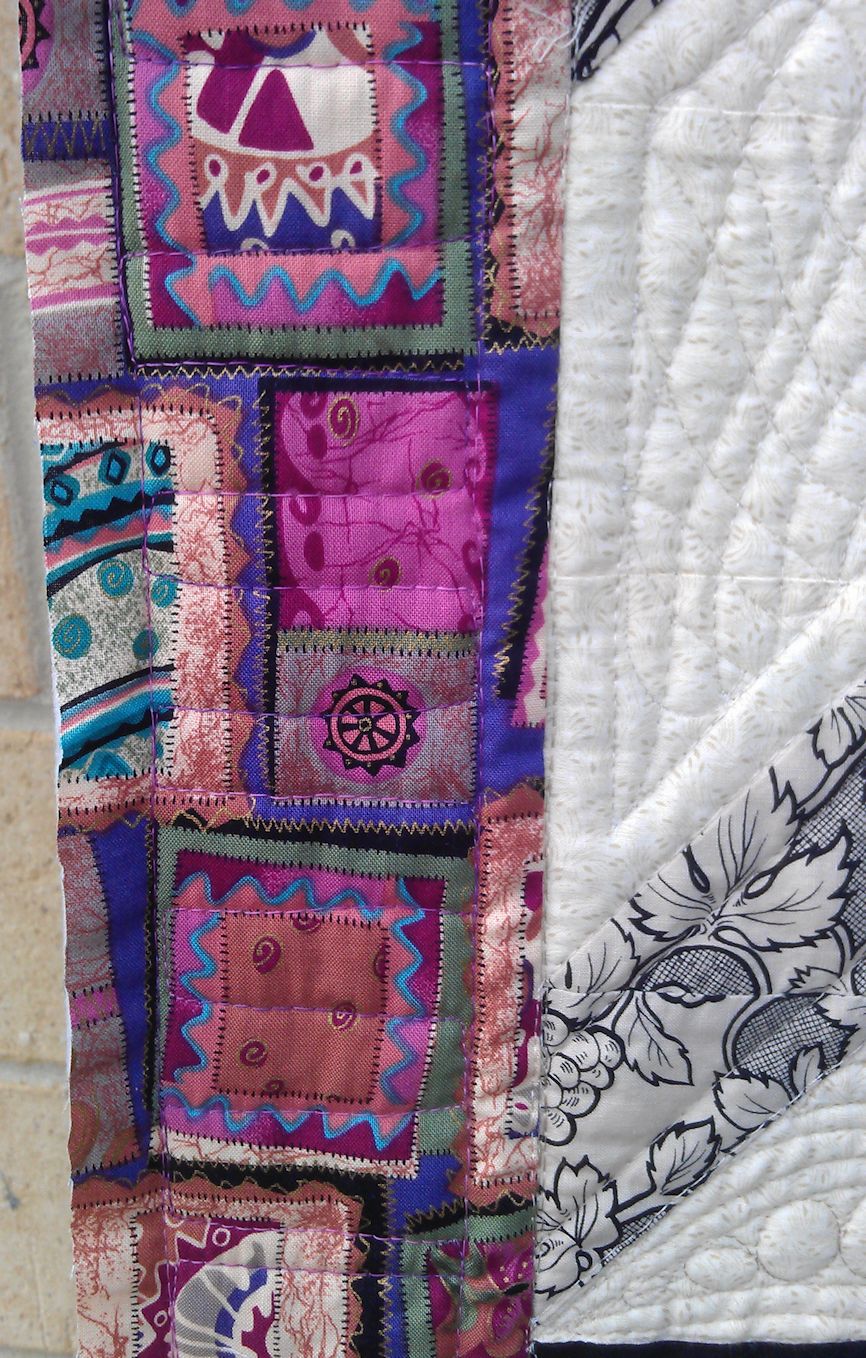
My challenge with this quilt was to take someone’s whole cloth top that they had carefully marked (the blue lines) in 12″ squares and a 4″ (?) border, and make something of it. Instead of trying to reinvent the wheel, I followed the markings the creator had made, then added fills where I thought they were necessary. I didn’t do ANY ruler work in this piece — all the ‘straight’ lines are either deliberately wonky, or are done by ‘eyeballing’ an imaginary straight line.

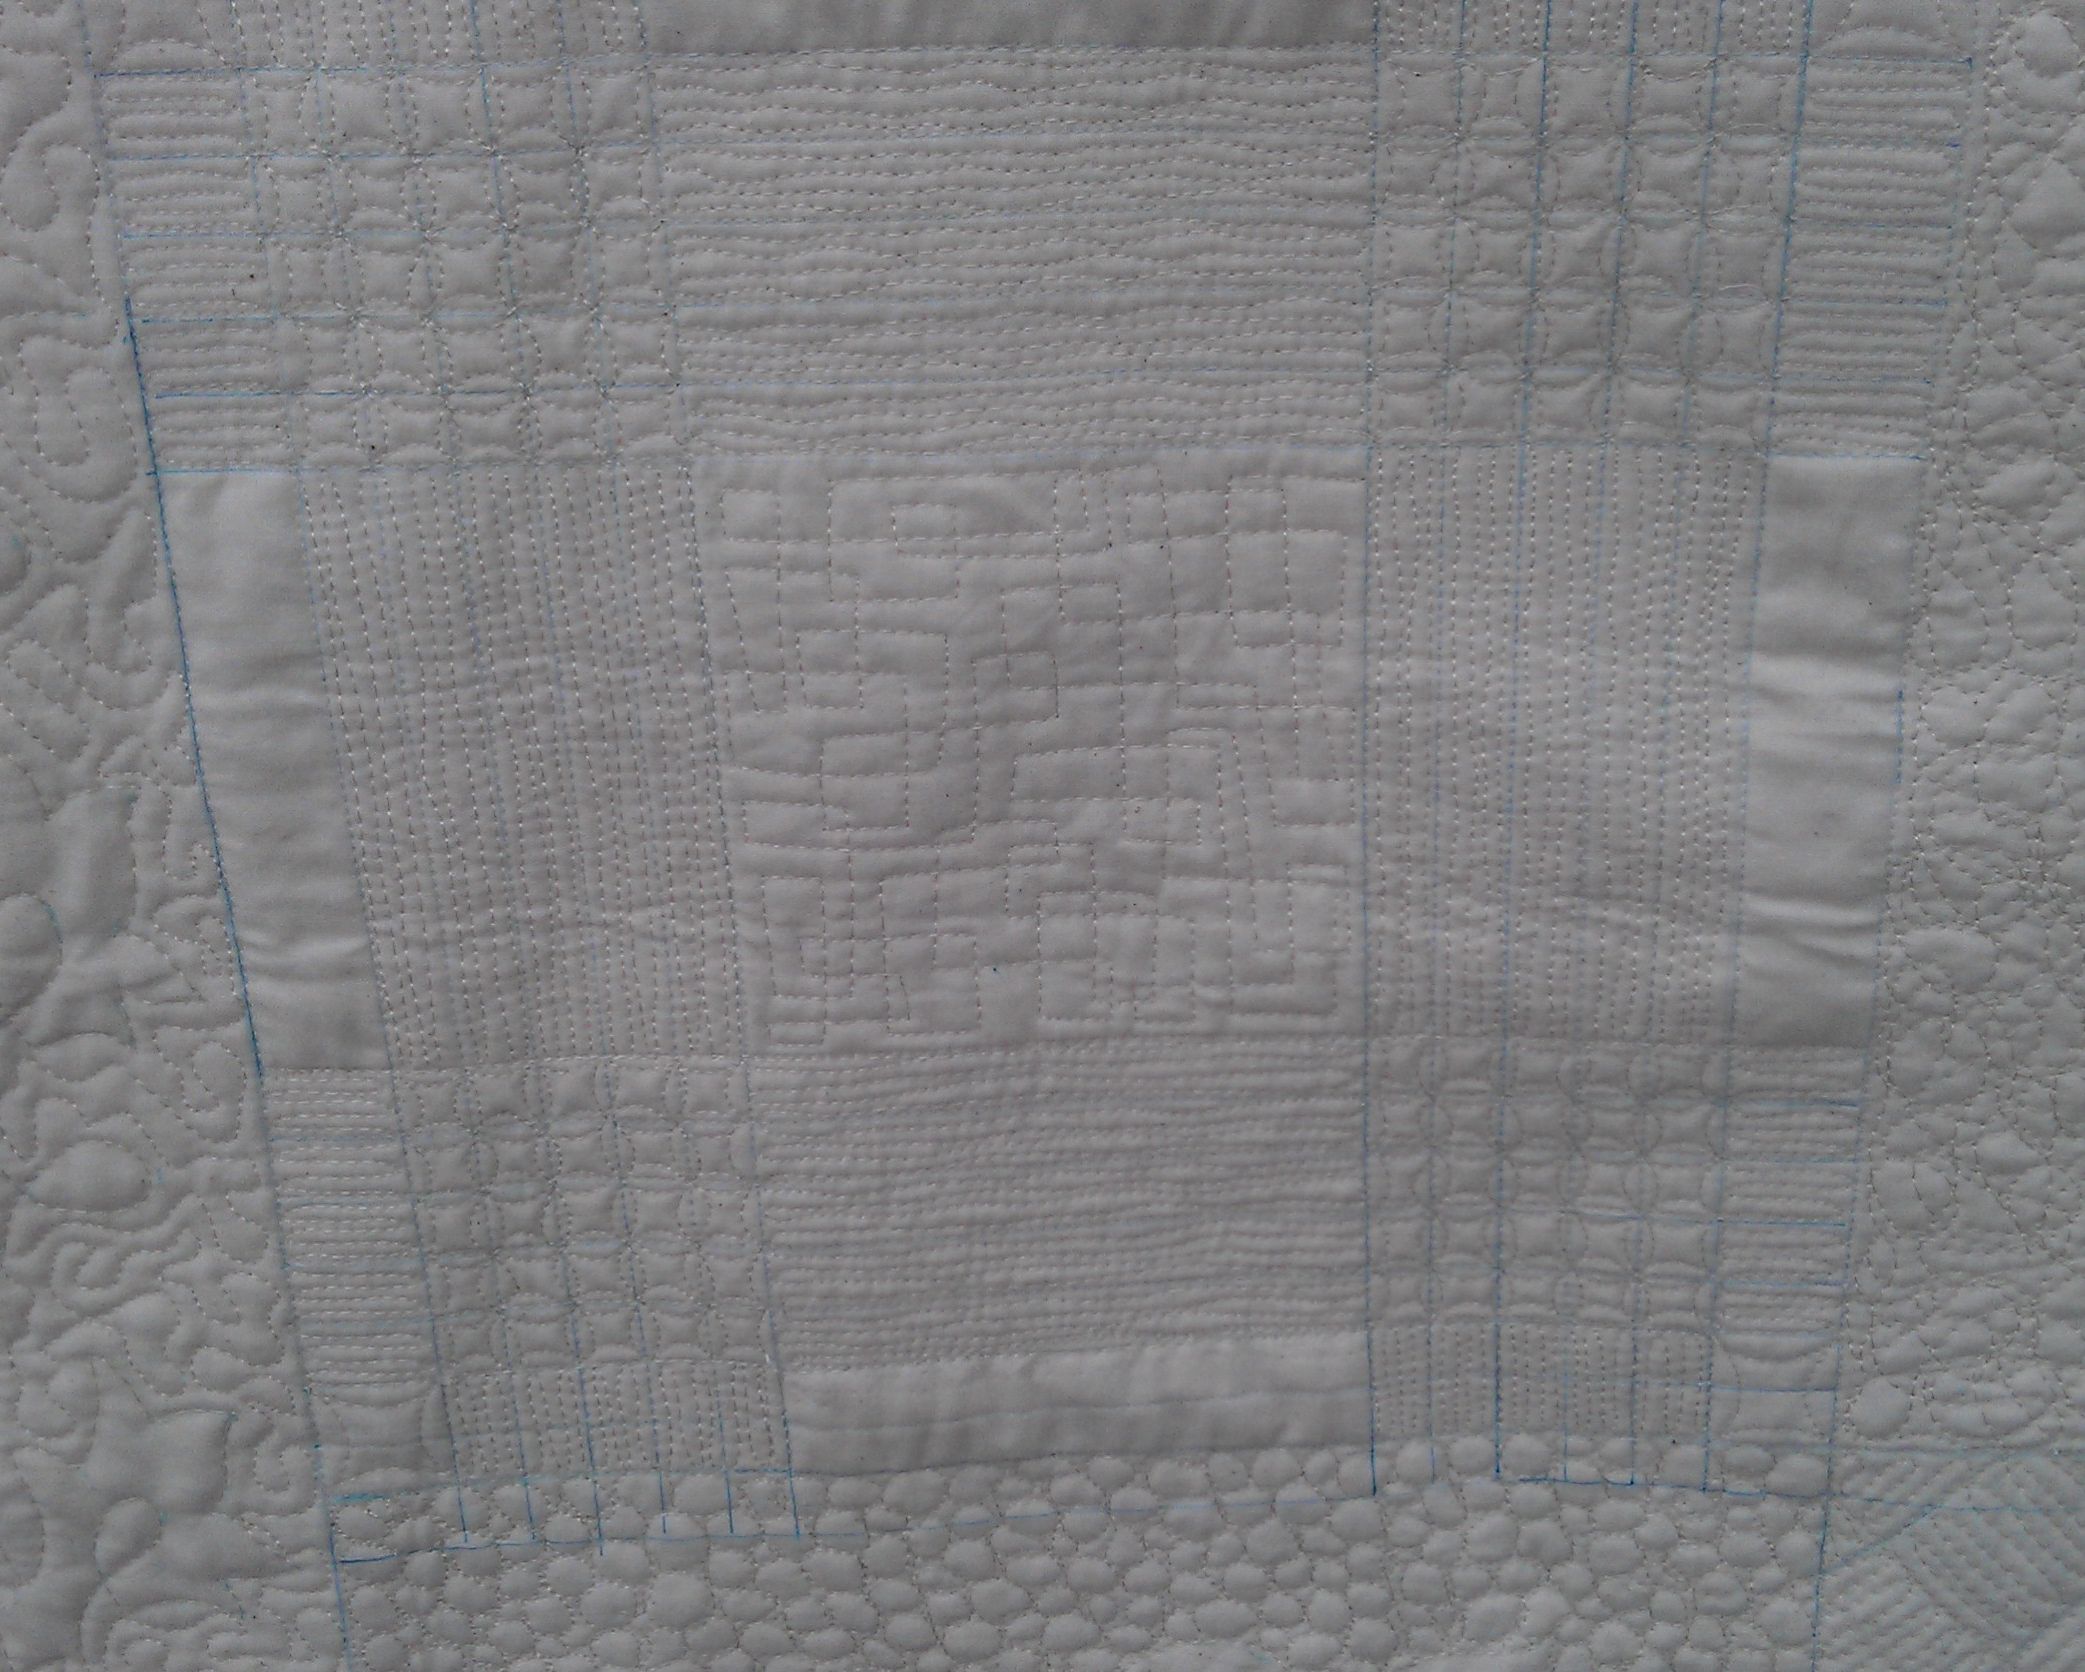
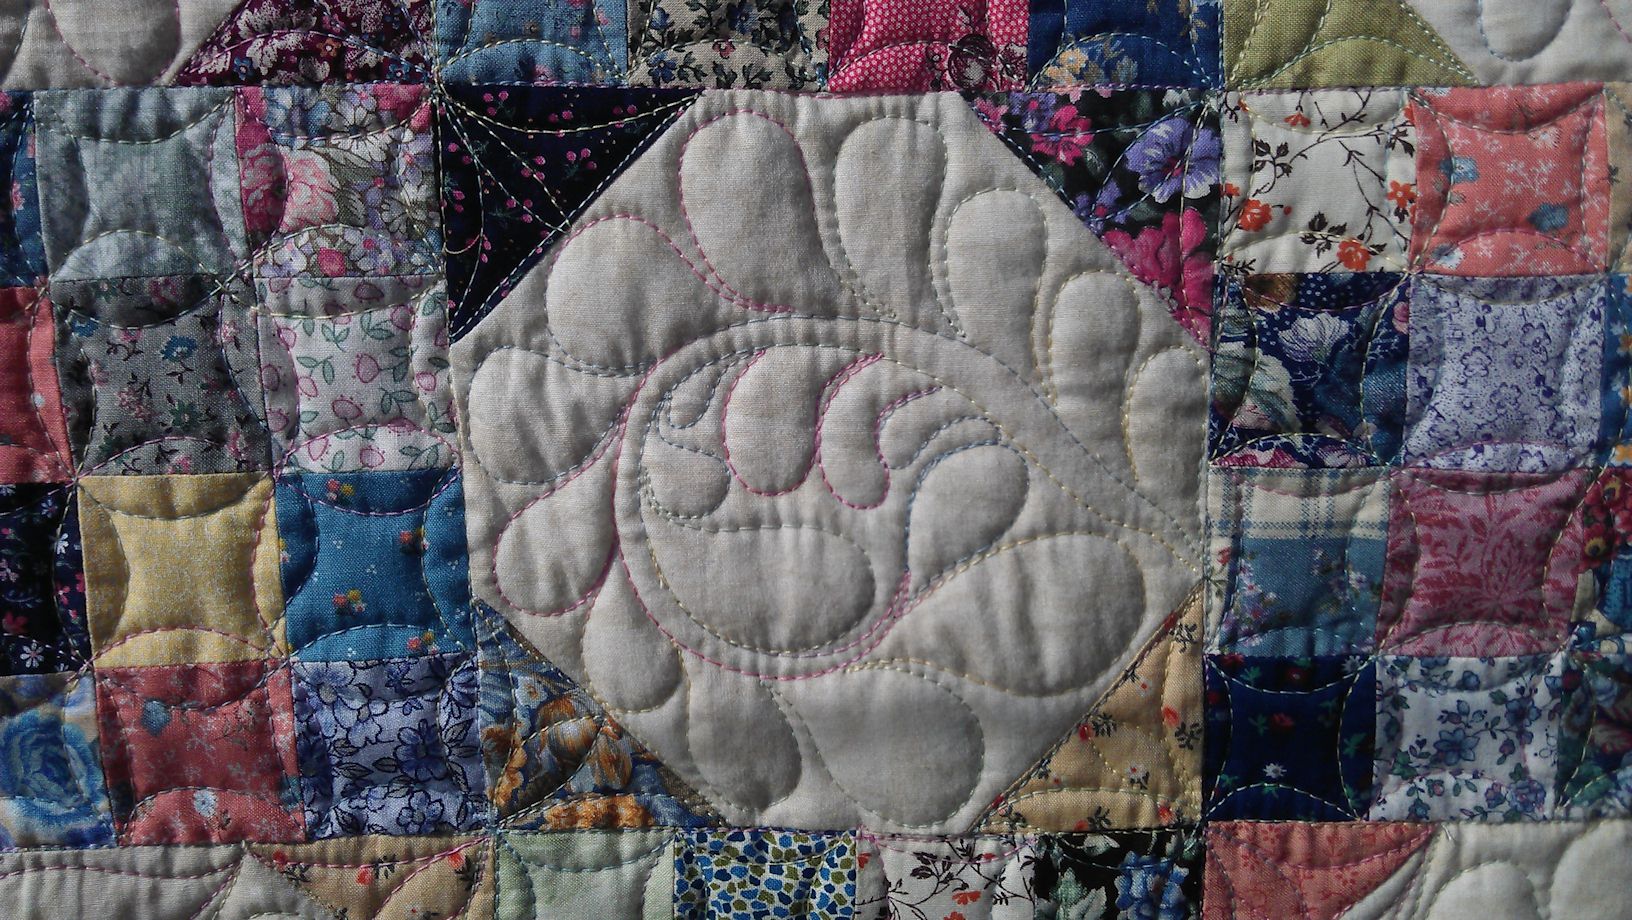
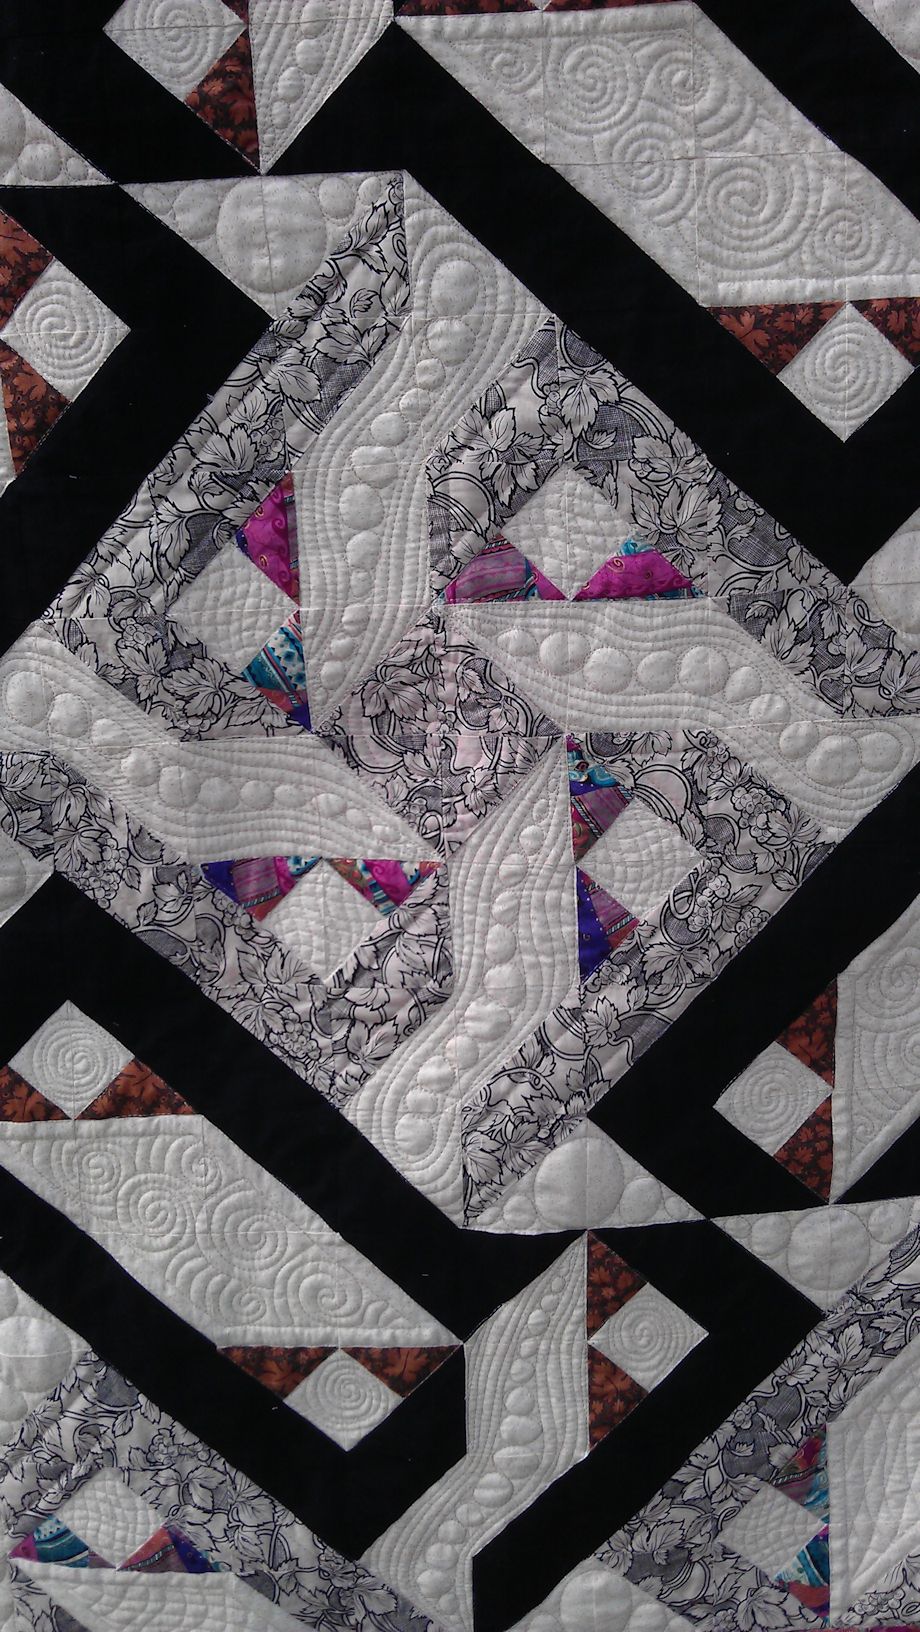
The centre square was the only one that didn’t have any markings, so I found a picture of a square Celtic knot and printed it out then marked it up with orange chalk.

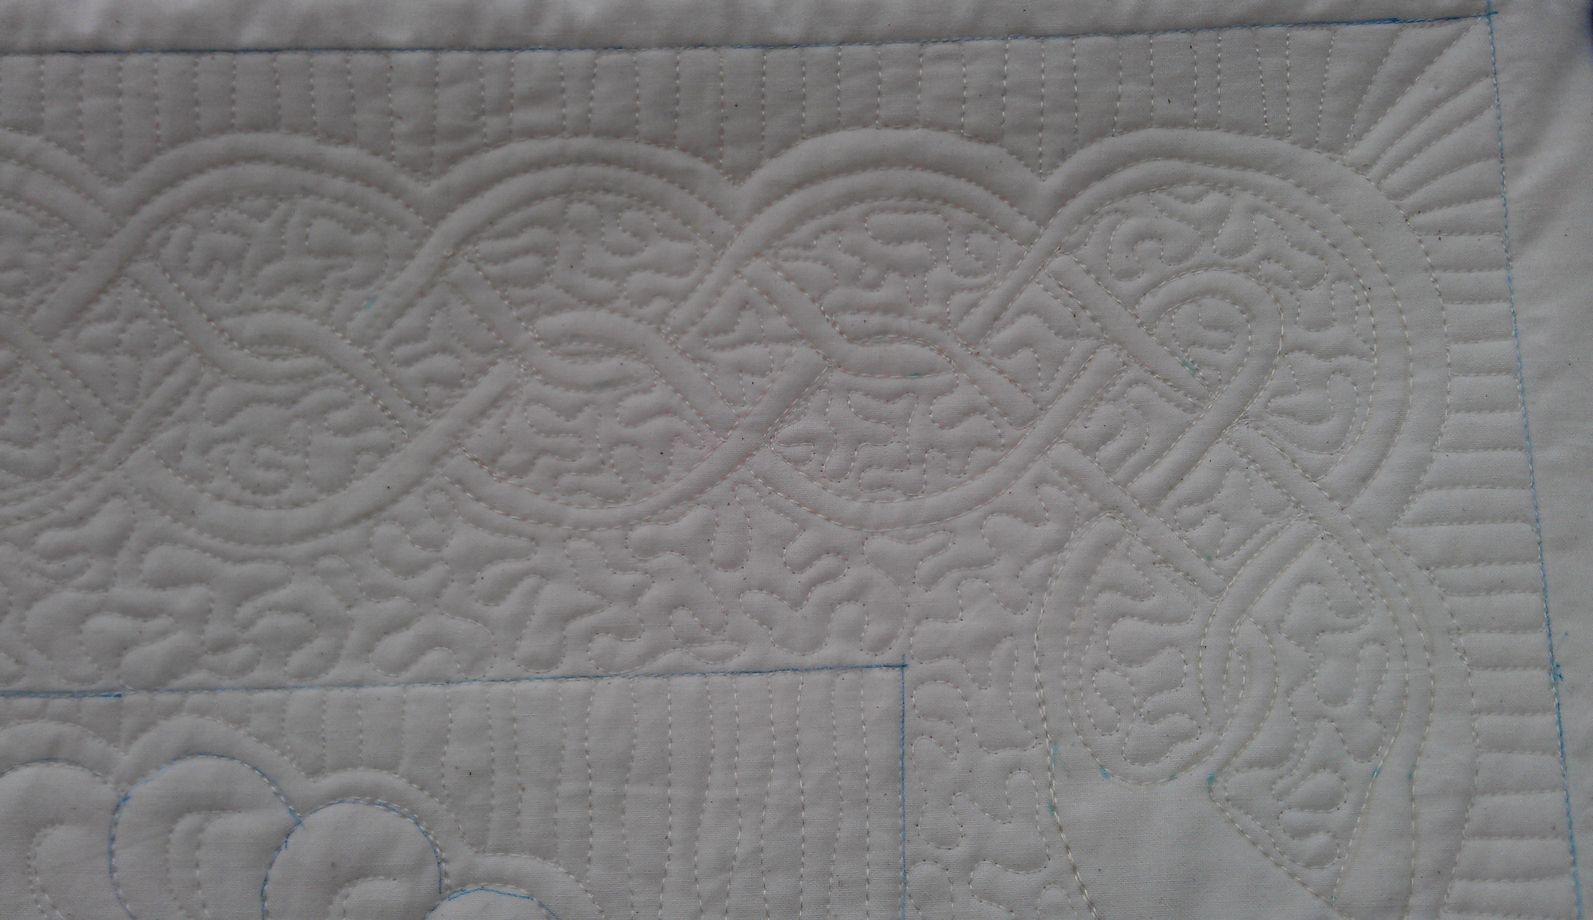
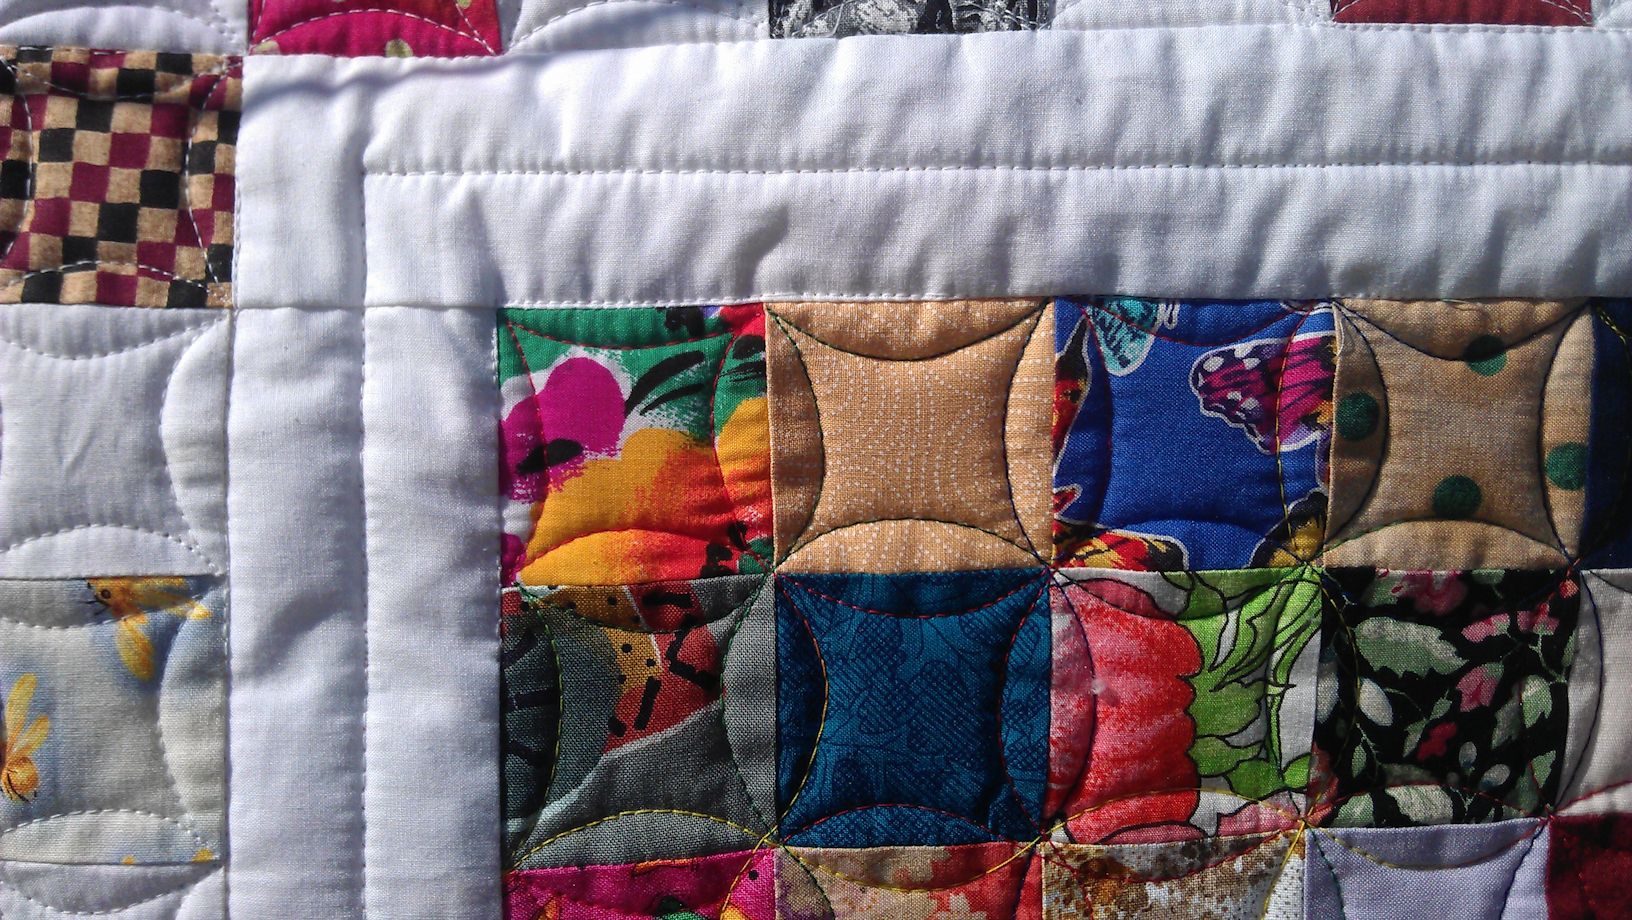
The person who marked up this quilt did an awesome job in the ‘borders’ as she segued from one design to another in a seamless manner.

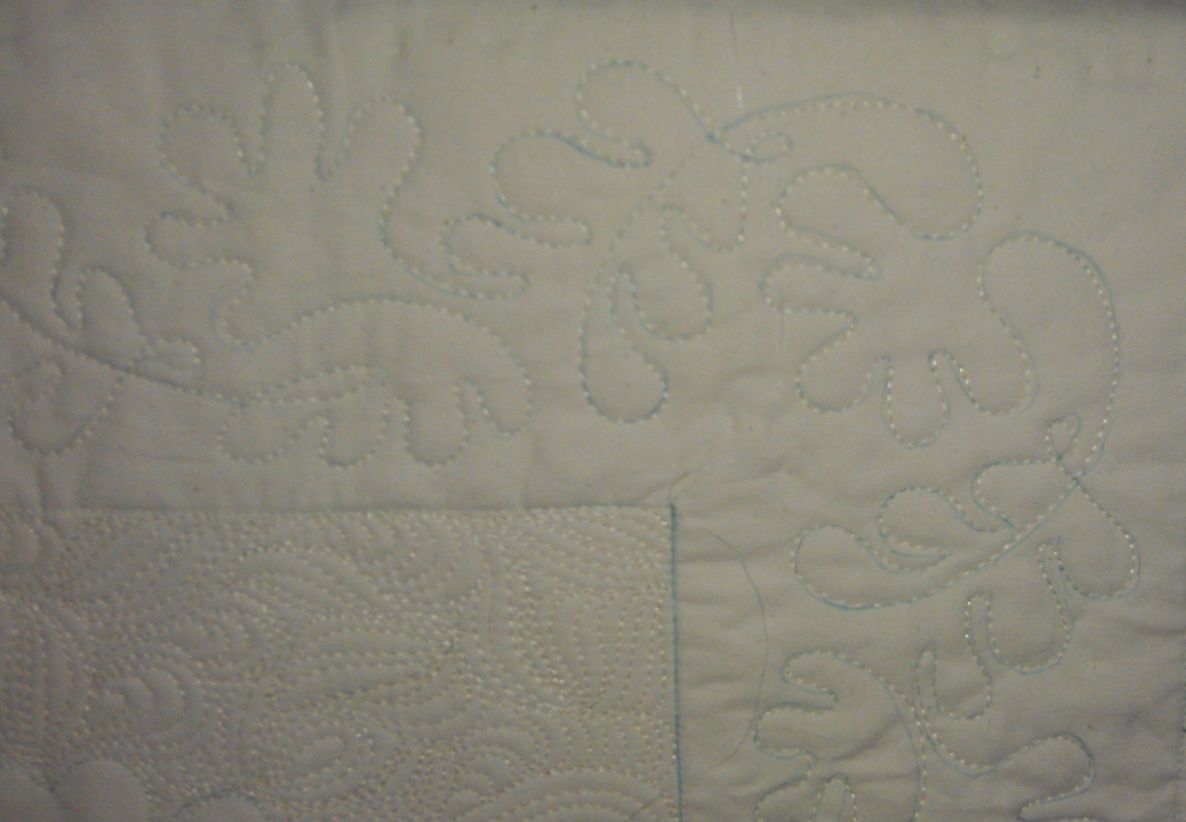
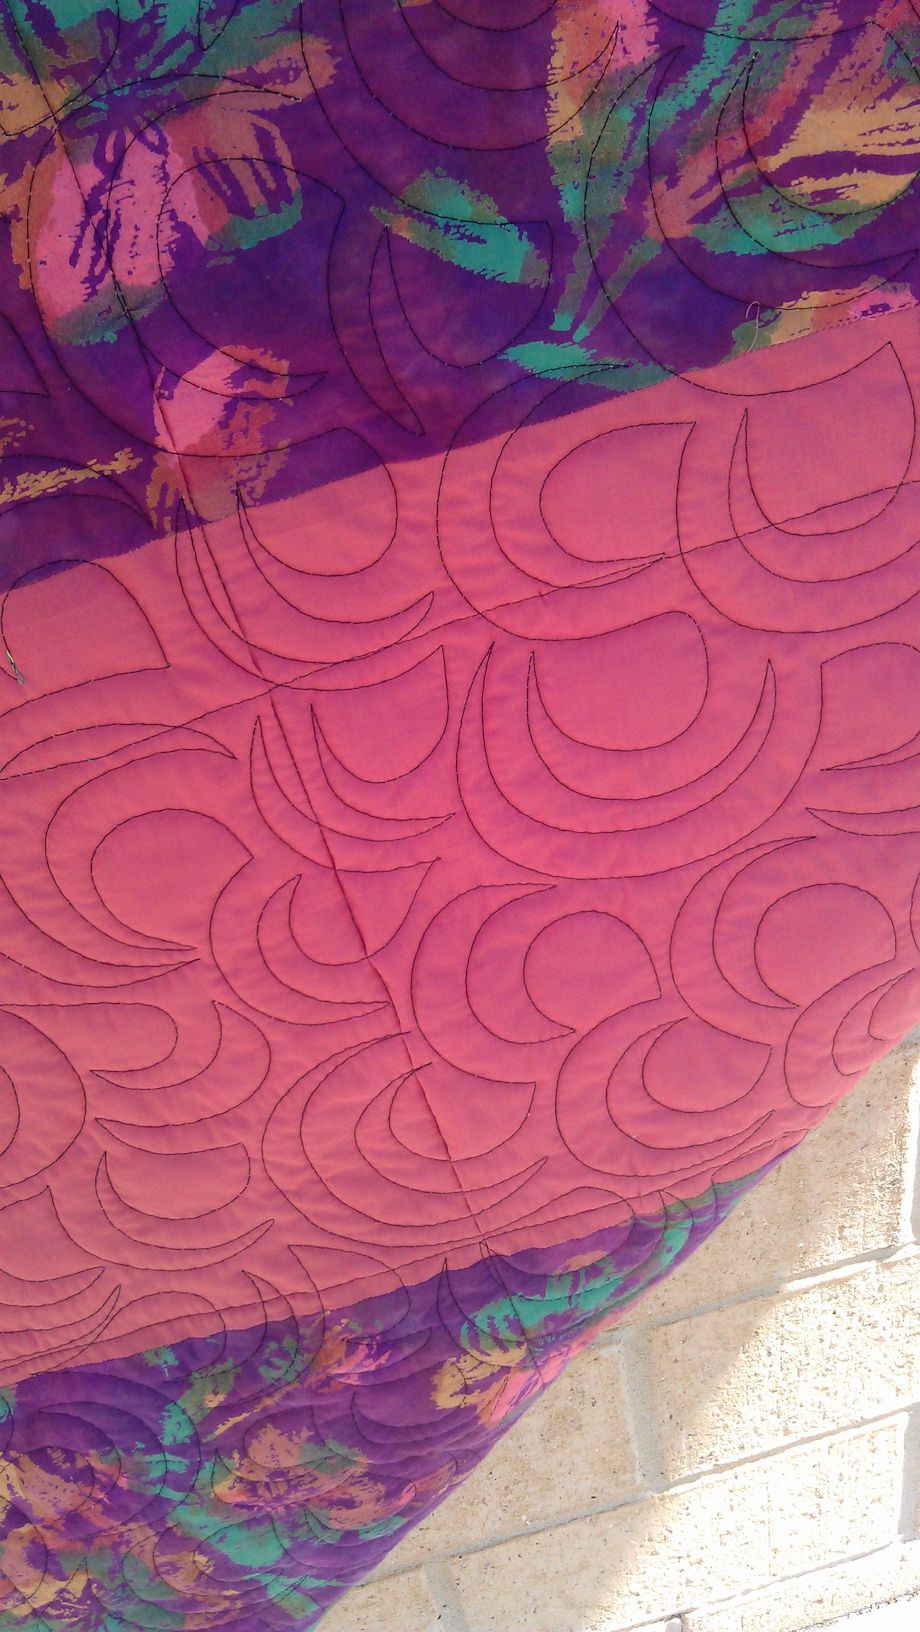
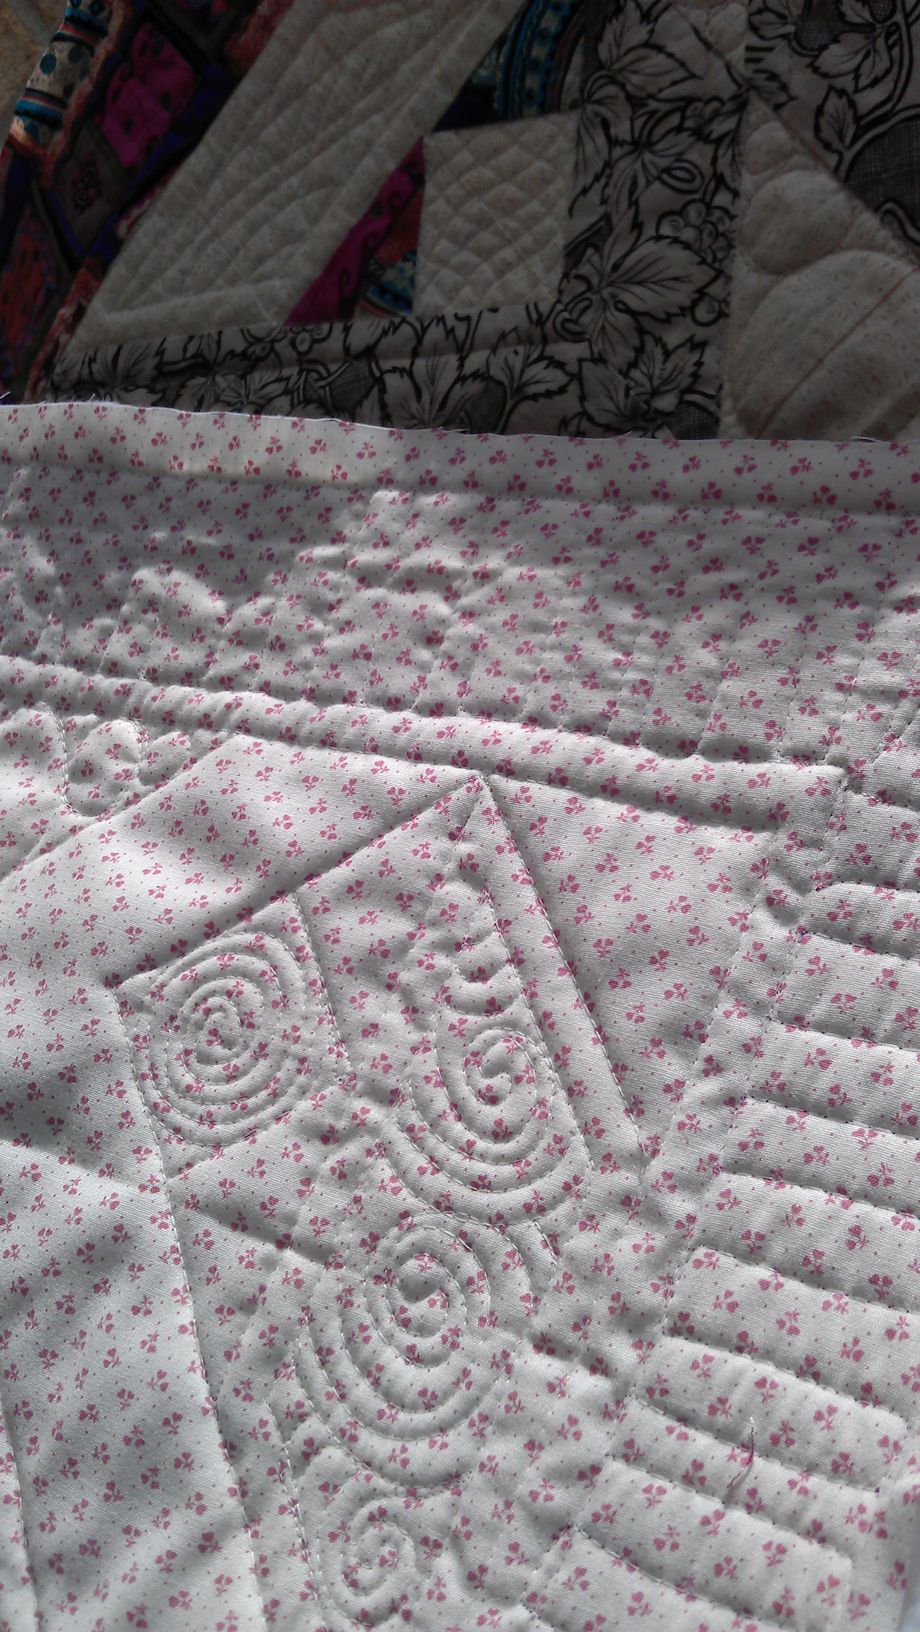
I REALLY REALLY hope that when this quilt gets washed before it gets given away that the marks come out! That said, the back looks pretty stunning too! 😉

(Some of the photos weren’t as good as I’d like — it was pretty windy outside and rain was threatening)

(Click on a photo to view it larger)

quilt133_06

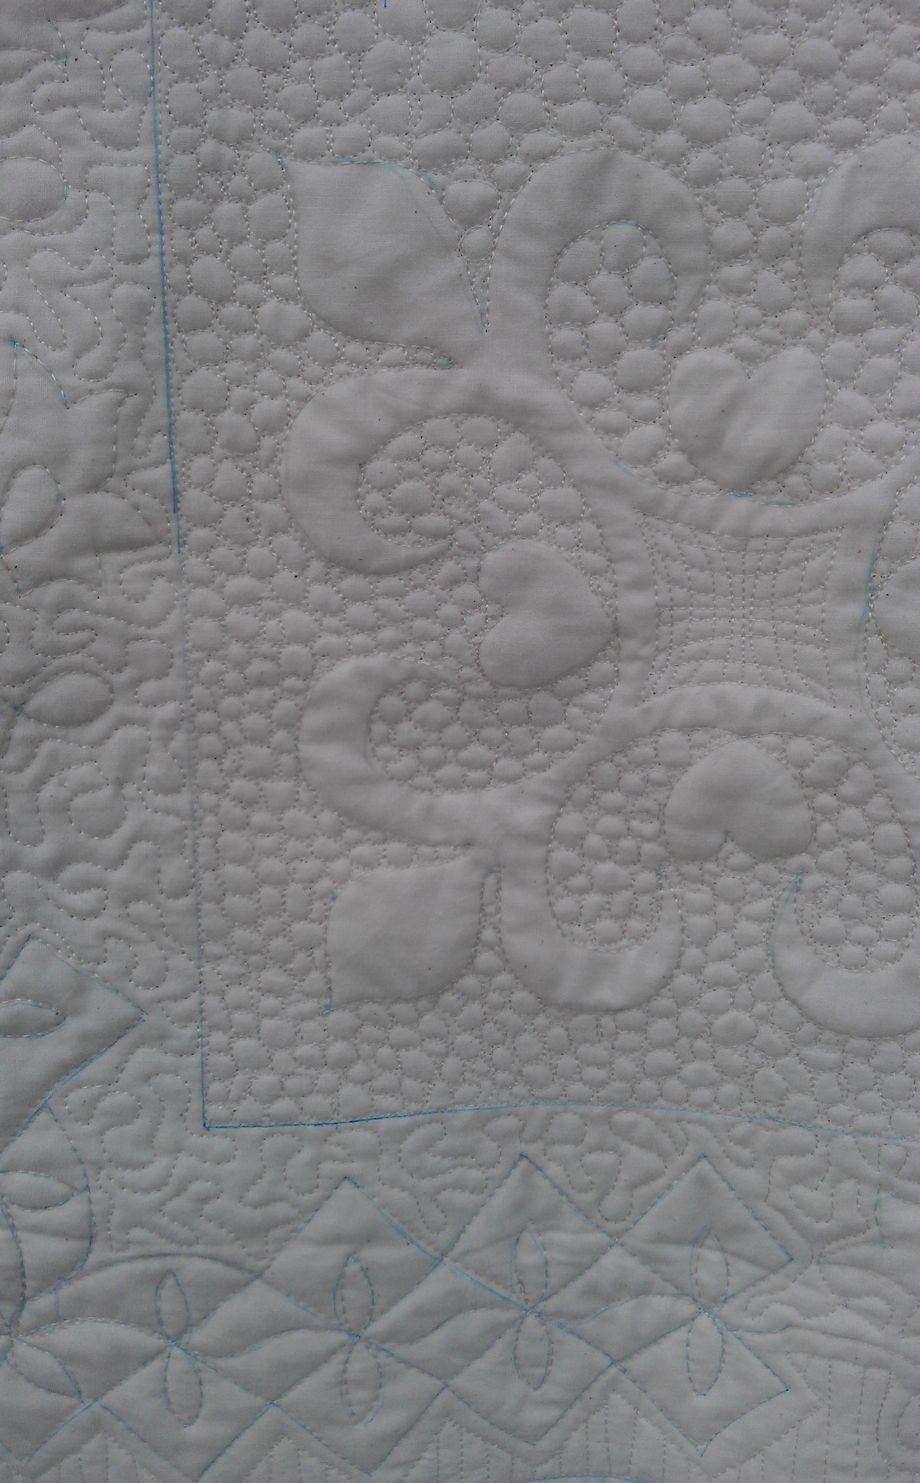
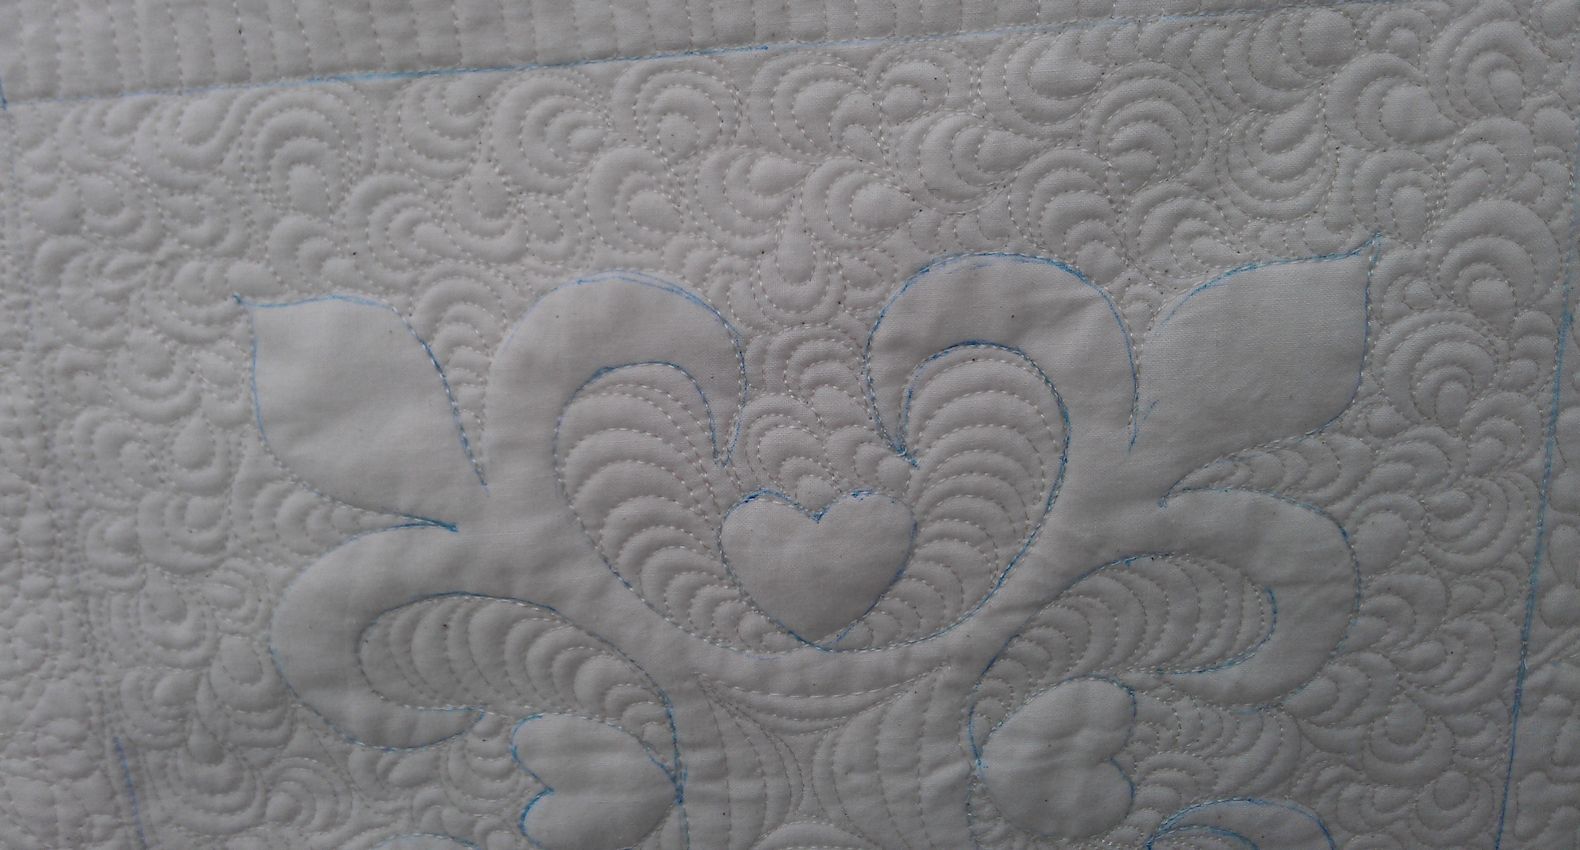
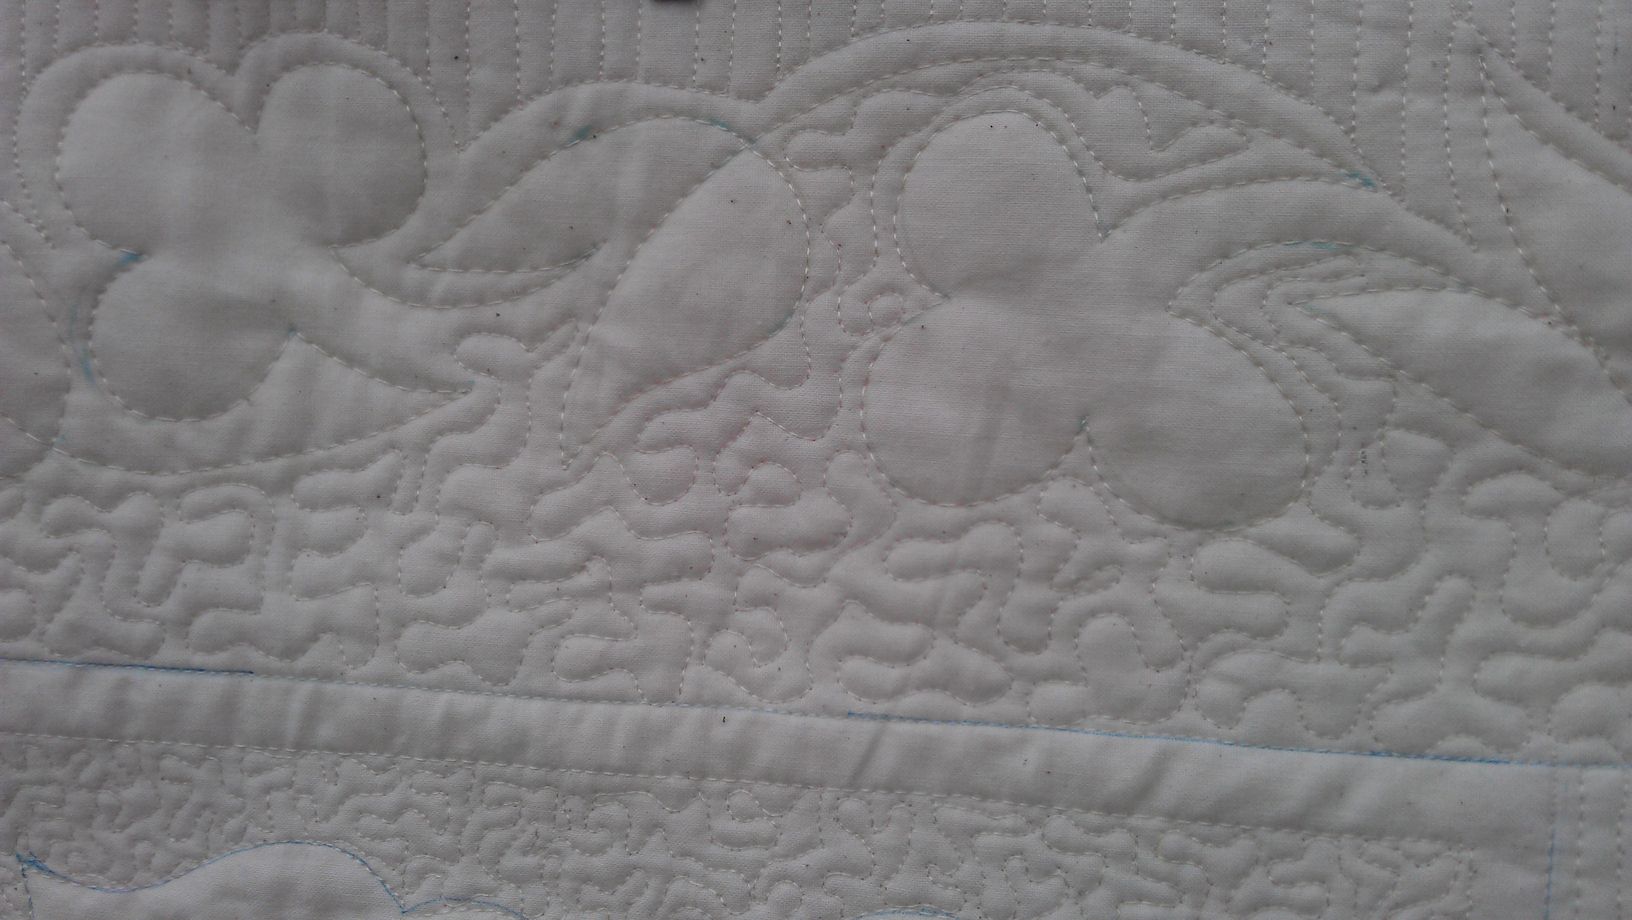
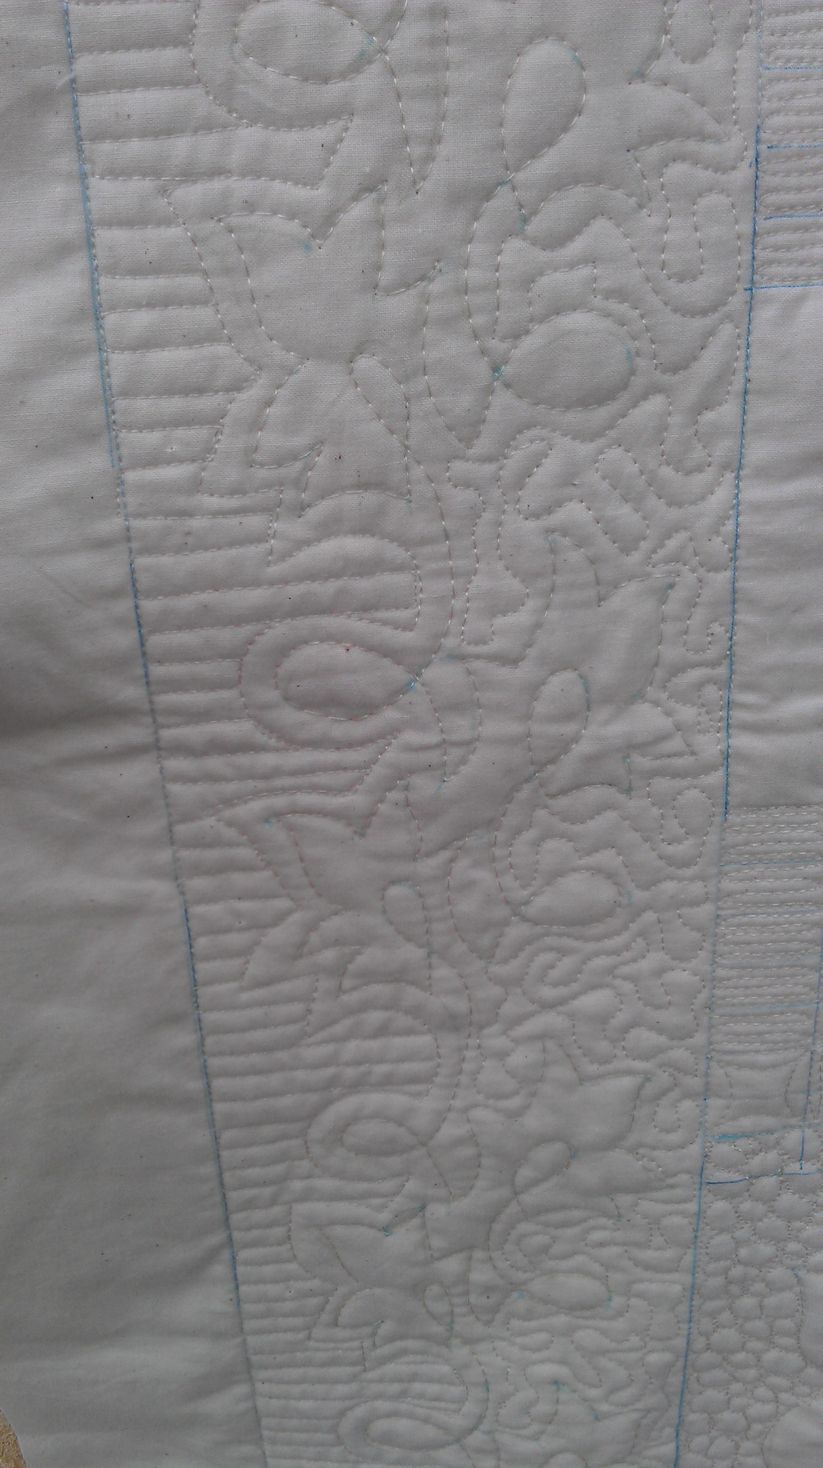
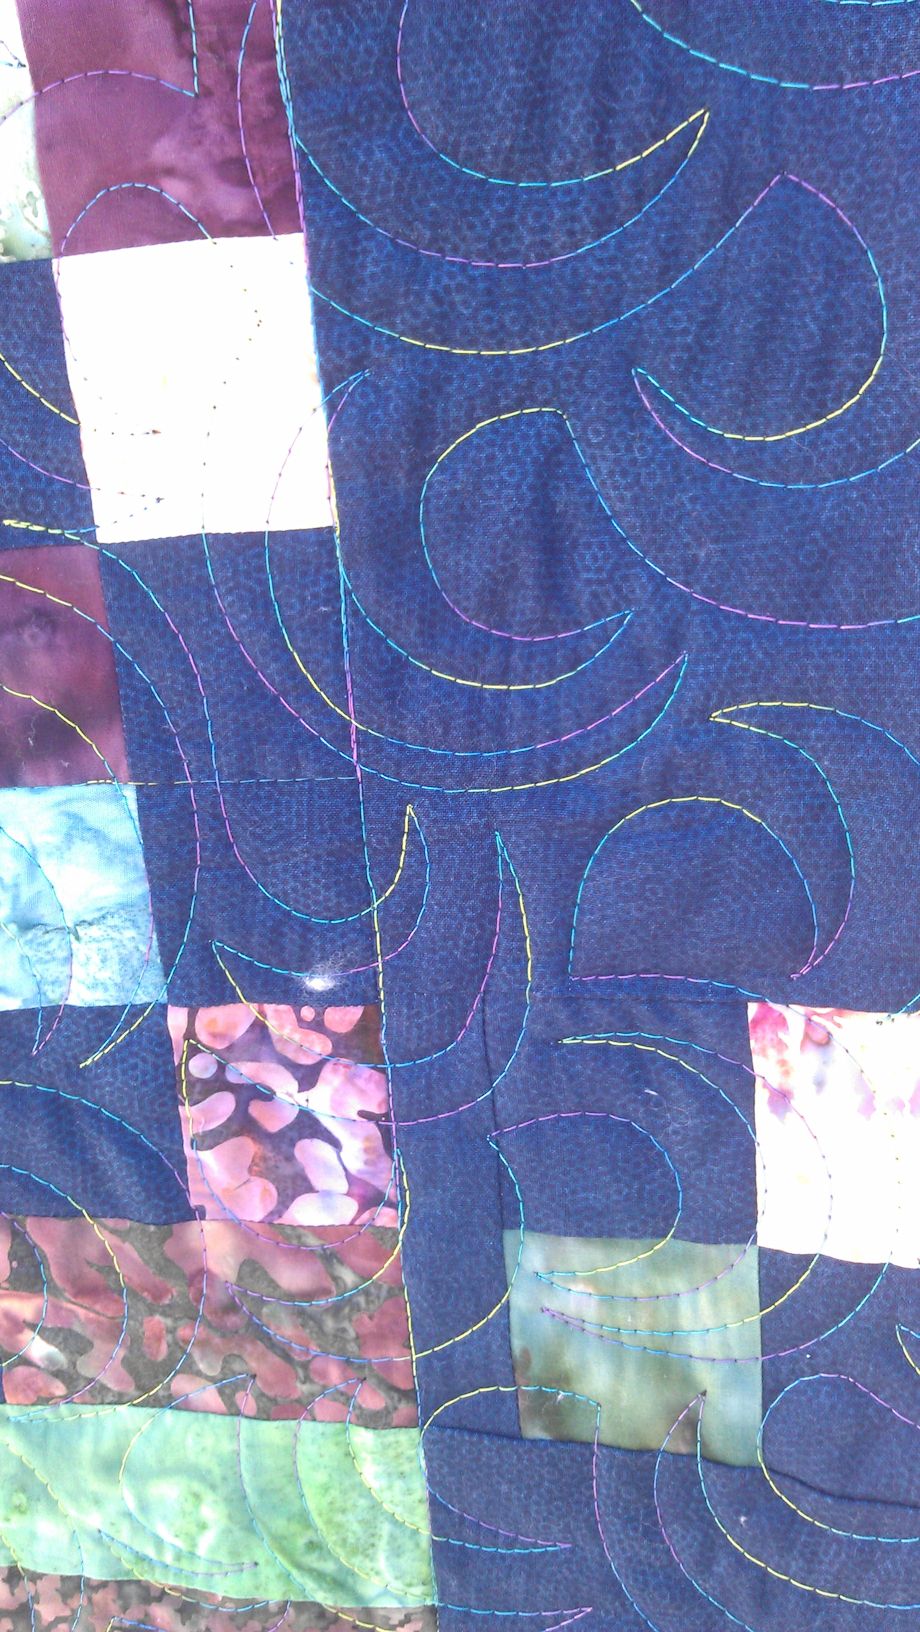
Some of the designs after I had only stitched the marked lines:

quilt133_04

quilt133_05

And then I quilted each square….

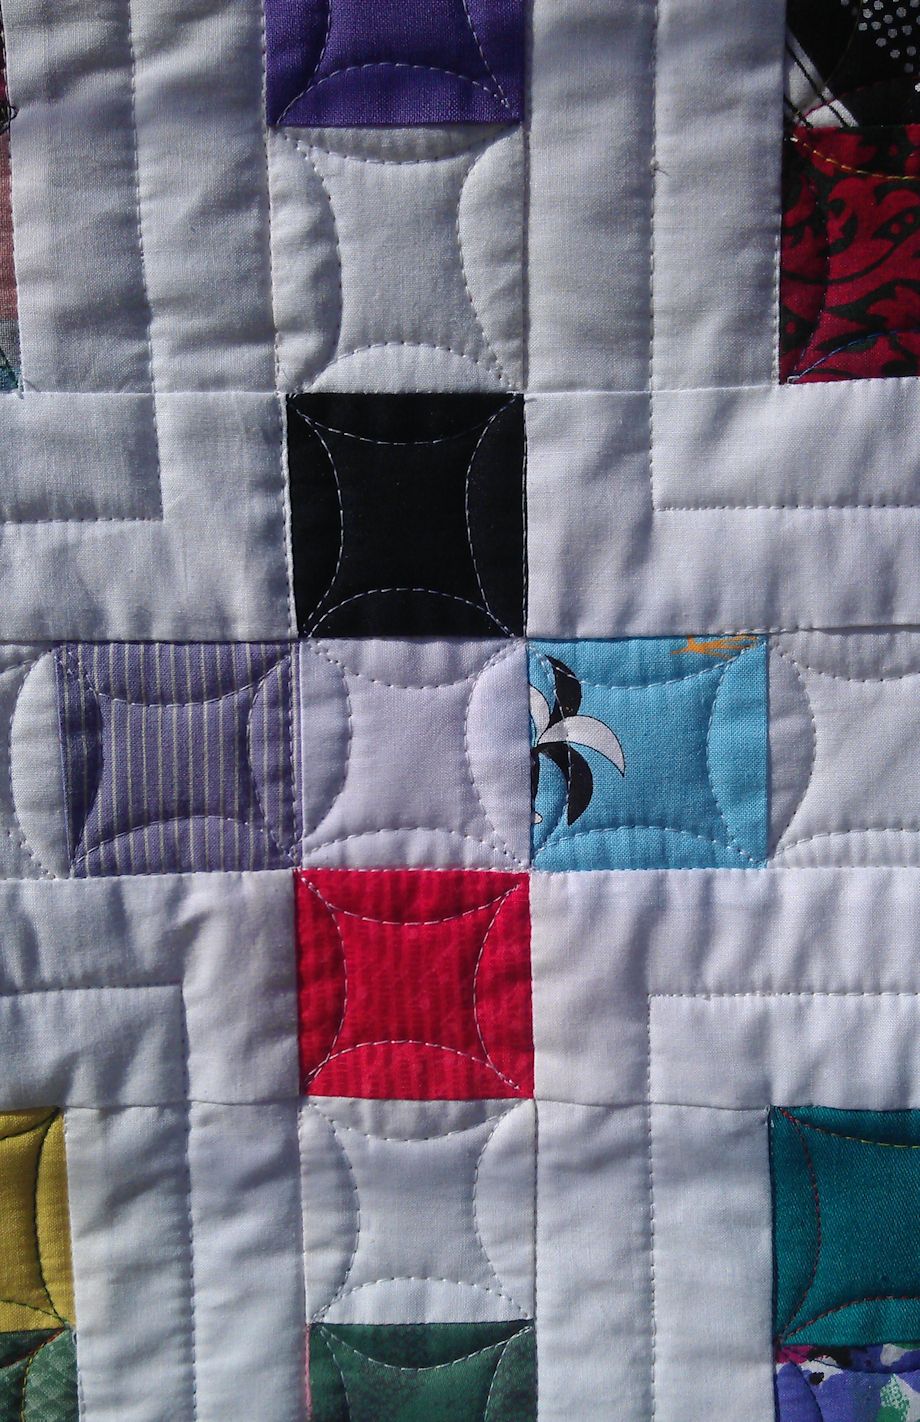
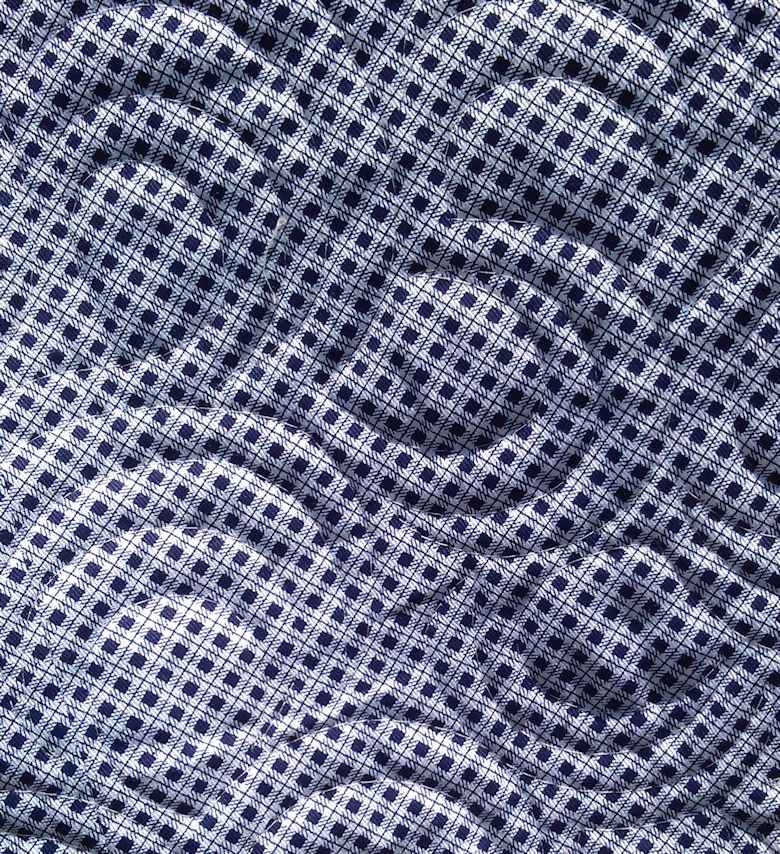
I started with this one, as I figured that 1/8″ straight lines creating a checkerboard effect of about 1″ diamonds would suit the markings:

quilt133_19

quilt133_15

quilt133_16

quilt133_18

quilt133_09

quilt133_22

quilt133_07

quilt133_02

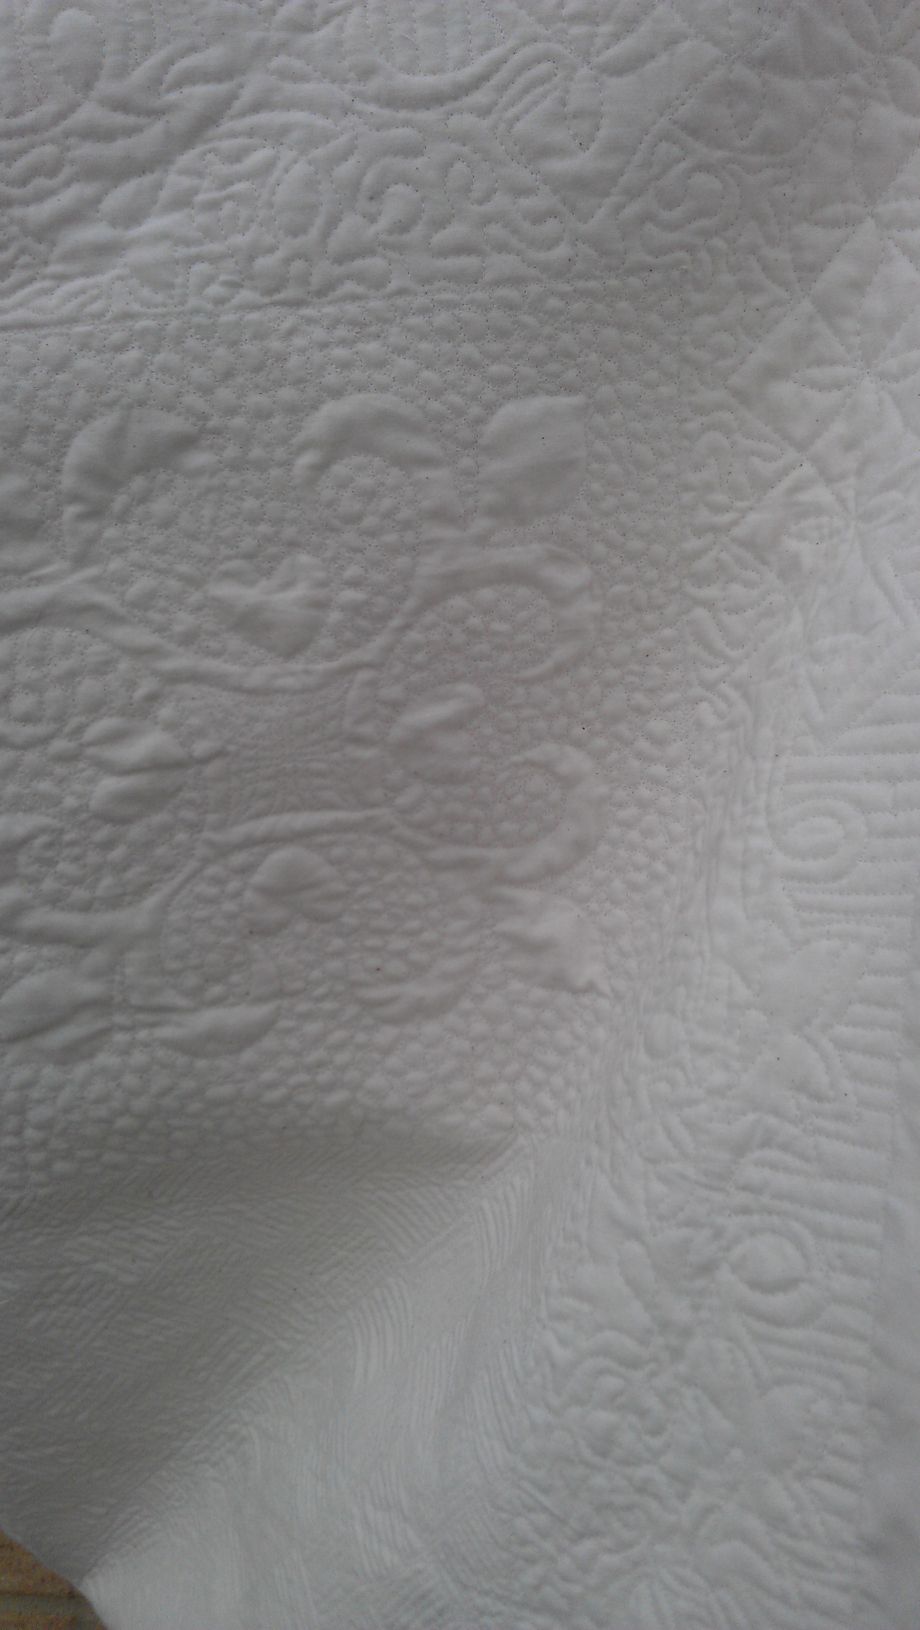
With the central Celtic knot design, I did some very tight scribble stitching inside the background areas, then less and less tight stitching heading out to the edge to the 12″ square. I was really pleased with how it came out, as my original intention was to do tight scribble stitching for the entire square. However, I thought it might pull the quilt out of shape if I did that, so I changed tack and made the outer areas far less tight, though it’s still scribble stitching.

quilt133_17

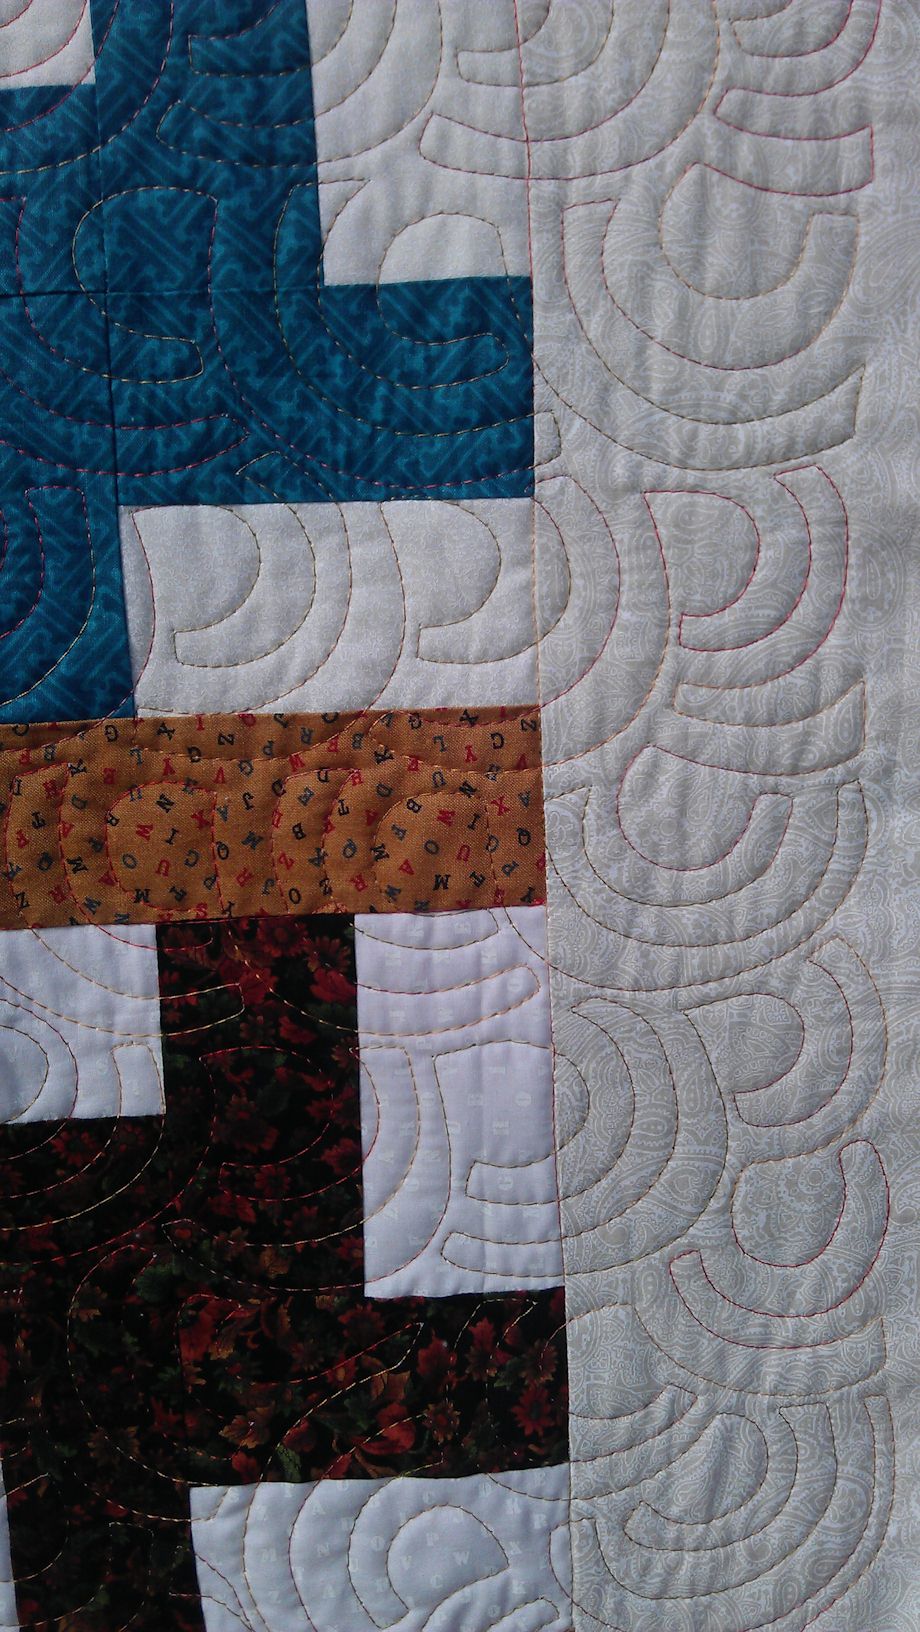
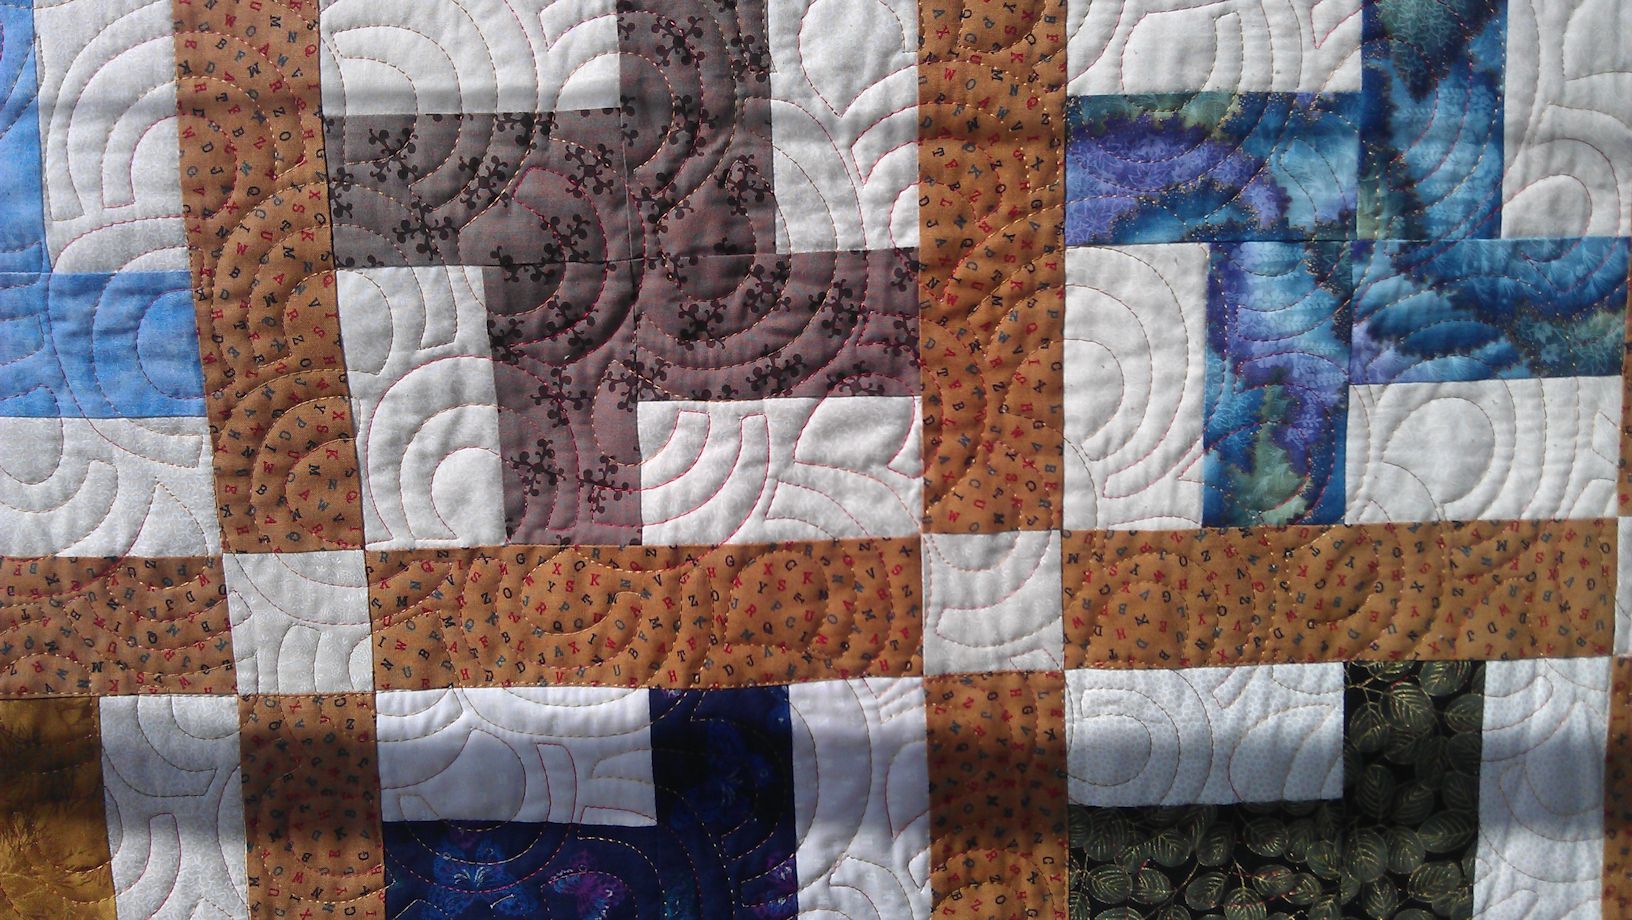
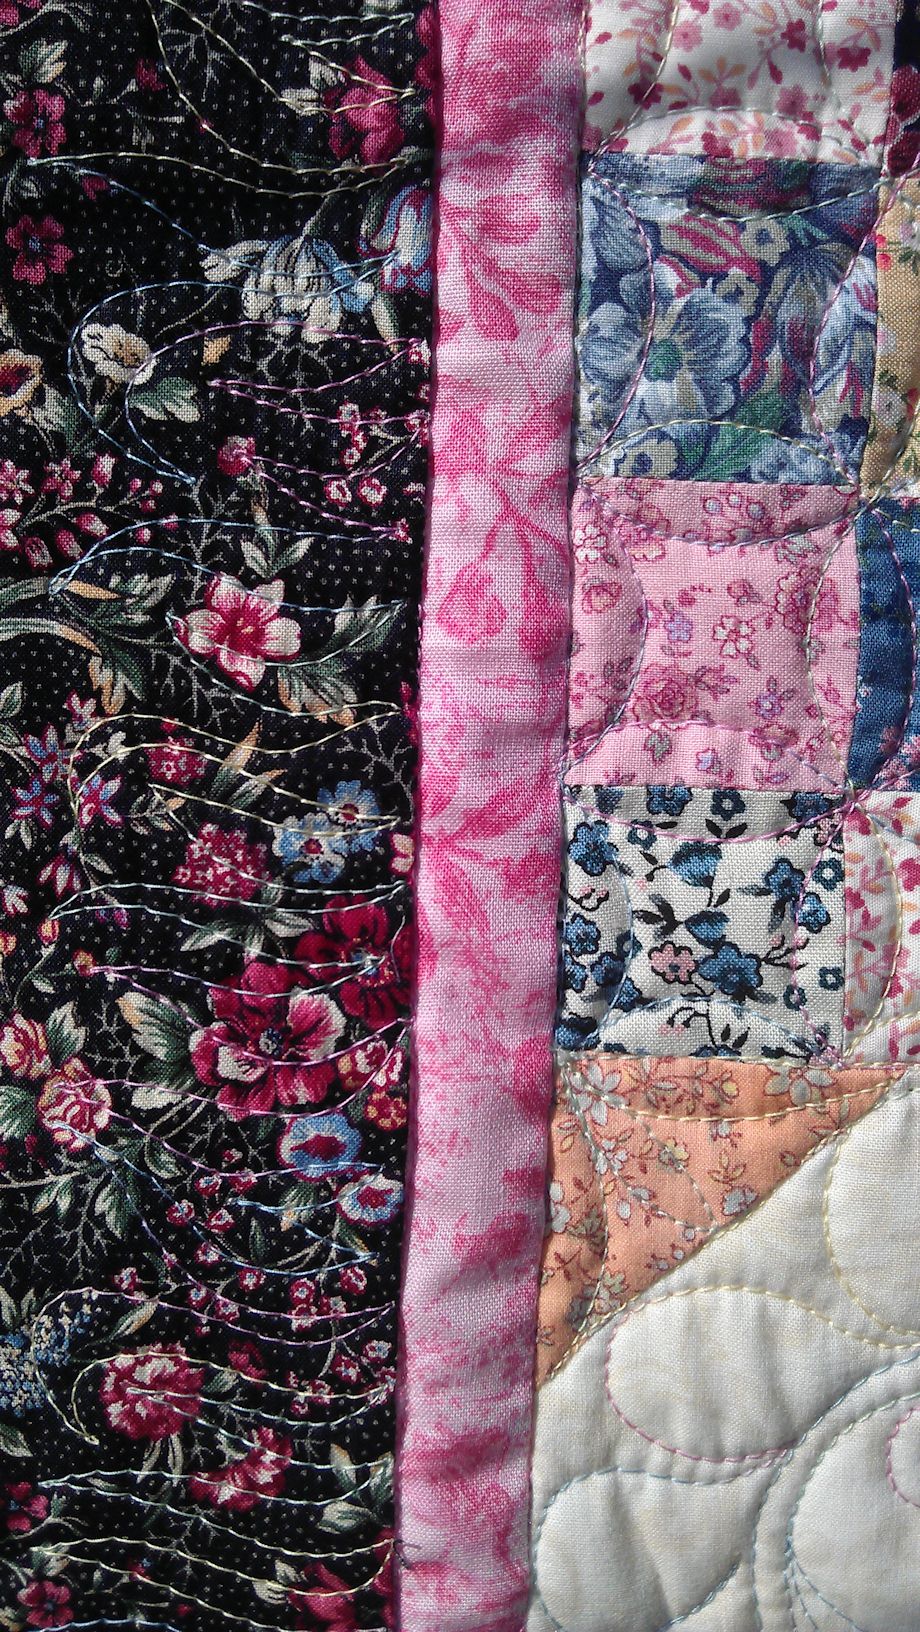
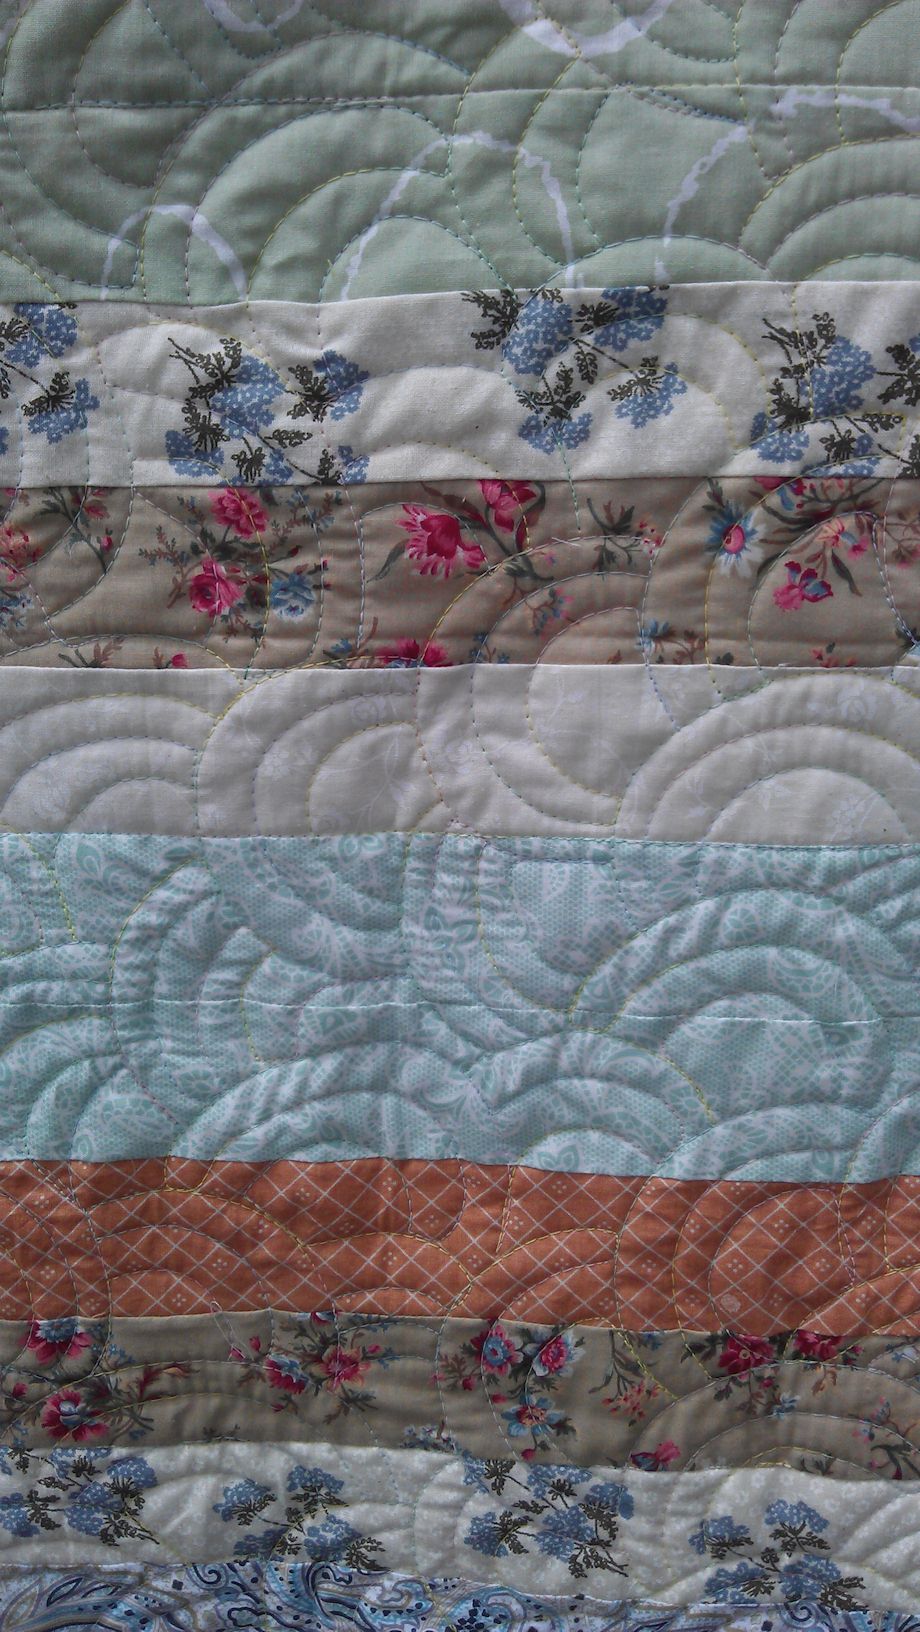
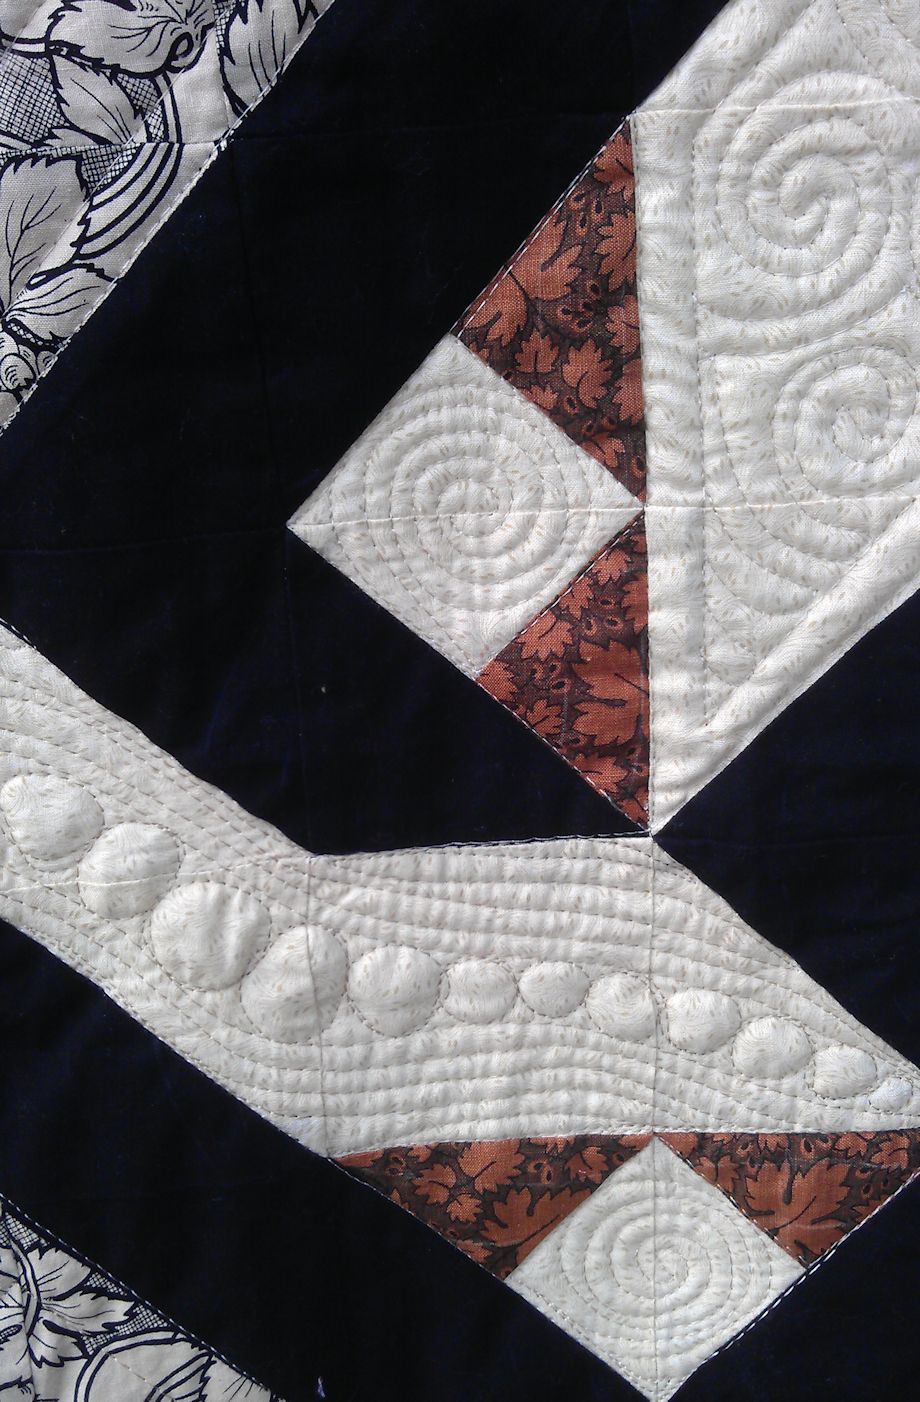
Detail of some of the border designs:

quilt133_10

quilt133_11

quilt133_12

quilt133_13

quilt133_14

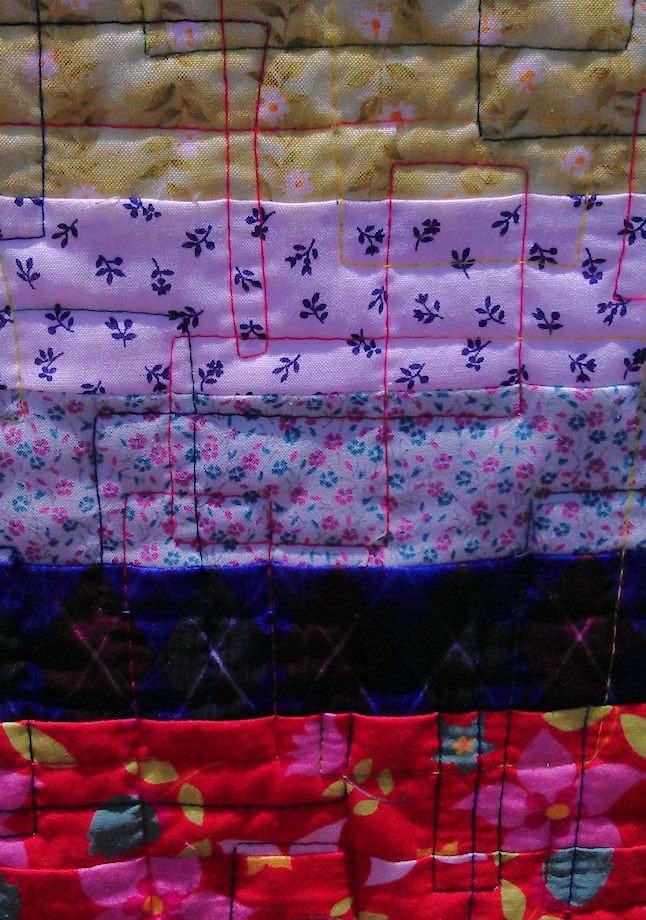
And this is the back:

quilt133_21

Time taken: About 6 hours or so (maybe 10??? — I wasn’t keeping track…)
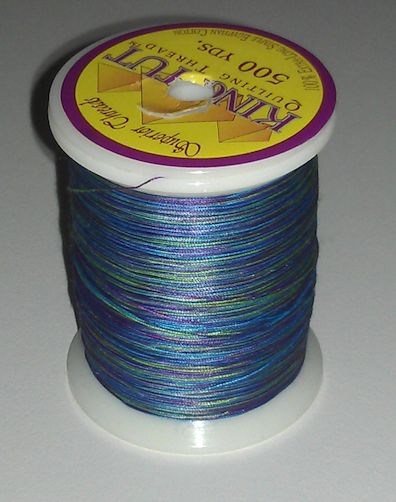
Threads used:

  • Top: Fil-Tec ‘Glide’ (40 wt trilobal polyester, Cream, colour 20001)
  • Bottom: Fil-Tec Glide pre-wound bobbin (white)


Community Quilt 132

23 03 2014

This was quite a traditional snowball block quilt, with lots of small floral fabrics used in all the scrappy squares.

I stitched in the ditch around all the blocks first, then did the cathedral windows/orange peel motif in all the blocks of little squares (each scrap square was about 1.5 inches square),with a half flower in the half square triangles setting off the snowballs. In each snowball, I did a single loopy spine and bulbous feathers. All stitching was done in the same variegated pastels (pink, yellow, green, blue, and cream) thread. In the black floral border, I did flames all the way along. I didn’t stitch the pink border.

(Click on a photo to view it larger)

quilt132_01

quilt132_02  quilt132_04

quilt132_03

Threads used:

  • Top: Fil-Tec ‘Harmony’ (‘Spring’, colour 14062; 40 wt cotton)
  • Bottom: Fil-Tec ‘Glide’ pre-wound bobbin in white


Community Quilt 131

23 03 2014

I liked this bright scrappy quilt! The crisp white set it off perfectly. I think this pattern was used (http://weddingdressblue.wordpress.com/2012/09/24/tutorial-film-at-five-quilt/) or a variation of it.

How to quilt it? First I stitched in the ditch around all the blocks to stabilise the quilt. My next thought was ‘modern’ with lots of straight lines, but then I decided to just do the straight lines in the centres of the sashing and border strips, using white thread. Once that was all stitched, I tackled the small squares. This time I decided to do the cathedral windows/orange peel motif as it’s quick, easy, and gives a great effect of circles and/or flowers. I used a variegated red, yellow, blue, and green thread for these sections. And I finished off the sashing/borders with the scrappy squares using the cathedral windows motif, but in white thread.

(Click on a photo to view it larger)

quilt131_01

quilt131_03

quilt131_02

Threads used:

  • Top: Confession: ANCIENT cotton overlocker thread in both white and a variegated red, yellow, blue and green! Using up my thread stash…
  • Bottom: Fil-Tec Glide pre-wound bobbin in white


Community Quilt 130

8 12 2013

This was the final one of the current batch. Again, it was a bright scrappy quilt. How to quilt it?

I figured there was more than enough going on in this quilt as far as colour and pattern went, so I opted for an all-over continuous line motif — one of my old favourites: the ‘open headband‘ motif. I made the arcs quite large, which meant I was able to quilt this quilt in just over an hour (I continued the motif into the border so I didn’t have to quilt that separately).

I used a variegated thread in blue, purple, and green, which I thought matched the quilt quite well.

(Click on a photo to view it larger)

quilt130_01

quilt130_02

Back:

quilt130_03

quilt130_04

Threads used:

  • Top: Superior King Tut ‘Arabian Nights’ (40 wt, cotton, colour #935)
  • Bottom: Bobbinfil (white)


Community Quilt 129

8 12 2013

Another scrappy jelly roll strip style quilt… this time in reasonably bright colours. While I quite liked the effect of the strips in the quilt, I’m not sure the border fabric adds much — while the colours are OK, the floral pattern clashes in my opinion.

I decided to quilt this one ‘modern’ style, with continuous line stitching in a square/rectangle motif. I used a variegated overlocker thread in primary colours that I’ve had for YEARS, which I though worked quite well with the colours in the quilt.

(Click on a photo to view it larger)

quilt129_01

quilt129_02

quilt129_03

Threads used:

  • Top: No idea! It’s a variegated overlocker thread in primary colours that I’ve had for years and there’s no label on the spool
  • Bottom: Bobbinfil (white)


Community Quilt 128

8 12 2013

This was a pretty pastel scrappy quilt, done in a jelly roll strip style. The temptation was to quilt it ‘modern’ style, but I decided to use a soft rounded motif instead, using a variegated soft pastel thread.

I like how it turned out.

(Click on a photo to view it larger)

quilt128_01

quilt128_02

Back:

quilt128_03

quilt128_04

Threads used:

  • Top: Wonderfil Silco (40 wt; cotton; color #SCM03)
  • Bottom: Bobbinfil (white)


Community Quilt 127

30 11 2013

This was a big quilt, made mostly with batiks in purples, pinks, yellows, blues and greens.

After stitching in the ditch around all the large blocks and the border and the outer edge, I decide to counter the rectangular/square design by quilting it in a rounded motif. I used my favourite ‘open headband‘ motif, making the arcs much larger than usual to try to get this quilt stitched fairly quickly as I wanted to get it back to the Community Quilts coordinator on Monday. I extended the quilting design into the border.

I really liked how the King Tut variegated thread (in blues, greens, purples and yellows) matched the fabrics so well.

(Click on a photo to view it larger)

quilt127_01


quilt127_02

quilt127_03

Back:

quilt127_04

Threads used:

  • Top: Superior King Tut ‘Cairo’ (40 wt, cotton, colour #932)
  • Bottom: Bobbinfil (black)


Community Quilt 126

30 11 2013

I quite liked this quilt — even though the colours weren’t my preference, they went well together. Normally with a sharp geometric block design like this ( a disappearing nine-patch, if I’m not mistaken), I’d soften it by quilting a curved/rounded motif. But not this time — the quilt design and colours just begged to be stitched with a rectangular motif 😉

This is a continuous line motif I’ve used several times before. It’s pretty easy to do as there really are no rules. And no rulers either 😉

(Click on a photo to view it larger)

quilt126_01

quilt126_02 Threads used:

  • Top: Fil-Tec Harmony ‘Tweed’ (40 wt, cotton, colour #14076)
  • Bottom: Bobbinfil (black)


Community Quilt 125

17 11 2013

This was an odd quilt — I didn’t ‘see’ the pattern in it until I saw it as a thumbnail image on my camera, and by then I’d already quilted it ;-). The pink/purple with the cream/black/brown was also odd, although looking at it finished, it seems to work.

(Click on a photo to view it larger)

quilt125_02

How to quilt it? Well, as there were so many odd-shaped blocks, I started by stitching in the ditch (ESS, yes EVERY one!). Then I quilted the small cream squares — in the ones surrounded by the cream and black floral fabric I stitched a wavy cross-hatch matrix, and on the ones surrounded by the black fabric I stitched a spiral.

quilt125_05

I followed that by echo stitching 1/2″ in from the edges of each diamond shape, then repeating the wavy matrix in the diamonds within the cream/black floral, and spirals in the diamonds within the black fabrics. So that took care of those spaces.

quilt125_10

Now, what to do for the odd-shaped beige spaces? I started by stitching the centre square in a big spiral, then came out from each corner with a snake-like sweep down the odd-shaped spaces, filling in with circles, then echoing the stitching about 1/4″ from the initial sweeps. I repeated that motif in the other odd-shaped cream spaces on the rest of the quilt.

quilt125_03

For the large cream triangles, I stitched a large circle, surrounded by two smaller circles on each side. Then I straight stitched about 1/2″ in from the seams of the cream/black fabric pieces. I didn’t stitch the black fabric or the pink or brown triangles at all. For all of this stitching, I used a dark cream thread (I ran out of the Madeira, but fortunately had a Robison-Anton thread almost the same colour).

quilt125_09

The border fabric was strange, with pink/blue/purple squarish shapes in it. I kept it simple by stitching a straight line 1/2″ in from the seam and 1″ in from the edge, then stitched perpendicularly between these two lines to create a ladder or bookshelf effect.

quilt125_08

The only ruler I used was the Line Tamer for the long straight lines and stitching in the ditch — everything else was free motion quilted, including the perpendicular lines in the border.

The back:
quilt125_01

Threads used:

  • Top: Madeira (rayon, 40 wt, colour #1082); Robison-Anton ‘Platinum’ (rayon, 40 wt, colour #2571); Superior King Tut ‘Egyptian Princess’ (cotton, 40 wt, colour #947)
  • Bottom: Bobbinfil (white)