Turtle Quilt 2

2 04 2013

I wanted to try another turtle quilt using the Herd of Turtles pattern (available from here: https://www.pacificrimquilt.com/2faq/), but this time using the raw edge applique technique. This method was much quicker for me, and I saved even more time (and a lot of anguish!) by NOT cutting out the areas around the sections on the carapace. Instead, I got out the Copic markers I’d purchased when I was in the US, and shaded the carapace sections to give the illusion of dimension. I was quite pleased with how the shading turned out. I had the green jelly roll fabric I’d made up a few weeks ago and that I didn’t particularly like, so I used that as the background, and for the turtles I used one of the metre-long batik lengths I’d bought in Bali last September. Because this is raw edge applique and because this is a quilt likely to be hung in a child’s room or used for a child, I wanted to stitch down those raw edges a bit more securely, so I used the same thread I’d used for the raw edge and stitched those edges down using a blanket stitch. Finally, I added some wavy kelp using a fluoro lime green thread, then followed the waviness of the kelp into the border. turtles2_01

Turtle with Copic marker shading done, including shading on the overlap with other turtles.Kelp stitched too.

Turtle with Copic marker shading done, including shading on the overlap with other turtles.Kelp stitched too.

Shading done with Copic markers

Shading done with Copic markers

Without the shading, the turtle's carapace was 'flat', but I wasn't going to cut out those tiny sections between each hexagonal shape!

Without the shading, the turtle’s carapace was ‘flat’, but I wasn’t going to cut out those tiny sections between each hexagonal shape!

Border detail - flames to emulate wavy kelp

Border detail – flames to emulate wavy kelp

Detail of the shading, kelp, blanket stitch edge over the raw applique edge, and the binding

Detail of the shading, kelp, blanket stitch edge over the raw applique edge, and the binding

Doing the shading with the brush end of the Copic marker

Doing the shading with the brush end of the Copic marker

Turtle without any shading

Turtle without any shading

Threads used:

  • Fil-Tec Glide ‘Peach’ (40 wt, trilobal polyester, colour #50473)
  • Mettler Poly Sheen (40 wt, polyester, colour #5940 [fluoro lime green])


Surface stitching is done

29 03 2013

I unpicked the orchid from the thin batting last weekend, then I put it on tearaway, used the thin batting in the turtle quilt, and then I surface stitched the orchid with matching threads. It’s now ready to be framed with a background fabric and finished off, though I’m not sure what I’ll do for either yet.

Meantime, here are some photos of the surface stitching I did in matching thread colours:

orchid_stitched02

I added extra ‘vein’ stitching in a light pink thread on the large petals, as well as stitching with various darker threads on the deeper veins. On the lower petals, I used a pale variegated cream/blue/yellow thread and quite like the added ‘texture’ it gave.

orchid_stitched03

On the back petal, I used lots of different coloured threads to reflect the paint colour going up the petal. I curved the stitching lines a little around the centre line to add the illusion of dimension.

orchid_stitched04

In addition to the variegated cream/blue/yellow thread for the long slightly curved lines in these petals, I used three different threads for the tips — a yellow, a neon lime green, and a soft cream extending into the main part of the petal.

orchid_stitched01

Again, I used a neon lime green thread in the green part (though only a little), and a lot of various coloured threads (from deep purple to pale pink) on the curved pieces to add dimension and ‘curviness’ to them.


Travel tips

28 03 2013

Some travel tips I picked up on my most recent trip to the US…

Phones

  • If you’re travelling from Australia to the US and are a Telstra Mobile customer, then SERIOUSLY consider getting a US SIM card for your phone if you’re taking your personal phone, not a company one. It will save you an absolute packet — hundreds, if not thousands, of dollars (see this horror story of a $12,000 bill for 13 days in Thailand: http://www.news.com.au/breaking-news/victorian-man-hit-with-12k-roaming-bill-after-thailand-holiday/story-e6frfkp9-1226618187589). You won’t have your usual Australian phone number for the time you’re away (text or email your new number to all those back home who need to know), but you will get MUCH cheaper calls, texts, and data charges than you would if you used Telstra’s global roaming. See this blog post of mine for details on using a T-Mobile Pay-per-day SIM: http://cybertext.wordpress.com/2013/03/21/telstra-to-t-mobile-settings-on-phone/Β Update July 2015: You can now buy T-Mobile and other SIM cards at a kiosk at Sydney International Airport (I think Melbourne too), and you may even get your new phone # allocated before you take off.
  • If you’re staying in expensive hotels in the US (or pretty much ANY hotel in Australia!), they’ll likely want to charge you big bucks for using their WiFi or wired network to access the internet. Instead, use your smartphone as a modem and tether it to your laptop — you might only get 3G signal strength, but that’s often better than you’ll get in hotels that advertise ‘highspeed broadband’ anyway. Some hotels have free WiFi in the lobby, so if you only need to check email, then sit yourself down there with a wine or a coffee instead.
  • While many places in the US have free WiFi, don’t assume that because you’re going through WiFi on your phone with your Telstra SIM that it will be free — it won’t! So get yourself a US SIM (see above).

Hotels

  • Some hotels have day rates, but these are REALLY hard/impossible to find via their websites. Day rates are ideal for a long layover (e.g. arrive at LAX at 7 am, but your next flight doesn’t leave until after midday; arrive at DFW for your 10 pm flight to Australia, but Qantas check-in doesn’t open until 6 pm and it’s now only 2 pm). But you have to ask for a day rate! In my experience, asking via the hotel’s email contact form, Facebook, or Twitter account may not get you a response, so pick up the phone (Skype is CHEAP from anywhere, or use your phone with your US SIM when in the US and make a free call) and call the hotel and ASK a real person. Call the direct number of the hotel — don’t go through the reservations call centre for all hotels in the chain. I’ve been able to score a day rate at the fabulous Grand Hyatt at DFW Airport and at the not-so-fabulous Hacienda Hotel near LAX. In both cases, the day rate was for a specified number of hours (typically 6 to 12 hours) and was cheaper than an overnight stay. The big advantage of a day rate at an airport hotel is that you can shower, repack, rest (though I’ve avoided that temptation in case I miss my connecting flight!), have some quiet time away from the airport bustle, etc. If you don’t want to fork out for the day rate at the Grand Hyatt in Terminal 4 at DFW, then ask about using their fitness centre — when I was there in 2012, the guy at Reception suggested that paying $30 for one-off access to their fitness centre might suit too, if I only wanted to use the shower facilities. I didn’t take him up on it as I needed to repack and figured there wouldn’t be room to do that effectively in the fitness centre. But it was an option I hadn’t thought of before. Update: I found two websites that only feature reputable hotels with day rates (there are plenty of not so reputable ones in a Google search results list!): http://between9and5.com/en/ and http://www.bookadayroom.com/; interestingly, neither of these listed the two hotels I mentioned above.
  • If you’re on the road in the US and need to stop somewhere for the night, check sites like Hotels.com and Priceline.com on your phone on your way to the location (NOT while you’re driving, of course), or even in the hotel’s carpark, to get current rates for the hotel that night. You can either book there and then via your phone, though I’ve found that just walking into Reception and mentioning that Hotels.com (for example) had the rate at $XX is enough to score the same rate… or even less. Beats dealing with filling in awkward forms on a small device like a phone and hunting out your credit card etc. If the hotel won’t match the price and you really want to stay there, walk outside (or even do it at Reception!) and make the booking via Hotels.com, etc. Or go somewhere else. Unlike Australia, there’s a plethora of hotels in the US near interstates or major towns/cities willing to compete for your dollar.
  • If you’re turning up late-ish in the day and haven’t booked your hotel room, you might be able to score a further discounted rate. Some hotels discount their rates late in the day just so they can get customers in the door. I scored a $99 room (already discounted from $119) for $69 at a Hampton Inn in Texas (Hampton Inns have another advantage in that they have a decent free breakfast in their locations too, so you can save by not buying breakfast; some even have soup and crackers and vege sticks in the evenings too, so if you’re not up for going out for a meal or even for a big meal, you can get sustenance there as part of your room rate. And they have really comfy beds!).

Airport lounges

  • Got a long-ish layover, but not long enough to get a hotel room near the airport? Consider buying a ‘day pass’ into an airline lounge. Some airlines have this option, but not all. Each airline will have its own rules about allowing access to non-members, and some may not allow you in if you haven’t got a ticket flying with them that day, or if the lounge is likely to be full, but again, it doesn’t hurt to ask. Oh, and you’ll have a better chance of getting in if you are dressed appropriately (no scruffy track pants, uggs, torn jeans [unless you really are a rock star, of course!], etc.), and don’t be loud and brash about insisting on getting in — you can catch more flies with honey than with Vegemite! Alaska Airlines used to offer a day pass for $30, but when I was in LAX a month ago I noticed that it’s $45 there. Also, there are no showers at the Alaska Airlines lounge in Terminal 6 at LAX either — just in case you were hunting a shower! The Alaska Airlines people told me that Delta (or was it United?) in another terminal at LAX has showers in their lounge, with a day pass of $30 for lounge access. I didn’t check this, so I can’t confirm it. Of course, if you’re heading home to Australia via LAX and are a member of the Qantas Club orΒ  flying Business Class, you’ll have access to showers in the Qantas lounge (THANK YOU, QANTAS!!).

My adage when travelling is “Ask. The worst you can get is ‘No’.” More often the answer is a ‘Yes’!


I remember when…

28 03 2013

… you could go to Perth Airport and ALWAYS see someone you knew who was not in the group you were with. The times when the Orbit Inne was THE place to go to see off friends/family for their adventure to the Eastern States or — for the very lucky — overseas! A time when running into someone you knew was commonplace, and when international and domestic flights all departed from the same terminal. When you could go outside onto the deck area and watch the planes take off (ah, the smell of avgas in the mornings…). When people actually came out to the airport to see other people off (and share a couple of drinks with them), and met them coming home.

Not now. It’s just a really big bus terminal now. And the Qantas Lounge is WAY bigger than the Orbit Inne ever was (the Orbit Inne used to house everyone; the Qantas Lounge only houses Qantas Club members and those flying Business Class). And ‘dump and run/grab and go’ is often the preferred method of dropping off/meeting people arriving home.

Here’s why (from a special feature on aviation in The West Australian, March 2013):

perth_airport

Back in the 1970s, which is where my earliest memories of Perth Airport are coming from, Perth had a population estimate of 744,000 in 1971 and 845,000 in 1976 (~1.2 million for the entire state). By the 2011 census, Perth’s population was 1.83 million (~2.4 million for the entire state). So while Perth’s population and the state’s population have doubled in that time, the passenger traffic going through Perth Airport (domestic and international) has exploded exponentially, according to the figures above.

In 1970, the passenger traffic for a year (536,704) was slightly less than the total population of Perth. By 2013, airport passenger traffic (15 million) will be more than 8 times more than the population (~1.8 million).

No wonder the airport is bursting at the seams, even though there have been lots of upgrades recently.

One thing they could do is address the parking situation. Again, it’s improved, but what on earth has Perth got against multi-storey carparks? We have them in the CBD, and are only now getting some at hospitals. There seems to be this aversion to going up when it comes to infrastructure that’s outside the CBD. Planners seem to think that endless flat land car parking is the way to go, when it has to be the most inefficient use of space. Sure, a multi-storey carpark will cost more than paving over a bit of ground, but the chances of making even more money from it (especially if there was a dedicated, secure long-term parking garage) are much greater. I was recently in Melbourne, Seattle, and Brisbane airports, all of which have one or more multi-storey carparks. Seattle has many — all those rounded objects in the picture below are carparks right at the door at Seattle Airport!

seatac_parking03


Sewing room mess

25 03 2013

When I got home from the US a week ago, I just dumped all my sewing/quilting stuff into my sewing room, knowing I’d sort it out later. It’s only a small room, so there’s not a lot of room to move… Here’s the sewing room looking like a bomb had hit it after I returned:

sewing_room_before01

sewing_room_before02

And here it is after I did a bit of a clean-up and put things back where they belong. The current projects (the orchid and the green batiks) are on the ironing board.

sewing_room_after02

sewing_room_after01

sewing_room_after03


Community Quilt 66

25 03 2013

I quilted this quilt just before I went to the US, but didn’t have time to photograph it or write up the blog post for it then.

I love this quilt! The bright coordinating colours were just ‘me’. And I had the perfect thread for it too — King Tut ‘Passion Fruit’ — a blend of yellow, purple, and green. The quilt needed to shine, so I just decided to do an all-over funky, floral open headband variation in keeping with the floral fabric in the border and the centres. (This quilt was perfectly square too, so many thanks to the maker.)

(Click on a photo to view it larger)

quilt66_01

quilt66_04

quilt66_03

Β  quilt66_05

Back:

quilt66_02
Threads used:

  • Top: Superior’s King Tut ‘Passion Fruit’ (40 wt, cotton; colour #931)
  • Bobbin: Bobbinfil (cotton, white)


Turtle quilt

25 03 2013

When I was in Seattle earlier this month, I went down to Pike Place Markets on my only day off. Not for the fish throwing (been there, seen that…) or the Chukar Cherries (though I made sure I did stop by and get some…), but to pop into Undercover Quilts, which is a tiny quilt store packed to the rafters right near the pub.

They had some great quilts, kits, and patterns on a Pacific North West theme and I was tempted… But eventually I settled on a ‘reverse applique’ type of pattern from one of their 2 fabric applique patterns: ‘Herd of Turtles’.

I made it up over the weekend and here’s how it turned out. Next time (if there is a next time) I might use more contrasting colours. BTW, I used two of the fabrics I bought in Bali last September. The pattern offered three applique options — hand -turned (nope!), fusible (I did this version and it was quite time consuming…) and raw edge. If I make this pattern again, I’ll try the raw edge applique option.

One other thing… the pattern piece is printed on a very flimsy and easily torn piece of paper. Before I taped it to the siding door glass, I reinforced the edges all round with clear packaging tape and then I traced it onto some tracing fabric (like a very light interfacing) so I don’t ever have to use the paper pattern again. I was disappointed that this pattern came on such flimsy paper, especially as the instructions are to tape it to the window or use a light box. If you did that straight ‘out of the box’, you’d wreck the pattern very quickly.

Threads used: water — ‘Mint’ (Robison-Anton, rayon, 40 wt, colour #2310); around turtle carapace pieces — ‘Wonder Blue’ (Robison-Anton, rayon, 40 wt, colour #2577); in border — ‘Pistachio’ (Fil-Tec Harmony, 40 wt cotton, colour #14066).

(Click on an image to view it larger)

turtles01

turtles02

turtles03

Update: The recipient of this quilt and his wife had a baby girl, Isabella, on 30 April 2013.


Quilt design inspiration is everywhere

25 03 2013

Some photos I took on my trip to and from the US. Maybe one day I’ll make a quilt of the Australian landscape from the air… or based on the chairs in the function areas of the Hyatt at Olive 8 in Seattle!

australia_from_the_air_march_2013_02b

australia_from_the_air_march_2013_03b

australia_from_the_air_march_2013_04b

australia_from_the_air_march_2013_05b

australia_from_the_air_march_2013_06b

australia_from_the_air_march_2013_07b

australia_from_the_air_march_2013_08b

australia_from_the_air_march_2013_09

brisbane01

australia_from_the_air_march_2013_01b

quilt_inspiration


My notes from Velda Newman’s workshop

21 03 2013

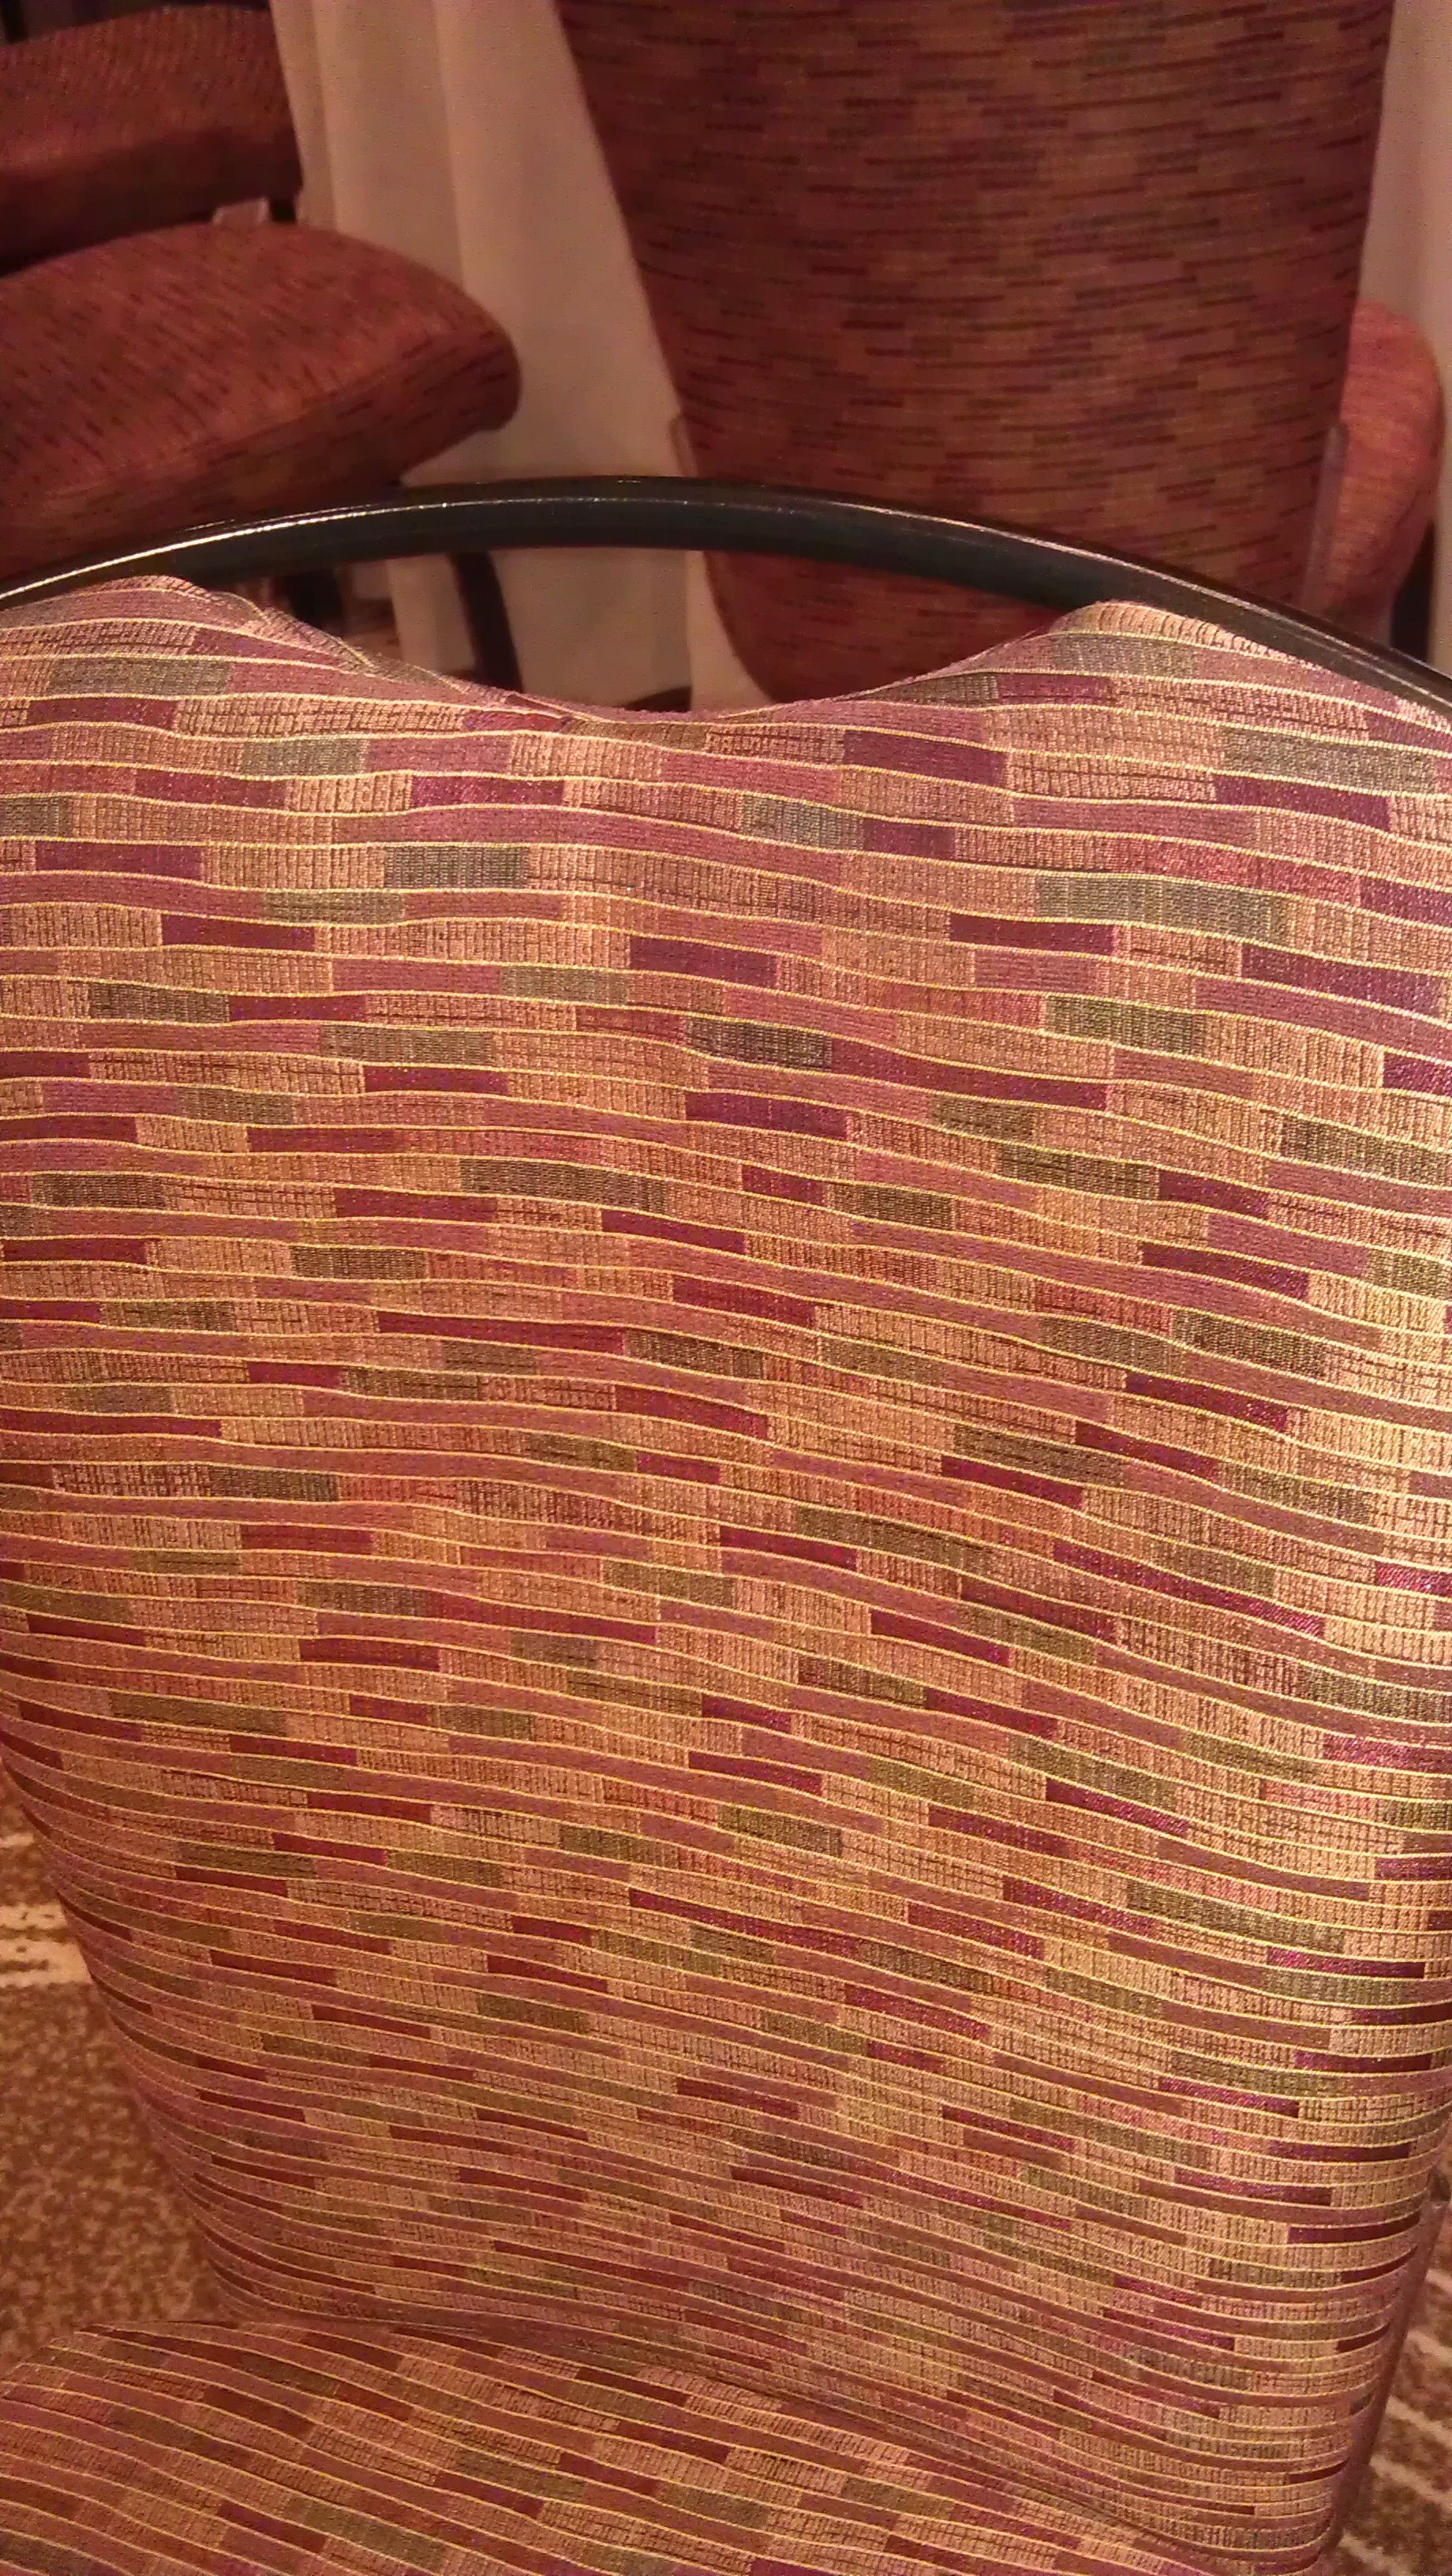
These notes are for me — I wrote them while attending Velda Newman’s workshop at Quilting Adventures in Texas in 2013. The originals are on paper in a notebook, so I wanted to record them digitally in case I ever lose the notebook! They may not make much sense to anyone who didn’t attend this 5-day workshop, but hopefully they’ll make sense to me when I try to apply some of the techniques we were taught to future art quilts I make.

For most outline drawing directly on to fabric , use a quilt marking pen that fades/disappears or irons/washes off. If you make a template first with something like TruGrid, then DON’T use a quilt marking pencil — use something more permanent; mark the fabric with a quilt marking pen, but not the template. If you use a template, cut out on the drawn lines, then place on the fabric and draw around the outline. Only cut the fabric later after you’ve finishing sewing, painting etc., and when you do, leave up to 1/2″ for turning under the edges, if you’re not doing raw edge applique.
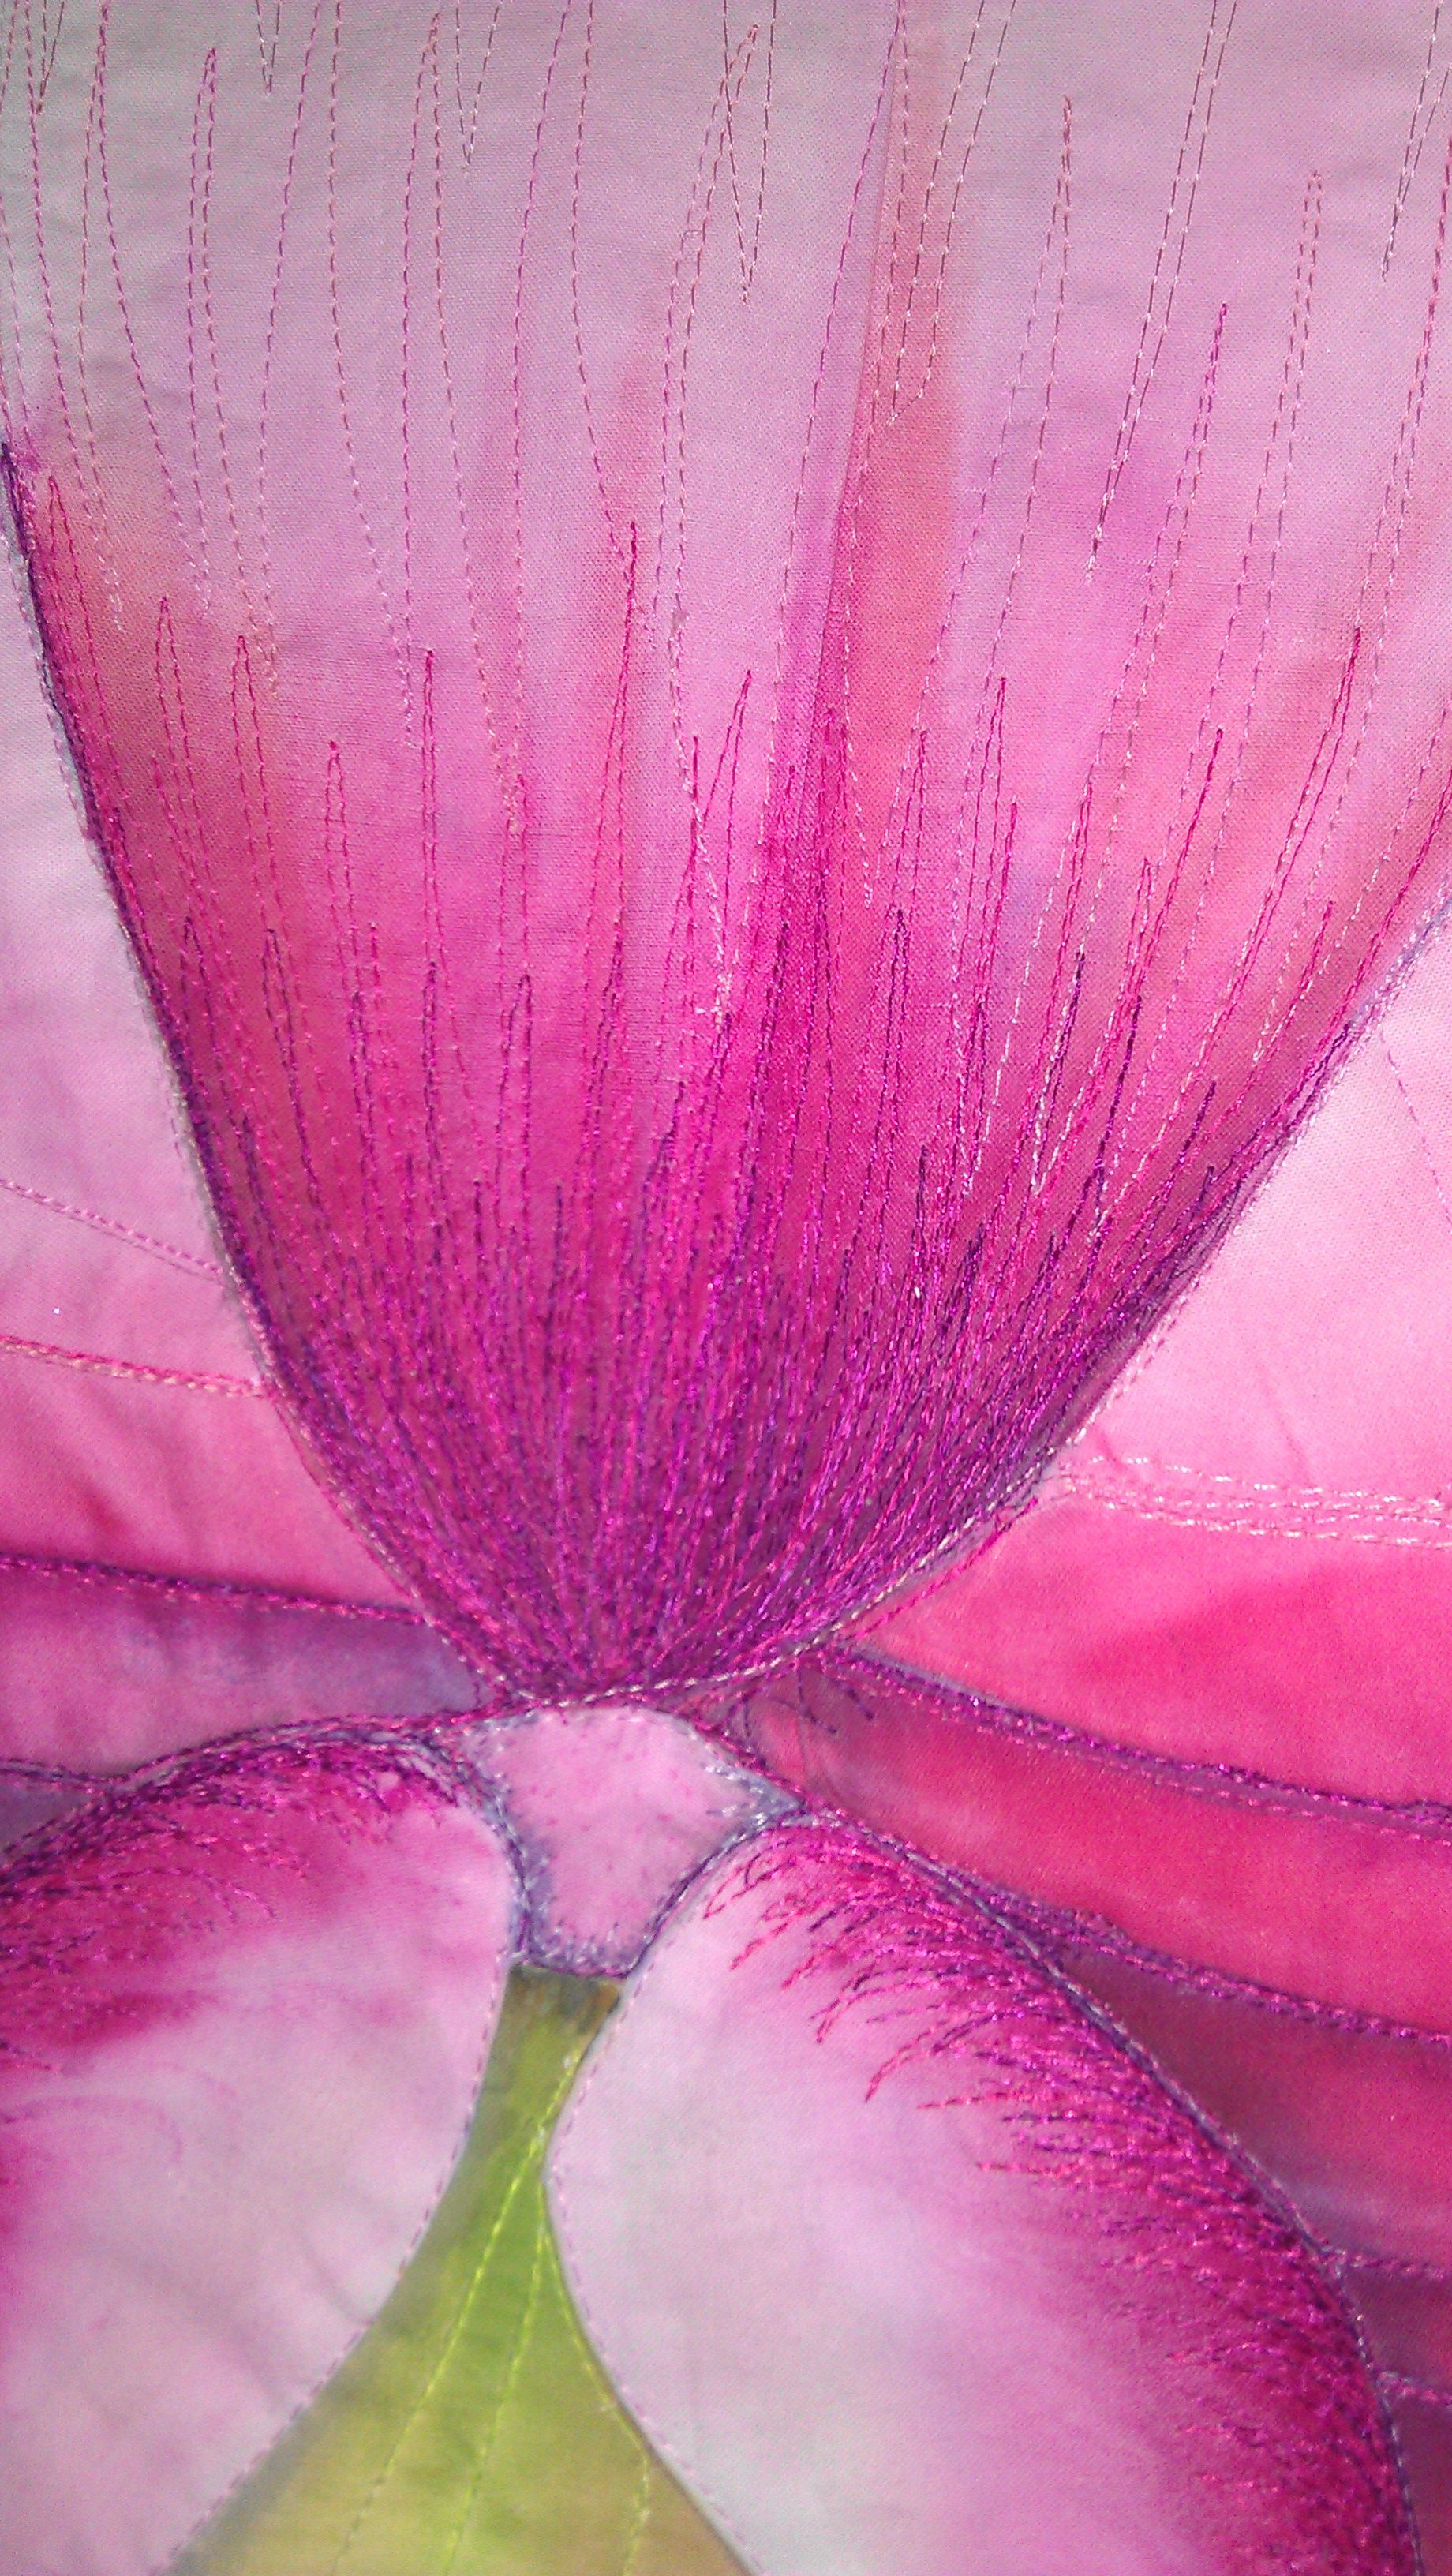
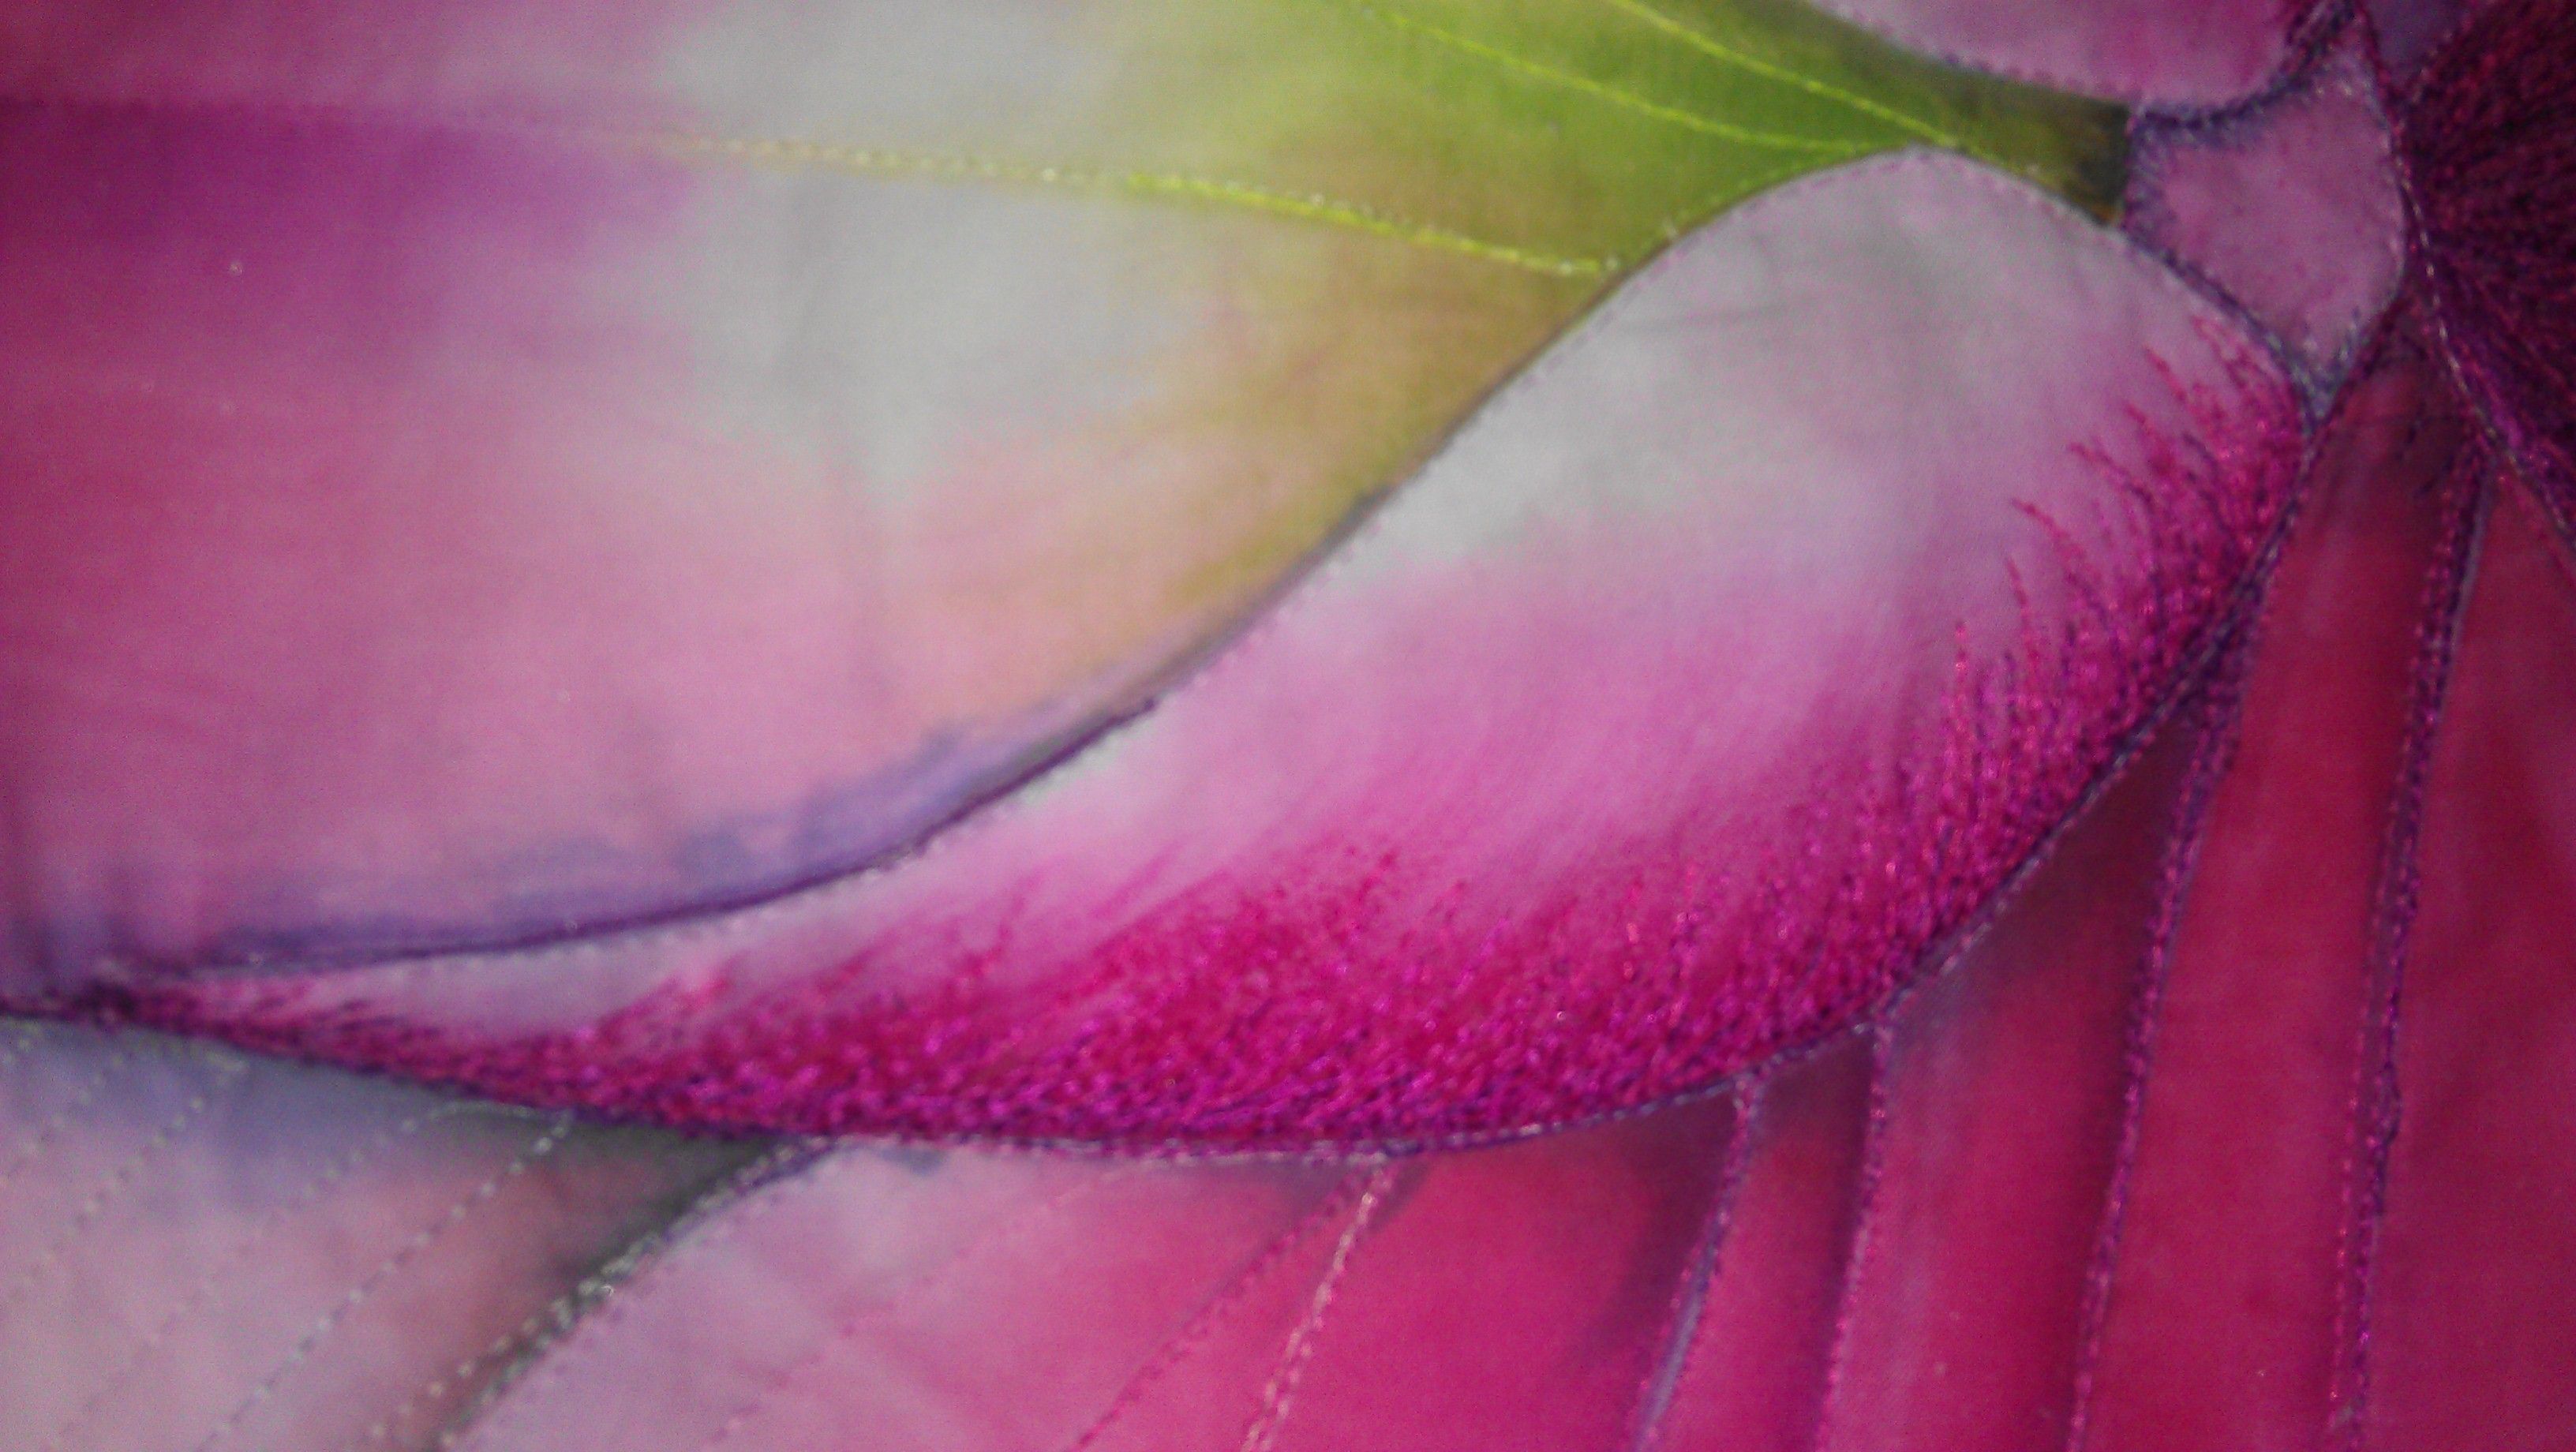
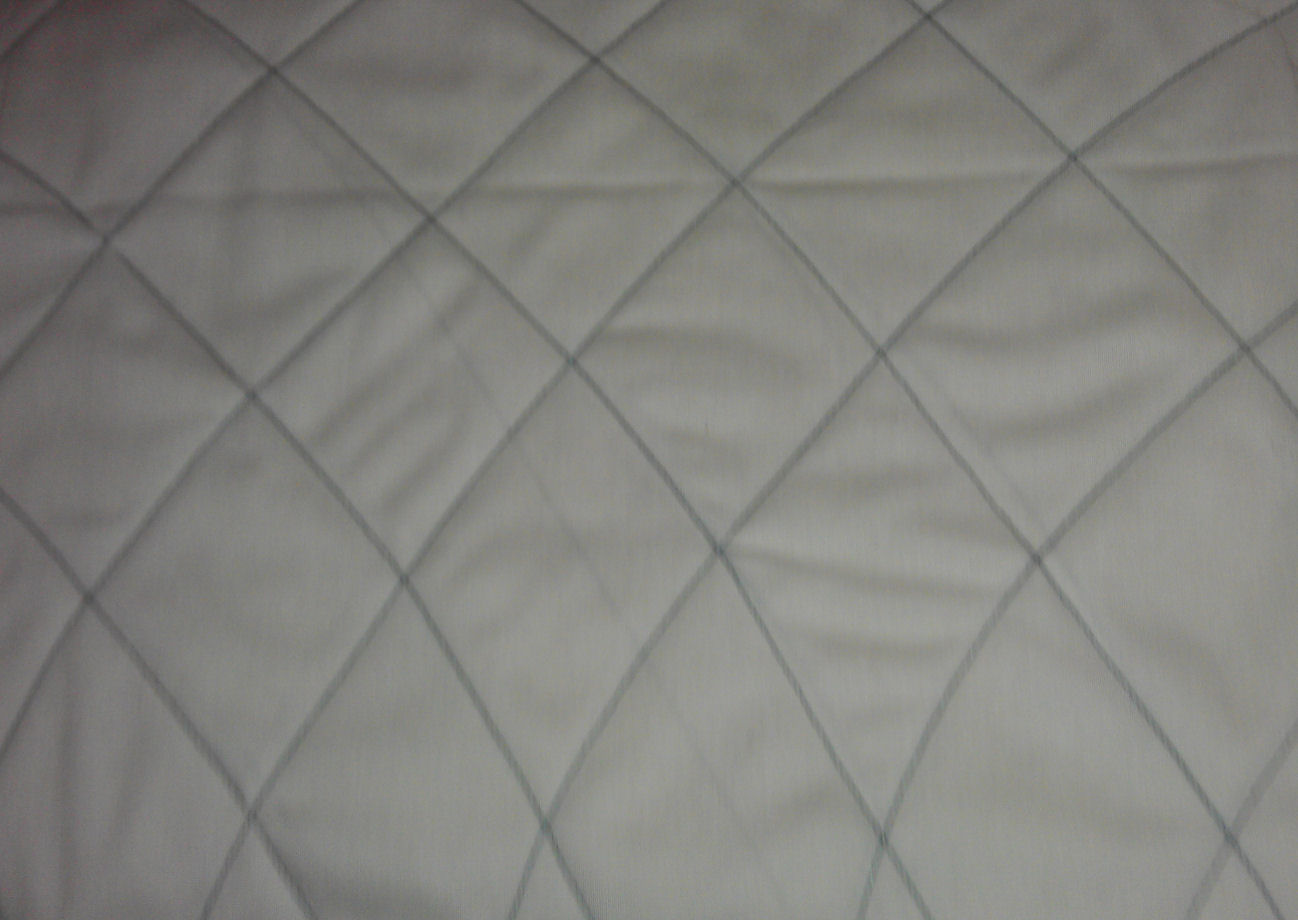
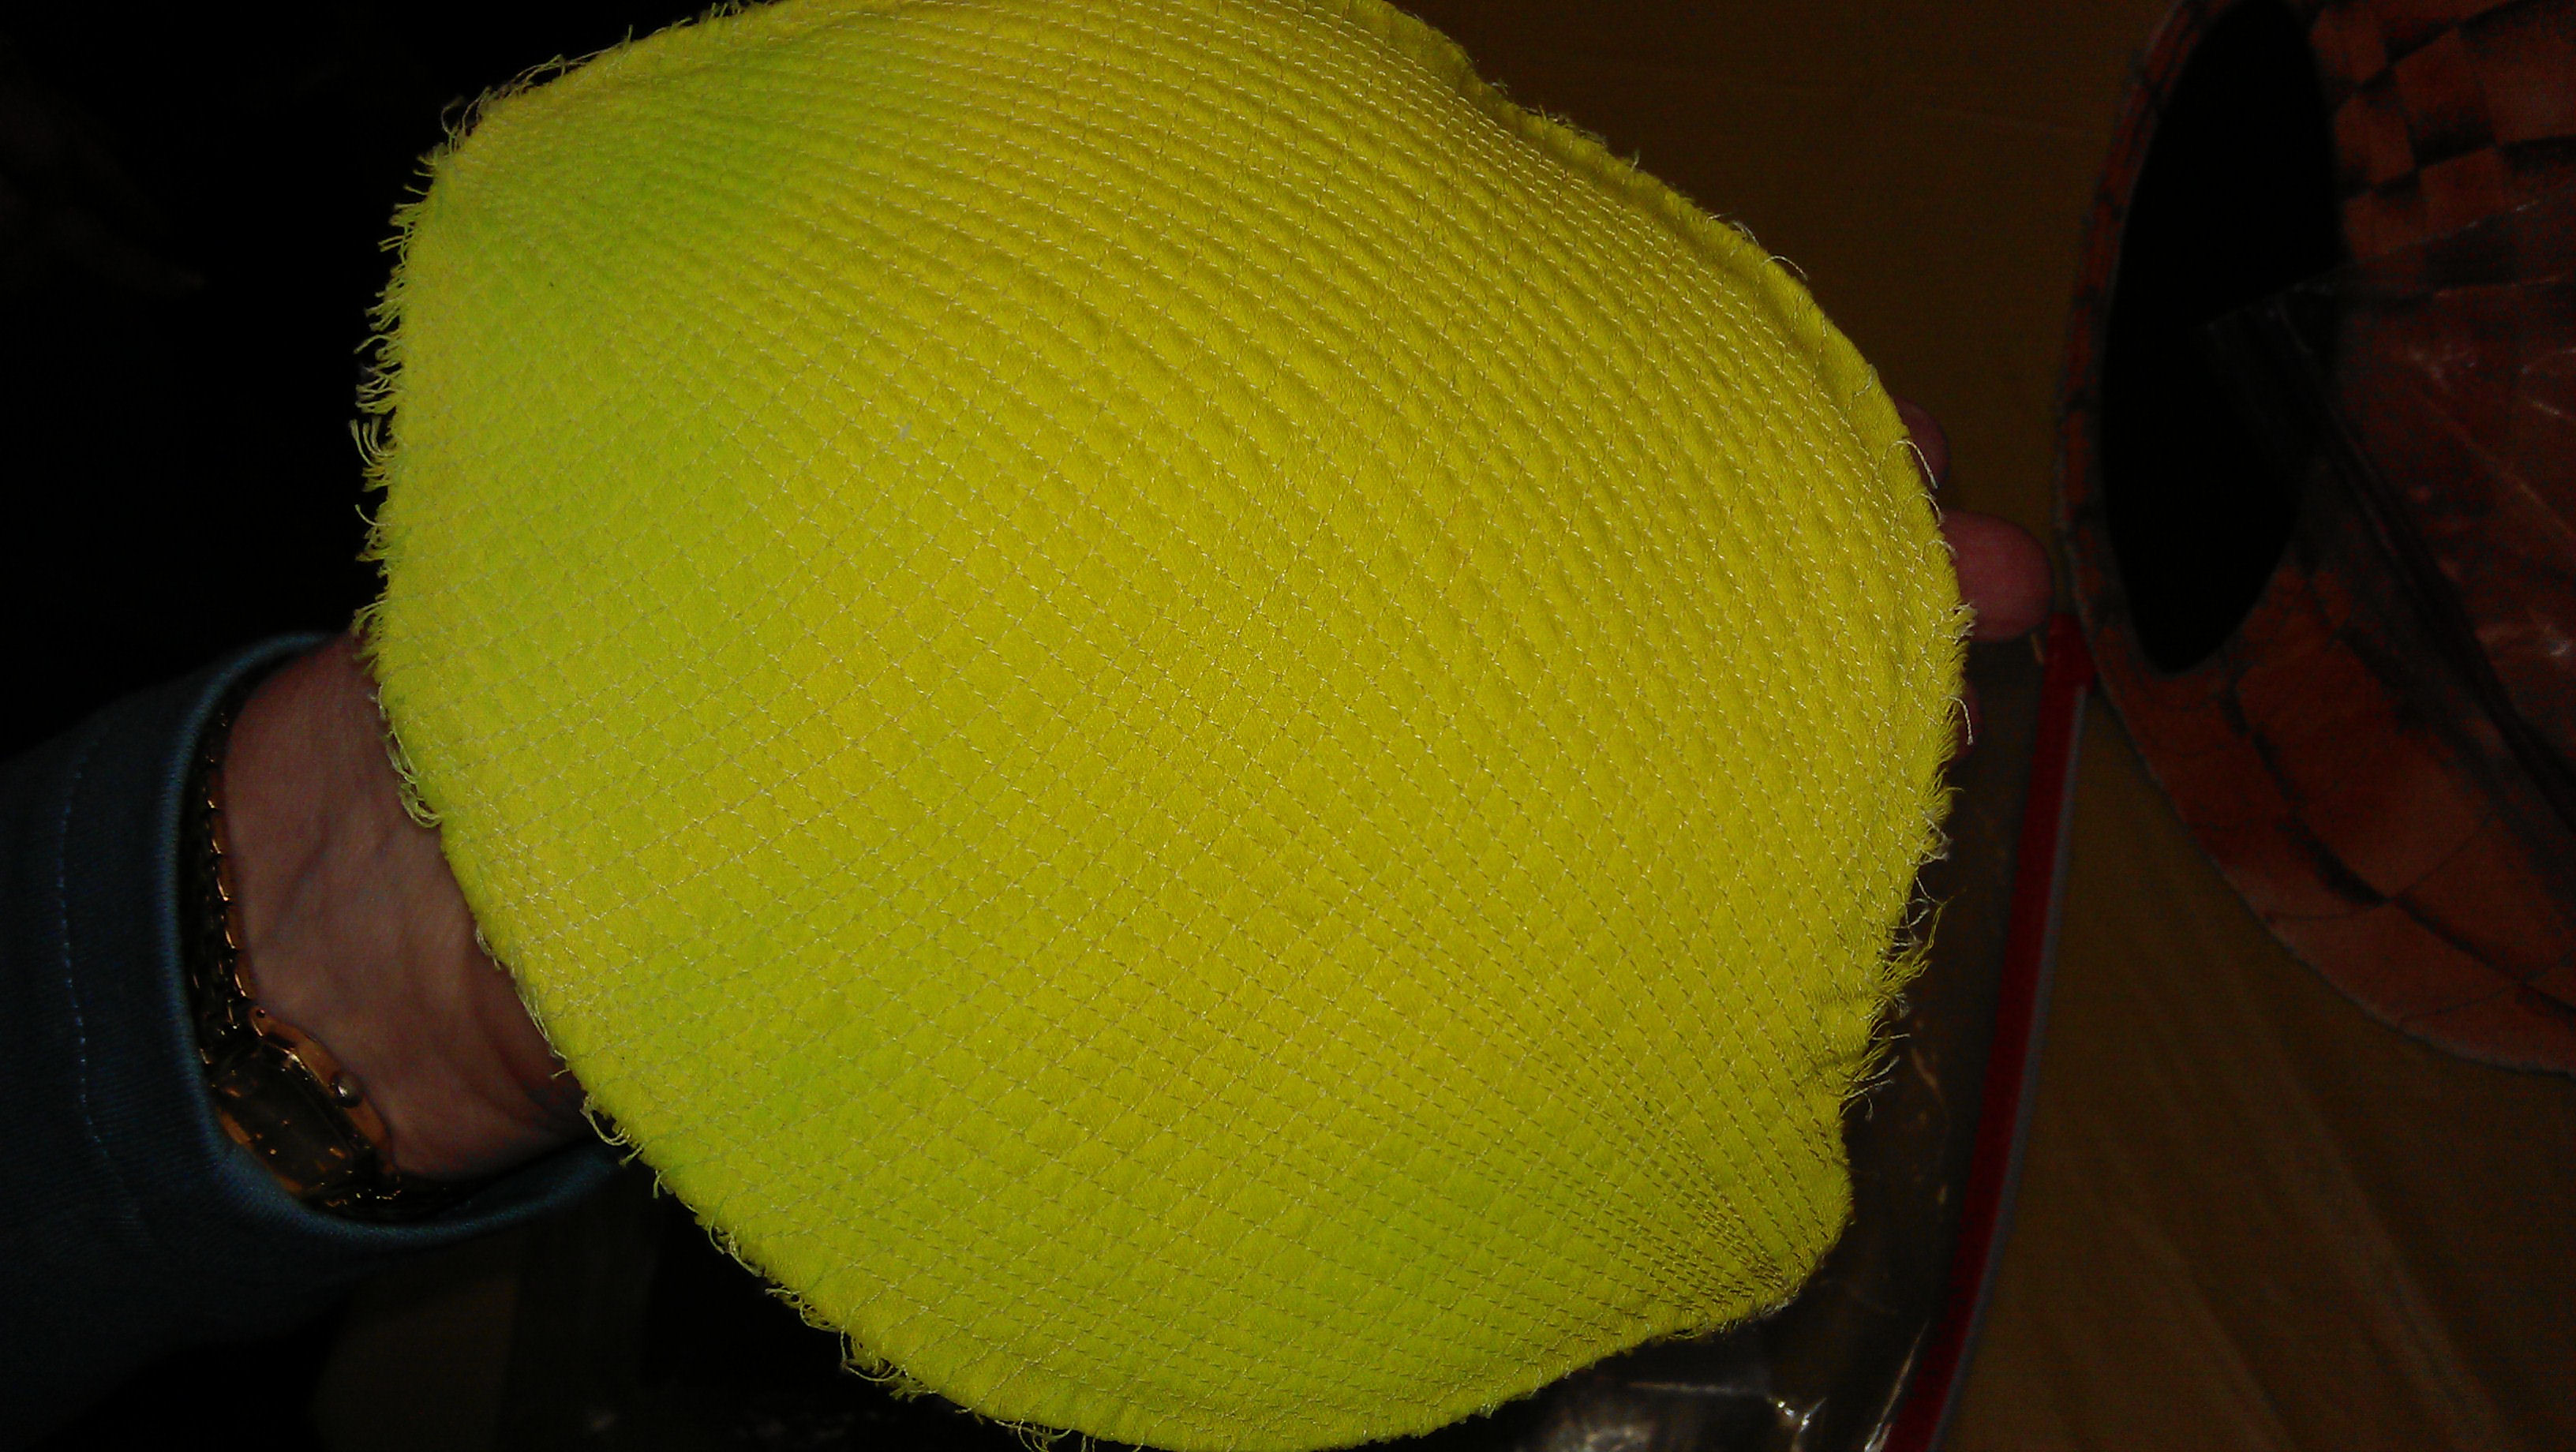
Curves

  1. Draw basic curves and concentric curves on fabric.
  2. Add some thin batting or stabiliser behind the fabric.
  3. Stitch along the drawn lines — use a normal foot or a walking foot. Stitch off the edge of the outline of the object.
  4. ‘Divide and conquer’ the lines to get the texture you want (e.g. lemon skin); i.e. stitch halfway between the lines each time, until the gaps between the lines is quite tiny.

qa_2013_day1_velda_newman19

qa_2013_day1_velda_newman02

qa_2013_day1_velda_newman17

qa_2013_day1_velda_newman18

Tucks

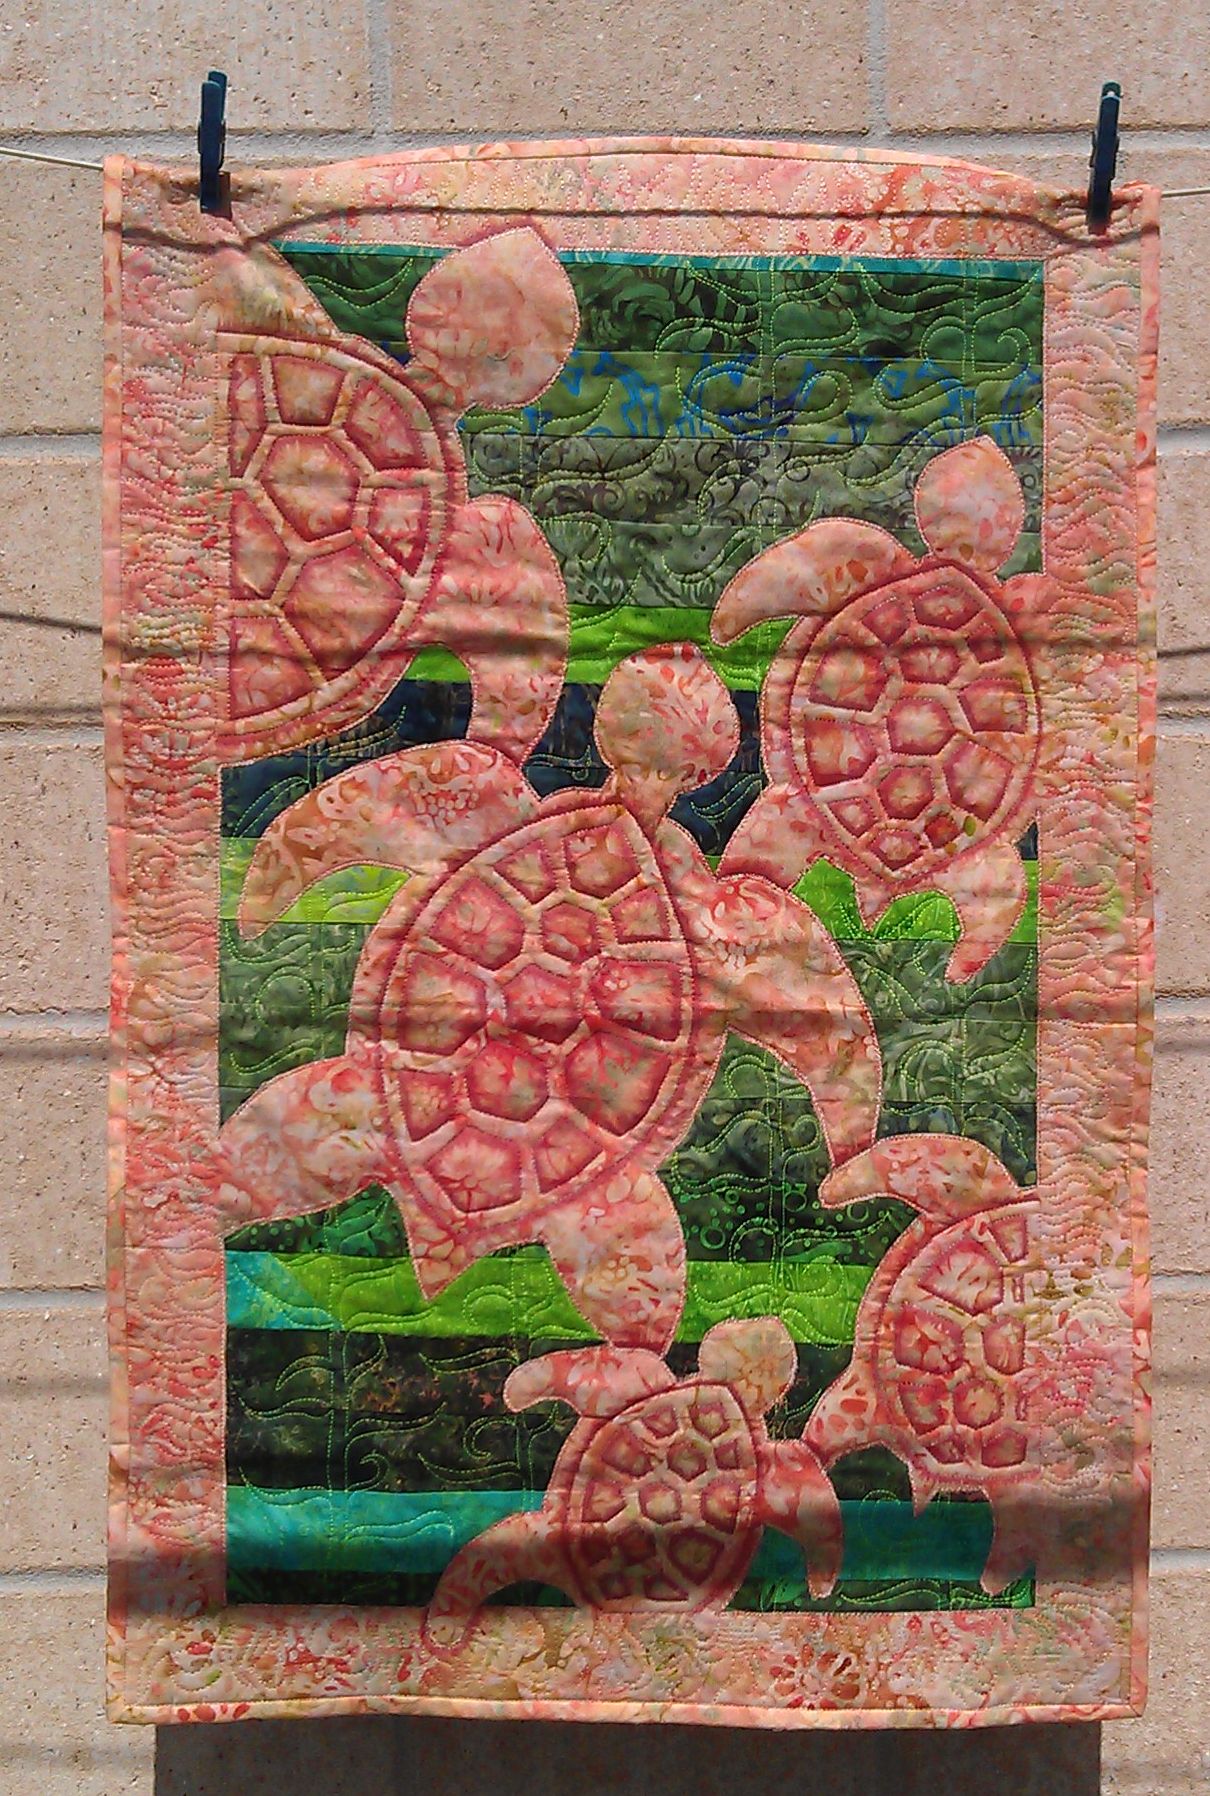
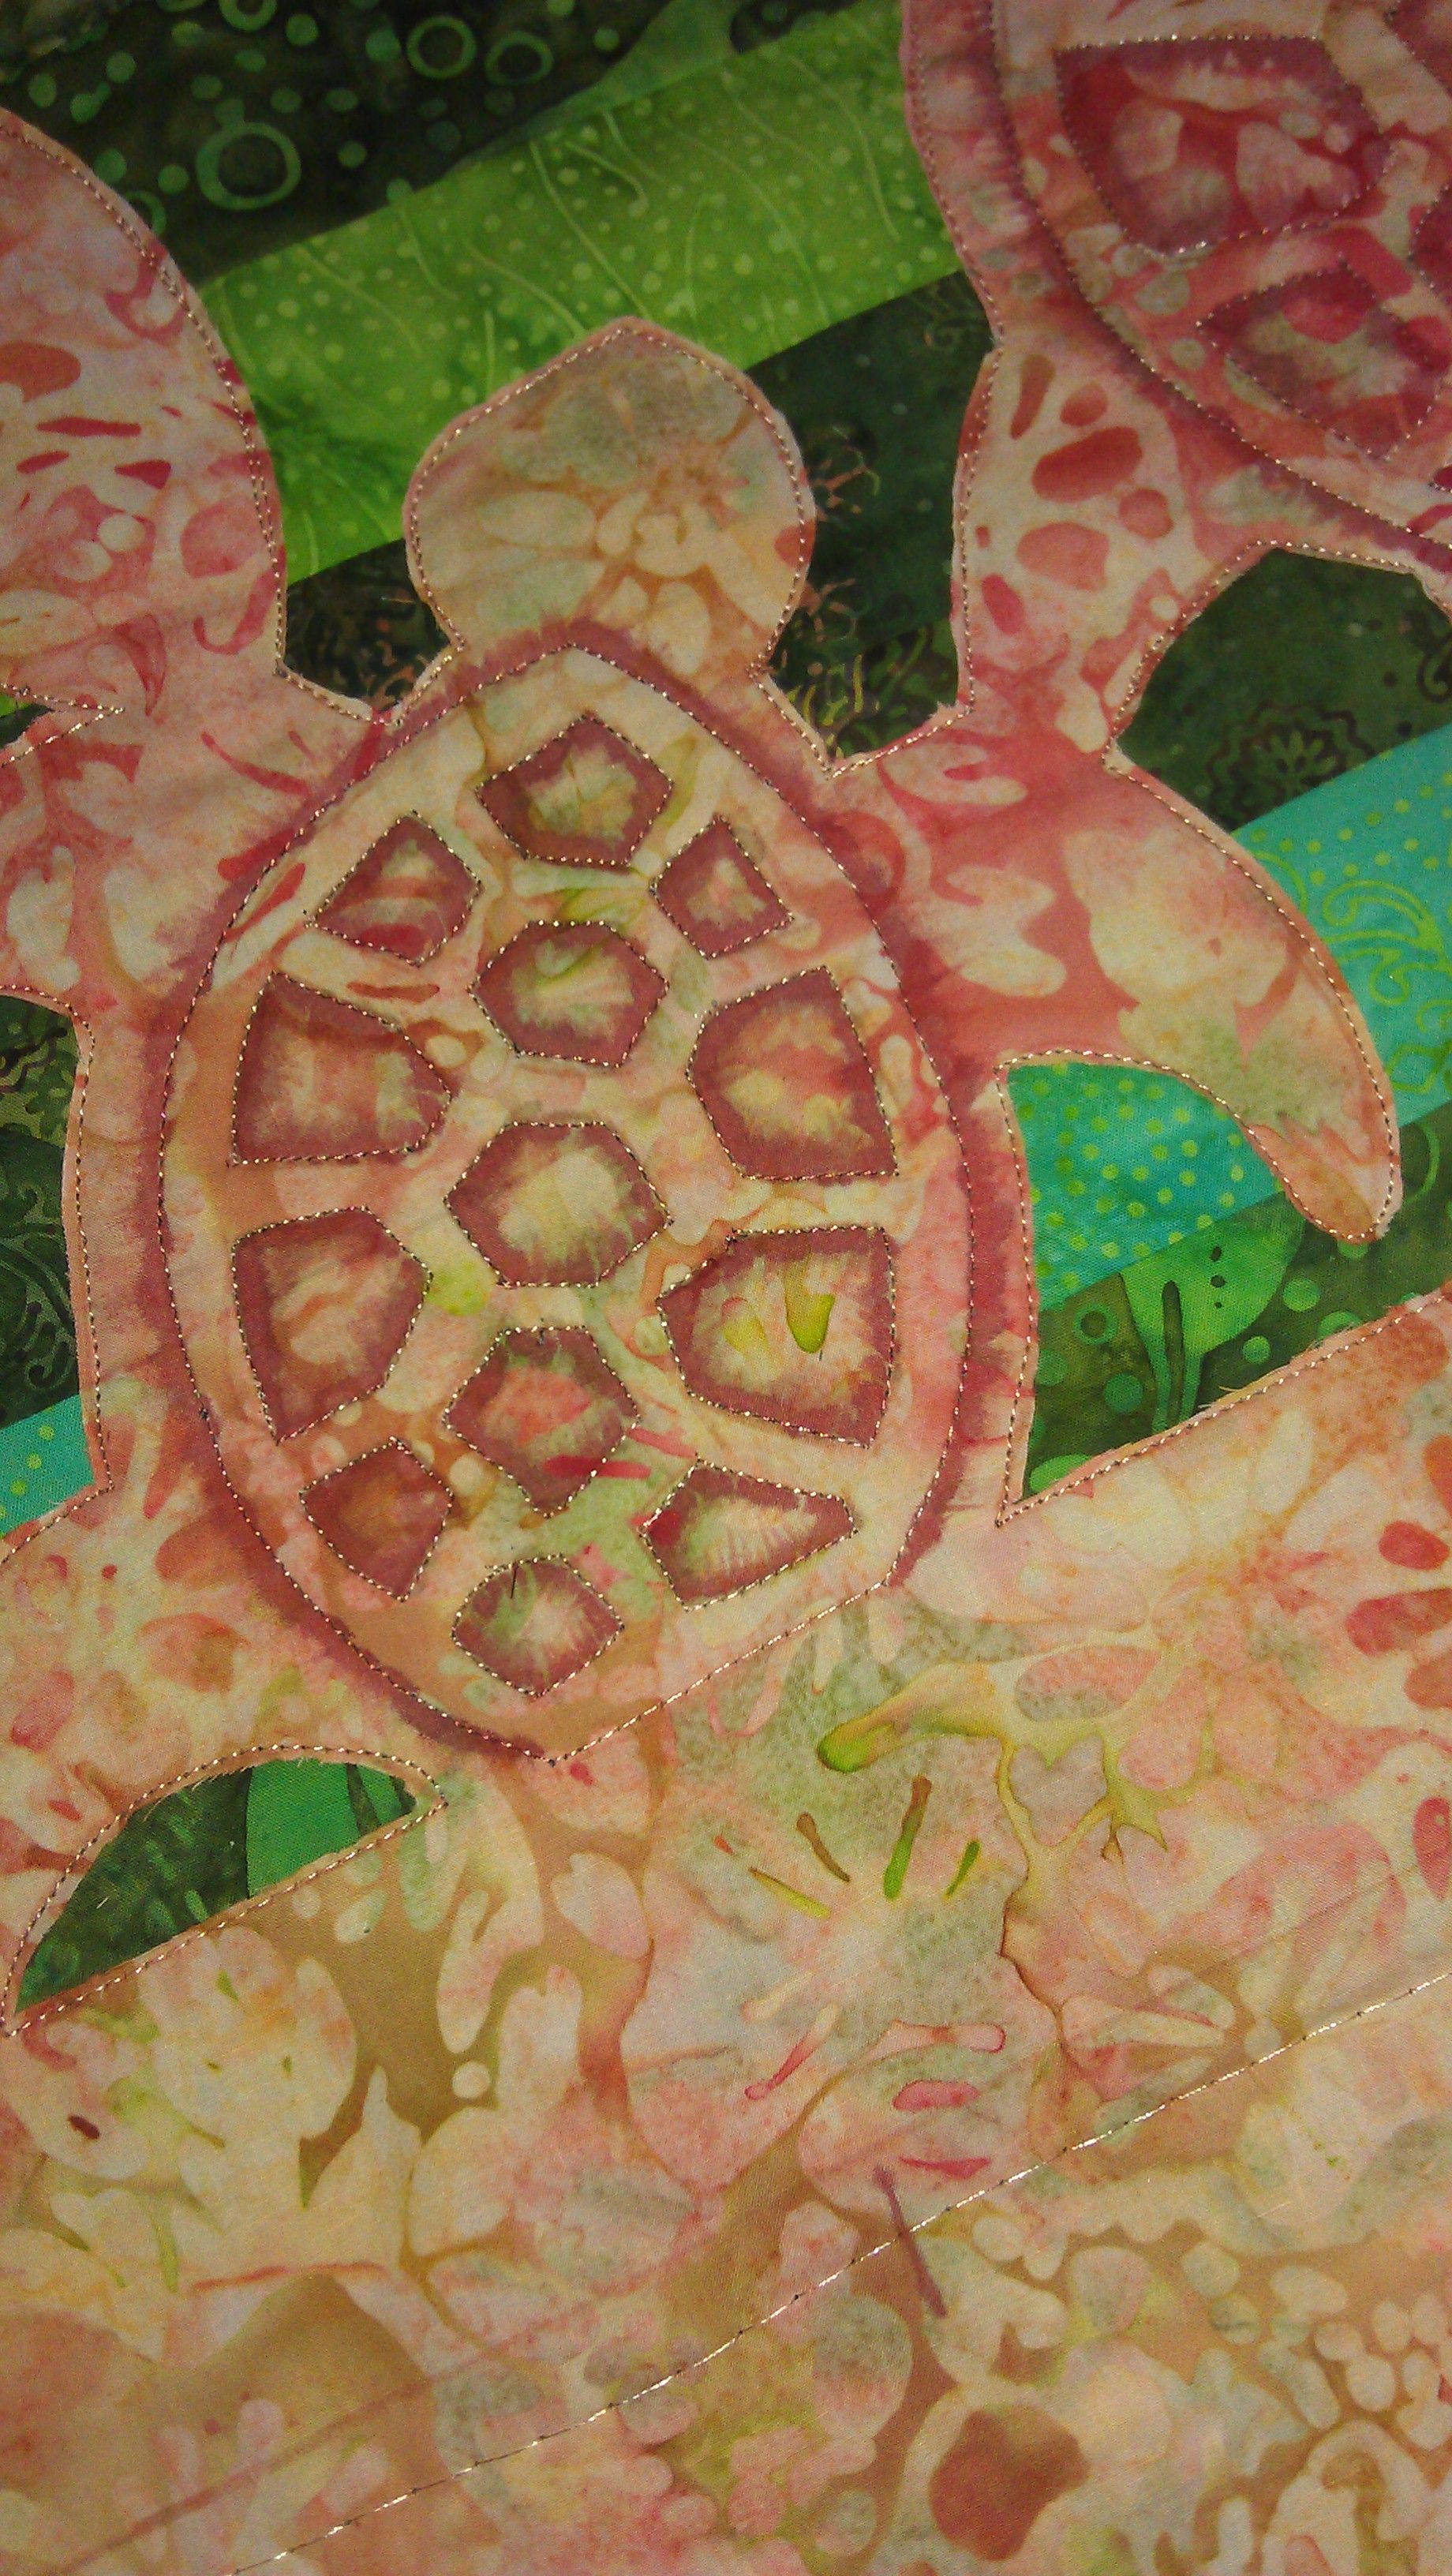
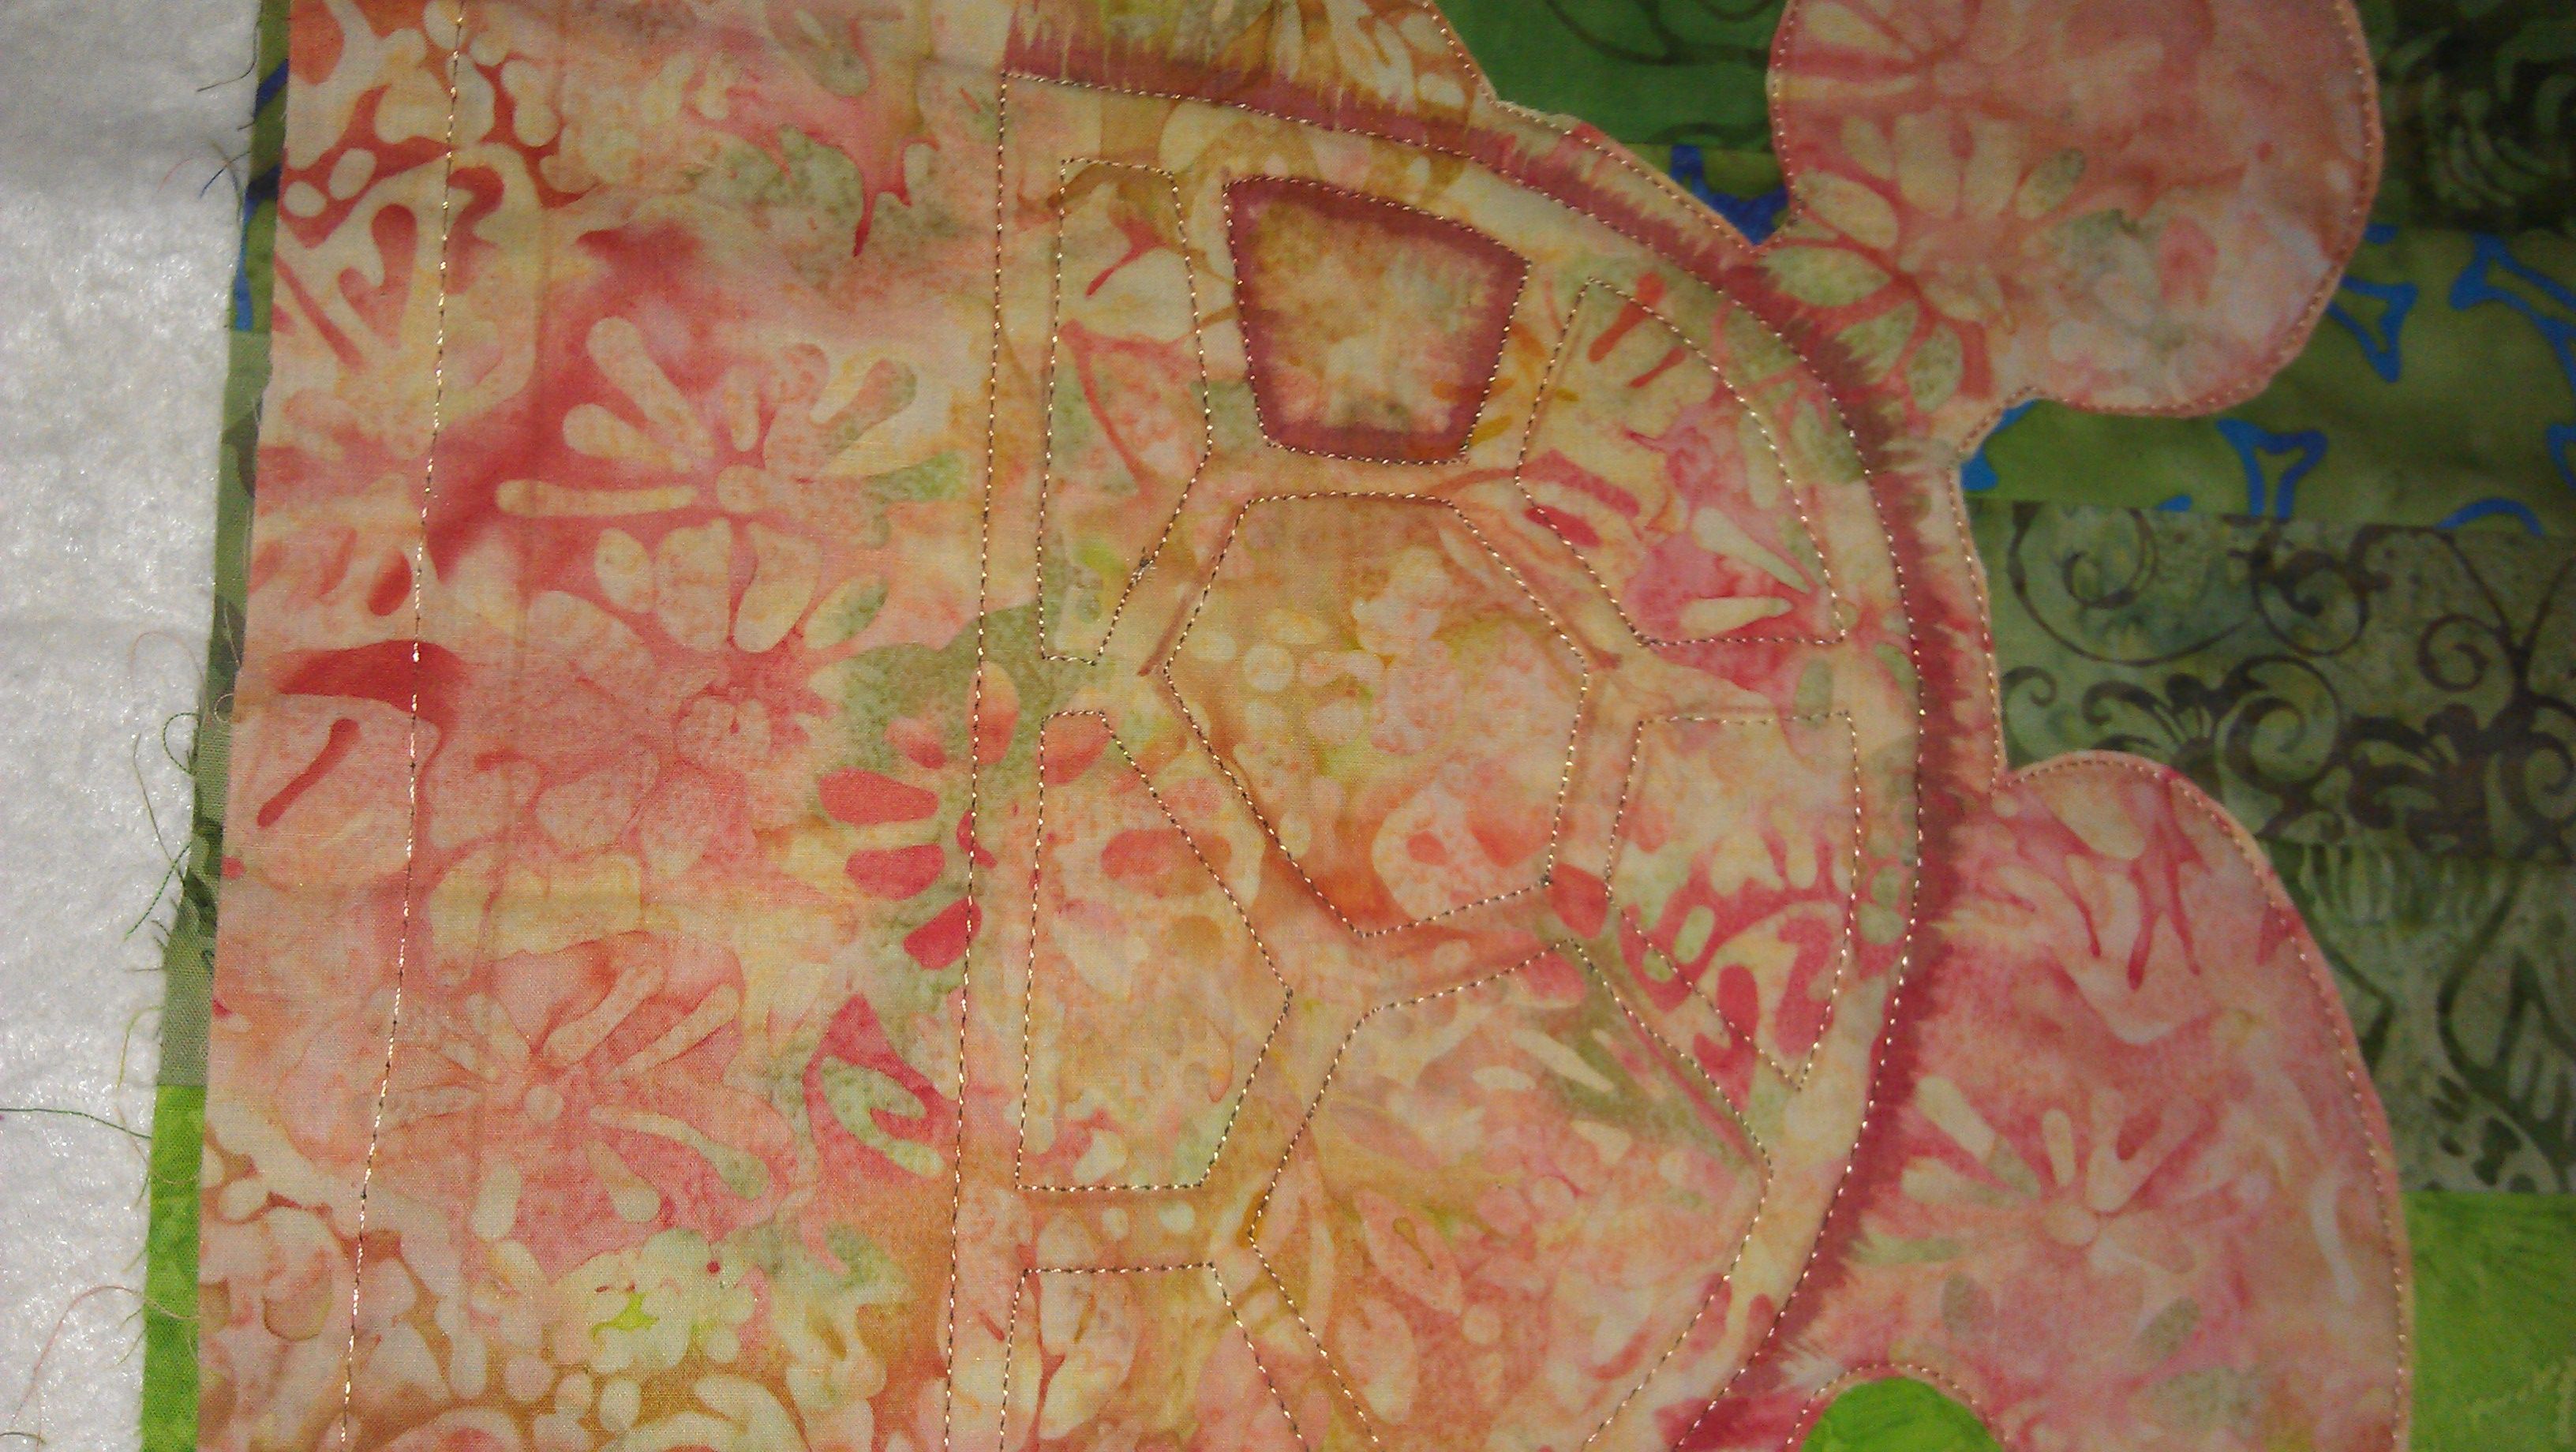
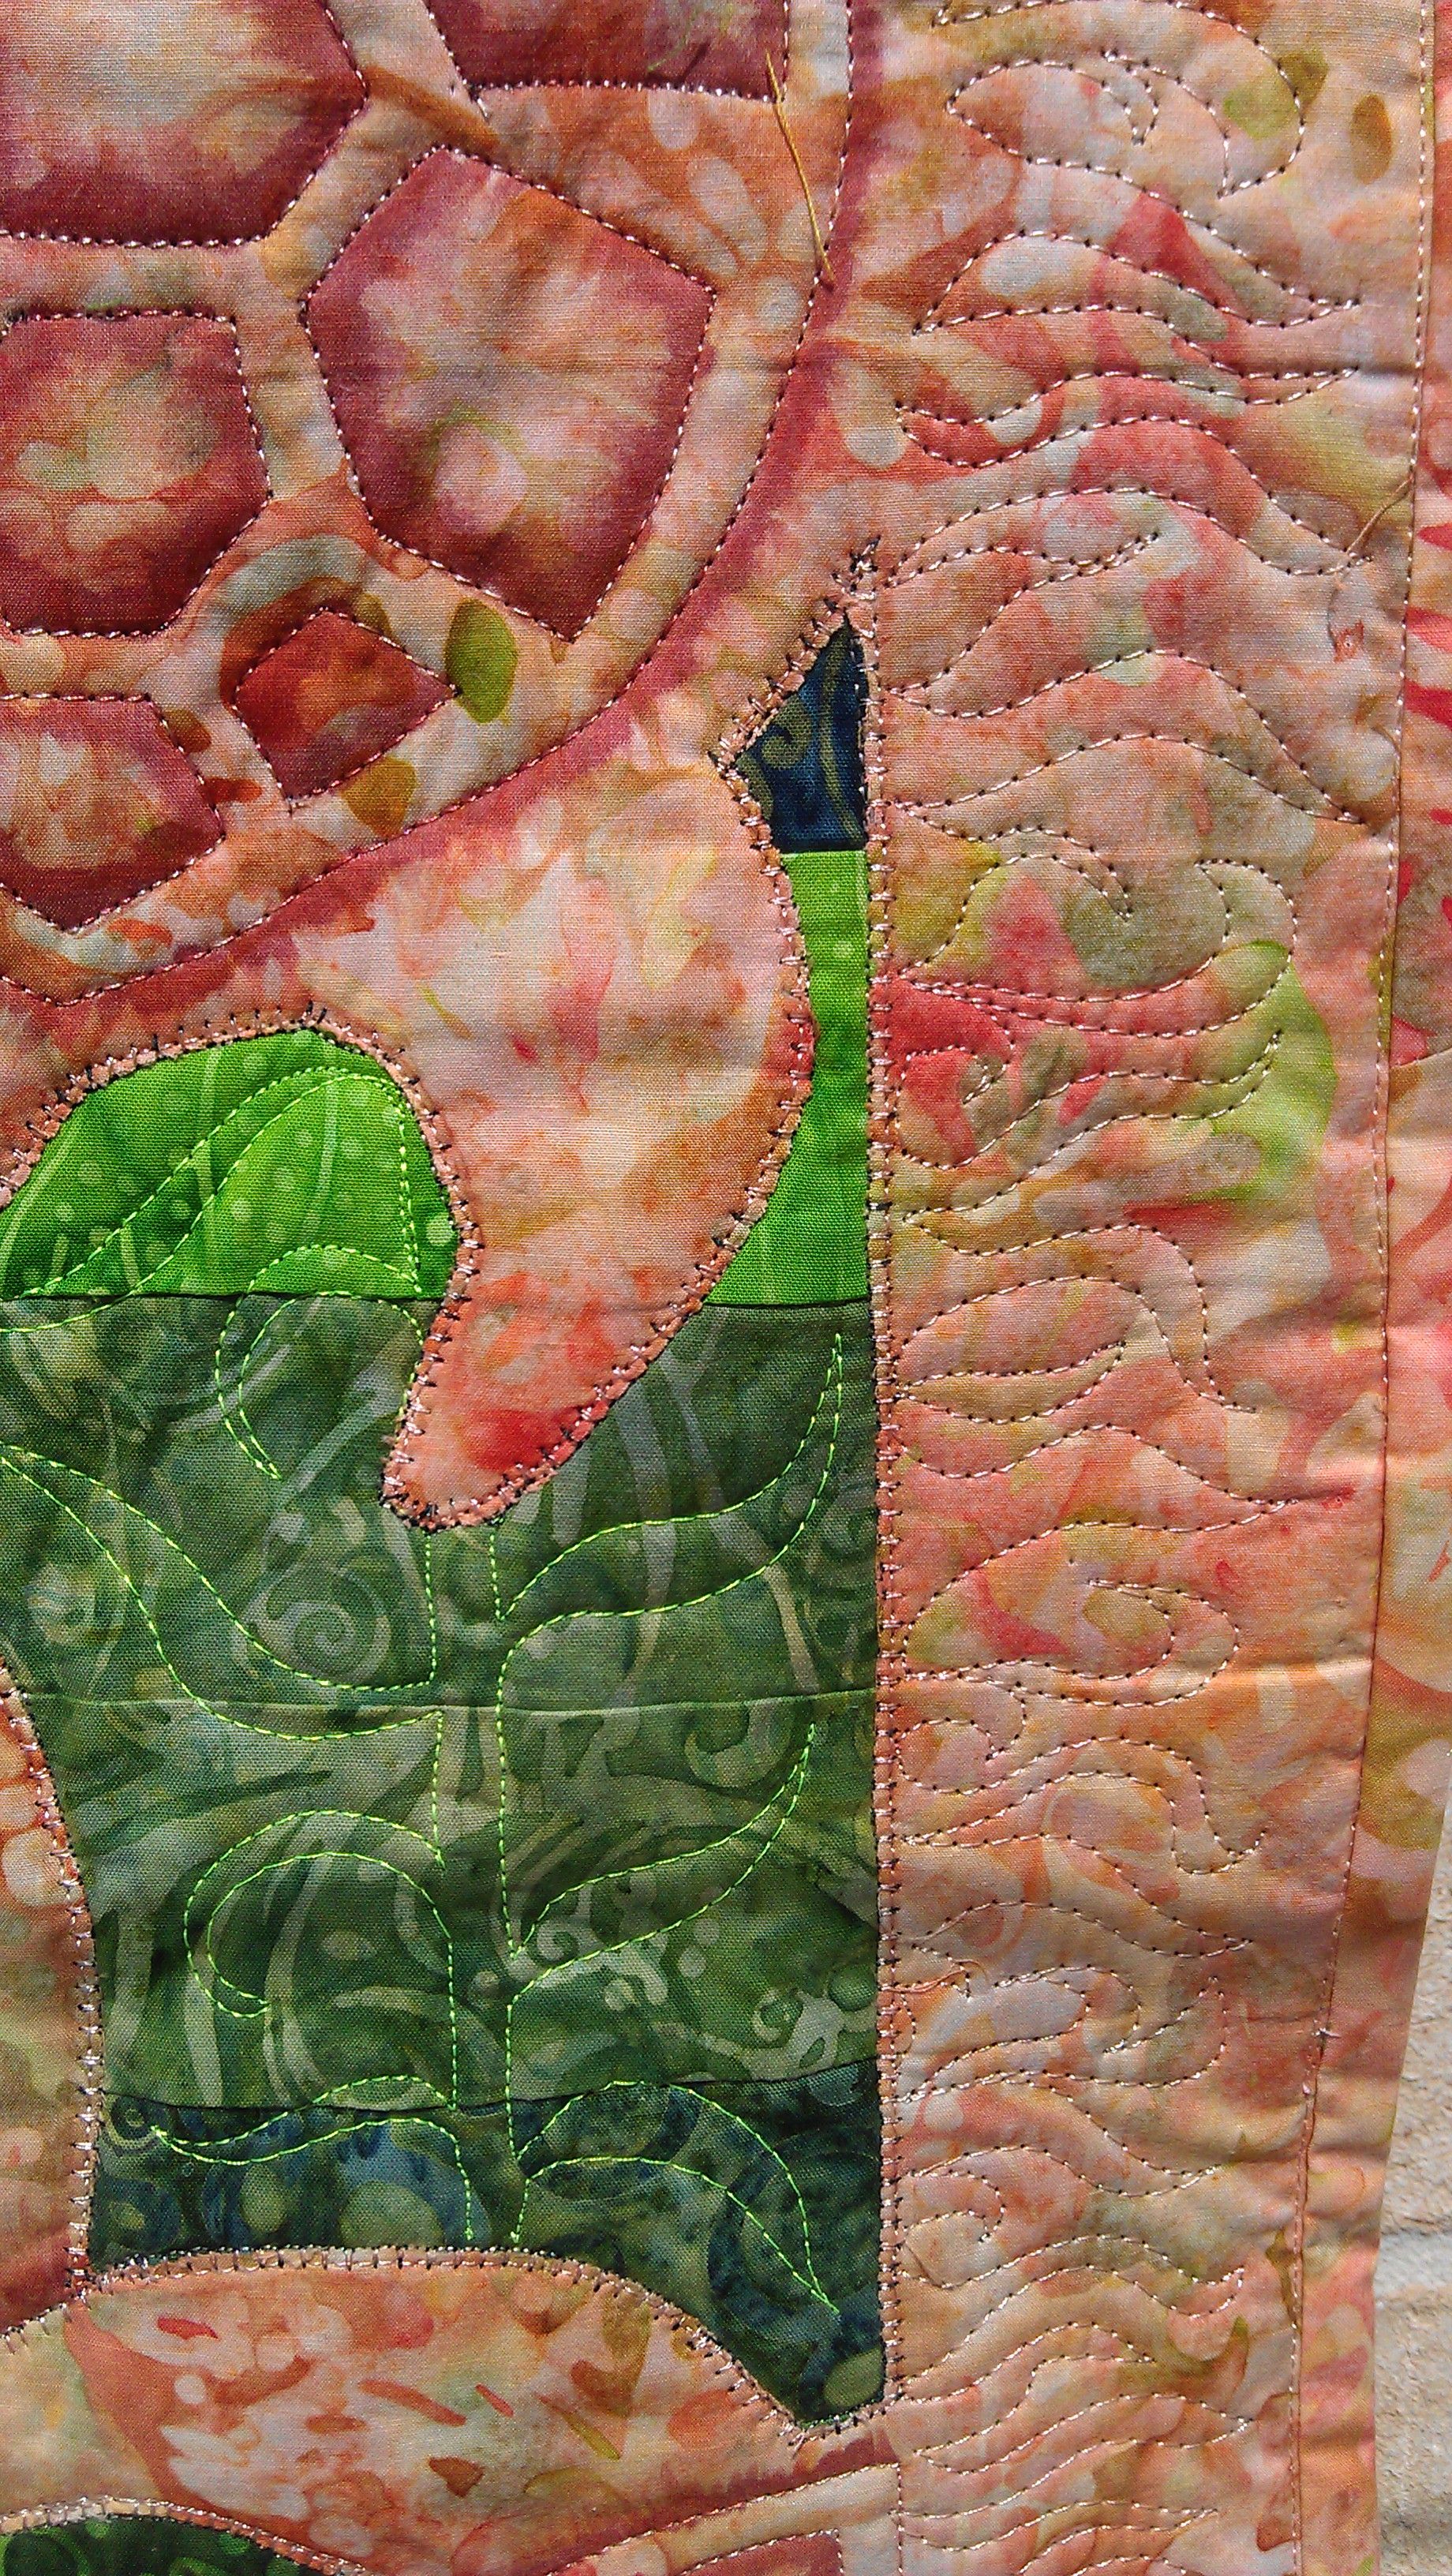
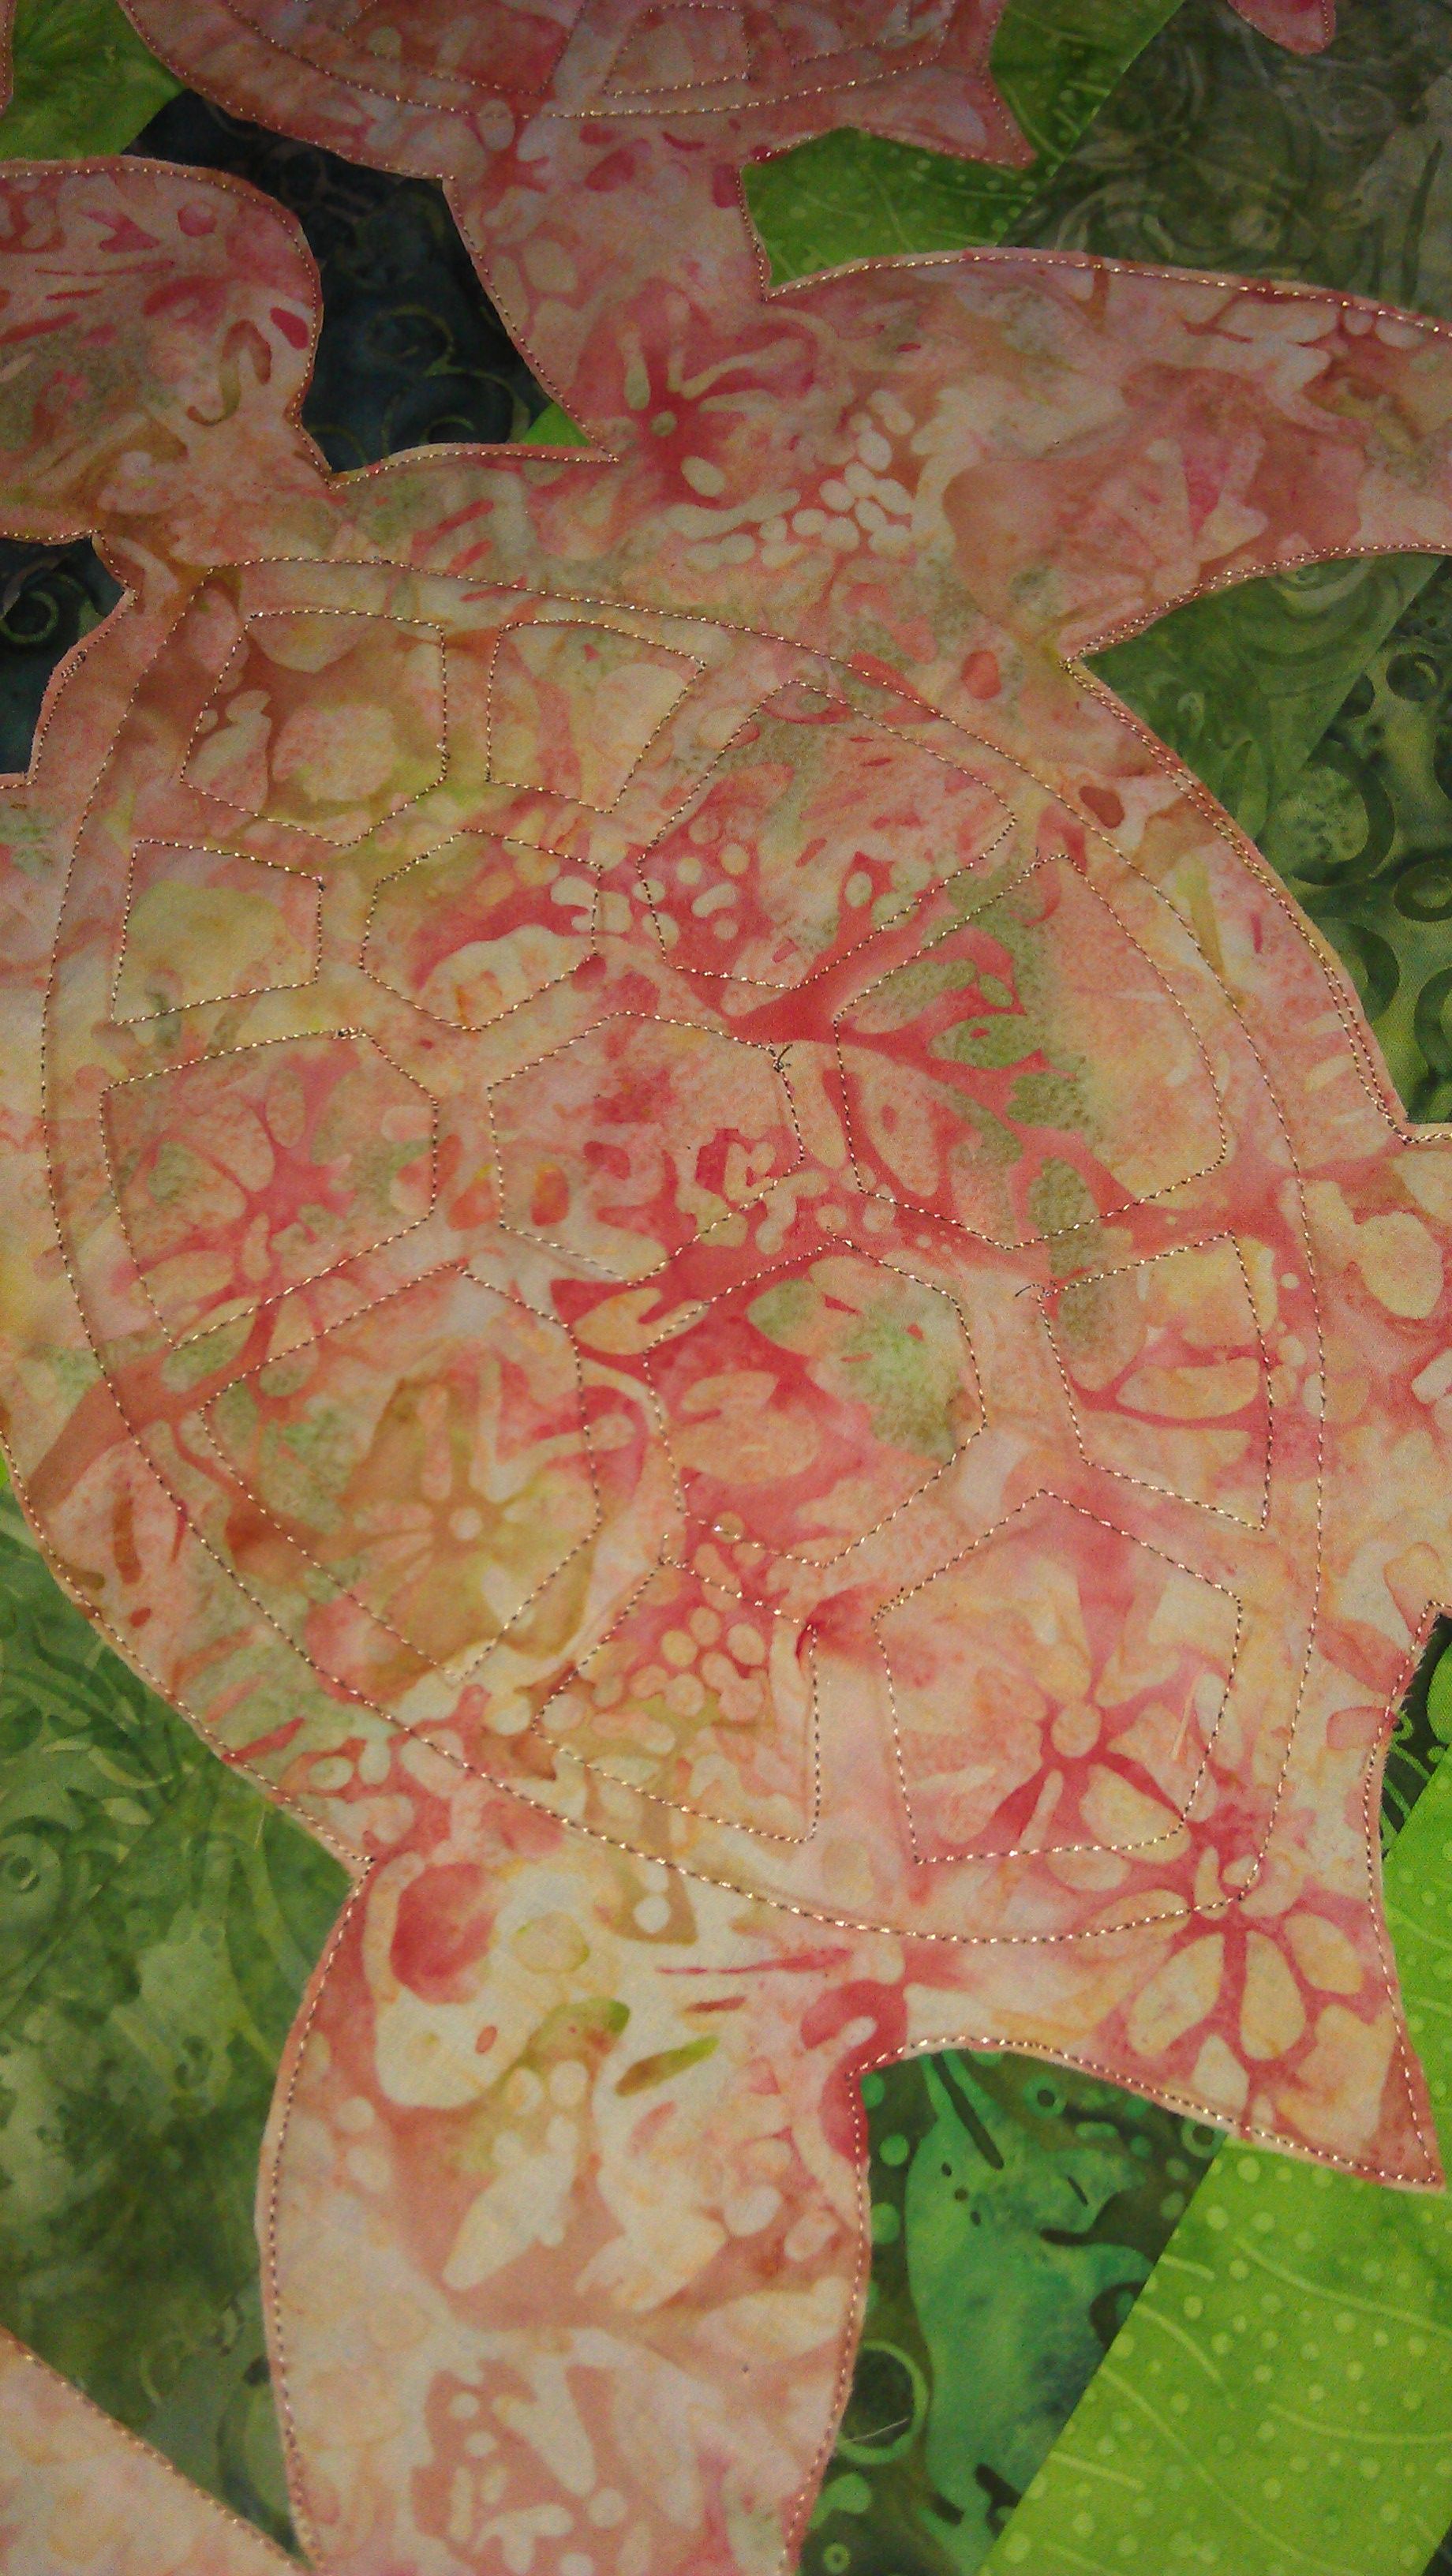
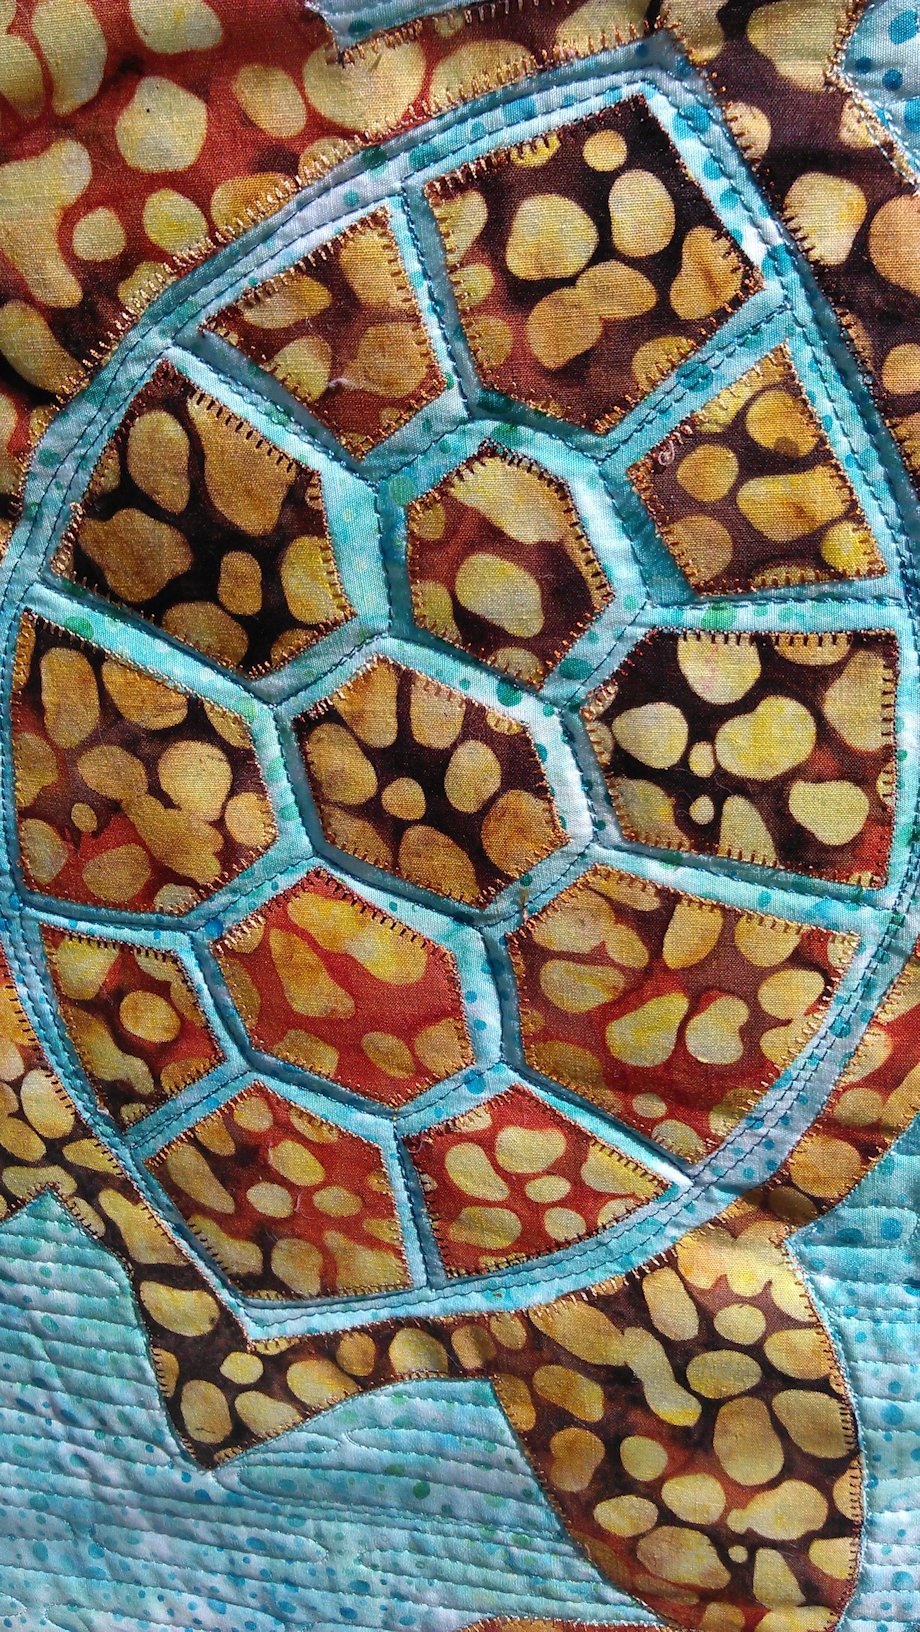
Useful to give the illusion of piecing without piecing! Great for objects like leaves, fish fins, curves on shells, etc.

  1. Draw a basic outline of a shape (e.g. a leaf) and draw a curved line for the centre line or vein (draw on the right side of the fabric for a tuck that sticks up; draw on the wrong side for a tuck that looks like a seam).
  2. Fold on the curve of the centre line and use ‘spit and pinch’ to finger-press the tuck line.
  3. Stitch about 1/16″ from the edge of the folded curve, creating a tuck.

If you’re doing lateral veins coming off a main vein on a leaf, stitch the lateral veins first from the outer edge to the centre line (tapering at the centre line), then stitch the centre vein, catching the lateral veins along the way. Press all lateral veins in the same direction.

Don’t forget — these leaves will be smaller than the original design/template, so don’t cut them out until you’ve done any stitching/tucks. Then cut them into whatever shape you want.

qa_day1_tucks

Reverse applique variation

  1. Place a light fabric piece on top of a dark fabric piece. The pieces should be the same size and lined up with each other.
  2. Mark the stitching lines/curves.
  3. Double-stitch along those lines.
  4. Mark the light sections to cut out.
  5. Cut out all the light sections close to the stitching to show the dark fabric underneath.
  6. Turn the piece over and mark the dark piece to discard.
  7. Cut out all the dark sections close to the stitching line to show the light fabric.
qa_day1_reverse_applique

Stitch twice ON the lines; don’t do two close rows of stitching like I did here
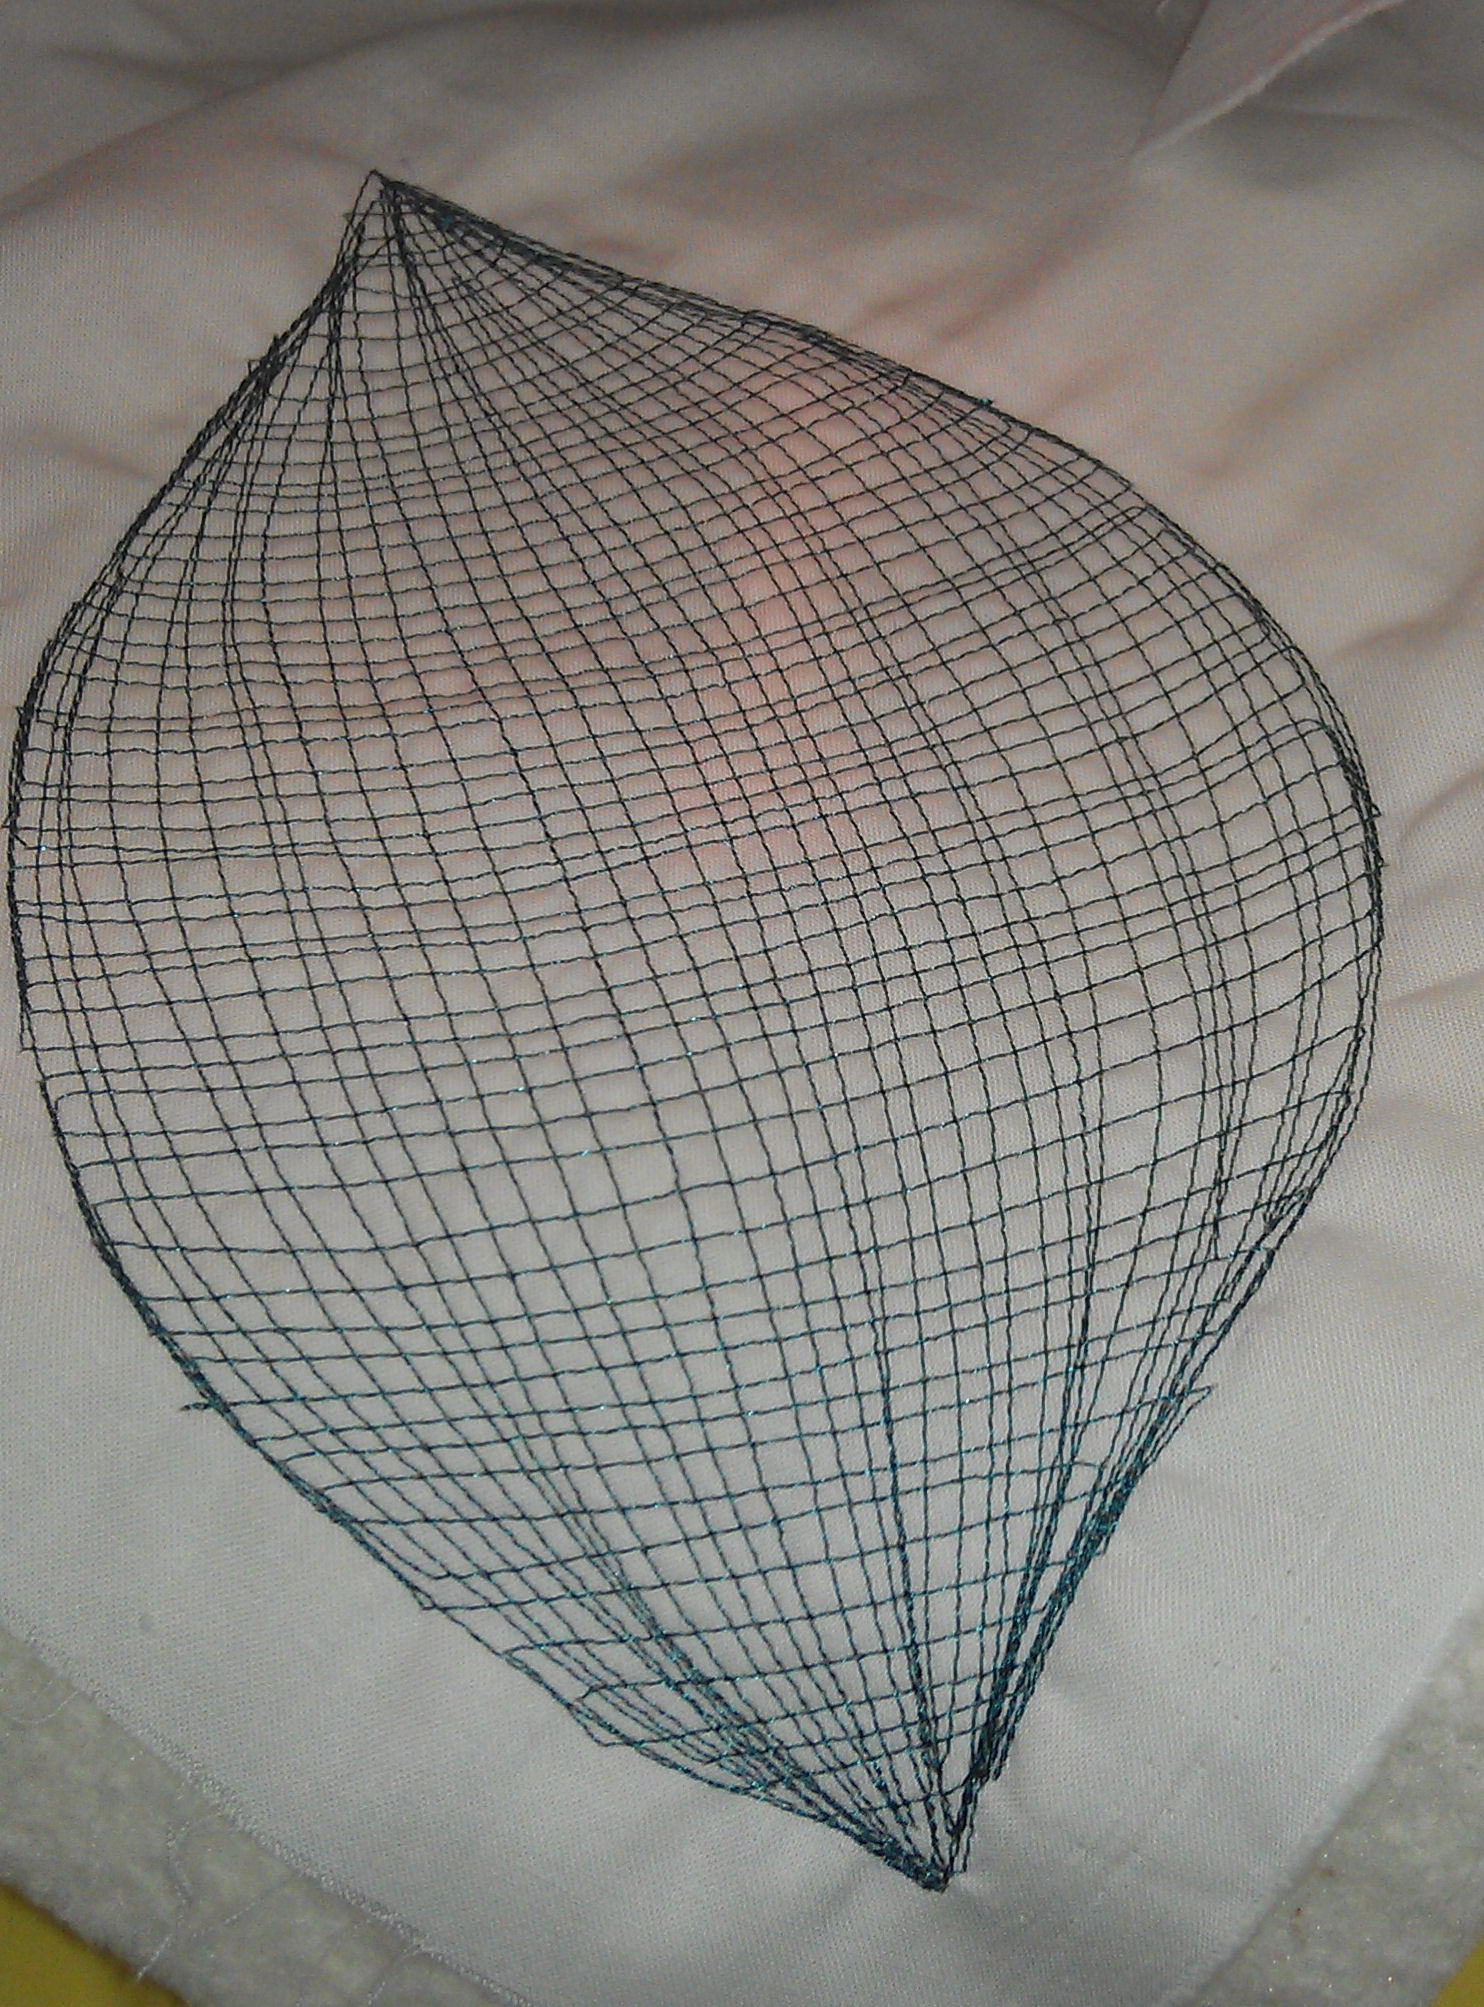
Cheesecloth

This was amazing stuff and you can such a lot with it to create texture! There are several techniques you can use — pull a small group of threads out every so often, pull threads apart creating holes and bumps, paint/dye beforehand (or afterwards), scrunch it, stretch it, etc.

Always cut the cheesecloth at least 2 inches bigger all round than the fabric it will be applied to. And when you’re done creating the texture and are ready to stitch it down on to its background fabric, cut off any excess cheesecloth.

When stitching cheesecloth down using your free motion/darning foot, use a CLOSED TOE foot! An open-toe foot WILL get caught in the threads. Use any stitch you want — pebbling makes great texture for reptiles, frogs, etc.

qa_day1_cheesecloth

Velda’s kit

Velda used these tools in her painting/marking kit:

  • Derwent Inktense watercolour pencils
  • Derwent Inktense watercolour blocks (sticks)
  • Acrylic artists’ paints, such as W&N (Winsor and Newton), Matisse, Dick Blick
  • NeoArt water-soluble oil pastels
  • Jacquard water-based resist
  • Copic markers (with brush and broad nib ends; refillable inks; colorless blender) — these are PERMANENT markers and do not blend easily; only use on DRY fabric
  • 1 inch to 1.5 inch paint brushes suitable for acrylics (for broad brush painting of large areas); smaller brushes for finer work
  • Hair dryer for drying paint — helps stop bleeding. Note: Paint always appears darker when wet; it dries lighter
  • 14″ or 16″ quilting or embroidery hoop for holding fabric taut while painting it
  • Bleach — used to ‘wick’ a section of dark fabric that you want to make slightly lighter; you can dip the edge of the fabric into it, or use a Q-tip or similar to apply the bleach. You MUST wash the fabric with soap and water after you’re finished to get the bleach out
  • Spray water bottle

Most of the paints/markers should be readily available from most decent art supply shops, or try these online outlets:

Note: Some online stores cannot ship flammable materials (such as the colorless blender or the ink refills) outside their country of location.

General techniques for all water-soluble, non-permanent paints/markers

  1. Wet the fabric with water spray.
  2. Wipe off excess water with a damp cloth/towel — the fabric should be damp but not soaking wet.
  3. Use the side of a watercolour pencil/stick/crayon to apply colour, then blend in with the end of a damp towel or your finger. You can scrub the paint into the weave of the fabric with a towel, so it’s better than your finger in many cases.
  4. Add further colour. Blend. Repeat.
  5. Dry with a hair dryer (on medium setting) held less than an inch over the top of the damp fabric. Start drying from the inside and work outwards, otherwise the fabric will fly away with the force of the air from the hair dryer!

Steps for the piece I worked on

  1. Decide on image.
  2. Trace outline of image onto plastic suitable for an overhead projector.
  3. Put on overhead projector and blow up the size. If you don’t have an overhead projector, use a photocopier to increase the size by 200/400/whatever %.
  4. Trace the projected outline onto Pellon TruGrid (if you’re using a photocopy, use a window/sliding door as a light box).
  5. This is your master pattern/outline, so mark each section with A, B, C or 1, 2, 3 etc.
  6. Place another piece of TruGrid over the top of the master pattern and trace each individual section separately, marking it with the same letter or number as on the master pattern. Also mark the overlap/underlap areas (e.g. use a dashed line to indicate where a piece of pattern goes under another piece).
  7. Cut out each piece on this second piece of TruGrid — cut on the outer line; do not leave a seam allowance (the seam allowance will be on the fabric, not the pattern).
  8. Place each pattern piece on its relevant fabric, pin, then mark the outline of the pattern piece on the fabric. NOTE: If you’re going to add tucks to a piece, consider NOT marking the final fabric outline or cutting it until after you’ve stitched the tucks.
  9. Cut out each fabric piece about 1″ extra all round. NOTE: If you’re likely to use a hoop for painting, consider NOT cutting out the fabric just yet!
  10. Mark major stitching and tuck lines on the fabric, then stitch them (no batting at this stage). If you’ve added tuck lines, re-mark the outline of the piece after you’ve stitched and pressed the tucks.
  11. Paint the fabric with acrylics to add dimension to the piece, then dry.
  12. Add lots of shadow at the tuck lines using the pencils/markers. Add other shadows, colours etc. as appropriate. Re-wet the piece as necessary and add more paint. Then dry completely.
  13. Turn under the edges that will overlap on each piece (fold on the marked outline lines). Snip around curves as necessary. Baste.
  14. Pin all the completed pieces together to make a single piece — it’s easiest to do this on a design wall. Use your TruGrid master pattern as your guide.
  15. Pin or baste the pieces together (glue baste with a fine point applicator works fine!), then stitch them together.
  16. Finish adding paint/pencil/marker touches to add depth, connect the pieces as a whole, etc.
  17. Cut out a piece of stabiliser the same shape as the piece, but about a 1/4″ smaller all round.
  18. Place the finished piece onto the stabiliser and stitch down, stitching from the centre of the piece out.
  19. Add surface stitching detail, as required.
  20. If you want to add THIN batting to ‘puff’ the piece a little, do it after you’ve done most of the surface stitching. Like the stabiliser, cut the batting a tad smaller than the finished piece, then baste and stitch/quilt as appropriate.
  21. Pin and baste the completed piece to the background fabric. Add any other pieces you created for this art quilt, as required. Topstitch, blanket stitch, or hand applique down if you don’t intend to quilt it down. This is your quilt top.
  22. Make the quilt sandwich with batting and backing fabric.
  23. Quilt and bind as desired.

Velda tends to face bind or use commercially pre-made piping to bind her art quilts, so consider those instead of more traditional folded and mitred binding. (See these videos for applying piping as a decorative finish, but not as a faced piped binding as Velda does on her art quilts:Β http://www.youtube.com/watch?v=q-rThp7KGRw [part 1] andΒ http://www.youtube.com/watch?v=zMlU2jAd-p4 [part 2]; try this piped cushion technique for a different method: http://www.positivelysplendid.com/2012/01/piping-tutorial-bee-happy-pillow.html)


And I’m home…

18 03 2013

I arrived in Brisbane from Dallas on time, and then my flight to Perth left and arrived on time. My bags came through fine, and my DH was waiting at the airport for me to drive me home.

After unpacking, I had to shutdown and bench the server as it had been running loud pretty much the whole time I was away, said my DH. It was definitely louder than usual. Once I had it open on the bench, I saw that the front intake air panel was covered in dust, so I spent the next 30+ minutes cleaning it thoroughly — when I restarted it, it purred along without the loud fan noise, so dust was the culprit. I really didn’t need that task right then as I was tired and hot, but it’s done and I don’t have to worry about that excessive noise any more.

We went out to a local Chinese restaurant for dinner, then I tried to watch an hour of TV, but completely missed the program as I kept drifting off to sleep πŸ˜‰ I went to bed at 9:30, woke at 2:30 am, drifted in and out of sleep until 5:15 am, when I got up. Hopefully, the jet lag will be minimal…

Today will be spent catching up on the last two weeks’ worth of mail, entering receipts and statements, paying bills, doing grocery shopping, unpacking all my sewing stuff etc. I start work again tomorrow. And life will go back to normal.