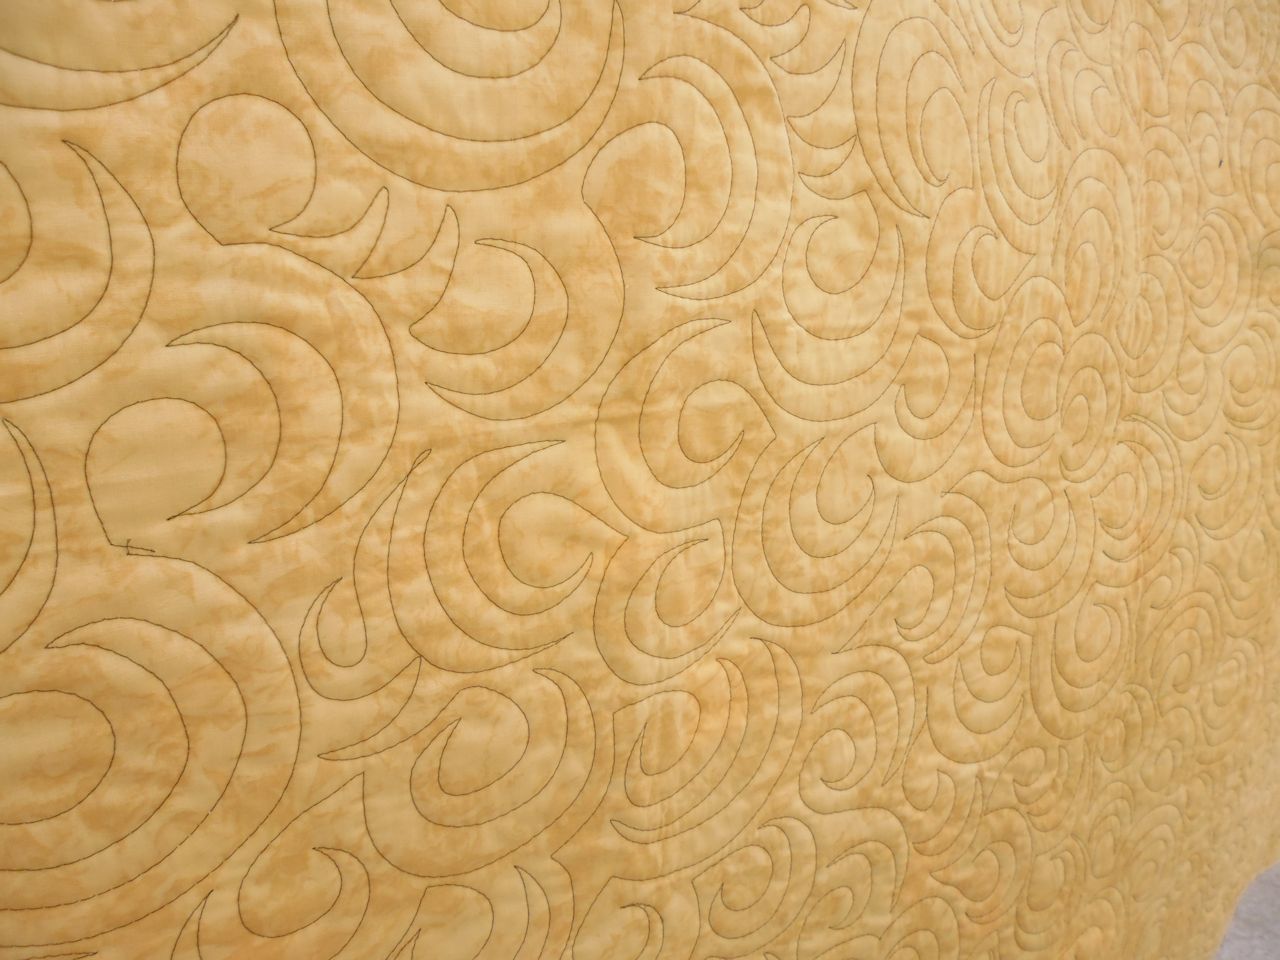
Another quilt that I stitched with an all-over spiral.
(Click on a photo to view it larger)
Back:
Threads used: (no information on threads as I did this quilt a while ago and can’t remember what I used!)
Another quilt that I stitched with an all-over spiral.
(Click on a photo to view it larger)
Back:
Threads used: (no information on threads as I did this quilt a while ago and can’t remember what I used!)
Another huge quilt! I stitched it with an all-over ‘open headband‘ motif, one of my ‘go to/muscle memory’ motifs.
(Click on a photo to view it larger)

Back:
Threads used: (no information on threads as I did this quilt a while ago and can’t remember what I used!)
This was a really big quilt, and my aim was to stitch the layers together in a way that held without going over the top with the quilting. I first stitched in the ditch around all the blocks, then simple straight lines (using my favourite Line Tamer ruler!) bisecting the blocks horizontally and vertically.
(Click on a photo to view it larger)


Threads used: (no information on threads as I did this quilt a while ago and can’t remember what I used!)
This next quilt was a Christmas panel. How to quilt it? I started by stitching in the ditch around all the elements of the panel, did cross-hatching on the diagonal in all the ‘border’ blocks, with some MacTavishing surrounding the rocking horses, and some stitching resembling Christmas baubles in the background to the tree, finishing up with a meandering stipple in the outer border.
(Click on a photo to view it larger)
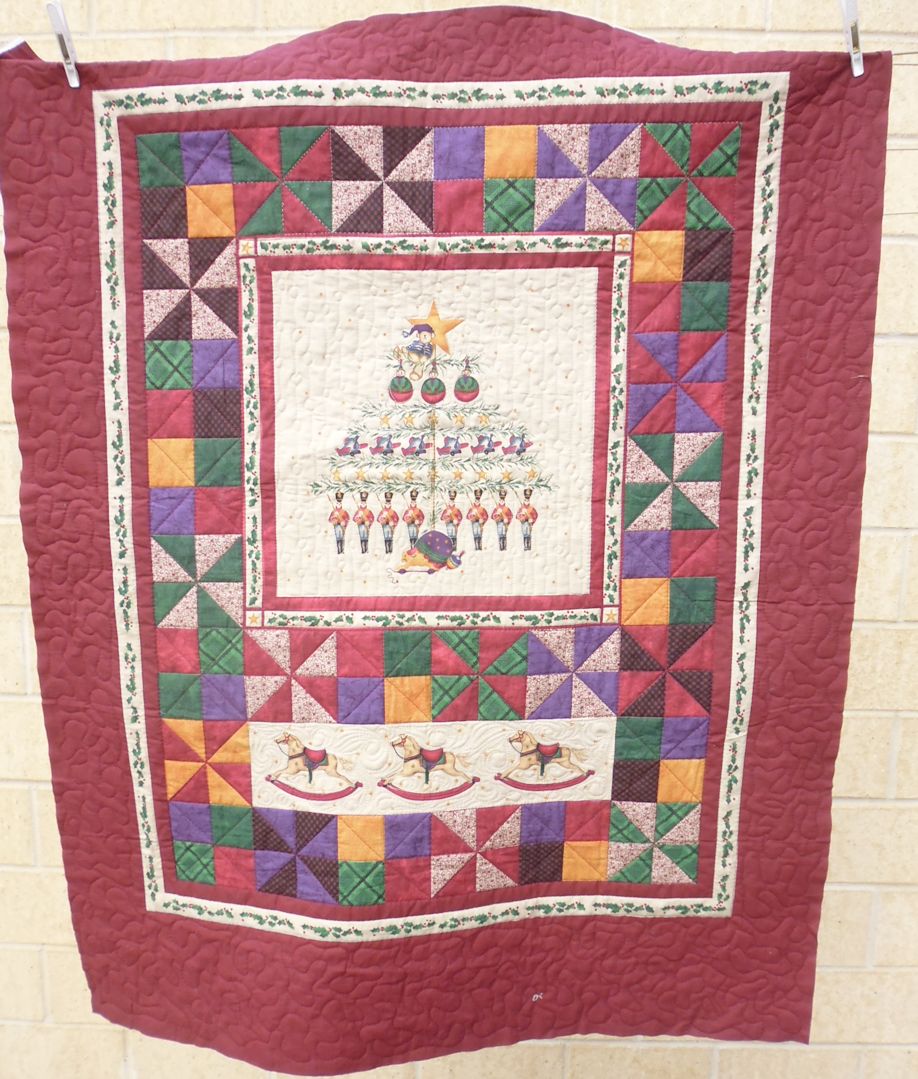


Threads used: (no information on threads as I did this quilt a while ago and can’t remember what I used!)
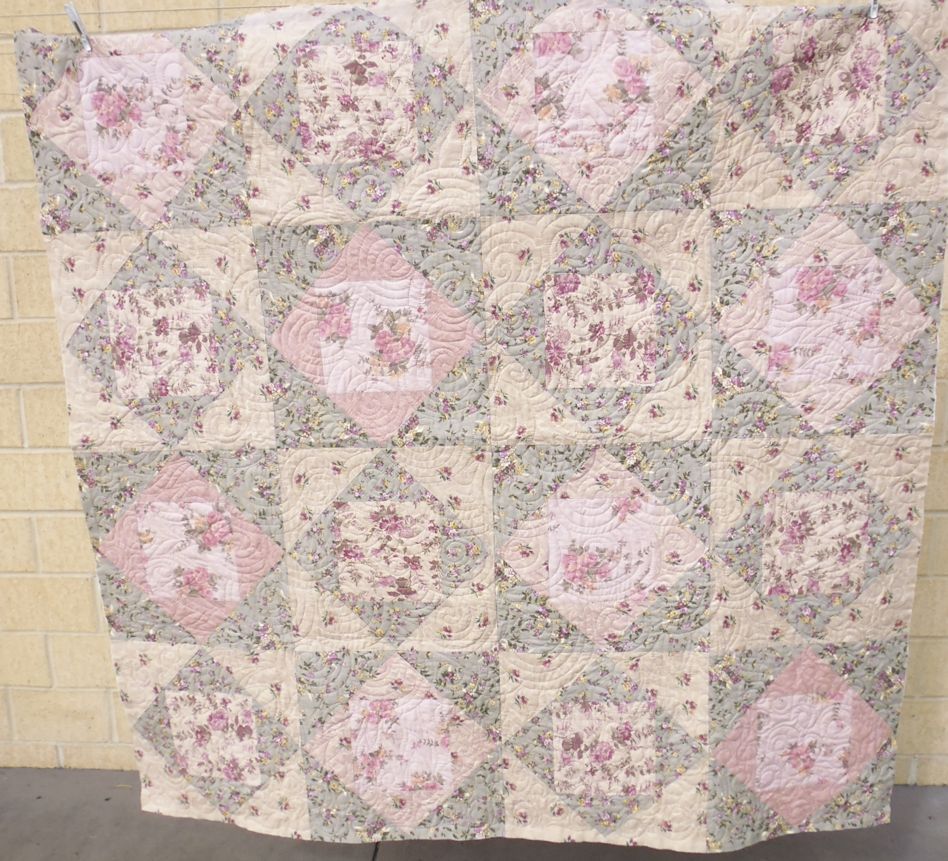
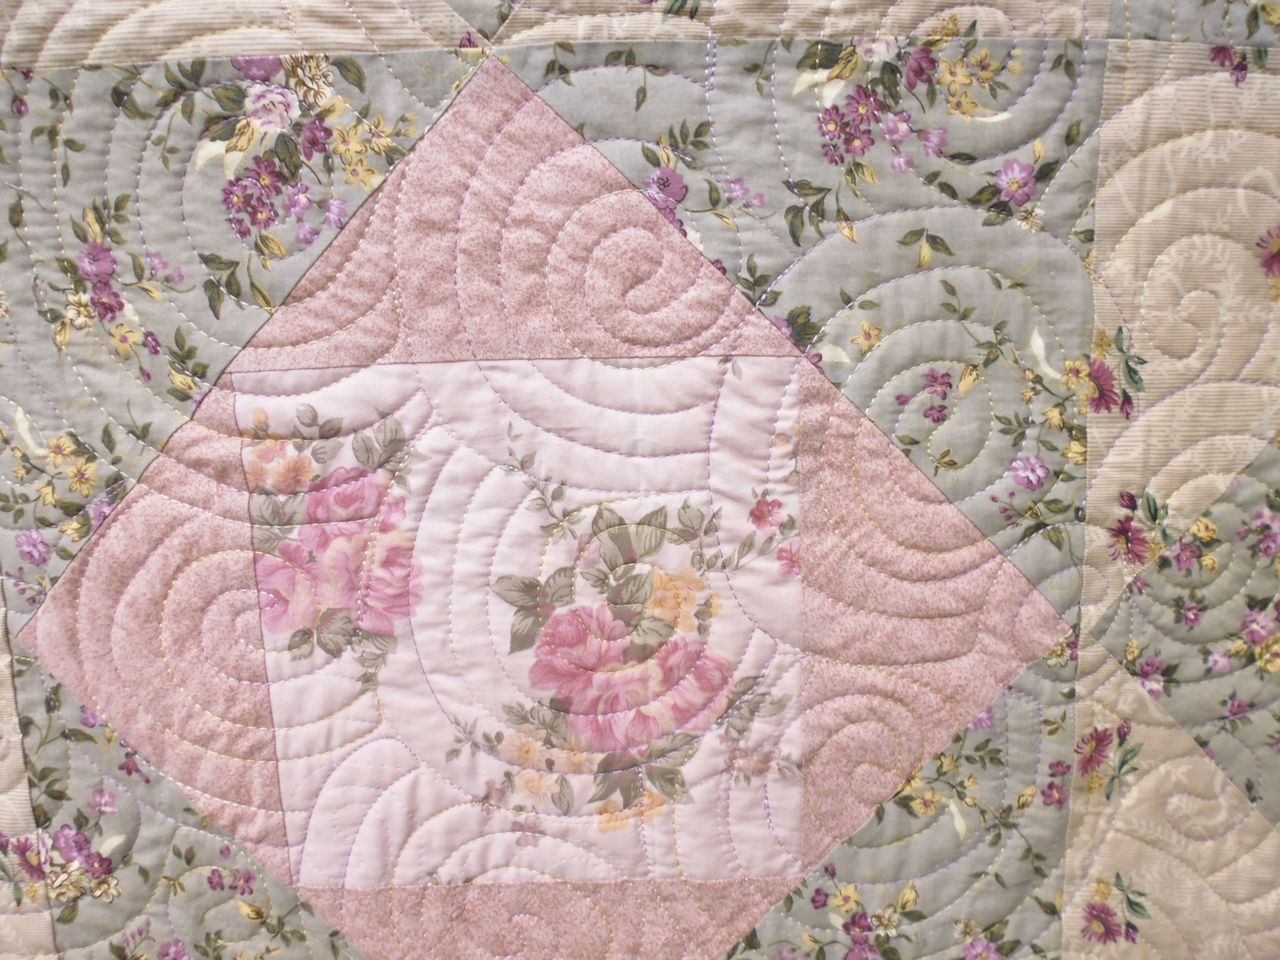
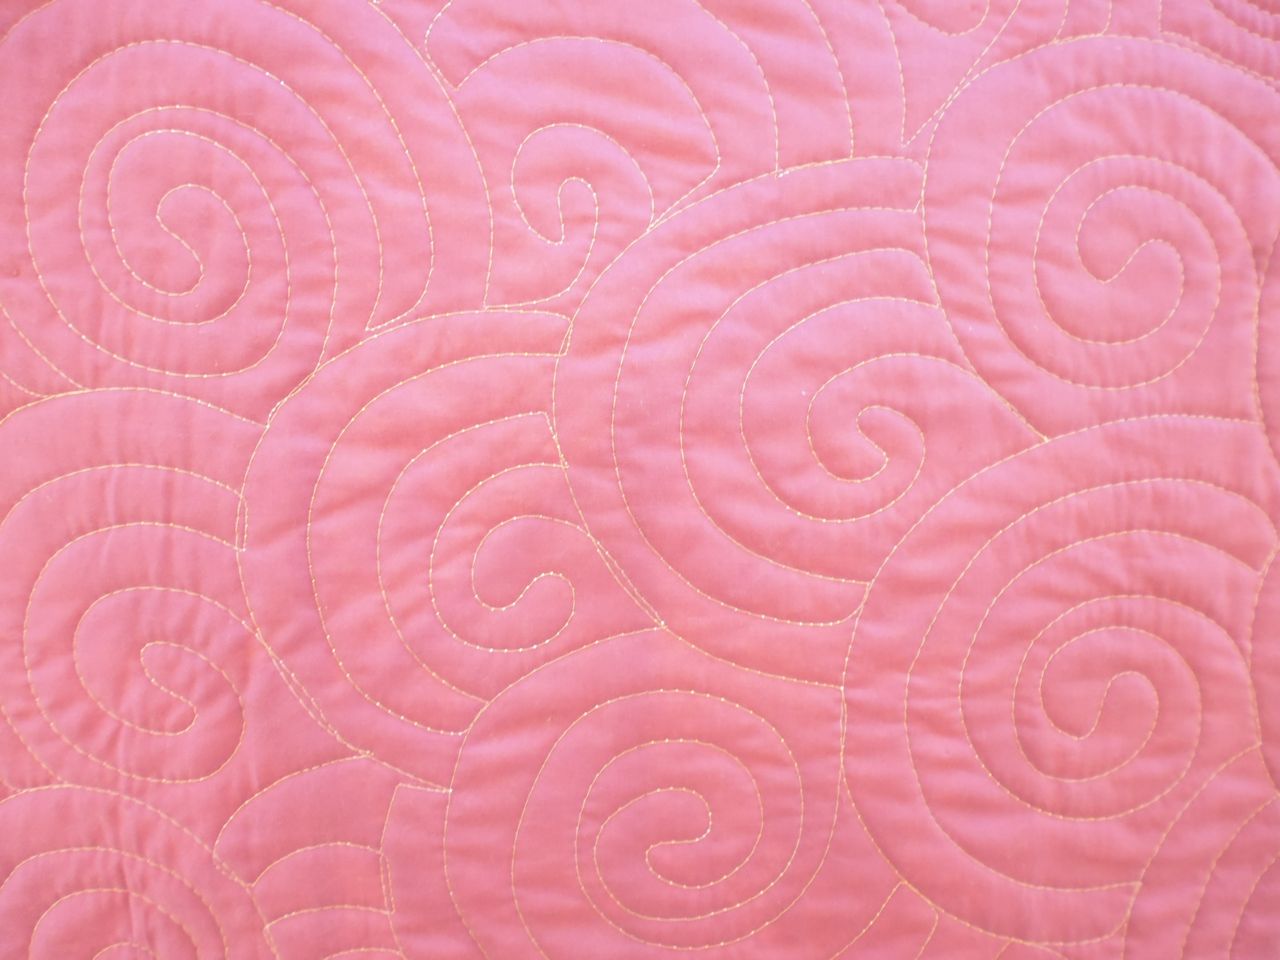
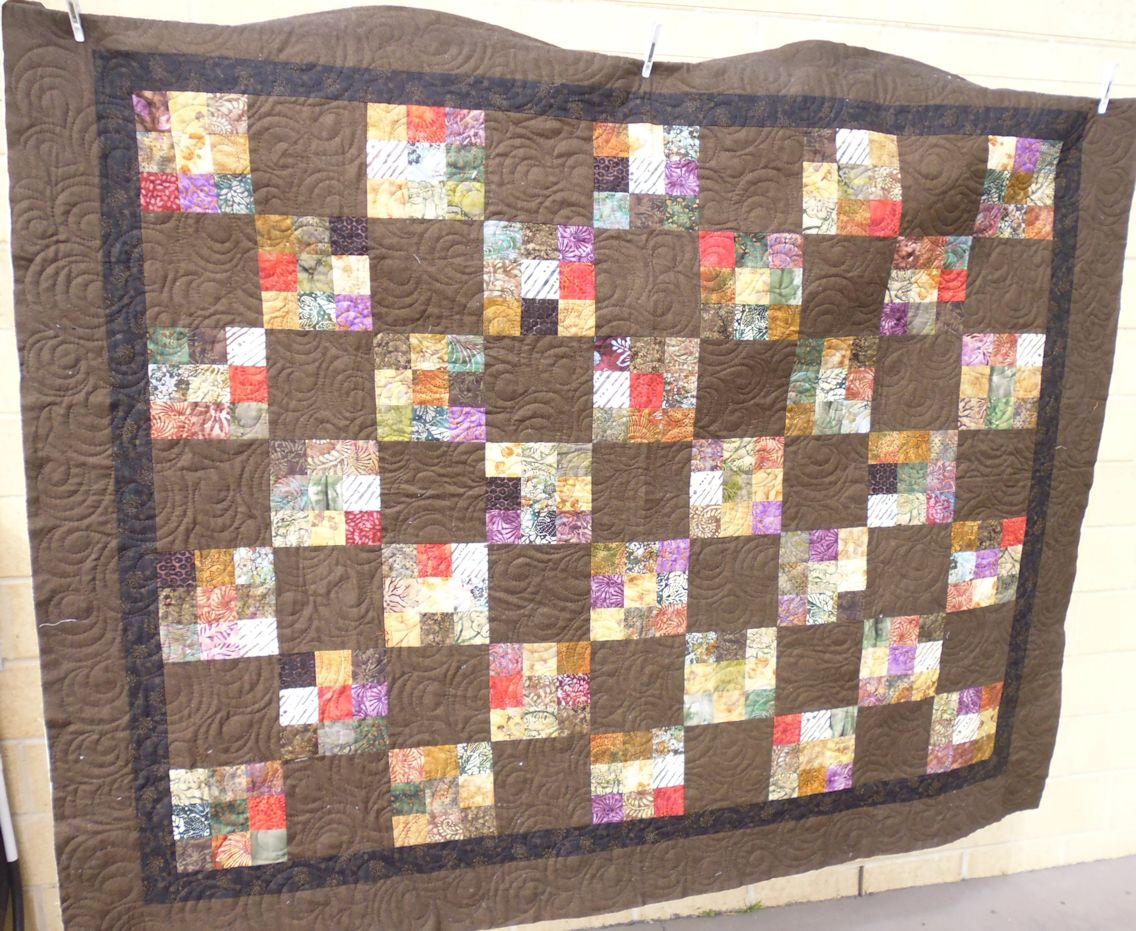
To counterbalance the very geometric rail fence blocks, I stitched large spirals all over this quilt.
(Click on a photo to view it larger)


Back:
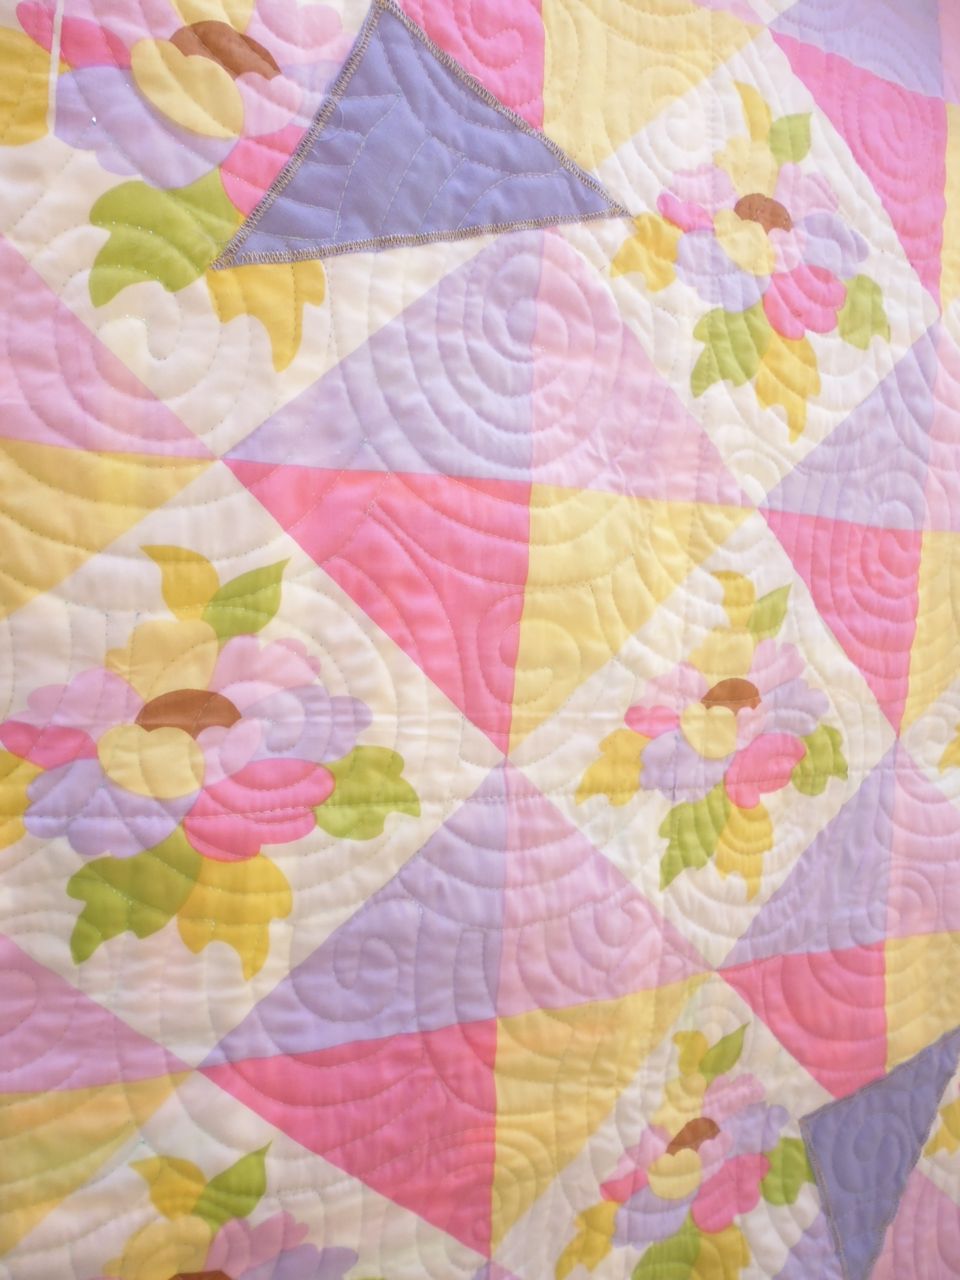
Threads used: (no information on threads as I did this quilt a while ago and can’t remember what I used!)
How to quilt this quilt made from fabrics that featured grapes, wine etc.? Easy! Stitch an all-over leaf design in the main part of the quilt top. I then stitched narrow piano keys in the plaid border.
(Click on a photo to view it larger)
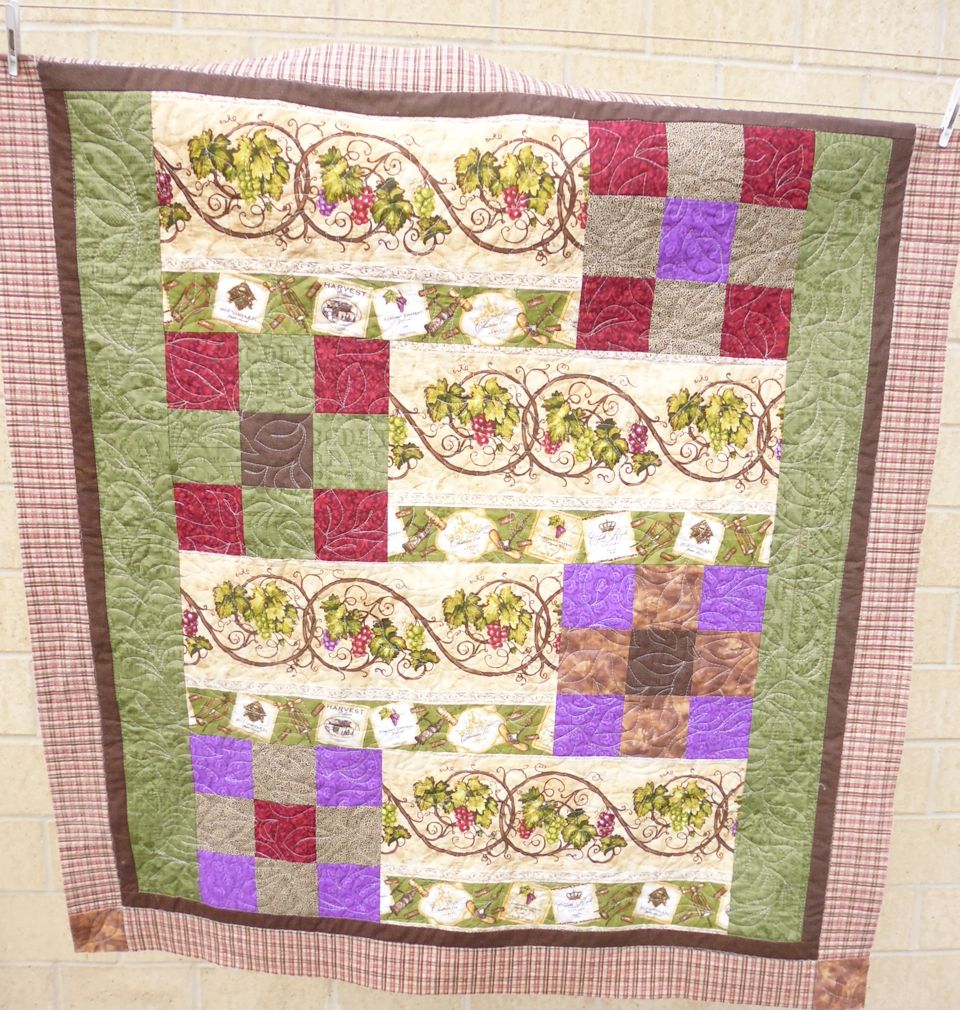
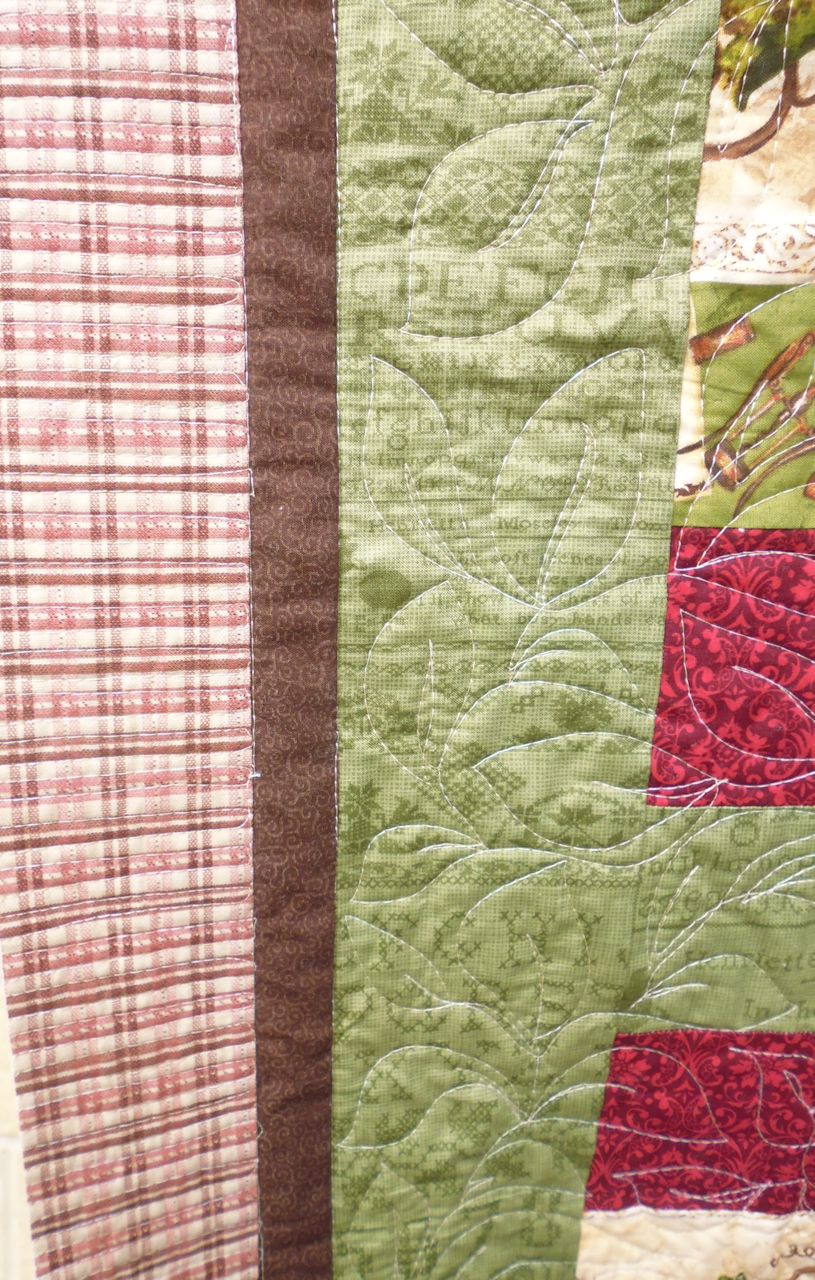
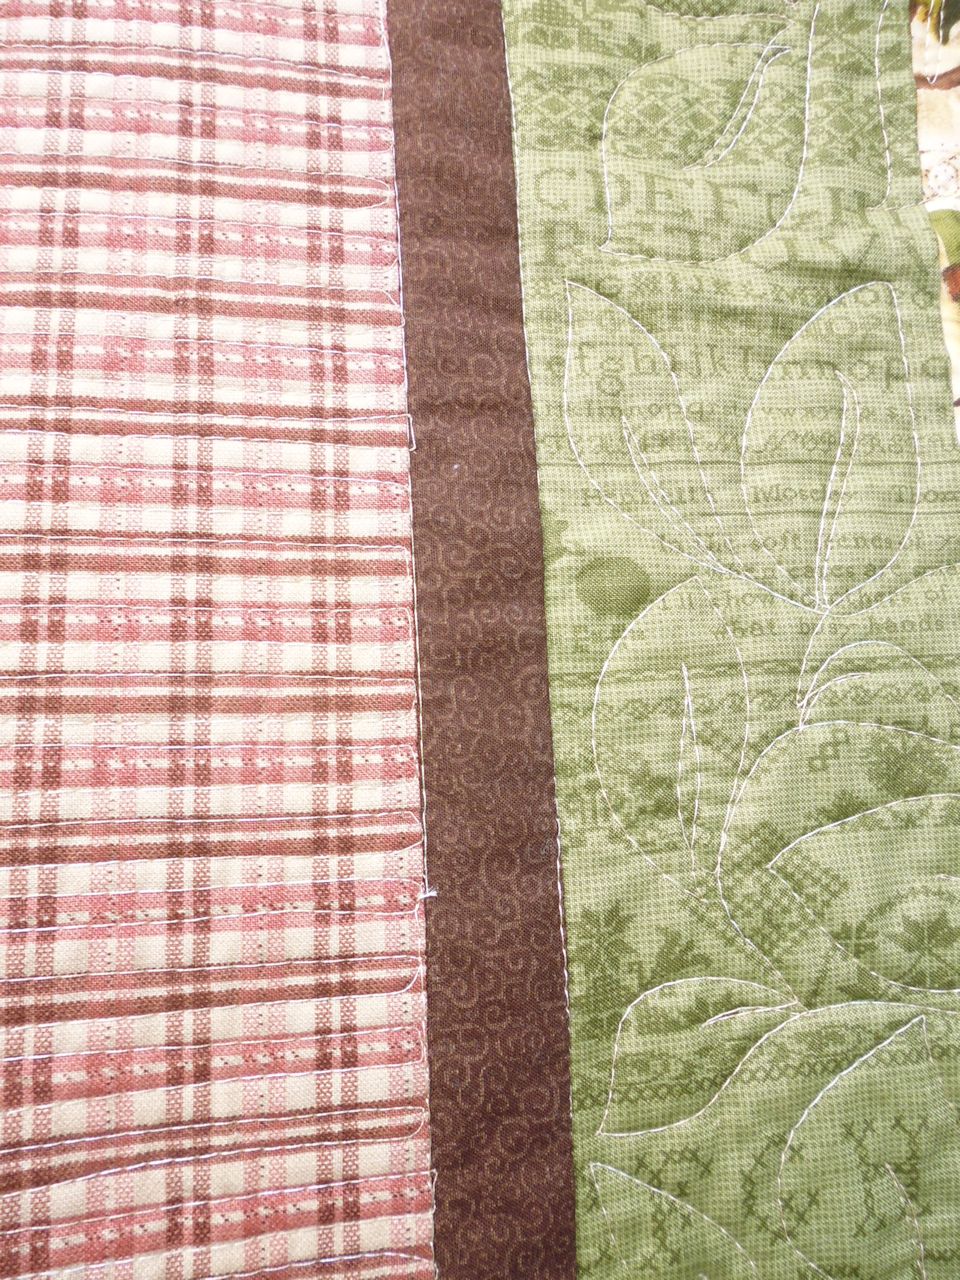
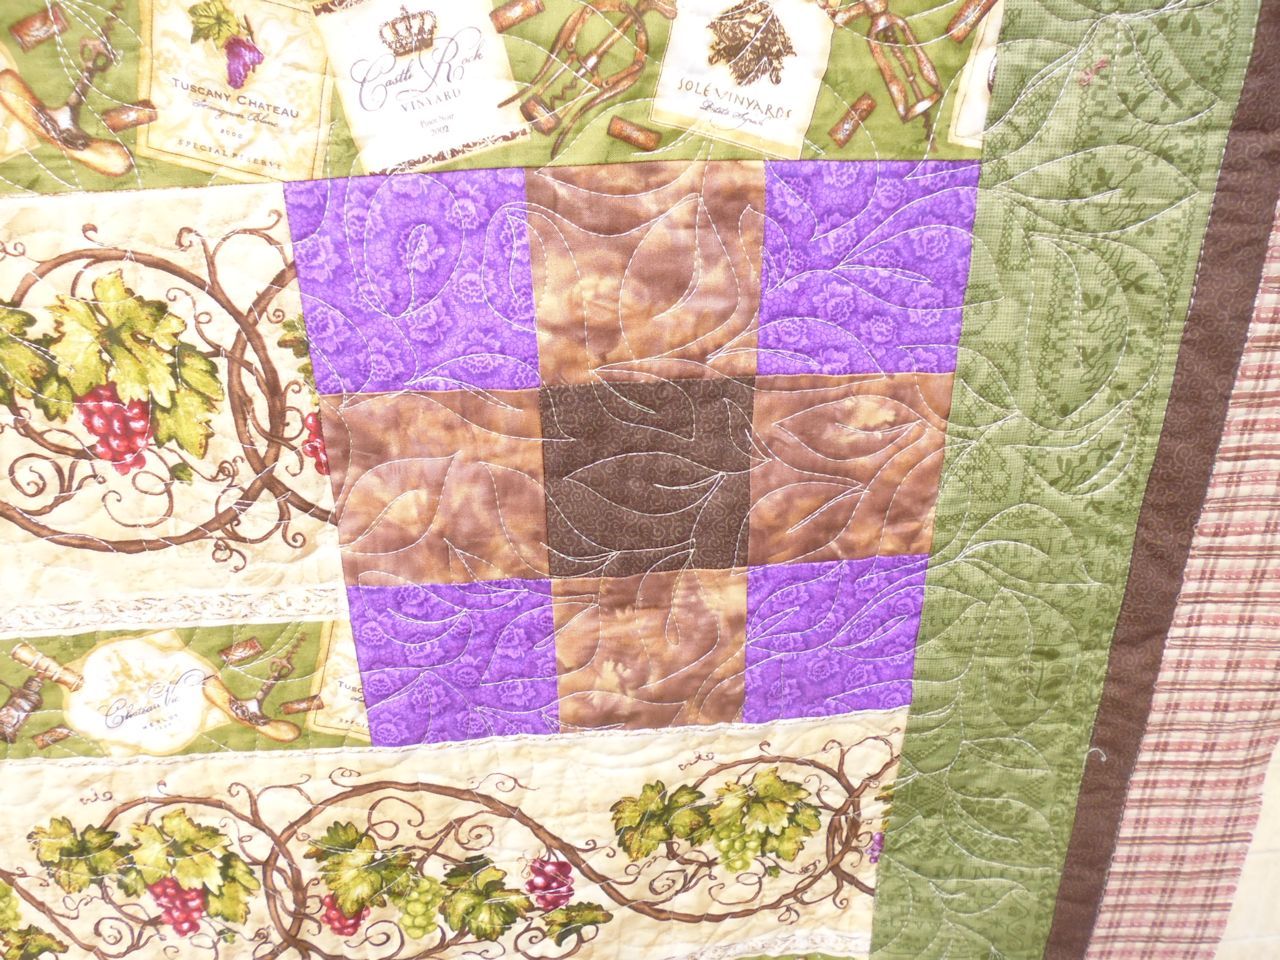
Threads used: (no information on threads as I did this quilt a while ago and can’t remember what I used!)
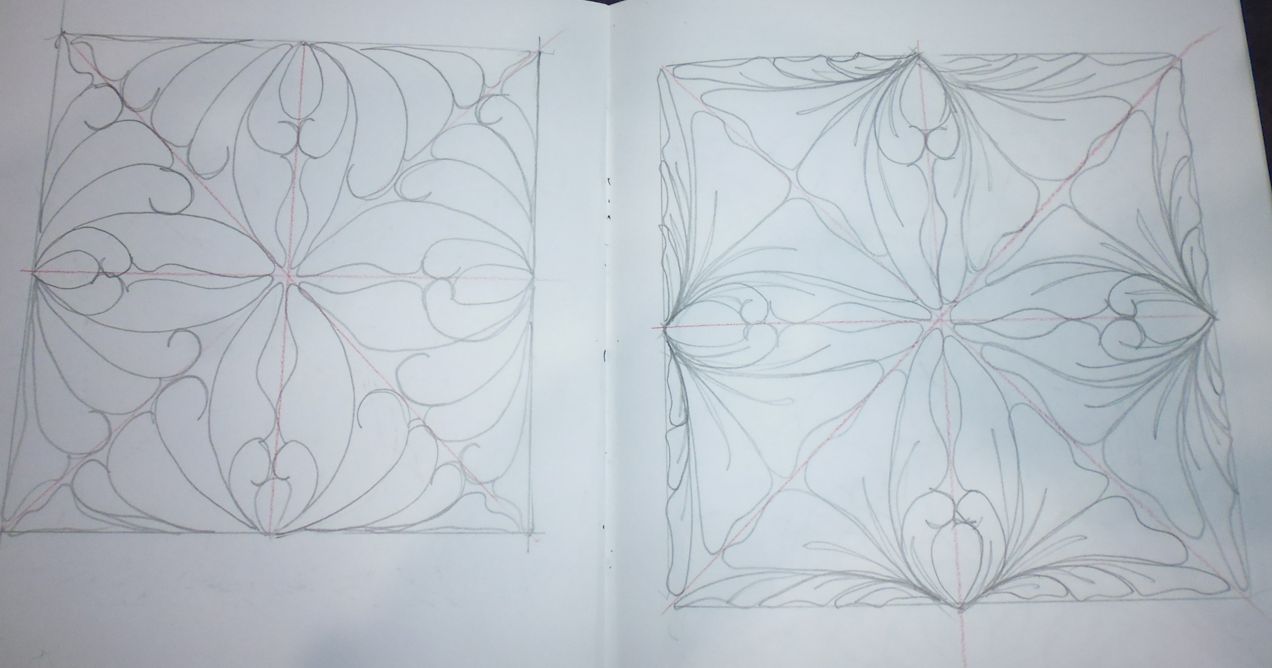
I attended a two-day workshop (no sewing!) at Handcrafters House in mid-August. This time our tutor was the lovely Jamie Wallen, who took us from scratchy feather designs to mini works of art. We focused on feathers and grids and how to take them from boring to magical.
Our tools were paper and pencil and for two days we learnt, sketched, drew, and amazed ourselves with our progress in coming up with designs for free motion quilting. Inspirational, and definitely worth doing if you ever have the opportunity. It’s not often you can just sit and doodle for two full days! I’ve already used one of the designs in a couple of quilts.
The photos below show my progress from the first feathers (far left of the first photo) to the last design.


I’m a bit behind in doing my blog posts! July was filled with quilting workshops and retreats, plus my trip to Vermont. Oh, and work. August had another quilting workshop (with Jamie Wallen), plus work, plus quilting Community Quilts, plus four full days (over weekends) thoroughly cleaning EVERYTHING in the shed to get rid of the rat scat, body marks left behind as they used out shed as their luxury winter apartment. So, I have a few blog posts to catch up on!
The first weekend in July was spent in Perth at Handcrafters House doing a great workshop with the lovely Melissa Sobotka, an award-winning art quilter famous for her immaculate attention to detail in her photo-realistic applique work. Take a look at some of her pieces here: http://www.msfiberart.com/
Because it was only a 2-day workshop, we all worked on the same piece — a bunch of tulips, cut from fabric, fused, and enhanced with Tsukineko All-purpose Inks (part of the workshop fee was a kit with the fabric range, Soft Fuse, and access to Melissa’s inks). But before we started on the tulips, Melissa taught us some basics of using the Tsukineko inks (liquid and blocks) and watercolour pencils to apply colour, shadow, depth etc. We used paintbrushes with the inks, not the Fantastix applicators that are traditionally used with them.

Then on the tulips. I’m going to reach back into my memory to see if I can recall the steps we did. The first step was to trace an outline of the main shapes and colour areas — light, medium, and dark — onto freezer paper, and label each one with its tonal value (e.g. ML for medium light).


After doing this, we put our master photo underneath the tracing and taped it down, laying and lightly taping the tracing on top.
Next, we started looking at how various parts of our first tulip hid behind and overlapped other pieces, and cut out the freezer paper bits for each part one at a time. It’s important not to cut everything out unless you have another tracing that shows which bit goes where and number the pieces — it’s super easy to get messed up, so Melissa’s advice was to do one small section at a time, using the photo underneath the tracing as your reference. After cutting out the freezer paper pieces for one tulip, we fused them to the FRONT of our selected fabrics, leaving about a 1/4-inch of extra fabric along all edges (rough cut — some of this gets cut off soon). On the back of the fabric we fused some soft fusible (e.g. Soft Fuse, Misty Fuse).

Cut and fused pieces for one tulip, the photo of which is showing through the hole in the freezer paper made when cutting out the individual parts of the flower
Next, we cut the excess fabric off each piece EXCEPT WHERE ANOTHER PIECE WOULD OVERLAP IT and fused the pieces together, starting from the piece representing the area furthest away. After several hours, we had one tulip done and could remove the freezer paper from the front of it. We continually referred to the photo to get it right.
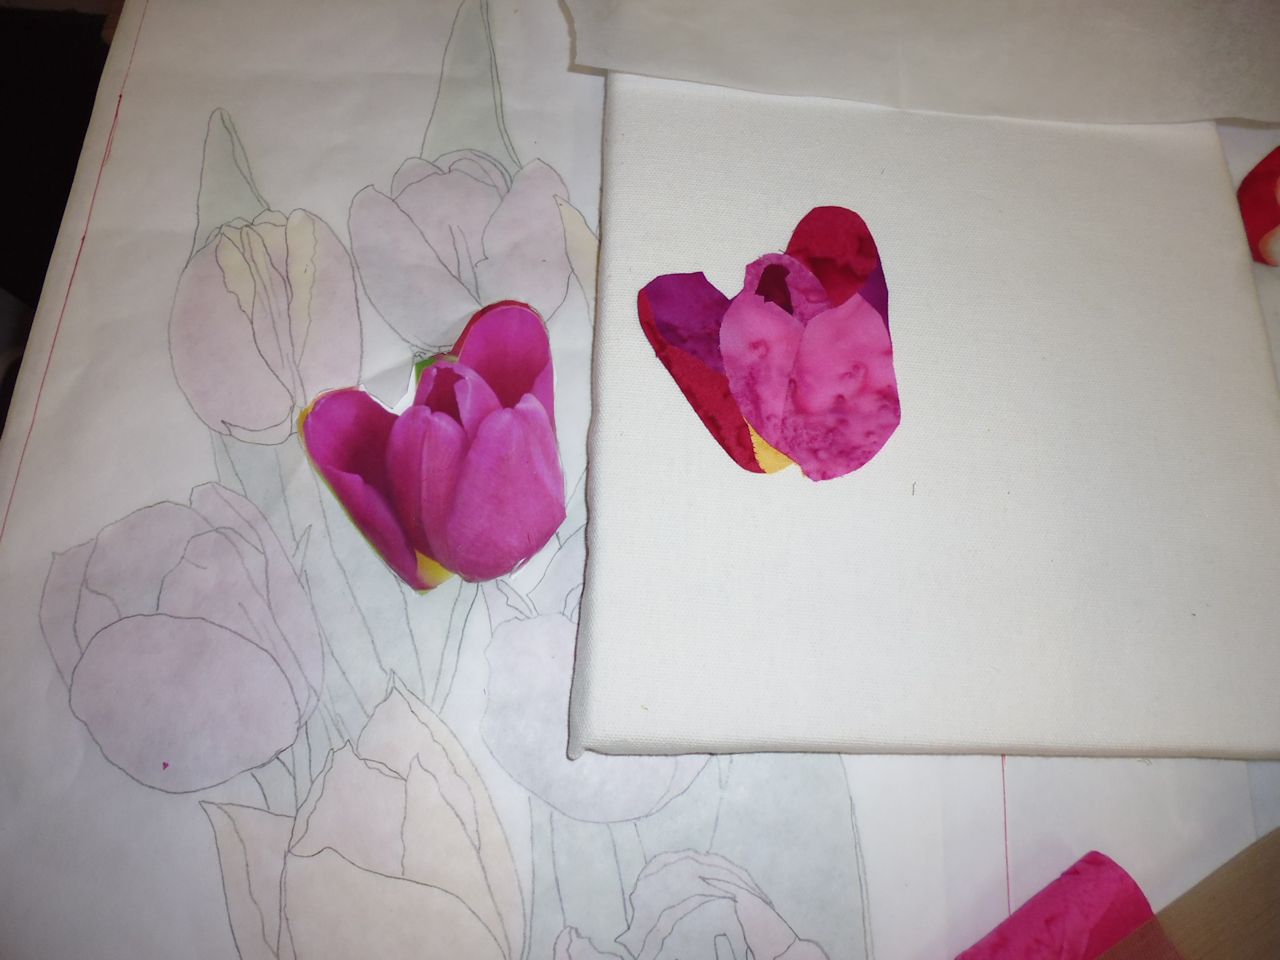
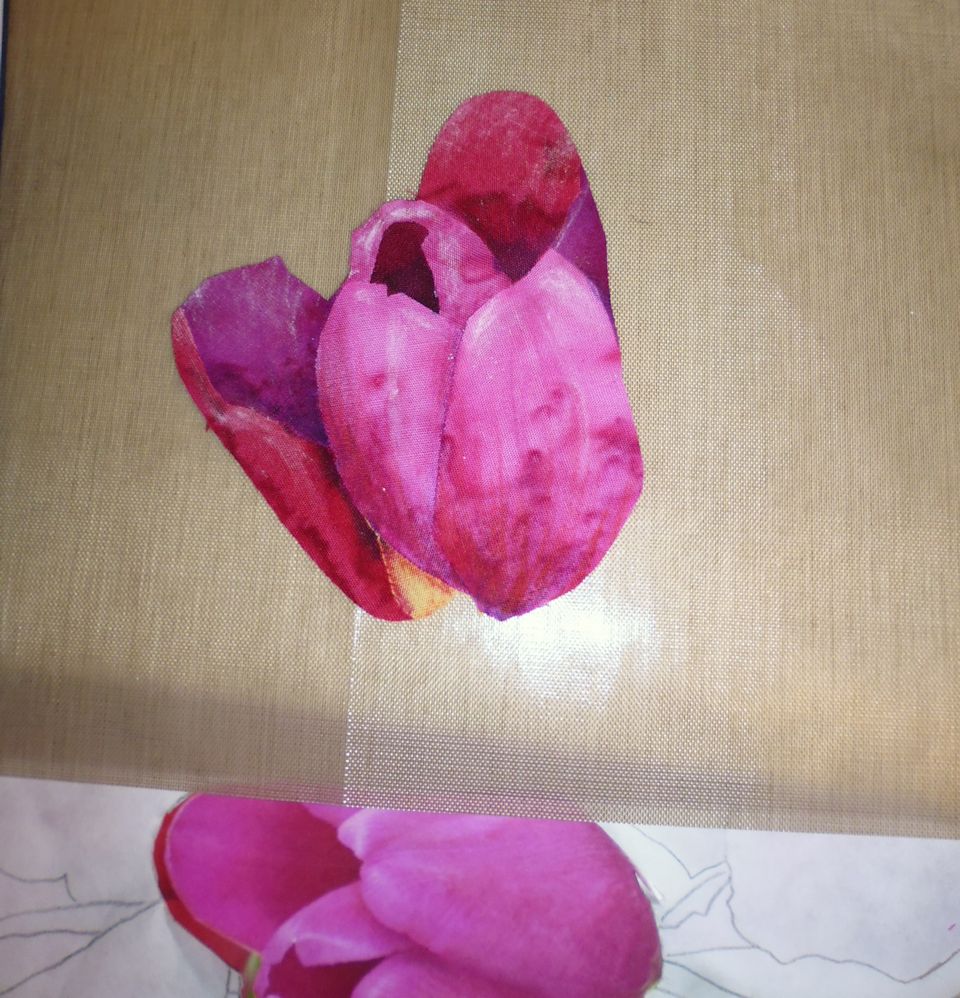
At this point, the tulip looks pretty flat. The colours are there in the fabric, but it doesn’t have much depth and shadow yet. This is where the inks come in. After applying various shades and colours my first tulip started to come to life.

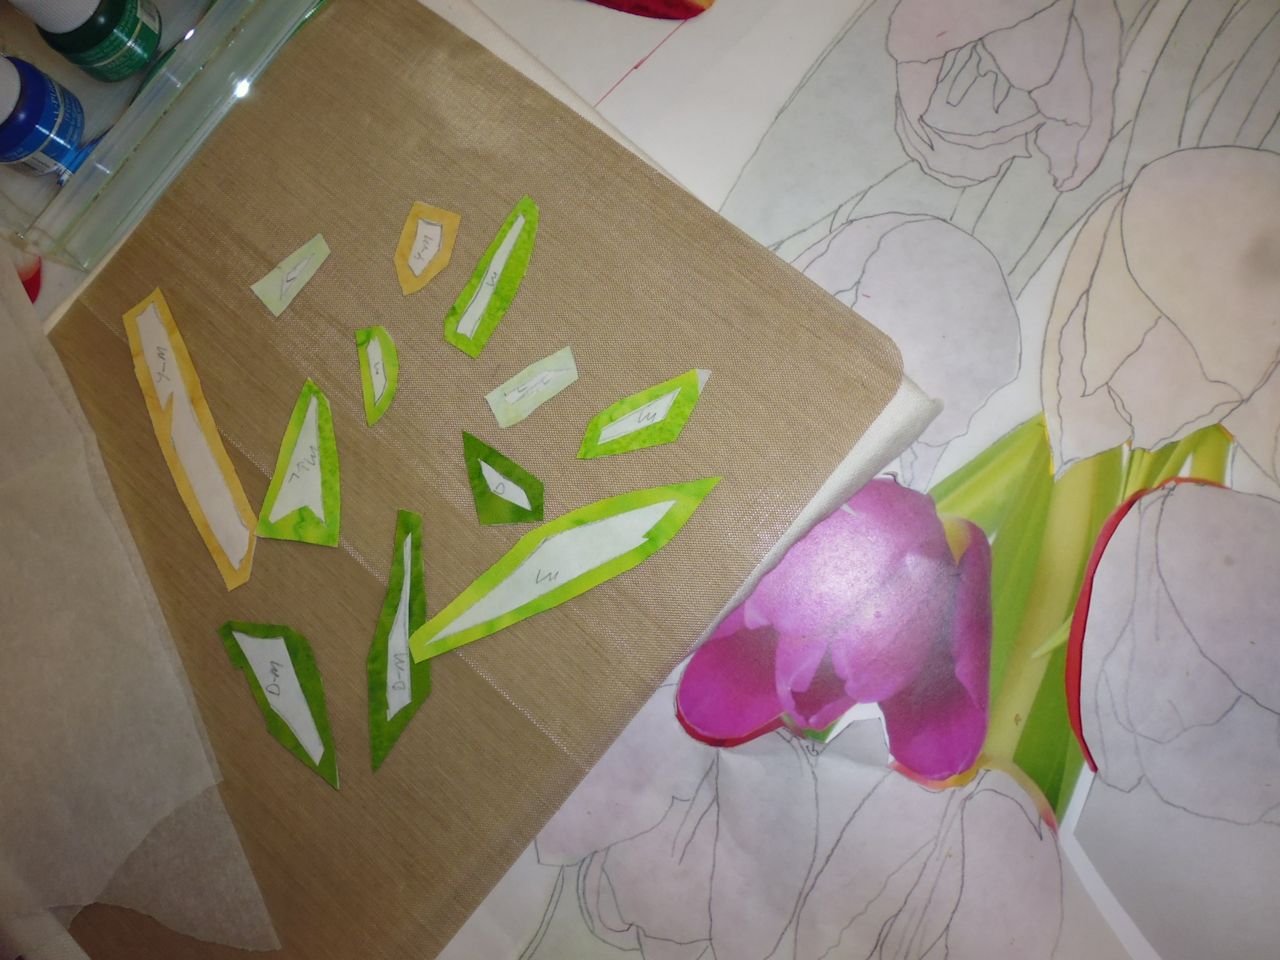
With so many tulips to do, I decided to try some leaves next, just to have a change of pace and to take advantage of asking Melissa any questions if I got stuck. Same process as for the tulips — cut, fuse, rough cut, fuse, ink.
By the end of the second day, I had two tulips I was happy with, a bunch of green stems joining them, and a tulip I definitely wasn’t happy with — so much so, I threw it in the bin! (However, one of my friends grabbed it and it was proudly displayed on her design wall when I went there the following weekend for my annual retreat!)
I haven’t finished the piece, and doubt that I will. In fact, I think I gave my finished tulips and stems to my friend as it’s doubtful I’ll ever finish it or have the patience to do so. I enjoyed learning the technique (it was similar to Lenore Crawford’s technique I learnt in 2012), but it’s too fiddly and precise for me. And it takes an enormous amount of time.
Melissa’s award-winning pieces are HUGE and take her up to a year to create. She must have the patience of Job! I certainly don’t…
My past week in Vermont – some highlights and observations:
Kris added these to my list:
Things that appear to have escaped your mind – although I don’t know how:
For future reference: Flying to Burlington from Perth and back takes about 51 hours (in actual time in the air, not including about the same in airport and tarmac wait time). Allow two days to get there and two to get home.
After my 8-day stay in Vermont, which became a 7-day stay because of a cancelled flight from Washington DC to Burlington, it was time to leave for the long trek home. I eventually made it home, only 20 minutes after the scheduled arrival time, but there were a few dramas along the way.
This 90-minute noon flight left a tad early and arrived early into DC. We had to wait for a gate. By the time we got off, the rain was bucketing down (it was also very hot, so it was very tropical). It was a small plane, so most carry-ons had to be gate checked, and every one of them was soaked coming up to the jetway. Fortunately, mine is a hard-shell carry-on, so that didn’t affect me much. Those with soft-sided bags weren’t so lucky… 2+ hour wait at Reagan Airport for the next flight, which I spent in their nice Admirals Club. Weather turned nice and sunny, with some clouds.
About a 3.5 hour flight. From memory, it left on time and also arrived a tad early. As my bags had been checked through to Australia from Burlington and I’d gone through TSA screening there, I only had to get myself (airside) to Terminal D. Had a shower and waited for the 10:15pm flight in the Qantas First Class lounge (yes, I got another points upgrade to First Class for the long leg!).
About a 17-hour flight, but it ended up being close to 20 hours sitting in the plane. They loaded all the passengers, then we had an announcement from the cockpit that we were still refuelling and loading bags, then another about 15 minutes later that DFW air traffic control had grounded all flights until a big thunderstorm went by. And a big thunderstorm it was! Lots of lightning, thunder, rain. The pilot kept us updated on the situation, and kept all the power and air conditioning on so it wasn’t oppressive in the 90F heat. It was getting later and later and still we sat on the tarmac, while the lightning raged around us. The pilot was great at keeping us updated, and reported that a couple of flights had taken off in slight lulls but those pilots were reporting it as ‘pretty bad’. Our pilot told us ‘we’re not having any part of that’, and so we waited. No-one seemed perturbed by this — it was darned obvious that flying into that mess was not a safe thing to do.
I did ask one of the flight attendants about the time and how it may go over their rostered hours and what would happen then. She said the pilots only had 30 minutes left of their rostered time and if we didn’t leave soon, the flight would have to be cancelled and we’d be offloaded and put onto other flights (that meant the next night at the earliest as there’s only one flight a day from DFW, unless they shuttled some people to Los Angeles, where there’s three flights to Australia each evening). She said the flight attendants’ rostered hours could be overriden as long as 18 of the 24 attendants agreed, but not the pilots’ hours. Fortunately, we left within that 30-minute window — I guess the pilot thought the risk was worth it considering the cost to cancel the flight. The lightning was abating by then too, though it was a pretty rough ride for the first 20 minutes or so of the flight until we passed/got higher than the storm cell.
Our scheduled departure time was 10:15pm — we didn’t get away until well after 1 am. For me, that wasn’t an issue as I had a 6-hour wait at Sydney Airport (based on the original schedule), but I’m sure others missed their connecting flights on landing. We left about 3 hours late, but obviously made up some time as we arrived only 2 hours late into Sydney.
Then came the debacle known as Sydney Airport and transferring from international to domestic — what a mess that is! Anyone with a tight connection would have missed their next flight — immigration with the Smart Gates was easy, but our bags were offloaded onto the smallest carousel (have you seen what 400 people around a small luggage carousel looks like?), luggage carts were some three carousels away from where the bags came out, customs was a long line as we were competing with passengers from other recently landed flights, and then the walk across the crowded international arrivals area then outside to the other building where we could drop our bags for the connecting flight.
Fortunately, I knew where to go. Anyone arriving in Sydney for the first time would be lost as the wayfinding signage is small, and the logic of transferring isn’t explained. Add to the confusion the crowds of people waiting in the arrivals hall. Then, when you get outside, you walk along the covered veranda and to the line for transferring your bags. But there’s only one line, no matter what class you’re flying or frequent flyer status you have. It’s not until you get through that line that you get pointed to the line for your class/status for the bag drop. That’s just not good PR for Qantas’ most frequent flyers — sorting out the lines first would make more sense. After baggage drop, it’s through security and then the wait for a bus to take you across the tarmac. Yes, a bus. In the late 1990s, they did a lot of work on the airport prior to hosting the 2000 Olympics, but one thing they didn’t do, and still haven’t done, is sort out the transfer debacle from international to domestic (or vice versa). Other airports serving much smaller populations than Sydney (pop’n 4+ million) have automated trains/monorails, elevated or below-ground walkways, etc. for transferring passengers. Not Sydney. You have to catch a bus, and invariably it fills up before you can get on and you have to wait for the next one. Sure, it’s free, but it has no room for more than 10 people’s carry-on luggage, so it’s a real bun fight for space for the 50 or so people on board and their carry-on luggage. Add to that the frazzled nature of people just coming off a long flight, who are naturally anxious about making their connections. Then when you get to the domestic terminal, you have to get off the bus (a big step down) then walk up a short flight of steps in the open to get to the escalators to go into the terminal. Once you’re in the terminal there’s no-one from Qantas to help you — you’re on your own. A great welcome for visitors to Australia — NOT! And I don’t know what anyone with a mobility issue does — steps to get on and off the bus, steps at the domestic terminal, then an escalator, with no assistance. I have a friend who cannot go on escalators — what would she do with no-one to help/guide her to an alternative way to get into the terminal? There are NO signs for elevators. This transfer time can take up to an hour, so even if you have a 45-minute connection window after finishing with customs, you’d be unlikely to make it, which just makes for some very upset and angry people. My advice if you’re connecting from an international to a domestic flight at Sydney is to allow AT LEAST 2 hours between your scheduled arrival time and scheduled departure time. Even then, it could be tight, especially if there’s any hold-up (late arrival, long queues for immigration, people not moving out of the way in the duty free that you are funneled through whether you like it or not, waiting for bags, long lines for customs even if you have nothing to declare, finding your way to and negotiating the transfer process and baggage drop for domestic, getting through security, waiting for the transfer bus, dealing with others on the bus and disembarking it, finding your gate for your domestic flight, and HOPING you make it!). I allow at least 3 hours. And then I collapse into a shower at the Qantas Club or Business Lounge to refresh my batteries for the last leg.
You might wonder why I go through Sydney, and not Melbourne or Brisbane where the international and domestic terminals are next to each other — that’s because the flight to Dallas is ONLY via Sydney. Melbourne, Brisbane, and Sydney all fly to Los Angeles, but only Sydney has the Dallas flight. If I’m going to the midwest, the east coast, etc. then the Dallas flight is really the only option, otherwise, I have downtime in Los Angeles (or San Francisco) to catch a domestic flight.
About a 5-hour flight. We left about 20 minutes late and weren’t able to make up that time. My husband was there to meet me, and then we had the 2-hour drive home.
No wonder I’m wrecked for a few days afterwards!
More movies watched on the flights:


