Revamping an old quilt

19 01 2014

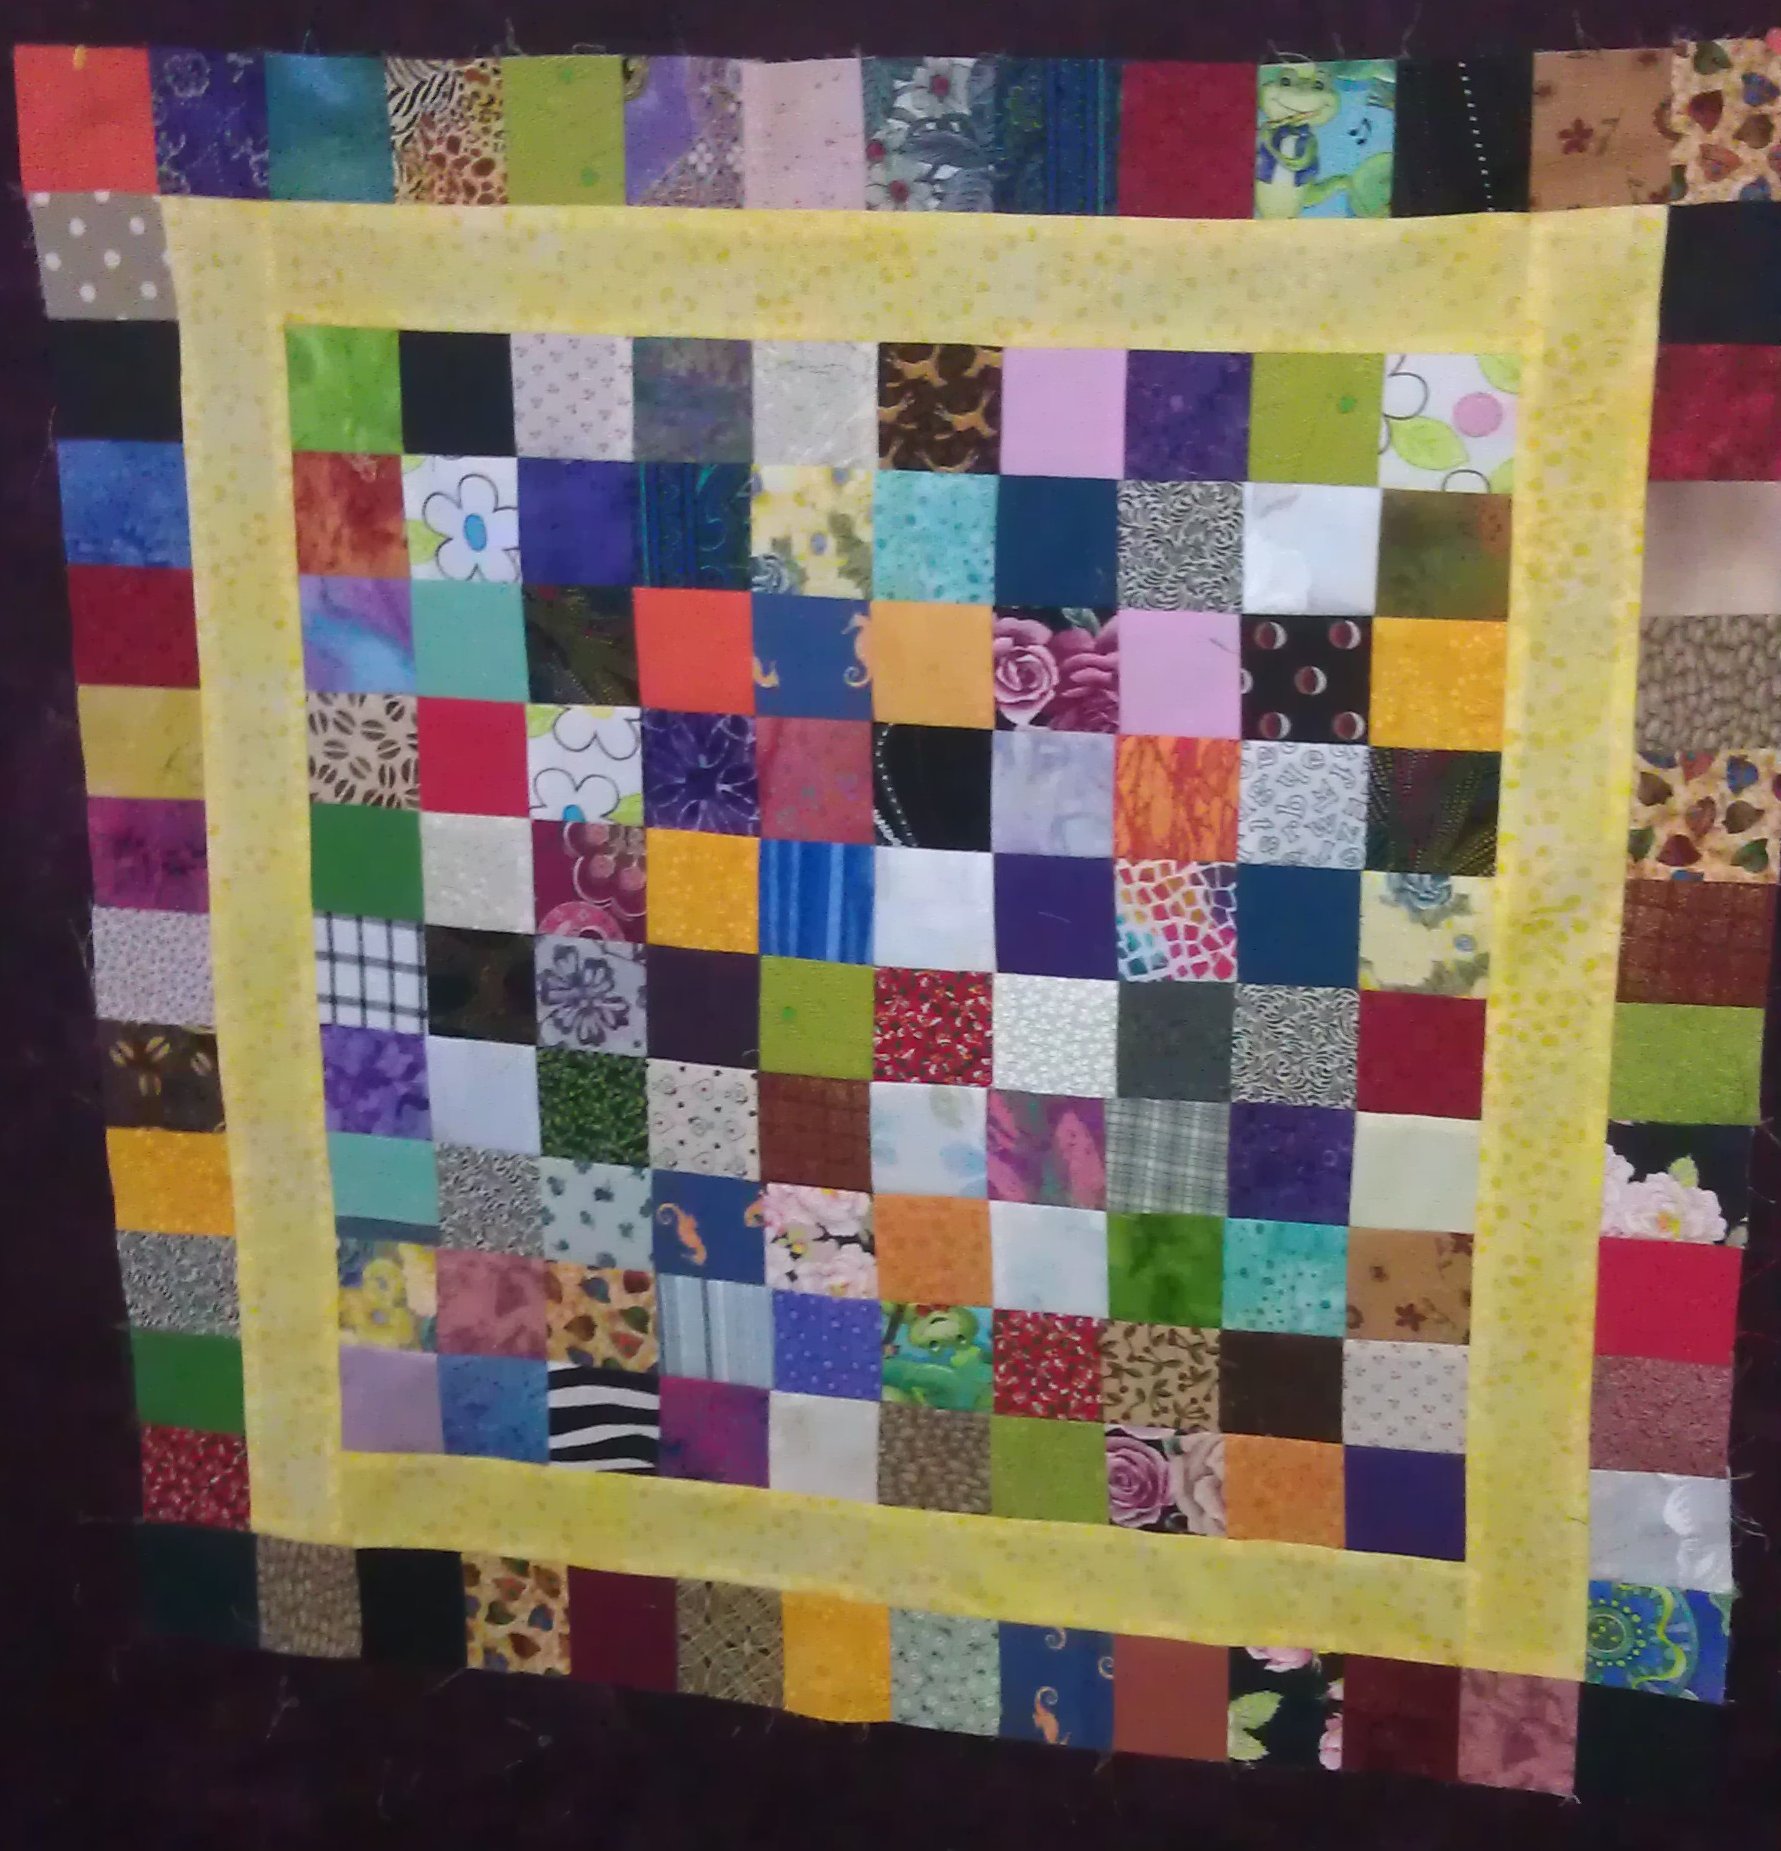
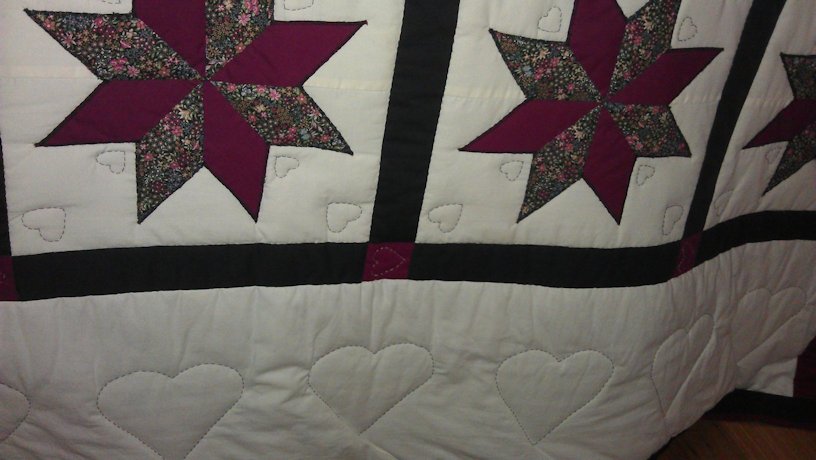
I learned to quilt back in the late 1980s. After making a few quilts, I stopped when life, work, etc. got in the way. One of the quilts I made back in the 1980s was this one, photographed in 2006 when our house in Perth was for sale:

old_quilt_00

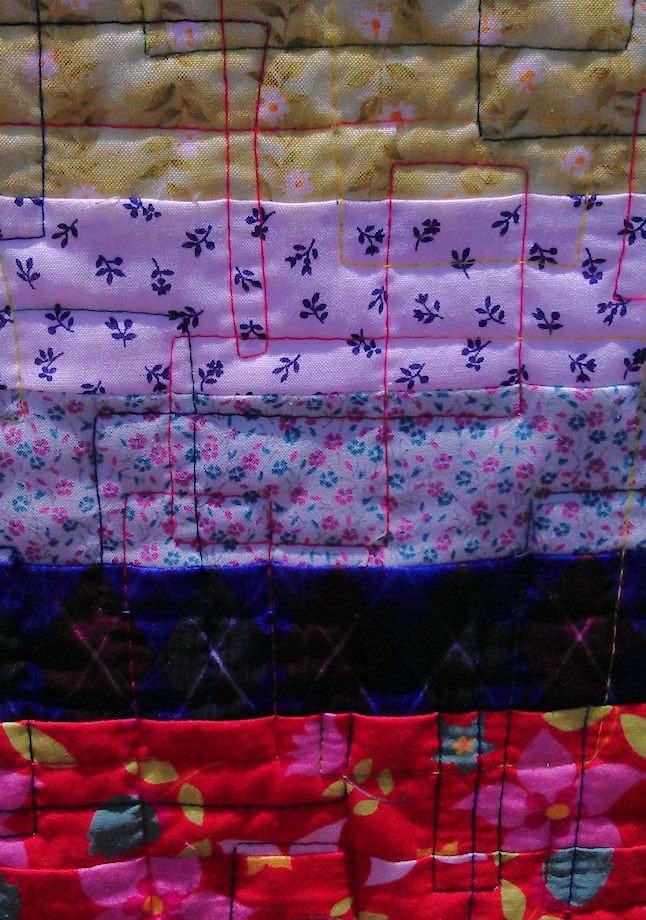
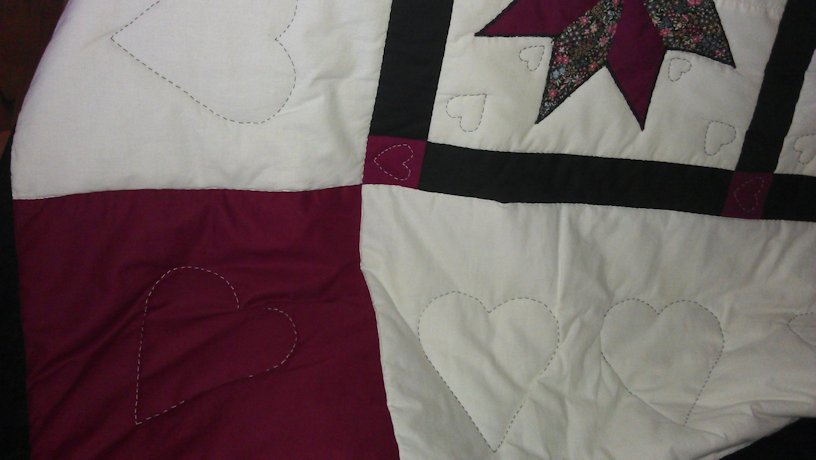
There was a lot wrong with it, including the horrible hand-quilted stitches I did in black thread on white. Yes, there was a time when I hand-quilted… long before I knew you could quilt on a machine! The stitches looked OK on the front, but they were shockers on the back. I remember stitching this big quilt inside a 16″ quilting hoop… I must’ve been MAD.

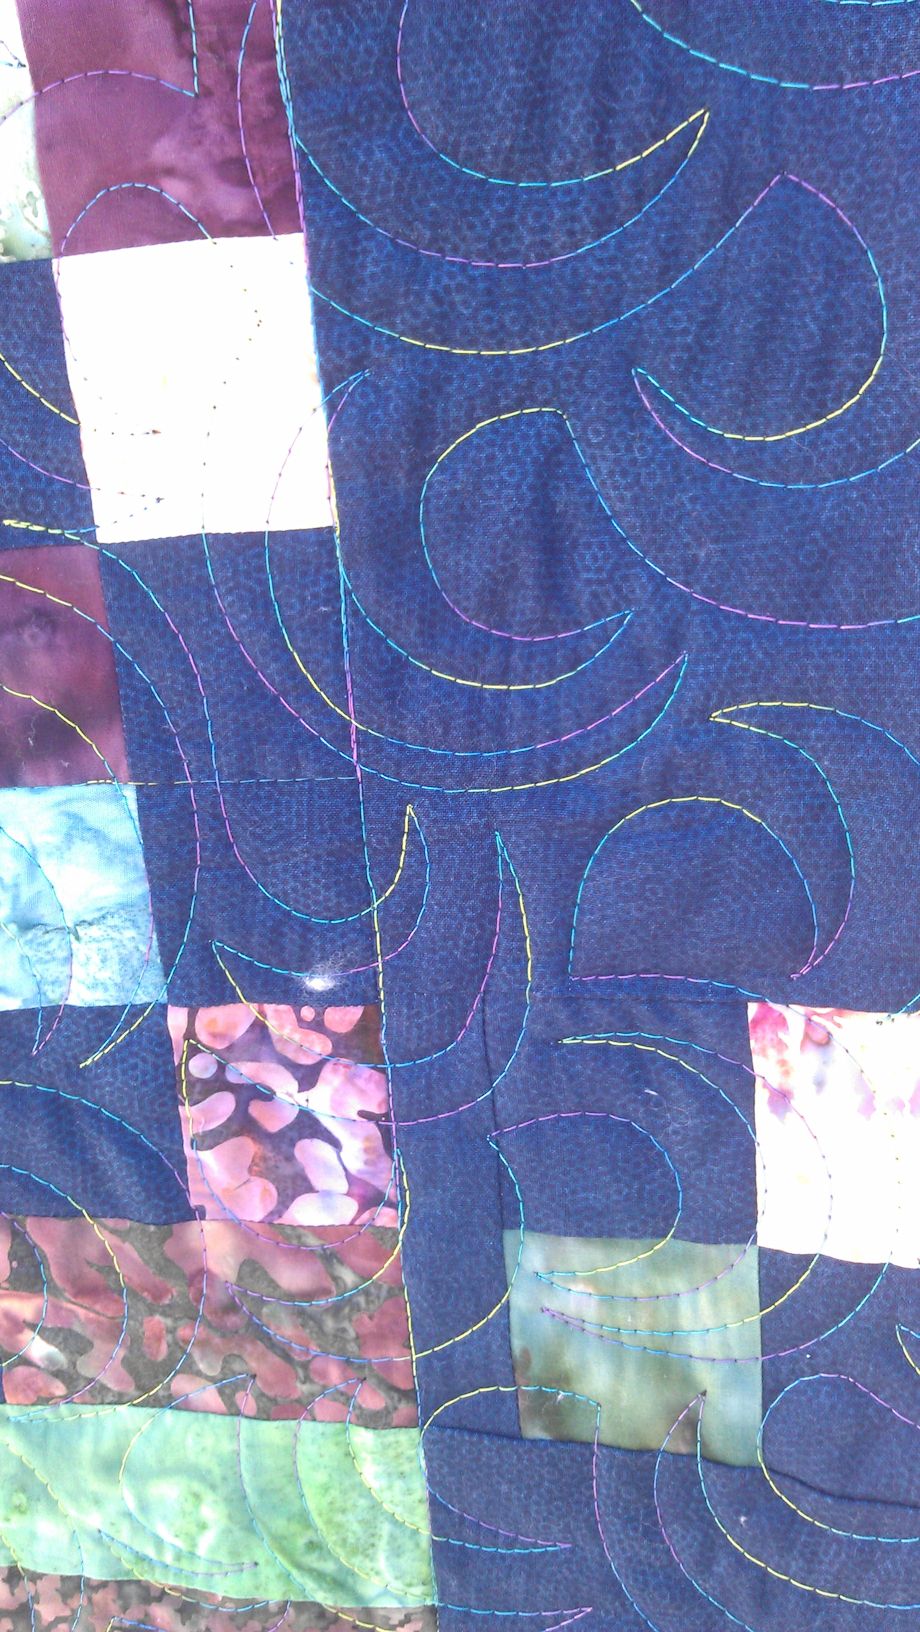
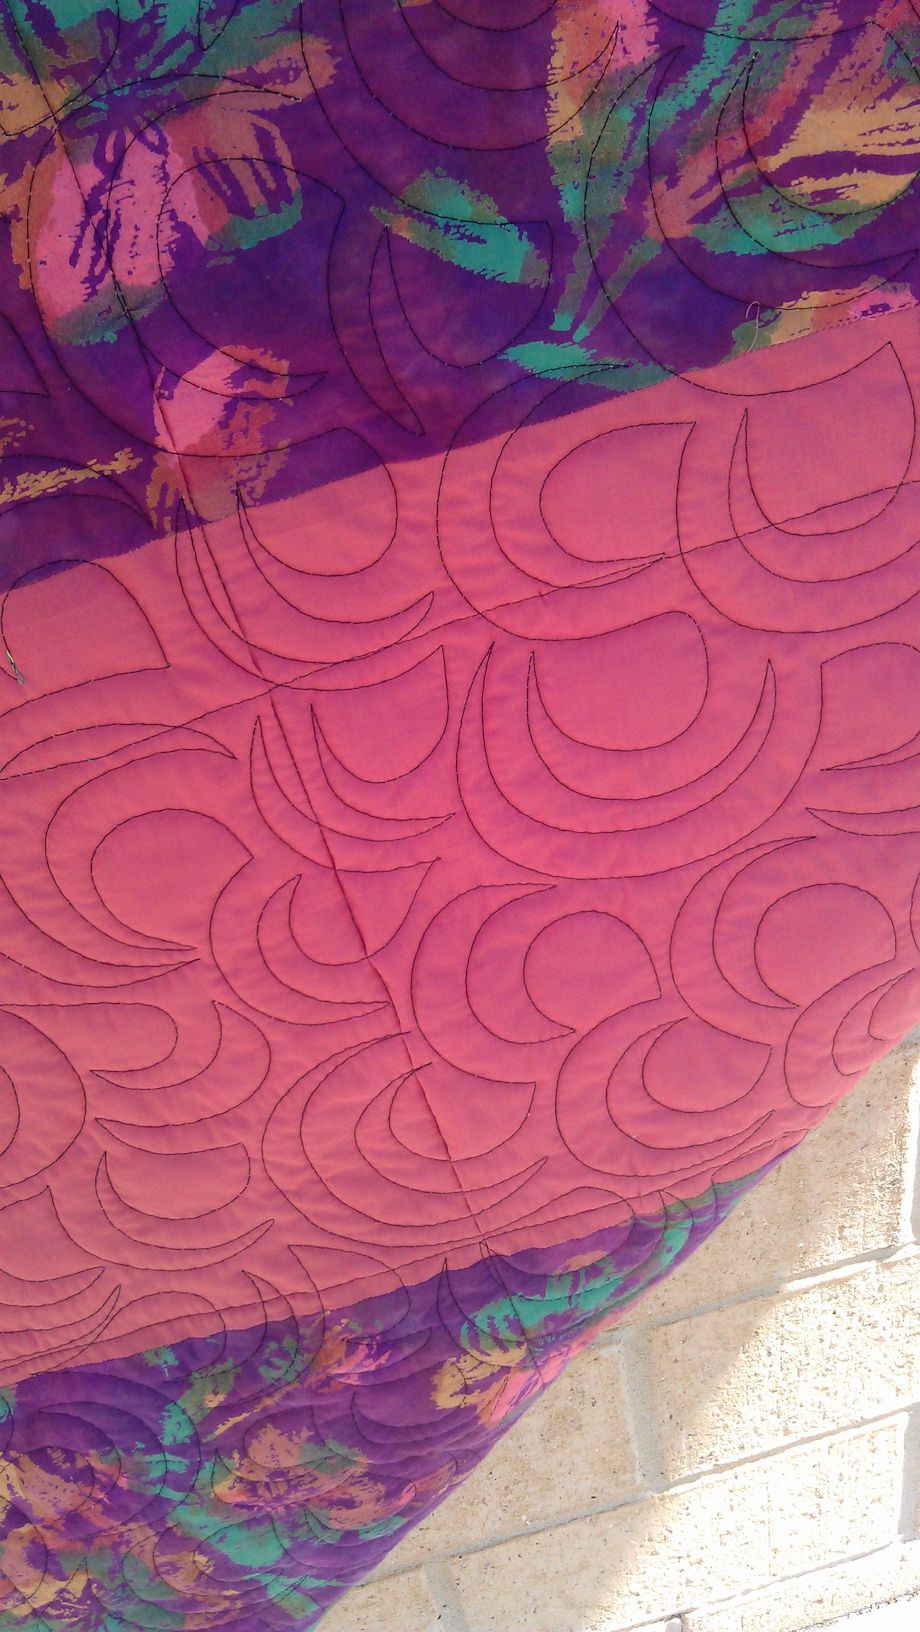
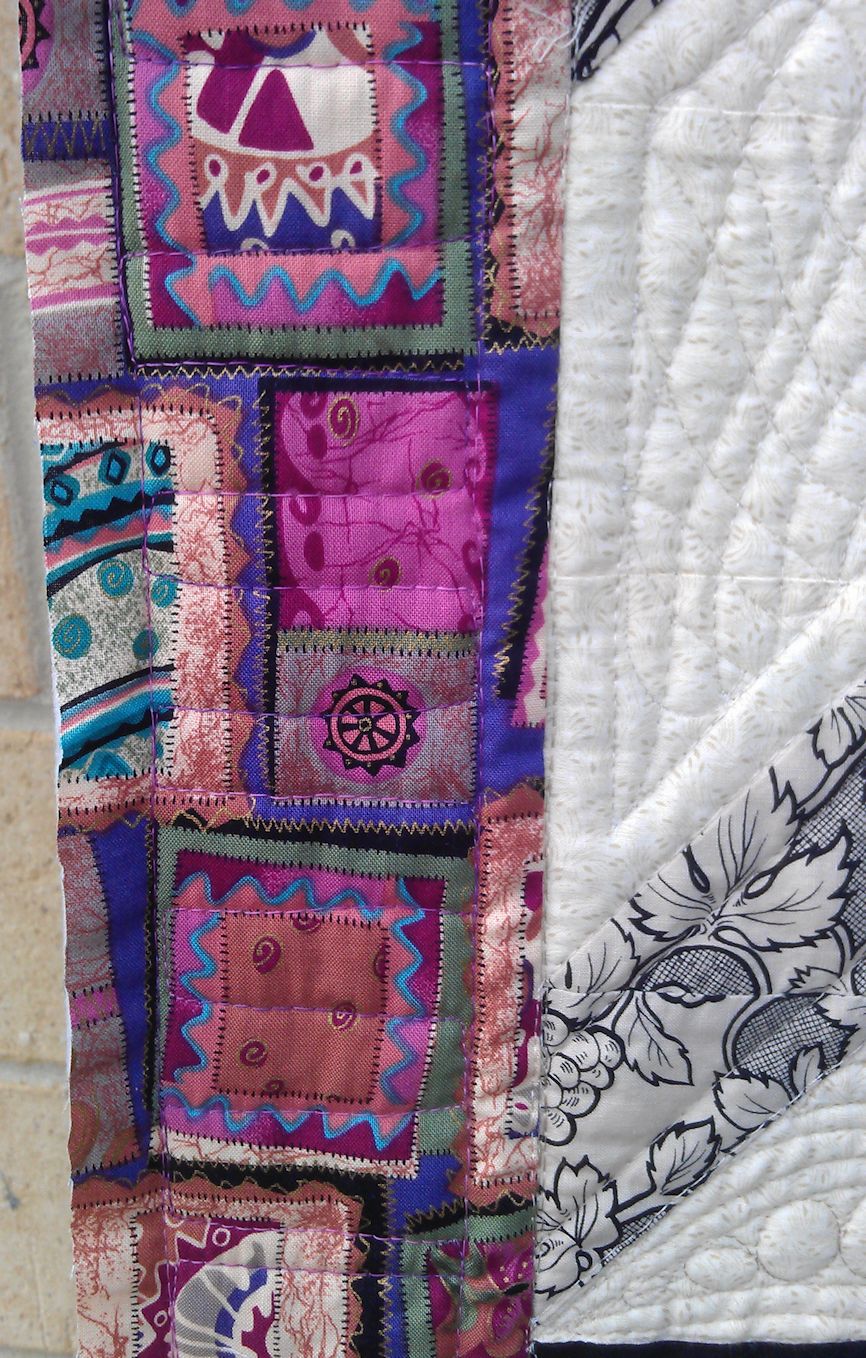
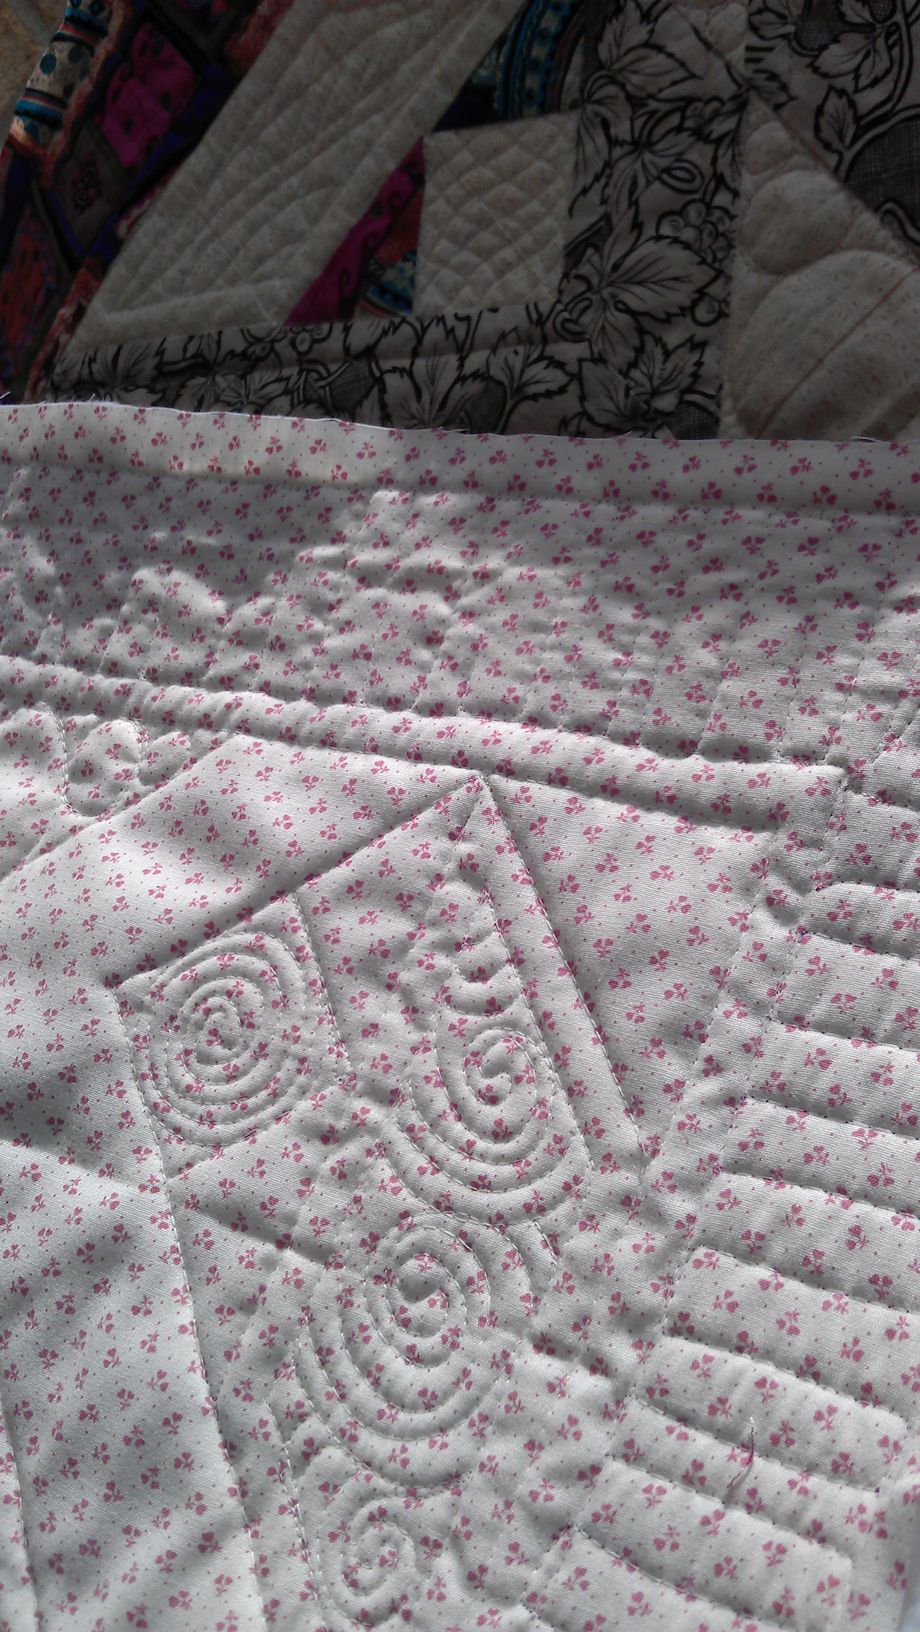
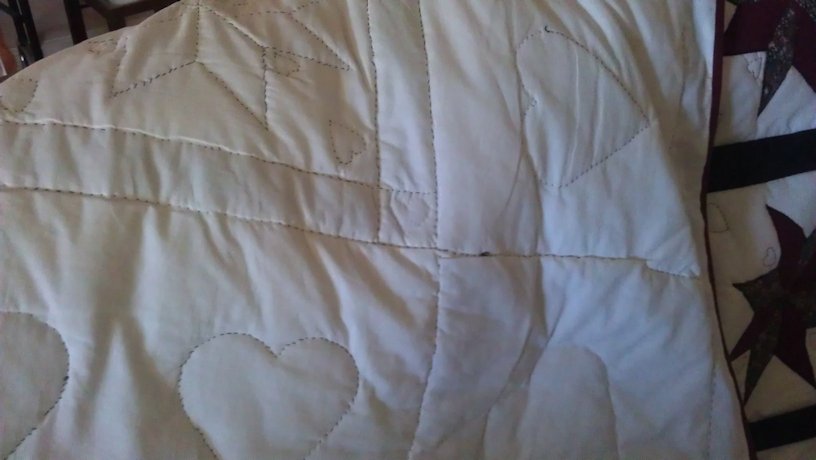
Here are some ‘before’ pictures of this quilt, including the embarrassing stitches on the back:

IMAG1619

IMAG1620

IMAG1623

As I was out of Community Quilts to quilt over the summer break while the coordinator was taking a well-deserved break, I decided to tackle this old quilt to try to breathe some life back into it.

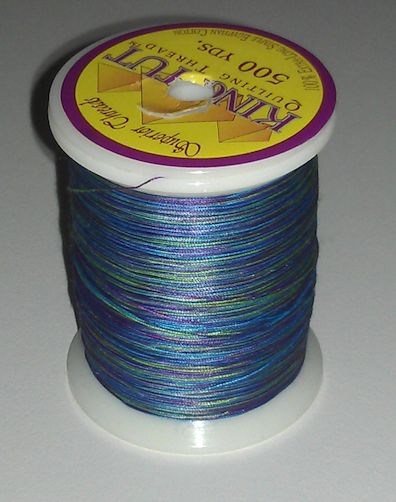
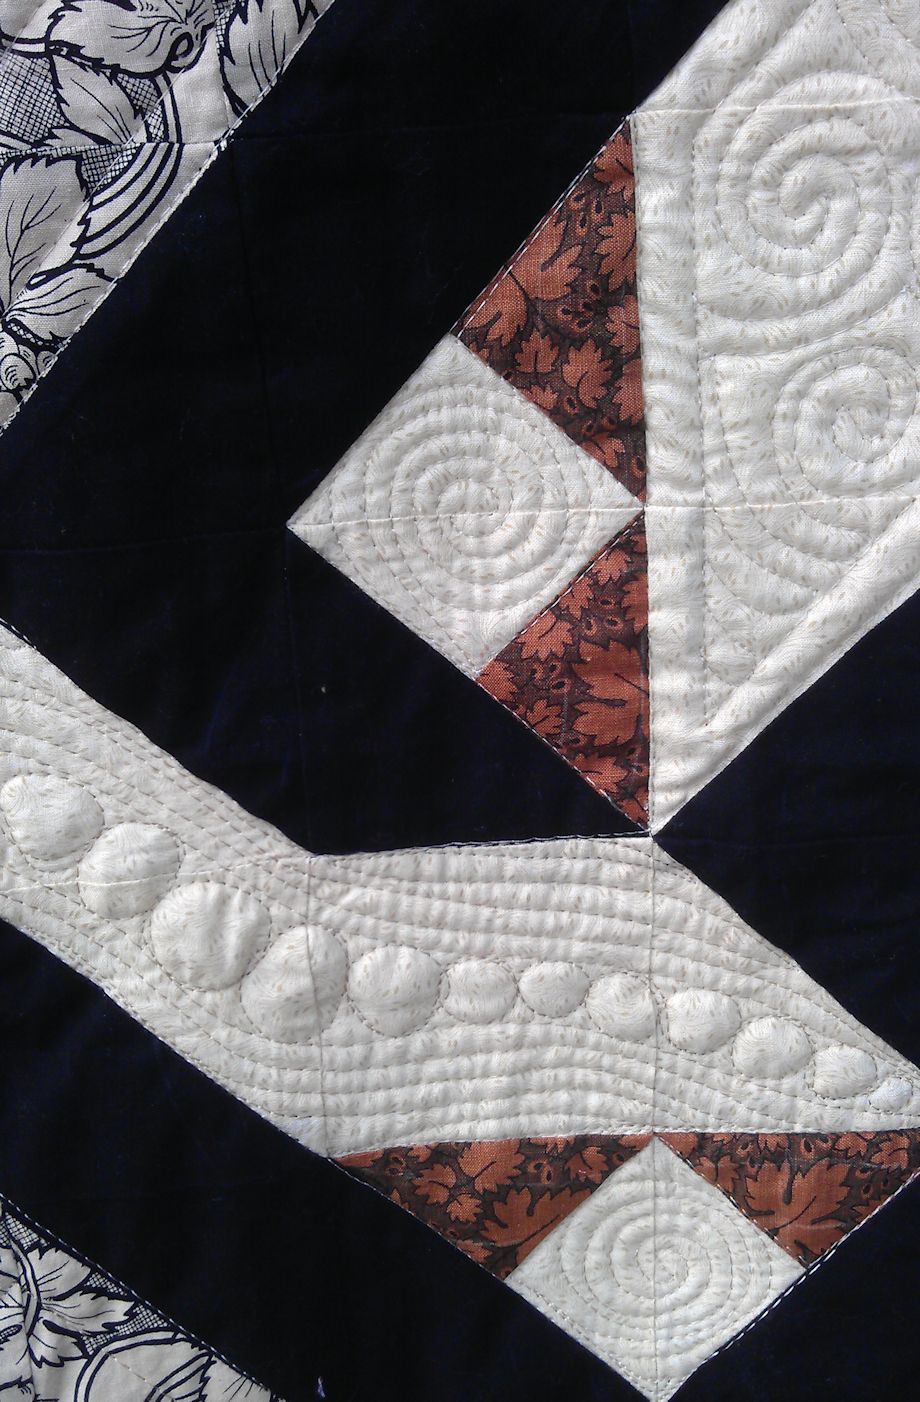
The first task was to stitch in the ditch around all the blocks and all the arms of each star. I started with invisible thread, but it kept snapping, so as my patience was wearing thin, I decided not to persevere with it and swapped to a slightly off-white thread (with black inside the stars).

Once I’d outlined all the main elements, I unpicked much of the hand stitching. That was a thankless task! And very time consuming. I was better than I thought back in the day and had knotted the stitches every six or so, which meant I couldn’t get a run on pulling out snipped stitches from one end. <sigh>

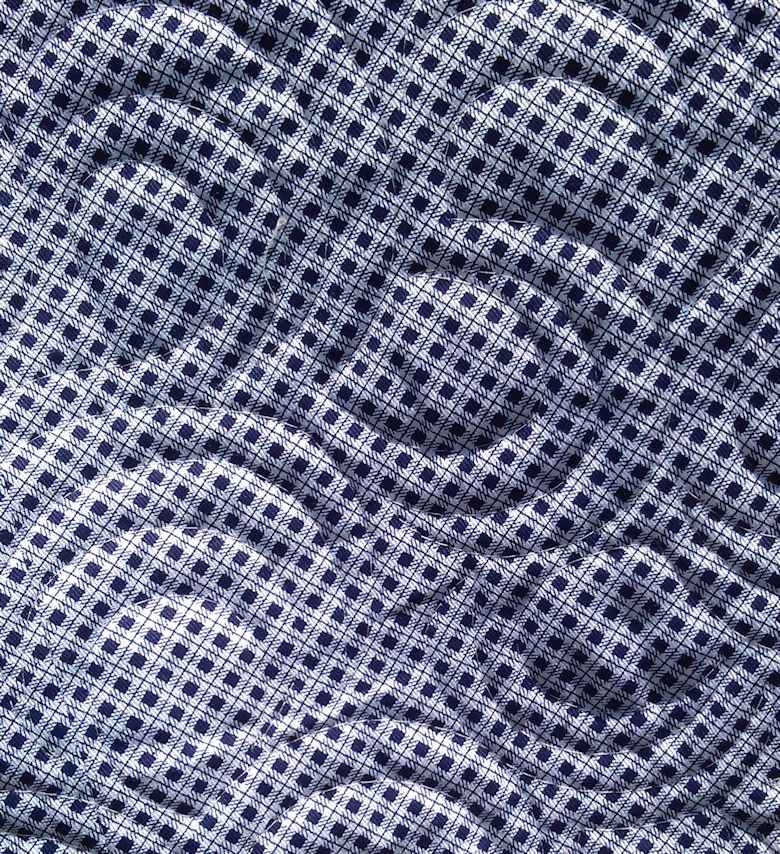
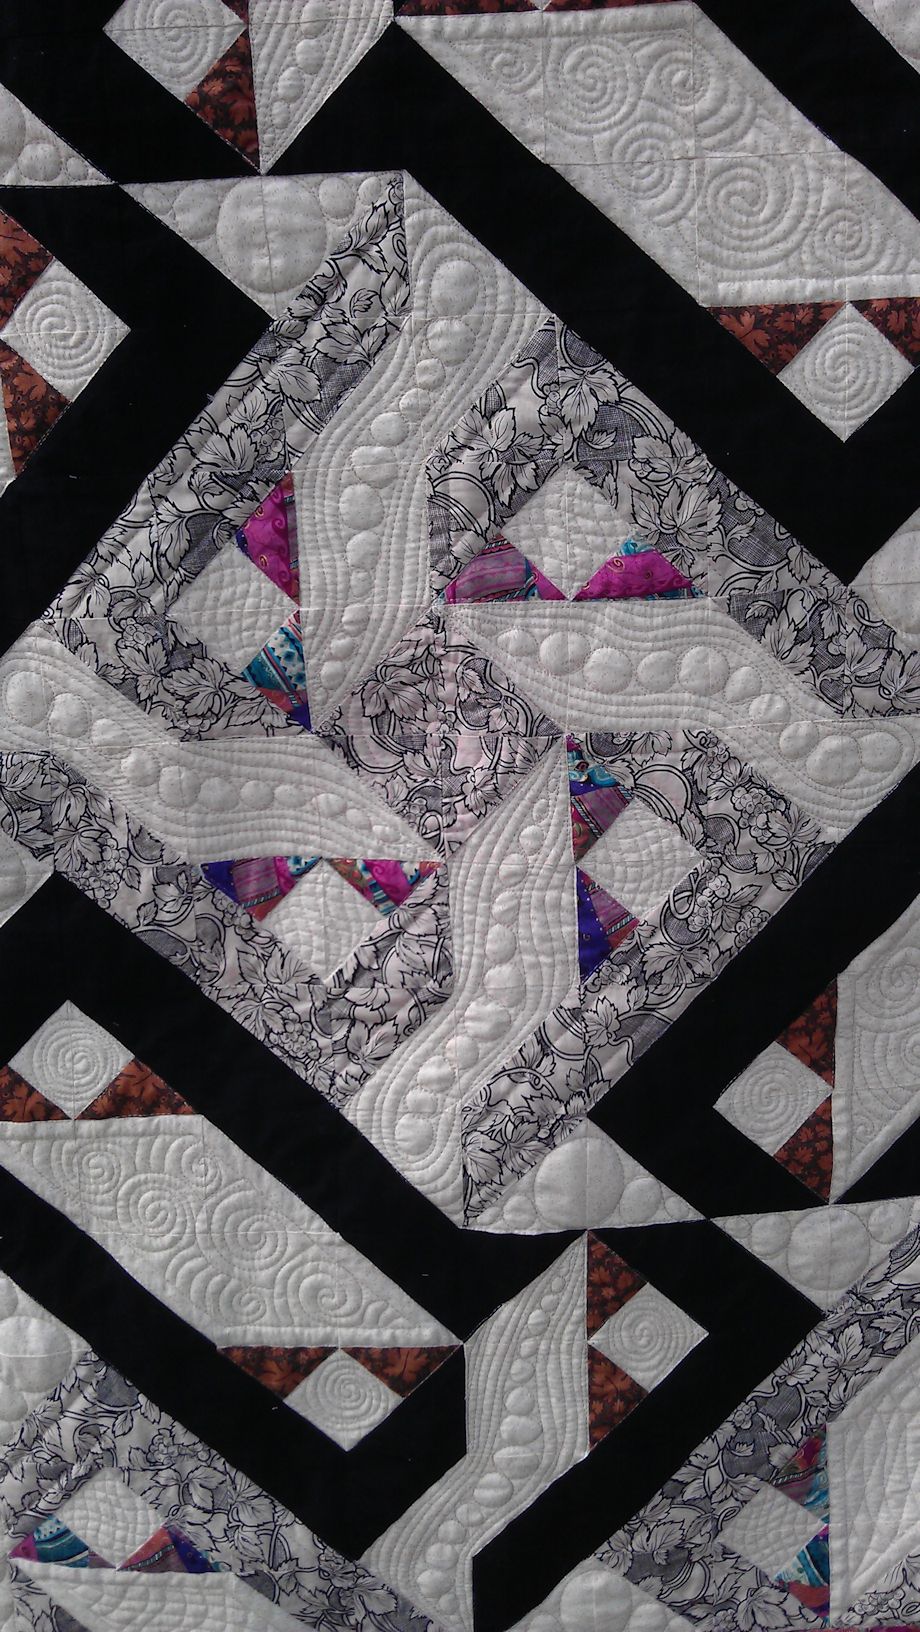
I decided to quilt the start blocks with McTavishing, making sure that I went up to but didn’t go into the little stars. I left the hand stitching on those.

IMAG1656

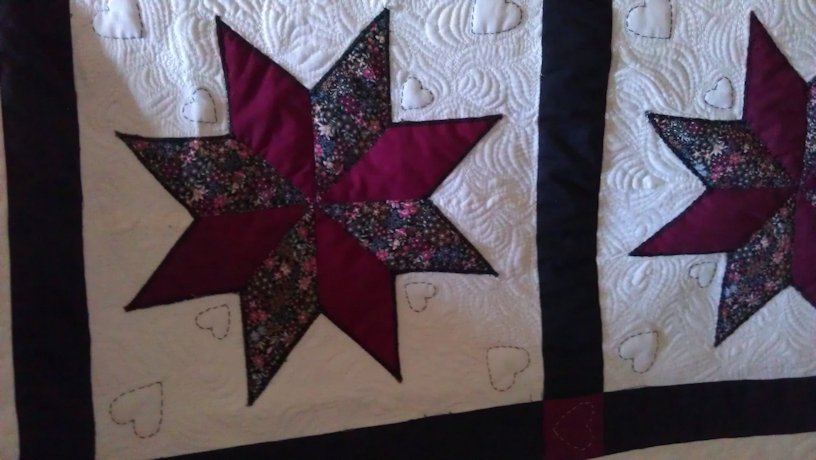
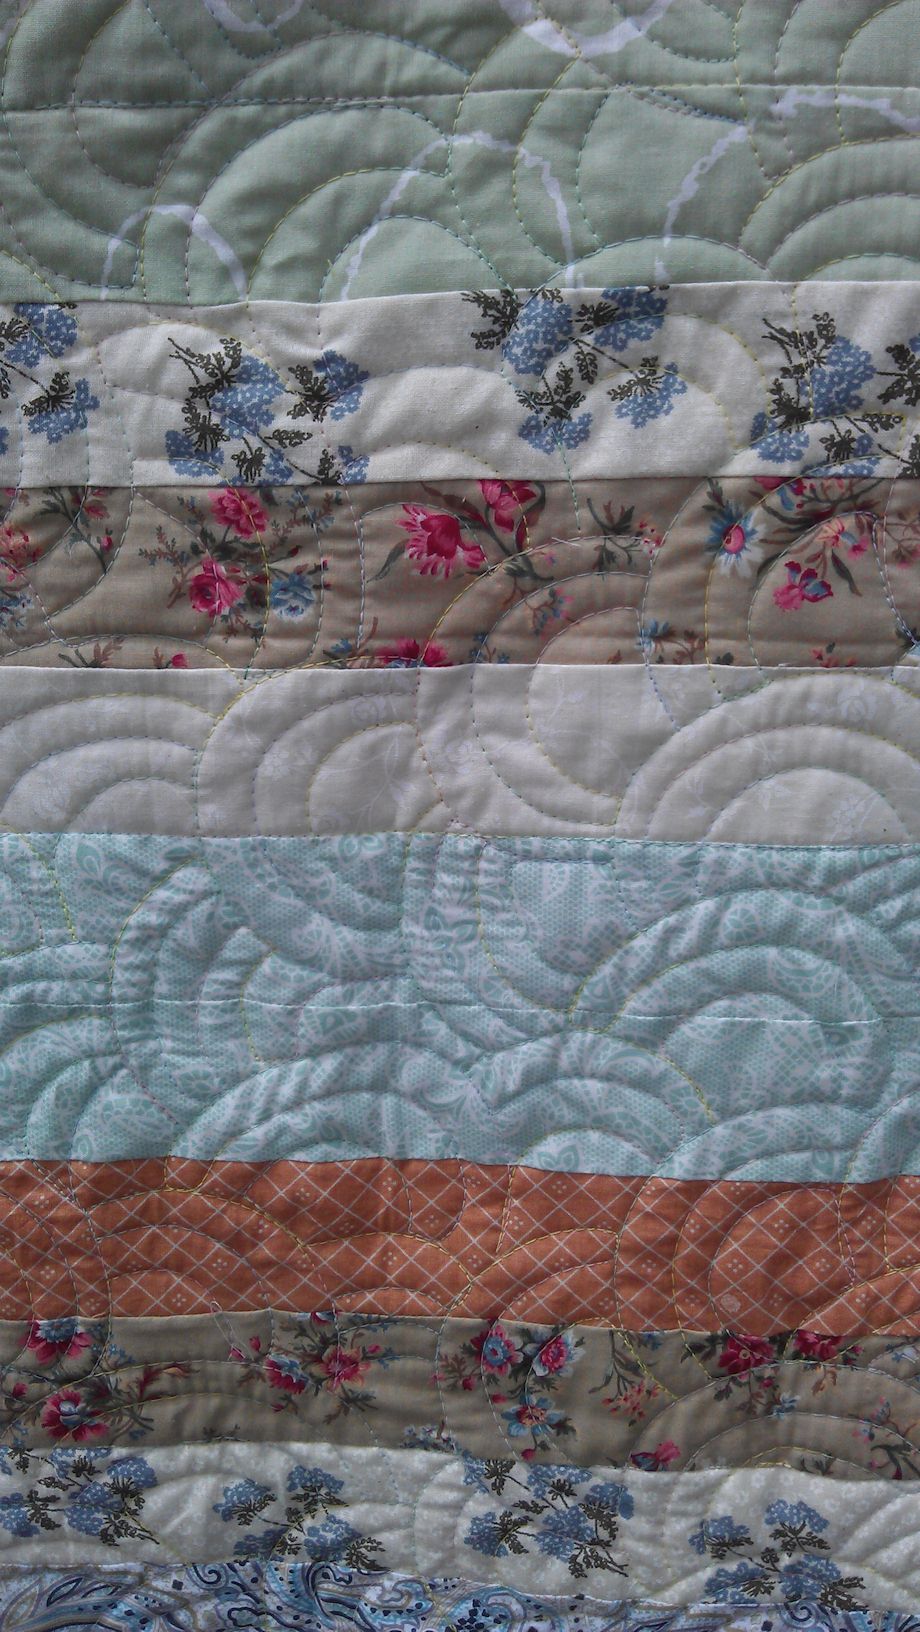
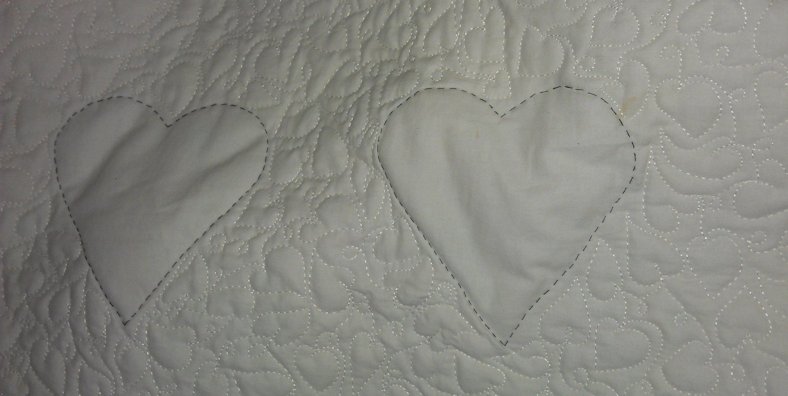
For the main border, I stitched lots of hearts and loops, again leaving the big hearts and the hand stitching for those. I didn’t quilt the black sashing strips or the maroon keystone pieces (in the sashing and the main border).

IMAG1651

A couple of things that I noticed when revisiting this quilt:

  • Who knows what batting I used in it! It was quite puffy, so it was probably a polyester wadding. It was puffy in some places, thin in others, overlapping in others (I could feel the overlaps), and non-existent in others mostly at the other border where I had obviously run out!
  • The binding was done with bias strips (who uses those anymore?) and was very uneven. In fact the whole outer border was a bit of a mess, so I didn’t try to quilt it. I left it as it was, though I did stitch in the ditch in the borders.
  • Puckering was obvious once I started quilting. It was probably a result of not cutting correctly on the grain. Where possible I either stitched it into submission or left it if at the outer border.
  • Marks on the fabric. There were a few marks on the fabric that looked like rust. As this quilt has hardly been used, who knows where they came from or how long they’ve been there. I didn’t try to remove them.
  • Colour fastness. I was surprised how well the colours have stood the test of time. None of the fabrics or the black thread appeared to have faded and none of the black thread I removed left any black dye. I doubt these fabrics were made or treated the same way as quilting cottons today, and it’s likely that some were just cottons from a fabric store, not special quilting fabrics.

I was quite pleased with the end result.

IMAG1653


Scrappy quilt: The middle

19 01 2014

Well, I only needed 400 squares for my scrappy quilt — 100 for each block. Making it 2 x 3 blocks would’ve made it HUGE, so as I wanted a lap quilt I stopped at 4 blocks (actually I made 5, and intend putting the 5th one on the back as a snuggly place for my feet in winter, like the old quillows).

With the sashing borders, more squares outside the sashing, and the main borders, this quilt is about 64 x 64 inches… plenty big enough for wrapping around me in winter (though it’s hard to think of winter when it’s close to 40C [104F] outside at the moment!).

Here’s a photo of one finished block, with the inner sashing border and the outer squares:

scrappy11

I’ve since added a wider yellow border in the same fabric as the sashing fabric around each block and put it all together ready for quilting. Actually, I started the quilting today, but I won’t take any more photos until I’ve finished it.

While white would have been a better choice to set off the multi-coloured blocks, I decided to use only fabric from my stash and NOT buy any more. I had a few metres of this lovely clear yellow batik I purchased in Bali a year or so ago, and it looked fine when I auditioned it against the blocks, so I went with that. Besides, a quilt that is in heavy use in the living room while watching TV and potentially drinking red wine or eating a snack is just asking for spillage if I did it in white!

The backing fabric as also from Bali, but that will remain a surprise until I finish it and take the photos.


Handi Quilter Sweet Sixteen bobbin case

30 12 2013

When is an M bobbin case not an M bobbin case? When it’s made by different manufacturers for different machines! Currently, there’s a discussion on the forum for the owners of sit-down models of quilting machines about the M bobbin case for the Handi Quilter Sweet Sixteen/Babylock Tiara, and one of the members posted a picture of the black spring she was told to remove to use the pre-wound Glide bobbins. The problem is that my bobbin case DOES NOT have this black spring and I suspect never had it as I can’t recall seeing it. (Update: Newer Sweet Sixteens have bobbin cases with the black spring.)

So I took some photos of my only bobbin case — the one that came with my Sweet Sixteen machine back in April 2011 — so that I’d have them on hand for future reference. I took several photos from different angles.

The only ‘spring’-like thing INSIDE my bobbin case is the flat metal piece that’s screwed into the housing — you could not remove it without first removing the screw. On its inner side, this flat metal piece has a straight edge, then sweeps into a scythe-like curve. Also, note the width and shape of the bobbin case opening (not the ‘fingers’ surrounding the opening, but the opening itself) — it’s a sort of skinny ‘D’ shape.

bobbin_case05

bobbin_case02

bobbin_case03

bobbin_case04

bobbin_case01

As a result of this discussion, I went searching for M size bobbin cases on the internet and found that there are all sorts of variations of these. Below I some photos I grabbed from the internet. Notice the shape of the opening, the ‘spring’ shape, and the black spring (in some cases), and even a ‘pigtail’ spring. They are all a little different to the bobbin case I have. So buyer beware! If you purchase any old M size bobbin case from the internet, it may not be the correct one for your machine!

bobbin_case_tin_lizzie

Tin Lizzie

bobbin_case_pfaff

Pfaff

bobbin_case_gammill

Gammill

bobbin_case_japanese_A1_long_arm

Japanese A1 long-arm


Scrappy quilt: The start

26 12 2013

I’m in the process of making a lap quilt from my scrap fabrics. I bought a Go! Cutter with a 2.5 inch square die to cut the hundreds of 2.5 inch squares I need for this quilt. The pattern I’m using is this one: http://weddingdressblue.wordpress.com/2011/07/06/100-patch-quilt-tutorial/

The first step in the process was to cut out hundreds of squares! I counted up how many I cut, and it came to more than 2000, and still I had scraps left over. I didn’t touch my fabric stash at all. Using the Go! Cutter saved my sanity — you can cut up to 54 squares at a time and they are ALL the same size and ALL correct. I put them into ziplock bags according to colour and then I left them for a few weeks until I got inspired to start stitching them together. (And to avoid this mammoth task in the future, now when I have offcuts from a quilt, I save the larger pieces and put the smaller ones through the Go! Cutter then add them to the relevant coloured baggie. Even smaller ones either then go into the bin, or I donate them to the local library for their children’s craft activities over the school holidays — small offcuts of wadding make great sheep and snow!)

scrappy01

Squares in baggies AFTER I’d used up 1160 of them!

I grabbed two pieces from the baggies, then stitched them, chain stitching the next two and so on. I stopped stitching at about 580 pairs, and STILL I have hundreds of 2.5 inch squares left over! If I need more, I’ll just raid my baggies of squares…

scrappy03

scrappy02

I call these long chain stitched pairs my ‘prayer flags’ as they remind me of the prayer flags in Nepal

The next step was ironing each pair open and snipping the joining threads. What a mindless task that was! Now I had a cutting table covered in pairs of squares…

scrappy04

scrappy05

Yes, I counted how many pairs I had — see notebook on the right.

After a few more days/weeks of avoiding the next task, I got into it while I was on leave just before Christmas. And that task was deciding how to put these pairs together. It would be easy to just grab a pair and then stitch the next pair I grabbed to it, but I wanted to make sure I had a balance of lights and darks, brights and pastels, etc. so I placed the pairs on my design board (thank goodness for that design board — this task would have been a nightmare otherwise).

scrappy07

Once I was happy with the ‘randomness’ of colours, tonal values etc., I stitched the first row of 10 squares (5 pairs) together, then pinned them back up. Then the next row and the next until all 10 rows were stitched.

Next came more pressing, this time pressing all the seams in one row the same way, then in the opposite direction for the next row and so on until all 10 rows were pressed. I pinned each row back up on the design board as it was pressed.

scrappy08

scrappy09

Next came joining rows 1 and 2 together, then 3 and 4, 5 and 6 and so on, nesting the seams together, and pressing the new seam in one direction.

I now had 5 pairs of rows of 10, so these had to be stitched together too, and the seams pressed.

Finally I had a single block of 100 squares!

scrappy10

I think I’ll need six 100-square blocks for my lap quilt — 2 across, and 3 down. That’s only 600 squares from my stash of 2000+ 2.5 inch squares….

More details as I create the quilt…

Already I reckon I’m about 10 hours (or more) into it, with many more hours to go. Anyone who thinks that paying $300 for a hand-made quilt at a craft fair is too much, has NO idea of how much time and effort goes into it (see this blog post for the costings for a quilt I made a couple of years ago: https://rhondabracey.com/2011/11/06/cost-of-craft-work/).

See also: https://rhondabracey.com/2014/01/28/scrappy-quilt-finished/


Community Quilt 130

8 12 2013

This was the final one of the current batch. Again, it was a bright scrappy quilt. How to quilt it?

I figured there was more than enough going on in this quilt as far as colour and pattern went, so I opted for an all-over continuous line motif — one of my old favourites: the ‘open headband‘ motif. I made the arcs quite large, which meant I was able to quilt this quilt in just over an hour (I continued the motif into the border so I didn’t have to quilt that separately).

I used a variegated thread in blue, purple, and green, which I thought matched the quilt quite well.

(Click on a photo to view it larger)

quilt130_01

quilt130_02

Back:

quilt130_03

quilt130_04

Threads used:

  • Top: Superior King Tut ‘Arabian Nights’ (40 wt, cotton, colour #935)
  • Bottom: Bobbinfil (white)


Community Quilt 129

8 12 2013

Another scrappy jelly roll strip style quilt… this time in reasonably bright colours. While I quite liked the effect of the strips in the quilt, I’m not sure the border fabric adds much — while the colours are OK, the floral pattern clashes in my opinion.

I decided to quilt this one ‘modern’ style, with continuous line stitching in a square/rectangle motif. I used a variegated overlocker thread in primary colours that I’ve had for YEARS, which I though worked quite well with the colours in the quilt.

(Click on a photo to view it larger)

quilt129_01

quilt129_02

quilt129_03

Threads used:

  • Top: No idea! It’s a variegated overlocker thread in primary colours that I’ve had for years and there’s no label on the spool
  • Bottom: Bobbinfil (white)


Community Quilt 128

8 12 2013

This was a pretty pastel scrappy quilt, done in a jelly roll strip style. The temptation was to quilt it ‘modern’ style, but I decided to use a soft rounded motif instead, using a variegated soft pastel thread.

I like how it turned out.

(Click on a photo to view it larger)

quilt128_01

quilt128_02

Back:

quilt128_03

quilt128_04

Threads used:

  • Top: Wonderfil Silco (40 wt; cotton; color #SCM03)
  • Bottom: Bobbinfil (white)


Community Quilt 127

30 11 2013

This was a big quilt, made mostly with batiks in purples, pinks, yellows, blues and greens.

After stitching in the ditch around all the large blocks and the border and the outer edge, I decide to counter the rectangular/square design by quilting it in a rounded motif. I used my favourite ‘open headband‘ motif, making the arcs much larger than usual to try to get this quilt stitched fairly quickly as I wanted to get it back to the Community Quilts coordinator on Monday. I extended the quilting design into the border.

I really liked how the King Tut variegated thread (in blues, greens, purples and yellows) matched the fabrics so well.

(Click on a photo to view it larger)

quilt127_01


quilt127_02

quilt127_03

Back:

quilt127_04

Threads used:

  • Top: Superior King Tut ‘Cairo’ (40 wt, cotton, colour #932)
  • Bottom: Bobbinfil (black)


Community Quilt 126

30 11 2013

I quite liked this quilt — even though the colours weren’t my preference, they went well together. Normally with a sharp geometric block design like this ( a disappearing nine-patch, if I’m not mistaken), I’d soften it by quilting a curved/rounded motif. But not this time — the quilt design and colours just begged to be stitched with a rectangular motif 😉

This is a continuous line motif I’ve used several times before. It’s pretty easy to do as there really are no rules. And no rulers either 😉

(Click on a photo to view it larger)

quilt126_01

quilt126_02 Threads used:

  • Top: Fil-Tec Harmony ‘Tweed’ (40 wt, cotton, colour #14076)
  • Bottom: Bobbinfil (black)


Community Quilt 125

17 11 2013

This was an odd quilt — I didn’t ‘see’ the pattern in it until I saw it as a thumbnail image on my camera, and by then I’d already quilted it ;-). The pink/purple with the cream/black/brown was also odd, although looking at it finished, it seems to work.

(Click on a photo to view it larger)

quilt125_02

How to quilt it? Well, as there were so many odd-shaped blocks, I started by stitching in the ditch (ESS, yes EVERY one!). Then I quilted the small cream squares — in the ones surrounded by the cream and black floral fabric I stitched a wavy cross-hatch matrix, and on the ones surrounded by the black fabric I stitched a spiral.

quilt125_05

I followed that by echo stitching 1/2″ in from the edges of each diamond shape, then repeating the wavy matrix in the diamonds within the cream/black floral, and spirals in the diamonds within the black fabrics. So that took care of those spaces.

quilt125_10

Now, what to do for the odd-shaped beige spaces? I started by stitching the centre square in a big spiral, then came out from each corner with a snake-like sweep down the odd-shaped spaces, filling in with circles, then echoing the stitching about 1/4″ from the initial sweeps. I repeated that motif in the other odd-shaped cream spaces on the rest of the quilt.

quilt125_03

For the large cream triangles, I stitched a large circle, surrounded by two smaller circles on each side. Then I straight stitched about 1/2″ in from the seams of the cream/black fabric pieces. I didn’t stitch the black fabric or the pink or brown triangles at all. For all of this stitching, I used a dark cream thread (I ran out of the Madeira, but fortunately had a Robison-Anton thread almost the same colour).

quilt125_09

The border fabric was strange, with pink/blue/purple squarish shapes in it. I kept it simple by stitching a straight line 1/2″ in from the seam and 1″ in from the edge, then stitched perpendicularly between these two lines to create a ladder or bookshelf effect.

quilt125_08

The only ruler I used was the Line Tamer for the long straight lines and stitching in the ditch — everything else was free motion quilted, including the perpendicular lines in the border.

The back:
quilt125_01

Threads used:

  • Top: Madeira (rayon, 40 wt, colour #1082); Robison-Anton ‘Platinum’ (rayon, 40 wt, colour #2571); Superior King Tut ‘Egyptian Princess’ (cotton, 40 wt, colour #947)
  • Bottom: Bobbinfil (white)