Quilting Adventures 2015: Day 5

25 03 2015

Last day at Quilting adventures (QA today). We did a bit more stuff on marking fabrics, this time with oil- and water-based crayons. And then it was time to say goodbye for another year to old friends and new.

I stayed overnight in New Braunfels (Gruene, actually [pronounced ‘Green’]) with Kim and her Mom–the QA organisers. Kim showed me some of the Hill Country around New Braunfels, which I had never seen before despite this being my third trip to the town. What a pretty place! I can see why tourists keep coming back. We also walked some of the old area of Gruene, including the Gruene Hall, where many a famous act has played. Check out the line-up for April:

P1030596


Quilting Adventures 2015: Days 3 and 4

13 03 2015

We’ve spent the past two days learning to use Tsukineko All-purpose Inks, Fantastix applicators, and Fabrico markers (also Tsukineko), as  well as artists’ coloured pencils and oil crayons to enhance fabric. Lura Schwarz Smith taught this part of the class. So much of the past two days was learning the techniques via demonstration and some hands-on practice; however, there’s not a lot of ‘product’ to show for how much we’ve learned, so there aren’t many pictures. I finally did some stitching late this afternoon prior to the walkthrough of everyone’s classes, doing some thread painting of the hair and shirt of the boy’s face I had traced and coloured with inks, markers, and pencils yesterday and last night after ‘show and tell’.

After a rocky start with drawing a face yesterday (guided by Lura), I felt much more comfortable working from a line drawing, tracing it onto fabric, and then shading it with the various media. It was quite amazing (and scary!) how some horrible emotions bubbled to the surface during the freehand drawing phase — faces were one of things I was awful at when I did Art at school (I was fine with still life, pattern and design, and poster work, but could never get faces right… all those yucky feelings came back…).

I also had two more photos printed onto fabric, taking advantage of the printer that Kerby and Lura had bought with them.

I won’t have a chance to start stitching work on any of the photos I’ve had printed until I get home — we’ve had so much learning of techniques in this workshop that there hasn’t been much time to ‘do’ and work on our own pieces. But that’s OK. Learning new stuff is why I chose this workshop. That said, I guess I’m a bit disappointed that I haven’t made any progress on the photos I had printed. However, that was MY expectation based on previous experience at other workshops; Lura and Kerby have definitely fulfilled all the expectations listed for the workshop.

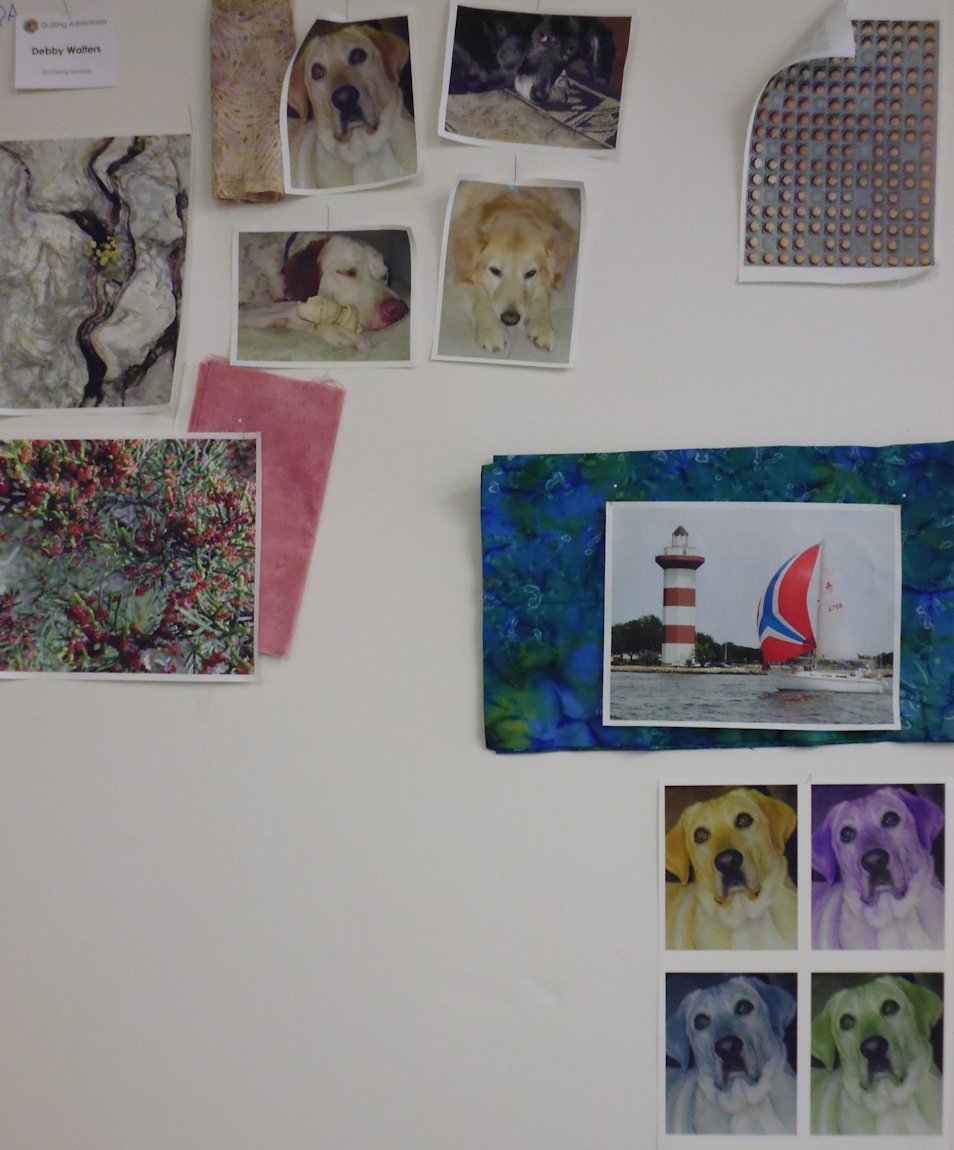
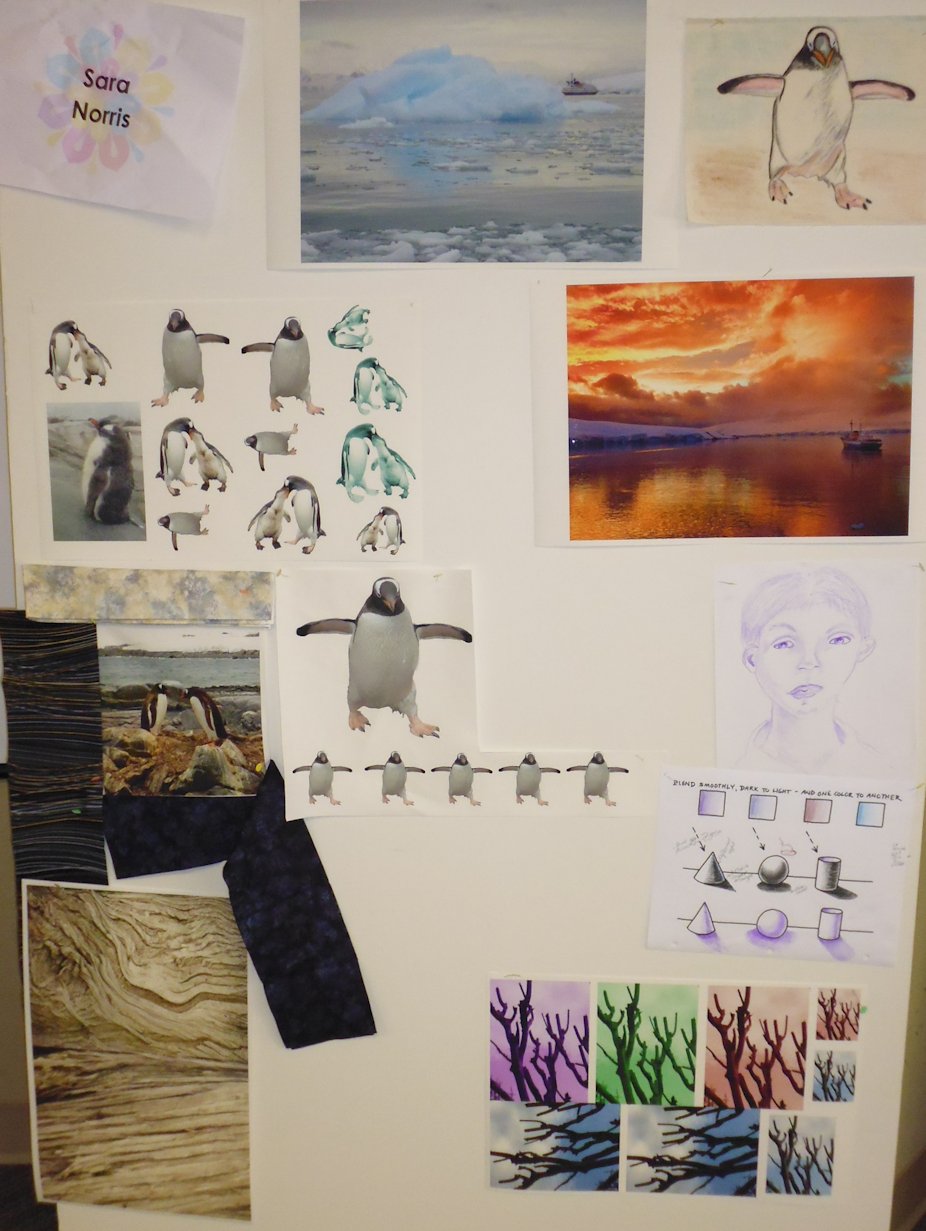
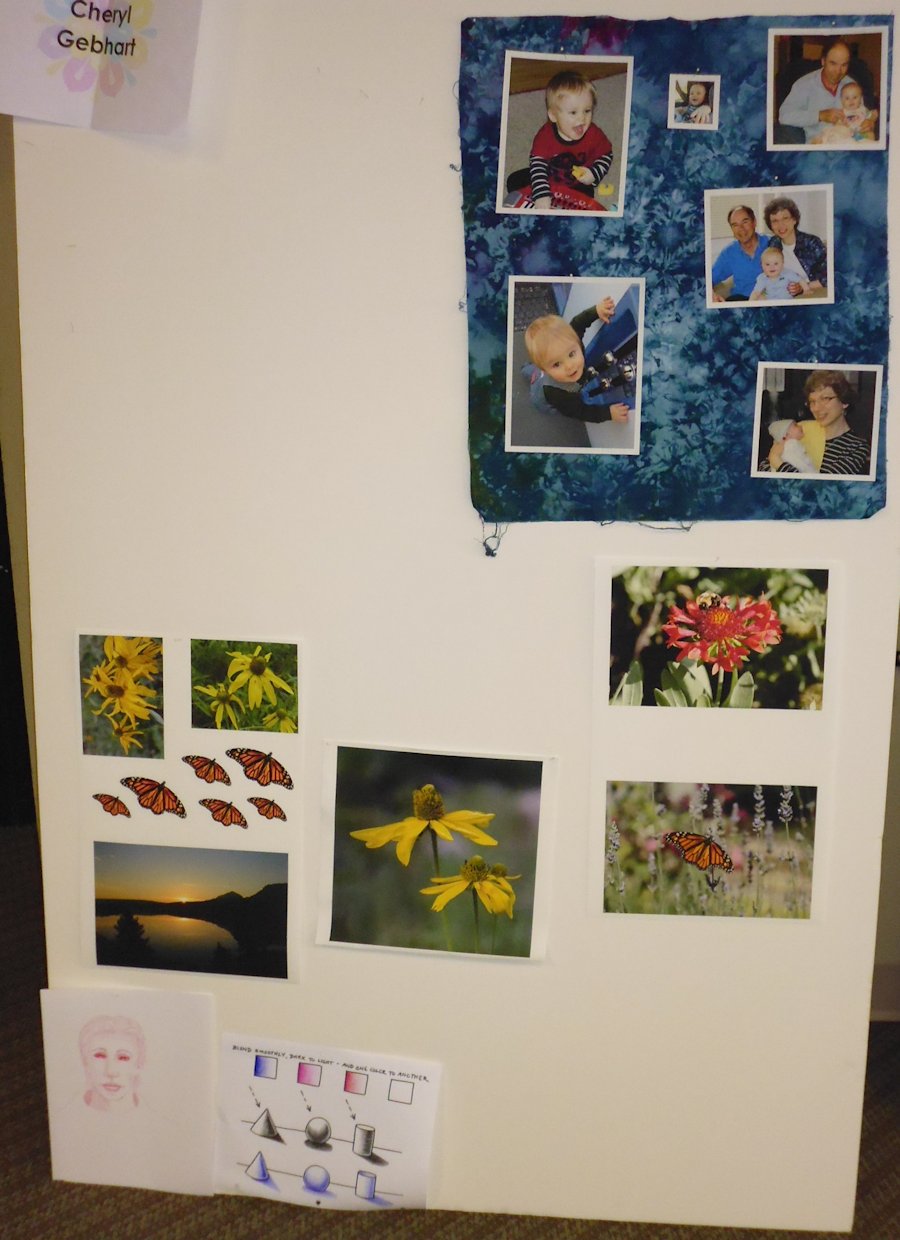
Here are the photos from the end of today for each of the students in my class (all five of us!).


P1030580

P1030581

P1030582


P1030584

P1030579

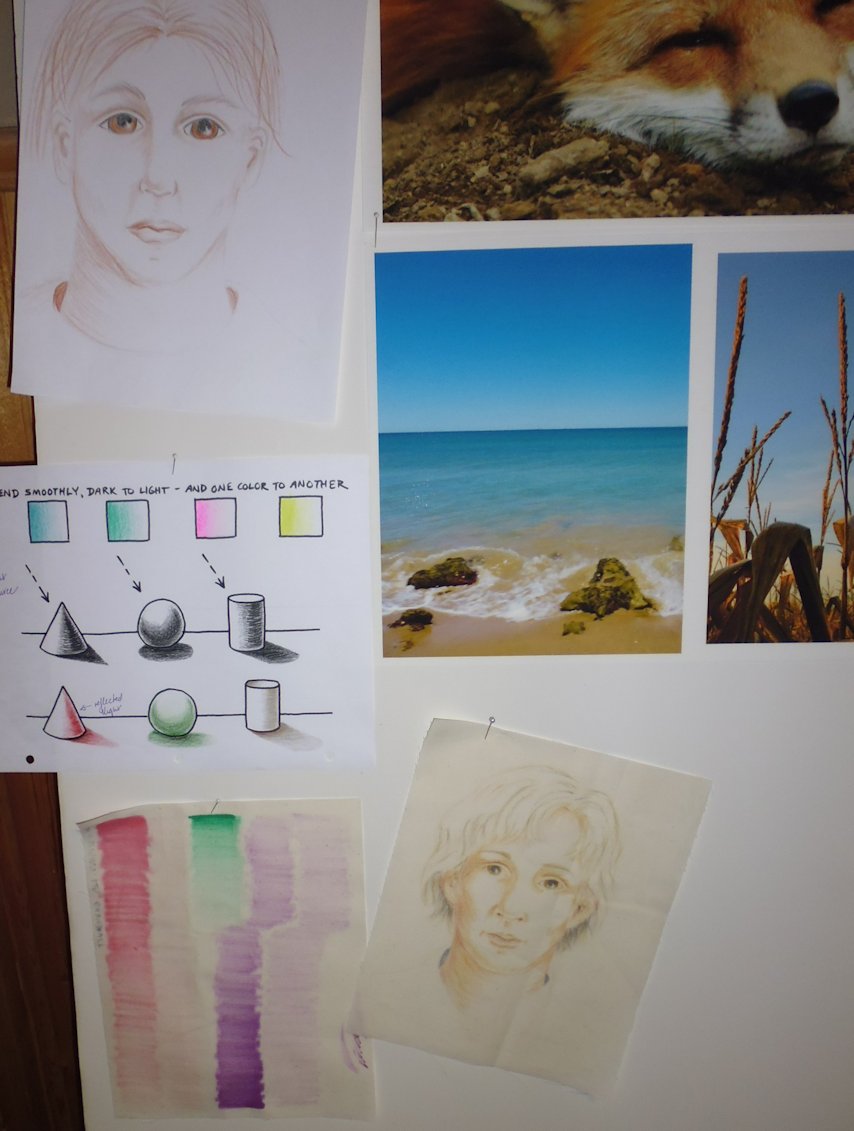
This was my design wall late Wednesday afternoon. The boy in the lower right has been partly shaded with inks. The boy on the top left was my freehand drawing of a face — the one that gave me such angst.

P1030583

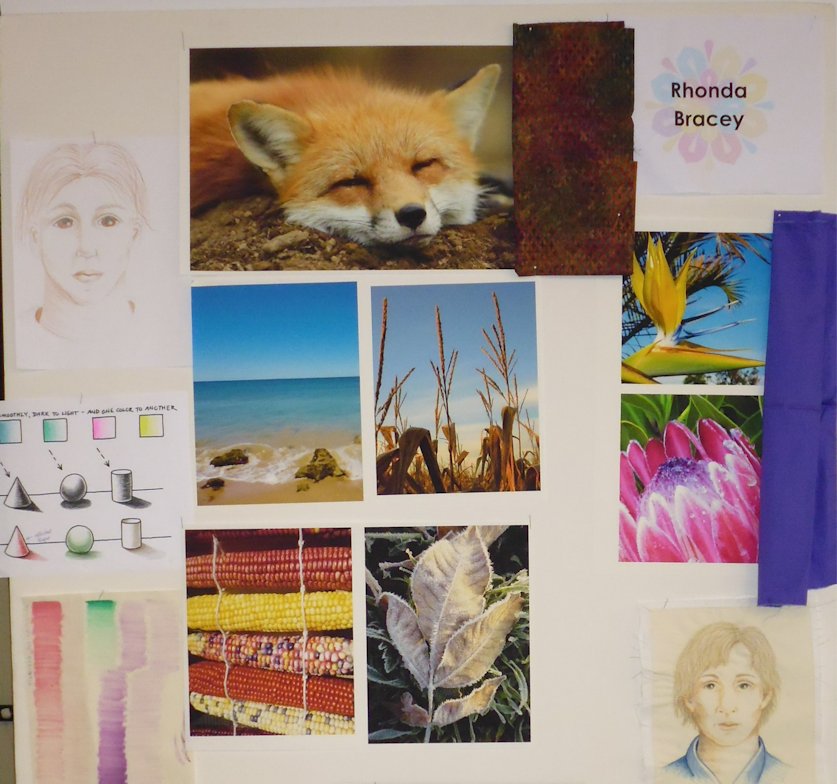
My design wall late Thursday afternoon. Two more photos printed on to fabric (corn from Santa Fe and a frosted leaf from Michigan), and a fabric chosen to perhaps border the fox. More ink and coloured pencil work etc. on the boy in the lower right, including thread painting of his hair and shirt.


Quilting Adventures 2015: Day 2

11 03 2015

We spent much of today on ‘walkabout’, taking photos around the resort, and then processing them in Photoshop Elements, and getting some printed on fabric. We learnt lots, but so far we haven’t got much ‘product’ to show for it, though that may change tomorrow when we start to work with our printed photos.

The photos below are of the design walls of those whose photos have been printed so far. Next step is enhancing the photos with paints, markers, and/or thread — the really fun part for me!

P1030577

P1030575

P1030576

P1030574


Quilting Adventures 2015: Day 1

10 03 2015

I spent last night working on homework!

Day 1 of Quilting Adventures (in New Braunfels, Texas) with Kerby and Lura Schwarz Smith was in the classroom at our laptops learning photo manipulation techniques in Adobe Photoshop Elements. Why? Because it rained and rained and rained almost the entire day here in Texas Hill Country. We might get out and about today to take photos if the rain abates. But yesterday and last night was all about prepping our existing photos ready for printing on fabric.

The printer Kerby is using is fantastic — he printed our binder cover pages yesterday after we’d manipulated our photos, and, with the combination of the inks, the paper, and the printer, they turned out brilliantly — see below for mine. (For the techies, the printer he used was an Epson R3000, with Ultra Premium ??? Matte paper. Out of my price range at nearly $1400 for the printer in Australia and inkjet cartridges at $50 each [NINE cartridges].) The results were great, but you’d have to be doing a lot of photographic printing on paper or fabric to justify that sort of cost. US price is about $700 for the printer… yes, Australians get price gouged, again…)

As so much work was done on the computer, the only photo I have to share is the cover page I created from a photo I took of a protea in my garden. It’s significantly reduced in size — the original is 31 MB TIFF; this one is reduced to 25% size, saved as a PNG, and is just under 1 MB (click it to view it larger).

king_protea-M-8x10⁻⁵

Only in Texas…

Needed to share this quirky ‘only in Texas’ moment. When I arrived at the venue and checked into my room, I found this ‘Texas star’ in the bathroom 😉 The rooms here are all decorated in a rustic Texas theme and the Texas star is everywhere. But in the years I’ve been coming here, I’ve never before seen a gold star on the loo paper 😉

P1030440


Community Quilt 194

3 03 2015

This was the last of the latest batch of Community Quilts, and the last done before I travel to the US on Thursday.

It was a bright ‘eye spy’ quilt and all those straight lines just told me to stitch it with a rounded motif! I went for an all-over design of very large spirals (lines about half an inch apart) in a matching yellow thread.

(Click on a photo to view it larger)


quilt194_01


quilt194_02

Threads used:

  • Top: Fil-Tec Glide ‘Mango’ (40 wt, trilobal polyester, colour 80116)
  • Bottom: Fil-Tec Magna Glide Classic pre-wound bobbin (light tan)


Community Quilt 193

3 03 2015

This brightly coloured scrappy quilt was very puffy — I think there were lots of bias edges in the blocks.

I started by stitching in the ditch with a thin Deco-Bob thread around all the large blocks and their yellow borders to stabilise the puffiness as far as possible. For the main part of each block, I stitched a large ‘wonky star‘ in yellow, with a secondary smaller wonky star inside the square made by the larger star.

My aim was to keep the geometric look of the blocks while stitching them enough to flatten out some of the puffiness.

I left all the borders and sashings unstitched.

(Click on a photo to view it larger)


quilt193_01

quilt193_02

Threads used:

  • Top: Wonderfil Deco-Bob (80 wt, colour DB122); Fil-Tec Glide ‘Mango’ (40 wt, trilobal polyester, colour 80116)
  • Bottom: Fil-Tec Magna Glide Classic pre-wound bobbin (light tan)


Community Quilt 192

1 03 2015

This quilt was made up of fairly traditional blocks and colours, so the only option was to quilt it using fairly traditional motifs.

After stitching in the ditch around every block, sashing strip, border, and applique piece, I then stitched a different design in each block.

I kept the border simple by just stitching a double straight line about half an inch from the seam and then another quarter inch out from that stitched line.

(Click on a photo to view it larger)

quilt192_04

quilt192_01

quilt192_02

quilt192_06

quilt192_05
quilt192_03

Threads used:

  • Top: Various Wonderfil Invisifil and Deco Bob threads in lime green (IF 702), soft pink (DB 205), soft gray (DB 103), and tan (DB 414)
  • Bottom: Fil-Tec Magna Glide Classic pre-wound bobbin (light tan)


Quilting pattern sources are everywhere

1 03 2015

If you keep your eyes open, you’ll see patterns in all sorts of places. I spotted this pattern on a feminine hygiene product!

panty_liner


Community Quilt 191

21 02 2015

This was a small scrappy quilt, made from all sorts of fabric squares. The main colour theme seemed to be a purple/pink, so I decided to  quilt it in purple. Several of the seams were uneven, so I needed to use a motif that ‘stitched them into submission’ without causing too many puckers. To counteract the squares, I decided to do a rounded motif, and chose an old favourite — swirly spirals.

I liked the end result.

(Click on a photo to view it larger)

quilt191_02

quilt191_01

Threads used:

  • Top: Robison-Anton (40 wt, rayon, purple of some sort)
  • Bottom: Fil-Tec Magna Glide Classic pre-wound bobbin (dark gray)


Community Quilt 190

21 02 2015

Another big quilt — this time for a soccer-mad kid 😉

After stitching in the ditch around the blocks to stabilise the quilt, I outline stitched the soccer balls in those blocks, using an Invisifil thread. Next, I ‘matrix’ stitched the blocks with fabric that had soccer nets behind the shoes, shirts, etc. I left the soccer balls unstitched so they ‘popped. Finally, I switched to a green thread to stitch large circles (emulating soccer balls?) in the blue, yellow, and green blocks and in the dark blue border. I left the green sashings unstitched.

(Click on a photo to view it larger)

quilt190_01

quilt190_02

Threads used:

  • Top: Wonderfil Invisifil (100 wt, colour IF 179); Robison-Anton ‘Brite Jade’ (40 wt, rayon, colour 2514)
  • Bottom: Fil-Tec Magna Glide Classic pre-wound bobbin (dark gray)