Community Quilt 114

7 10 2013

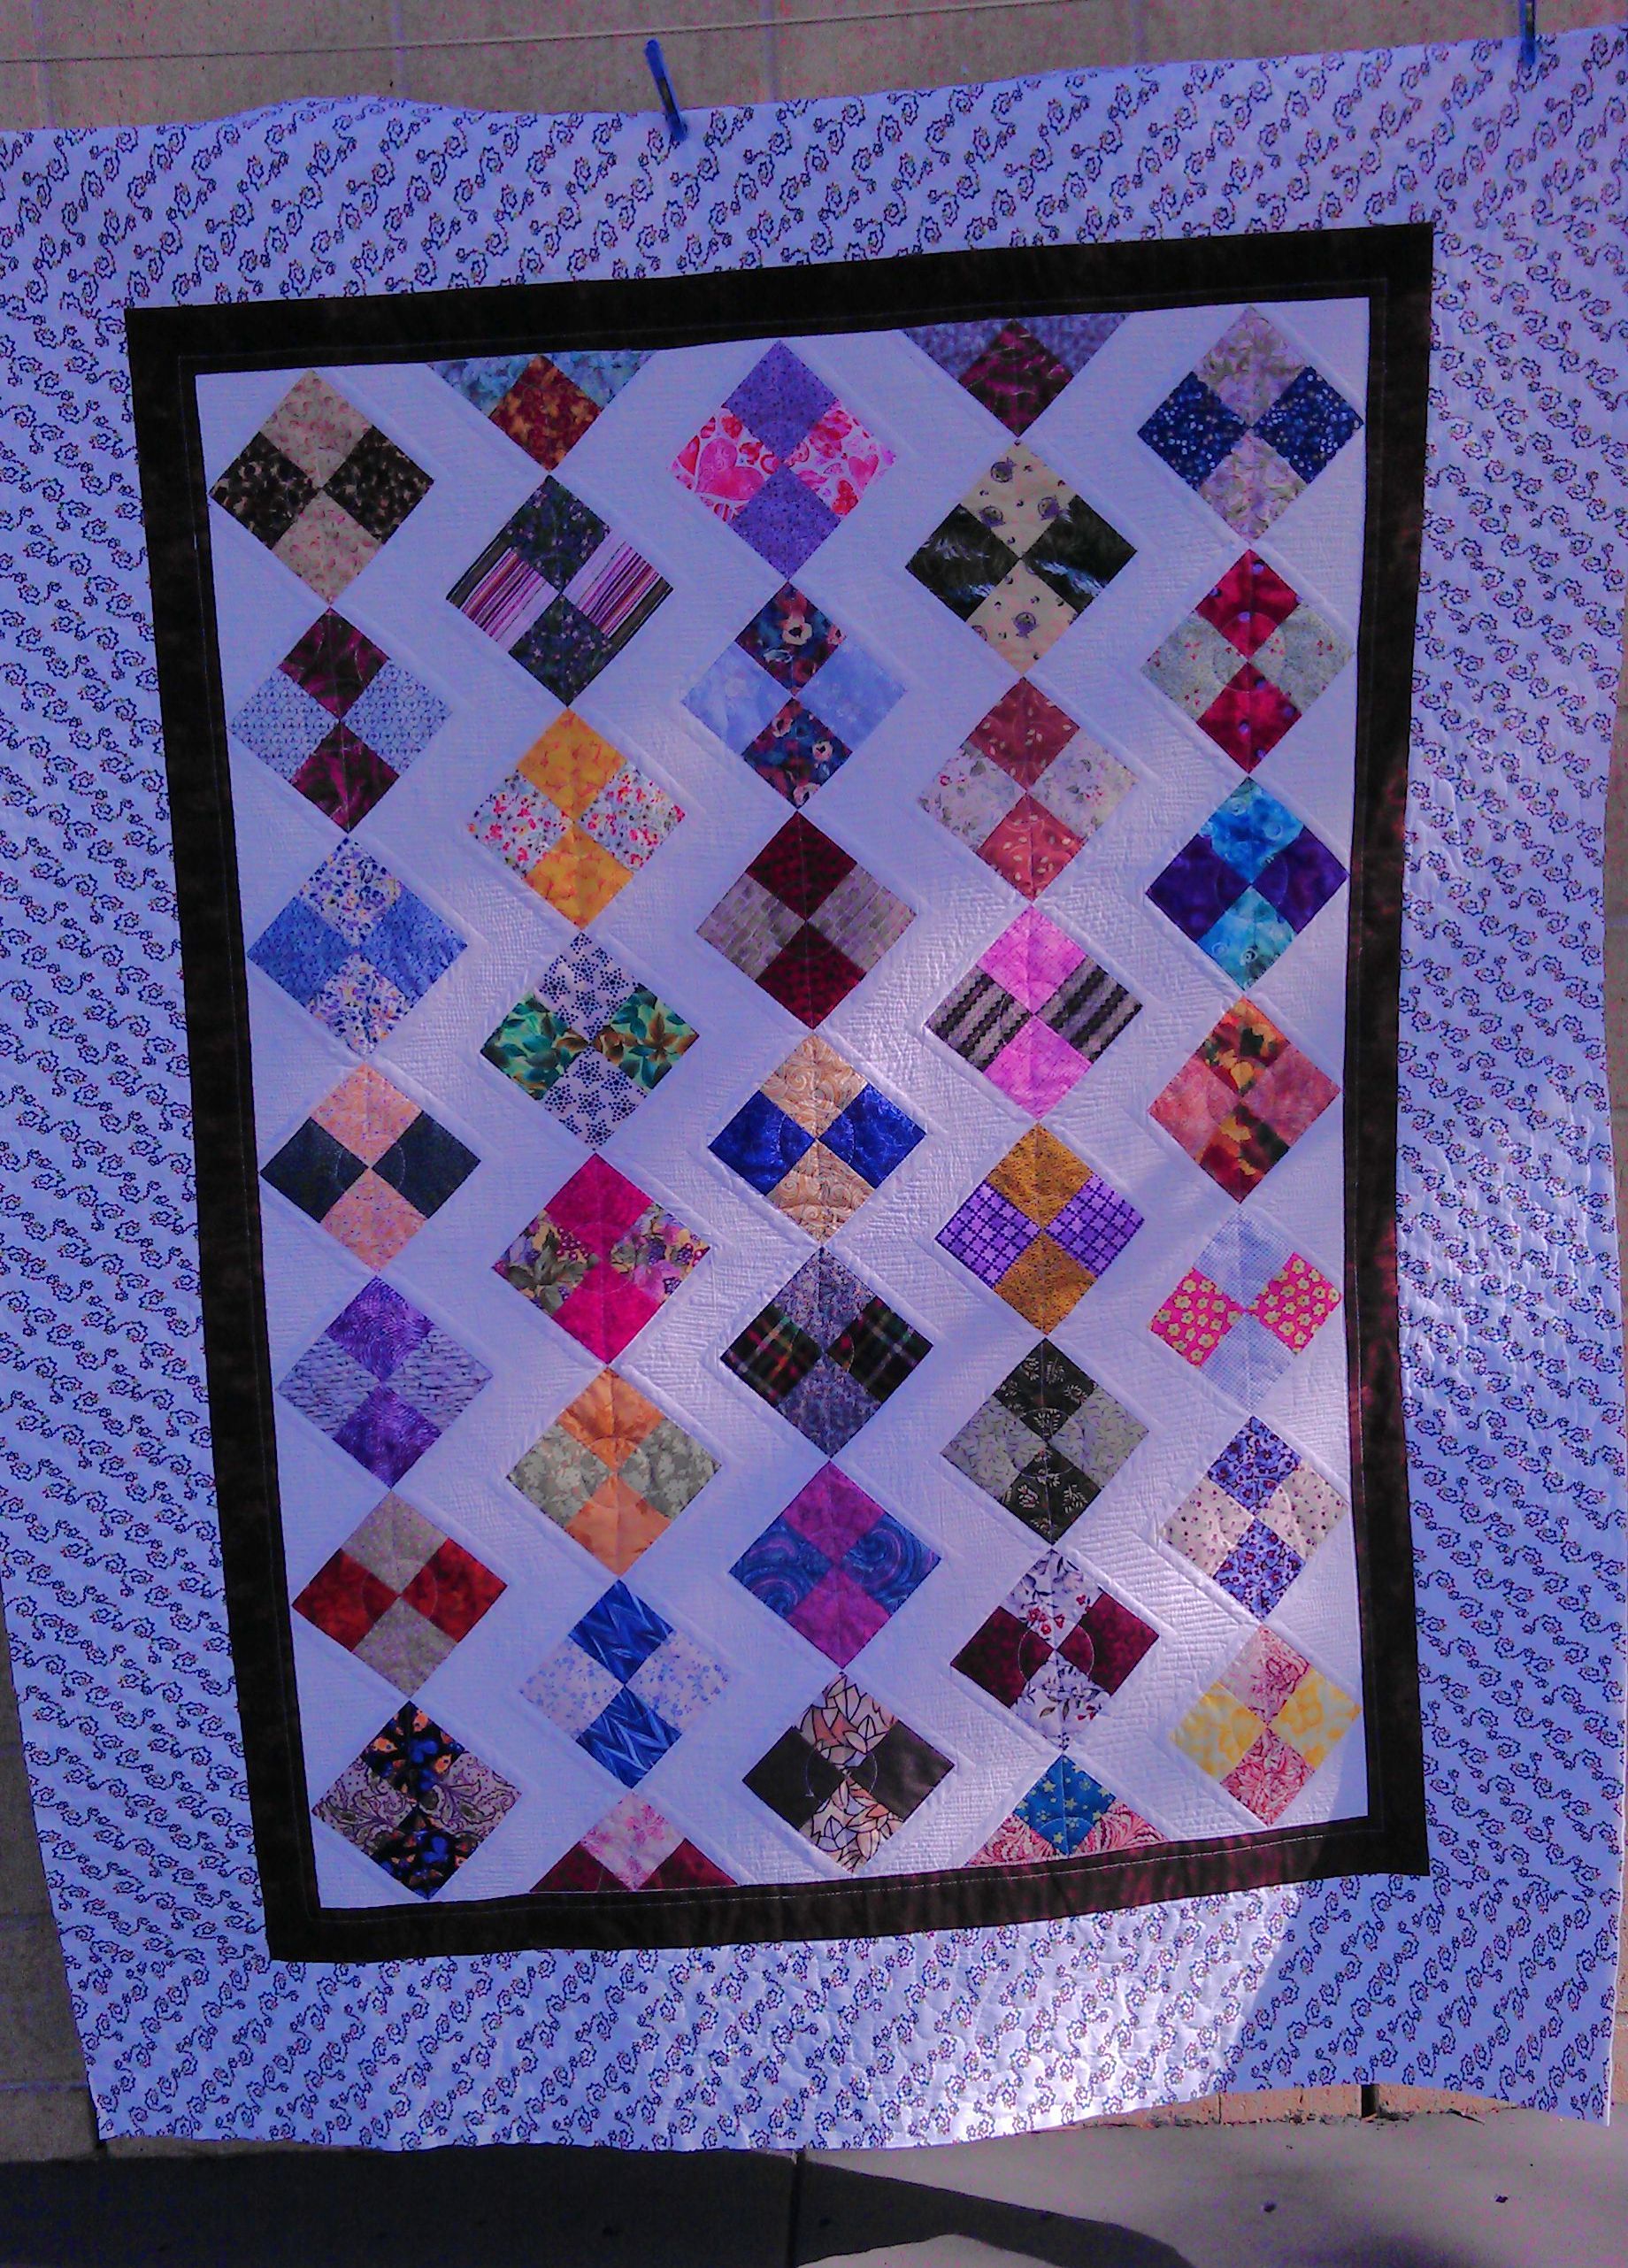
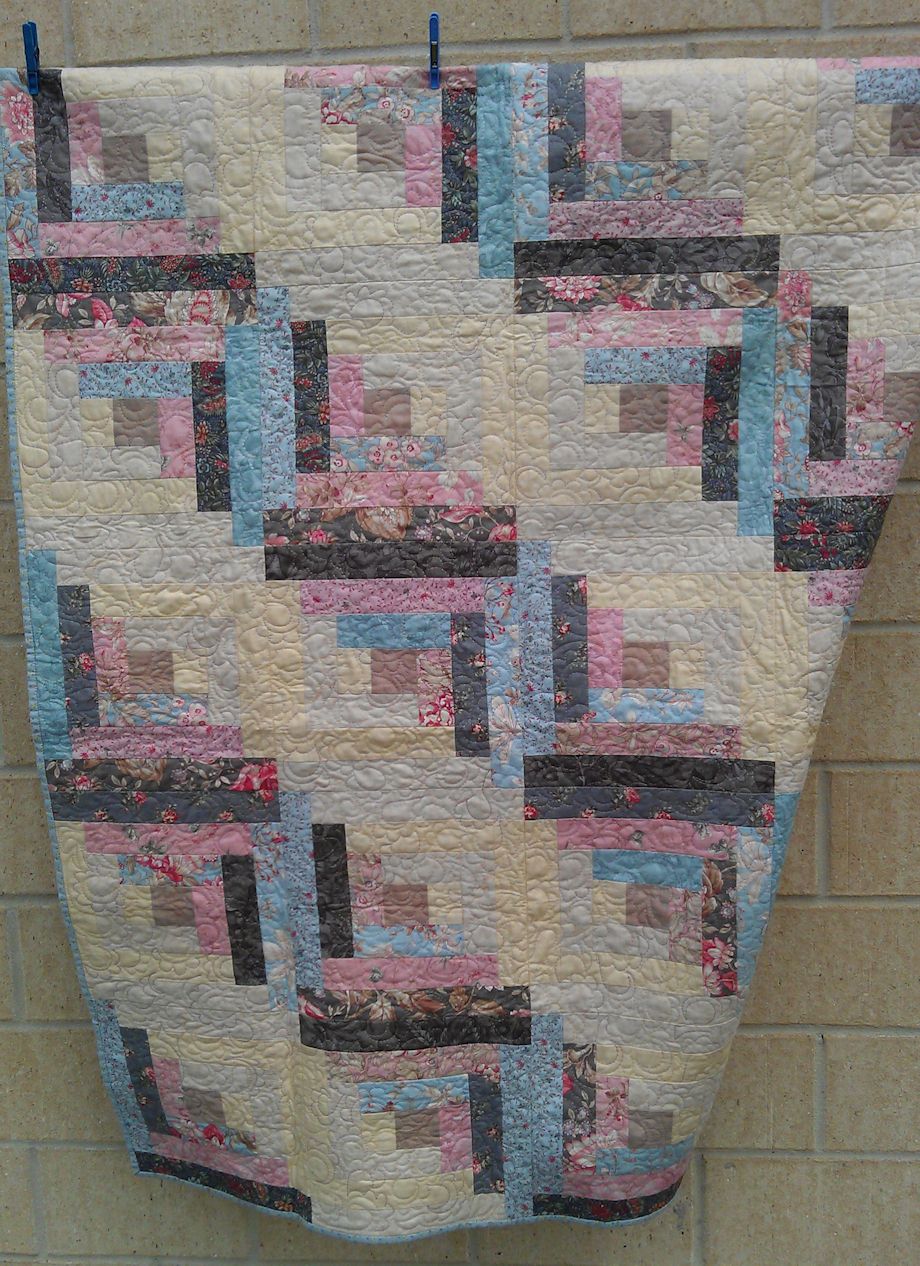
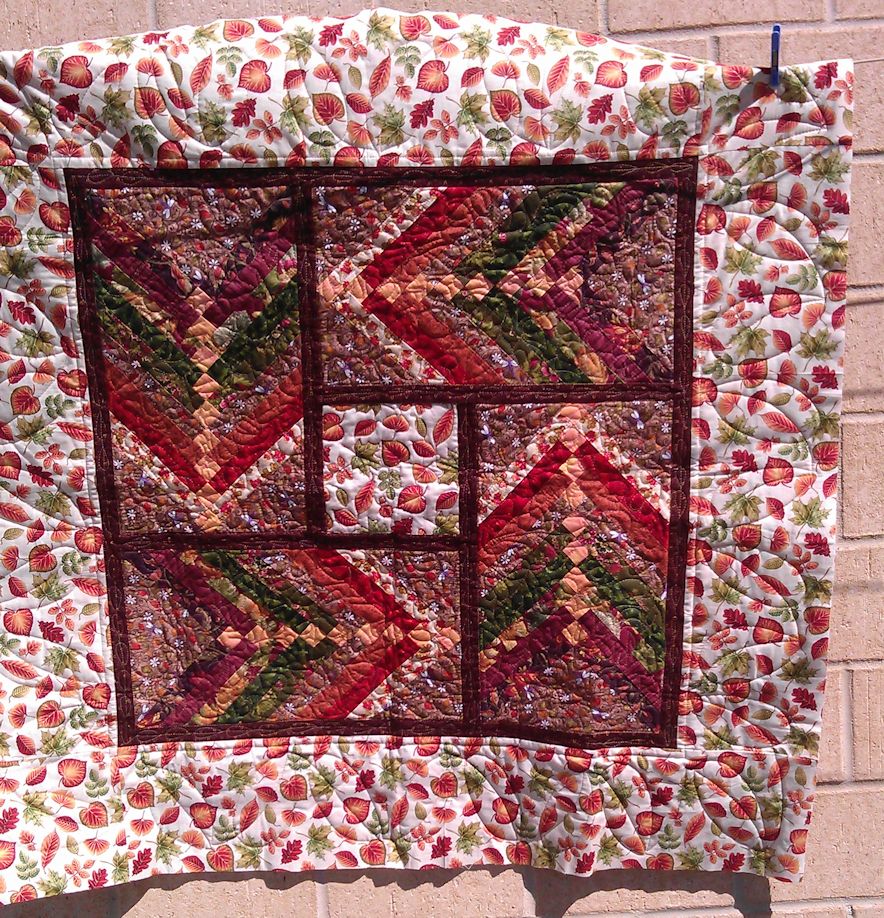
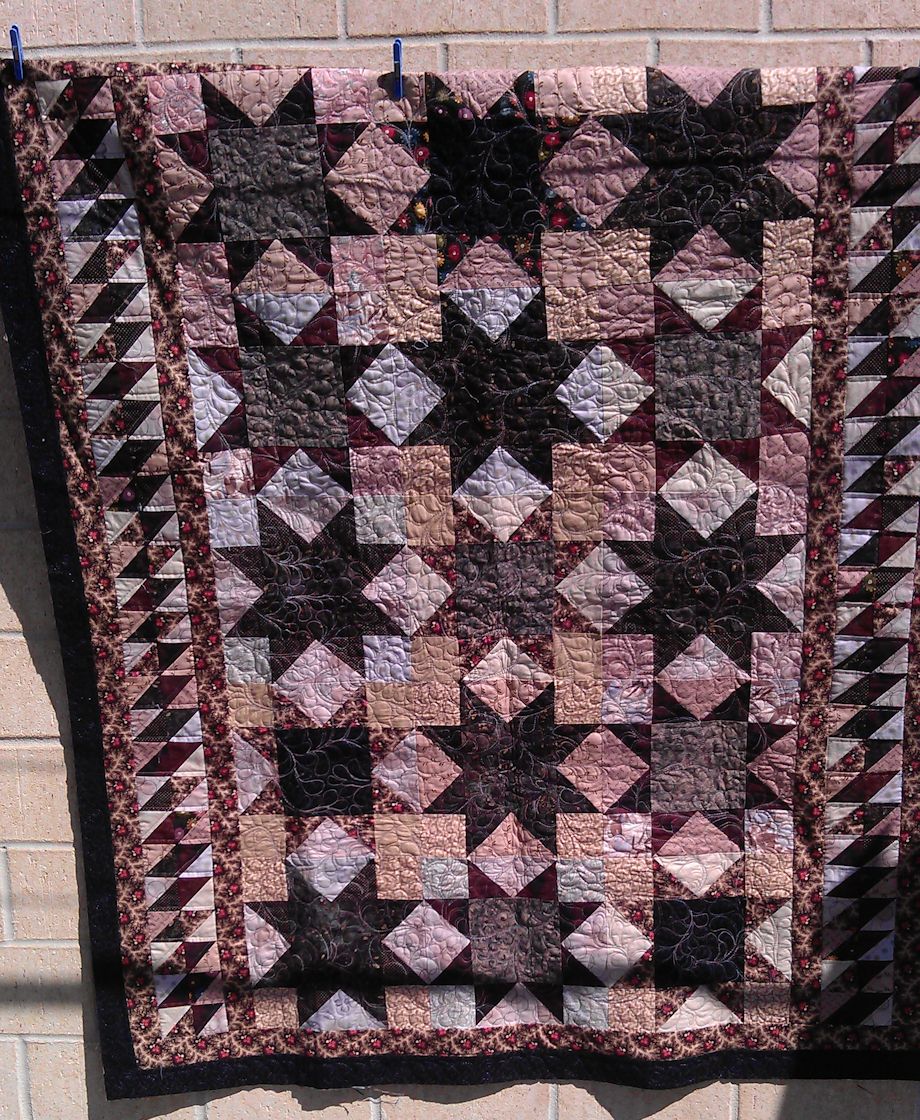
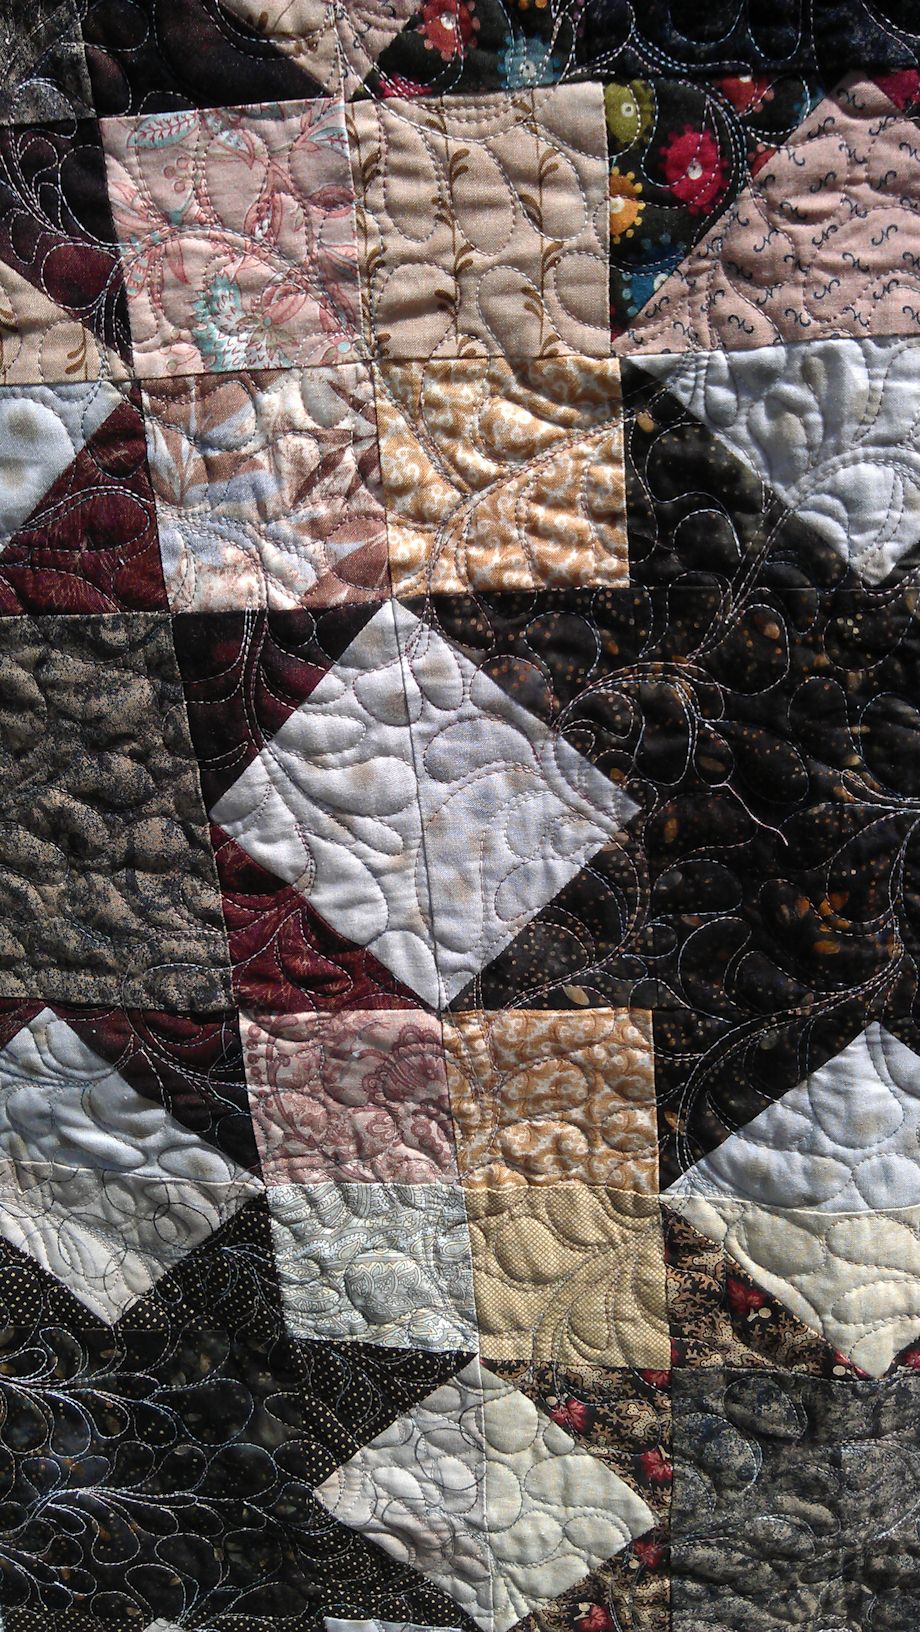
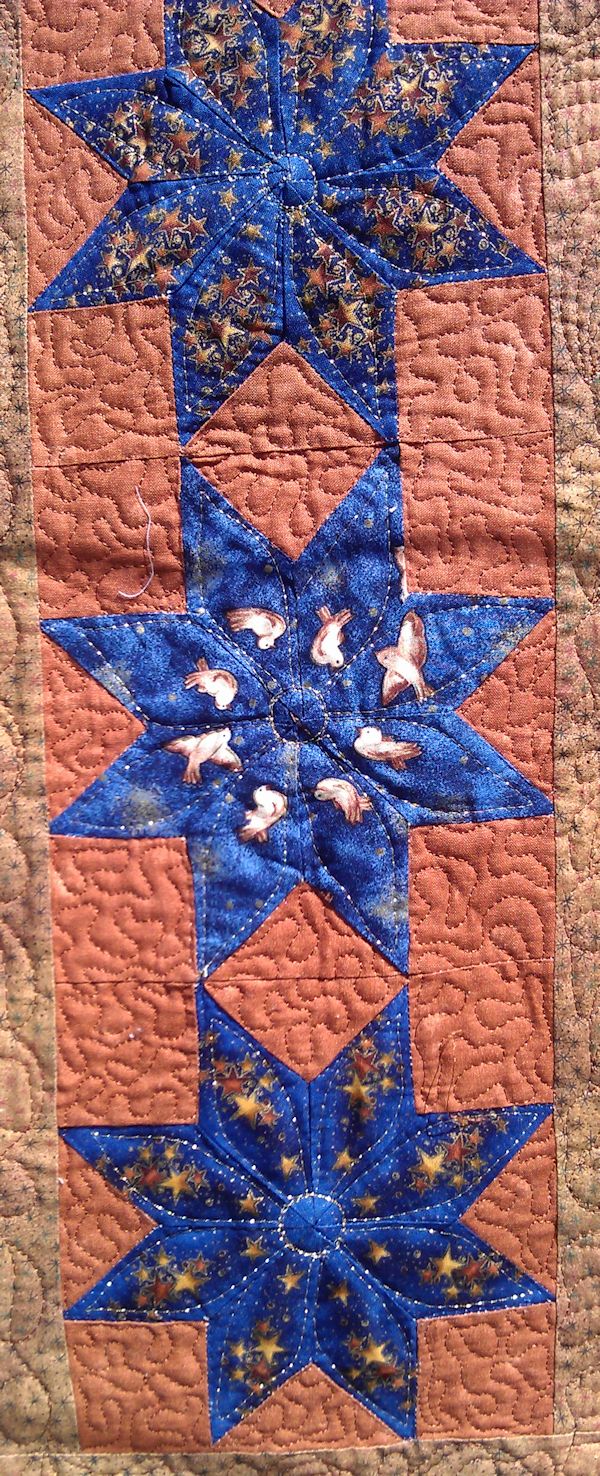
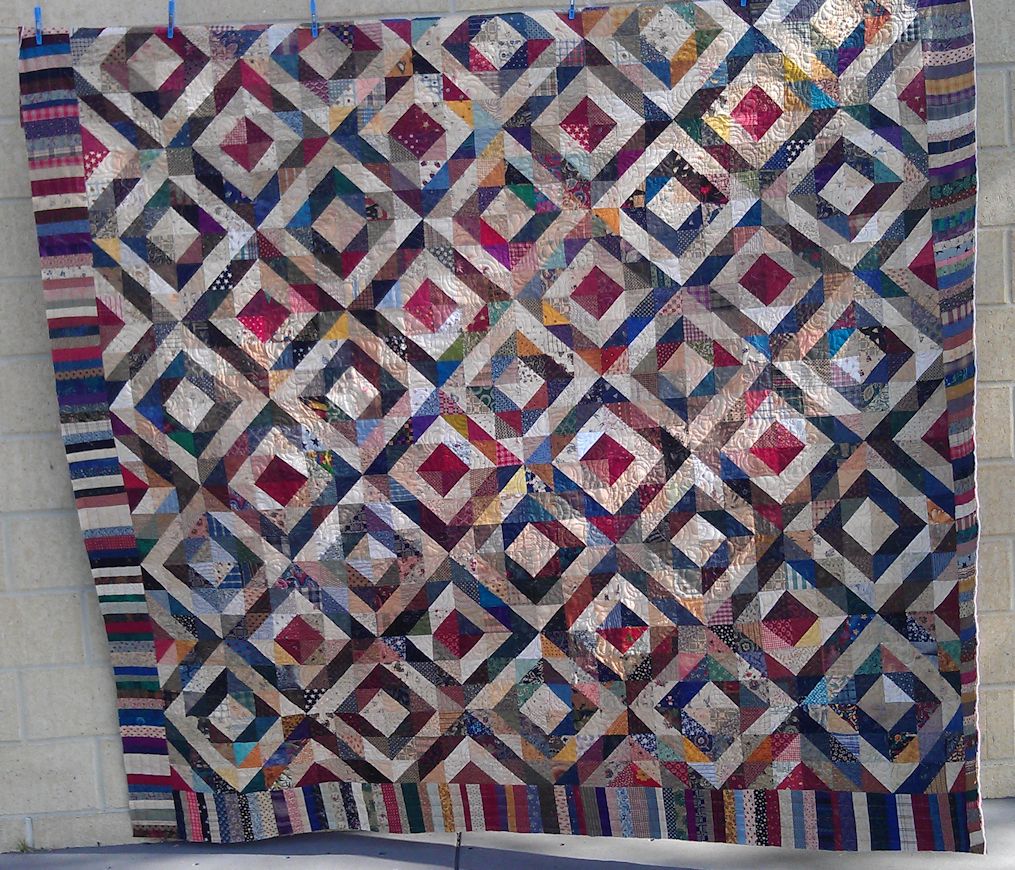
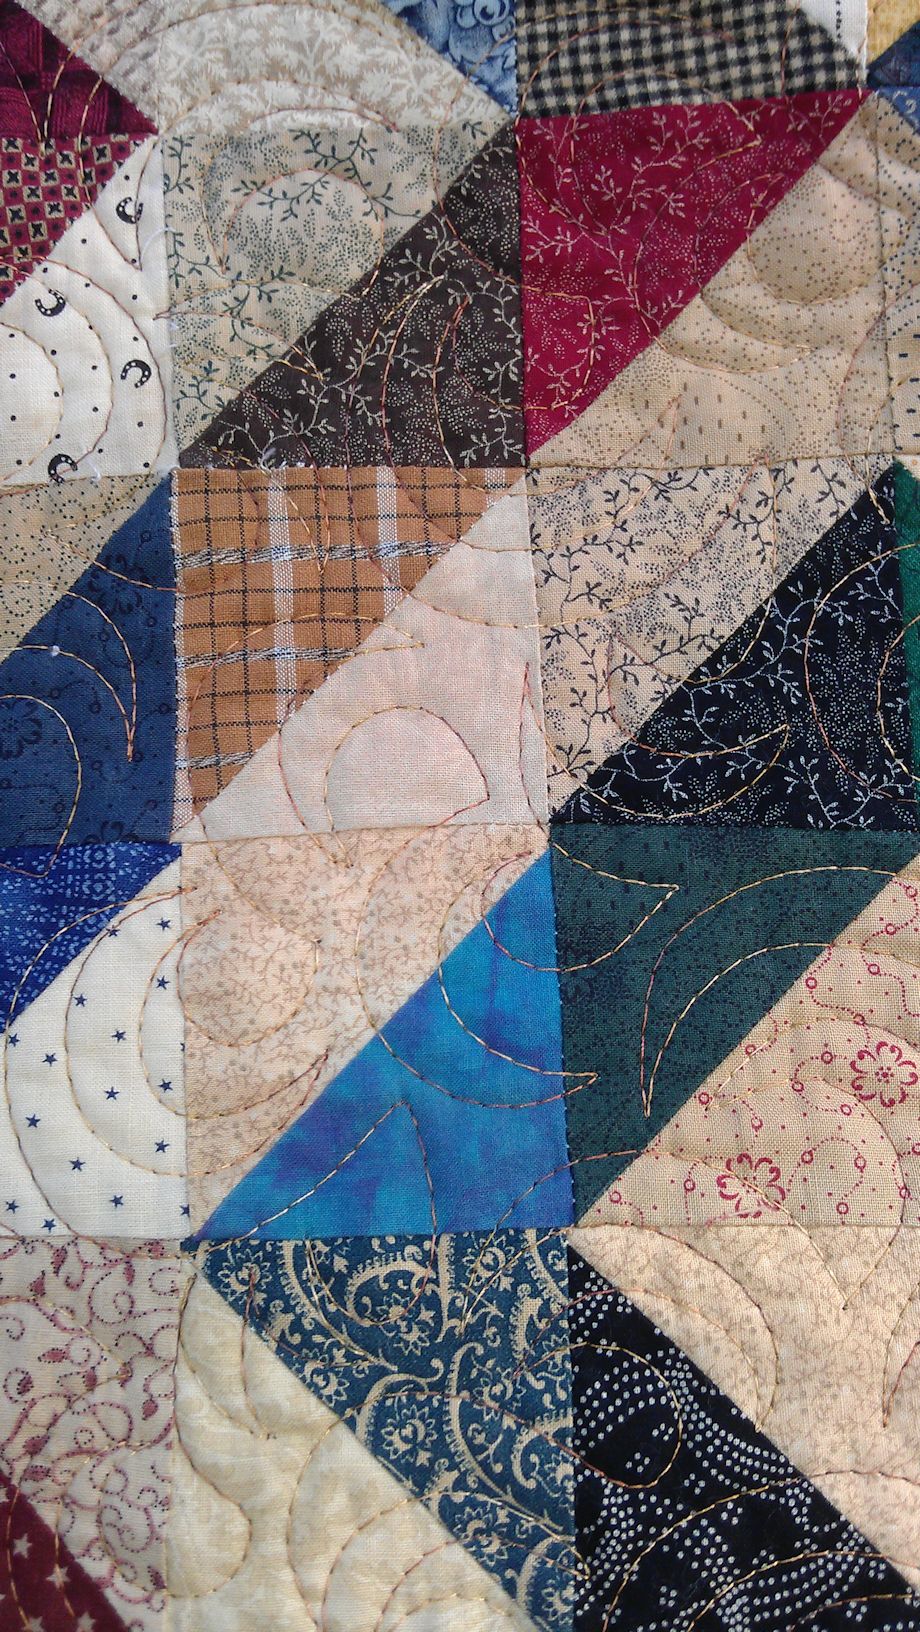
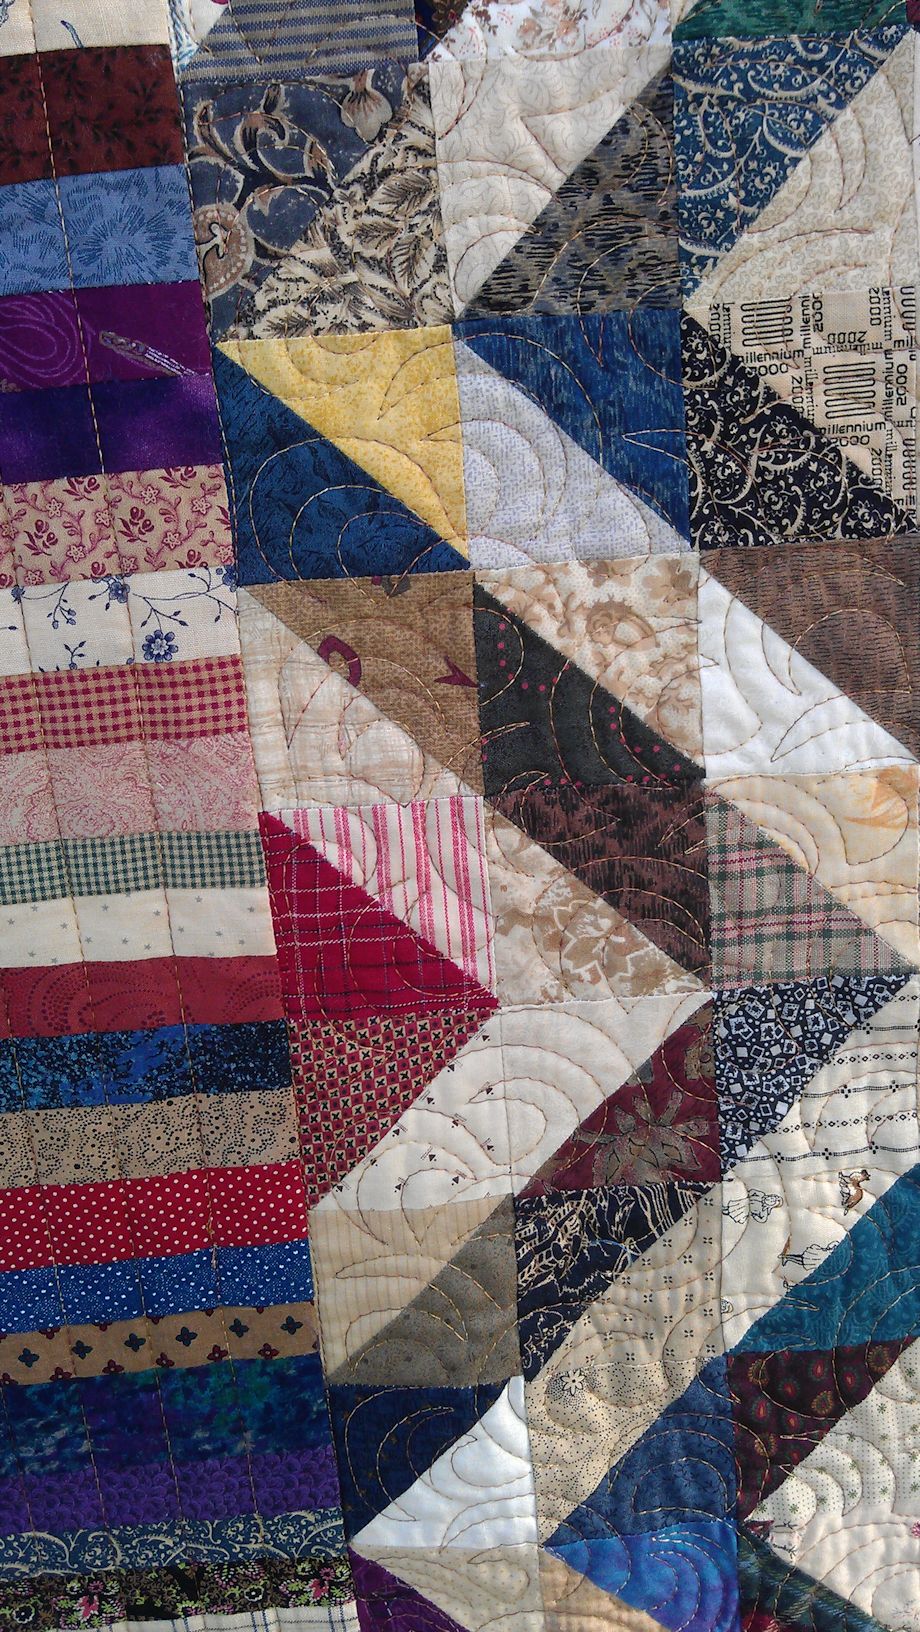
This was a HUGE scrappy quilt! I had to fold it quite a bit over the clothesline to keep it off the ground when I took the photos. The person who created this quilt top used a massive range of scrappy fabrics to make her half-square triangles and the overall effect is quite lovely (though not ‘my’ colours).

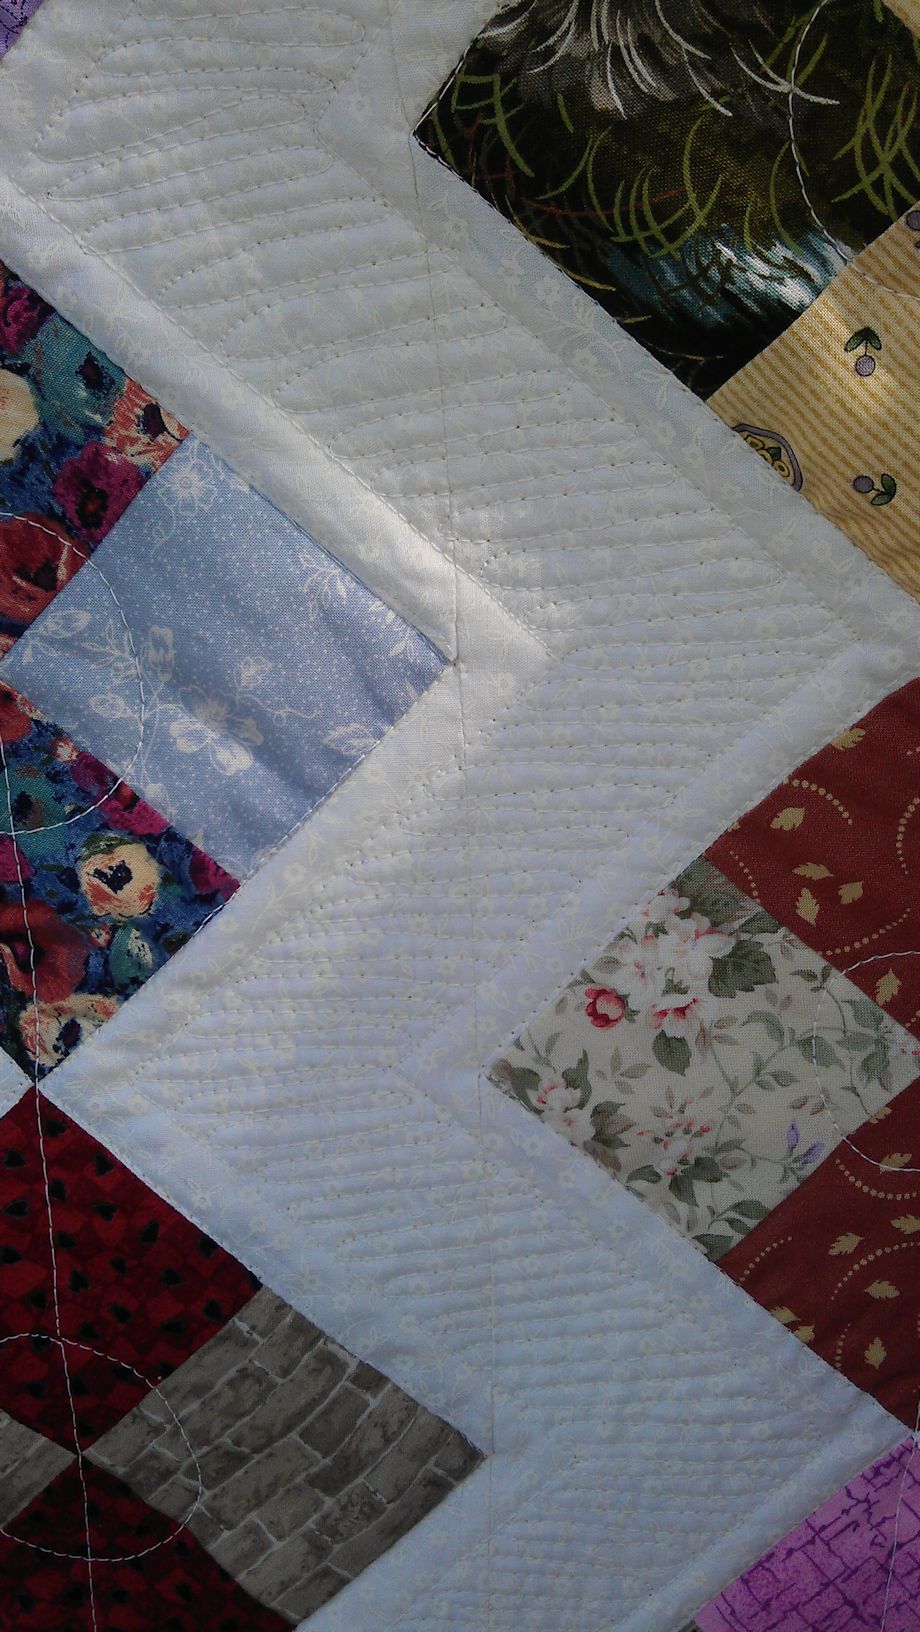
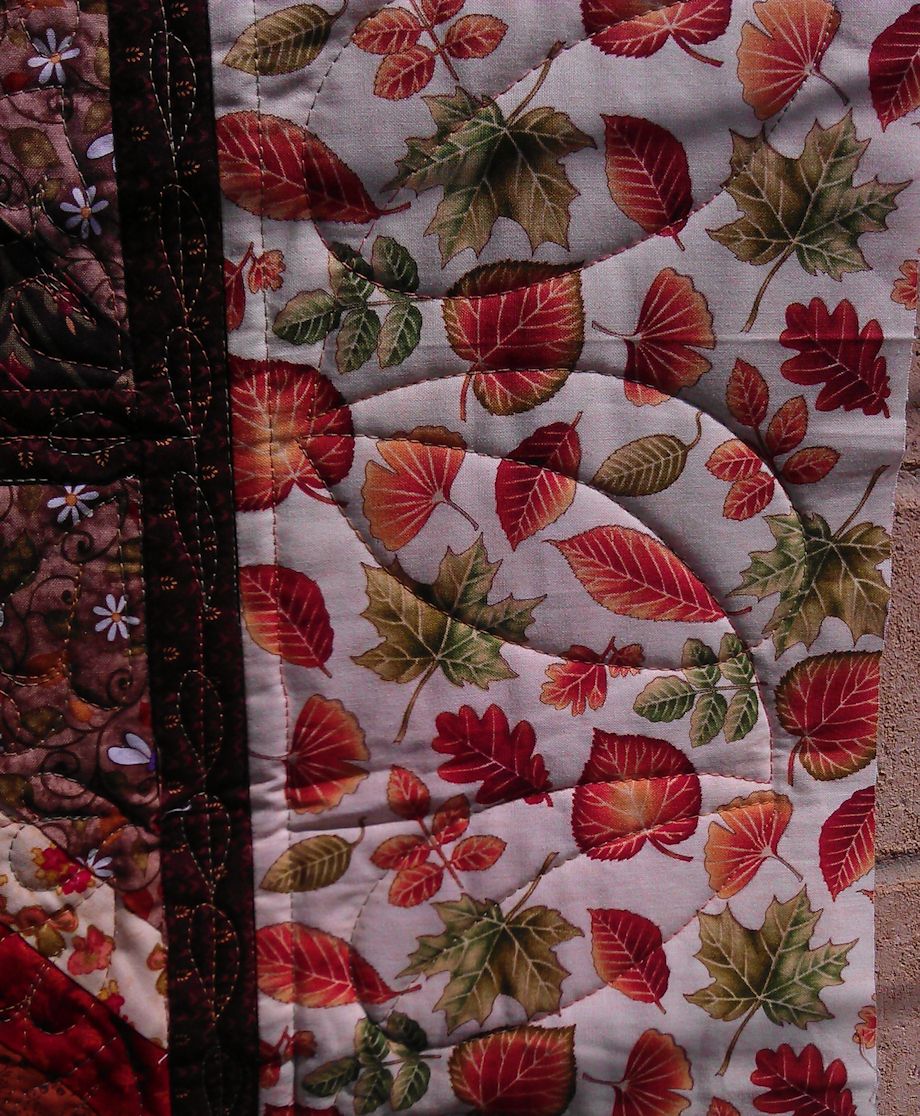
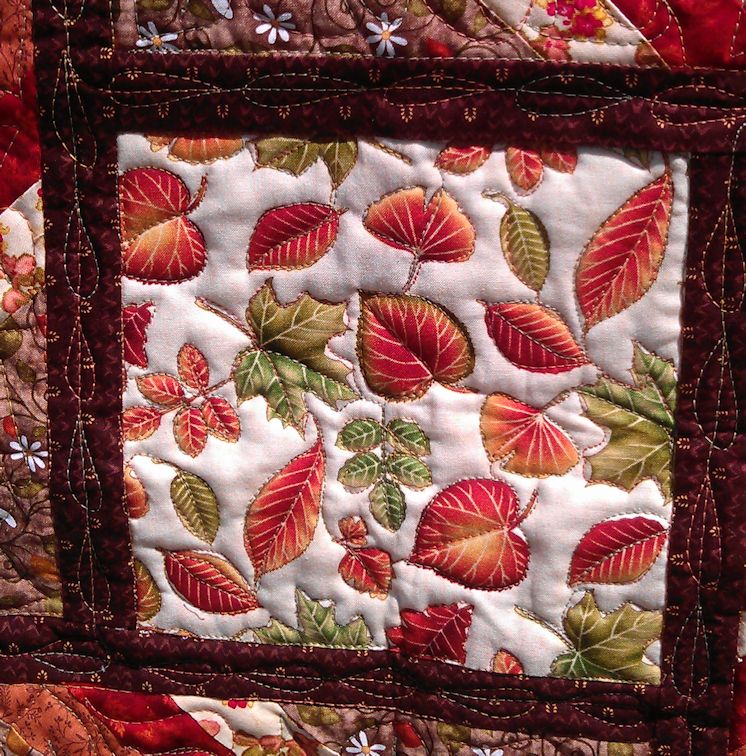
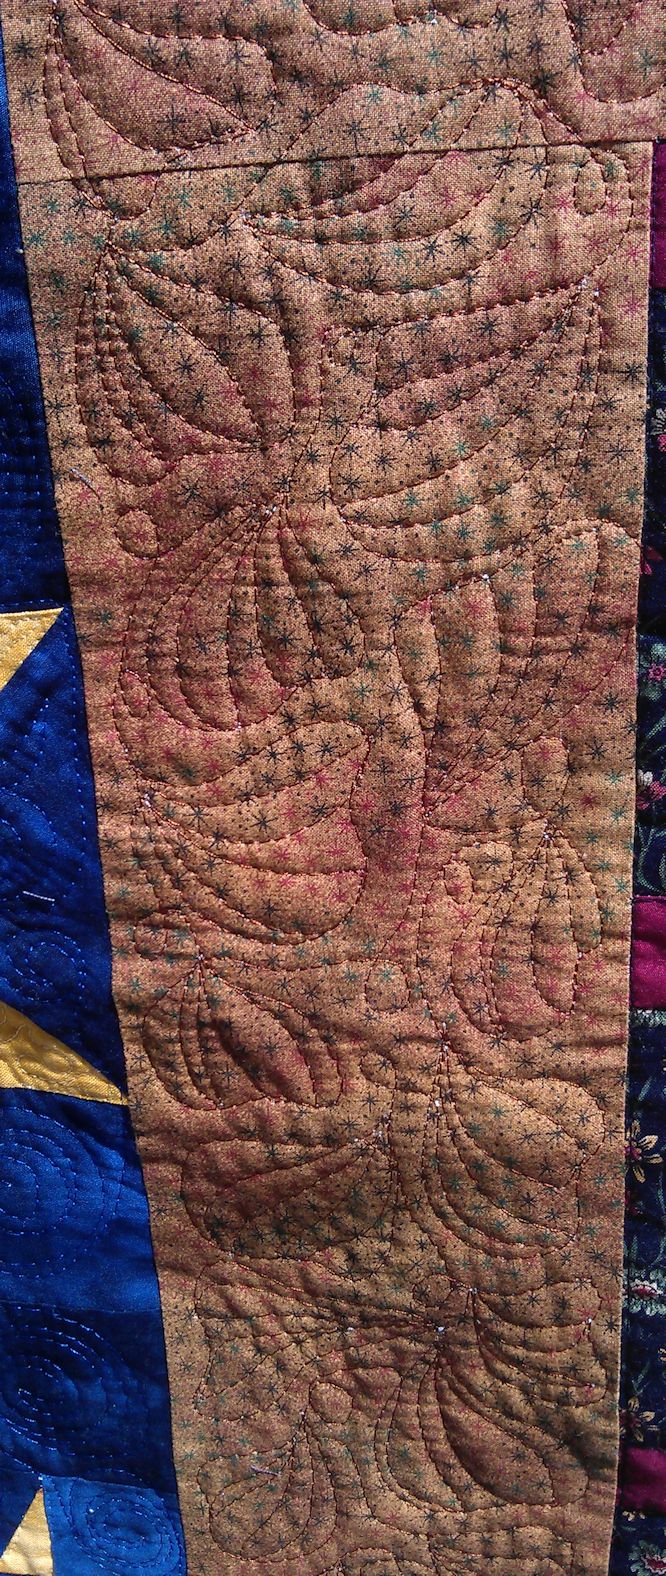
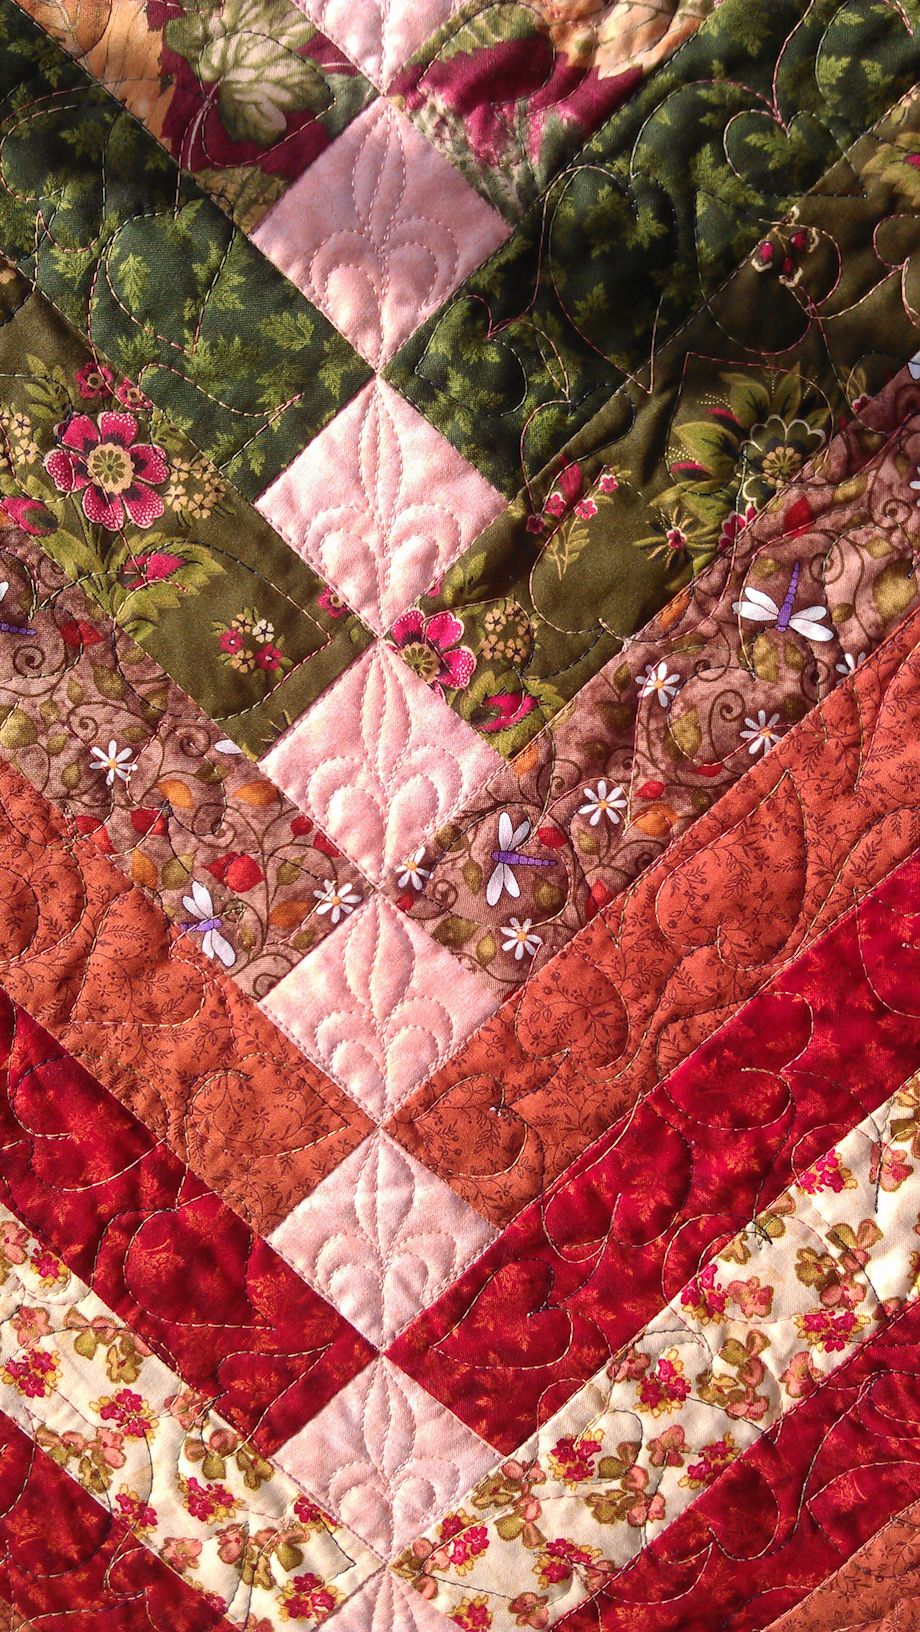
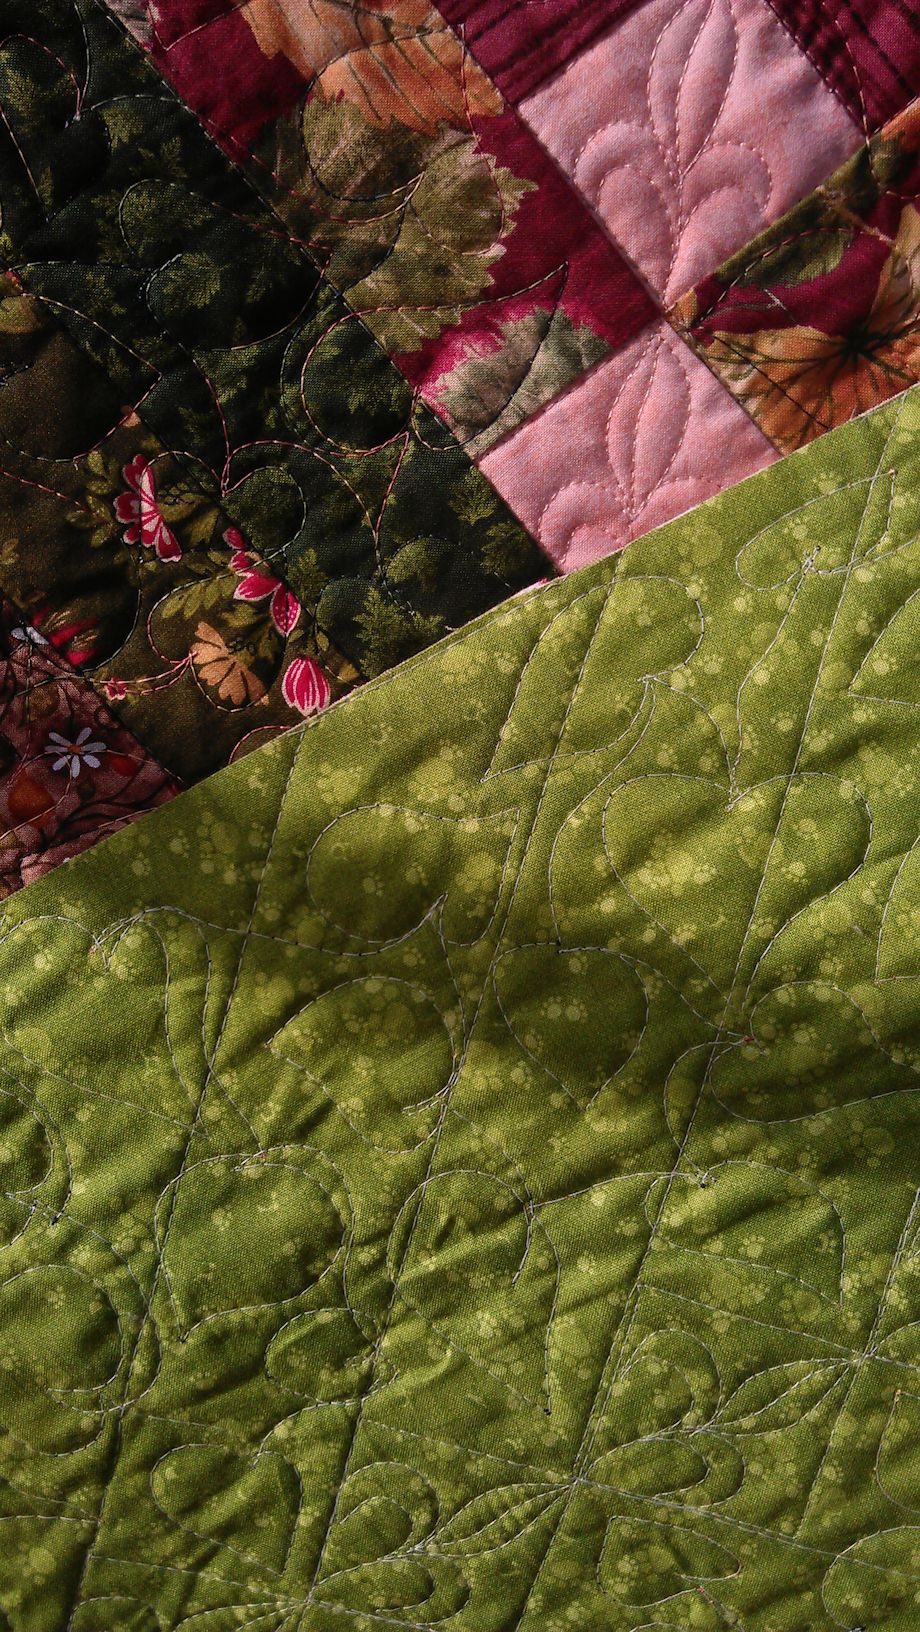
How to quilt it? Well, stitching in the ditch for ESS wasn’t an option I relished! So I decided to fall back on an old stalwart design I haven’t stitched for a while — open headbands. I used a lovely Affinity thread (from Fil-Tec) in variegated browns and it was perfect for this quilt. It also stitched like a dream and didn’t break or shred once in the entire quilt.

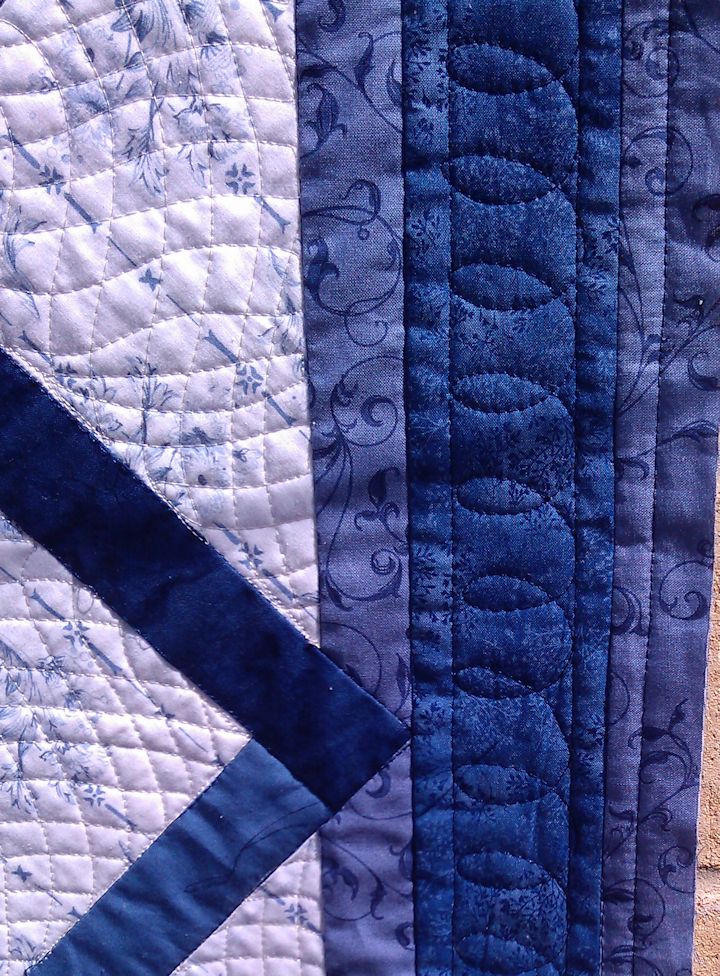
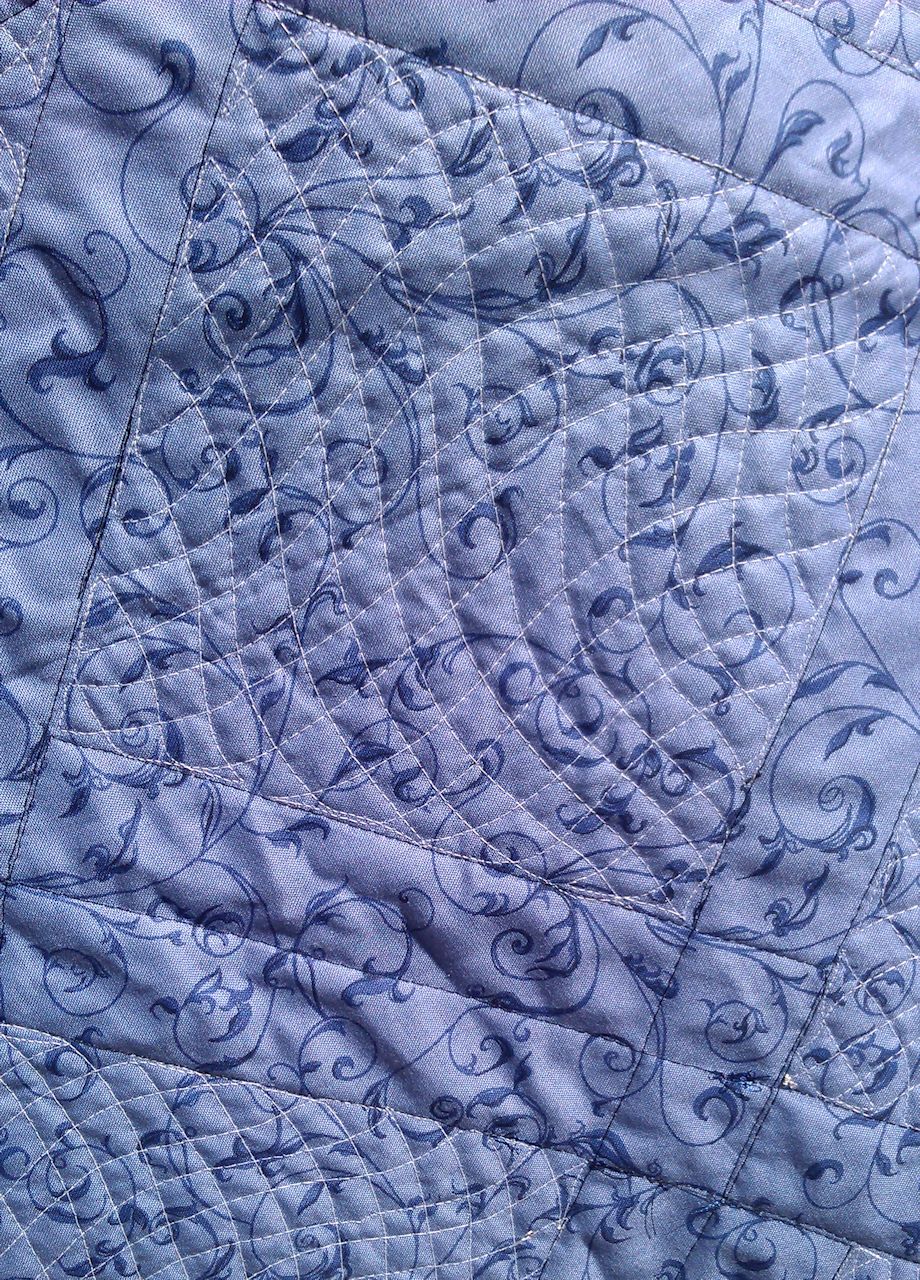
The edges of the border were starting to pull apart so I used Elmer’s washable school glue to hold them down. Originally I was going to do ‘piano key’ stitching in the border, but realised that as soon as the quilt was trimmed, the stitches would be cut and start pulling apart again. Instead, I decided to stitch perpendicular to the border fabrics, about 1″ away from the main part of the quilt, then echoed those stitches every 1″ to near the edge of the border. That seemed to work, and once trimmed, the stitches all stayed in place.

The only problem I had with this quilt was its sheer bulk — even with my extension tables and the large throat of my Sweet Sixteen, I struggled to pivot and turn this quilt. It WAS big.

(Click on a photo to view it larger.)

quilt114_01

quilt114_03

quilt114_02

Threads used:

  • Top: Fil-Tec Affinity ‘Brunette’ (40 wt, trilobal polyester, colour #60291)
  • Bottom: Wonderfil Deco Bob (80 wt, colour DB 414)


Community Quilt 113

7 10 2013

This was a fairly ordinary scrappy quilt (MY opinion only — others may love it), but that white space just screamed out for some chevron-style quilting I’ve seen a lot of recently.

I stitched echoing straight lines 1/2″ from the edges of the 4-patch blocks, then filled those white areas with a continuous line ‘zigzag’, with the lines between 1/8 and 1/4″ apart. No I didn’t measure them or mark them or use a ruler — I just free motion stitched those lines. Perfection wasn’t my aim — the effect was. And I think I achieved that.

After I’d finished the white areas, I had some quite puffy 4-patches, so I just free motion stitched a sort of circle with a line going through it through each of them. That idea came out of my head and I take full responsibility for it ;-).

For the brown border, I used the same white thread to add a single line of straight stitching (this time I used my Line Tamer ruler!) to give the effect of a picture frame. And then I did big meandering stippling in the outer border.

(Click on a photo to view it larger.)

quilt113_04

quilt113_02

quilt113_01


quilt113_03

quilt113_05

Threads used:

  • Top: Wonderfil Silco (40 wt, colour #SC03)
  • Bottom: Bobbinfil (white)


Community Quilt 112

2 10 2013

I wasn’t very inspired by the fabrics or colours in this disappearing nine-patch quilt. How to quilt it?

I decided to do a continuous line all-over design — my squared-off open headband motif, which I’ve decided to rename to ‘WiFi’ as the shapes look just like the WiFi icon you see on your smartphone or tablet! 😉 (and the RSS feed symbol)

I used a variegated thread in greens and yellows to blend with the quilt top fabrics.

(Click on a photo to view it larger.)

quilt112_01

quilt112_02

quilt112_03

Back:
quilt112_04

Threads used:

  • Top: Superior King Tut ‘Crocodile’ (40 wt, cotton, colour #943)
  • Bottom: Wonderfil Deco Bob (80 wt, colour DB 414)


Community Quilt 111

2 10 2013

I wasn’t sure about this quilt when I pulled it out of the packet during our quilt retreat. Just blue and white? And then I had an awful time with my machine stitching in the ditch around each block, until my friend (and Handi Quilter dealer) Michelle took a look at the machine and made a small adjustment to the ‘finger’ in the bobbin area. Then it stitched fine!

I started it at the retreat, but as the power went out on our last night, I didn’t get to finish it there, so I finished it this weekend just gone. I had in mind to do something in the white parts, possibly some sort of lattice effect following the straight blue lines in the white and blue fabric. But when I looked more closely, I saw that none of the lines lined up with the lines in the other blocks, so with a lot of marking and calculating required, stitching a straight line lattice just wasn’t going to work for me.

Instead, I recalled some ‘matrix’ designs that Leah Day had done, so I decided to do a wavy diagonal matrix in the white blocks, leaving about a 1/2″ between the lines. These are super easy to do and you don’t have to be perfect 😉 Also, if you stitch the matrix correctly, there’s no stopping and starting, except at the beginning and end of the block. I really liked the effect — I achieved a lattice effect without having to use rulers or mark lines. And I think the curves add an organic nature to the quilt that straight lines just don’t have.

For the borders, I just stitched a straight line 1/2″ from the edges, then in the dark blue border I stitched loops (like lower case ‘L’s or ‘E’s in cursive writing) between the straight lines. I left the blue sashing strips unadorned.

(Click on a photo to view it larger.)

quilt111_01

quilt111_02

quilt111_03

Back:

quilt111_04

Threads used:

  • Top: Fil-Tec Glide ‘Rock Navy’ for the stitch in the ditch around each block (40 wt, trilobal polyester, colour #30001); Fil-Tec Glide ‘Cream’ for the lattice work (40 wt, trilobal polyester, colour #20001)
  • Bottom: Bobbinfil in black and white depending on which thread I was using in the top


Community Quilt 110

2 10 2013

This was another small quilt I quilted at our retreat. It had already been finished and bound, and ‘stitch in the ditch’ around the blocks had been done, but the Community Quilts coordinator asked if I could rescue it and liven it up a bit.

It was a such a pastel log cabin quilt, with lots of small flower fabrics used — how to quilt it? I decided on an all-over continuous line motif of large and small arcs, emulating flowers.

(Click on a photo to view it larger.)

quilt110_01

quilt110_02

IMAG1193

This was the quilt while it was on my machine. On the right is how it looked when I got it — fairly plain, with just the stitch in the ditch quilting. I think I livened it up a bit with the quilting.

Threads used:

  • Top: Wonderfil Mirage in a variegated wine/cream/orchid/yellow (rayon, 30 wt, colour #SD 32)
  • Bottom: Bobbinfil (white)


Community Quilt 109

2 10 2013

What a pretty little quilt this was! All those bright autumn tones and cheery leafy fabrics.

I started by stitching in the ditch around the blocks just to stabilise the quilt, then I outline quilted the centre block of leaves. My original intention was to do the same in the border, but it took quite a while just to do the centre, so I abandoned that idea quick smart!

In each French Braid block, I did a continuous line quilting design of leaves, with more leaves in the sashing strips. And keeping with the leaf theme, I did HUGE leaves in the border 😉

This was another quilt I quilted at the retreat so I can’t remember what thread I used — sorry! (it was a variegated cotton thread in autumnal colours…)

(Click on a photo to view it larger.)

quilt109_01

quilt109_04

quilt109_03

quilt109_02

quilt109_05


Community Quilt 108

2 10 2013

I quilted this quilt during our annual quilt retreat weekend. I could have followed the geometric blocks, but instead decided to soften them with feathers — everyone likes feathers, right? 😉

I left the first and third borders unstitched, did some straight line ruler work (with my Line Tamer ruler) in the half square triangles in the second border, and then some half feathers and spirals in the black border.

I really liked how the variegated thread blended beautifully with this quilt top — thanks for letting me use it, Bobbie!

(Click a photo to view it larger.)

quilt108_01

quilt108_02

quilt108_03

Back:
quilt108_04

Threads used (from memory!):

  • Top: Fil-Tec Harmony ‘Driftwood’ for the feathers and one border (40 wt cotton); Floriani embroidery thread in a dark charcoal for the black border (40 wt rayon?)
  • Bottom: Bobbinfil (white)


Community Quilt 107

2 10 2013

This was one HUGE quilt! I reckon it took me well over 12 hours to quilt.

First, I stitched ESS (‘every stinkin’ seam) around all the blocks to stabilise it. Then I tackled one block at a time, deciding how to quilt it, then selecting thread colours, then doing the quilting. Some of the quilting is VERY dense and took ages.

I’m not going to attempt to document the threads I used as there were so many, and as I did this quilt over a couple of weekends, with a week-long trip to Bali in between 😉 There’s no way I remember what I used!

(Click on a photo to view it larger.)

quilt107_01

quilt107_12

quilt107_11

quilt107_10

quilt107_09

quilt107_08

This photo isn’t as good as I would’ve liked… The bubbles (baubles?) in the Christmas tree are all stitched in gold metallic thread and shine brightly 😉

quilt107_07

Yes, I stitched every second row of that checkered fabric, vertically and horizontally…

quilt107_06

I stitched the centre flowers in the stars in gold metallic thread and really liked the effect

quilt107_05

Another one where I stitched every single cross-hatch in the fabric…

quilt107_04

quilt107_03

quilt107_02

I really like McTavishing, but it uses an incredible amount of thread and takes a long time, so I tend to only do it in small areas, like the background of this tulip block. To make the tulip ‘pop’ even more, I echo stitched about a quarter inch from it before dong the McTavishing.

quilt107_15

I used a gingko leaf motif in the background. I hadn’t stitched that design in ages — I should use it more often as it’s a great filler.

quilt107_14

I wasn’t sure what to do in the border as this quilt had a LOT of quilting. So I decided to do large ‘petals’ with a smaller inner petal (or flame), and then once I’d finished all around the quilt, I went back and echo stitched around them all. I quite liked the final effect.

quilt107_13


Community Quilt 106

1 09 2013

Ah! My first french braid quilt!

How to quilt it? Well, it needed to be stabilised first, so I stitched ESS… (every stinking seam!) in a beige/tan Rasant cotton. A few hours later, I was ready to look at what design I’d use. I was thinking straight line ‘modern’, but instead decided to try out a fleur-de-lis motif that I found the other day on the internet in the peach-coloured setting squares. I quite liked how they turned out and will likely use that motif again, perhaps in sashing or a narrow border.

I was still struggling with how to quilt the main top. But after taking a very close look at the fabric — which was mostly leaves and some flowers — I decided on an all-over, continuous line leaf motif, using a variegated thread in green, pink, yellow and very dark green (I think!).

(Click on a photo to view it larger)

quilt106_01

quilt106_02

Back:

quilt106_03

Threads used:

  • Top: Fil-Tec Glide ‘Peach’ (40 wt, trilobal polyester; colour #50473); Superior King Tut ‘Old Giza’ (40 wt, variegated cotton, colour #941)
  • Bobbin: Bobbinfil (70wt, cotton, white)


Community Quilt 105

1 09 2013

This was a nice bright quilt, but the bias edges of some of the blocks meant that there was some ‘wonkiness’ and puffiness that wasn’t going to settle down with some serious stitching to beat it into submission 😉

How to quilt it? Well, I wanted to soften all those straight edges and disguise the wonkiness as far as possible, so I decided to stitch it in an all-over, continuous line spiral motif. That helped tame the wonkiness a bit, and created some circular puffiness that hid the puffiness of the blocks caused by the bias.

I didn’t quilt the small black borders; had they been bigger, I probably would have. I didn’t want to stitch them by extending the same design as the main quilt top as I thought the orange stitching would dull the bold effect of the black.

(Click on a photo to view it larger)

quilt105_01

quilt105_02


Back:

quilt105_03

Threads used:

  • Top: Robison-Anton (40 wt, rayon, orange)
  • Bobbin: Bobbinfil (70wt, cotton, white)