Gloria Loughman Trunk Show

14 06 2011

On the Friday night of the Gloria Loughman retreat, Gloria showed some of her amazing landscape art quilts and described the methods she used and the story behind each quilt.

Below are some pictures of the quilts from this trunk show — click on a small image to see it full size, then click on it when it’s full size to see it even larger.


Gloria Loughman retreat

14 06 2011

I had the privilege of attending a quilting retreat on the weekend, organised by my friend Michelle from Handcrafters House in Midland, Western Australia, and taught by one of Australia’s most well-known and internationally recognised landscape art quilters, Gloria Loughman.

On the Friday night, Gloria had a ‘trunk show’ where she showed some of the quilts she and her previous students had made. Baggage limits meant she wasn’t able to bring along some of the big quilts that feature in her books, but what we saw was inspiration enough.

This weekend’s theme was ‘Escape to the Rainforest’ and we learned how to paint backgrounds on fabric (a new experience for me — it was fun and opens up a whole lot of possibilities), as well as how to create a sense of depth and dimension in any scene.

For our ‘rainforest’, we could either use the tree and leaf motifs that Gloria provided, or work from a tree or forest picture of our own. All day Saturday (and into Saturday night) and most of Sunday was spent creating our landscape, the quilt top.

I chose to do a single tree from a photo I’d taken a few weeks back.

Tree picture I used as inspiration

Tree picture I used as inspiration

I was able to get to the point where almost all my surface stitching was done, so I’ve only got a little to finish before putting on borders, then layering it with batting and backing fabric and quilting it. Unfortunately, I was totally immersed in the process and forgot to take pictures as I went (!), so you can’t see how a plain white piece of fabric got transformed into this piece via paint, more paint, and then fabric, more paint, more fabric and stitching — you can only see the almost end result!

My fabric tree

My fabric tree

Stitching detail - grass and trunk

Stitching detail - grass and trunk

Stitching detail - leaf clusters and trunk

Stitching detail - leaf clusters and trunk

It was a terrific weekend — great learning, great people, great organisation (thanks Michelle), great teacher (Gloria is a born teacher and really generous with her time and really friendly; she joined in everything, and she and her husband seemed to really relax and enjoy themselves), and great food, location, and hosts (Avalon Homestead, Toodyay).

Update July 2011: It’s finished! https://sandgroper14.wordpress.com/2011/07/16/estuarine-eucalypt-art-quilt-finished/


More quilts from that one jelly roll

27 05 2011

I’ve finally made the last two quilts from the one jelly roll of fabric I got at the Eleanor Burns Quilting Academy (here’s the first and largest quilt I made: https://sandgroper14.wordpress.com/2011/04/25/bright-jelly-roll-lap-quilt-finished/).

The last two are smaller — one is a lap quilt about 36 inches (93 cm) square, and the other is a gender-neutral cot/crib quilt. Again, I’ve quilted them densely. I was particularly pleased with the feathers I did in the border of the lap quilt –I really like the method for doing these that I’ve learned from the Diane Gaudynski book. And I love the rubber ducky backing fabric!

Both quilts (and the larger lap quilt) are now for sale in my Etsy store, where there are more pictures:


‘Underneath the Australian Sun’ has a new home — in Utah!

23 05 2011

My ‘Under the Australian Sun’ piece of fabric art has gone to its new home in Utah. It was purchased by Dana and she has had it framed and it now hangs on a wall in her beautiful home. Dana was kind enough to share her pictures with me.


Kelli’s chickens

11 05 2011

The first piece I quilted with my new HQ Sweet Sixteen was a gift — a table runner/place mat for Kelli. Kelli has just moved from Arizona to Colorado — new home, new job, new phase of her life — and one of the things she wants when she gets settled is some chickens. She’d asked me if I could make a table runner/place mat to match the chicken coasters I have for sale in my Etsy store, and how much would it be.

Instead of charging her, I decided the table runner/place mat + a set of coasters would make a nice house moving/housewarming gift for her. I hope she likes them!

All the applique work was done on my domestic sewing machine, a Husqvarna Viking Sapphire 870, and the quilting was done on my new Sweet Sixteen.

Click the image to see it at a larger size, then click it again to view it full size, where you’ll see the free motion quilting detail.

Update: Kelli must be one of the few people left in the world to handwrite thank you cards:


Practising feathers

9 05 2011

Feathers are one of the free motion quilting motifs I’ve been too scared to tackle! I’ve doodled them and that’s helped. I’ve bought some books on different techniques and tried them out. But I still wasn’t happy with my feathers. Until I got the Diane Gaudynski book on free motion quilting that was recommended to me by Joan.

I sat down at the Bee (my HandiQuilter Sweet Sixteen machine) and got started. I marked sweeping curves for the spines, and side rails to contain the ends of each feather shape, put some variegated thread on the Bee and got going! I was really pleased with how my feathers turned out. I did four lines of ‘puffy’ feathers with some different effects in the spines, then a central feather that was more like real feathers or even a fern frond.

The filler in between some of the feathers is based on Karen McTavish‘s ‘McTavishing’, though I don’t think it’s true McTavishing 😉 I haven’t finished the filler spaces yet — I may do pebbles/bubbles or small scallops to the sides of the central feather/fern as there’s already a lot of tight, short curved bits in that feather. Update: Finished! I used scallops in the filler spaces next to the central feather.

I was pretty pleased with the tension, and, by using a different coloured thread on the back, I had a good indication of when the tension was ‘off’.

I was also pretty pleased with my first real attempt at feathers, using a style that I’m comfortable with — I found Diane Gaudynski’s method very easy to do. Also, other than the sweeping guides, there’s NO marking. I’m far too lazy to mark out a pattern! I just want to quilt it!

Click on a small photo to see it larger, then click on the large photo to zoom in to see the stitches (the yellow thread is my basting stitches — I take these out when I’ve finished a section; the brighter orange photo is with the flash — the rest are taken without a flash to try to get the 3D quality to stand out):


My very own ‘Bee’

5 05 2011

After playing with the HandiQuilter (HQ) Sweet Sixteen quilting machine at the Eleanor Burns Quilting Academy in March, and after really putting it through its paces when a friend lent me hers, I’ve now purchased my own machine!

I picked it up from Handcrafters House in Midland (Western Australia) last Friday, and spent about 2 hours with the lovely Michelle being trained on it. Because I had already used it extensively for about 2 weeks when I had the loan machine from Bobbie, I had lots of questions for Michelle, so instead of the standard training, she mostly dealt with my questions and assessed the samples I brought in for her. Most of my issues were to do with tension, particularly getting the bobbin (foundation) tension right. I learned a lot about tension! 😉

As an aside, just before I picked up my machine, Michelle and her team at Handcrafters House were named HandiQuilter’s International Dealer of the Year, beating some 750 dealers in 10 countries for that award, which is based partly on sales but mostly on customer support and training. Congratulations, Michelle and all your team!

I was originally going to call my machine ‘The Beast’ because it’s such a big and heavy thing, but I decided I needed something a little less horrible for such a lovely machine. After some ideas from my quilting circle of friends, and mulling over some ideas of my own, I’ve settled on ‘Bee’/’The Bee’. Why? Several reasons:

  • B for big, beautiful, brilliant, beast
  • B for my surname
  • Bee as in ‘quilting bee’ and ‘buzzing bee’ (my husband reckons it makes a noise like a bee when he hears it from another room in the house), and of course, ‘busy bee’

Here’s The Bee in its new home in my sewing room, and with the first largish piece I quilted using it (I did quilt another smaller piece before this one, but it’s a gift for someone who reads this blog, so I won’t post pictures of that until after the gift is delivered!) — click on a small image to see it full size, then, once it’s full size, click on it again to see it it even larger:

The quilting motif I’ve used on that square metre of orange batik is based on the crocus designs from Leah Day and her free motion quilting project. It’s a design I find really easy to do and is a great filler design for all sorts of large and small areas.

See also:


HQ Sweet Sixteen table

30 04 2011

For future reference… and in case anyone else has the same problem!

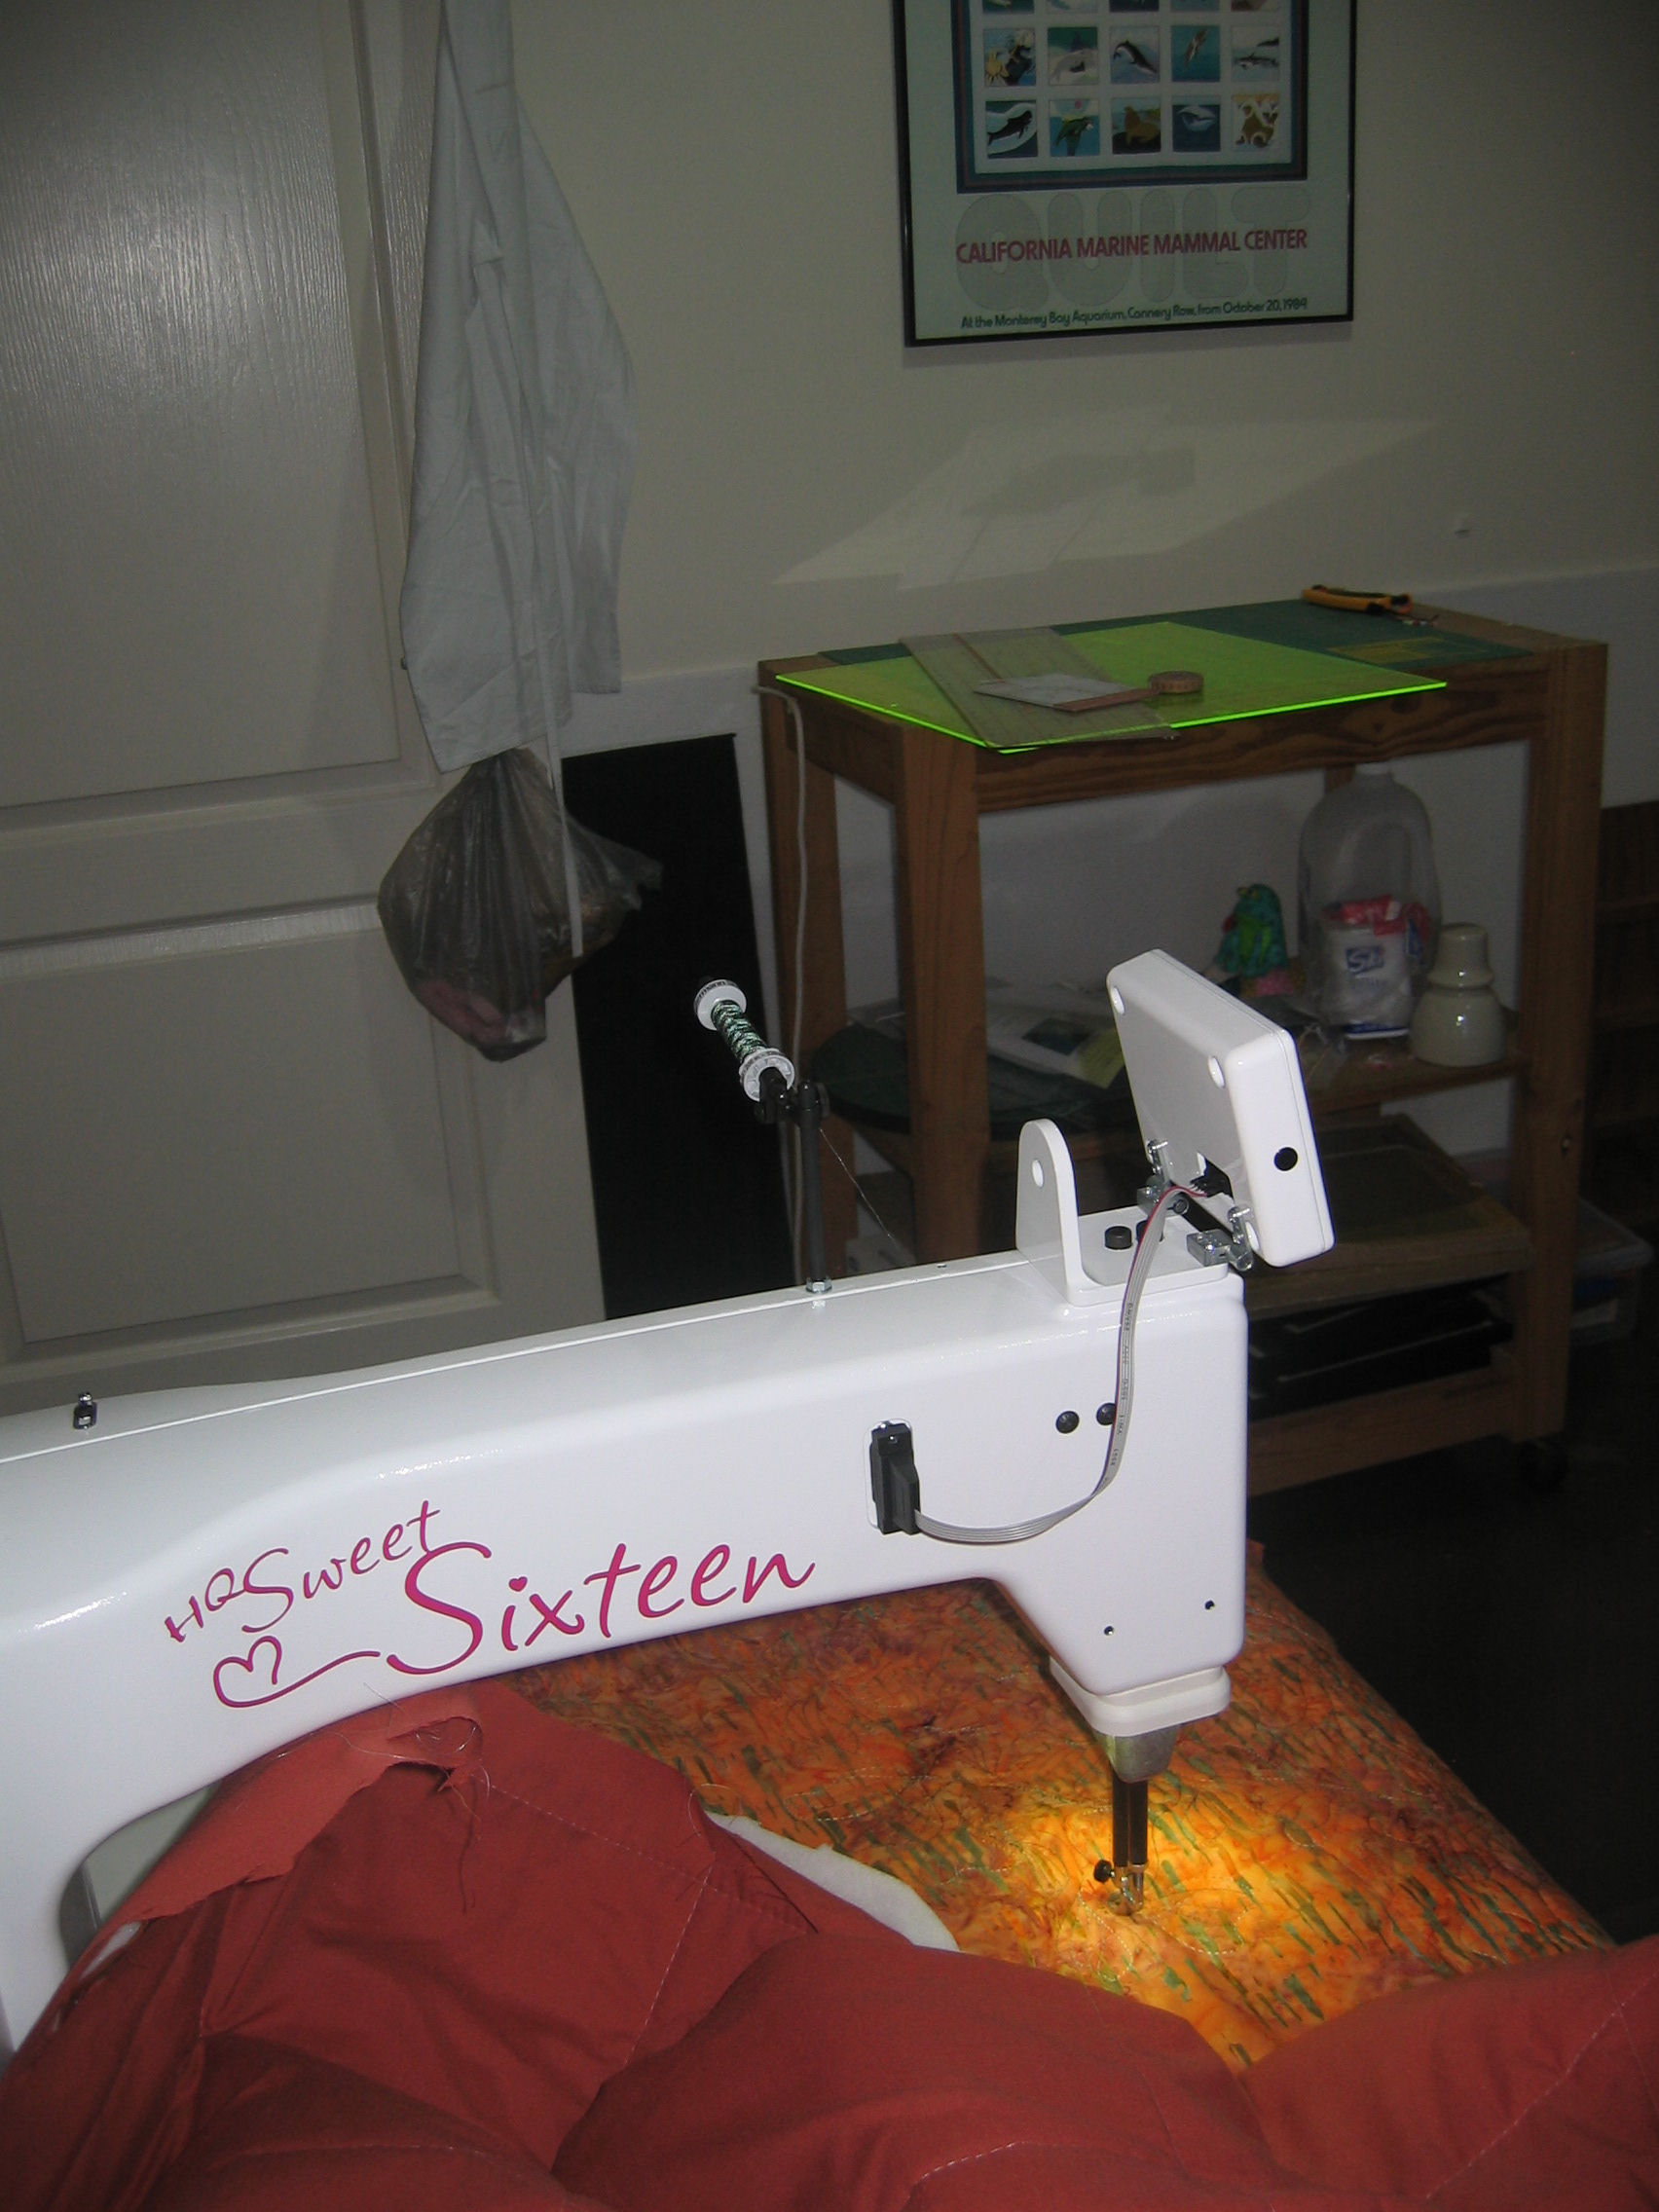
I’ve just purchased my ‘Beast’ — a HandiQuilter (HQ) Sweet Sixteen sit-down quilting machine. It comes with several things, including a purpose-built table.

Now this machine is big — and heavy. So it’s important that the table is stable and that the fold-out legs are fully folded out and locked into place before you put the machine into it. Sounds easy, right? Not so much…

There’s one instruction in the instruction manual for the table, which tells you to open the collapsed legs and lock them into place. That’s it.

But there’s a problem. This is one tough table and it has an exceptionally tough metal framework for the legs (and rightly so — it has to hold a lot of weight and deal with a lot of vibration over its lifetime). My dealer warned me that the legs ‘could be a bit stiff’ to lock into place on the fixed frame, and, if they were hard to lock in, to try using a screwdriver to lever the metal bits apart a little so that the hole on the collapsible arm could slot over the dimple on the fixed bit.

So late yesterday afternoon I unpack the table and put it on its back. I open out the legs and try to snap them into place to lock them. Nope. After a few tries, I get a screwdriver and try that. Still no joy. All that’s happening is that little flakes of black paint from the metal are coming off. I ask my husband to help me (he’s much bigger and stronger than me). Between us all we get is frustration. I go out to the shed to get the BIG screwdrivers to see if we can get more leverage. After about 45 minutes trying to get these legs locked away, we give up and agree to try again this morning.

At 5 am this morning (I woke at 4 am and all sorts of ideas for this table were running around my head…), I email my friend who has one of these machines and tables, as well as Michelle, the HQ dealer I bought the machine from. I also post a request to the Yahoo! group for owners of this machine to see if anyone there can offer any ideas.

A couple of hours later my husband gets up. I’ve had a suggestion from the group to try WD-40. My dealer emails me about some of the problems she’s had and how she’s had to kick the legs into place on some of the tables (about 10 kicks before they locked in!). My friend calls me and tells me her husband is coming home from his mine site this morning and she offers his assistance (he’s put together and taken her table apart at least twice). So I call him and arrange for him to drop into our house on his way home (we’re about halfway on his 3-hour drive).

Meantime, my husband’s now properly awake. I mentioned to him that I thought a block of wood might help to pry these metal arms open a couple of millimetres, but I discovered that the design of the arms is such that that’s not going to work (it sounded good in my head at 4 am!). I also mentioned the WD-40 option, and that my friend’s husband would be dropping in a few hours. So off my husband goes to the shed. He comes back with CRC, a block of wood (4×2), and a rubber mallet!

Back we go into my sewing room, where he lightly sprays the area (the dimple on one arm and the corresponding hole on the other) with CRC. Then he places the wood at the bend where the two bits need to lock in and become straight. I hold on to the other end of the wood block and he gives it a decent thump with the rubber mallet. It moved! Two more hits and it was locked away. We did the other set of legs and it was done!

So for anyone else having the same problem with their HQ Sweet Sixteen table’s legs, save yourself some time and frustration and have to hand a block of wood, a rubber mallet, and some CRC (or WD-40) before you start. I’m not sure which of those three items was the critical one — I suspect it was a combination of all three.

Thank you to Michelle for her suggestions, to Bobbie for offering Brian to us (it was nice to see him!), and to the Yahoo! group for their suggestions.

Update: There’s a video on HandiQuilter’s Facebook page about locking the legs in place: http://www.facebook.com/video/video.php?v=10150165136526966. However, we did this and it still didn’t work for us…


Gender-neutral cot quilt

25 04 2011

Some time back I received a set of charm squares (5 and 10 inch) and matching 2.5 inch strips as part of a promotional ‘gift’ for subscribing to a quilting magazine. I never figured out what to make with all this fabric and, over time, I’ve used parts of it for some of the travel accessories I make and sell on Etsy — luggage tags, luggage handle wraps, luggage straps and the like (http://www.etsy.com/shop/RhondaMadeIt?section_id=6122839).

I hadn’t touched the pack of 40 five inch squares. Until now.

I decided to make a gender-neutral cot quilt out of them, using mostly the lavender and soft greens, peppered with some of the pinks and blues and the occasional orange.

I used a disappearing nine-patch technique and then mixed up the blocks to give a more random appearance. I separated each set of four blocks with sashing strips in the lavenders and greens, added batting and a purple backing fabric, then free motion quilted the entire cot quilt in a large meandering stitch, using lavender thread top and bottom. The binding is a mix of the remaining lavender and green fabrics.

I’ve now added this pastel, gender-neutral cot quilt to my Etsy store: http://www.etsy.com/listing/72831508/lavender-and-green-gender-neutral-cot

Click on a small photo below to show it full size, then click on it again in full size mode to zoom in to see the stitching.


Bright jelly roll lap quilt – finished

25 04 2011

I’ve finally completed some of the projects that were still outstanding from when I returned from the Eleanor Burns Quilting Academy in California last month.

On Day 3 of the Eleanor Burns Quilting Academy, I was in the class that made a quilt top from a jelly roll in 6 hours, using a serger (overlocker). The pattern is an Eleanor Burns design, and Eleanor gave us labels for the pieces we made, which she autographed using a permanent fabric pen (see the photo of the label).

When I got home, I added the borders, the batting, and the very bright backing fabric, then spent many many hours (about 10?) free motion quilting it on a HQ Sweet Sixteen. I found that flame motifs worked well in the square blocks, and so did several blocks with flame variations. I used a red, yellow, blue and green variegated cotton thread in the bobbin, and while it worked well with the backing fabric, it did show through a bit in some parts of the stitching. I did hooked feathers for the white border. Finally, I bound this quilt with a mix of the jelly roll and border fabrics.

I’ve now added this very bright lap quilt to my Etsy store: http://www.etsy.com/listing/72828803/bright-lap-quilt.

Click on a small photo below to show it full size, then click on it again in full size mode to zoom in to see the stitching.