Stitching feathers in an octagonal shape

14 10 2013

When I was faced with the octagonal snowball blocks in one of the community quilts I quilted, I decided to stitch feathers. But making feathers flow nicely in an octagon is a challenge because of the odd angles. Here’s the end result, and how I did it.

(Note: I use a Handi Quilter Sweet Sixteen machine, but you can use this technique on any domestic sewing machine, mid- or long-arm quilting machine, or even hand stitching.)

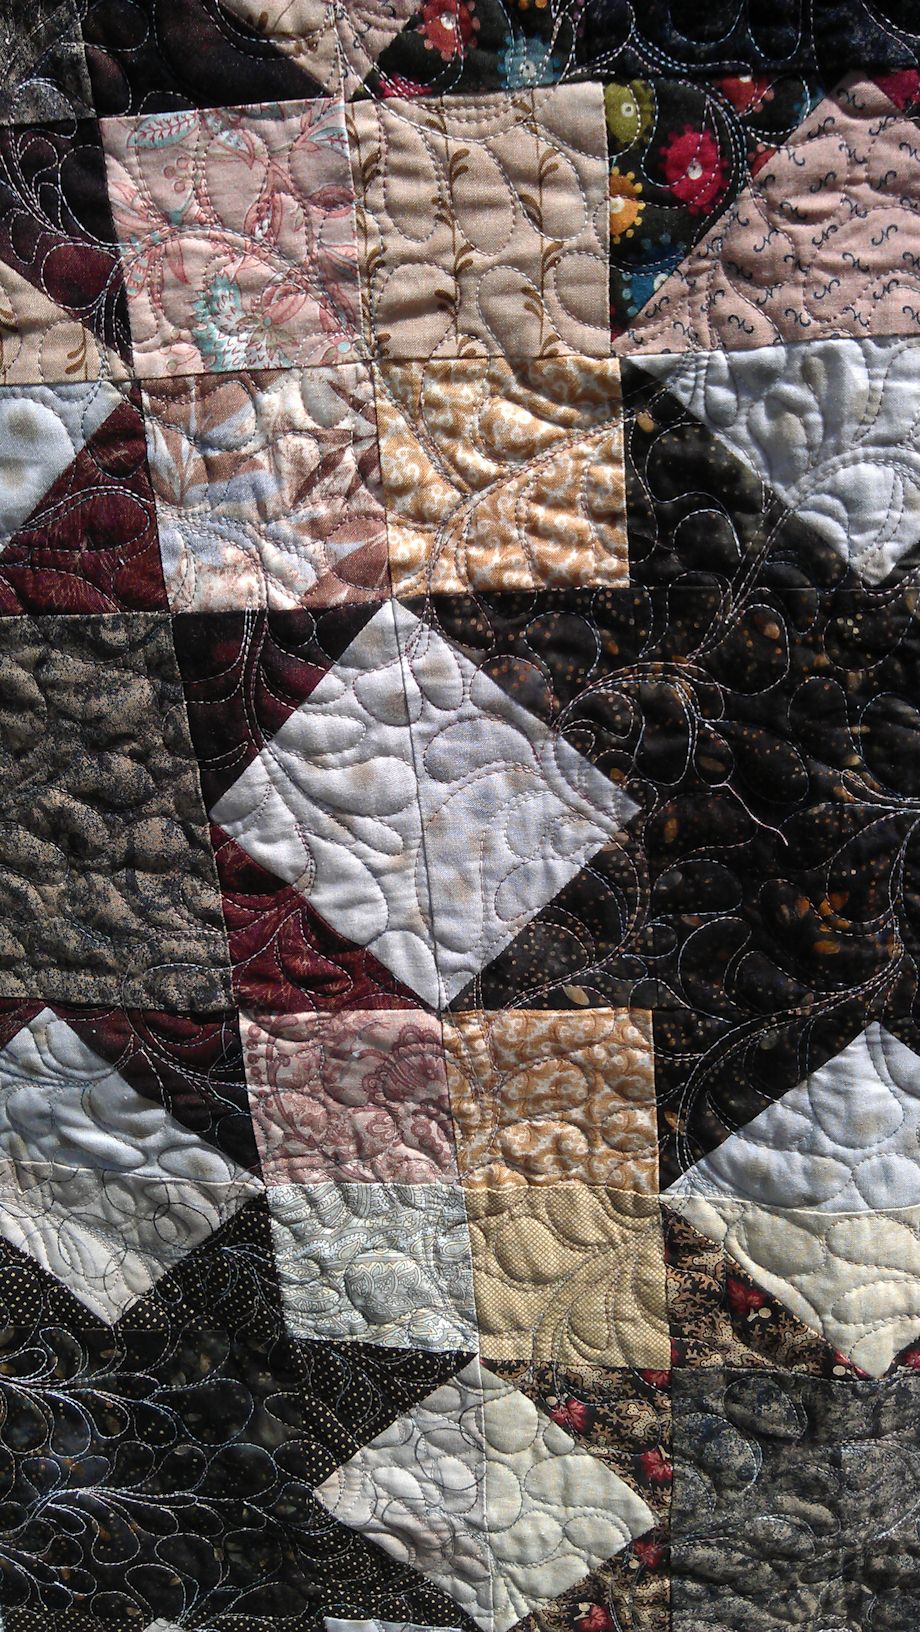
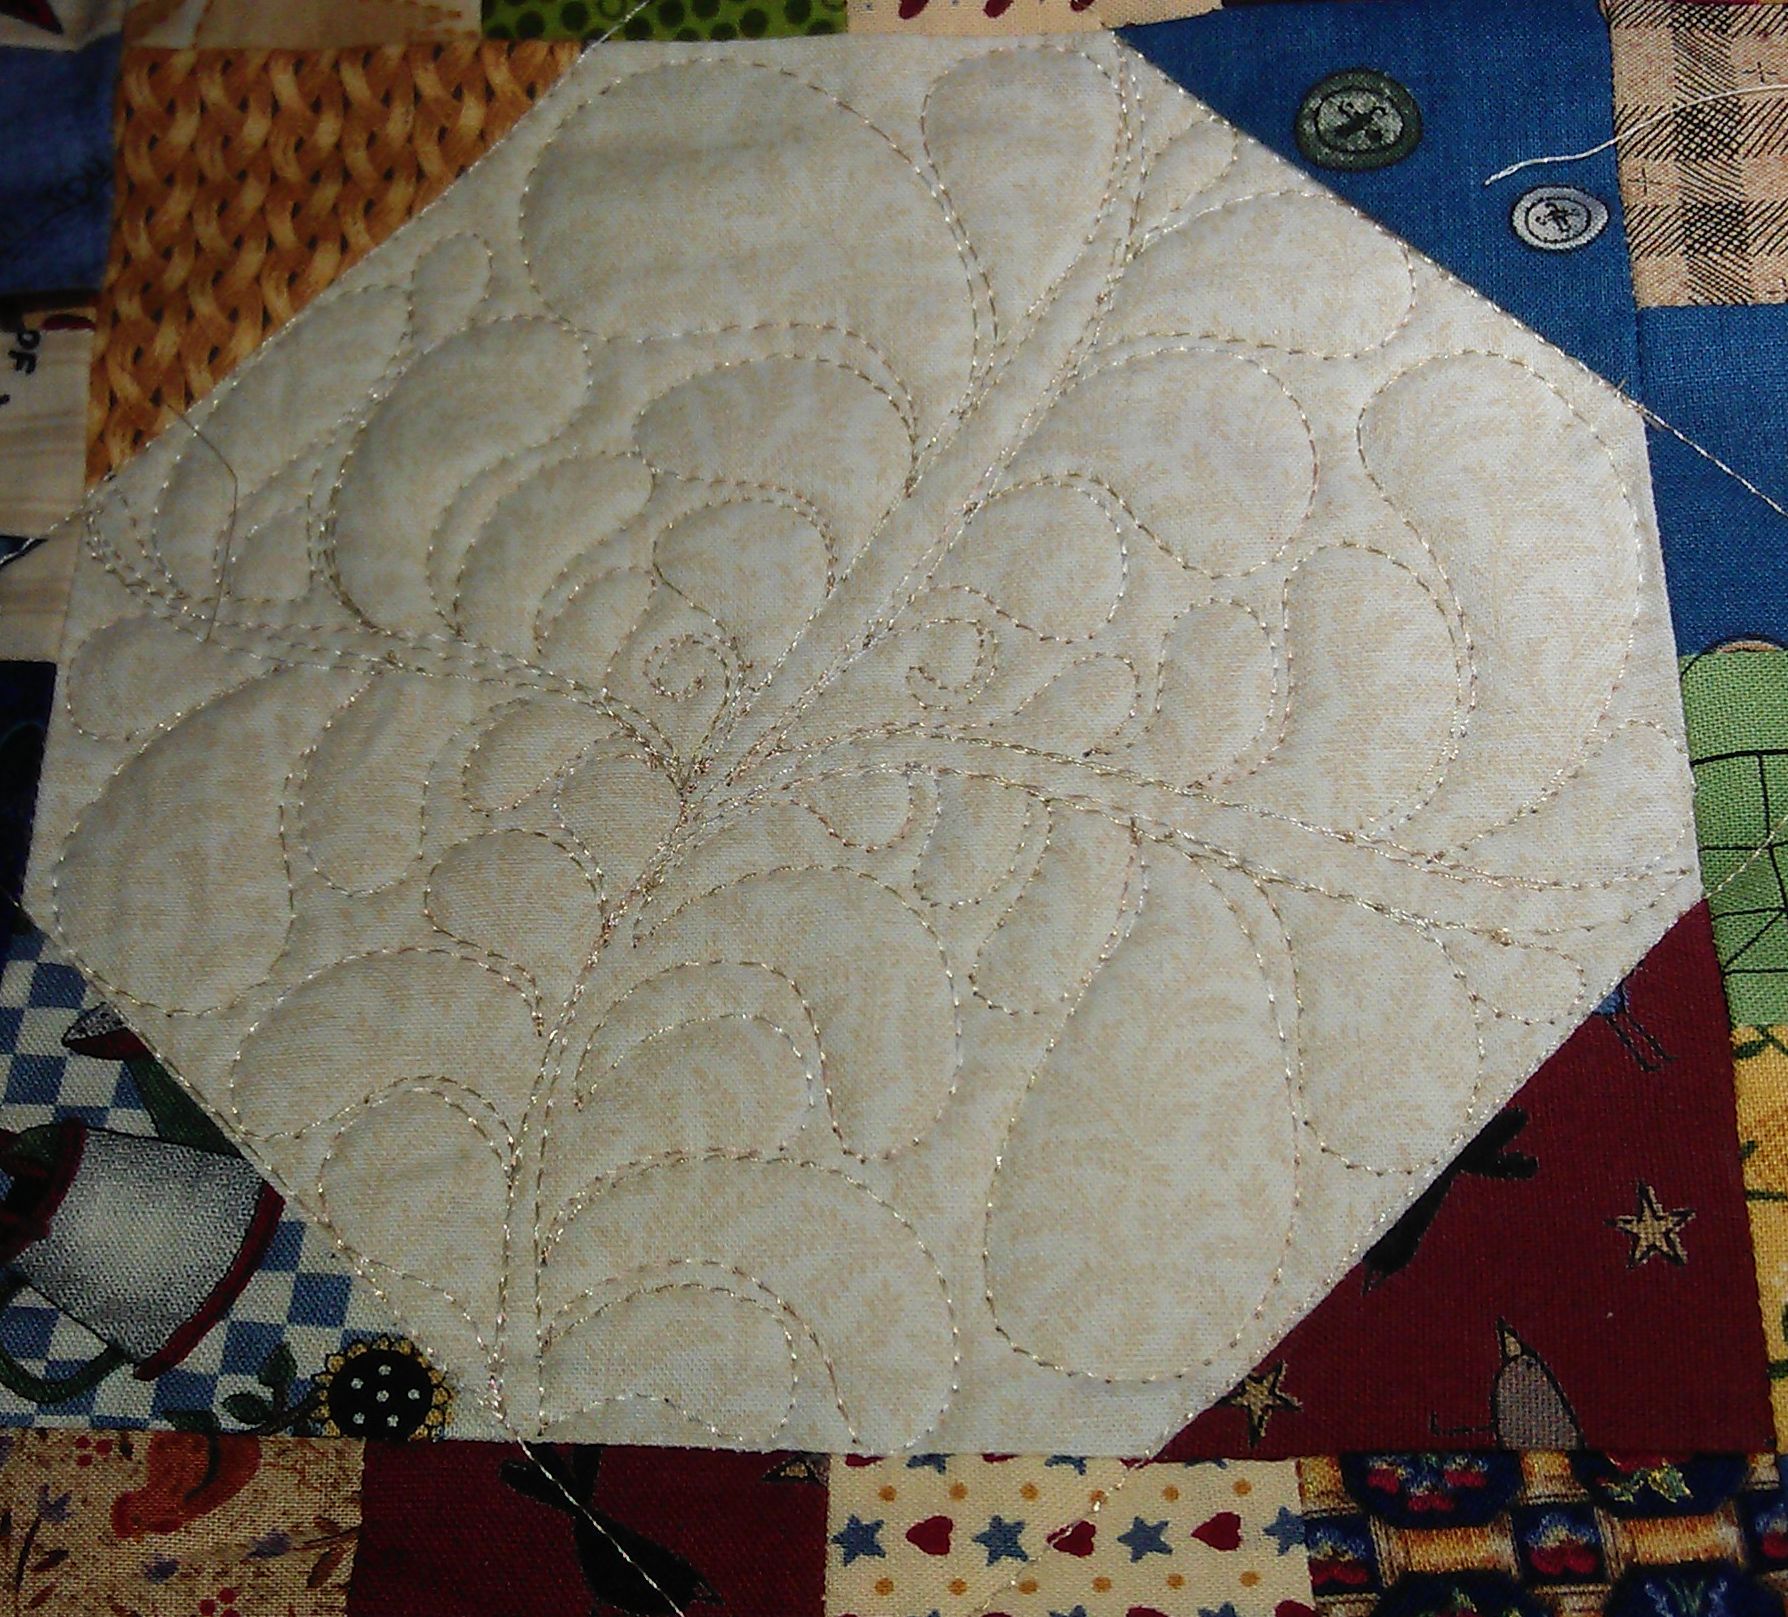
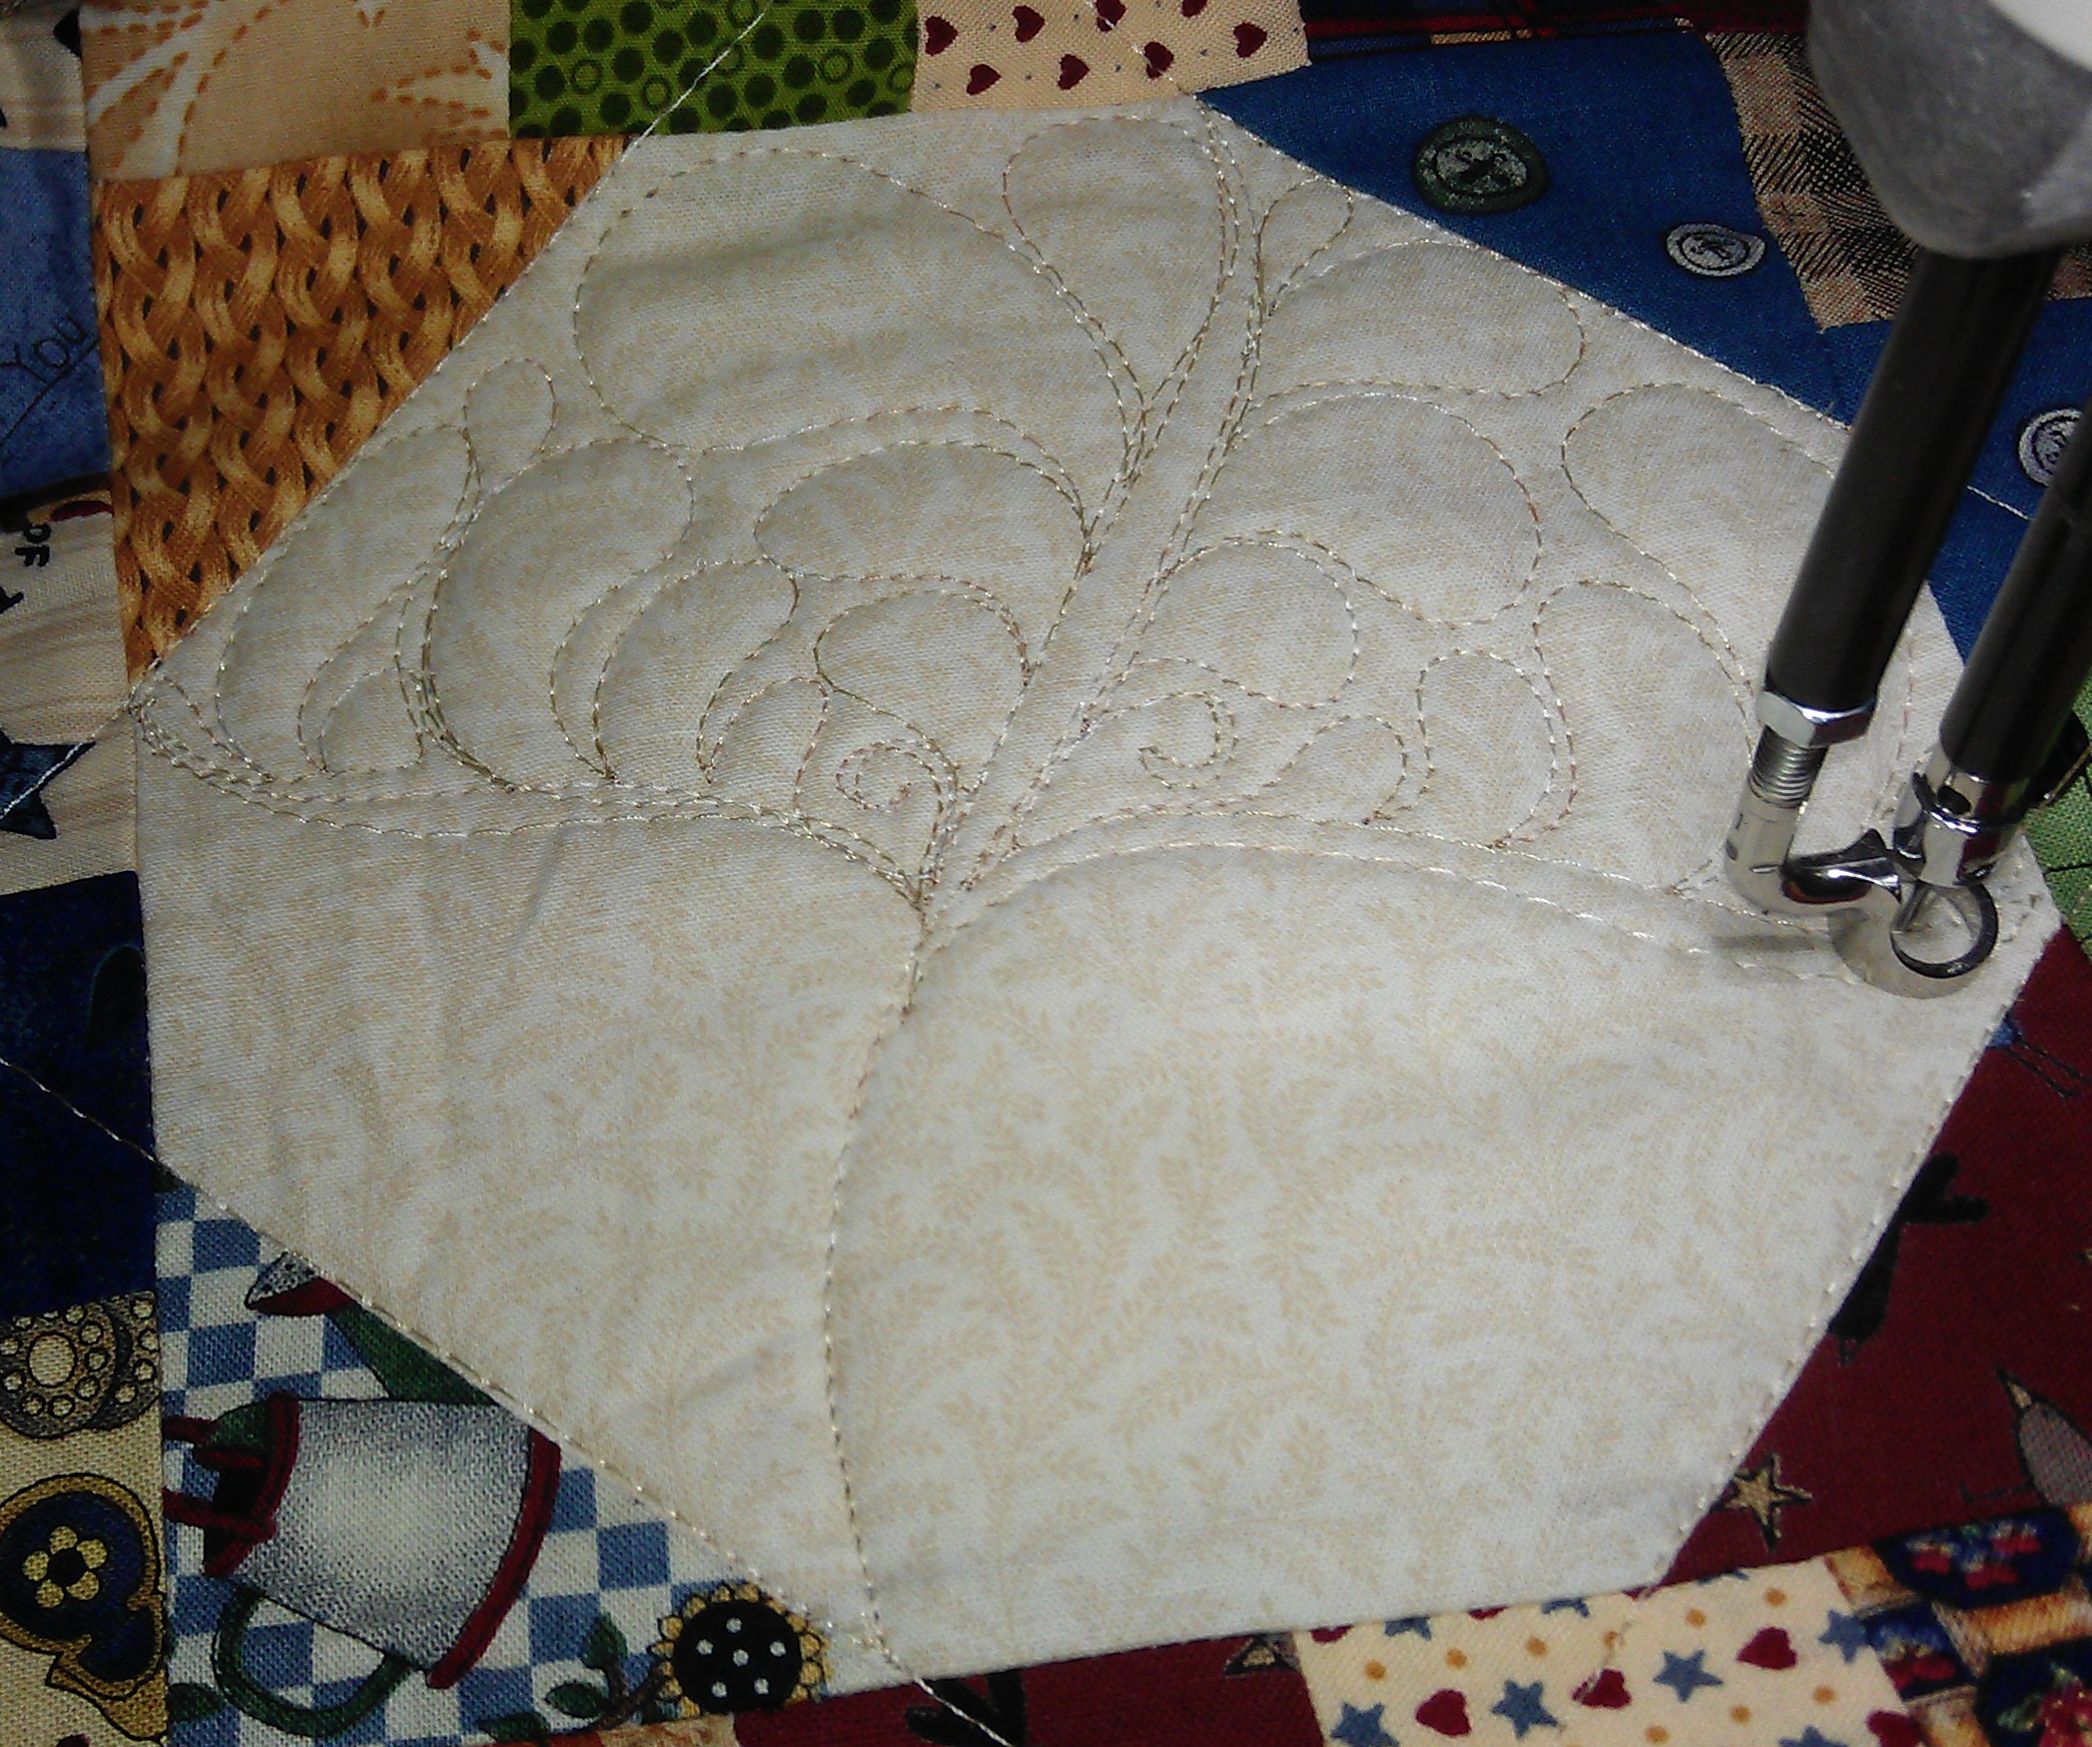
The finished feathers inside an octagon:

feathers_octagon15

Step 1

Stitch a long sweeping curve diagonally across the block from one corner to its diagonal opposite.
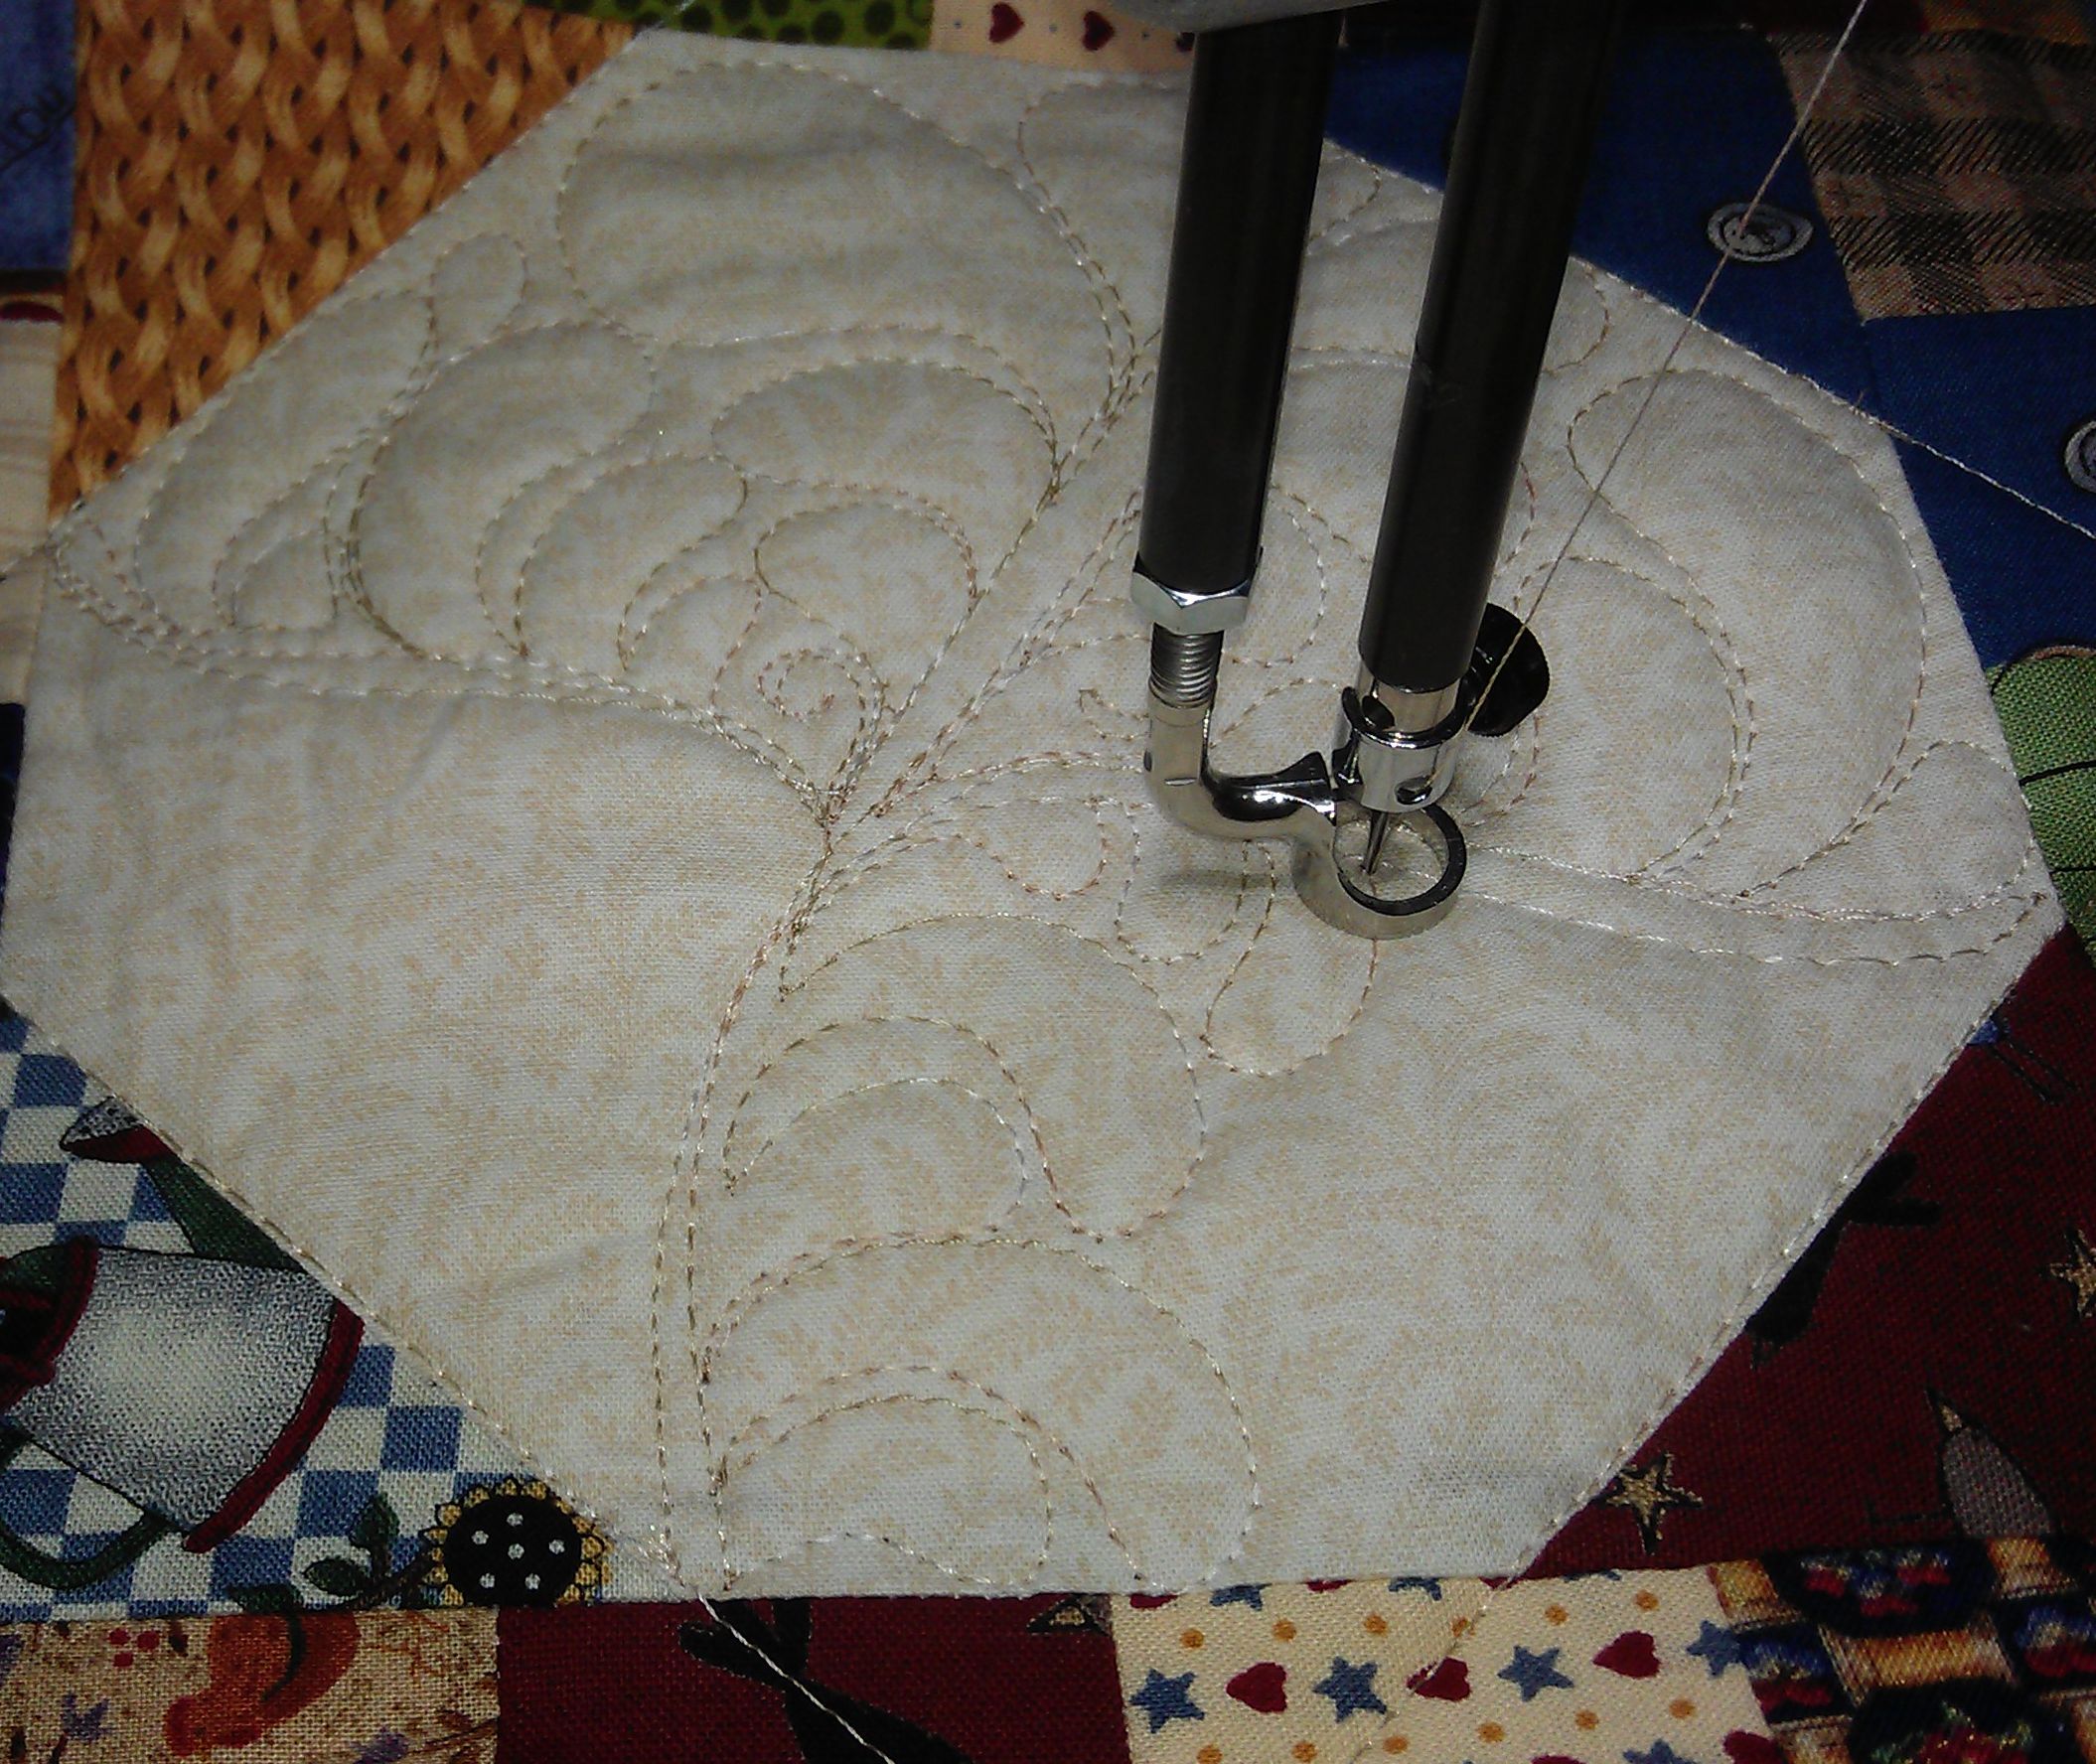
feathers_octagon01

Step 2

Echo stitch back down that line to about the halfway point. This is the main spine.

feathers_octagon02

Step 3

At about the halfway point, stitch out to another point on the octagon with a sweeping curve, then echo stitch back to the main spine. This creates one of the two minor spines.

feathers_octagon03

Step 4

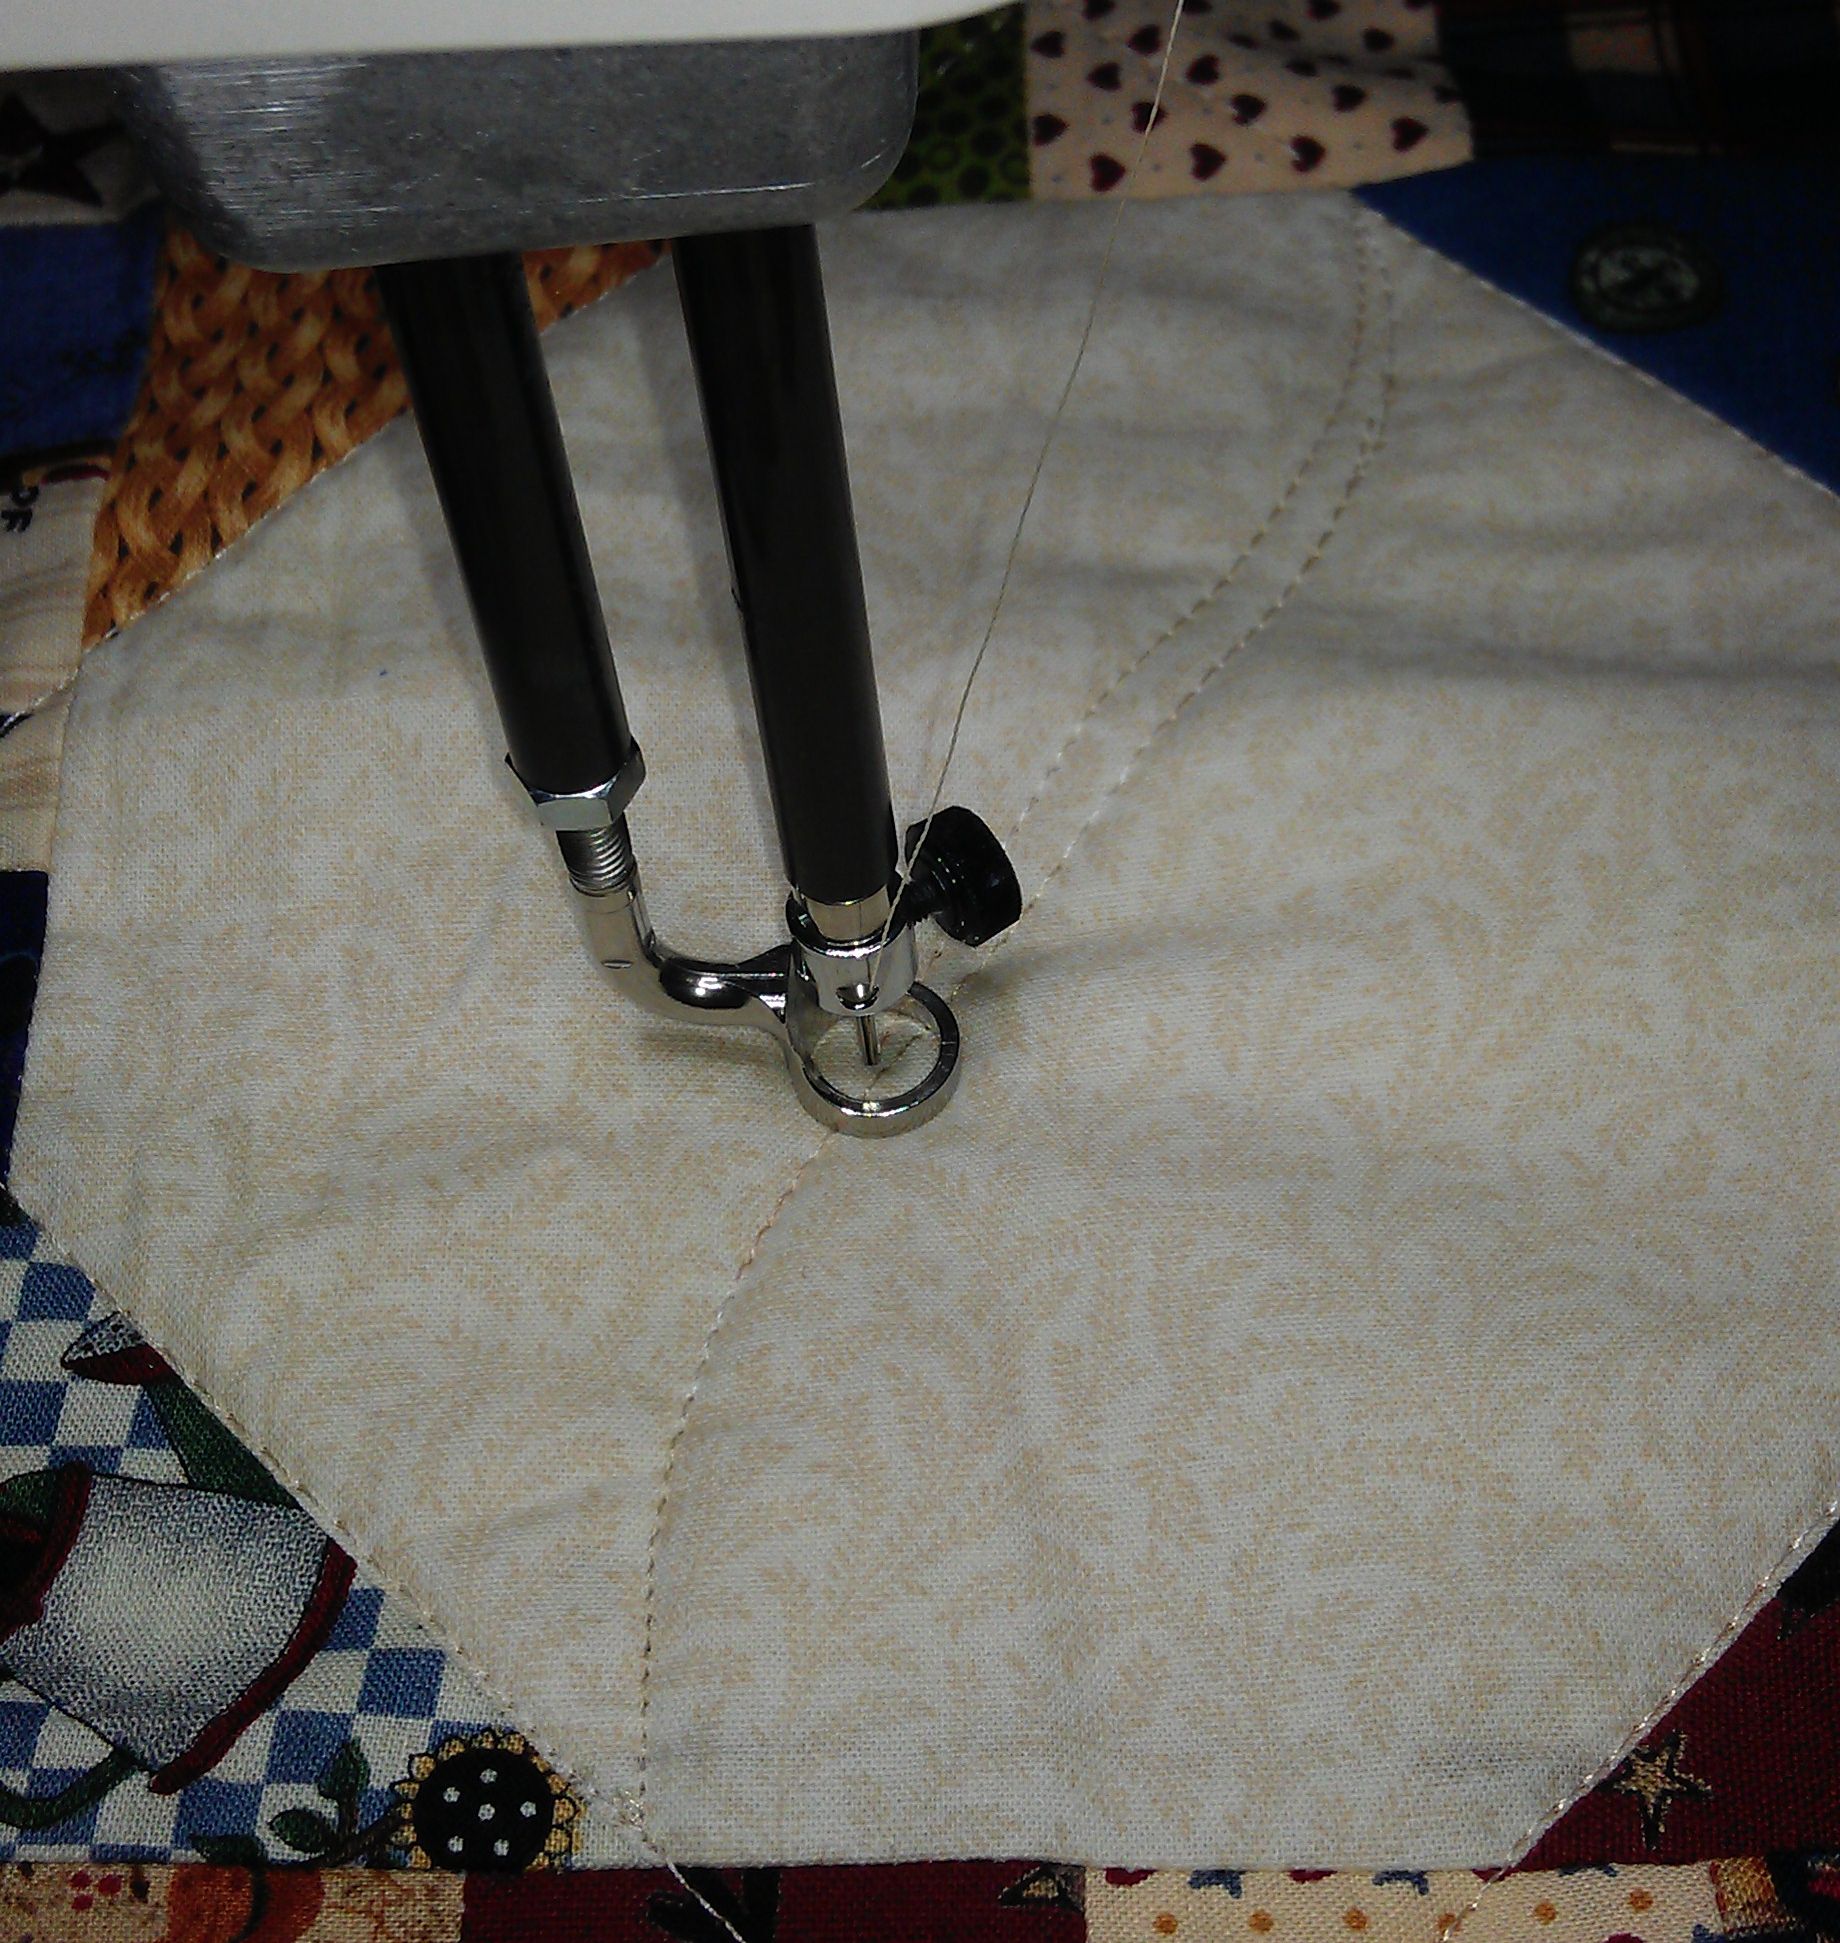
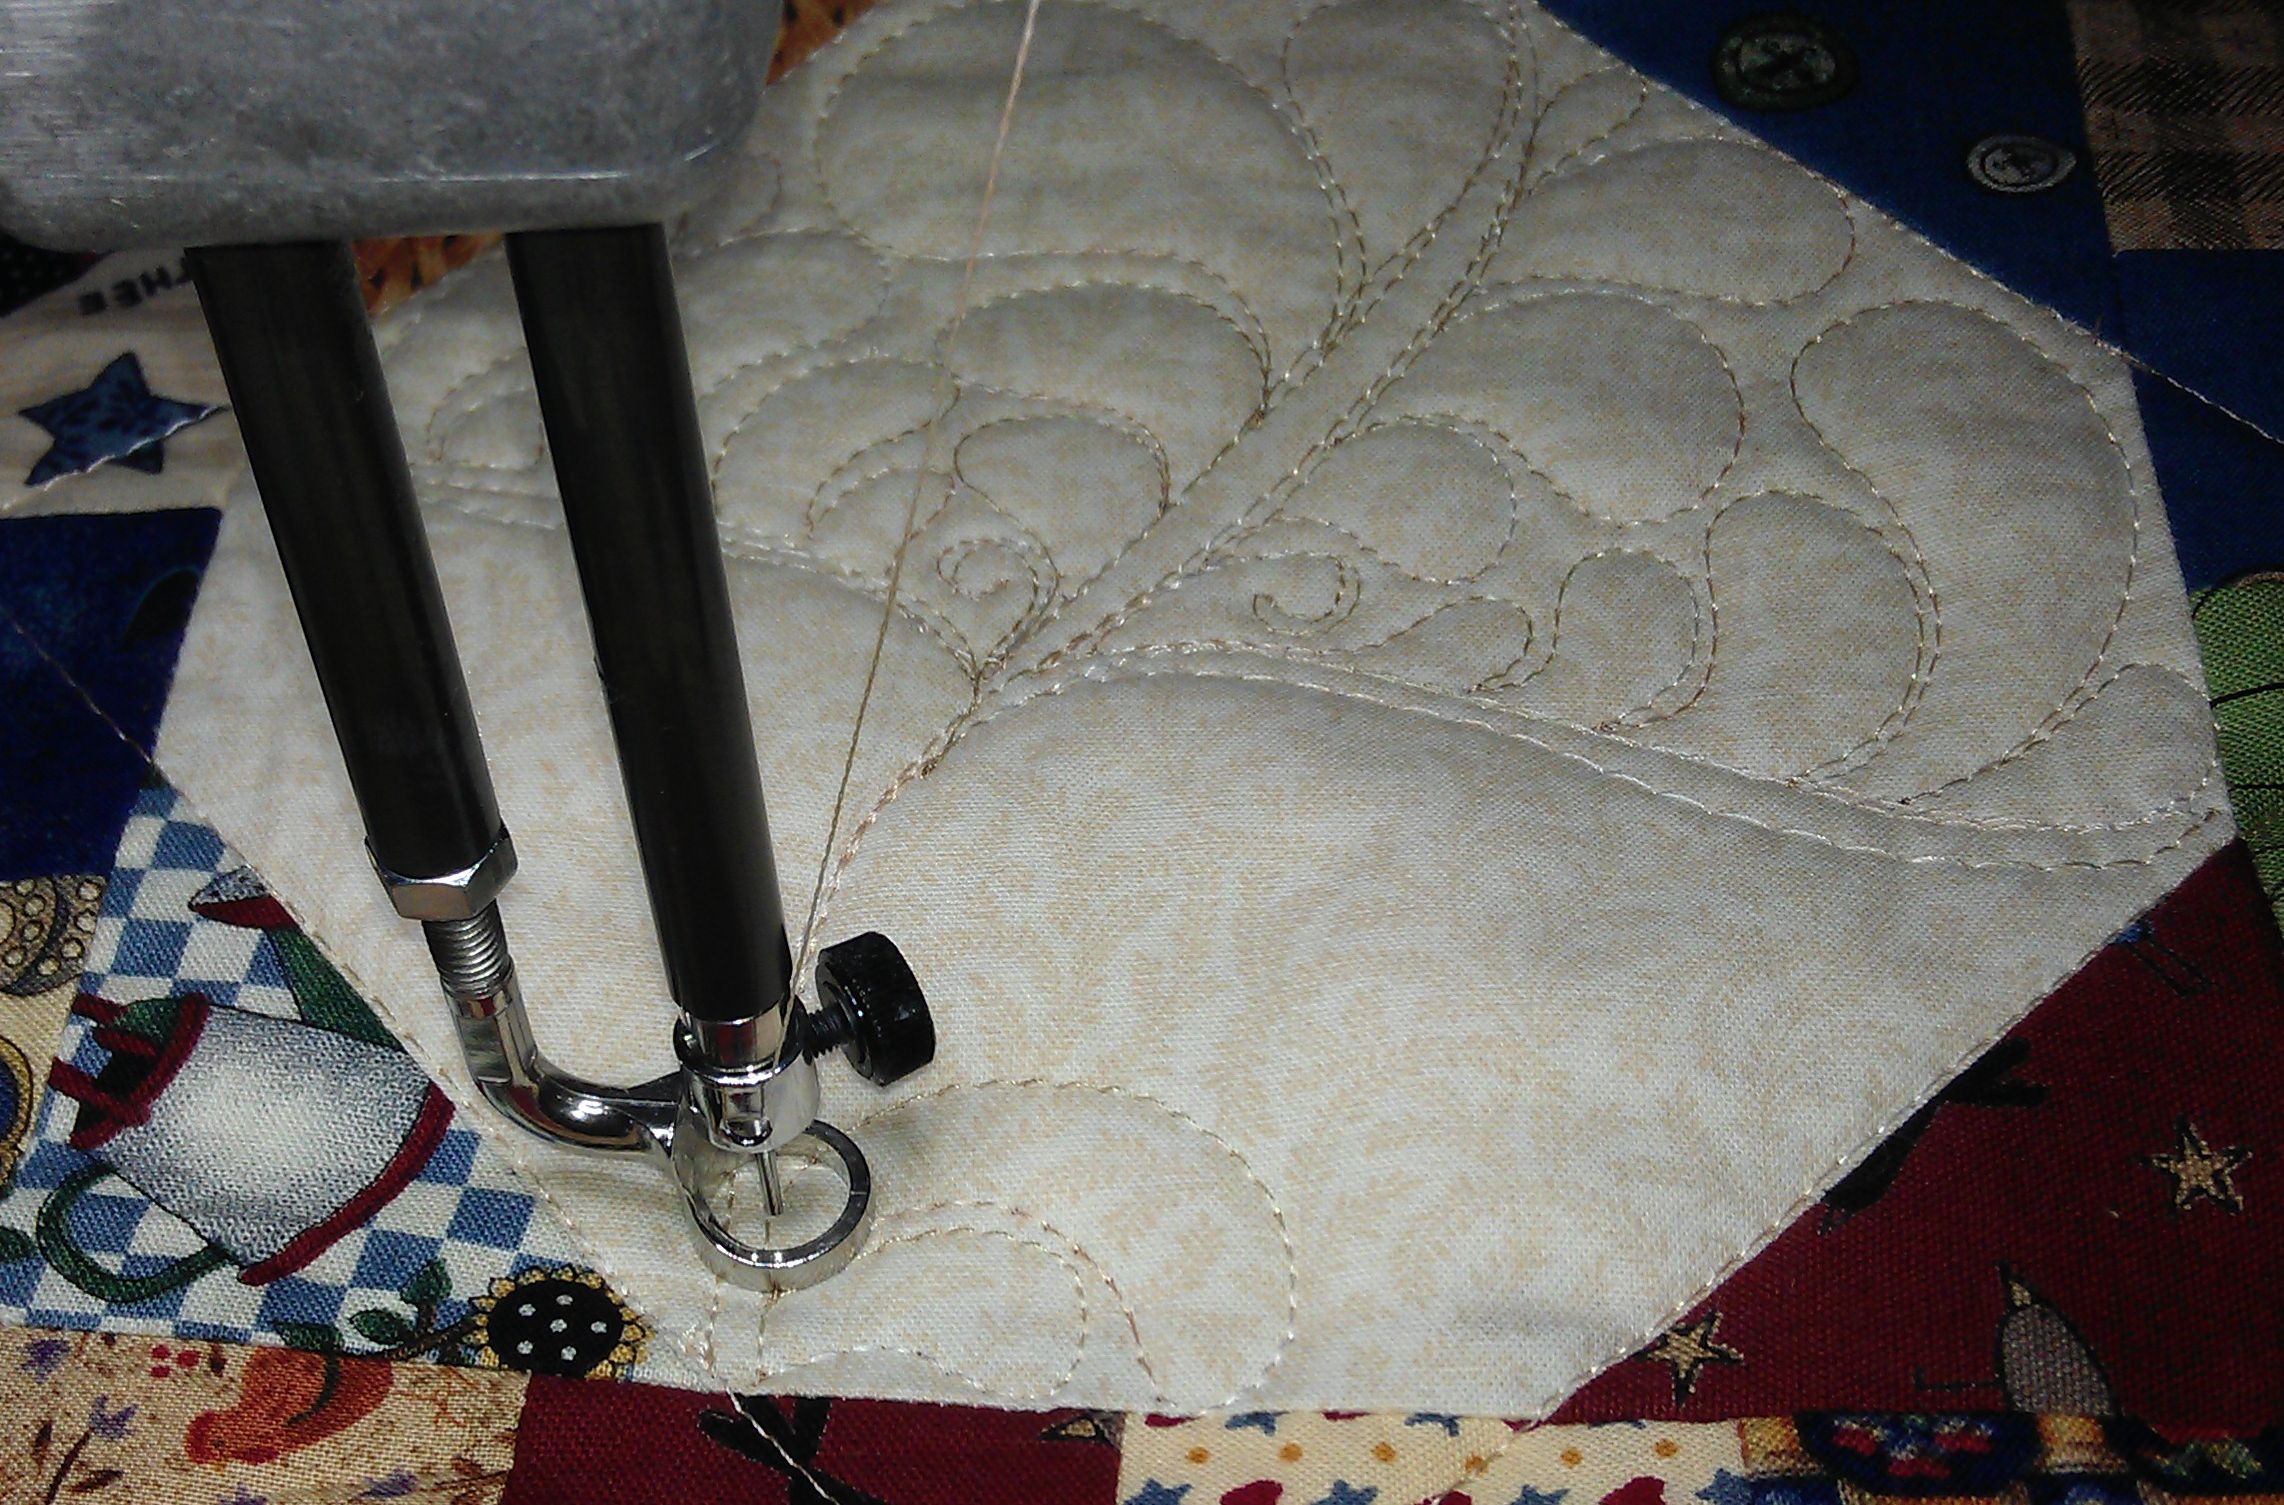
Where the spines join, stitch a little curl.

I can’t remember where I learnt this trick, but it’s a good one as it gives a curved shape ready for the feathers to curl around and avoids the issue of which side of the feather to start stitching, and thus which feather will dominate that space. And once the feather is finished, you really can’t notice that there’s a little curl in there unless you look hard for it. (Note this photo is taken from the side so I could get a clear photo of the curl.)
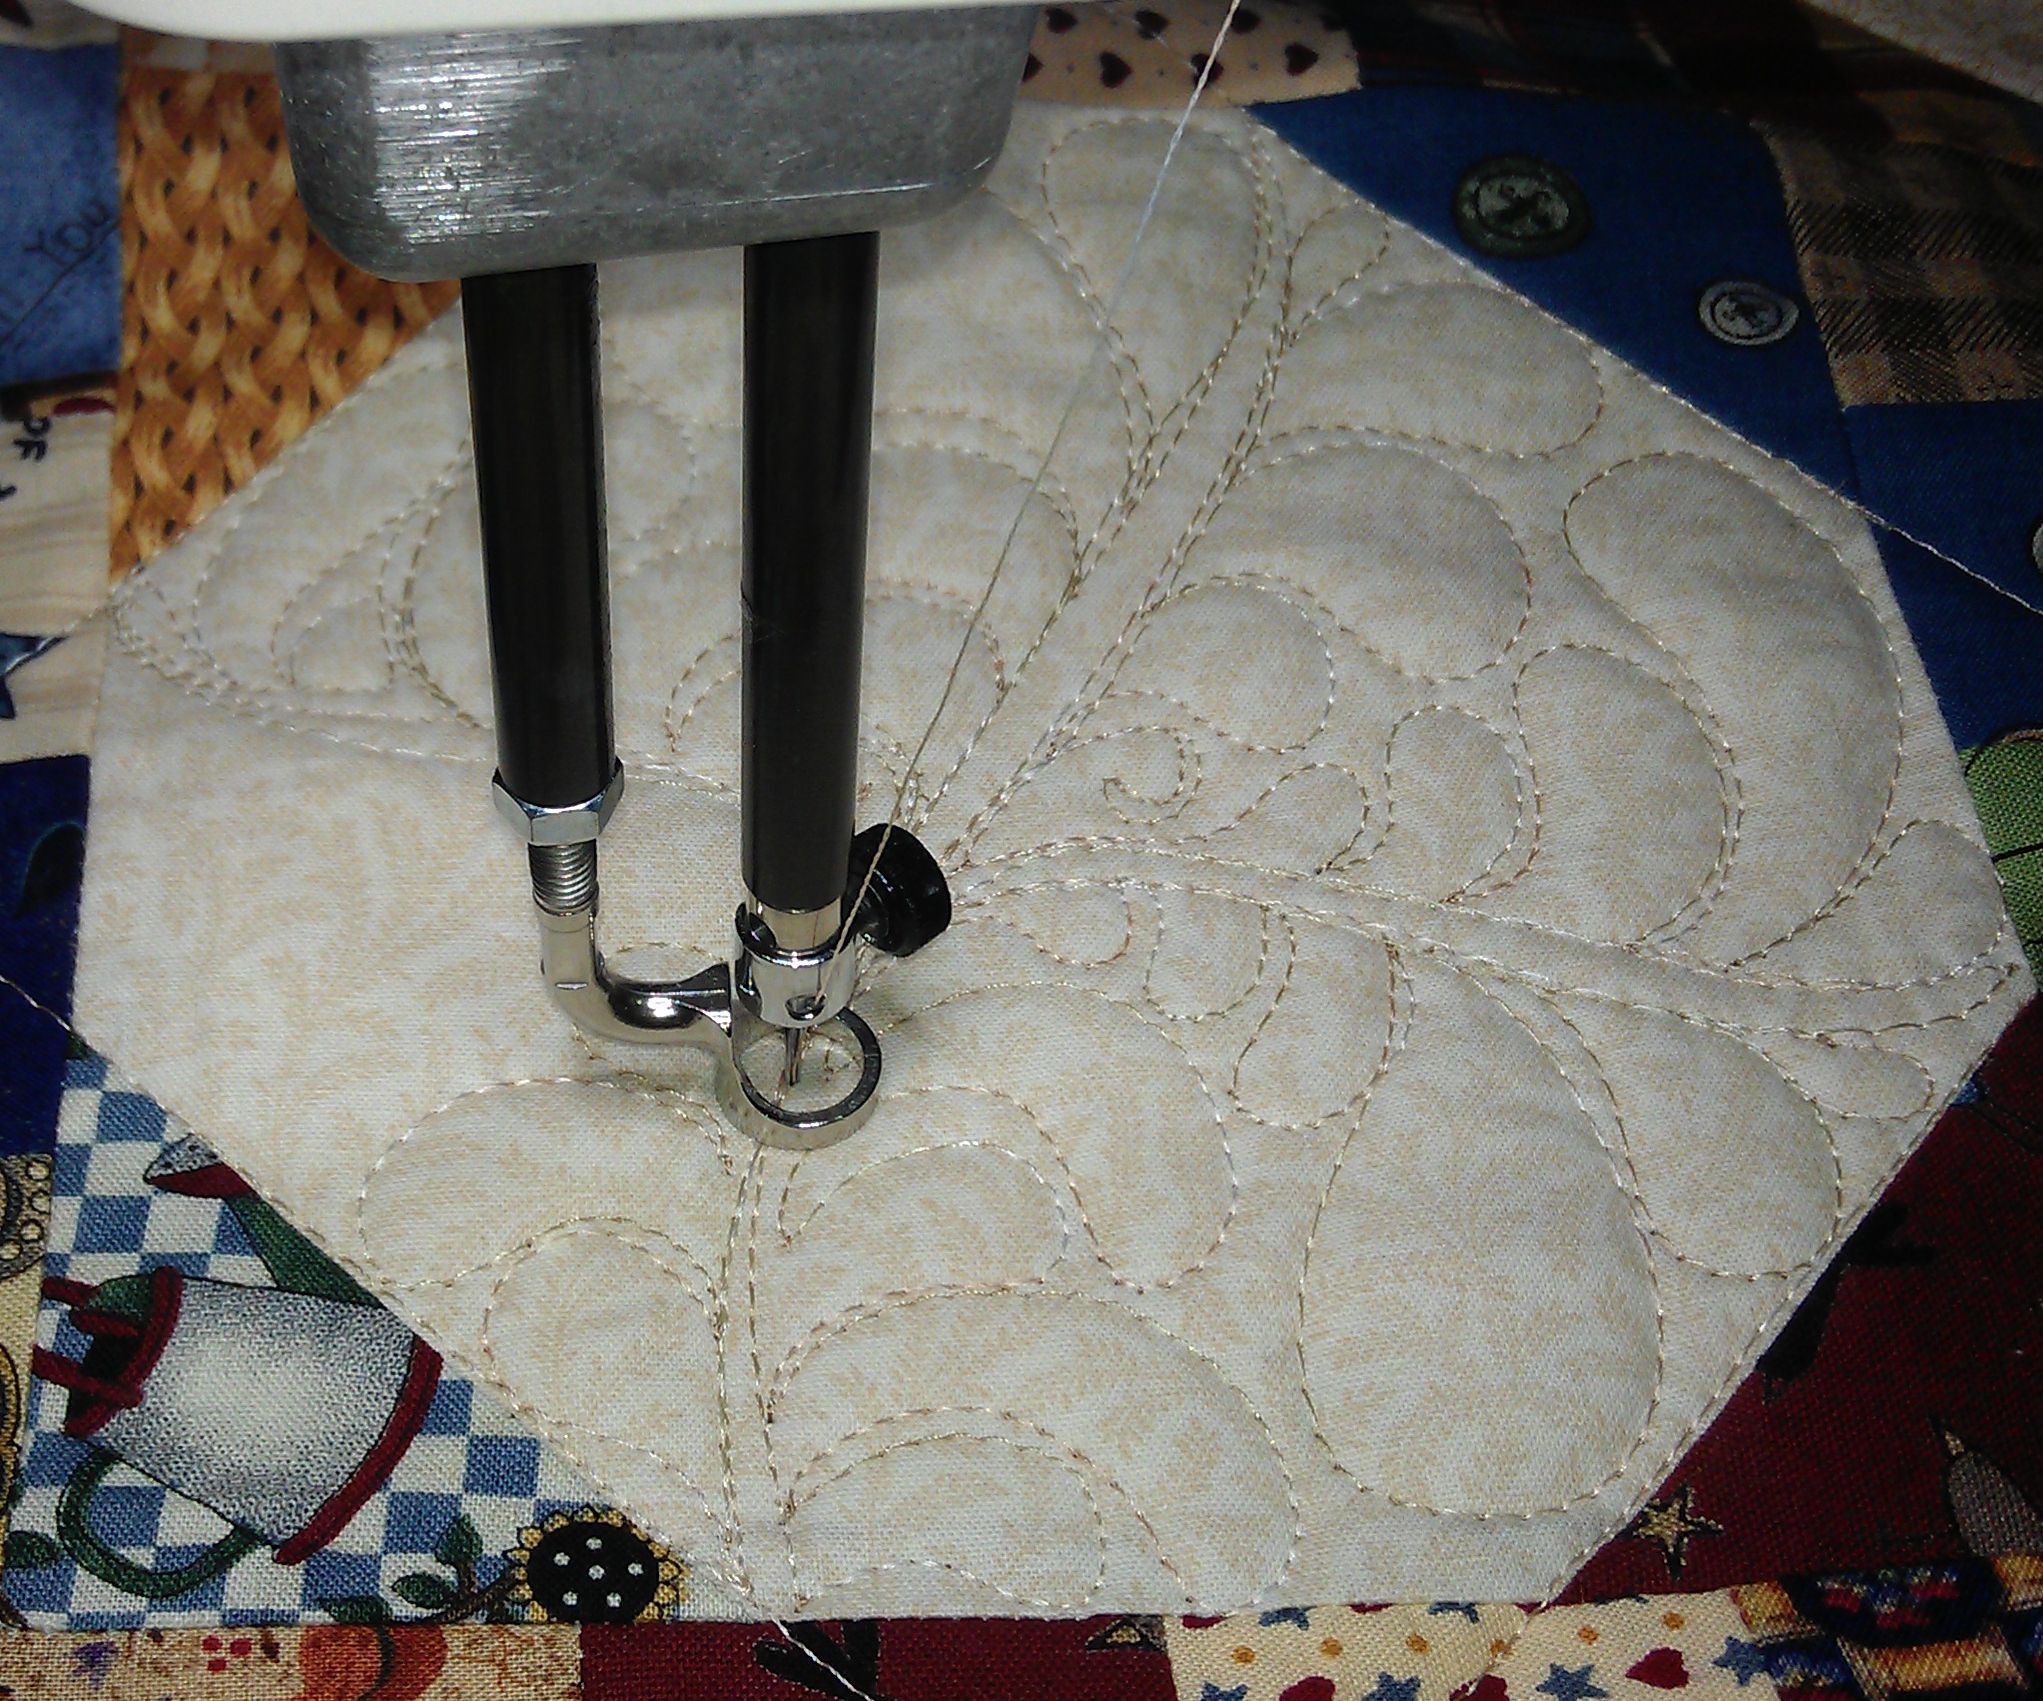
feathers_octagon04

Step 5

Start stitching your feathers up one spine, using the curl to give your first feather its curve — it doesn’t matter which side of the space between the spines you start stitching. Don’t go too far over into the other half of the space, or leave too much space for the other side to fill — imagine about a halfway point and stitch your feathers to there.

When I’m stitching feathers, I think of commas — some people think of half hearts, but bulbous fleshy commas work for me 😉 I also leave a slight gap between my feathers and complete each one in its entirety — I don’t use the ‘bump’ method of stitching feathers, but that’s a personal preference, so use whatever method you like to stitch your feathers.

feathers_octagon05

Step 6

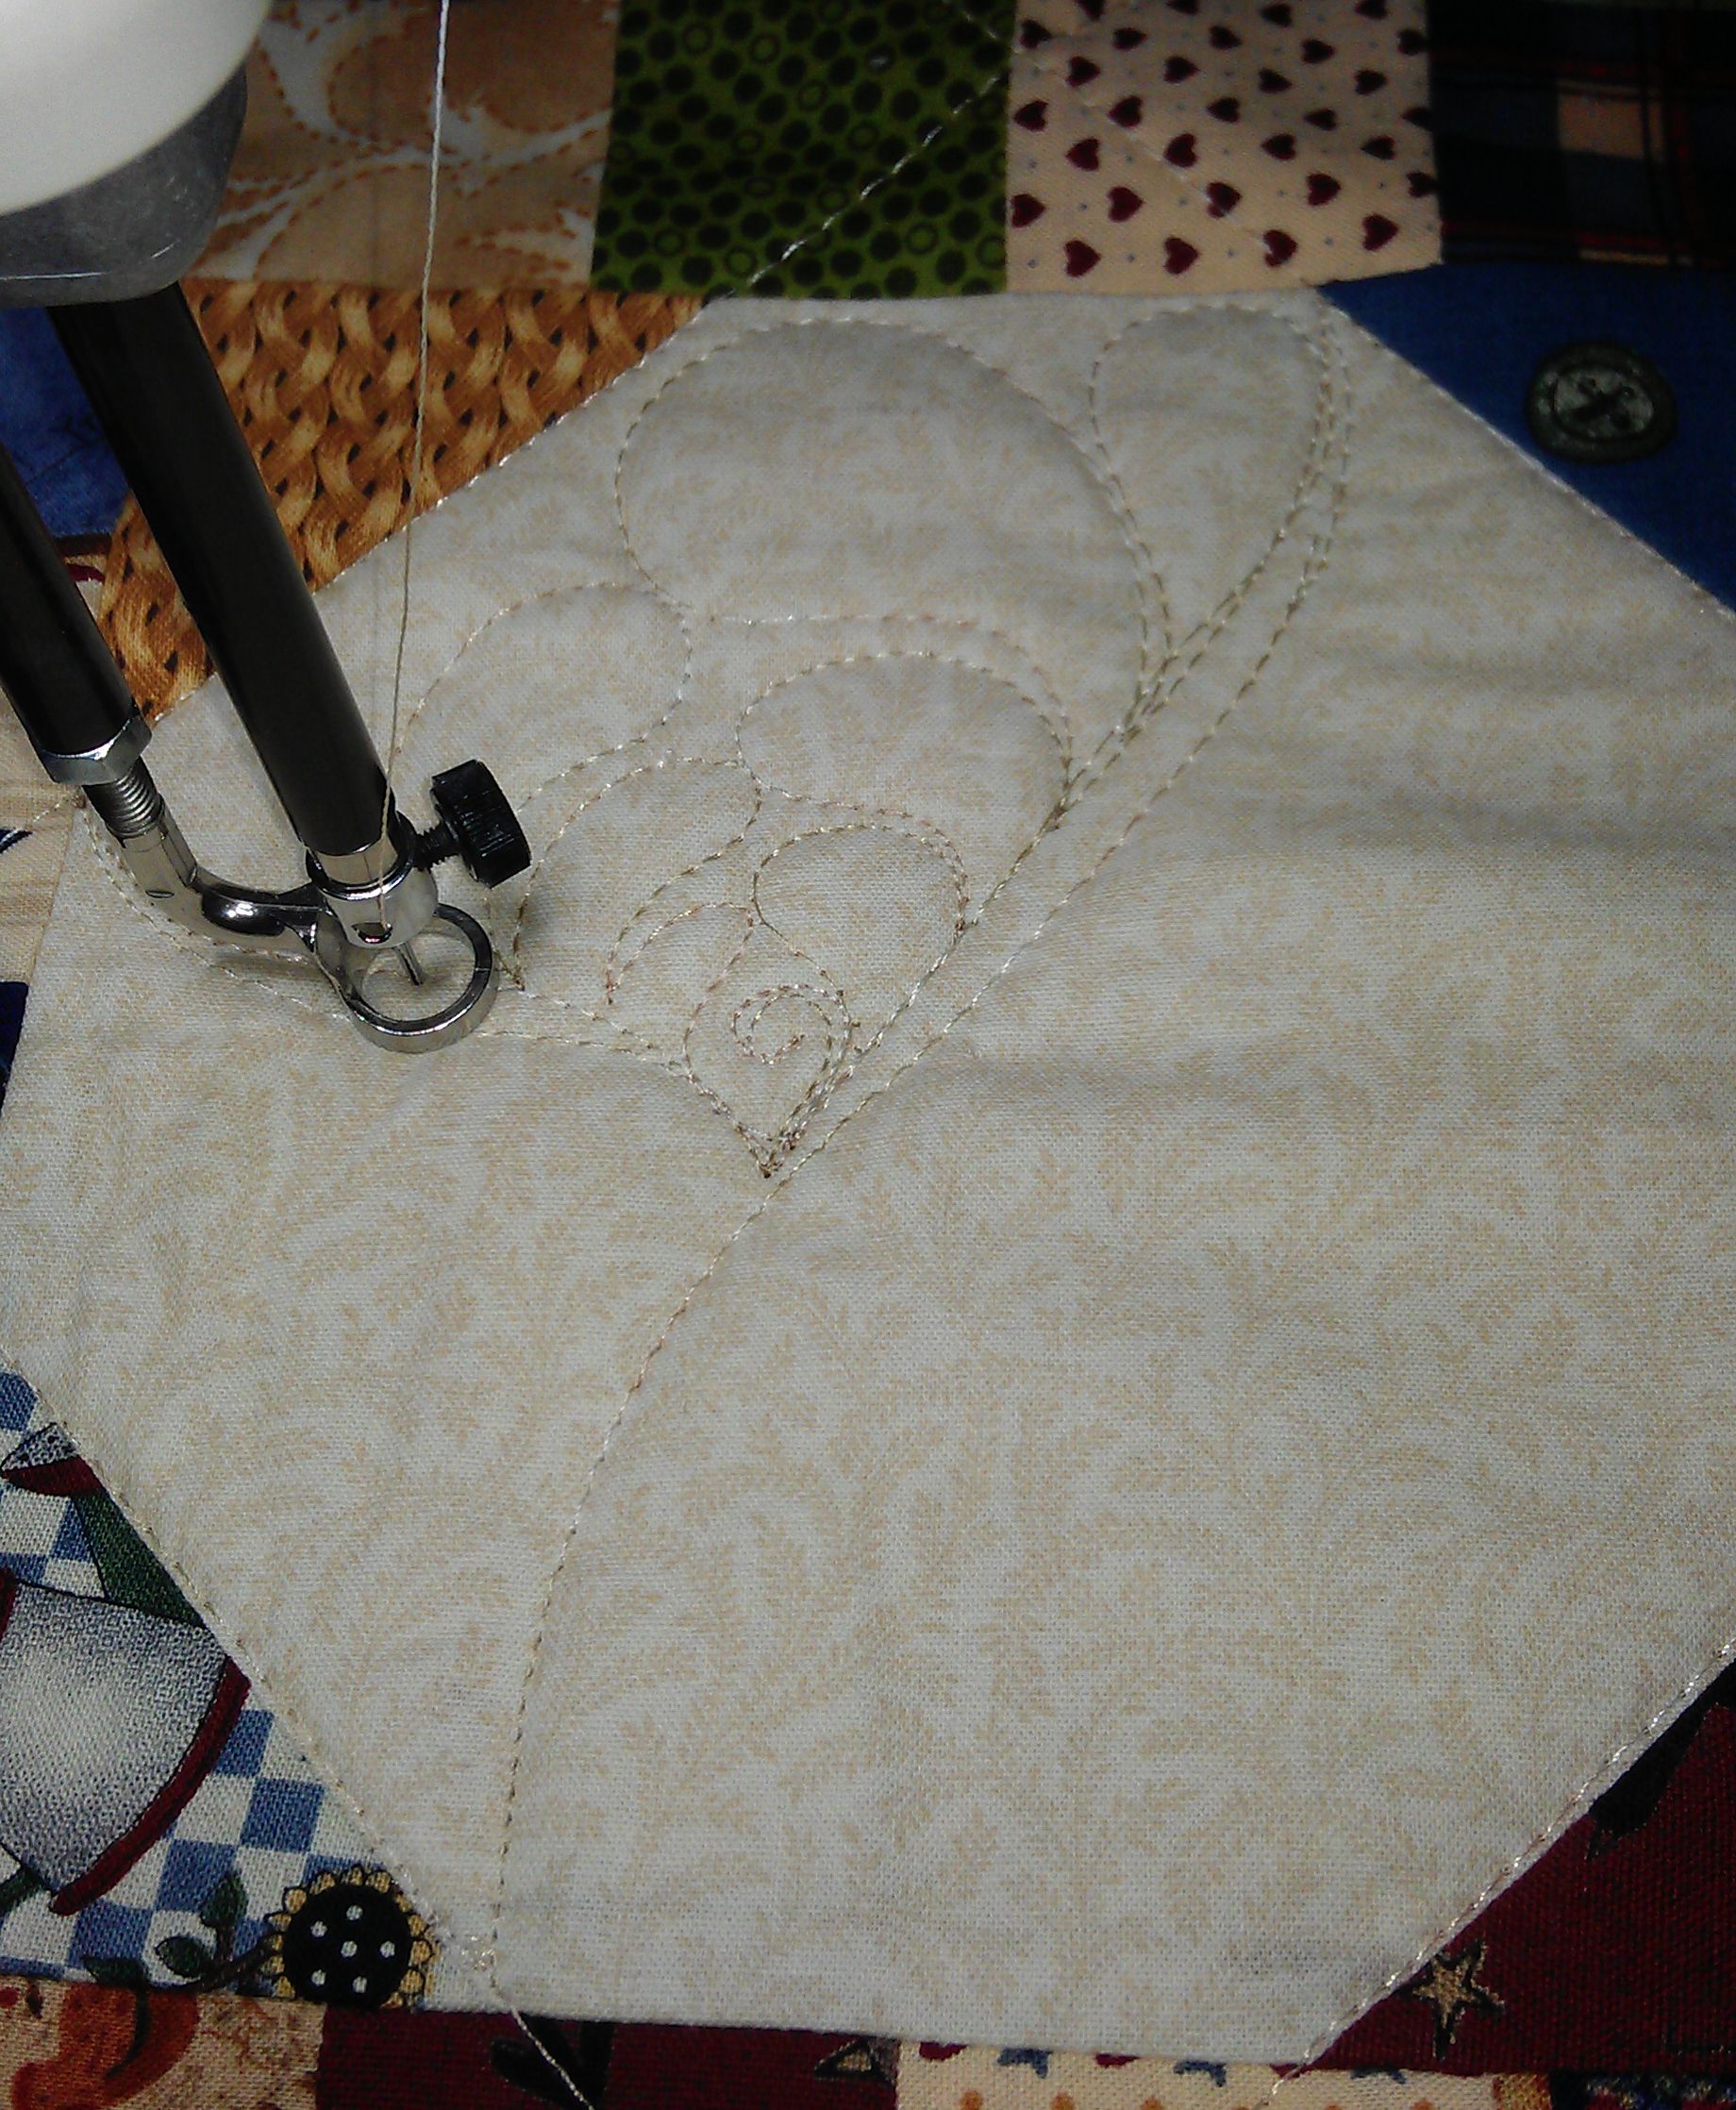
After you’ve finished stitching the feathers along the first spine, stitch back down that spine to the curl, then start stitching the feathers on the other spine, again using the curl as your starting point. Try to make the feathers ‘kiss’ (or ‘air kiss’) the feathers on the other side of the space. When you’re finished, travel stitch back down the spine to the central area.

In the photo below, see how the curl looks like a feather once it’s surrounded by other feathers? And see how I have a small gap between the feathers and how each gap is a little different? And notice that some feathers just touch (kiss) the ones on the other side, and some don’t? You don’t have to be perfect! You’re looking for an overall effect, not a perfect feather every single time. Life’s too short…

feathers_octagon06

Step 7

Your first inside space is now complete. That wasn’t so hard, was it? Now it’s time for the next space.

As before, from about halfway down the main spine, sweep out and echo stitch back in to create the second minor spine. You can add some interest by NOT starting the next minor spine from the same place as the first one.

The reason I create three spines (one major, two minor) is to break up the space, and because using an odd number is more pleasing to the eye than an even number (e.g. most [all?] flowers have an odd number of petals — 3, 5, 7, 9, etc. so if it works in nature, it has to work in quilting, right?).

feathers_octagon07

feathers_octagon08

Step 8

As before, stitch a curl at the junction of the spines, then stitch the feathers up one spine, then travel back down the spine, and stitch the feathers up the other side of the space, kissing (or air kissing) the feathers on the other side.

feathers_octagon09

feathers_octagon10

Step 9

Stitch back down to the beginning of the main spine (where you first started), echoing the first line of stitching.

Start stitching the next lot of feathers from the base, working your way up the spine and curving around the outside of one of the minor spines. Your aim is to fill the entire space.

When I’m stitching these feathers, there’s a temptation to create big feathers to fill the space. But these can look odd. So I just try to keep creating similar sized feathers to the previous ones. How? By adding *little* feathers in between the normal size ones, and by curving over those little feathers to kiss the *side* of another feather, not its ‘nose’, as shown in the second photo below.

feathers_octagon11

feathers_octagon12

feathers_octagon13

Step 10

When you’ve finished filling the space, travel stitch back down the spines to the starting point and stitch feathers up the empty main spine and curve around to finish the feathers on the other minor spine, just like you did in Step 9.

feathers_octagon14

Finished!

And you’re done! One octagonal shape filled with feathers:

feathers_octagon15

Other hints

  • I tried to stitch my feathers in all the octagon blocks of the quilt from every angle. I stitched the spines from top to bottom or bottom to top, other times from left to right or right to left, yet others on an angle. I did this to get practice at creating feathers from any position, no matter how the quilt is oriented to my machine or my body. While I can do that successfully now (LOTS of practice), I’m still not as good at stitching feathers ‘backwards’ from the top of the spine to the bottom — I still have to get to the bottom of the spine to start my next lot of feathers. One day….
  • When you get to the top of the spine, you may have a space to fill. Just do a loop (like the top of a cotton swab tip) if you can’t do a curved feather in that space. Take a look at some of the photos above to see how I dealt with that odd space.

Have fun!


Community Quilt 115

14 10 2013

How to quilt this very geometric blue and red quilt? Circles! Well, spirals/swirls a la Angela Walters, as seen on her Craftsy class on machine quilting negative space.

I used a red, blue, purple, and cream variegated thread for all the top stitching. When I checked online for the name of the thread colour in the Superior Rainbows collection, I found that #814 (the label on this thread and another spool of it I had) didn’t match the colour of the thread I used, so I suspect that I was using old stock with a number that’s now used for a different colour.

I really liked how the circular elements juxtaposed the rectangles and squares used in the quilt.

In the border, I stitched some ‘sort of’ flames (or petals), with an inner flame/petal and an outer one, and then echoed all round. I used the same thread in the border as I used for the main part of the quilt.

And yes, in case you were wondering, I stitched all those swirls ‘freehand’ — no rulers, no marking.

(Click on a photo to view it larger.)

quilt115_01

quilt115_02

quilt115_03

quilt115_04

This is the thread I used — it was labelled #814 and is from the Superior Rainbows range:

rainbows_thread

This is what the current catalog has as #814 in Superior Rainbows thread — they are QUITE different colours:

rainbows_814_current

Threads used:

  • Top: Superior Rainbows (40 wt, trilobal polyester, colour #814 — NOTE: this is NOT the same thread in the current Rainbows catalog under that number. The closest I could find was #823, though that’s still not the same colour as the thread I used that was labelled #814)
  • Bottom: Bobbinfil (white)


Community Quilt 114

7 10 2013

This was a HUGE scrappy quilt! I had to fold it quite a bit over the clothesline to keep it off the ground when I took the photos. The person who created this quilt top used a massive range of scrappy fabrics to make her half-square triangles and the overall effect is quite lovely (though not ‘my’ colours).

How to quilt it? Well, stitching in the ditch for ESS wasn’t an option I relished! So I decided to fall back on an old stalwart design I haven’t stitched for a while — open headbands. I used a lovely Affinity thread (from Fil-Tec) in variegated browns and it was perfect for this quilt. It also stitched like a dream and didn’t break or shred once in the entire quilt.

The edges of the border were starting to pull apart so I used Elmer’s washable school glue to hold them down. Originally I was going to do ‘piano key’ stitching in the border, but realised that as soon as the quilt was trimmed, the stitches would be cut and start pulling apart again. Instead, I decided to stitch perpendicular to the border fabrics, about 1″ away from the main part of the quilt, then echoed those stitches every 1″ to near the edge of the border. That seemed to work, and once trimmed, the stitches all stayed in place.

The only problem I had with this quilt was its sheer bulk — even with my extension tables and the large throat of my Sweet Sixteen, I struggled to pivot and turn this quilt. It WAS big.

(Click on a photo to view it larger.)

quilt114_01

quilt114_03

quilt114_02

Threads used:

  • Top: Fil-Tec Affinity ‘Brunette’ (40 wt, trilobal polyester, colour #60291)
  • Bottom: Wonderfil Deco Bob (80 wt, colour DB 414)


Community Quilt 113

7 10 2013

This was a fairly ordinary scrappy quilt (MY opinion only — others may love it), but that white space just screamed out for some chevron-style quilting I’ve seen a lot of recently.

I stitched echoing straight lines 1/2″ from the edges of the 4-patch blocks, then filled those white areas with a continuous line ‘zigzag’, with the lines between 1/8 and 1/4″ apart. No I didn’t measure them or mark them or use a ruler — I just free motion stitched those lines. Perfection wasn’t my aim — the effect was. And I think I achieved that.

After I’d finished the white areas, I had some quite puffy 4-patches, so I just free motion stitched a sort of circle with a line going through it through each of them. That idea came out of my head and I take full responsibility for it ;-).

For the brown border, I used the same white thread to add a single line of straight stitching (this time I used my Line Tamer ruler!) to give the effect of a picture frame. And then I did big meandering stippling in the outer border.

(Click on a photo to view it larger.)

quilt113_04

quilt113_02

quilt113_01


quilt113_03

quilt113_05

Threads used:

  • Top: Wonderfil Silco (40 wt, colour #SC03)
  • Bottom: Bobbinfil (white)


Using Elmer’s washable school glue on quilts

7 10 2013

I recall hearing about Elmer’s washable school glue some time back, so when I was in an art supply store in Texas earlier this year, I picked some up (forgetting what it was useful for, but knowing that it’s not easy to find in Australia).

Then last week I came across this forum article about using Elmer’s washable school glue on quilts: http://www.quiltingboard.com/tutorials-f10/how-use-elmers-washable-school-glue-because-yall-asked-t217470.html There were lots of hints and tips in it, and quilters seemed to be using it for all sorts of things, including basting full quilts!

When I was quilting one of my community quilts on the weekend, I noticed that the edges were starting to pull apart, as shown in the first two photos below:

elmers00

elmers01

I thought about trying to stitch them down with stay stitching, but then I thought of Elmer’s glue! Why not give it a try?

I tried various ways to use Elmer’s glue to fix the edges together — straight from the bottle was a bit blobby and way too much glue, but when diluted with water (about 1:3) it was too liquid and just disappeared into the fabric and wouldn’t hold when ironed. After a bit of trial and error, I just squirted a bit of the glue into a paint tray (any plastic lid etc. would do), wet an artists’ paintbrush a tad, then dipped it into the glue and painted it onto the seams I wanted to join. I found I was able to get the right consistency and had a lot more control over the paintbrush than I had over the squirt mechanism on the glue bottle.

elmers02

I only put glue on the underside of the seam, then pressed down with a finger before ironing. You can only see it pressed down here as taking a photo on a phone with only one hand is tricky 😉

After doing about 10 of these seams, I ironed them down with a hot, dry iron. This sets and dries the glue for stitching, though it will eventually wash out (you’re using WASHABLE glue),

elmers03

It worked a treat and none of that stitching came apart while I finished quilting this quilt. It’s a keeper!


Community Quilt 112

2 10 2013

I wasn’t very inspired by the fabrics or colours in this disappearing nine-patch quilt. How to quilt it?

I decided to do a continuous line all-over design — my squared-off open headband motif, which I’ve decided to rename to ‘WiFi’ as the shapes look just like the WiFi icon you see on your smartphone or tablet! 😉 (and the RSS feed symbol)

I used a variegated thread in greens and yellows to blend with the quilt top fabrics.

(Click on a photo to view it larger.)

quilt112_01

quilt112_02

quilt112_03

Back:
quilt112_04

Threads used:

  • Top: Superior King Tut ‘Crocodile’ (40 wt, cotton, colour #943)
  • Bottom: Wonderfil Deco Bob (80 wt, colour DB 414)


Community Quilt 111

2 10 2013

I wasn’t sure about this quilt when I pulled it out of the packet during our quilt retreat. Just blue and white? And then I had an awful time with my machine stitching in the ditch around each block, until my friend (and Handi Quilter dealer) Michelle took a look at the machine and made a small adjustment to the ‘finger’ in the bobbin area. Then it stitched fine!

I started it at the retreat, but as the power went out on our last night, I didn’t get to finish it there, so I finished it this weekend just gone. I had in mind to do something in the white parts, possibly some sort of lattice effect following the straight blue lines in the white and blue fabric. But when I looked more closely, I saw that none of the lines lined up with the lines in the other blocks, so with a lot of marking and calculating required, stitching a straight line lattice just wasn’t going to work for me.

Instead, I recalled some ‘matrix’ designs that Leah Day had done, so I decided to do a wavy diagonal matrix in the white blocks, leaving about a 1/2″ between the lines. These are super easy to do and you don’t have to be perfect 😉 Also, if you stitch the matrix correctly, there’s no stopping and starting, except at the beginning and end of the block. I really liked the effect — I achieved a lattice effect without having to use rulers or mark lines. And I think the curves add an organic nature to the quilt that straight lines just don’t have.

For the borders, I just stitched a straight line 1/2″ from the edges, then in the dark blue border I stitched loops (like lower case ‘L’s or ‘E’s in cursive writing) between the straight lines. I left the blue sashing strips unadorned.

(Click on a photo to view it larger.)

quilt111_01

quilt111_02

quilt111_03

Back:

quilt111_04

Threads used:

  • Top: Fil-Tec Glide ‘Rock Navy’ for the stitch in the ditch around each block (40 wt, trilobal polyester, colour #30001); Fil-Tec Glide ‘Cream’ for the lattice work (40 wt, trilobal polyester, colour #20001)
  • Bottom: Bobbinfil in black and white depending on which thread I was using in the top


Community Quilt 110

2 10 2013

This was another small quilt I quilted at our retreat. It had already been finished and bound, and ‘stitch in the ditch’ around the blocks had been done, but the Community Quilts coordinator asked if I could rescue it and liven it up a bit.

It was a such a pastel log cabin quilt, with lots of small flower fabrics used — how to quilt it? I decided on an all-over continuous line motif of large and small arcs, emulating flowers.

(Click on a photo to view it larger.)

quilt110_01

quilt110_02

IMAG1193

This was the quilt while it was on my machine. On the right is how it looked when I got it — fairly plain, with just the stitch in the ditch quilting. I think I livened it up a bit with the quilting.

Threads used:

  • Top: Wonderfil Mirage in a variegated wine/cream/orchid/yellow (rayon, 30 wt, colour #SD 32)
  • Bottom: Bobbinfil (white)


Community Quilt 109

2 10 2013

What a pretty little quilt this was! All those bright autumn tones and cheery leafy fabrics.

I started by stitching in the ditch around the blocks just to stabilise the quilt, then I outline quilted the centre block of leaves. My original intention was to do the same in the border, but it took quite a while just to do the centre, so I abandoned that idea quick smart!

In each French Braid block, I did a continuous line quilting design of leaves, with more leaves in the sashing strips. And keeping with the leaf theme, I did HUGE leaves in the border 😉

This was another quilt I quilted at the retreat so I can’t remember what thread I used — sorry! (it was a variegated cotton thread in autumnal colours…)

(Click on a photo to view it larger.)

quilt109_01

quilt109_04

quilt109_03

quilt109_02

quilt109_05


Community Quilt 108

2 10 2013

I quilted this quilt during our annual quilt retreat weekend. I could have followed the geometric blocks, but instead decided to soften them with feathers — everyone likes feathers, right? 😉

I left the first and third borders unstitched, did some straight line ruler work (with my Line Tamer ruler) in the half square triangles in the second border, and then some half feathers and spirals in the black border.

I really liked how the variegated thread blended beautifully with this quilt top — thanks for letting me use it, Bobbie!

(Click a photo to view it larger.)

quilt108_01

quilt108_02

quilt108_03

Back:
quilt108_04

Threads used (from memory!):

  • Top: Fil-Tec Harmony ‘Driftwood’ for the feathers and one border (40 wt cotton); Floriani embroidery thread in a dark charcoal for the black border (40 wt rayon?)
  • Bottom: Bobbinfil (white)